Thermaltake Water 3.0 Performer C
PC cooling is at the heart of the PC Master Race. When it comes to longevity of the hardware particularly the heart and the mind of any PC that is CPU, users tend to invest in a good cooling solution. These days there are a variety of coolers falling in particularly four broad categories:
- Air Coolers
- CLC
- Hybrid Coolers
- Custom Loop
There are pros and cons of each type. Most of the air coolers tend to be bulky and take up much space. This puts pressure on the motherboard’s PCB and on the CPU as well. Skylake was one of the examples where many damaged CPUs were reported due to the sheer weight of the cooler. Not to mention the compatibility issues of the air coolers with RAM, the first PCIe slot and the chassis itself. AIO/Hybrids/Custom Loop would clear that space around the CPU socket but many users avoid them for the fear of leakage.
While the market for the coolers may seem saturated, it is surprising to find more competitive offerings from the old players and new players alike. Recently, during CES 2017, EVGA, a well-known Nvidia’s AIB partner has announced their AIO coolers for CPU. EKWB is known for its top-notch, quality components in liquid cooling under the custom loop. The company introduced their unique AIO in 2015. Reeven has entered in this market segment recently with their 240mm CLC named Naia.
Thermaltake Technology Inc. was founded in 1999 with the vision of building Thermaltake Technology into “a cultural brand for the enjoyment of entertainment, e-Sports, technology, and lifestyle”. Thermaltake Technology is focused on delivering the perfect user experience. Their products range from Power Supply Units, PC Chassis, Complete Custom Loop solutions, CPU Coolers, Fans to the range of the peripherals like keyboards, mouse, mouse mat, headphones and even gaming chairs. The very essence of the Thermaltake DNA is based on Courage, Passion, and Perseverance.
Today, I will take a look at Thermaltake’s entry-level budget friendly CLC, Water 3.0 Performer C. The new Thermaltake All-In-One LCS Water 3.0 Series is designed to exceed user expectations. One simple upgrade allows users to enjoy better cooling performance and greater CPU protection.
Item: Water 3.0 Performer C
Manufacturer: Thermaltake
Price: $65.99 at the time of the review
Specifications:
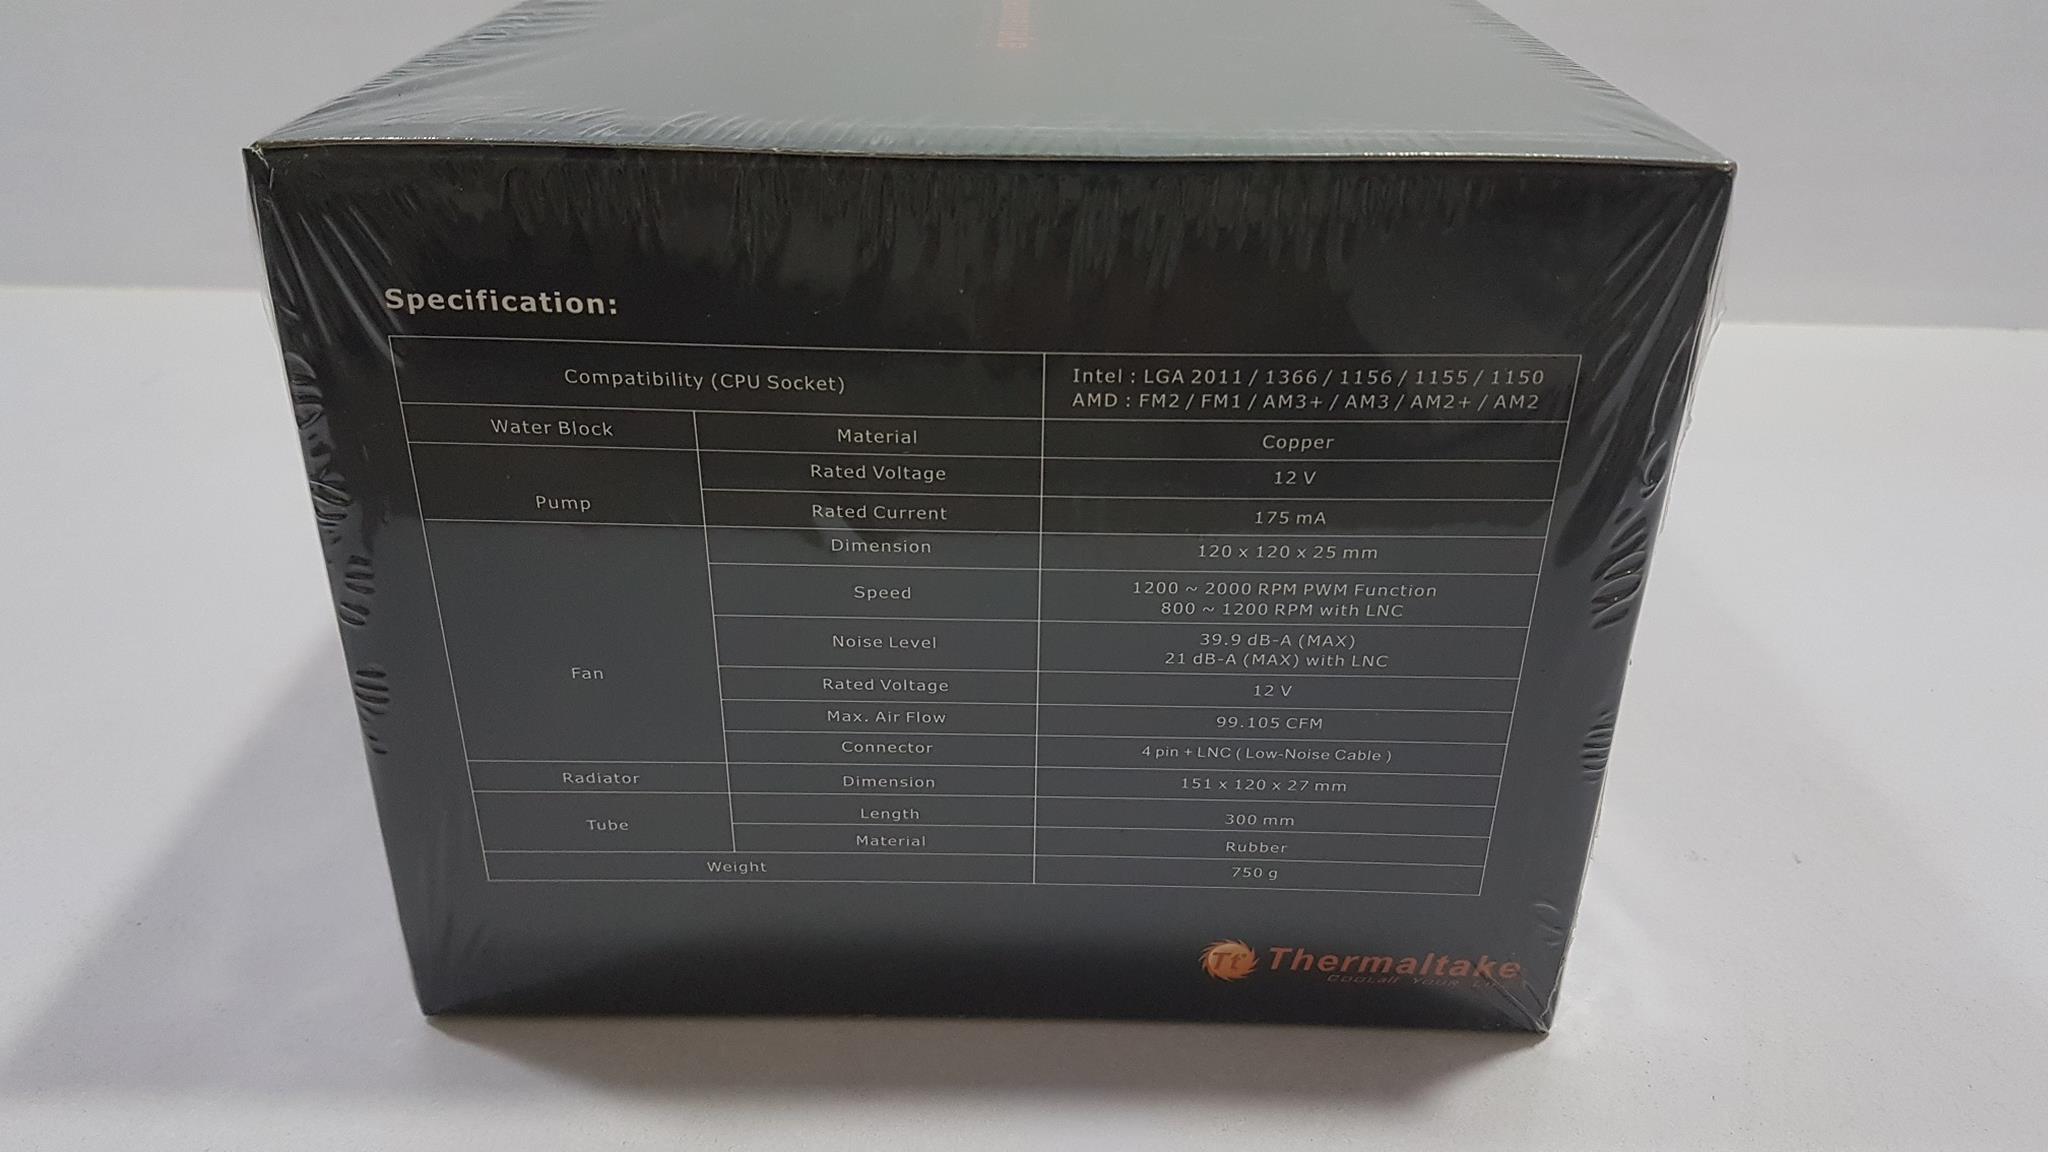
Socket INTEL: LGA 1150 / 1151 / 1155 / 1156 / 1366 / 2011 / 2011-V3 AMD: AM2 / AM2+ / AM3 / AM3+ / FM1 / FM2
Water Block Material: Copper
Pump Motor Speed: 2900 +/- 150 RPM Rated Voltage: 12V Rated Current: 175mA
Fan Dimension: 120mm x 120mm x 25mm Speed: 1200 – 2000 RPM PWM 800 – 1200 RPM with LNC Noise Level: 39.9 dBA 21 dBA with LNC Rated Voltage: 12V Max Air Flow: 99.105 CFM Connector: 4-pin PWM
Radiator Dimension: 151 x 120 x 27mm
Tube Length: 300mm Material: Rubber
Weight 750g
Packaging and Contents
The cooler comes in a black color cardboard box. The front side of the packing box has the cooler’s picture printed on it along with the model no and name. Thermaltake logo and name are printed on the top left side. Emphasis on Silent operations is highlighted in a circle with LNC.

On the back side of the packing box, Cooler’s salient features are printed. Info Label is printed on the bottom right side.
The left side of the packing box has specifications printed in a tabular format. Thermaltake’s logo and brand name are printed on the bottom right side.
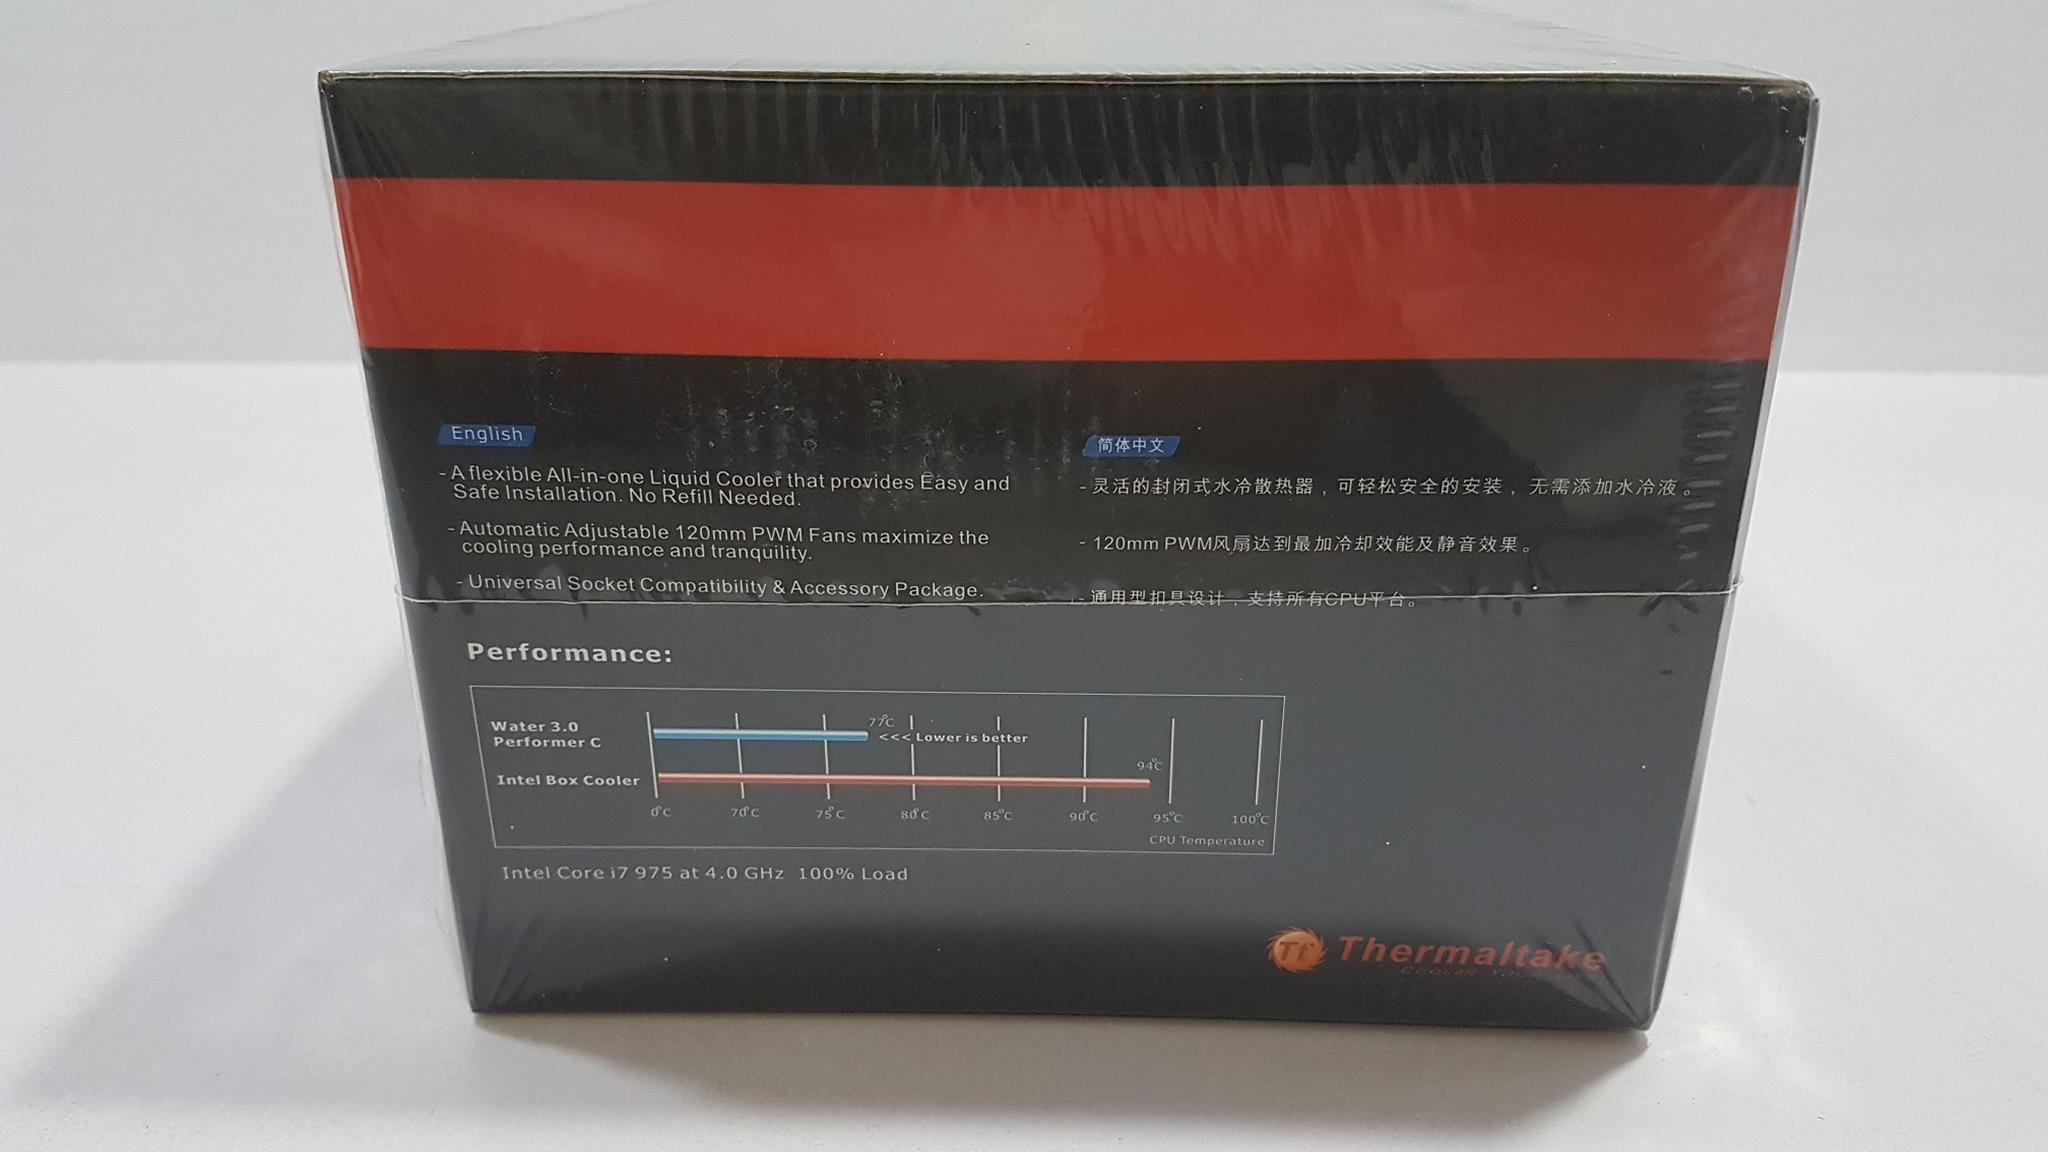
The right side of the packing box shows the graphical representation of the cooler’s performance in terms of CPU temperature measured in degree Celsius. The cooler was tested on Intel i7 975 at 4.0GHz with 100% load and max it hit was 77C as mentioned in the graph. For comparison, the Thermaltake has used Intel’s stock cooler. The Thermaltake’s logo and brand name are printed on the bottom right side
The top cover has the Thermaltake’s logo and brand name printed in Orange color with the tagline, “Cool All your Life”
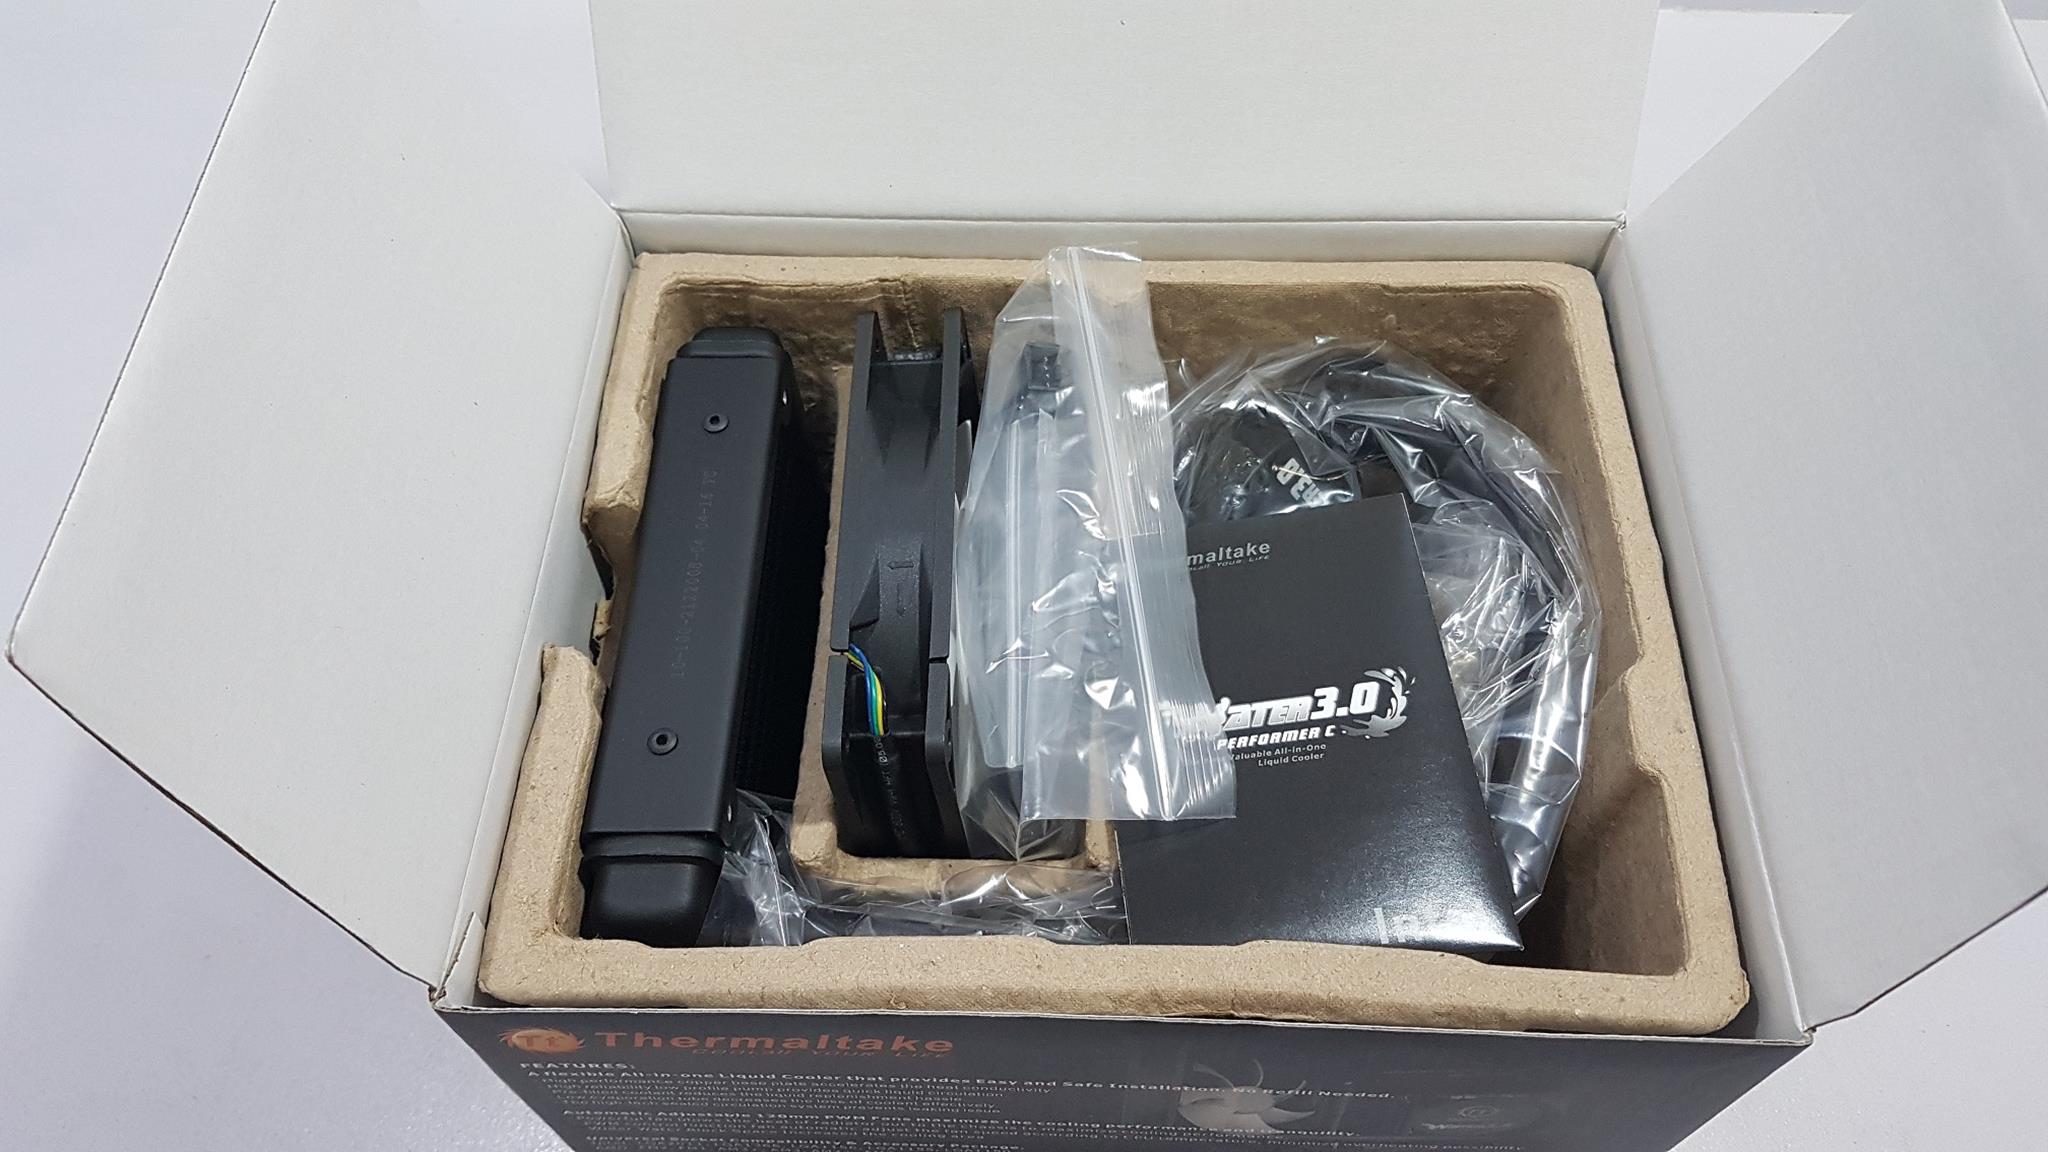
Opening the box would reveal the content. Corsair H55 users will immediately recognize the similarities in the packing contents. Why? Both are same Aestek design.
Accessories
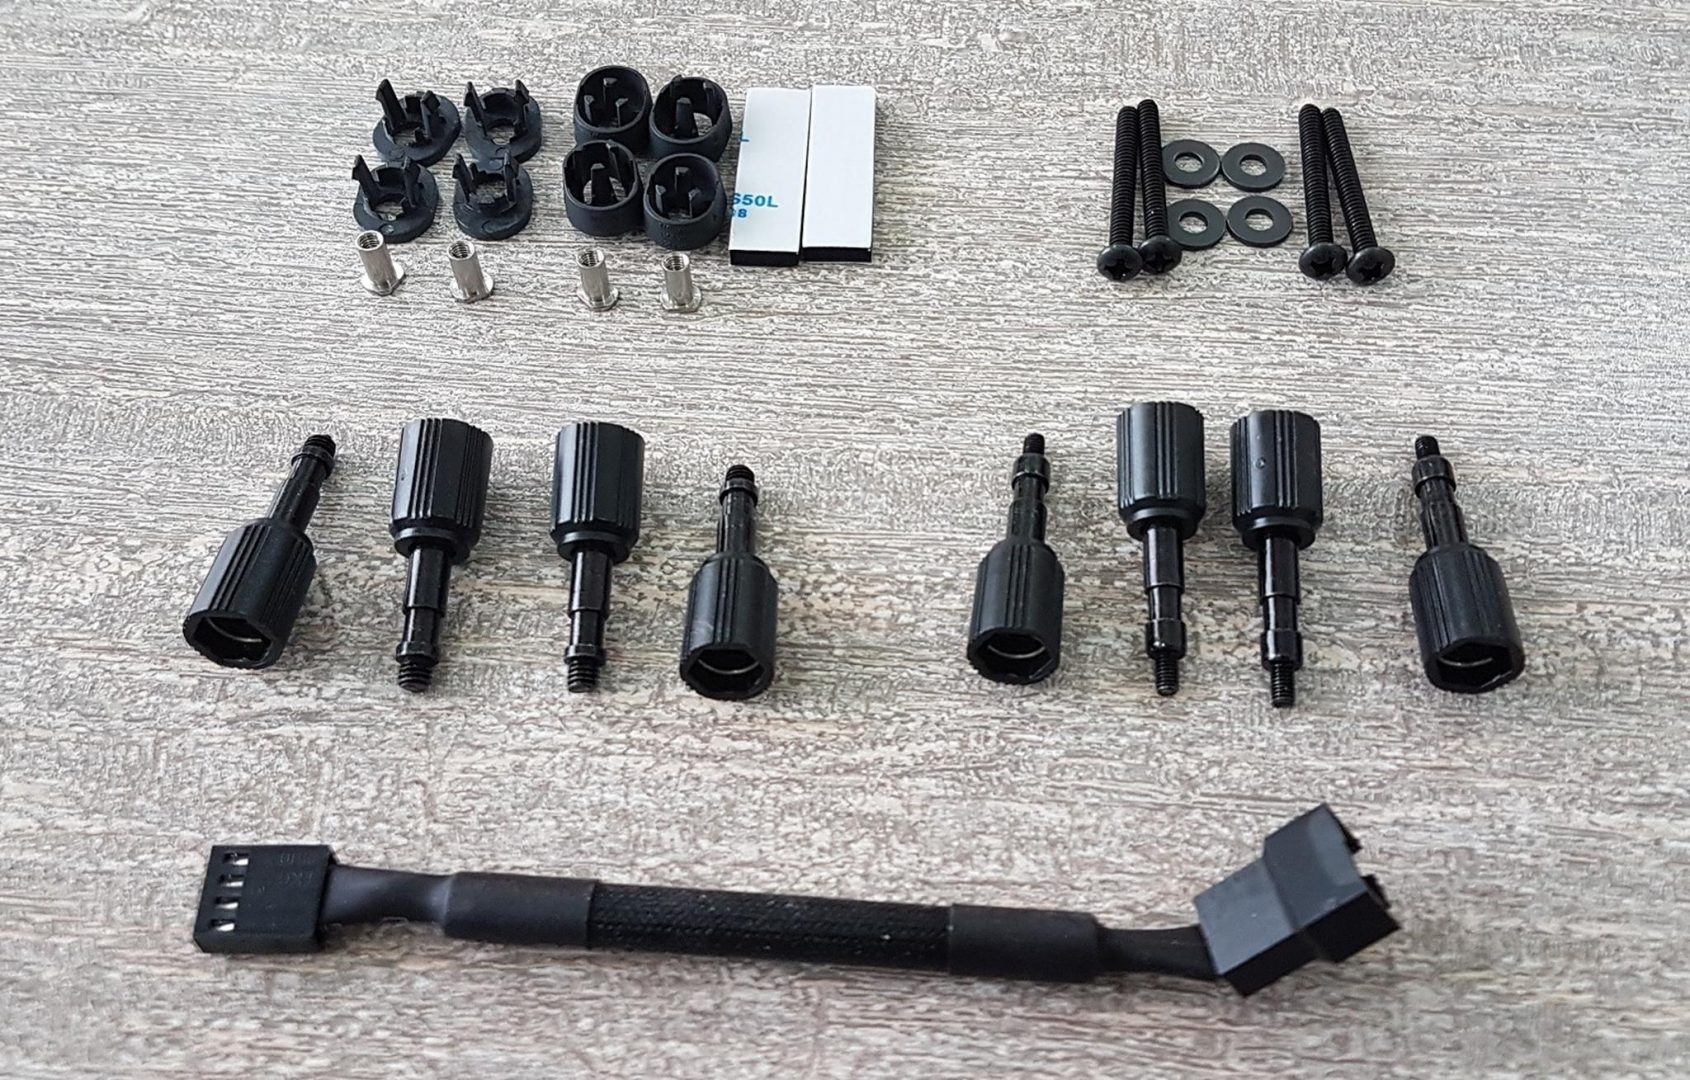
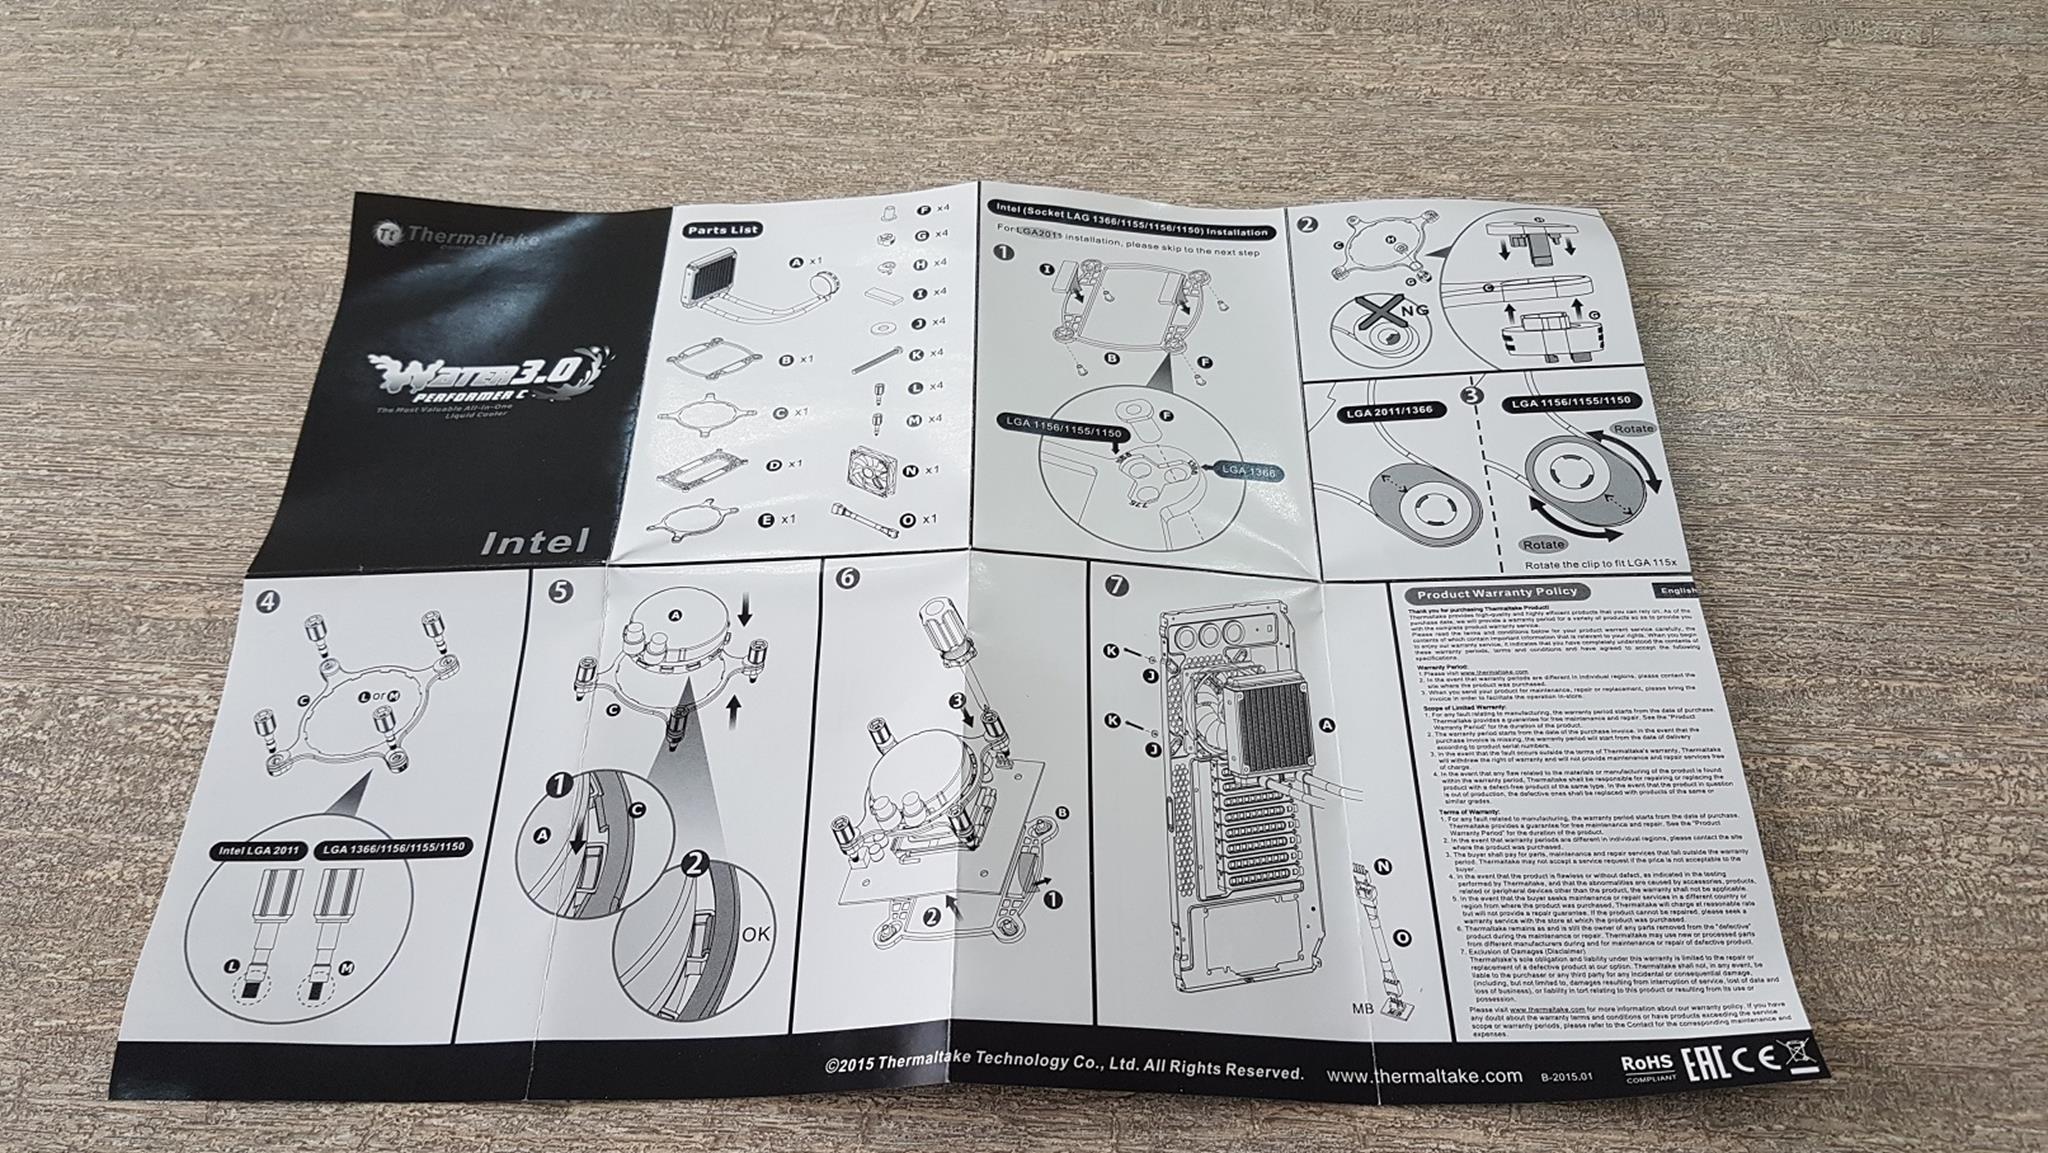
The Thermaltake has provided a plethora of accessories for the users. The mounting mechanism is strange and will be described later in the installation section. The user guide is pictorial only but gives enough guidance to the builder.
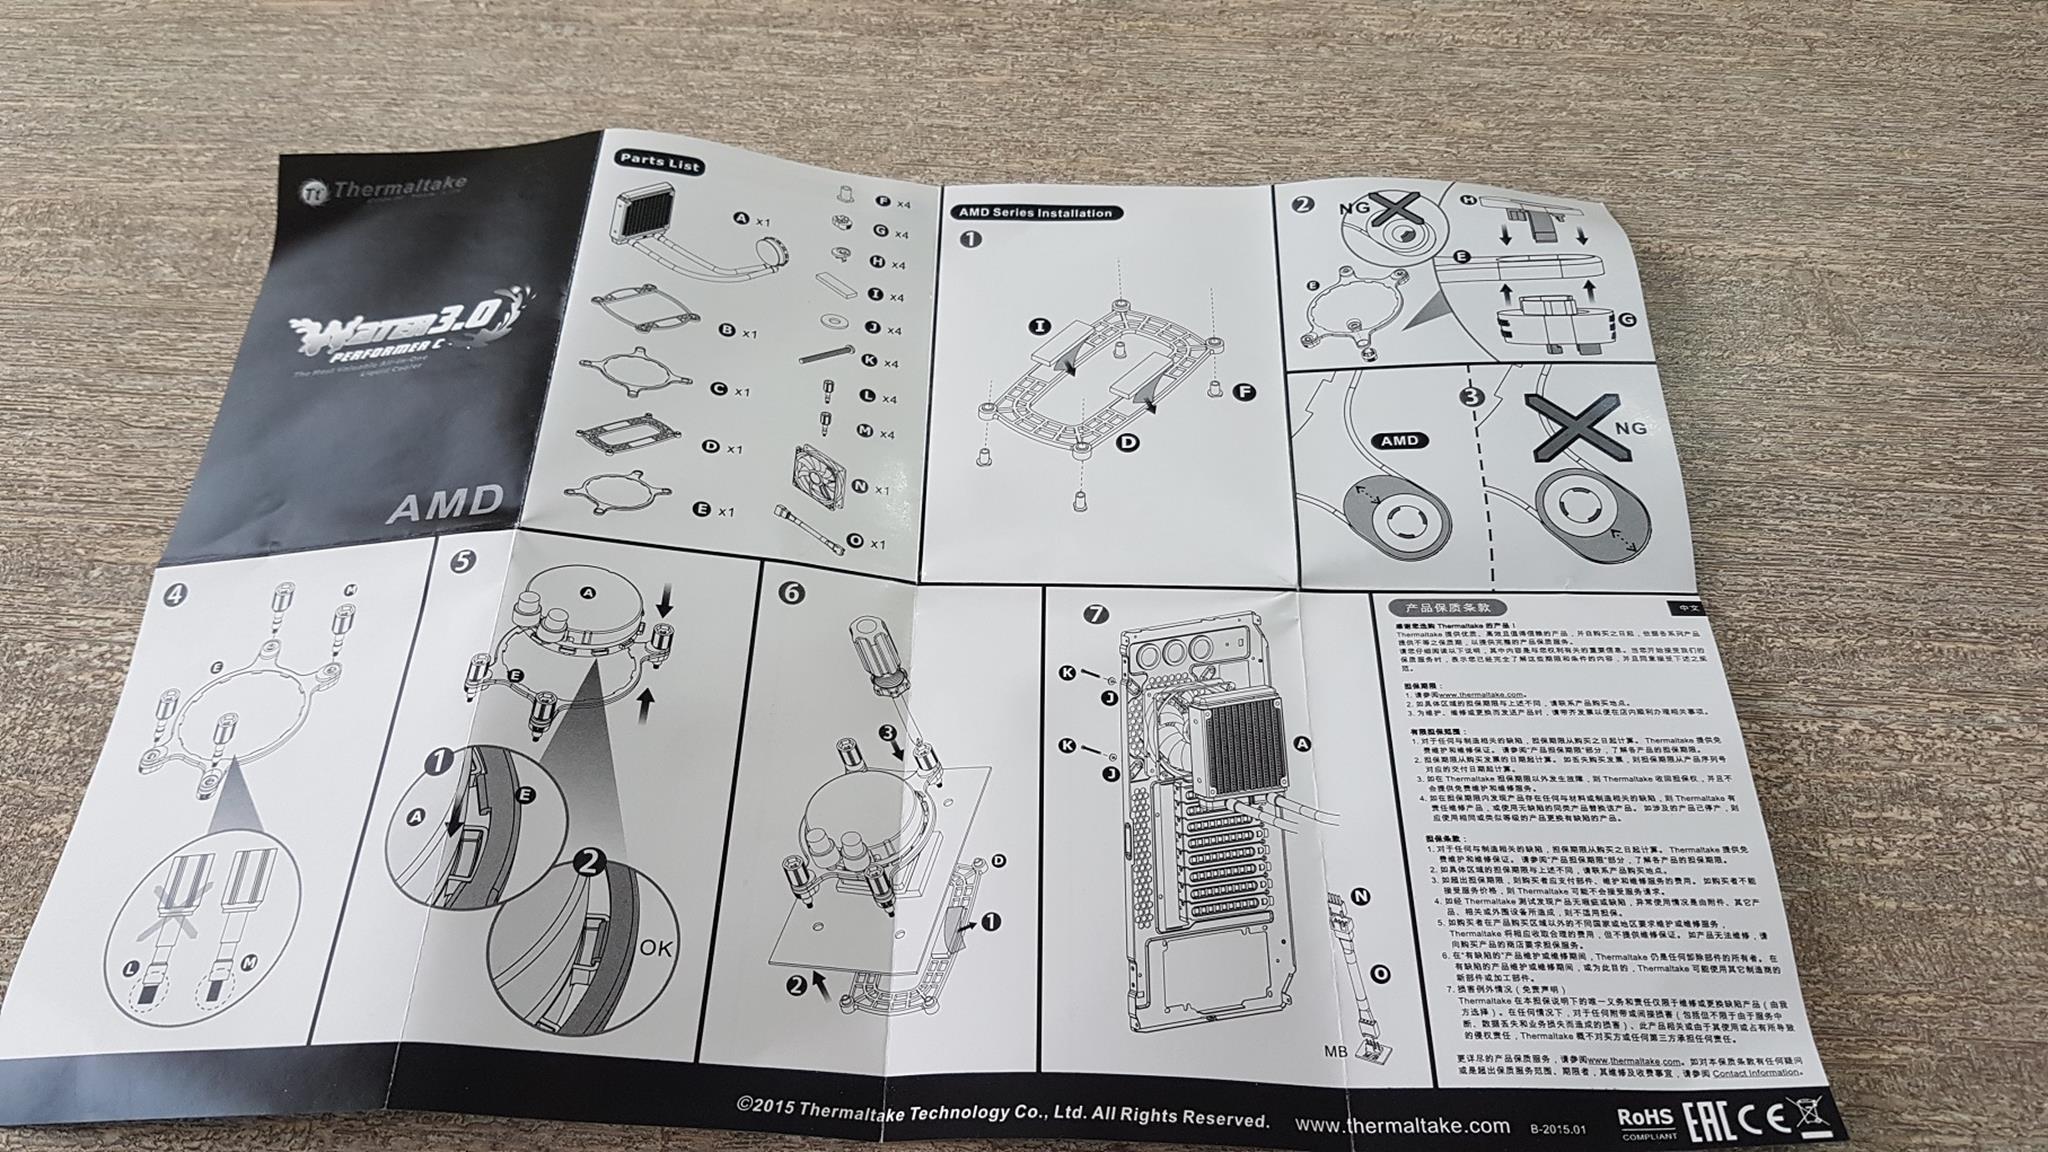
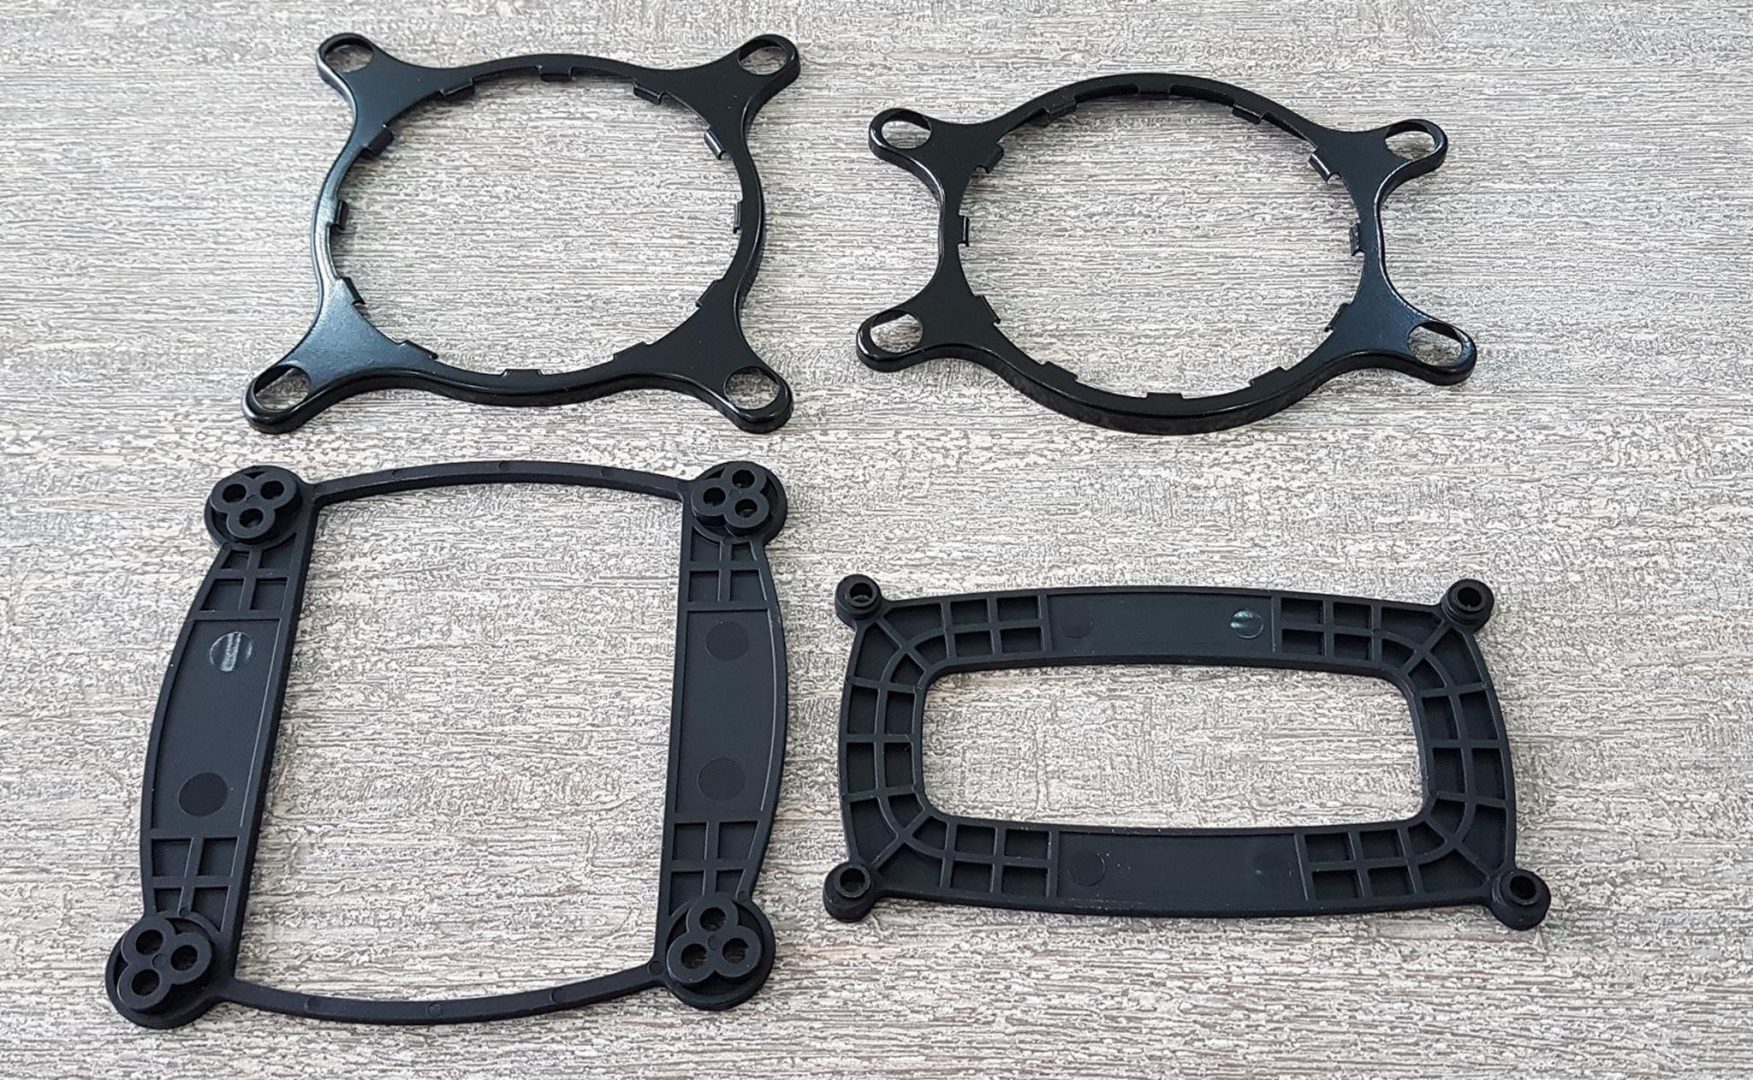
Accessories include:
- Intel and AMD mounting brackets
- Rings plates for Intel and AMD platform
- 4 Screws for Intel non-2011 sockets and AMD sockets
- 4 Screws for LGA 2011 / 2011-V3
- Washers
- Screws for fan mounting
- 4 Silicon Washers
- 2 dual-sided tapes/adhesives
- 4+4 mounting clips for the ring plates.
Closer look
For a liquid cooler, enthusiasts not only looking for an easy and clean setup to efficiently calm the roaring CPU, more likely they also crave for the best low-maintenance solution. The new Thermaltake All-In-One LCS Water 3.0 Series is formed to support these desires of enthusiasts. Upgrade the simplicity of liquid CPU cooling to enjoy better cooling performance and protect the investment in the CPU as well.
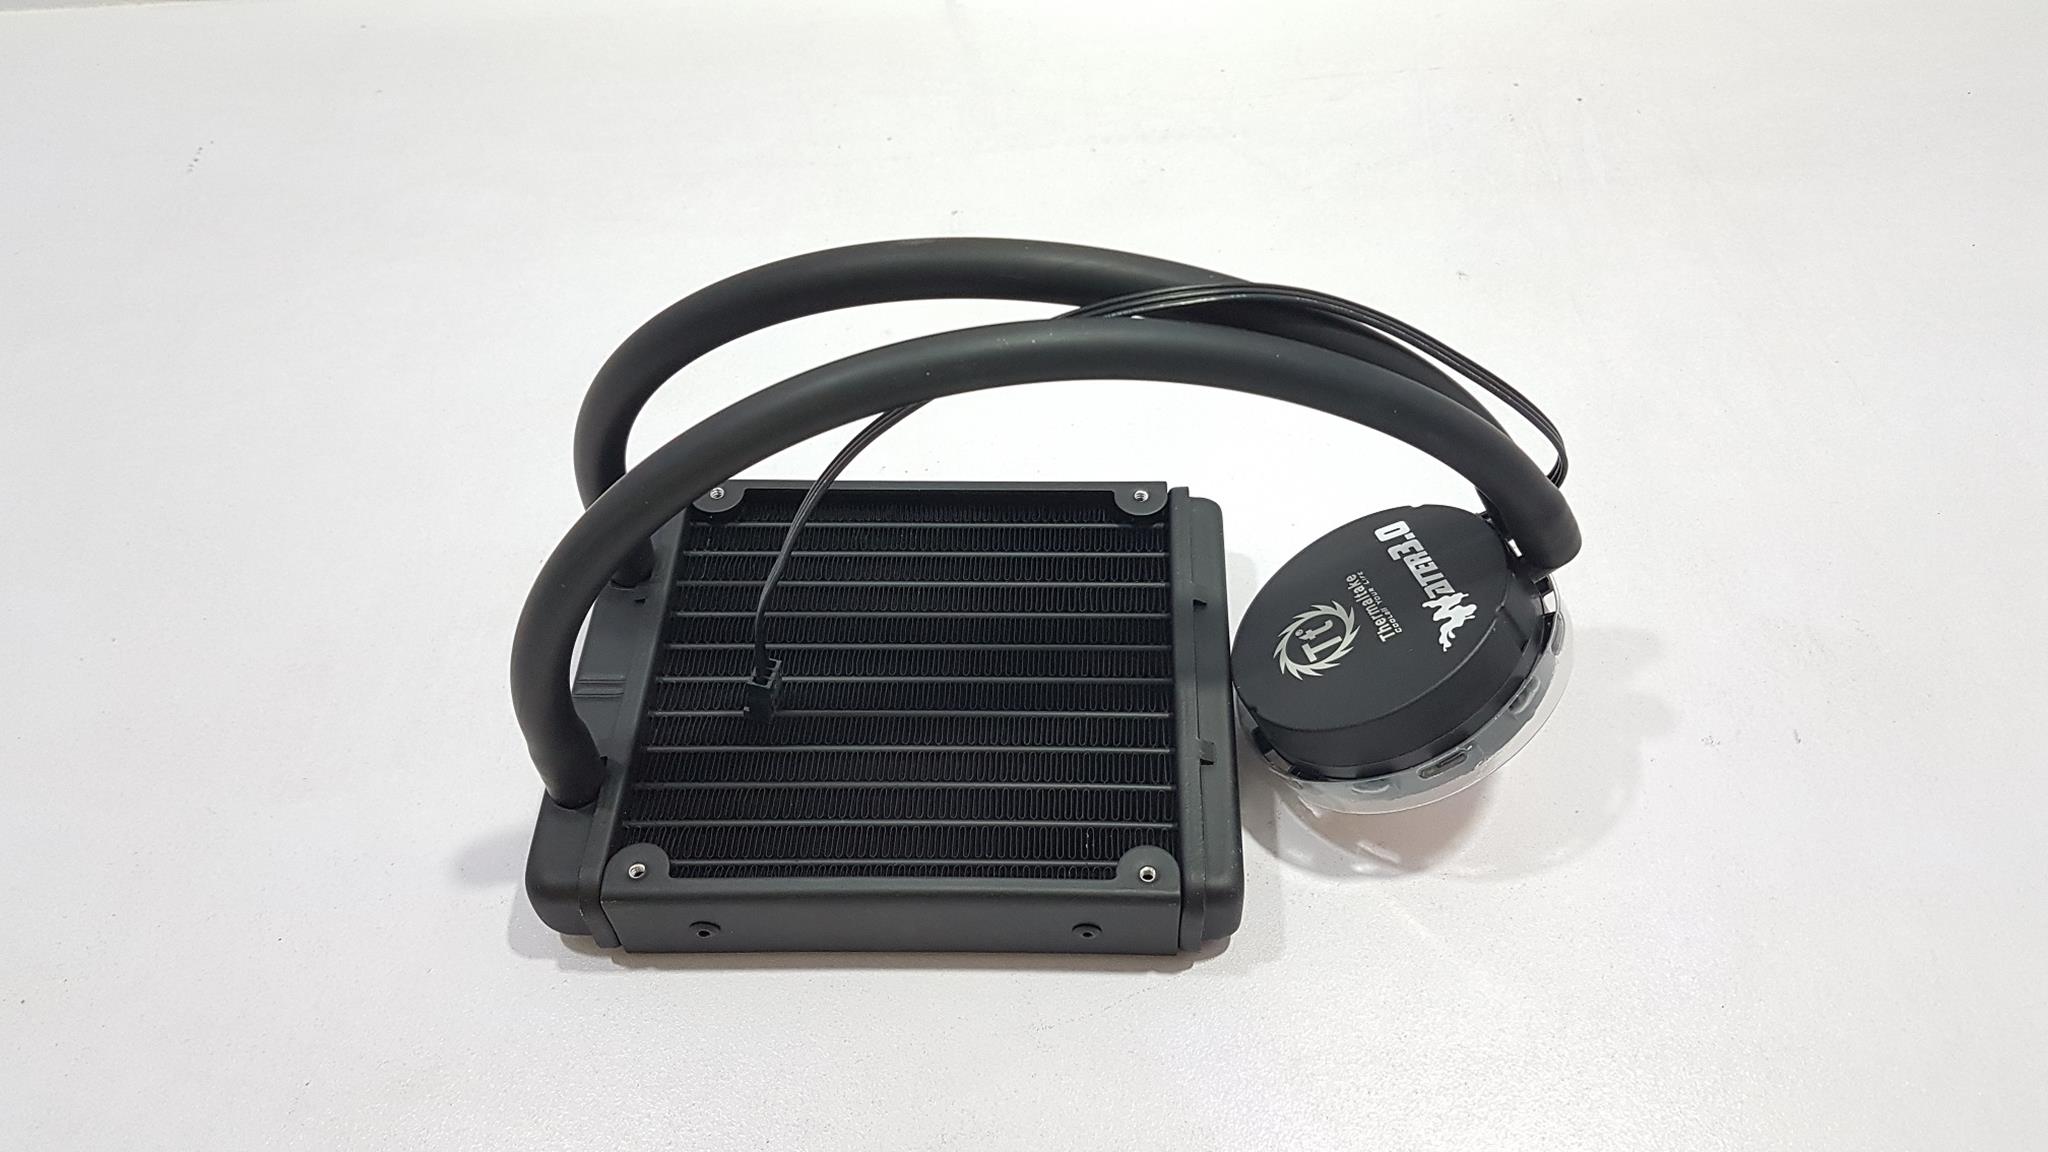
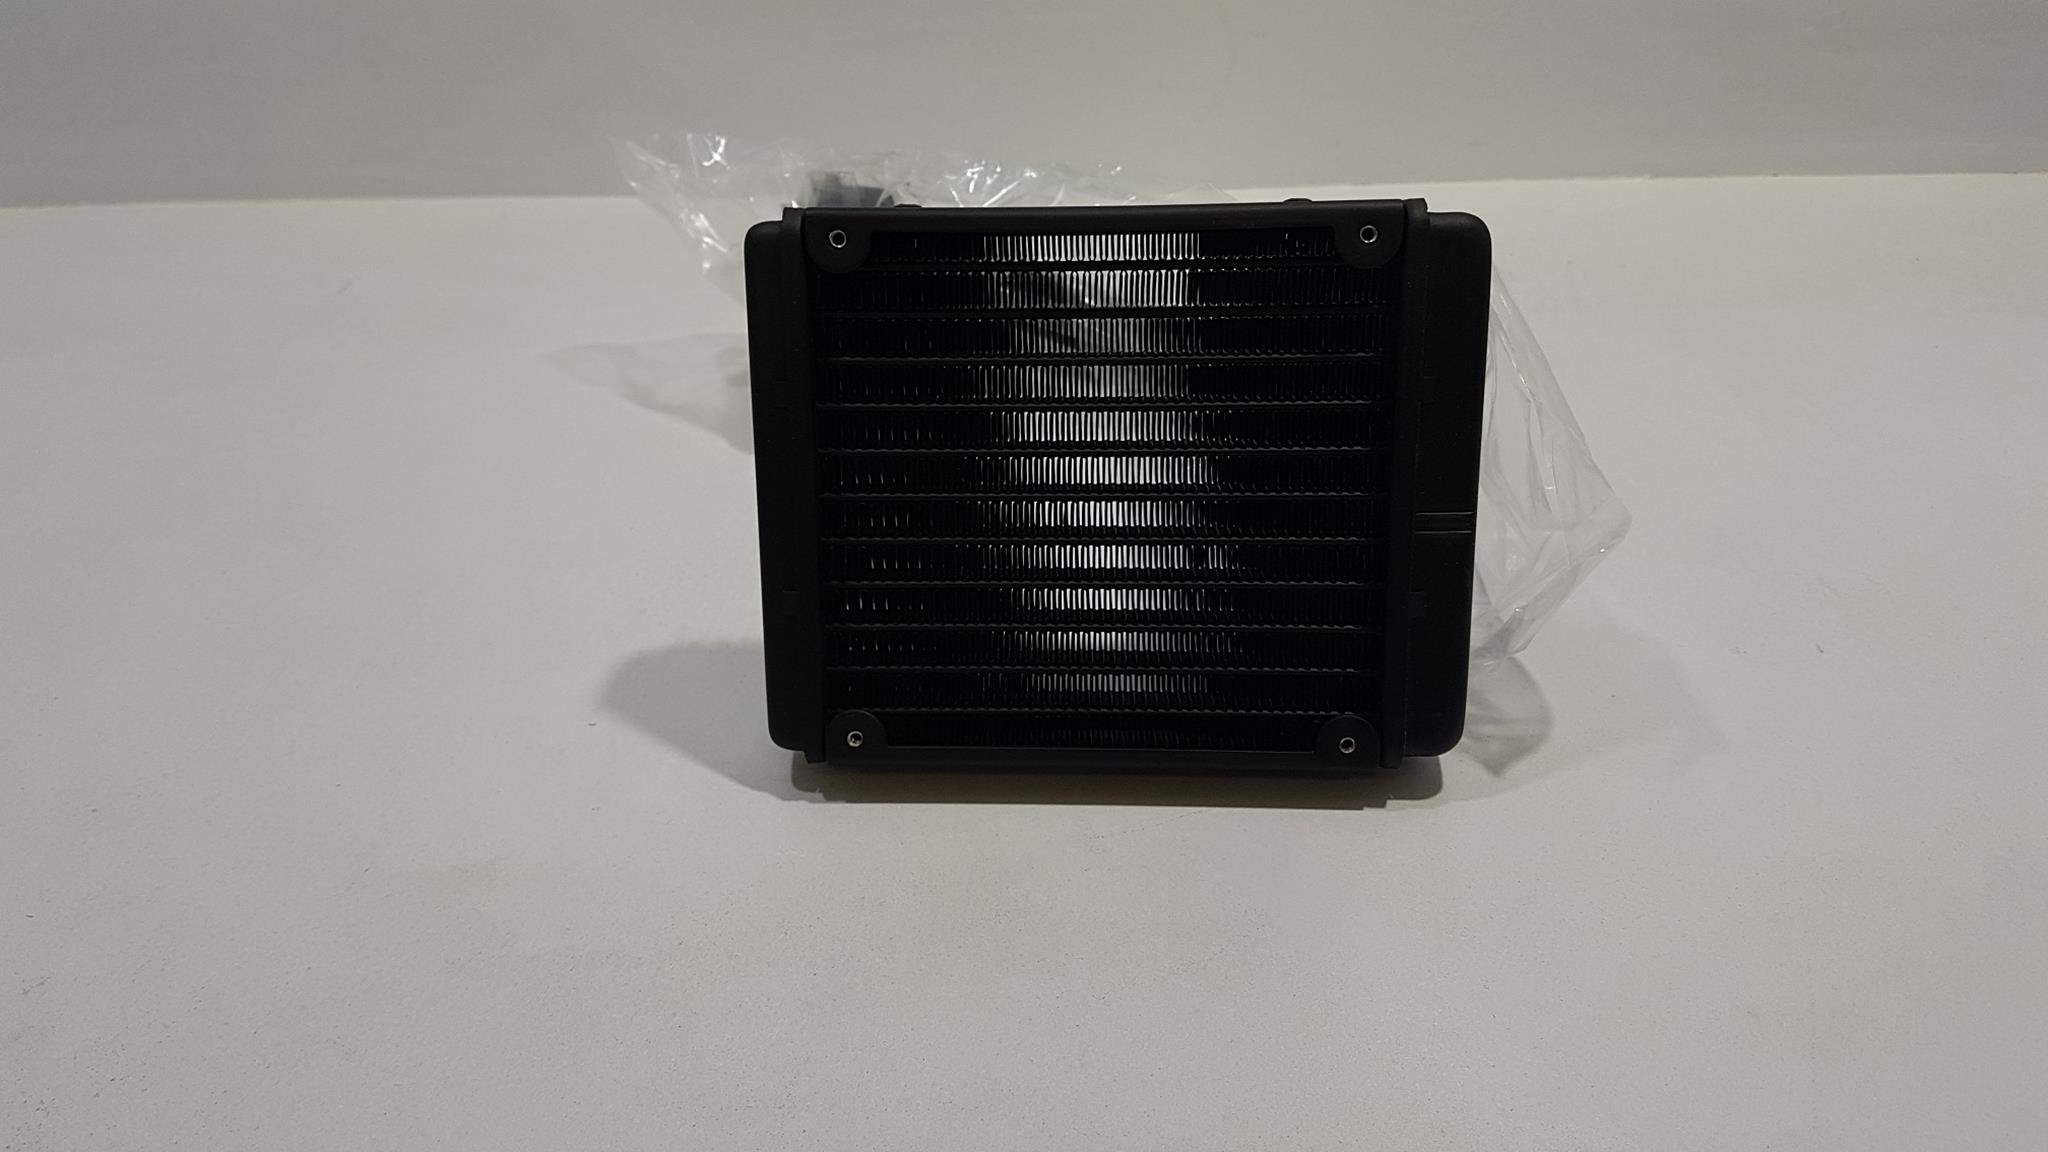
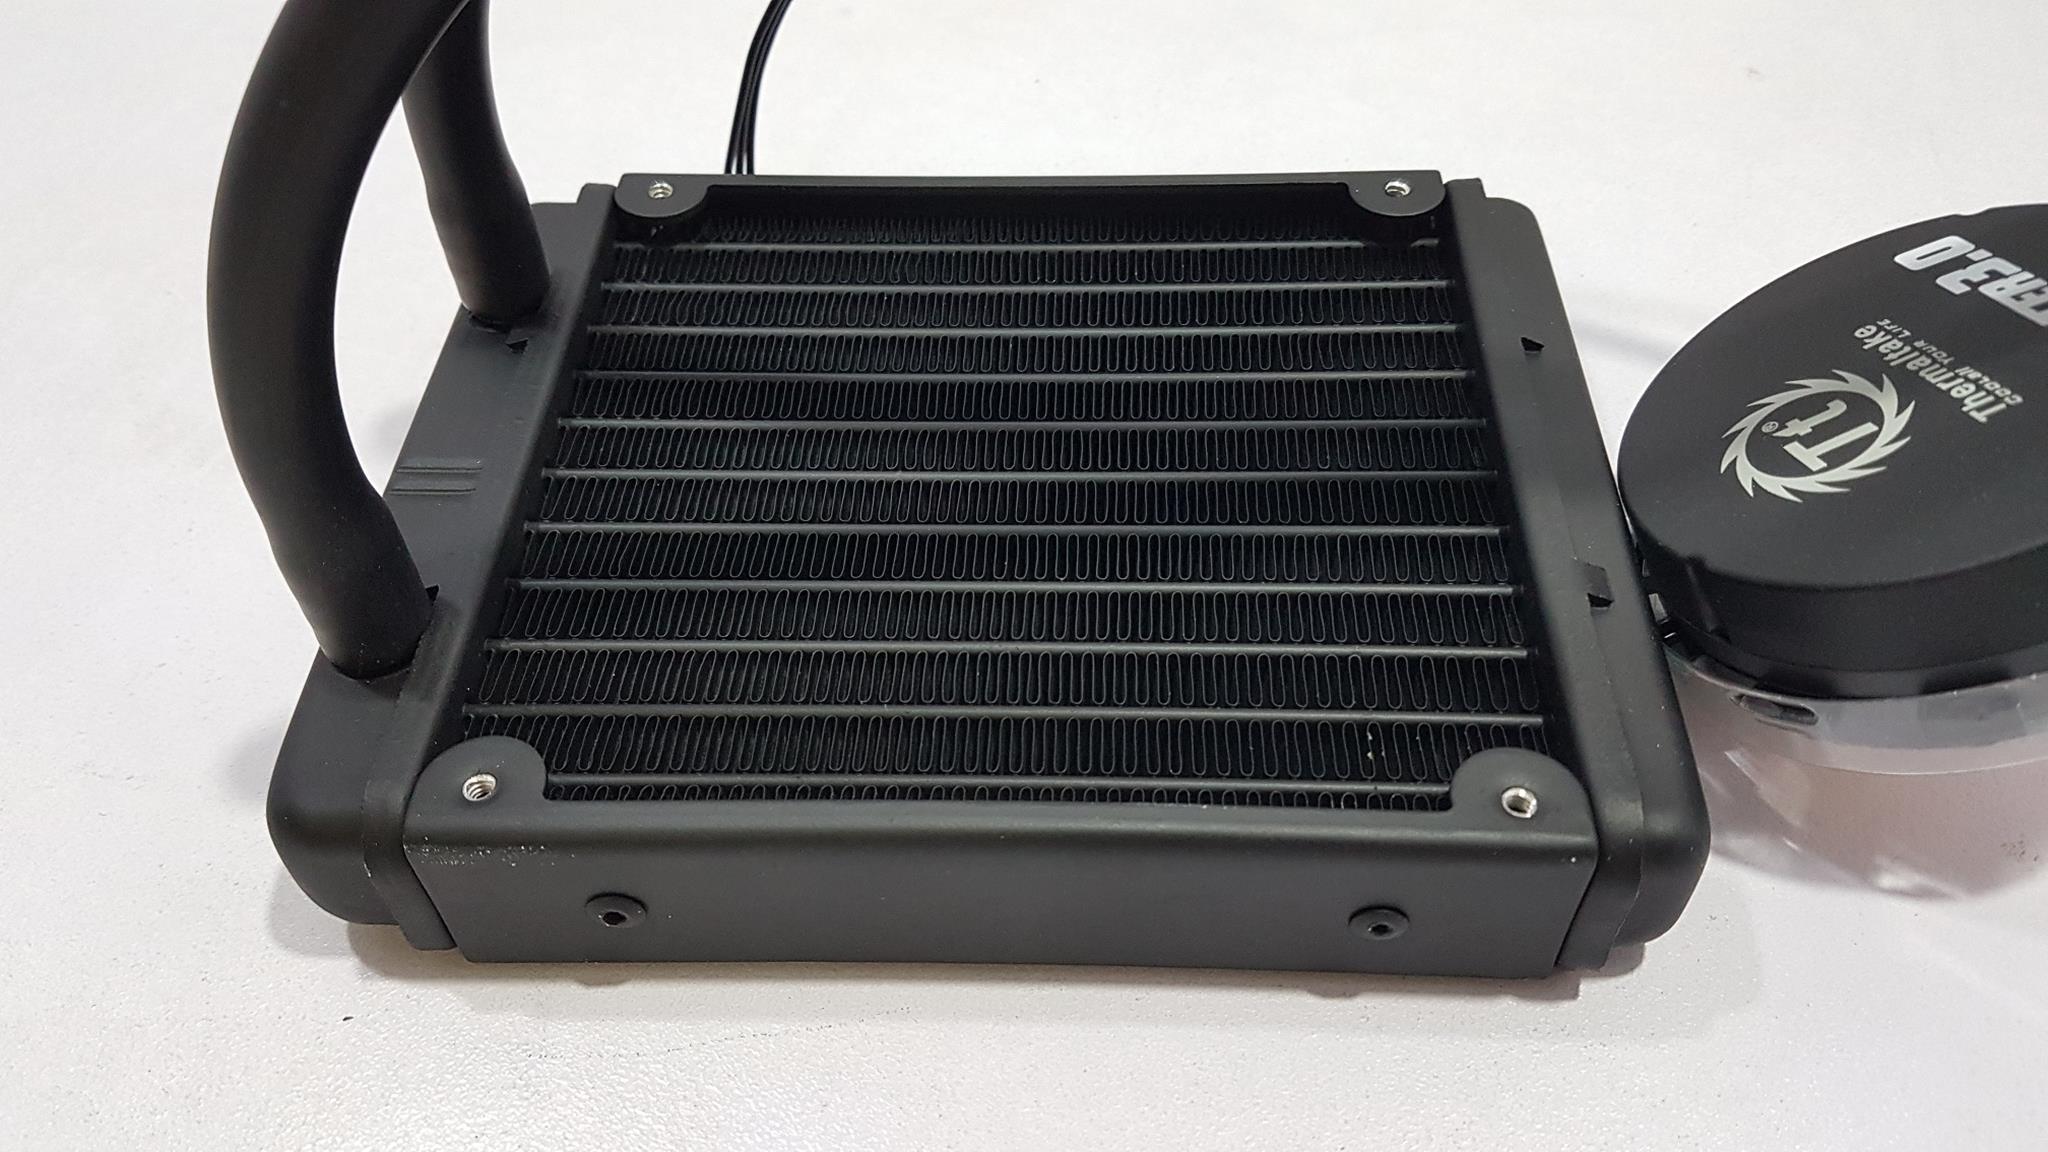
The Thermaltake Water 3.0 Performer C is a 120mm CLC cooling solution for the budget users. It has a 120mm radiator with a single 120mm fan. The dimension of the radiator is 151 x 120 x 27mm. The thickness of the radiator is 27mm. It is not a thicker one as compared to the Water 3.0 Pro. The radiator is quite lightweight and its material is aluminum.
Fin stack is dense and taking into account the left and right side channels, it has total 13 channels for water flow. It has a standard inlet and outlet blocks for the water flow. Hot water flows in from the inlet and passes through the corresponding channels. Heat is blown away thru the fins by the fan and cold or normal water flows out of the radiator through the outlet port.
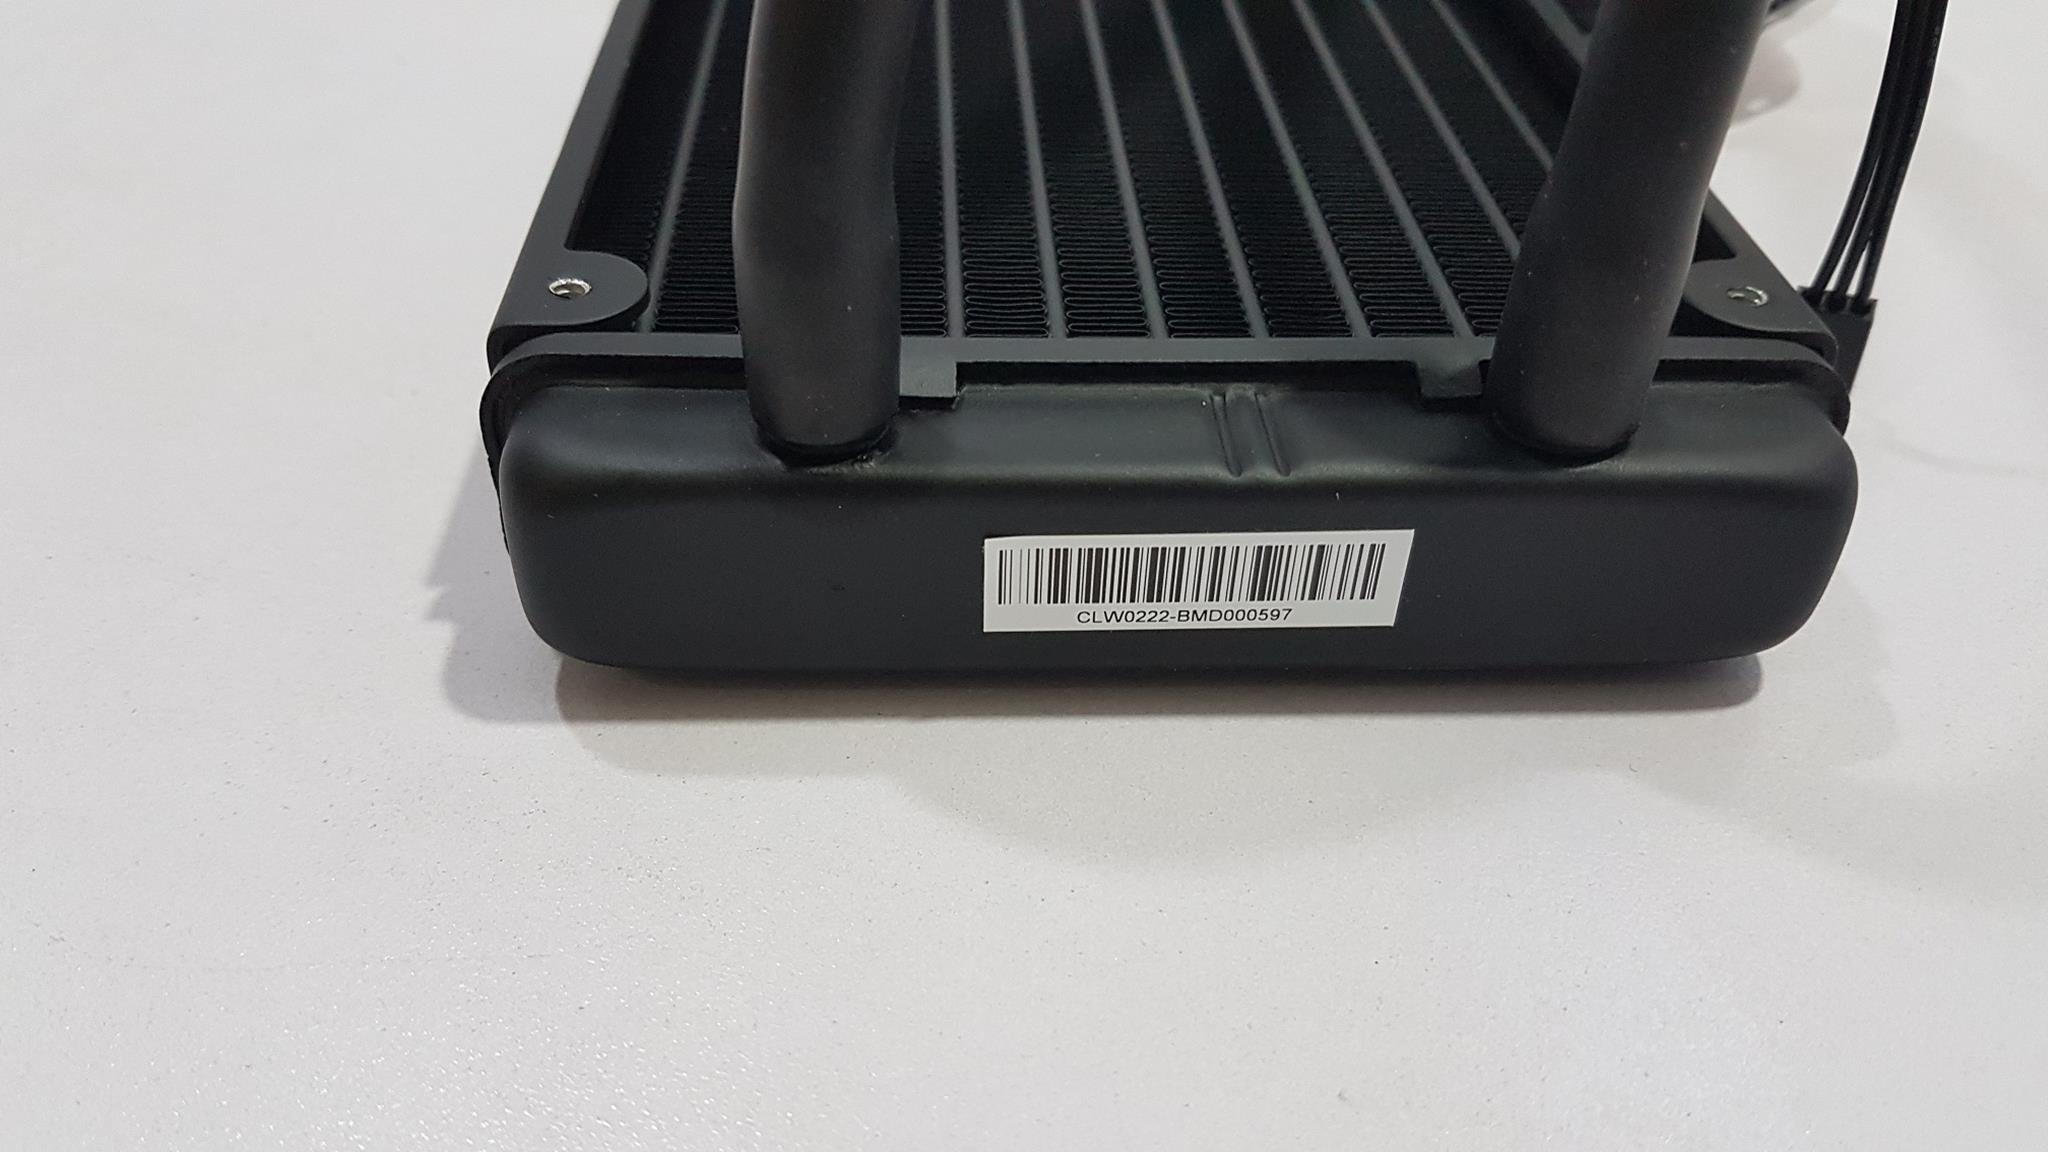
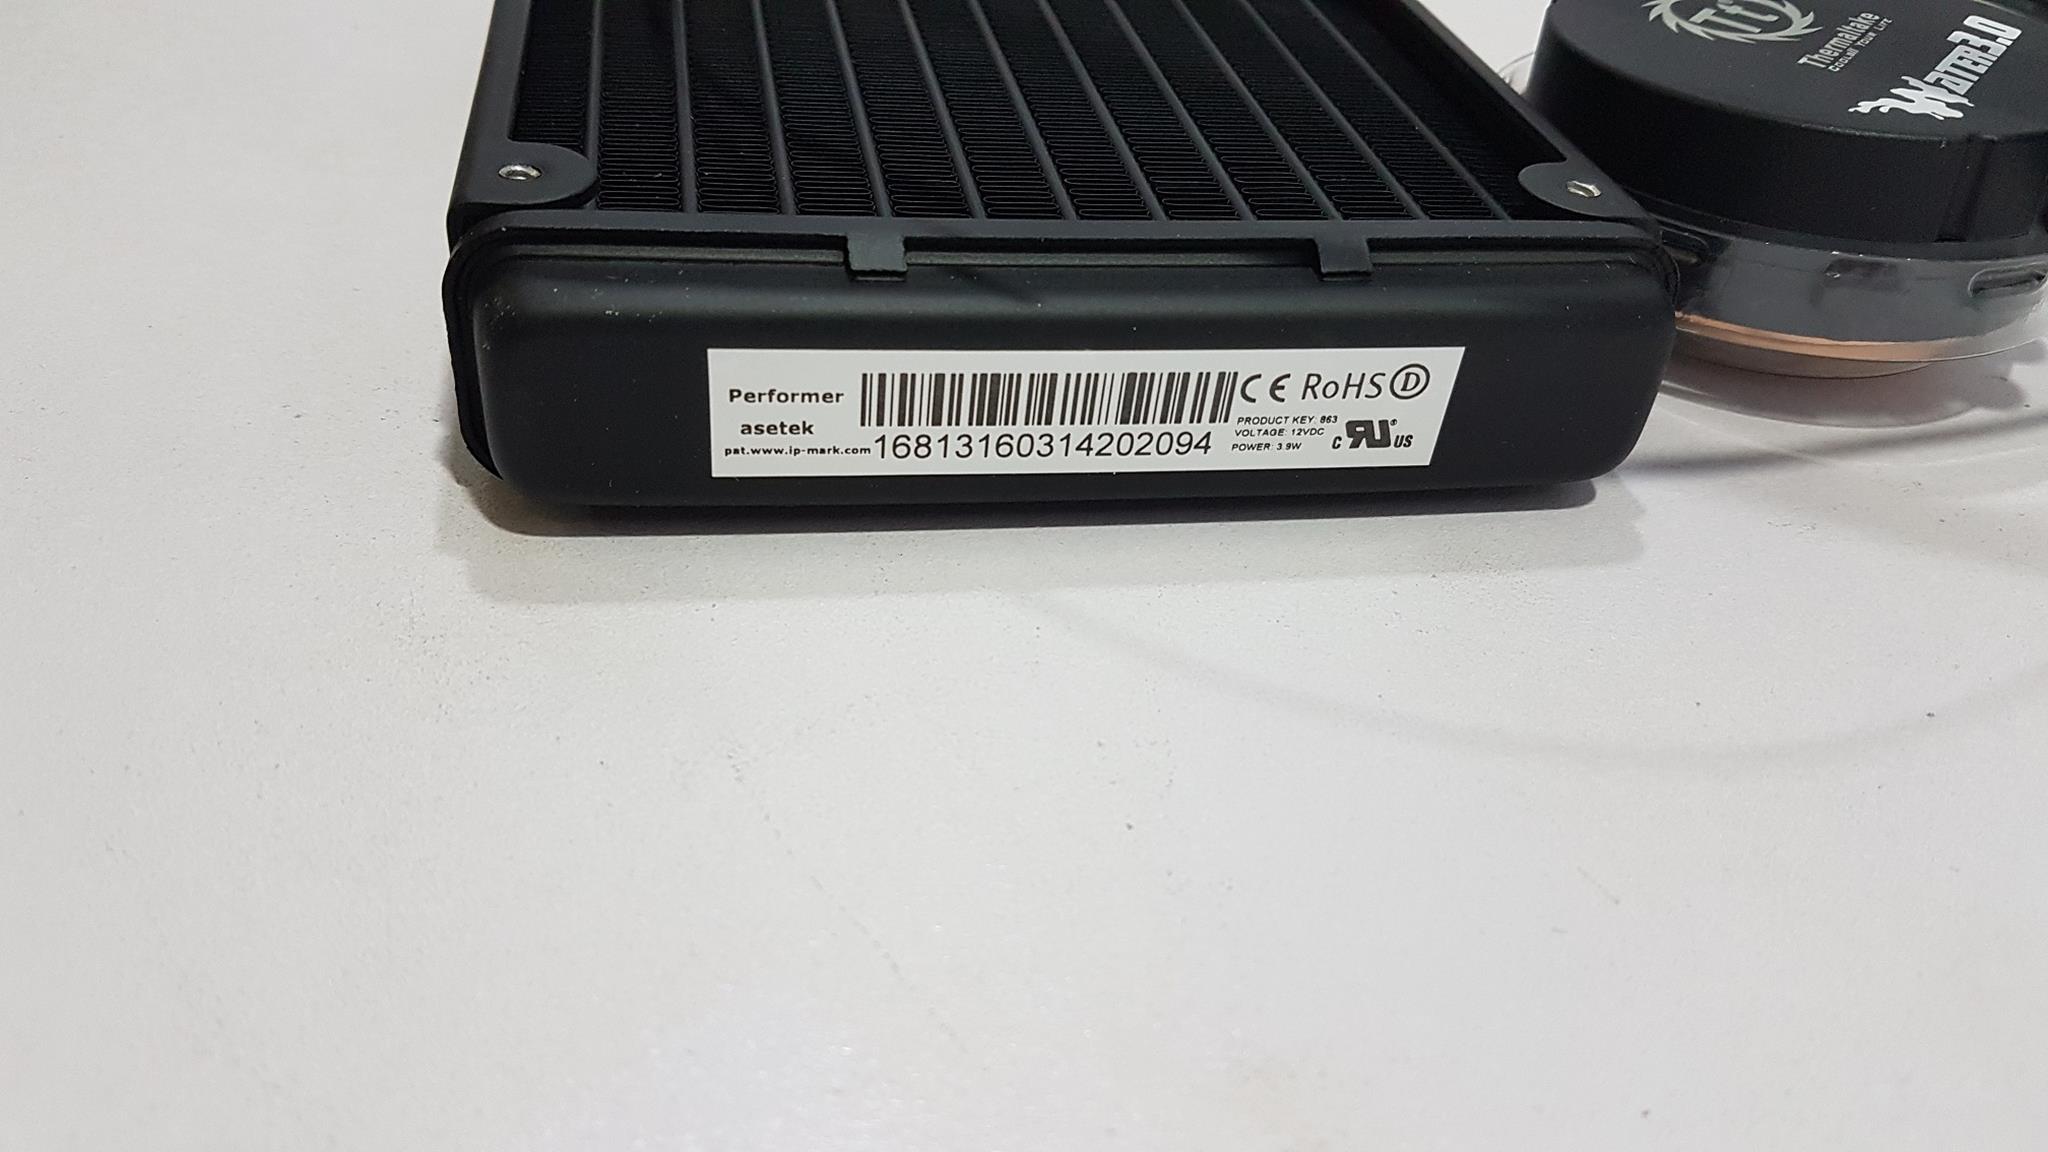
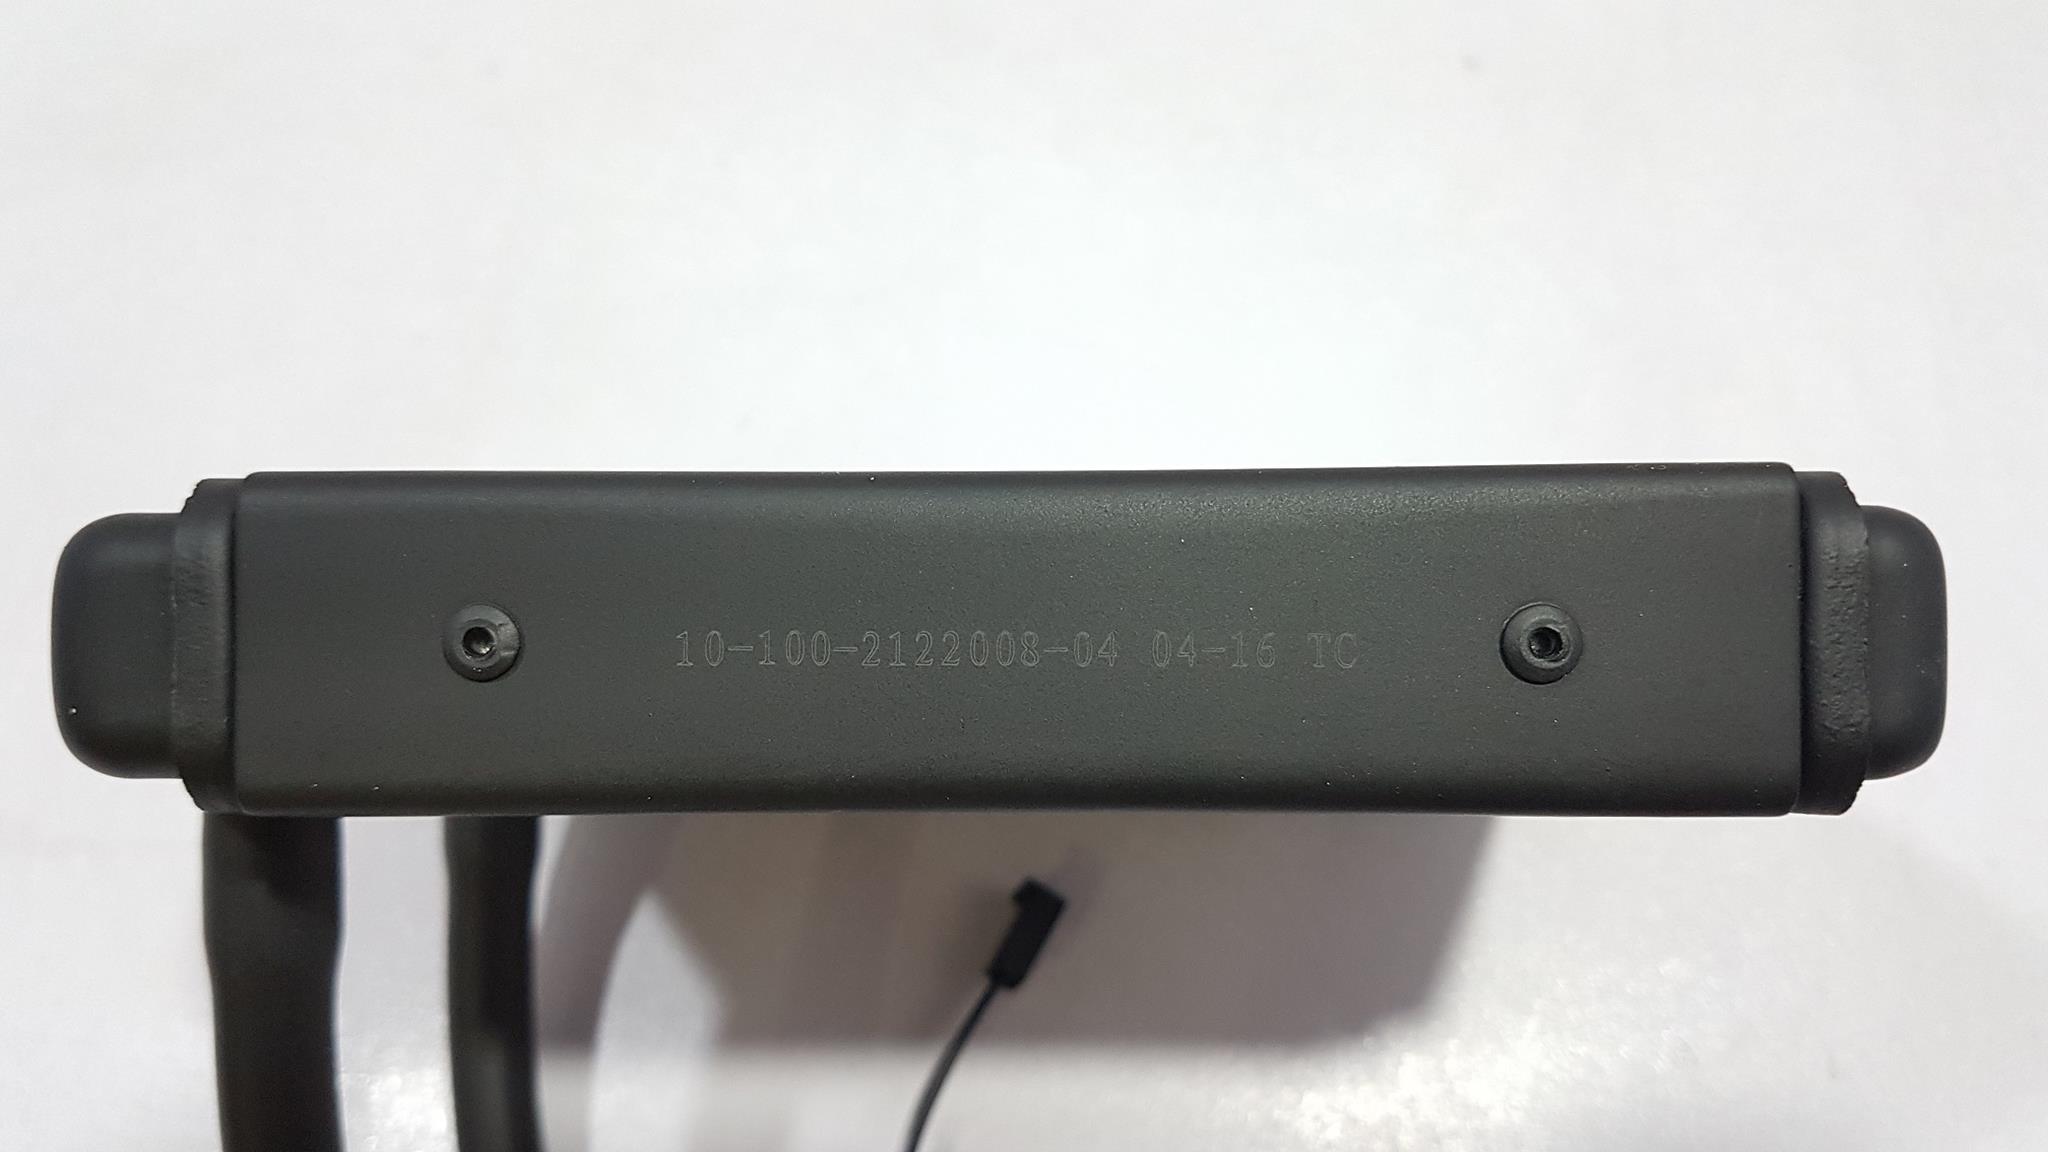
The OEM of the pump and the radiator is Aestek. Majority of the CLC manufacturers use Aestek design with their own tweaking coming from fan design, its speed control and lighting effect. The unit seems to be using standard G1/4 thread size. CLW0222-B is the model no printed on the head side. Performer Aestek and label info is on the opposite side confirming that it is indeed an Aestek design. Serial no is printed on the right side of the radiator.
The Thermaltake has used rubber tubes. They are flexible and still don’t produce kinking when bent or rotated which is a plus. How the tubes are fitted on the fittings rather gives less impression of the quality.
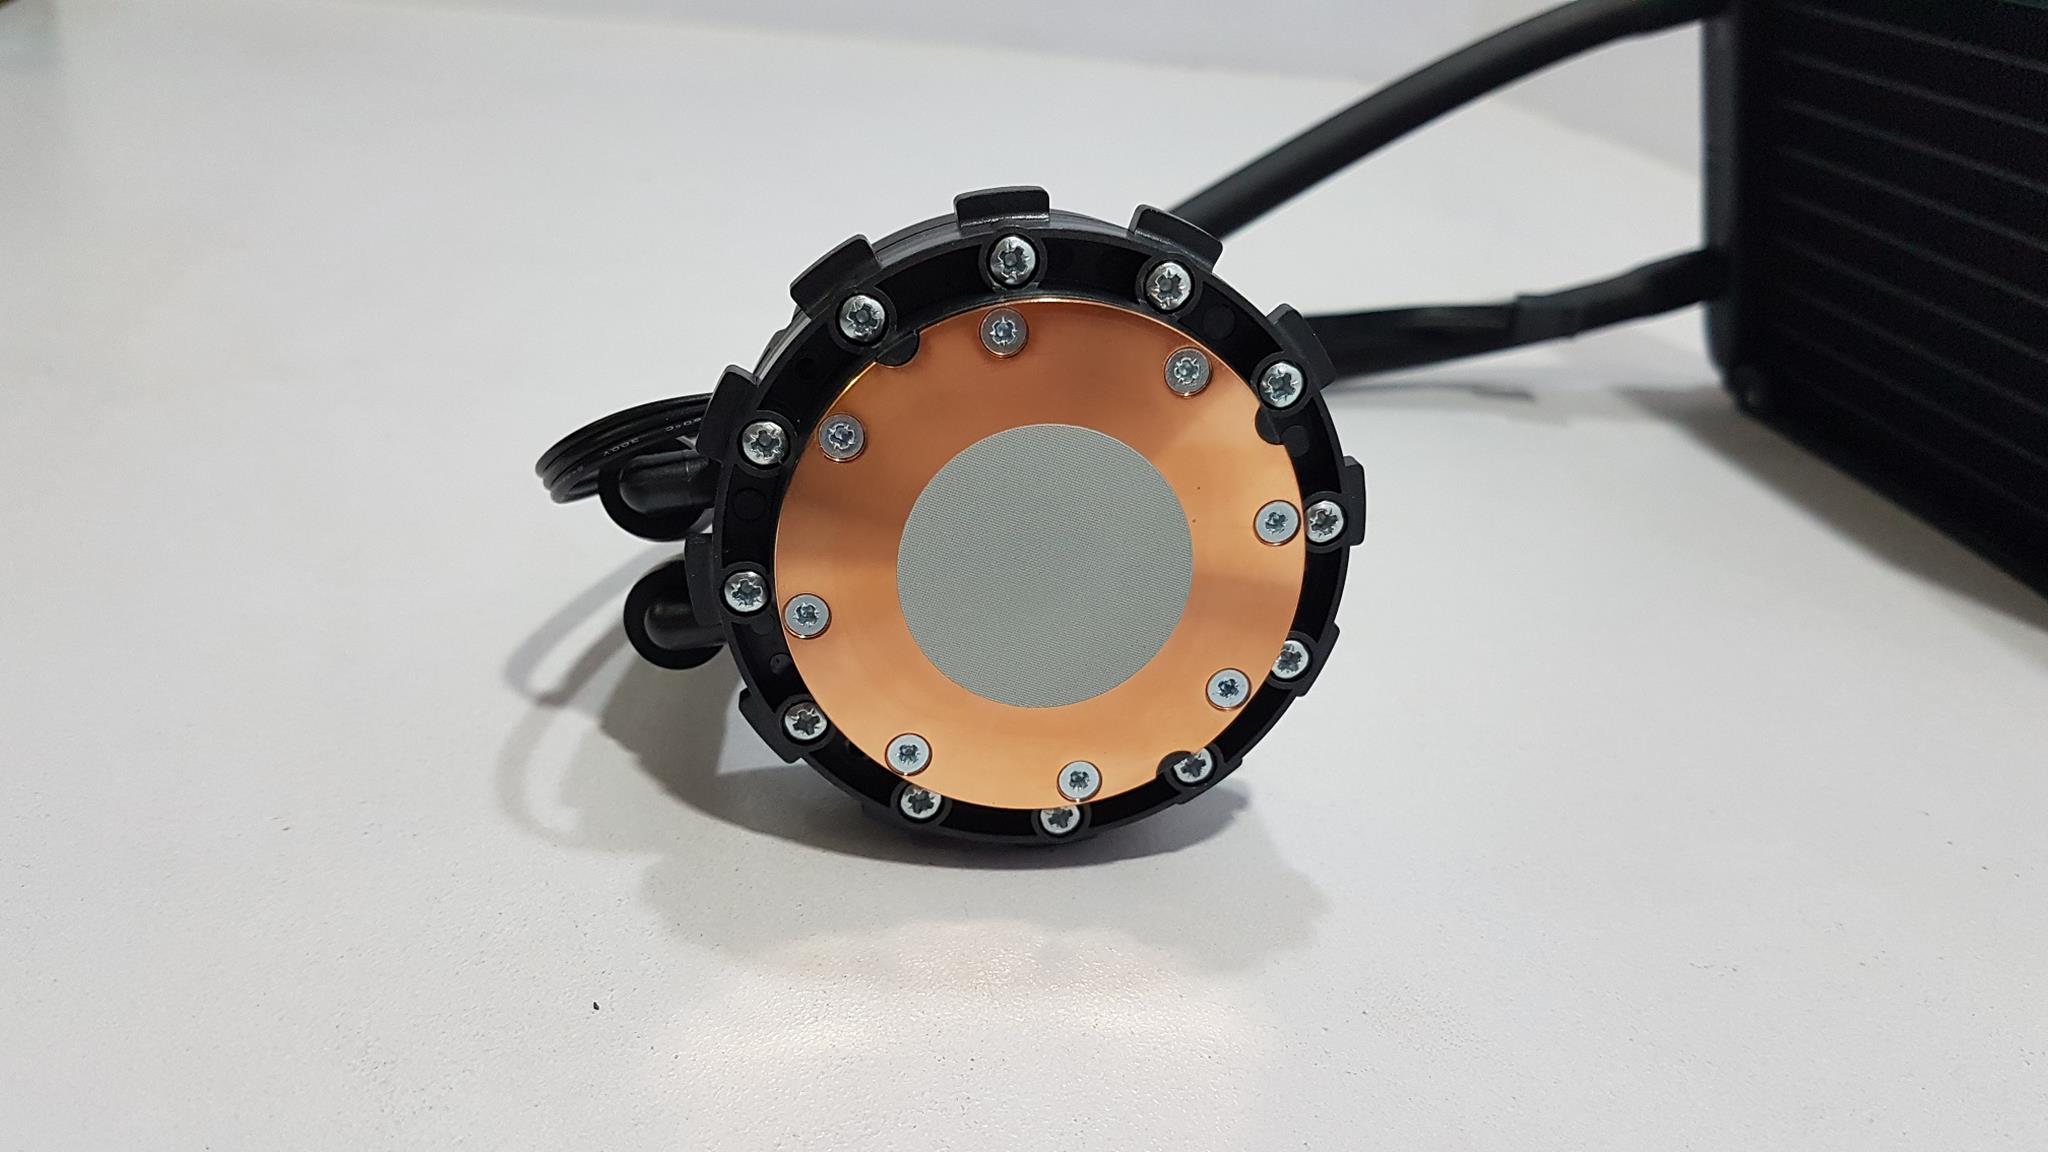
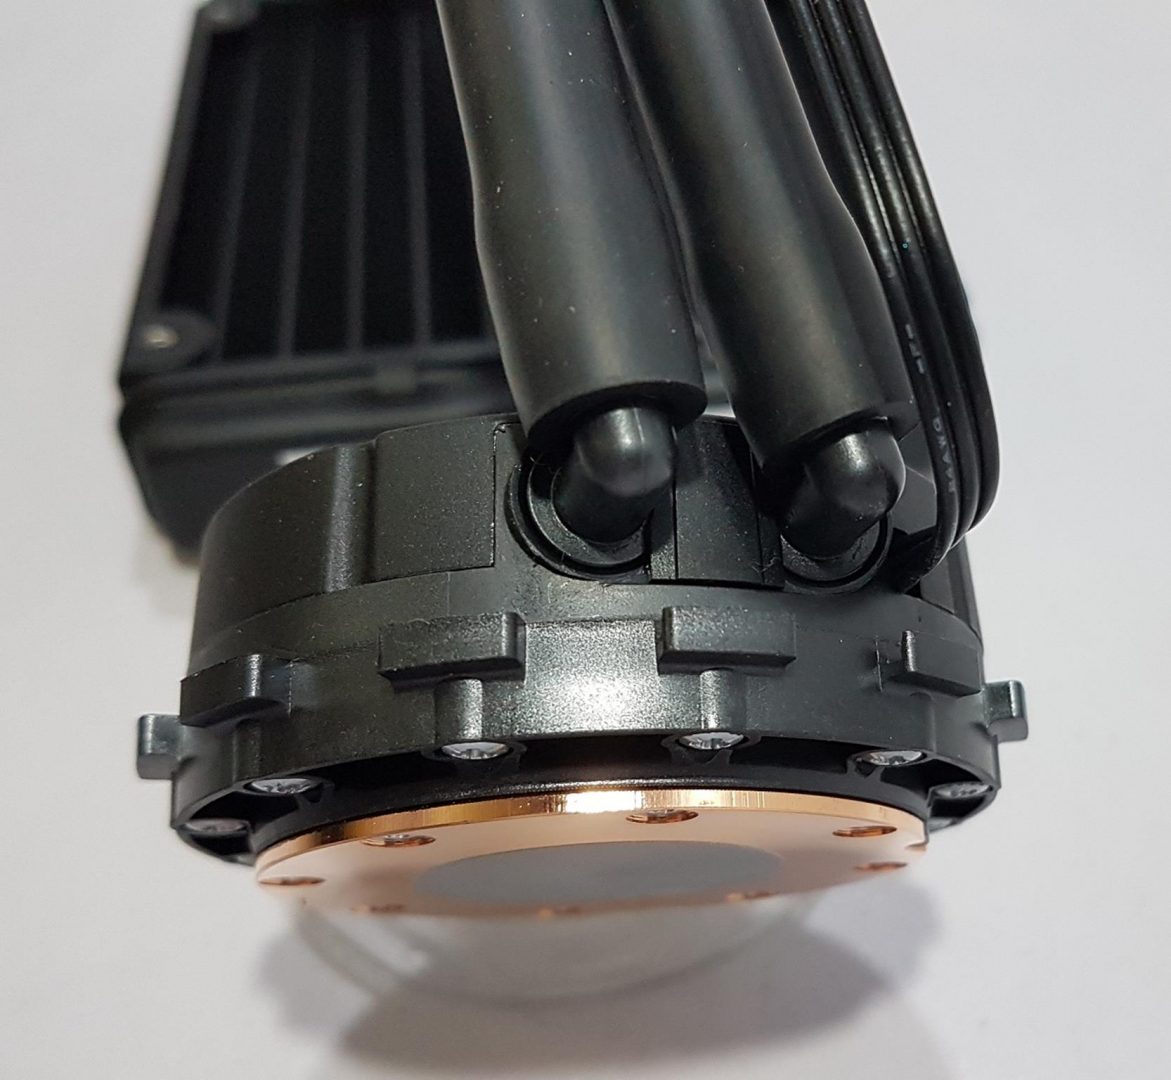
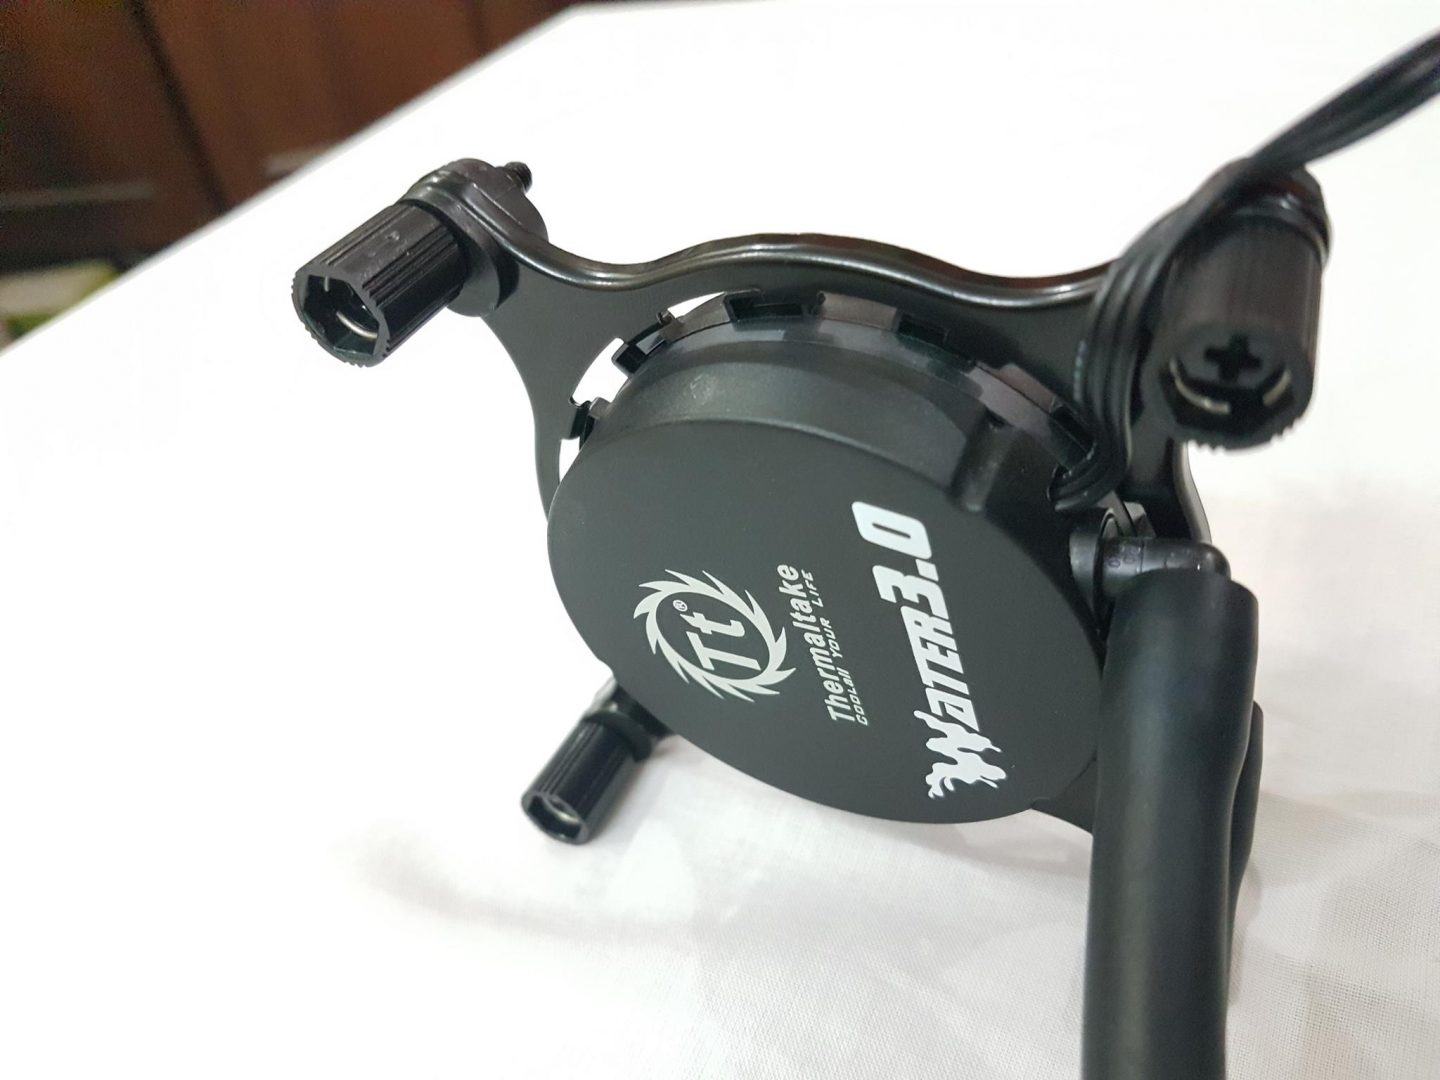
The unit has full copper baseplate on the high-performing water block. Thermal paste is pre-applied which is user-friendly but advanced users can change the thermal paste as per their own requirement. The unit was used on Kabylake platform initially with the stock thermal paste and performance was good. 8 screws are holding the copper base plate with the block.
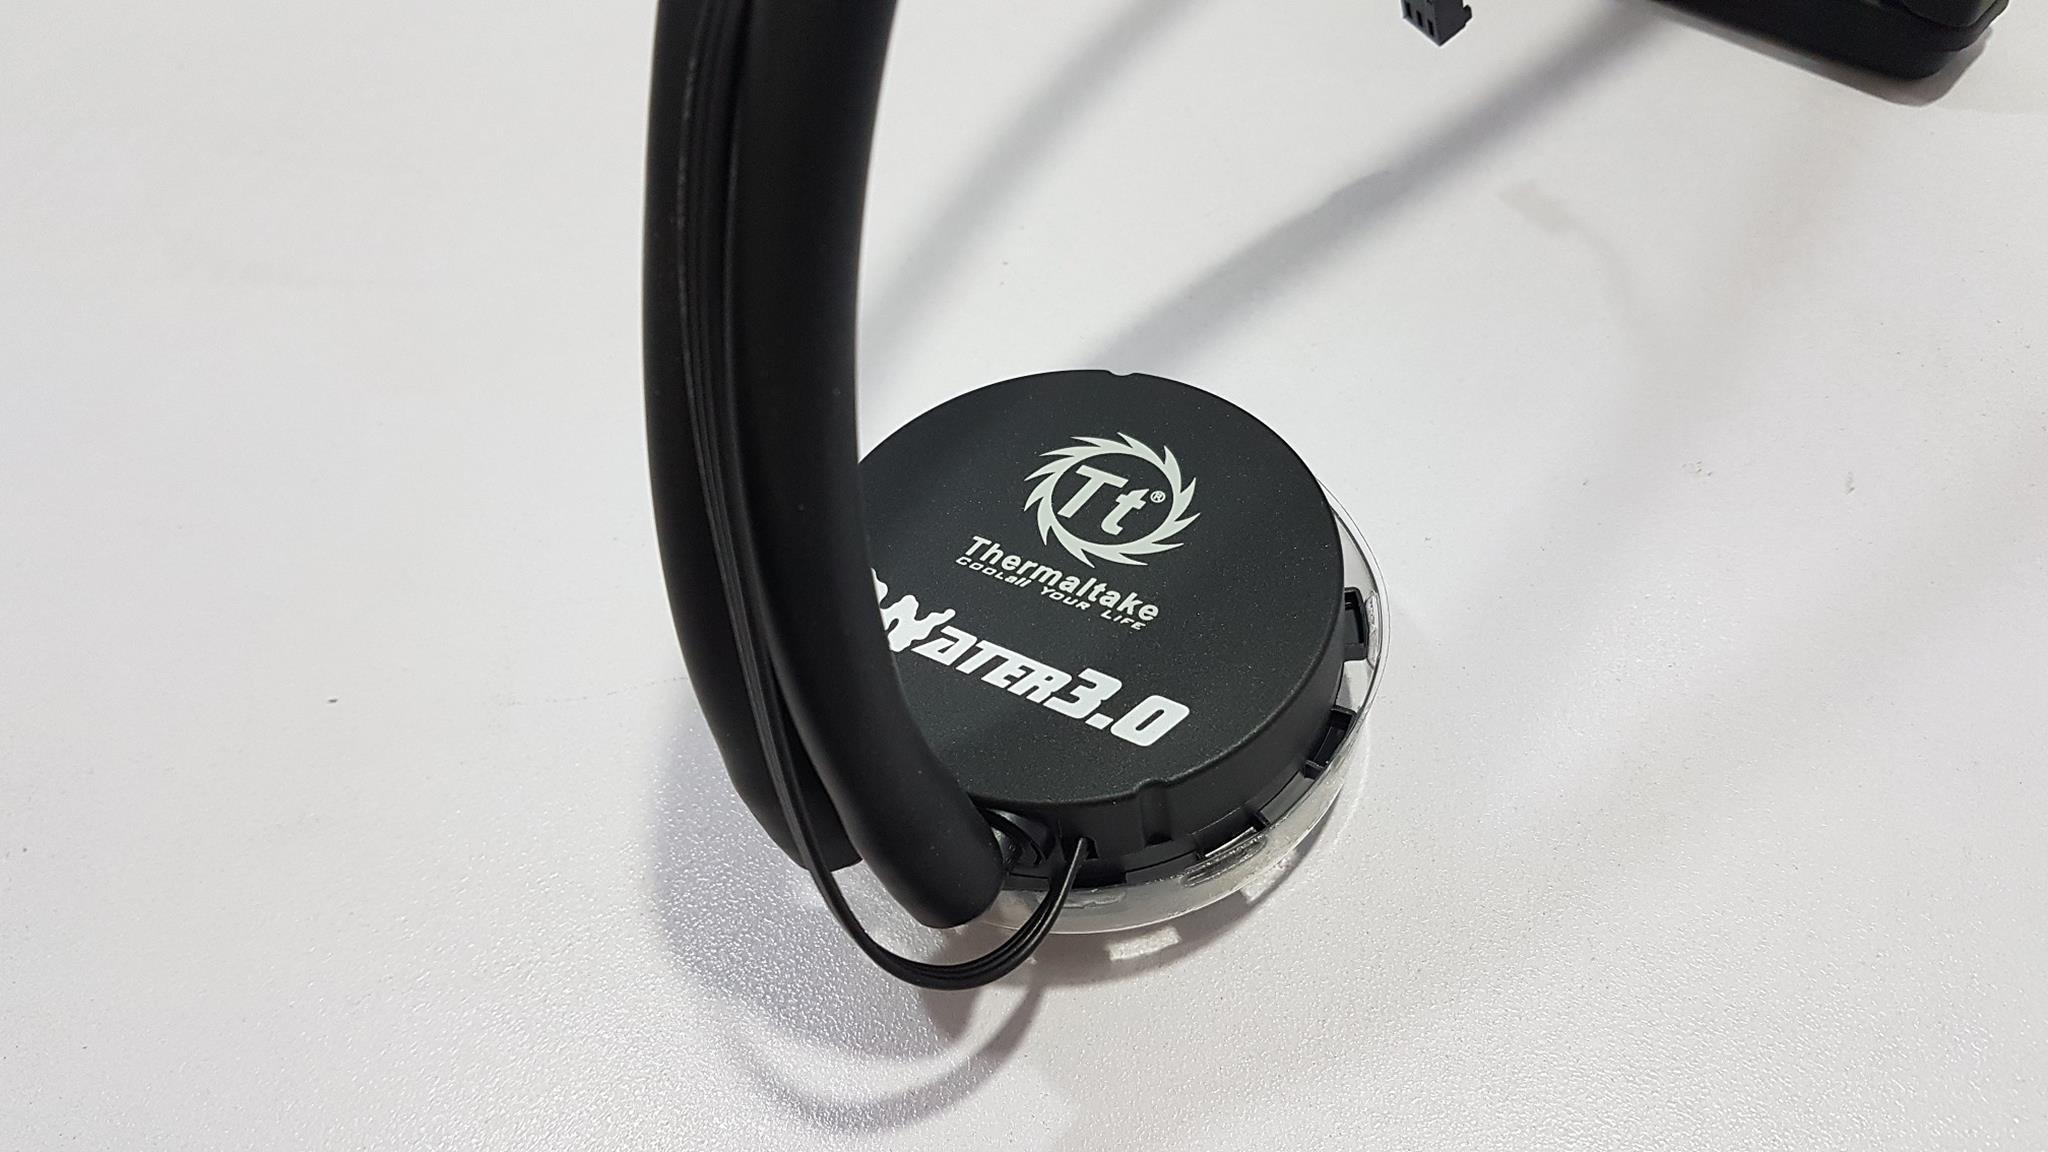
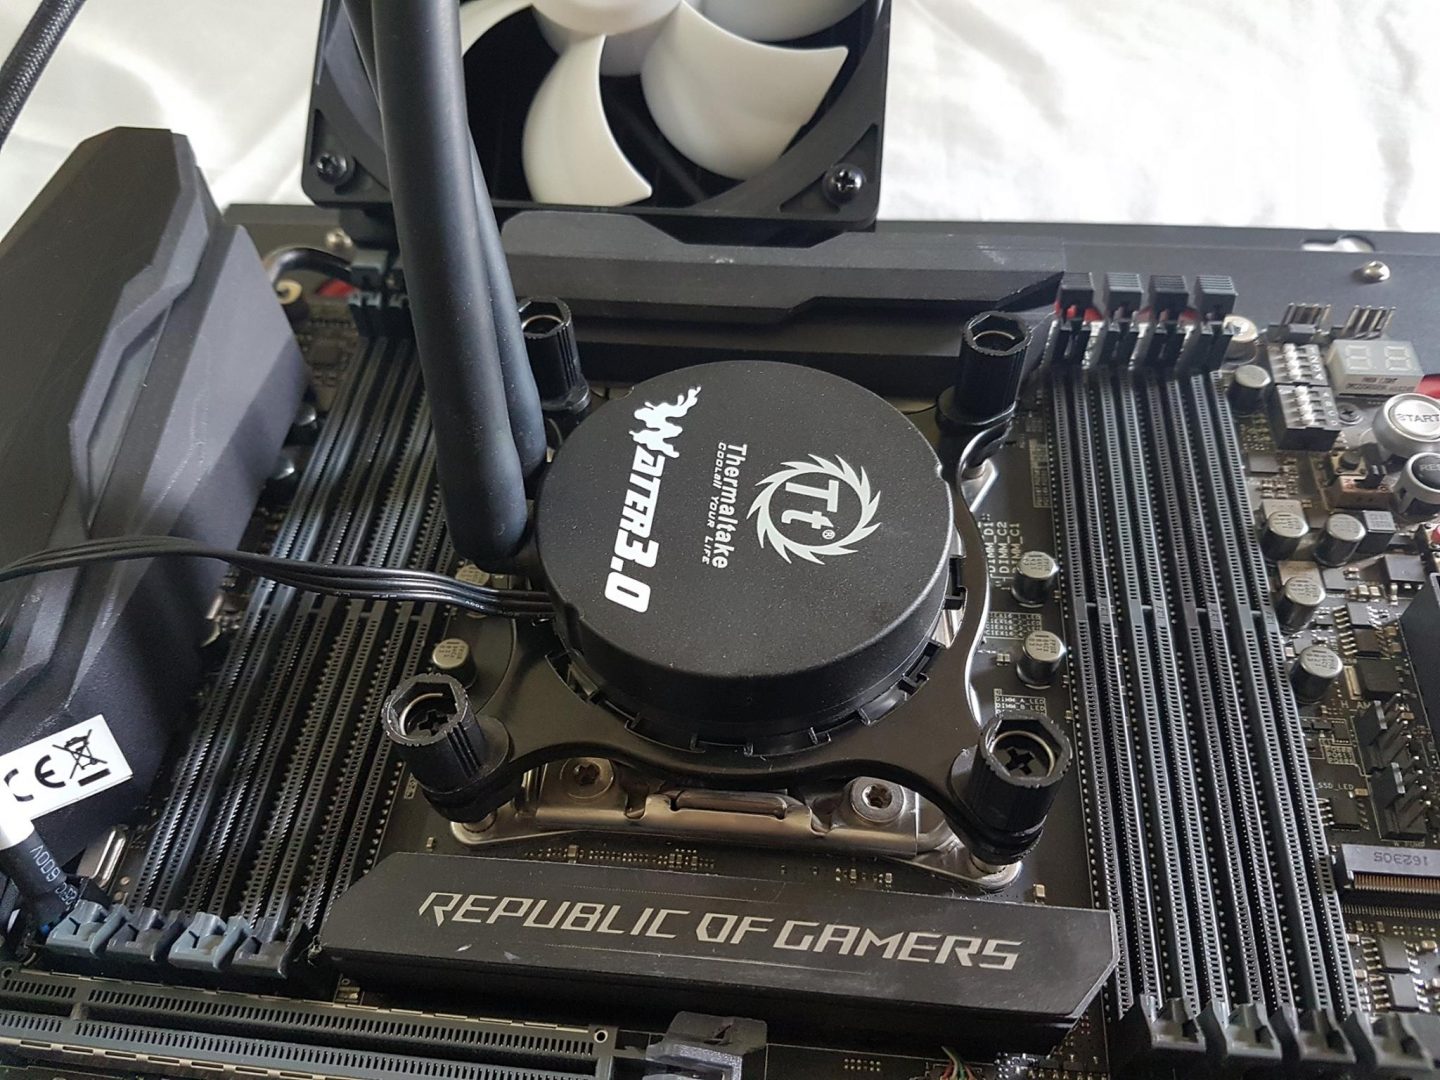
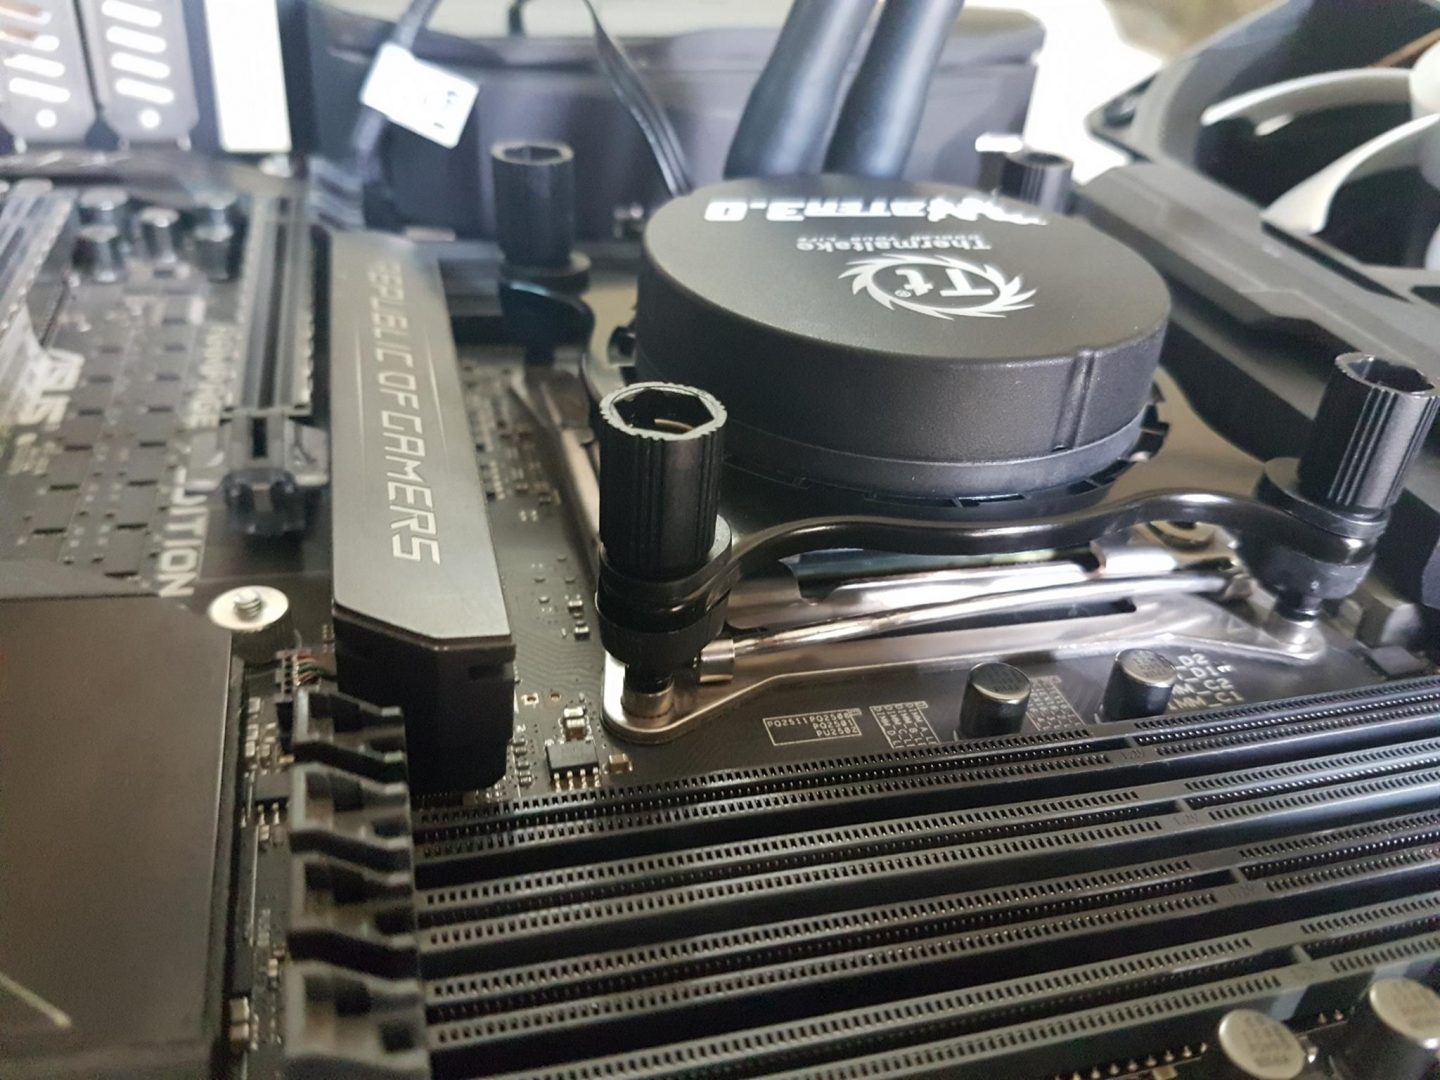
To access the complete pump unit, 12 screws in the mainframe needs to be removed. Pump motor has RPM of 2900 with +/- 150 which is handy. There is a 3-pin cable coming out of the pump area. Connect it with the CPU fan header or preferably the AIO headers available on modern motherboards. Fittings are 90 degrees implemented on the block and can be rotated to make room and angle of the tubes as per the requirement. The Thermaltake logo and brand name are printed on the top of the block in white color.
The Thermaltake claims the cooler to have universal socket compatibility. It has support for AM4 and Intel’s 2066 though I am not sure if the existing AMD bracket would be enough for AM4 installation.
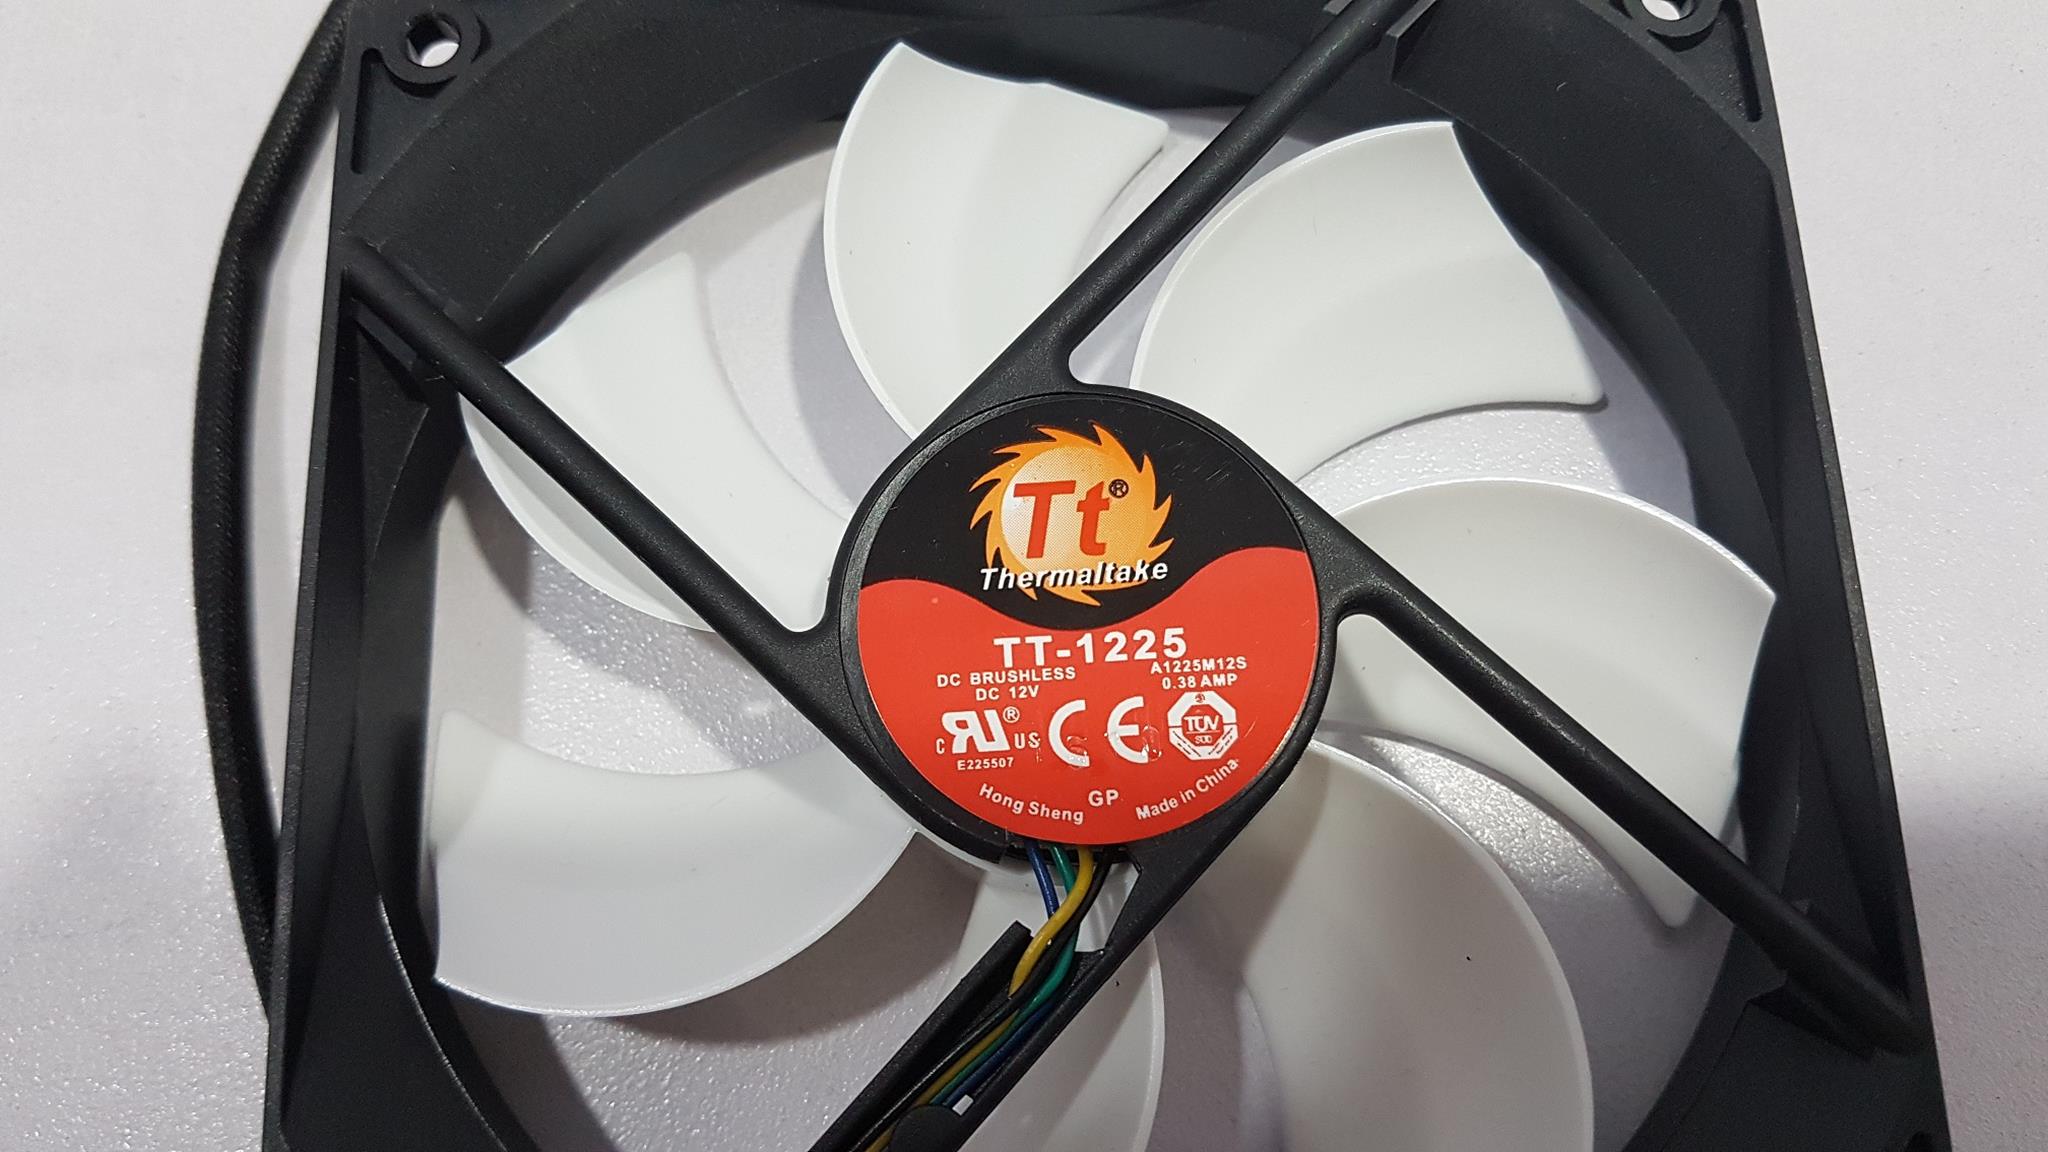
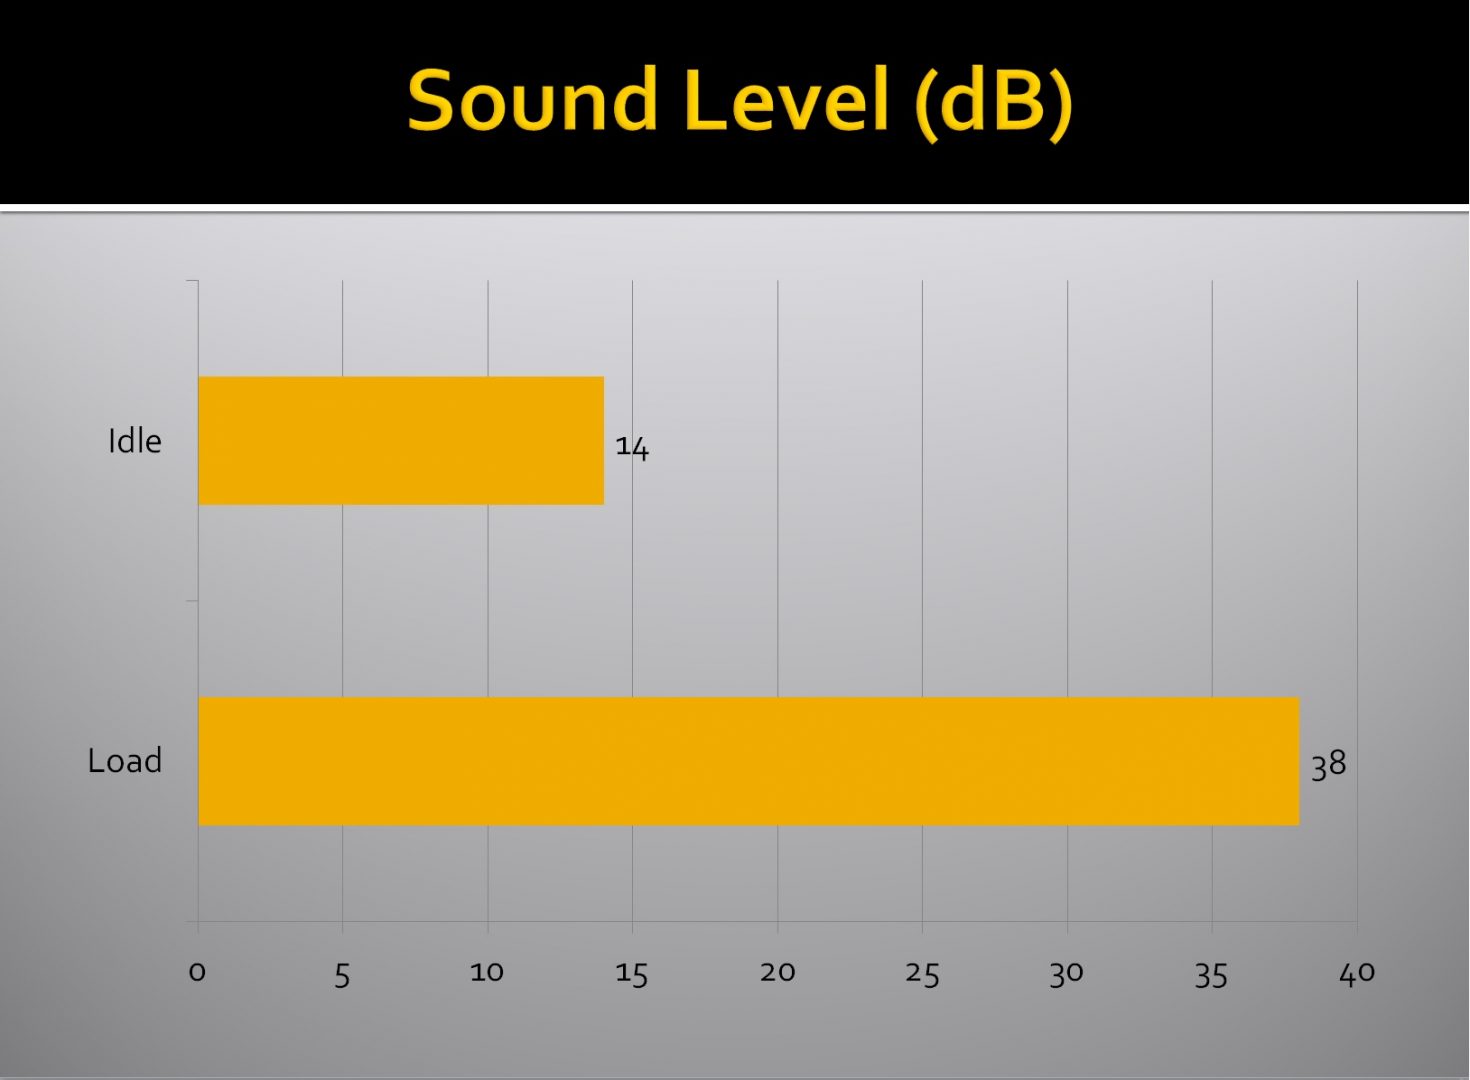
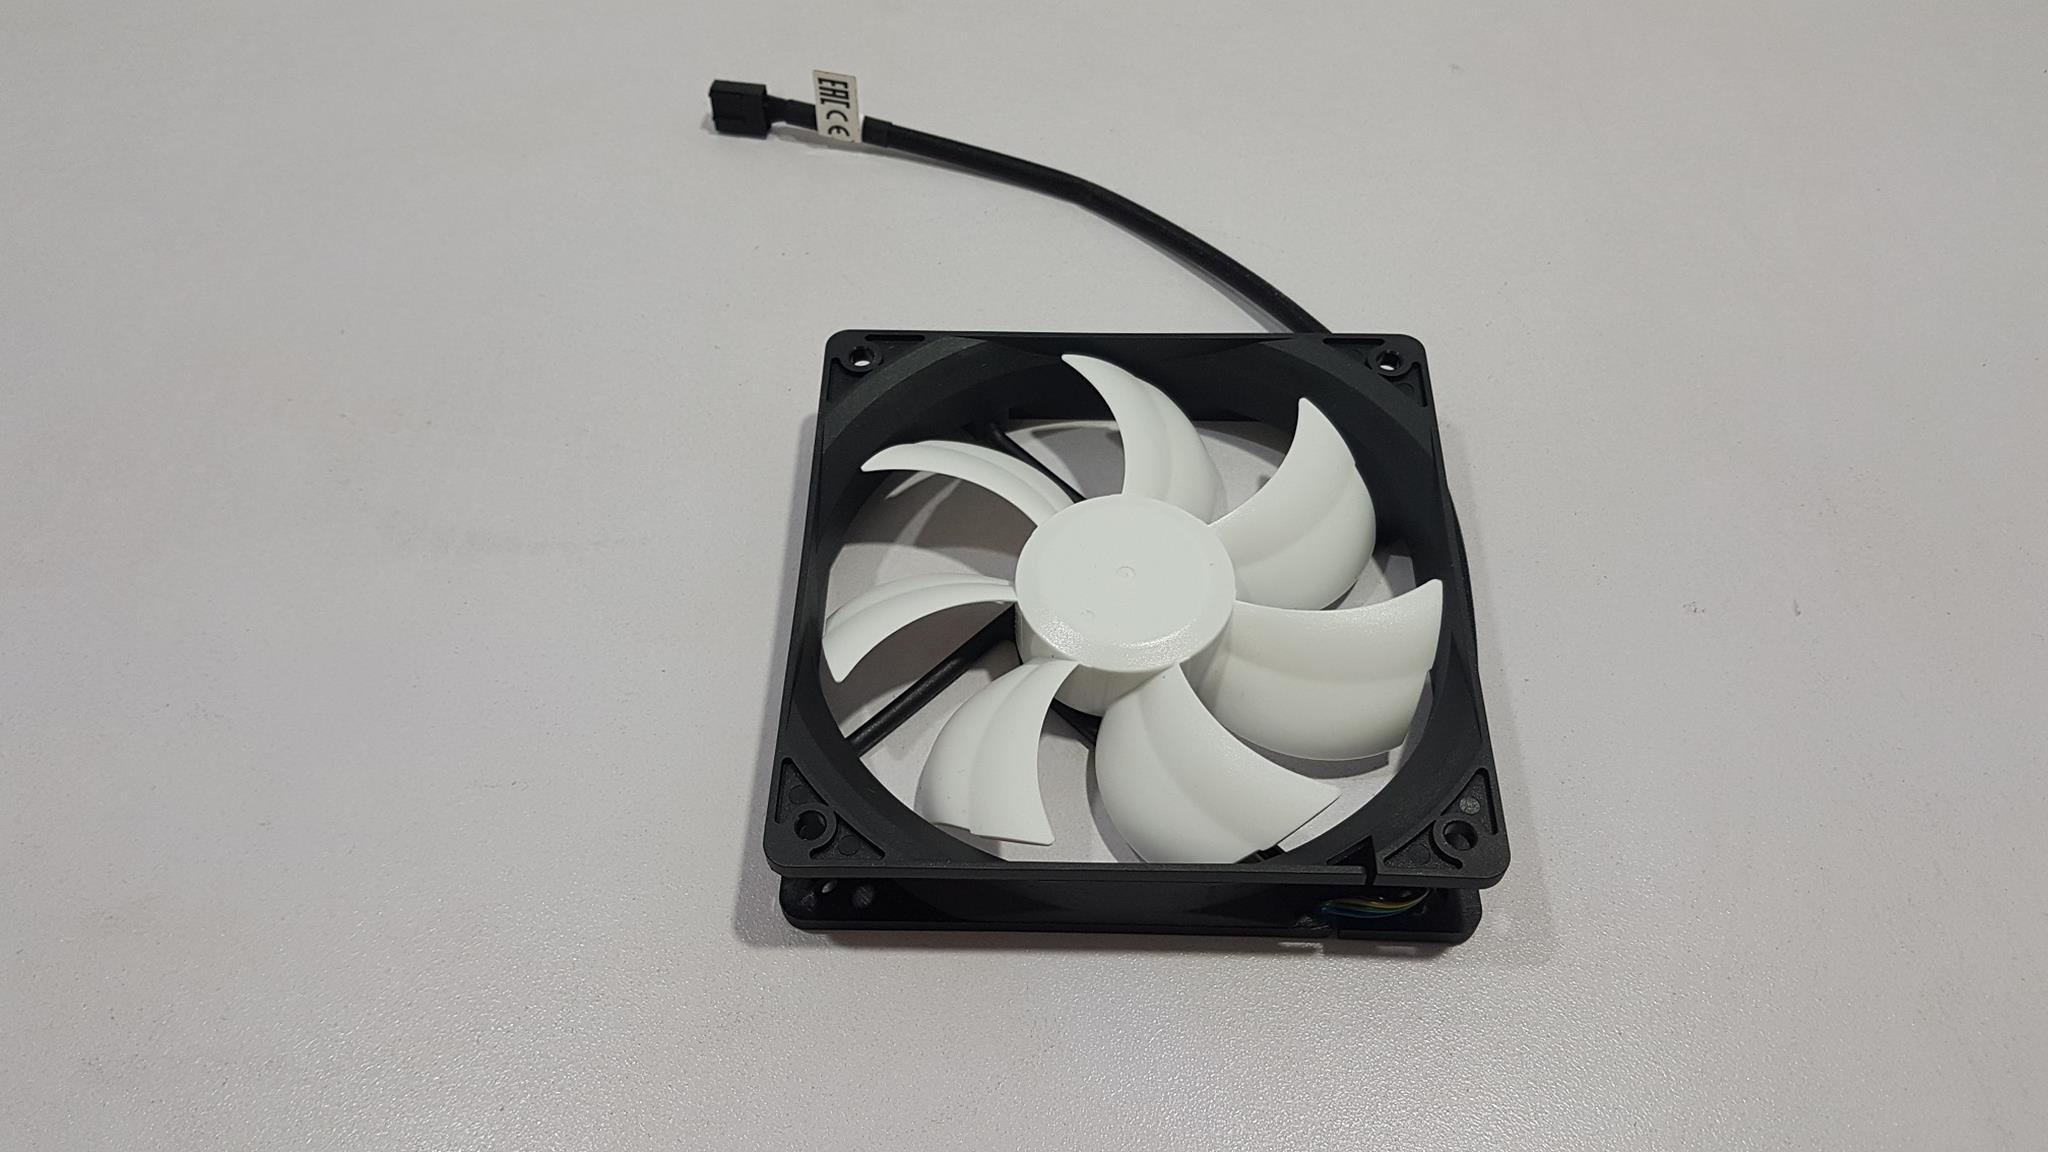
The unit comes with a single 120mm fan. It has 7 blades in white color with dual-layered design to improve the air flow. RPM range is between 1200 to 2000 RPM when not using the LNC (Low Noise Cable). With LNC the RPM range is 800 to 1200 RPM. Fan part no is A1225M125 and it is DC Brushless type. The fan has 4-pin connector and it is PWM. The frame of the fan is in black color. The user would need to buy the second fan should there be the need for a push/pull setup. The noise level is 39 dBA max with LNC and 21 dBA with LNC. My sound meter measured the noise to 36 dBA at 100% speed and that level of sound did not bother me at all though sound level sensitivity varies from person to person.
Installation
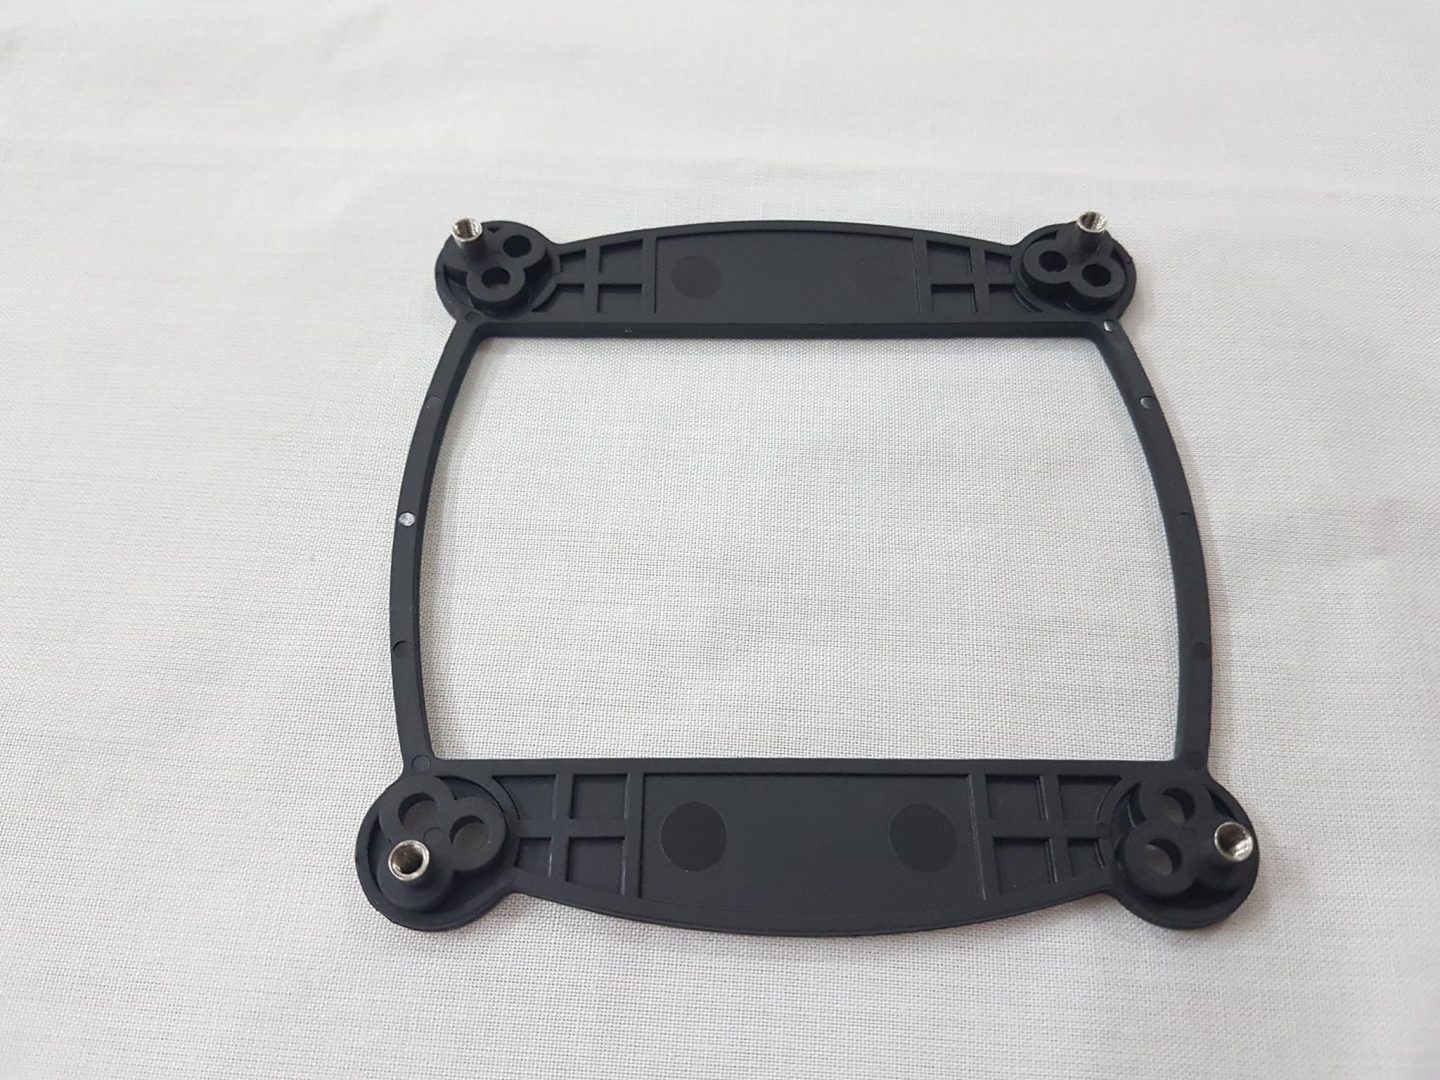
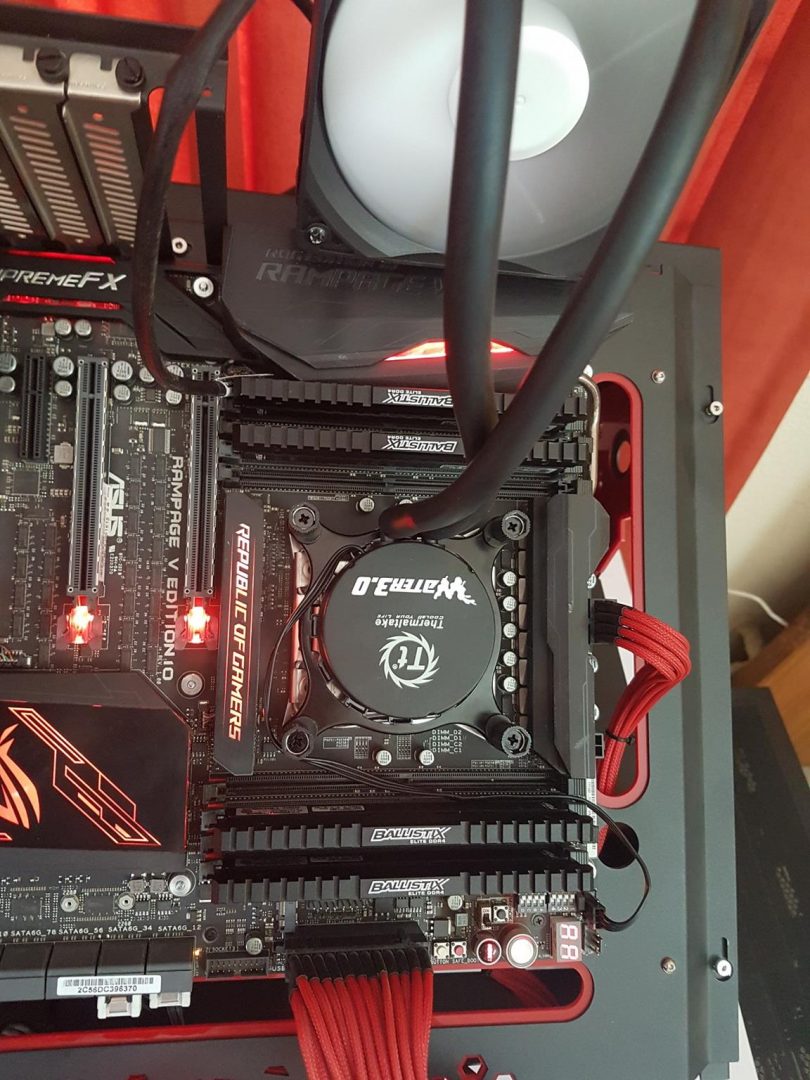
To test the cooler, Asus Rampage V Edition 10 based on socket LGA 2011-V3 (X99 platform) was used. On this socket, there is no need to install the backplate but for AMD and Intel LGA 115x/1366 sockets, the back plate would be required. As I mentioned earlier that this cooler has the strange mounting mechanism which is kinda typical of Aestek, let’s have a look at how to prepare the backplate for use with LGA 1151. The Intel’s backplate has three holed corners. Each of these holes represents socket mounting. They are LGA 1366, LGA 1155 and LGA 775. To mount the cooler on the socket LGA 1151 insert the metal holder into the LGA 1155 designated hole.
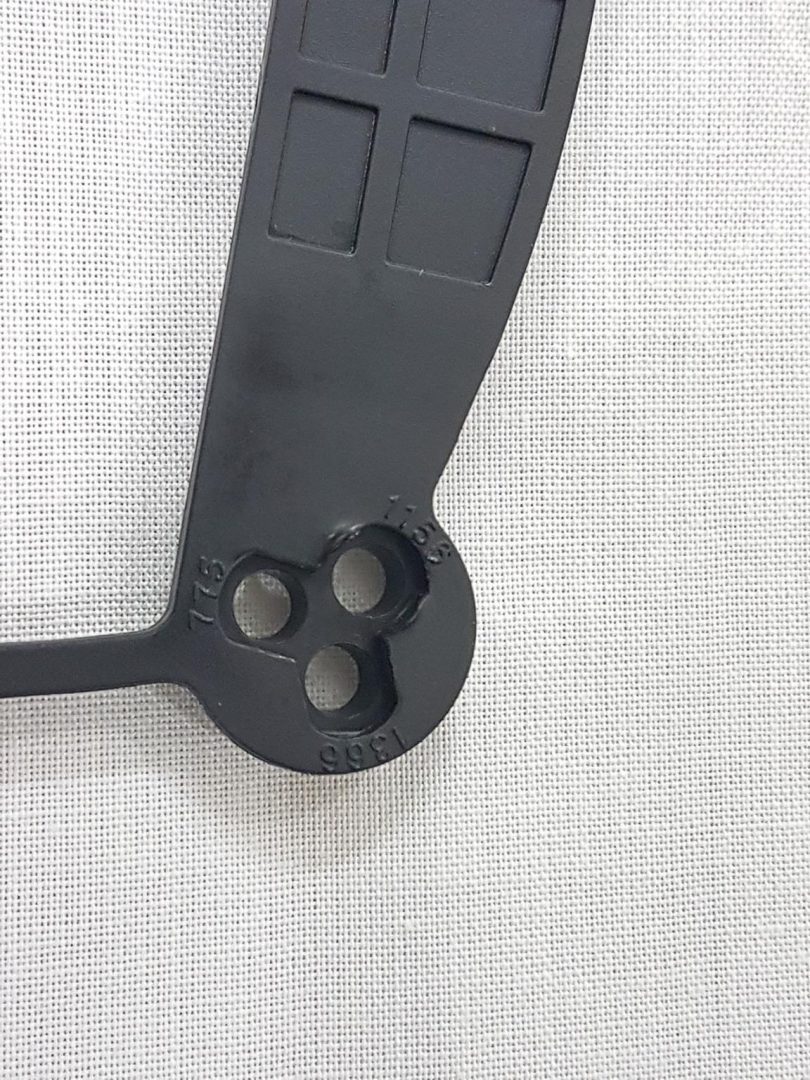
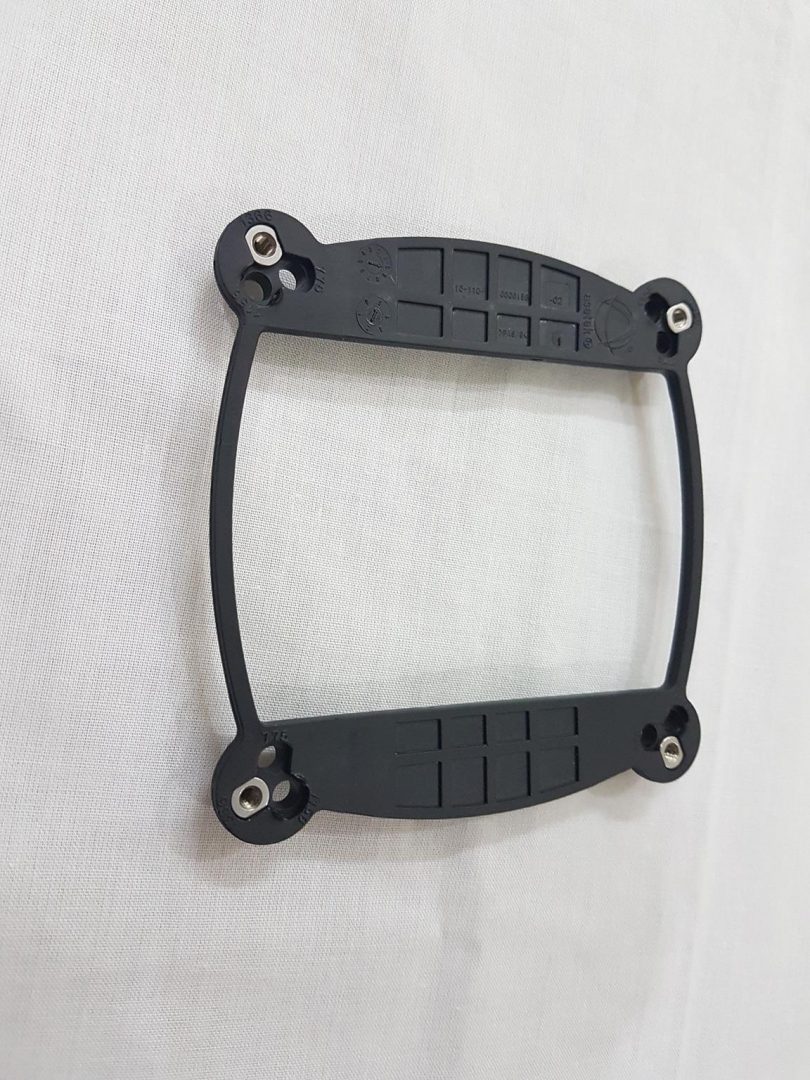
If you are using cooler for a longer time then it is preferable to paste the dual sided adhesive on the backplate as it will make the backplate stick with the motherboard and will spare your hand to focus on the remaining installation. I did not use these adhesives as I have other coolers pending to be reviewed.
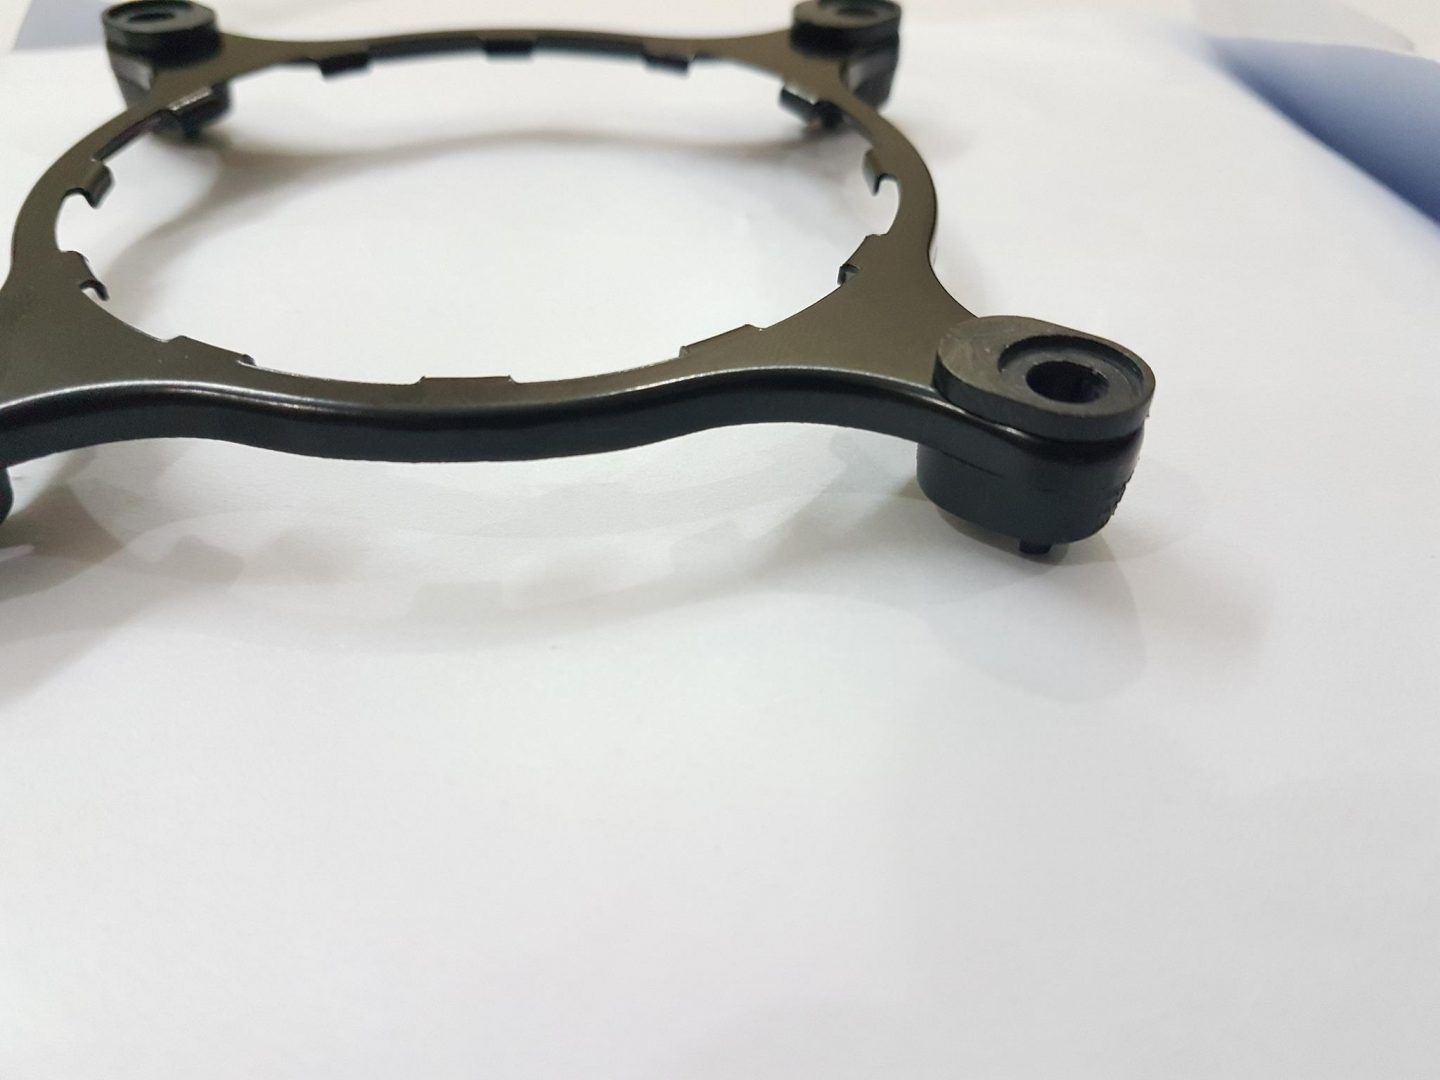
For LGA 2011, we don’t need backplate, thankfully. Next up one would need to prepare the ring. Use the 4+4 clips from the accessories. Use the manual and take your time as this is the tricky part. For LGA 2011/1366 the hole on the upper mounting clip needs to be aligned with the corner of the ring plate. The clip with the deeper body will go under each corner of the ring while the clip with head and three legs will go on the top of each corner. They will insert into each other.
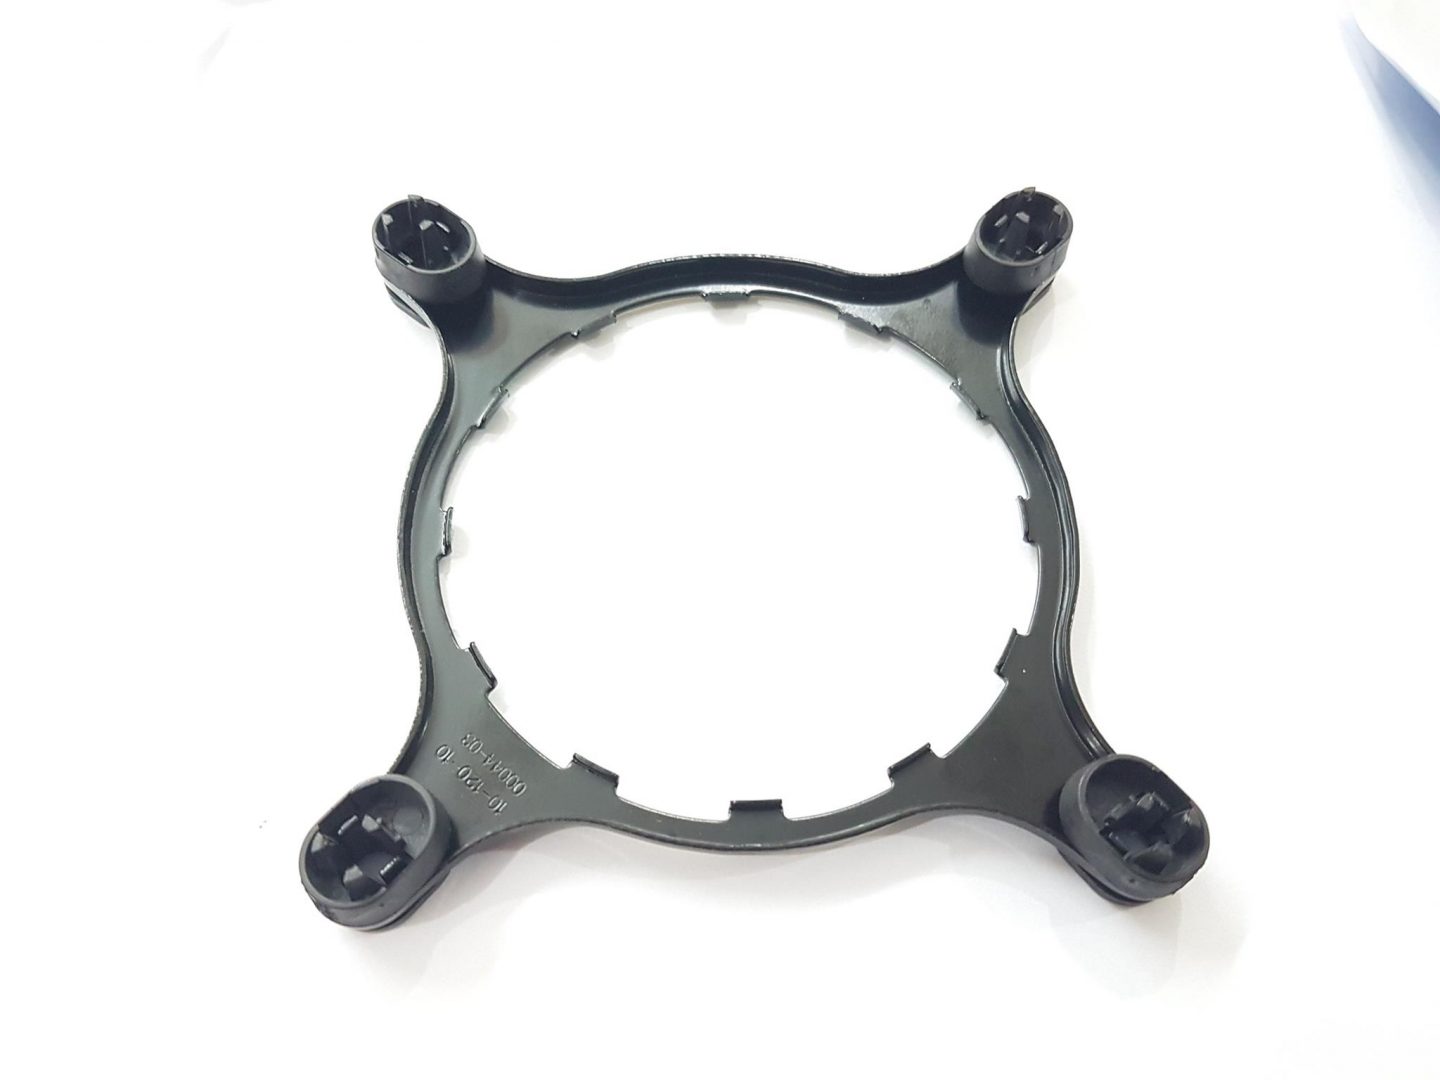
Next up we need to put the thumbscrews through these holes on the ring plate. Use the four screws with thicker threads for LGA 2011. Push the screws with thread side through the top of ring plate’s each cornered hole all the way down till you hear the click. Repeat the process for each corner. Now comes the point when the ring needs to be mounted on the pump block. Pass the block area through the ring plate. Align the notches on the ring with the notches on the pump and rotate the ring till its notches slide in and lock. Your CLC is ready to be used. Phew!
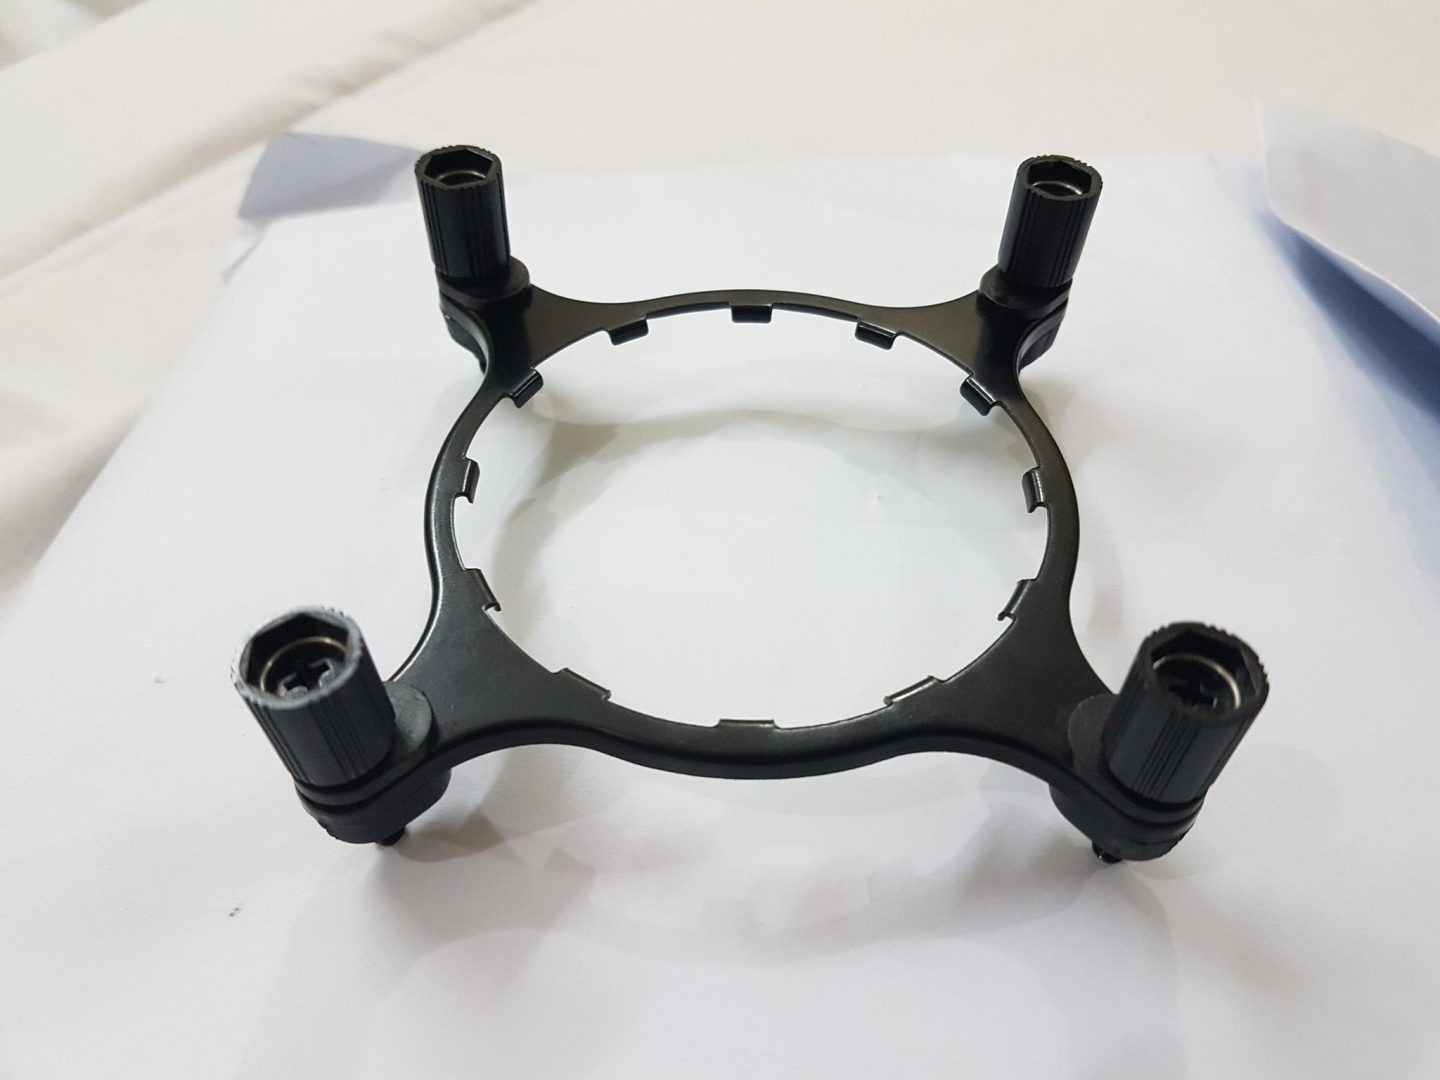
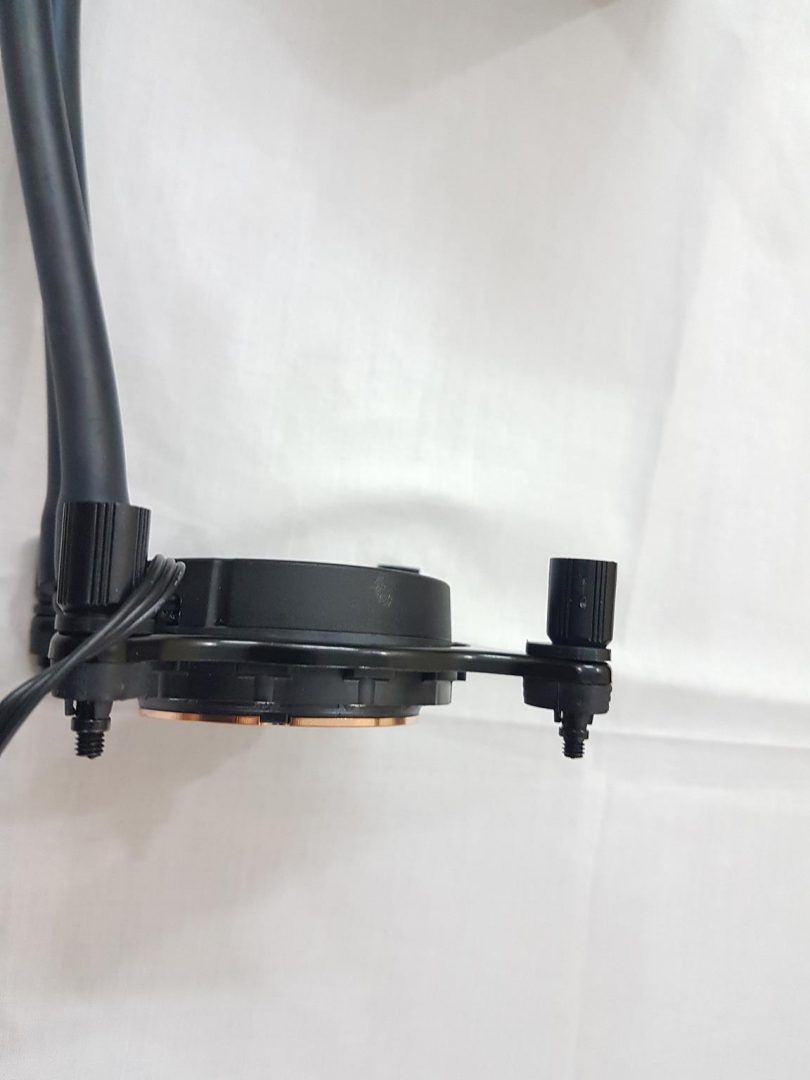
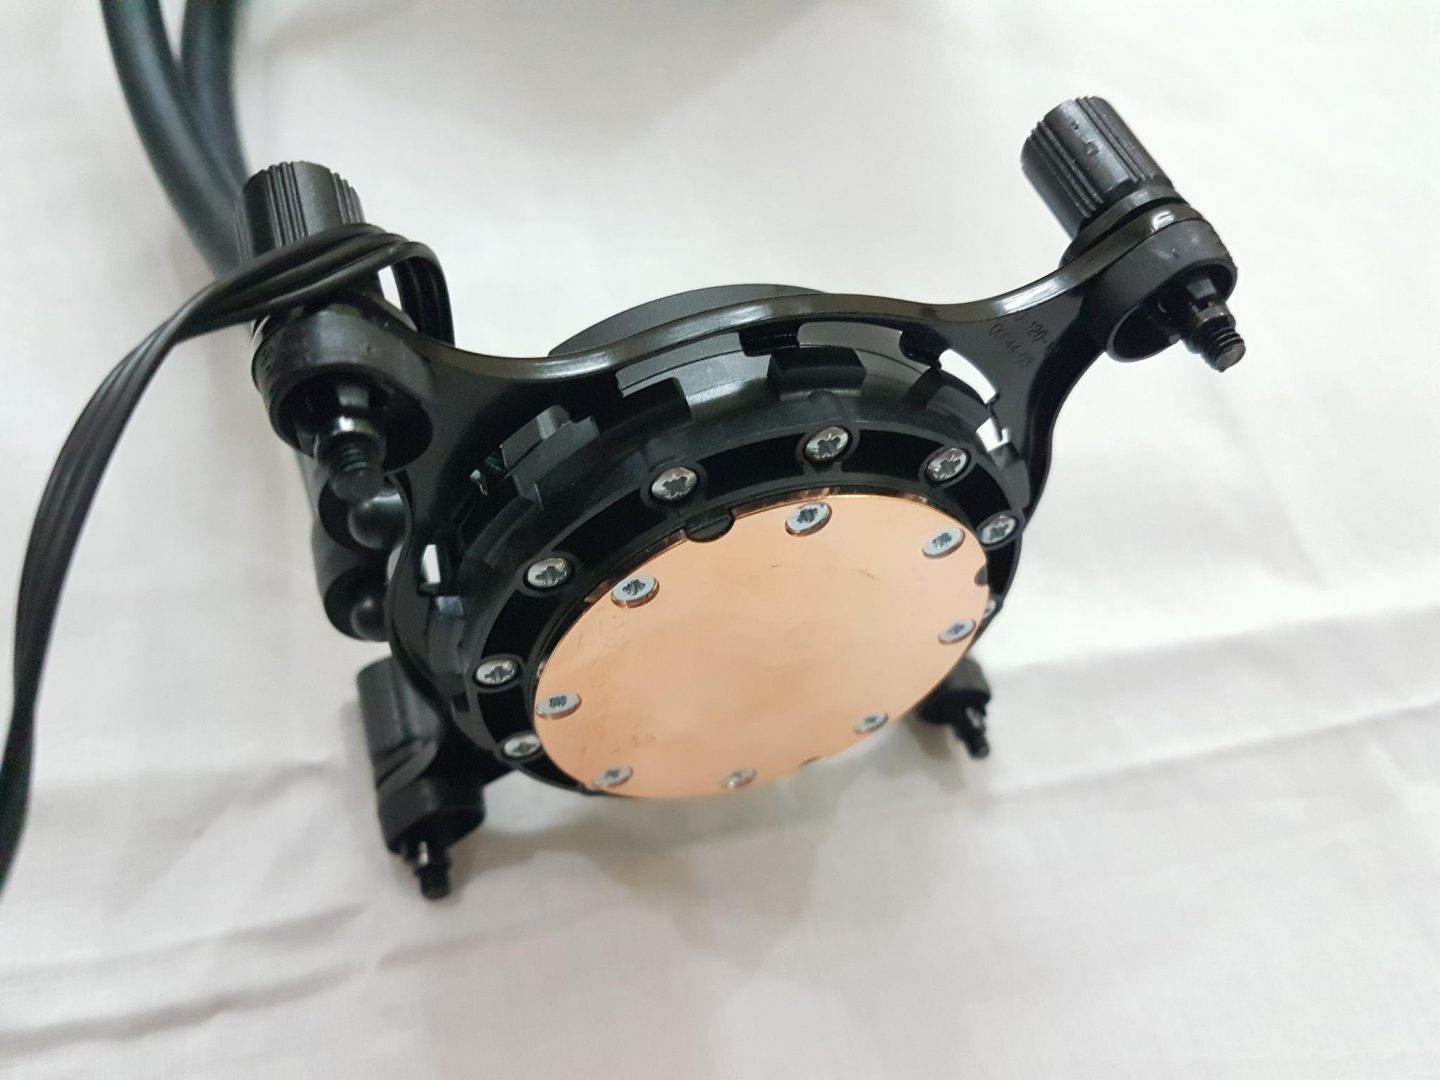
If you are using the stock paste then go ahead and put the block on the CPU such as to align the four pre-drilled holes around the LGA 2011 socket on the motherboard with the screws of the ring plate. Screw the unit with one screw at a time and preferably diagonally for better pressure on the IHS.
To ensure that standardization among the coolers tested on my test bench, I use same paste each time and it is Cooler Master MakerGel Nano Ultra. Pea size method was used. The paste was even spread using applicator on the IHS of the CPU (Intel 6850k).
Compatibility and Clearance
The beauty of using CLCs is that we don’t run in any incompatibility with RAM and first PCIe lanes though users need to check for the radiator mounting clearance and availability. This unit being the 120mm size has the far most compatibility with any chassis. Even the budget mid-tower chassis can accommodate the 120mm CLC. The unit was used in Thermaltake View 31 when that chassis was reviewed earlier. It was tested on my test bench in an open environment using PrimoChill Praxis WetBench.
Test Bench
Following test bench was used for testing this cooler: –
- Asus Rampage V Edition 10
- Intel i7 6850k
- Crucial Ballistix Elite 4x4GB @ 3000MHz
- Asus GTX 750Ti
- Samsung 840 EVO 250GB SSD
- WD Black 6TB
- Corsair AX1200i
- Following coolers were used for comparison:
- Corsair H100i V2
- Noctua NH-U14S [Single Tower, Single Fan]
- Cryorig R1 Ultimate
- Reeven Ouranos RC-1401, Justice RC 1204 and Hans RC 1205
Cooler Master MasterGel Maker Nano Ultra was used during all tests.
Following software were used for the testing and monitoring.
- Asus Real Bench v 2.44
- Real Temp GT v 3.70
Testing was done on Microsoft Windows 10 x64 Pro edition.
Methodology
Ambient temp of 20C was maintained with delta correction of +/-1C. All reported temps are in degree Celsius. Below is the table for the settings used:
Settings Stock Overclocked
VCore [Manual] 1.136V 1.360V
Frequency 3.6GHz with the Turbo boost of 3.8GHz 4.40GHz
XMP Yes Yes
CPU core voltage was set to manual to avoid the voltage spikes and to ensure the standardization among all tests for better calibration of the data. Fans were set at PWM with Turbo mode and were left at PWM mode to control them as per the load. Each cooler was tested on stock settings for 30 minutes stress run to take the temps readings. Minimum and Maximum values were recorded from the software. With overclocked CPU, the stress test was run three times on each cooler for 15 minutes duration with 30 minutes interval between each run to ensure that components cool down sufficiently before next run. This was important to take the near accurate readings of the temps. DRAM voltages were fixed as well.
Corsair H100i V2’s pump was set on High-Performance mode during all tests. Fans were not connected with the unit. Fans on H100i V2 were connected on the motherboard’s PWM header which was used for other coolers as well during complete testing. Temps during gaming were also recorded with overclocked CPU for each cooler.
Performance Results
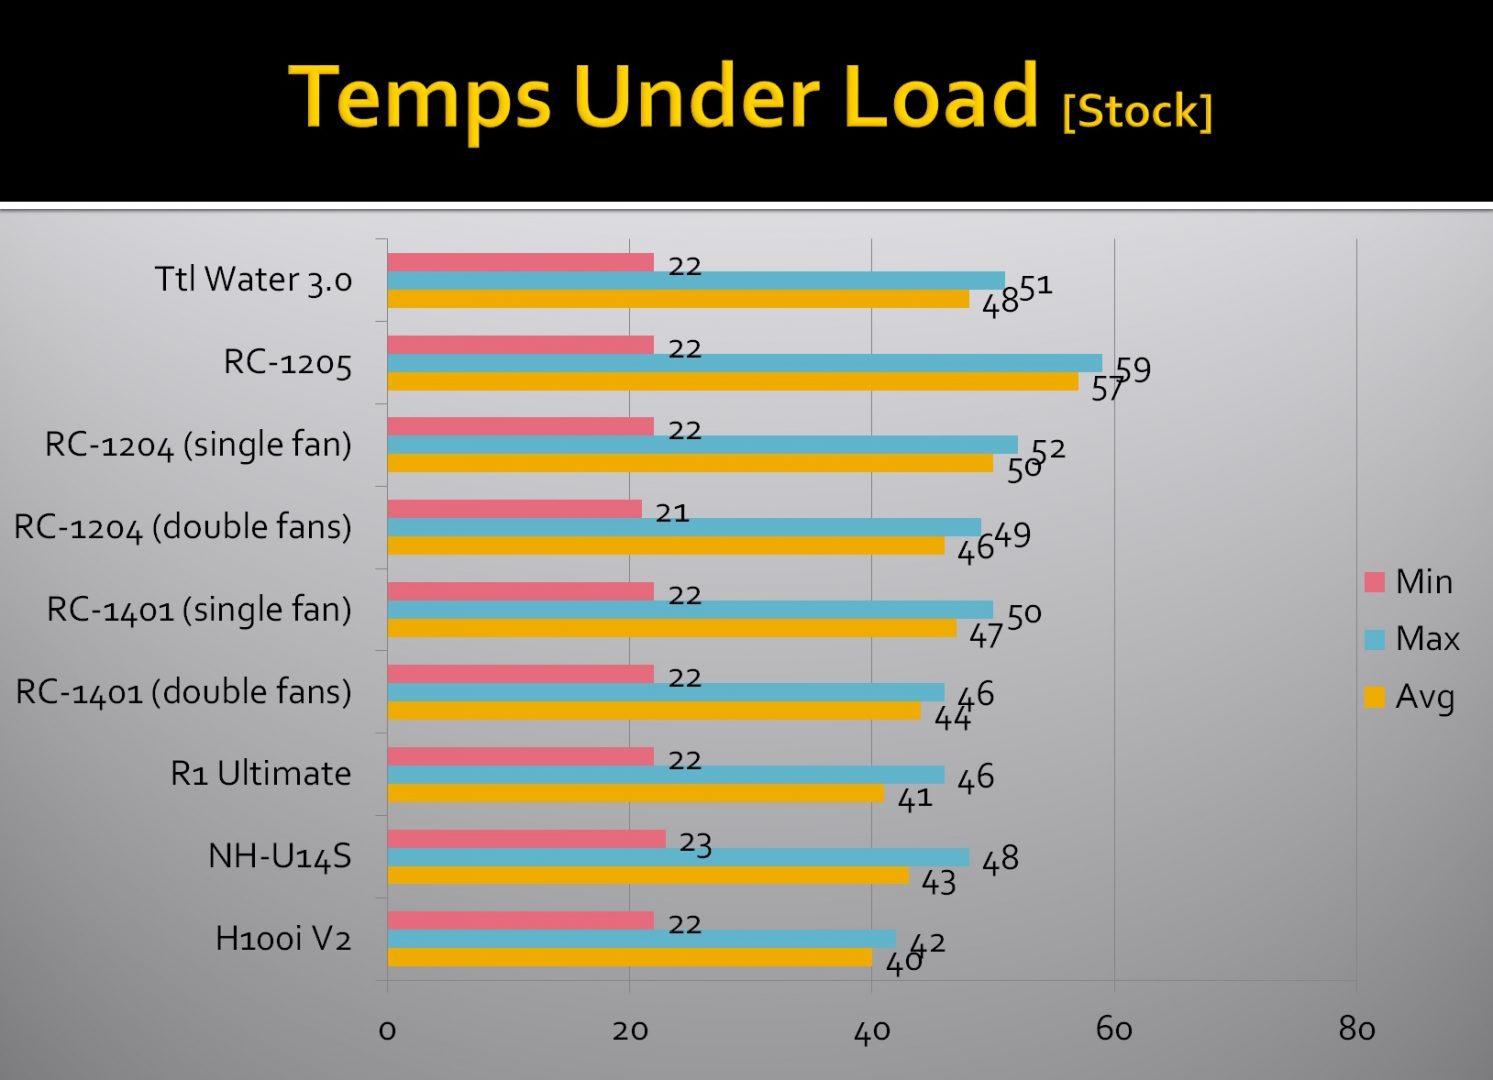
First off with the test run on stock settings, minimum temp was 22C. Idle temps really don’t tell the tale. Max temp of 51C was recorded when the cooler was put under stress on stock clocks. Not a bad performance for a 140W TDP chip.
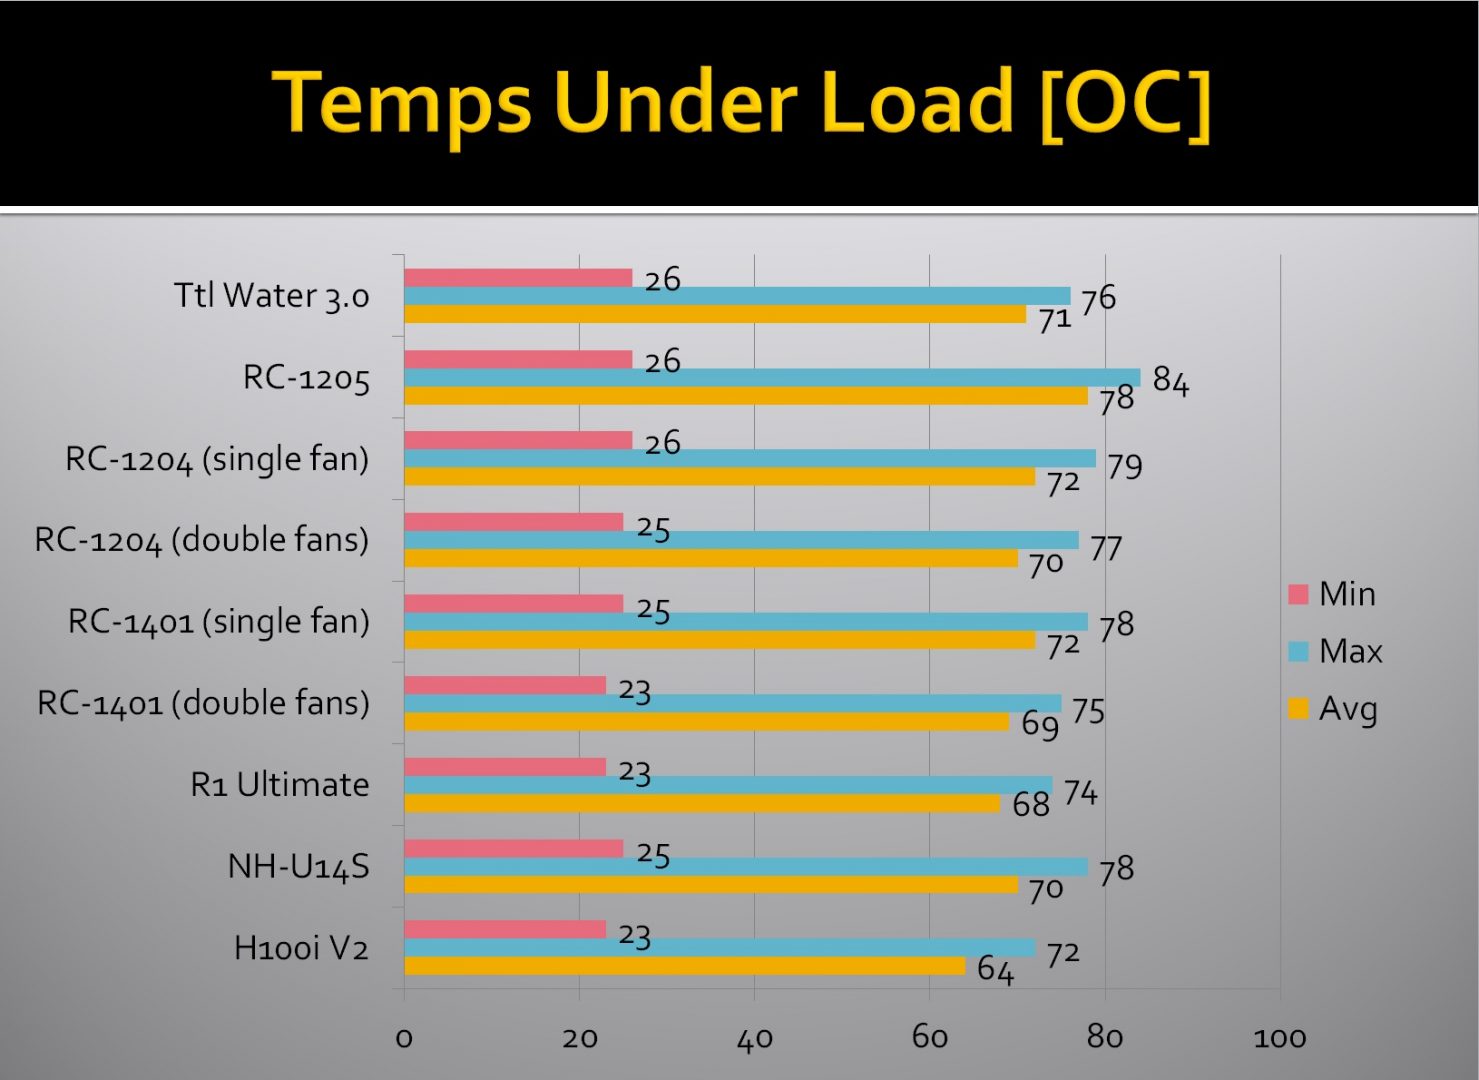
Next up is the result of stress test when CPU was overclocked to 4.40 GHz at 1.360 manual VCore. A maximum temp of 76C with the average temp of 71C was recorded. Again, this unit has performed very well.
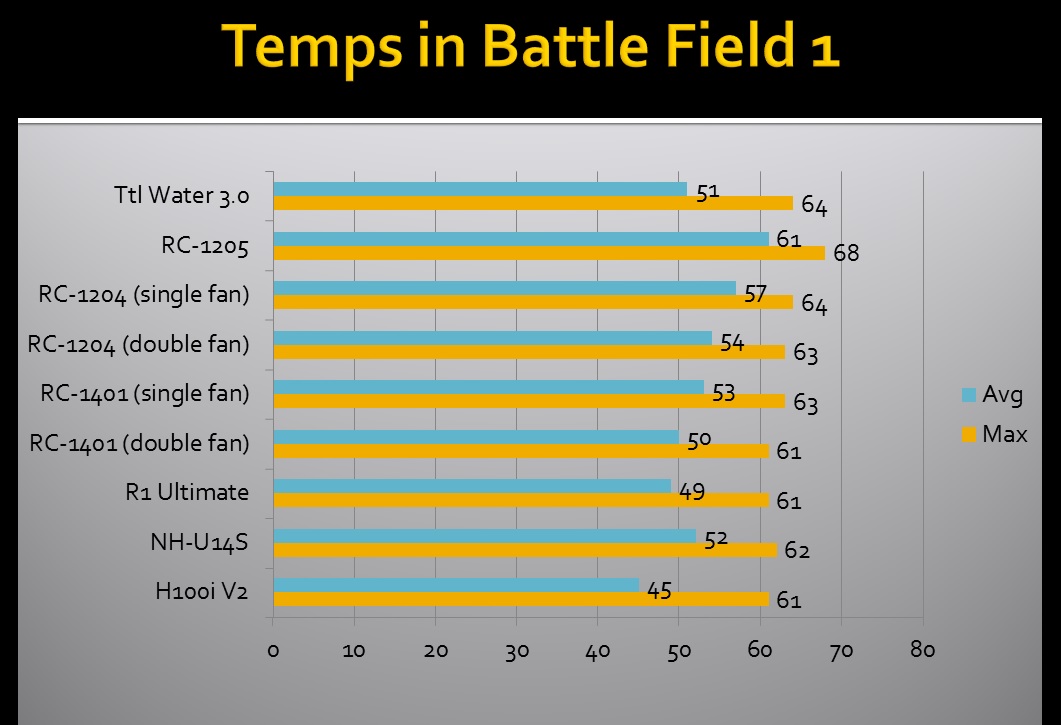
Battlefield 1 was used to test the temps while gaming. Max temps it hit on the CPU were 64C with an average of 51C.
Acoustic performance was impressive on this cooler as well.
Conclusion
Time has come to wrap it up. I will start with an apology first. This content was supposed to be published in the first week of the July but unfortunately, I got femur neck fracture and it took me 2.5 months down the recovery road till I get the point where my Dr allowed me to start putting limited weight on the injured leg and a walk with support. I am thankful to the Thermaltake for their co-operation and patience also I am thankful to my father who helped me setting up my test bench and putting the cooler on for the thermal performance testing. My bone has not yet healed and a gradual recovery is being made.
The Thermaltake Water 3.0 Performer C is an All In One or more correctly Closed Loop Cooler with 120mm size. The package comes with a 120mm fan, user manual and a lot of accessories to enable the unit to be compatible with the majority of the sockets including AM4 and LGA 2066. The fan’s blades are in white color with black frame and it is PWM with loads of performance potential. Though the LNC (Low Noise Cable) is included in the package, I never really felt a need to use that cable even under 100% speed the noise levels were quite acceptable on the fan. The pump is powered by a 3-pin connector coming out of the pump unit, the motor is rated at 2900 +/- 150 RPM. The fan has an airflow of a healthy figure of 99.105 CFM with the max noise of 39 dBA without LNC and max 21 dBA with LNC. This unit is Aestek design.
Value
The price of the Thermaltake Water 3.0 Performer C at the time of this review is $65.99. One can say that within that price a good air cooler can be bought and put to use. Agreed but this price for a 120mm CLC is actually good value. Why? Read below.
Performance
The Thermaltake Water 3.0 Performer C was tested on Intel’s X99 platform with 6 cores chip. This chip is rated at 140W TDP. Consumer grade chips are usually rated between 84-91W TDP. The cooler was put to the task of cooling the chip with 1.360V @ 4.4 GHz and the max temp it hit was 76C. This is an absolutely good performance from a 120mm CLC with a single fan. This is definitely a price to performance ratio category winner.
This cooler has won our Best Value and Performance Awards.

We are thankful to the Thermaltake for giving us the opportunity to review their Water 3.0 Performer C.


