Thermaltake Toughpower iRGB Plus 1250W PSU Overview
Thermaltake Technology Inc. was founded in 1999 with the vision of building Thermaltake Technology into “a cultural brand for the enjoyment of entertainment, e-Sports, technology, and lifestyle”. Thermaltake Technology is focused on delivering the perfect user experience. Their products range from Power Supply Units, PC Chassis, Complete Custom Loop solutions, CPU Coolers, Fans to the range of the peripherals like keyboards, mouse, mouse mat, headphones and even gaming chairs. The very essence of the Thermaltake DNA is based on Courage, Passion, and Perseverance.
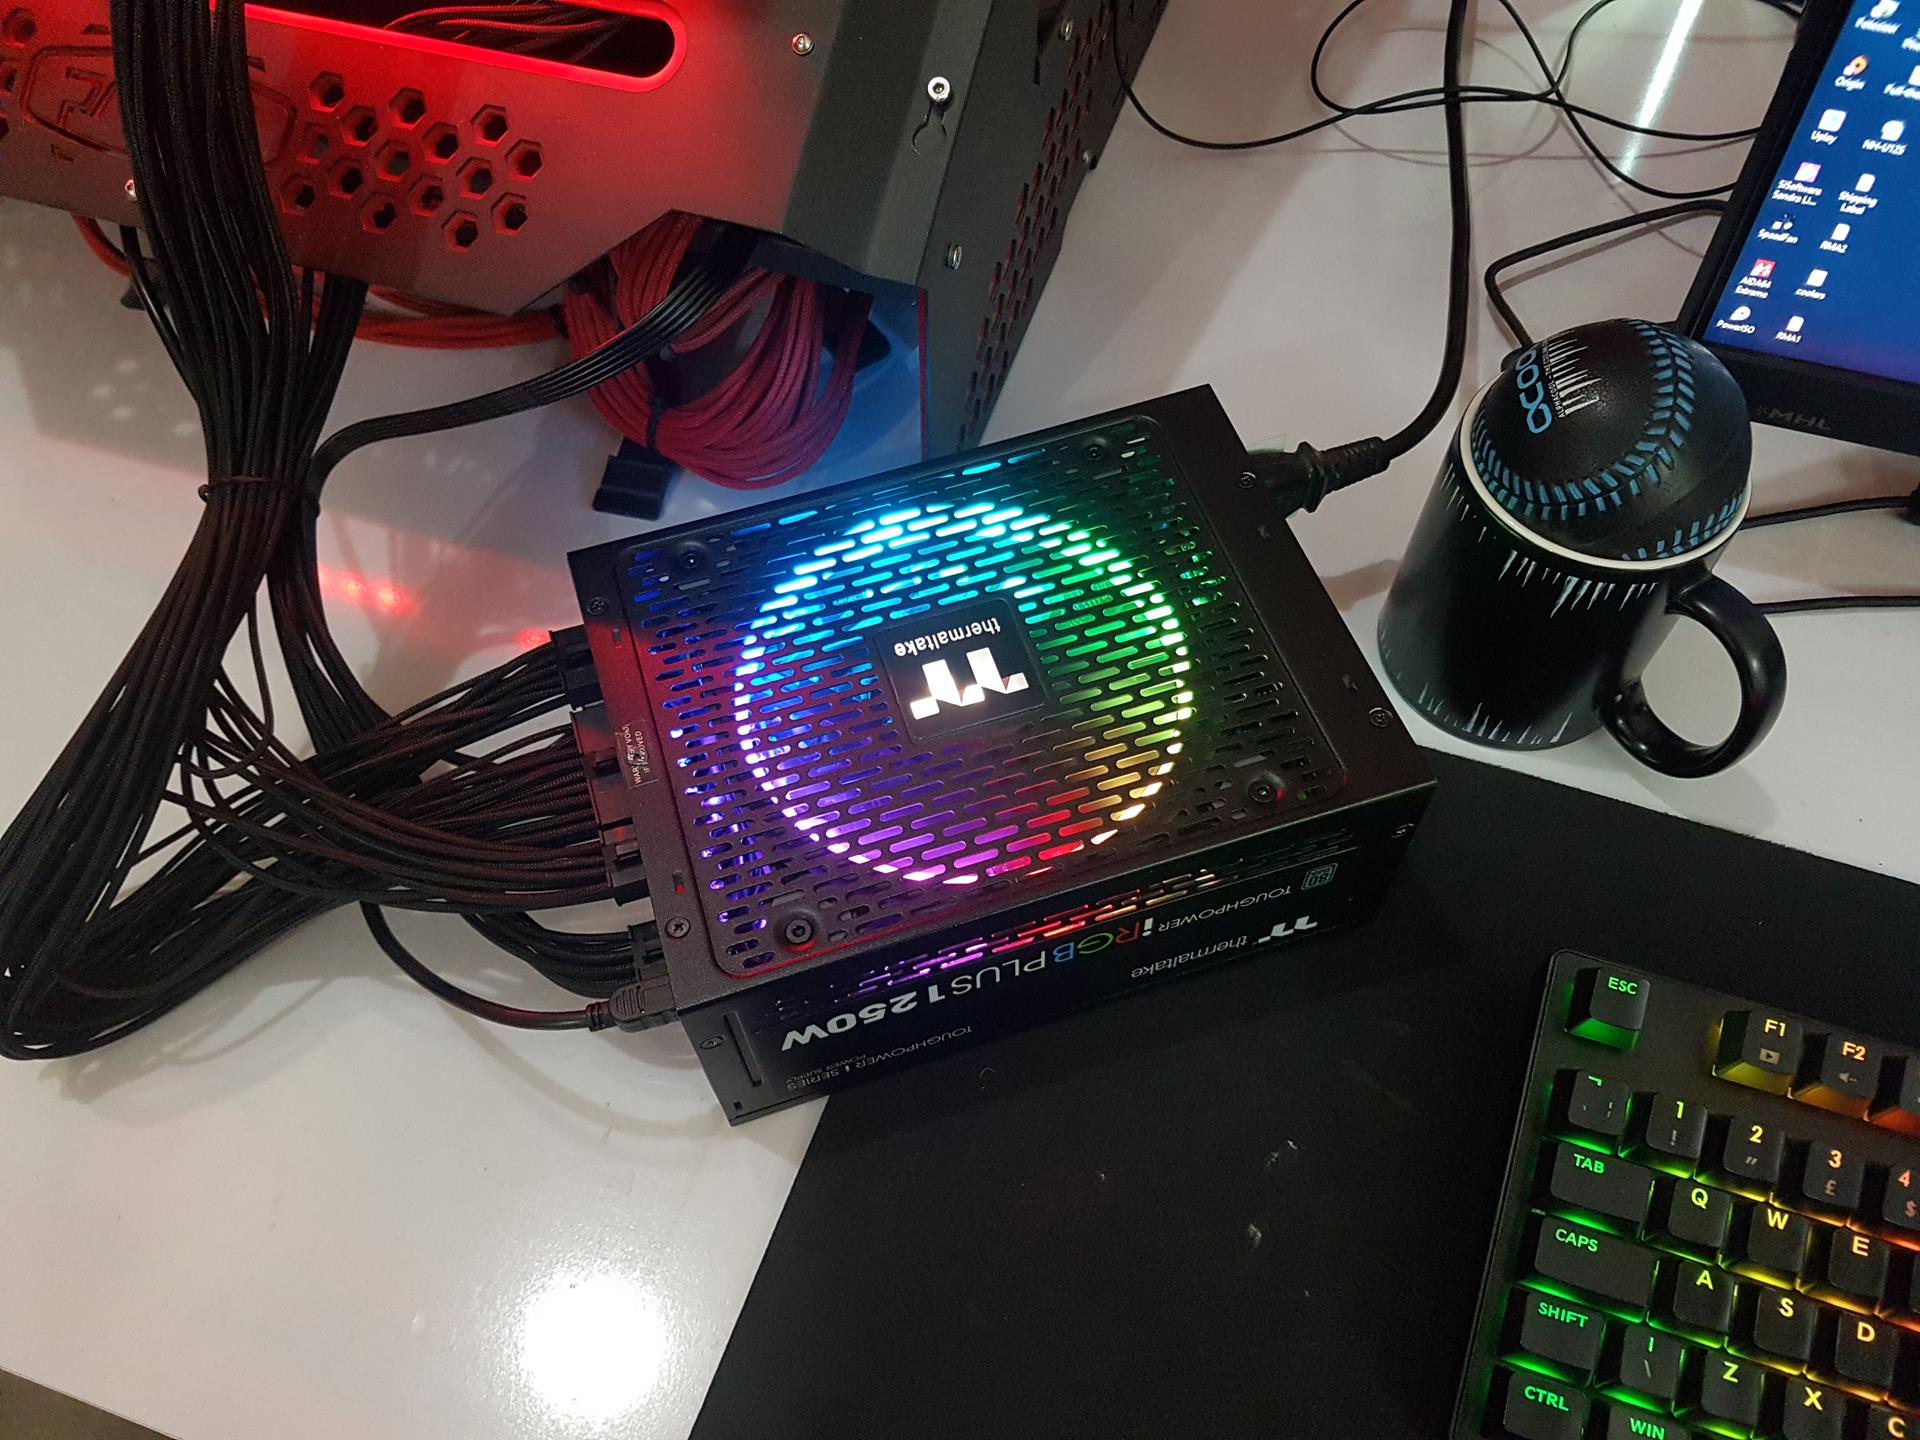
Thermaltake has sent us their new power supply from Tough Power iSeries i.e Toughpower iRGB Plus 1250W PSU. This PSU is 80 Plus Titanium rated meaning it can deliver up to 94% of efficiency under load. It is fully modular with 8 PCIe connectors, 2 EPS connectors. Thermaltake is offering 10 years of warranty on this PSU that speaks for their confidence in this lineup. This is a digital power supply that is using 32Bit Microcontroller Unit (MCU) from Microchip Technology. Digital power supplies sports high-efficiency switching transistors that perform only necessary steps and waste less energy given off as heat. This PSU features the Thermaltake legendary RGB Plus 140mm fan with 16.8M colors possibility and RGB spectrum. The user has total control of the RGB lighting effect and fan’s speed using the Thermaltake’s DPS G App. DPS G App is a sub-component of their SPM Architecture. SPM Architecture allows the user to control and monitor every aspect of their PC using the PC based application and uploading the data to the cloud services that would enable the user to generate various reports regarding their power utilization etc. Not only this but there is also a mobile app as well that would allow the user to view these reports directly on their mobile devices. In addition, the user can create alerts that can be notified on their mobile devices and mobile app allows the user to restart or shutdown the PC. To complete the bundle offer, Thermaltake has included individually sleeved PEG, EPU and 24-Pin ATX cables in black color. They have also provided the cable combs for better cable management and pleasing looks. The peripheral cables are flat.
Item: Toughpower iRGB PLUS 1250W Titanium – TT Premium Edition
Manufacturer: Thermaltake
Price: Rs 41000/-
Specifications
Packaging and Unboxing
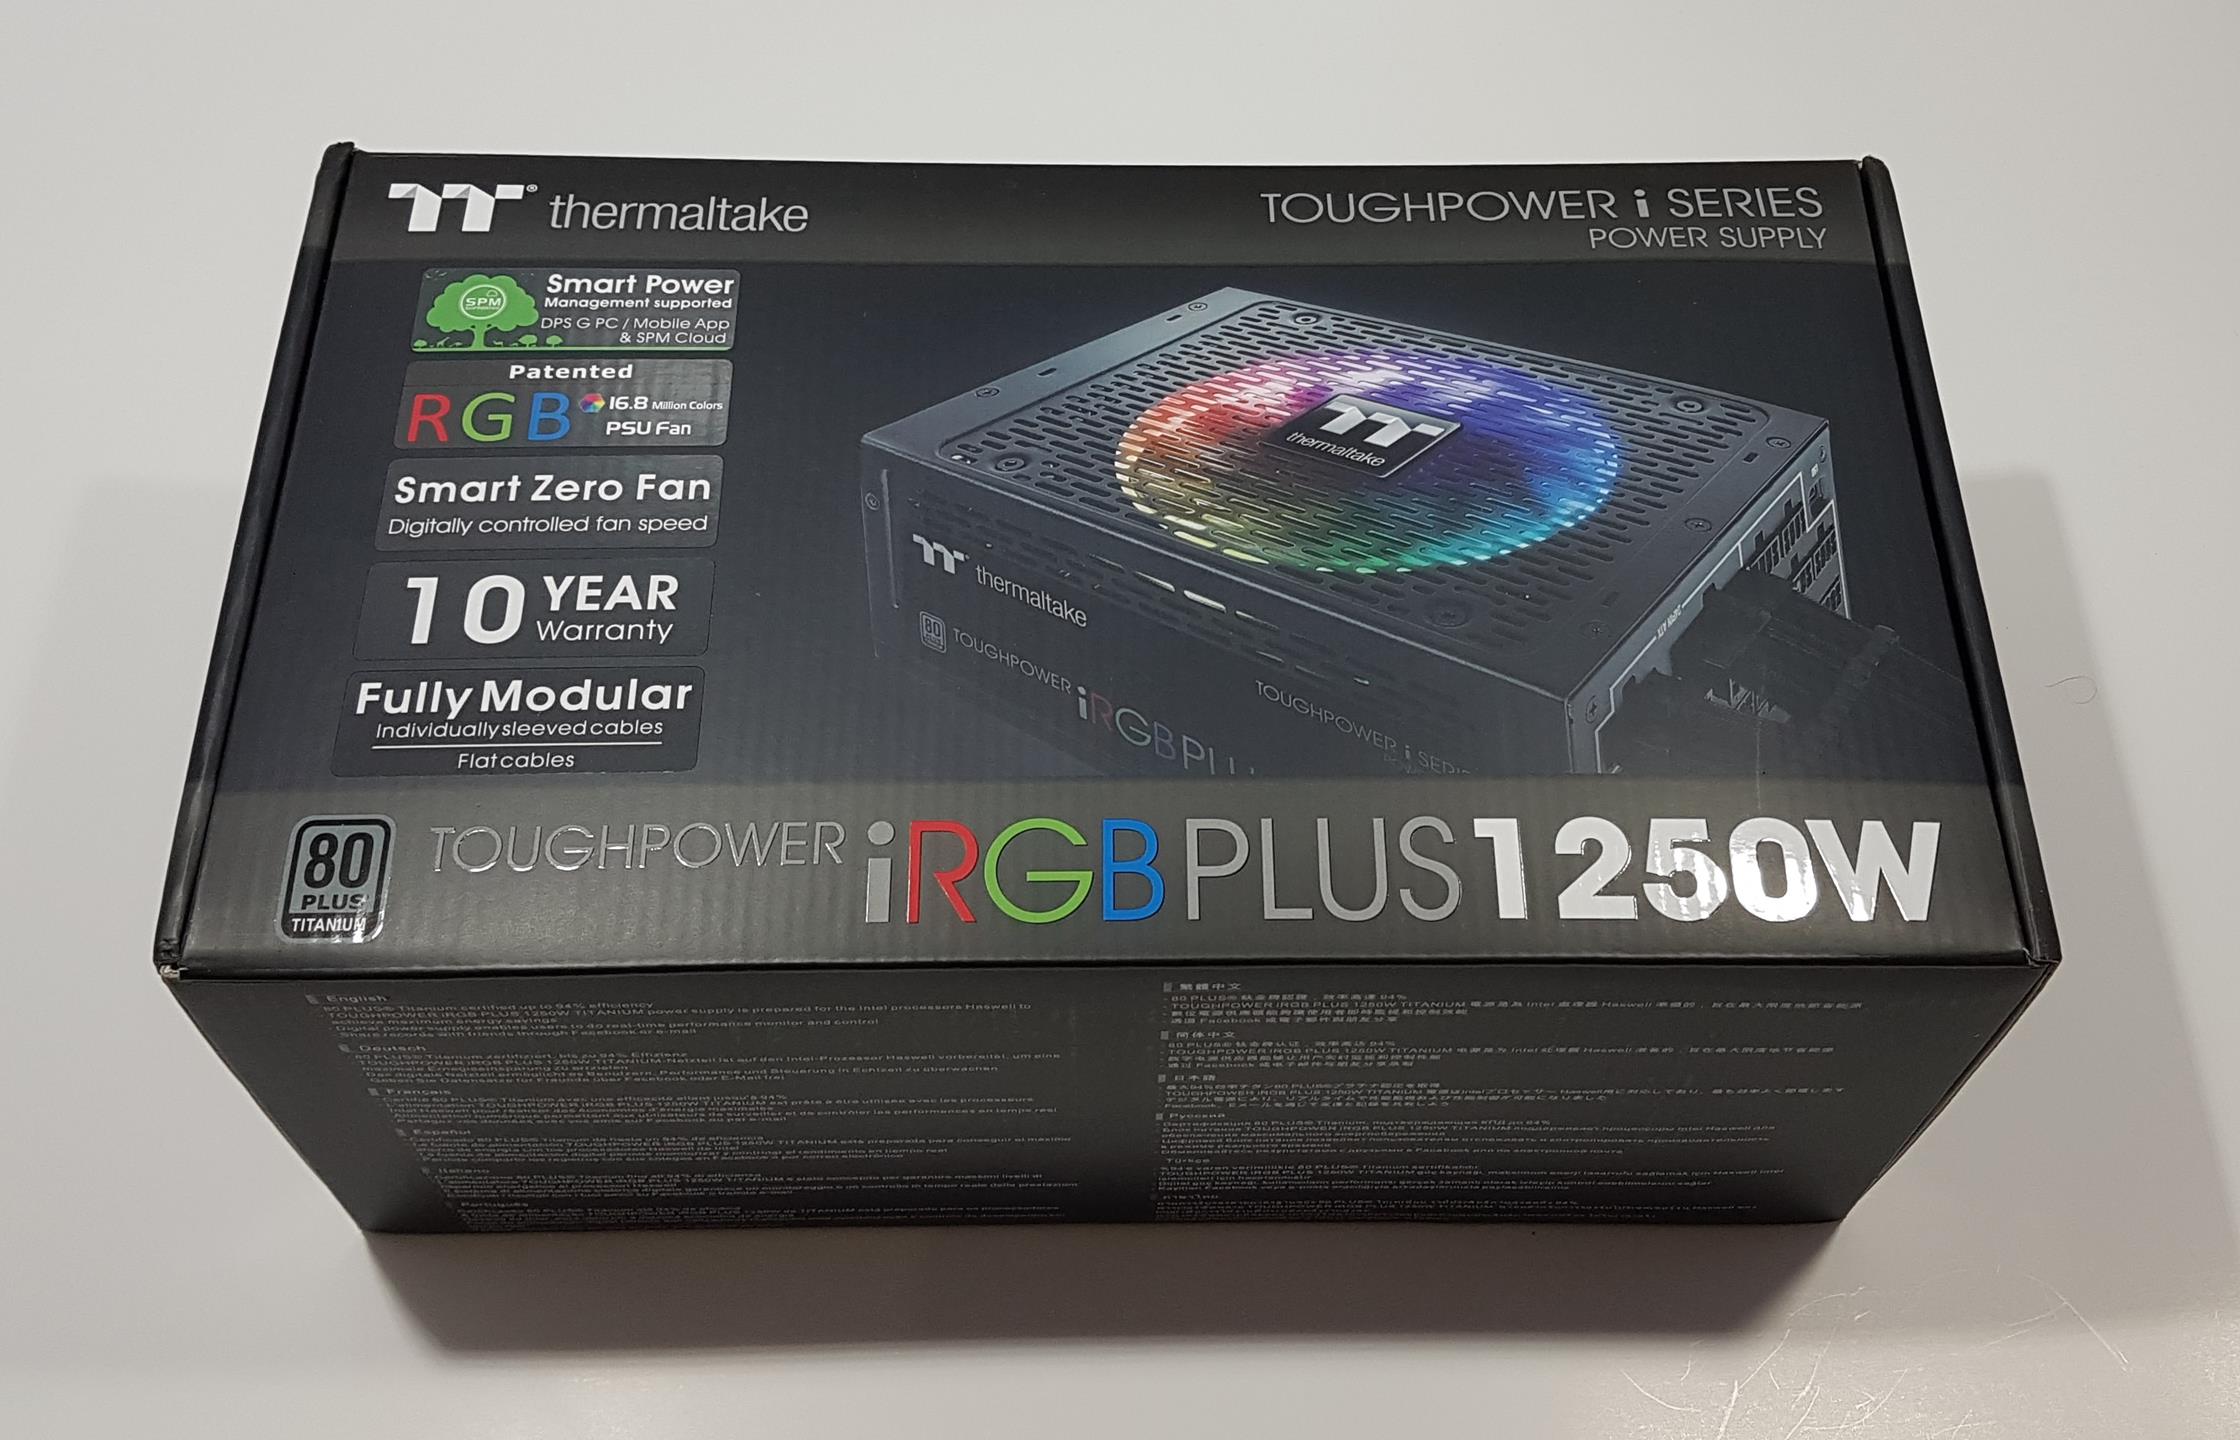
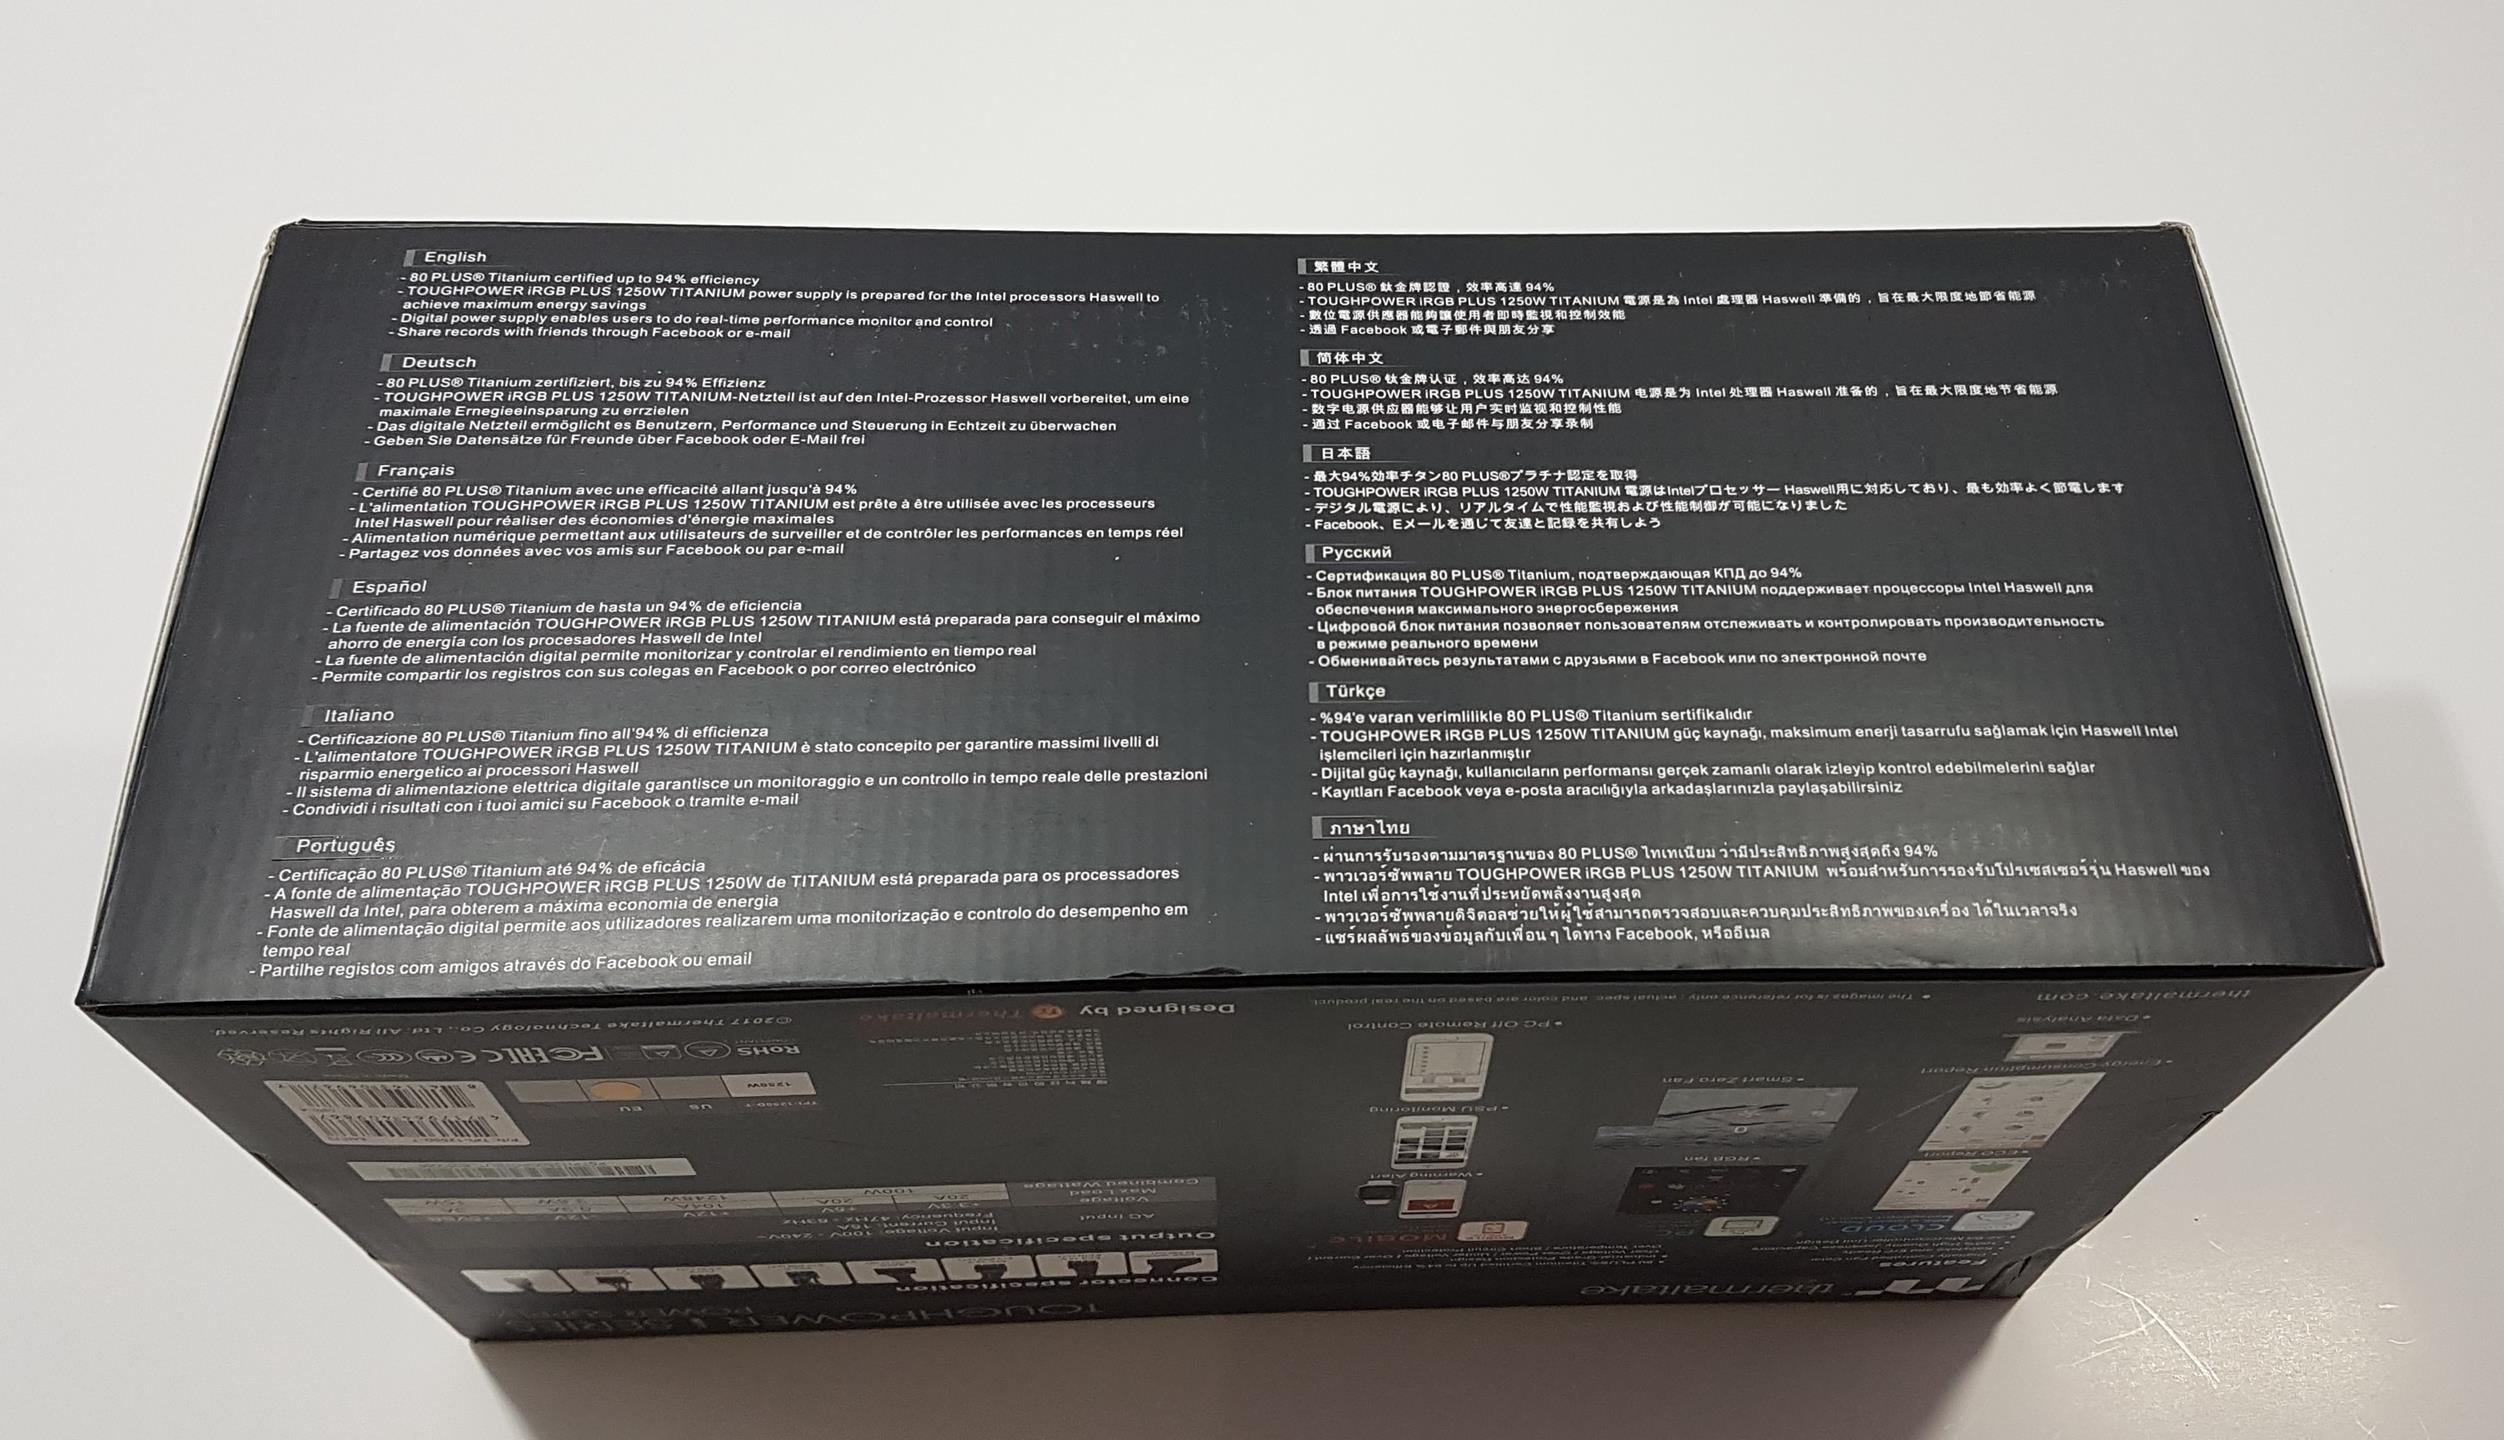
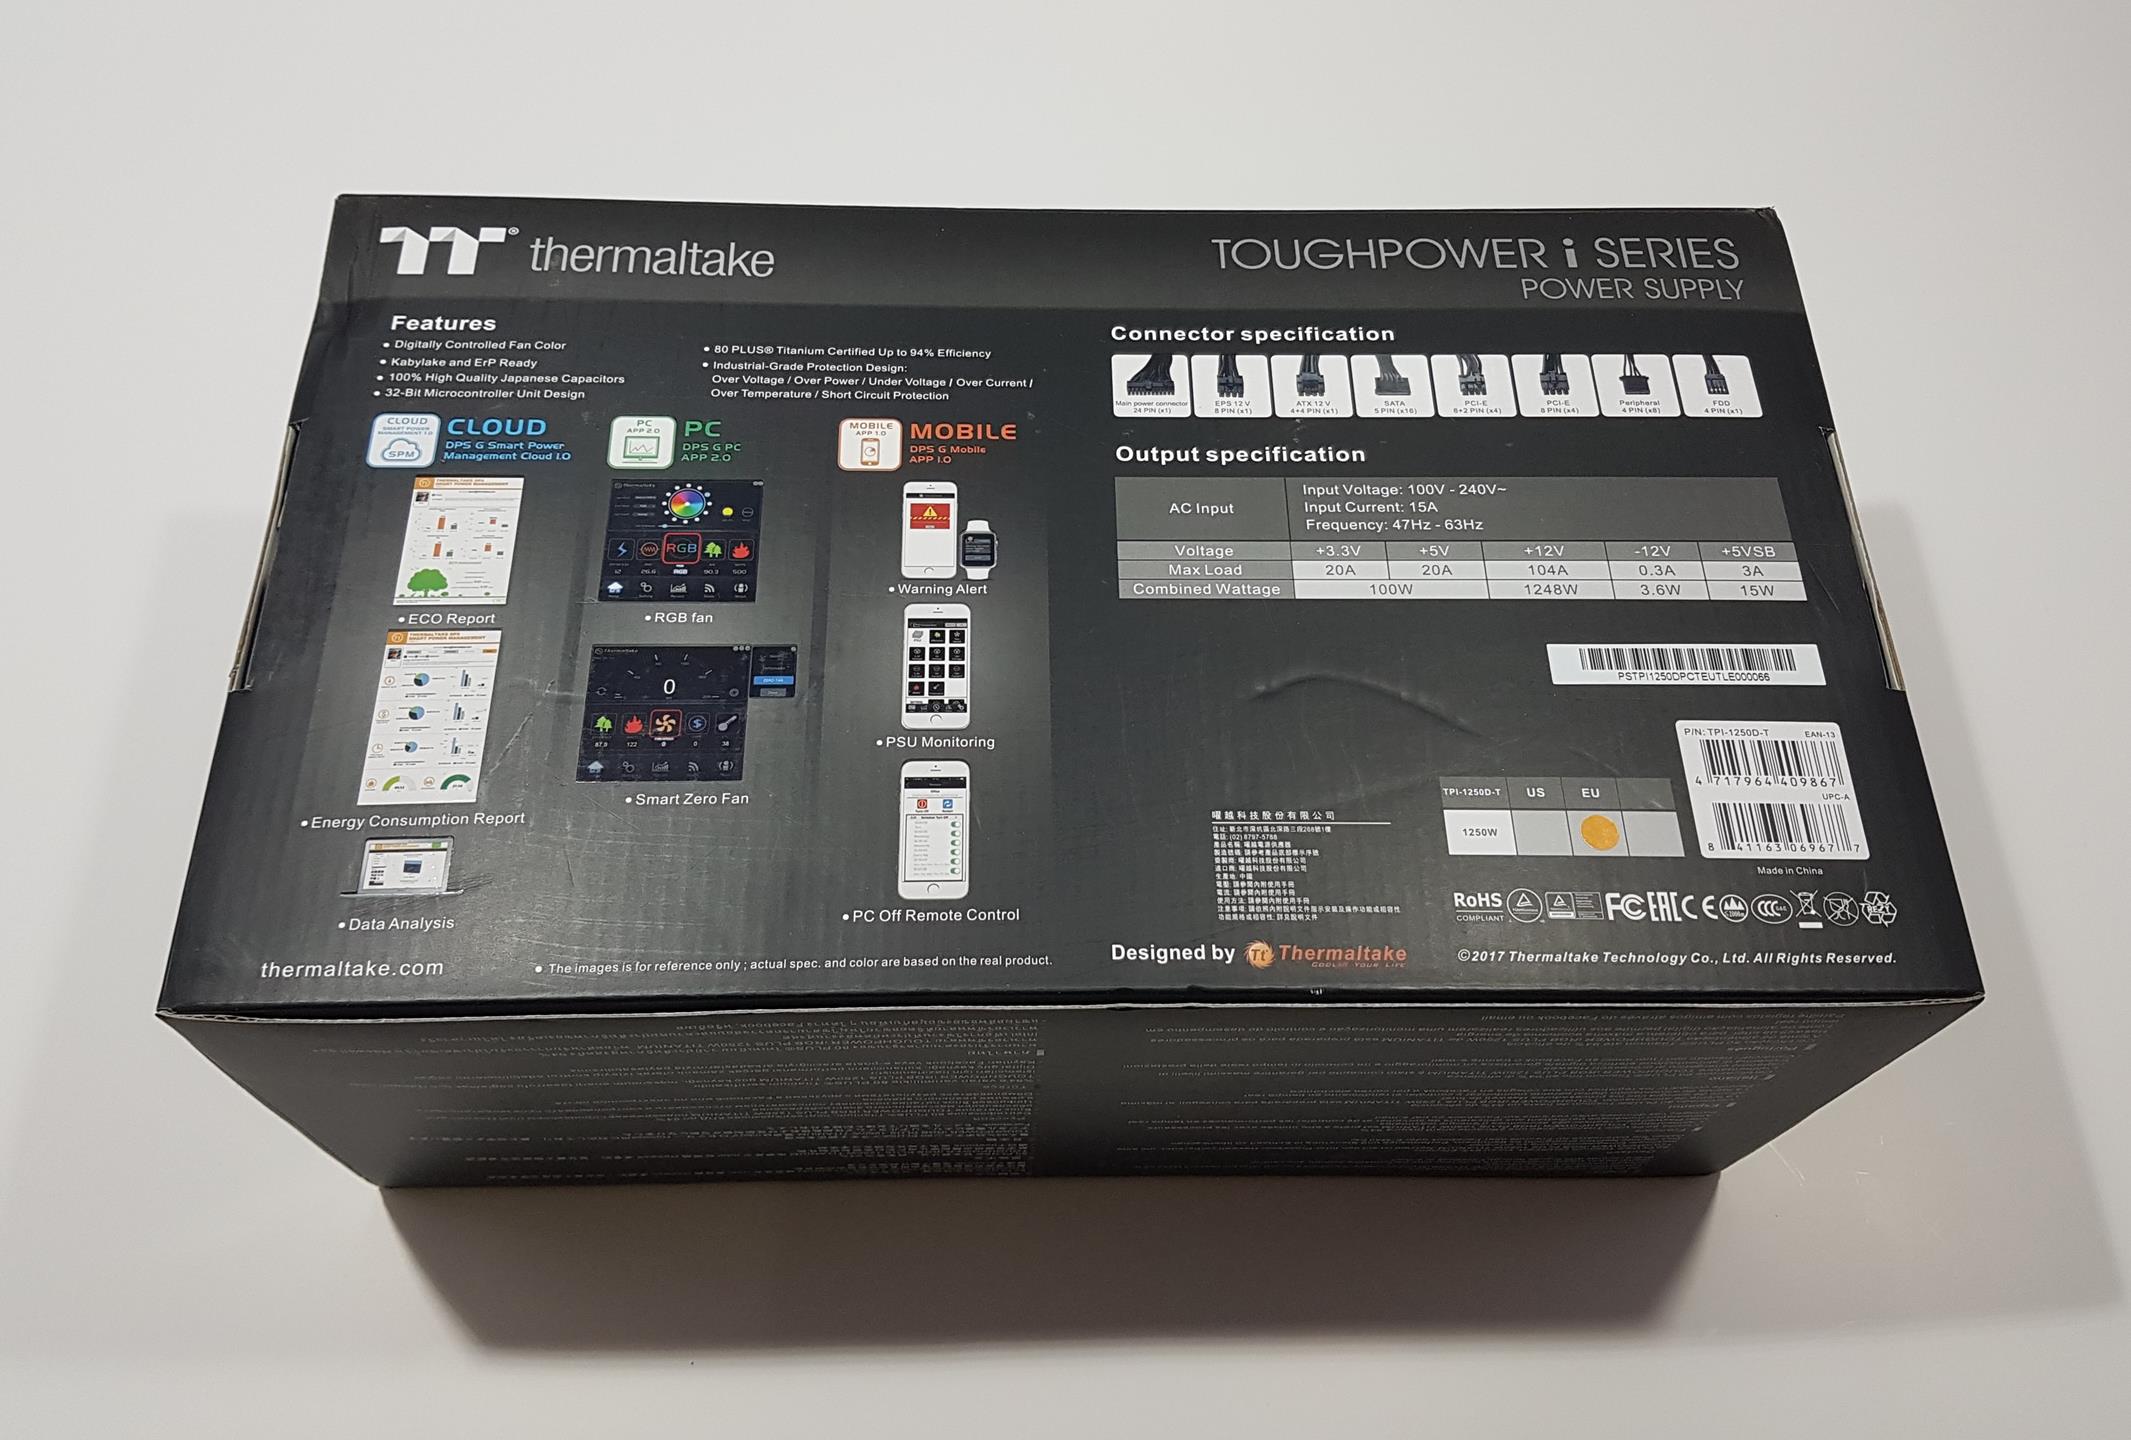
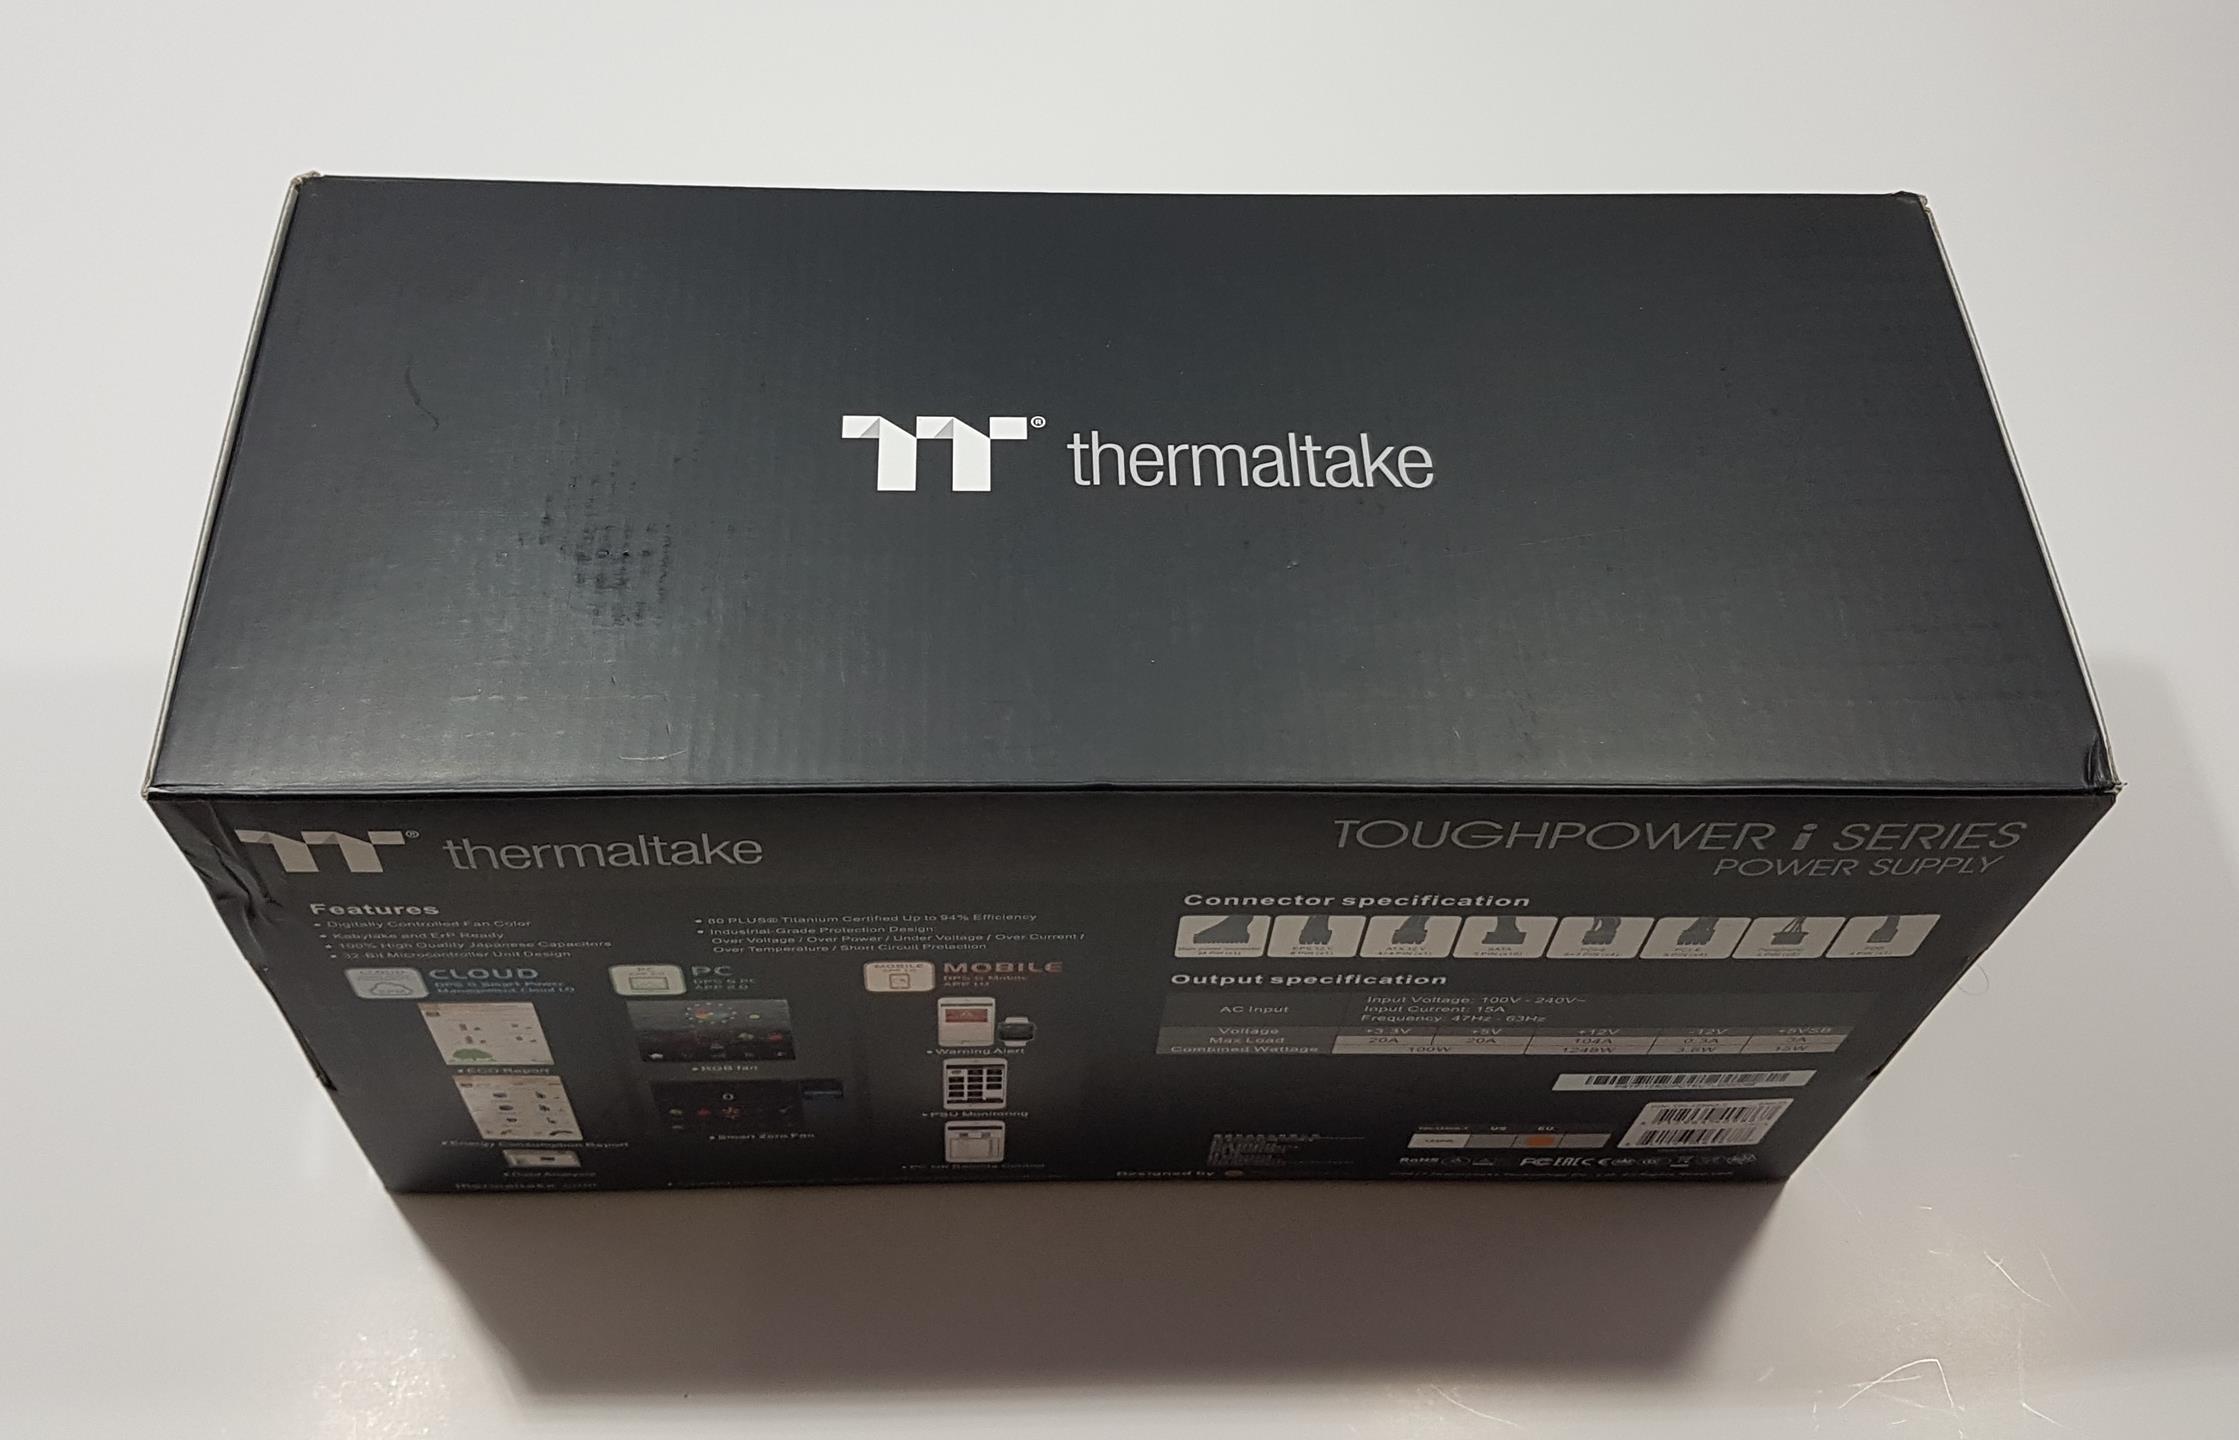
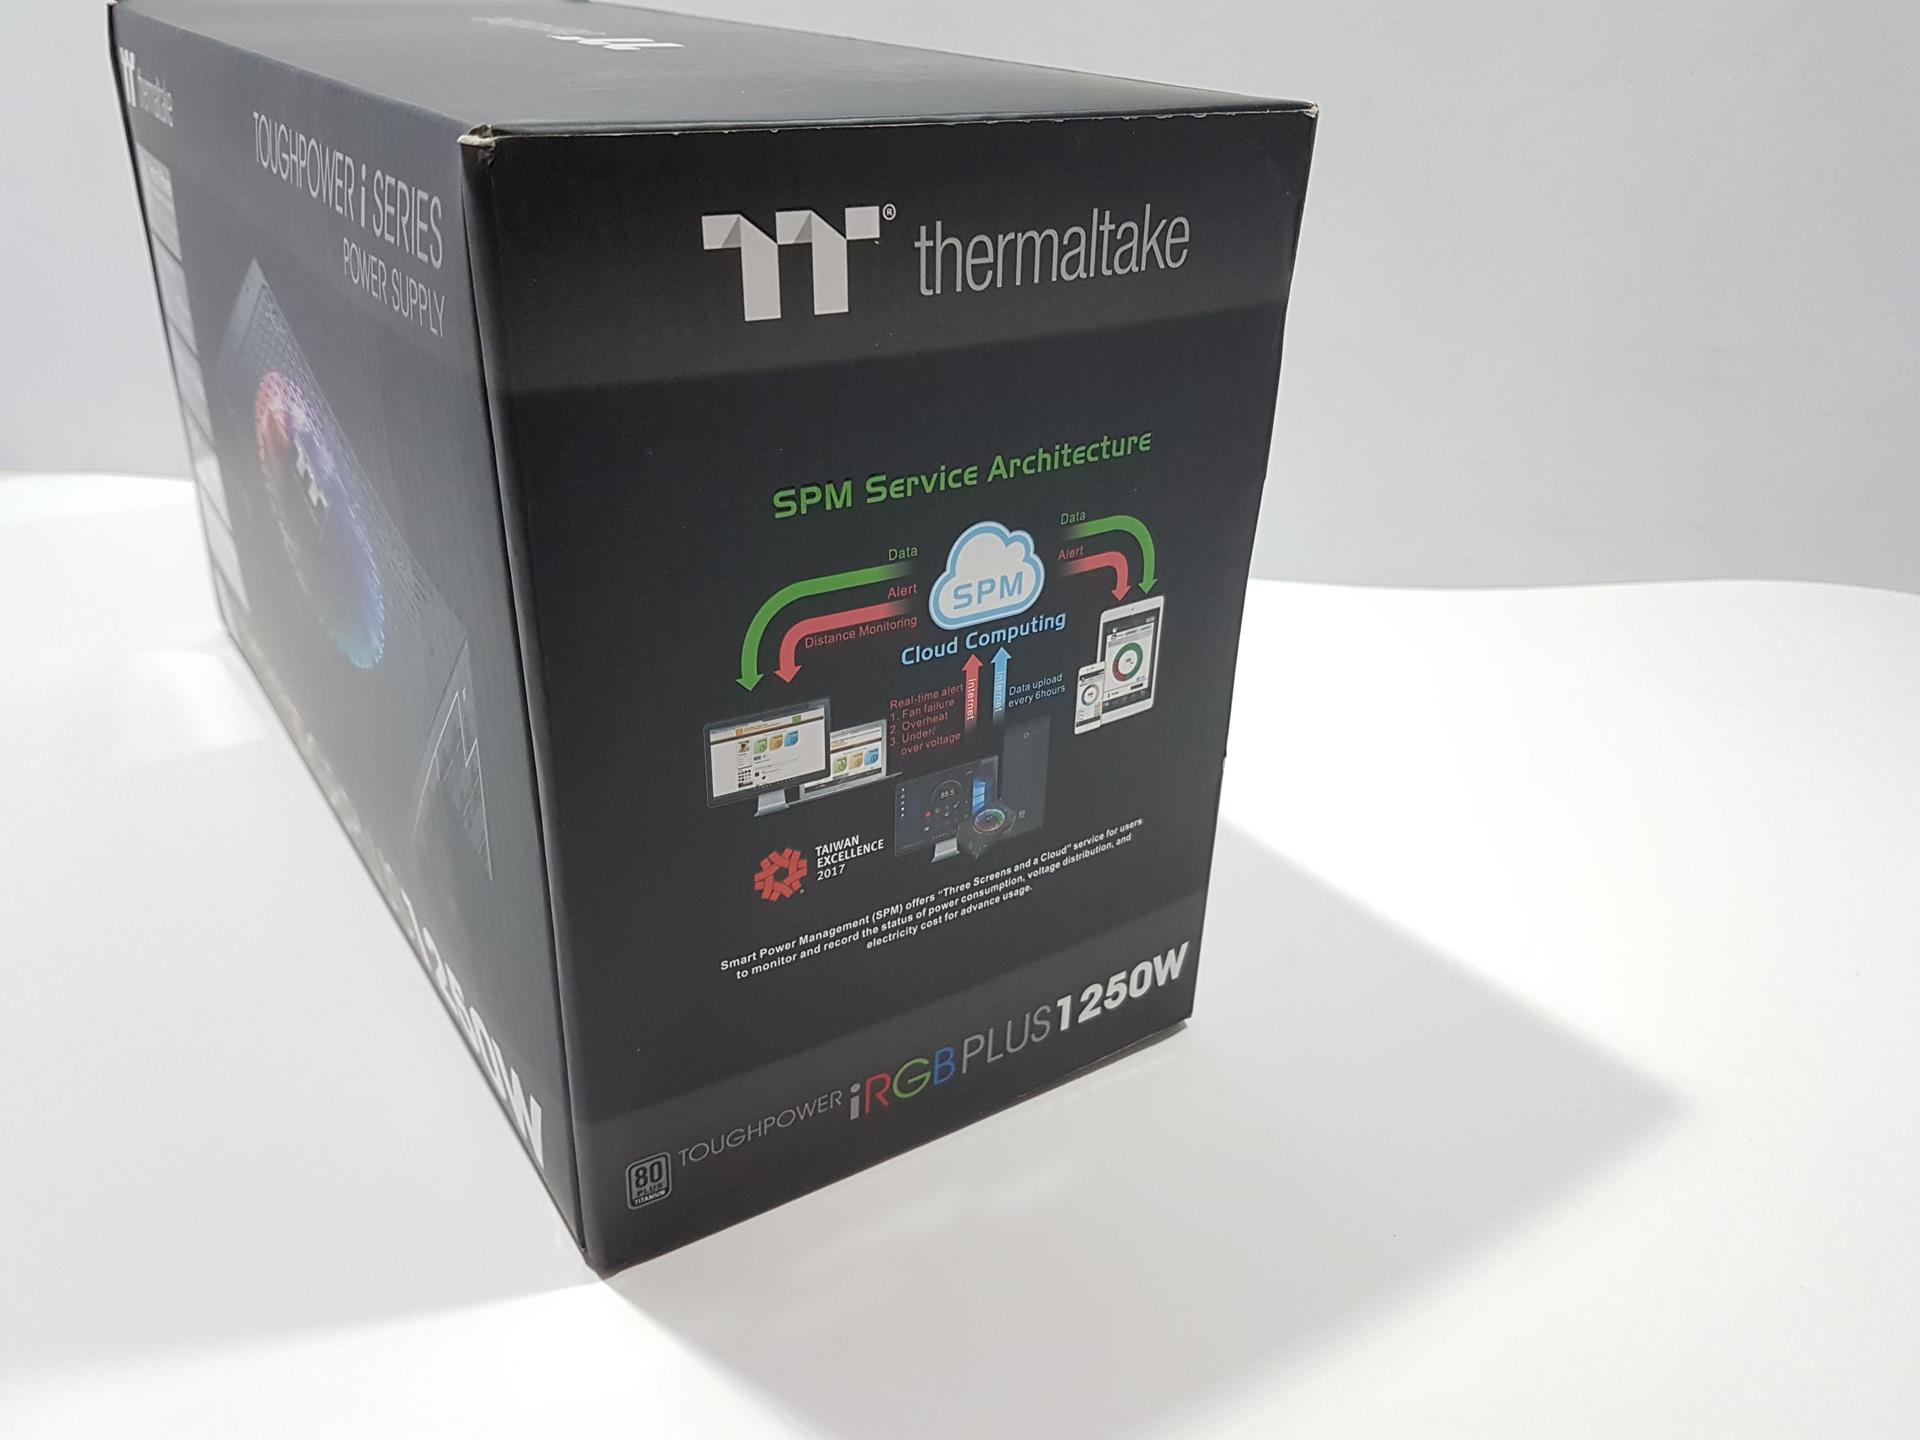
PSU comes in a cardboard box in black color. The front side has Thermaltake brand name and logo printed on the top left side. Toughpower i Series Power Supply is printed on the top right side. This power supply has a support for Smart Power Management. It has a patented 16.8M colors RGB Ring Plus 140mm fan. Being a digital PSU, it has a control to set the fan at zero speed. Thermaltake is offering 10 years of warranty on this unit. It is fully modular. It has individually sleeved cables as well as flat cables. It is 80 Plus Titanium rated. The model of the unit is printed at the bottom. The backside has Thermaltake brand name and logo printed on the top left area. Toughpower iSeries Power Supply is printed on the top right area. Salient features are printed under the brand logo. Connector Specifications are printed on the right side. Output specification table is printed under the Connector Specification. This PSU has a single +12V rail with 104A rating on it making up to 1248W. Serial no sticker is pasted under the output specification table. Part No, EAN, and UPC info labels are printed on the bottom right side. This version is for EU region. Unit is made in China. The left and right sides of the box are identical. There is a Thermaltake brand logo and name printed on the top area. Smart Power Management architecture is described pictorially in the center. Model of the unit is printed on the bottom. The top side has Thermaltake brand logo and name printed in the middle. The bottom side of the box has salient features of the PSU printed in 12 different languages.
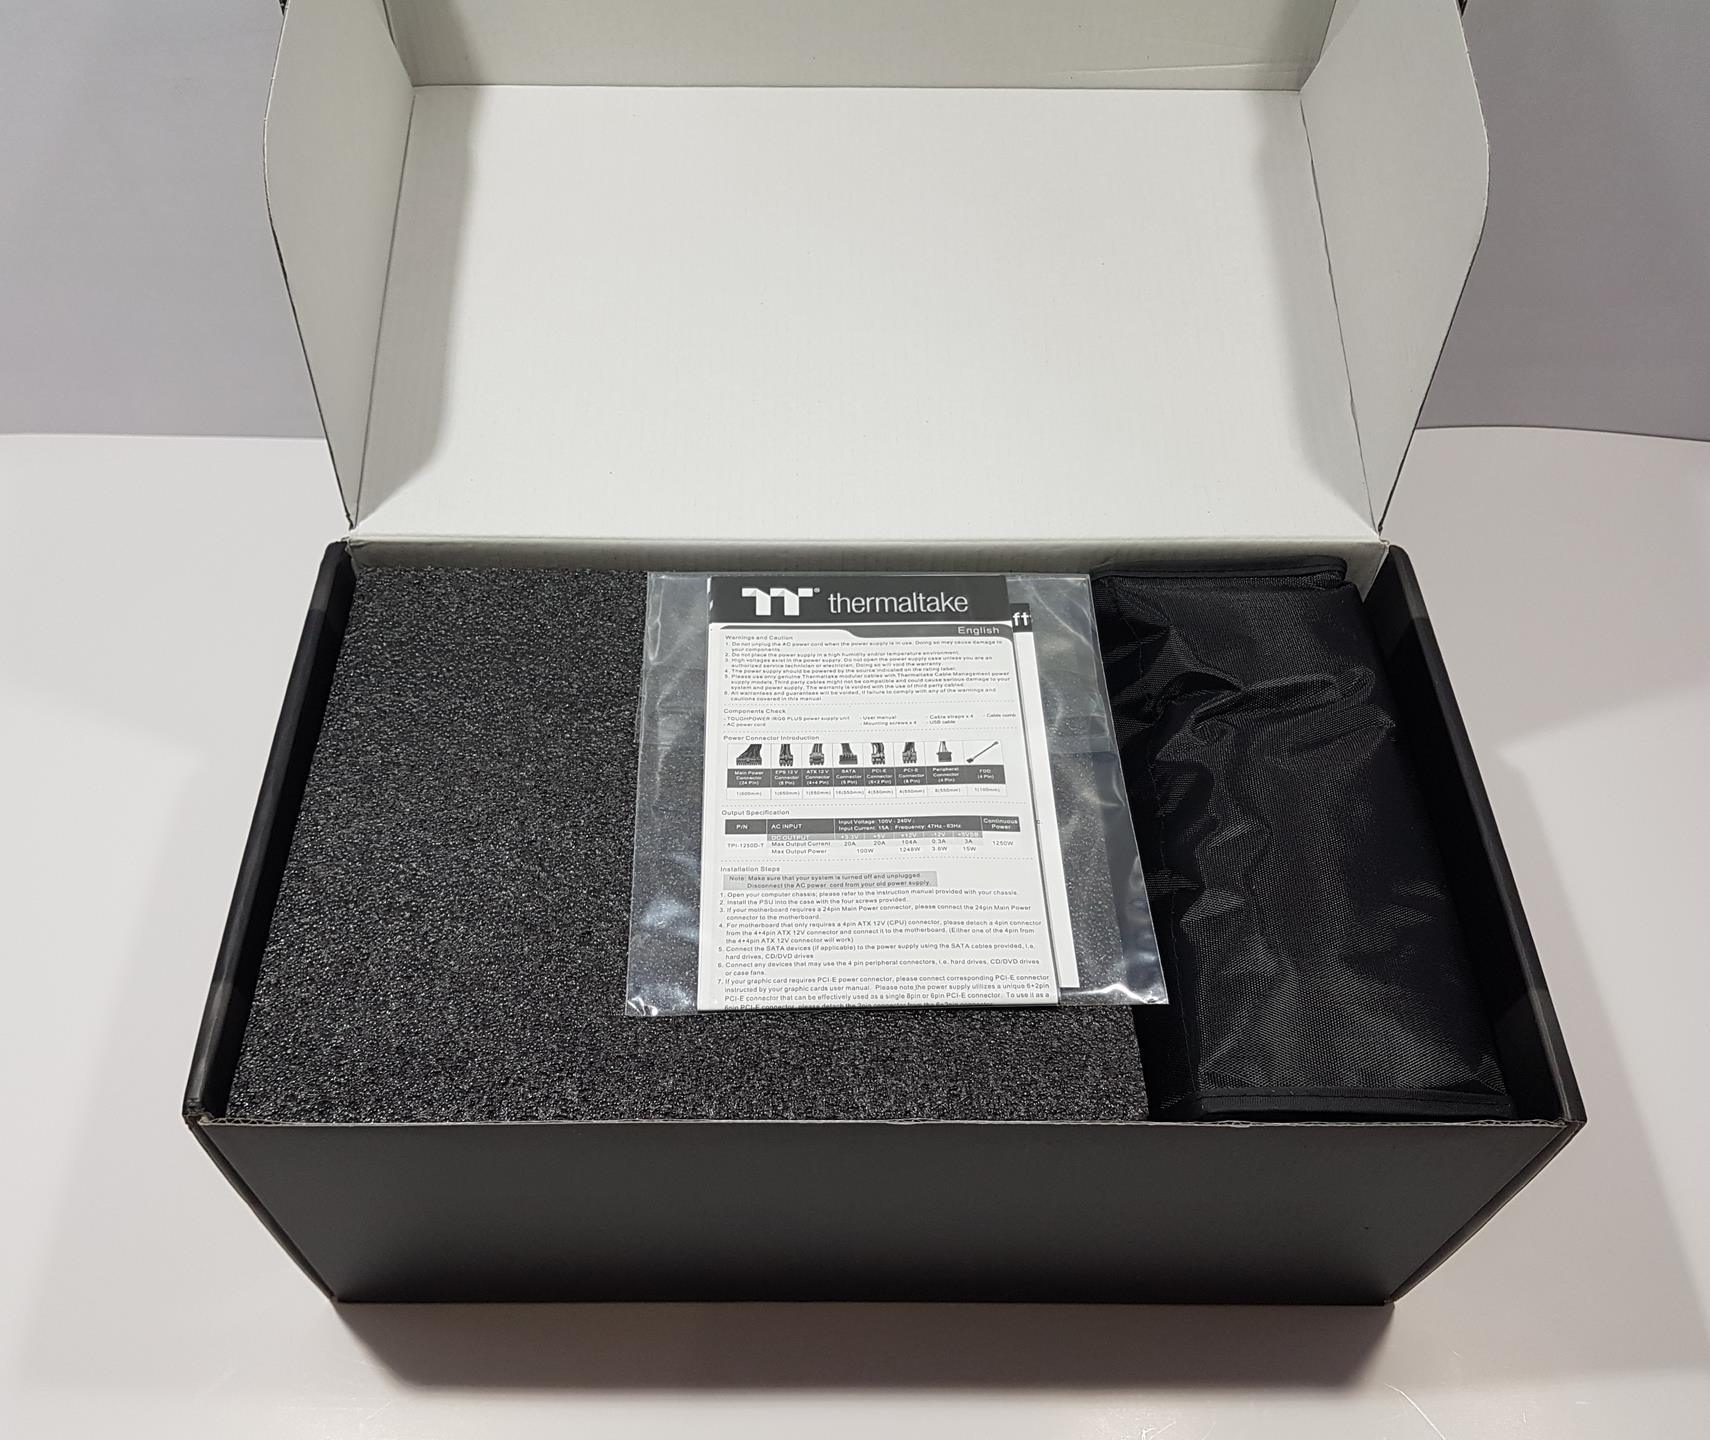
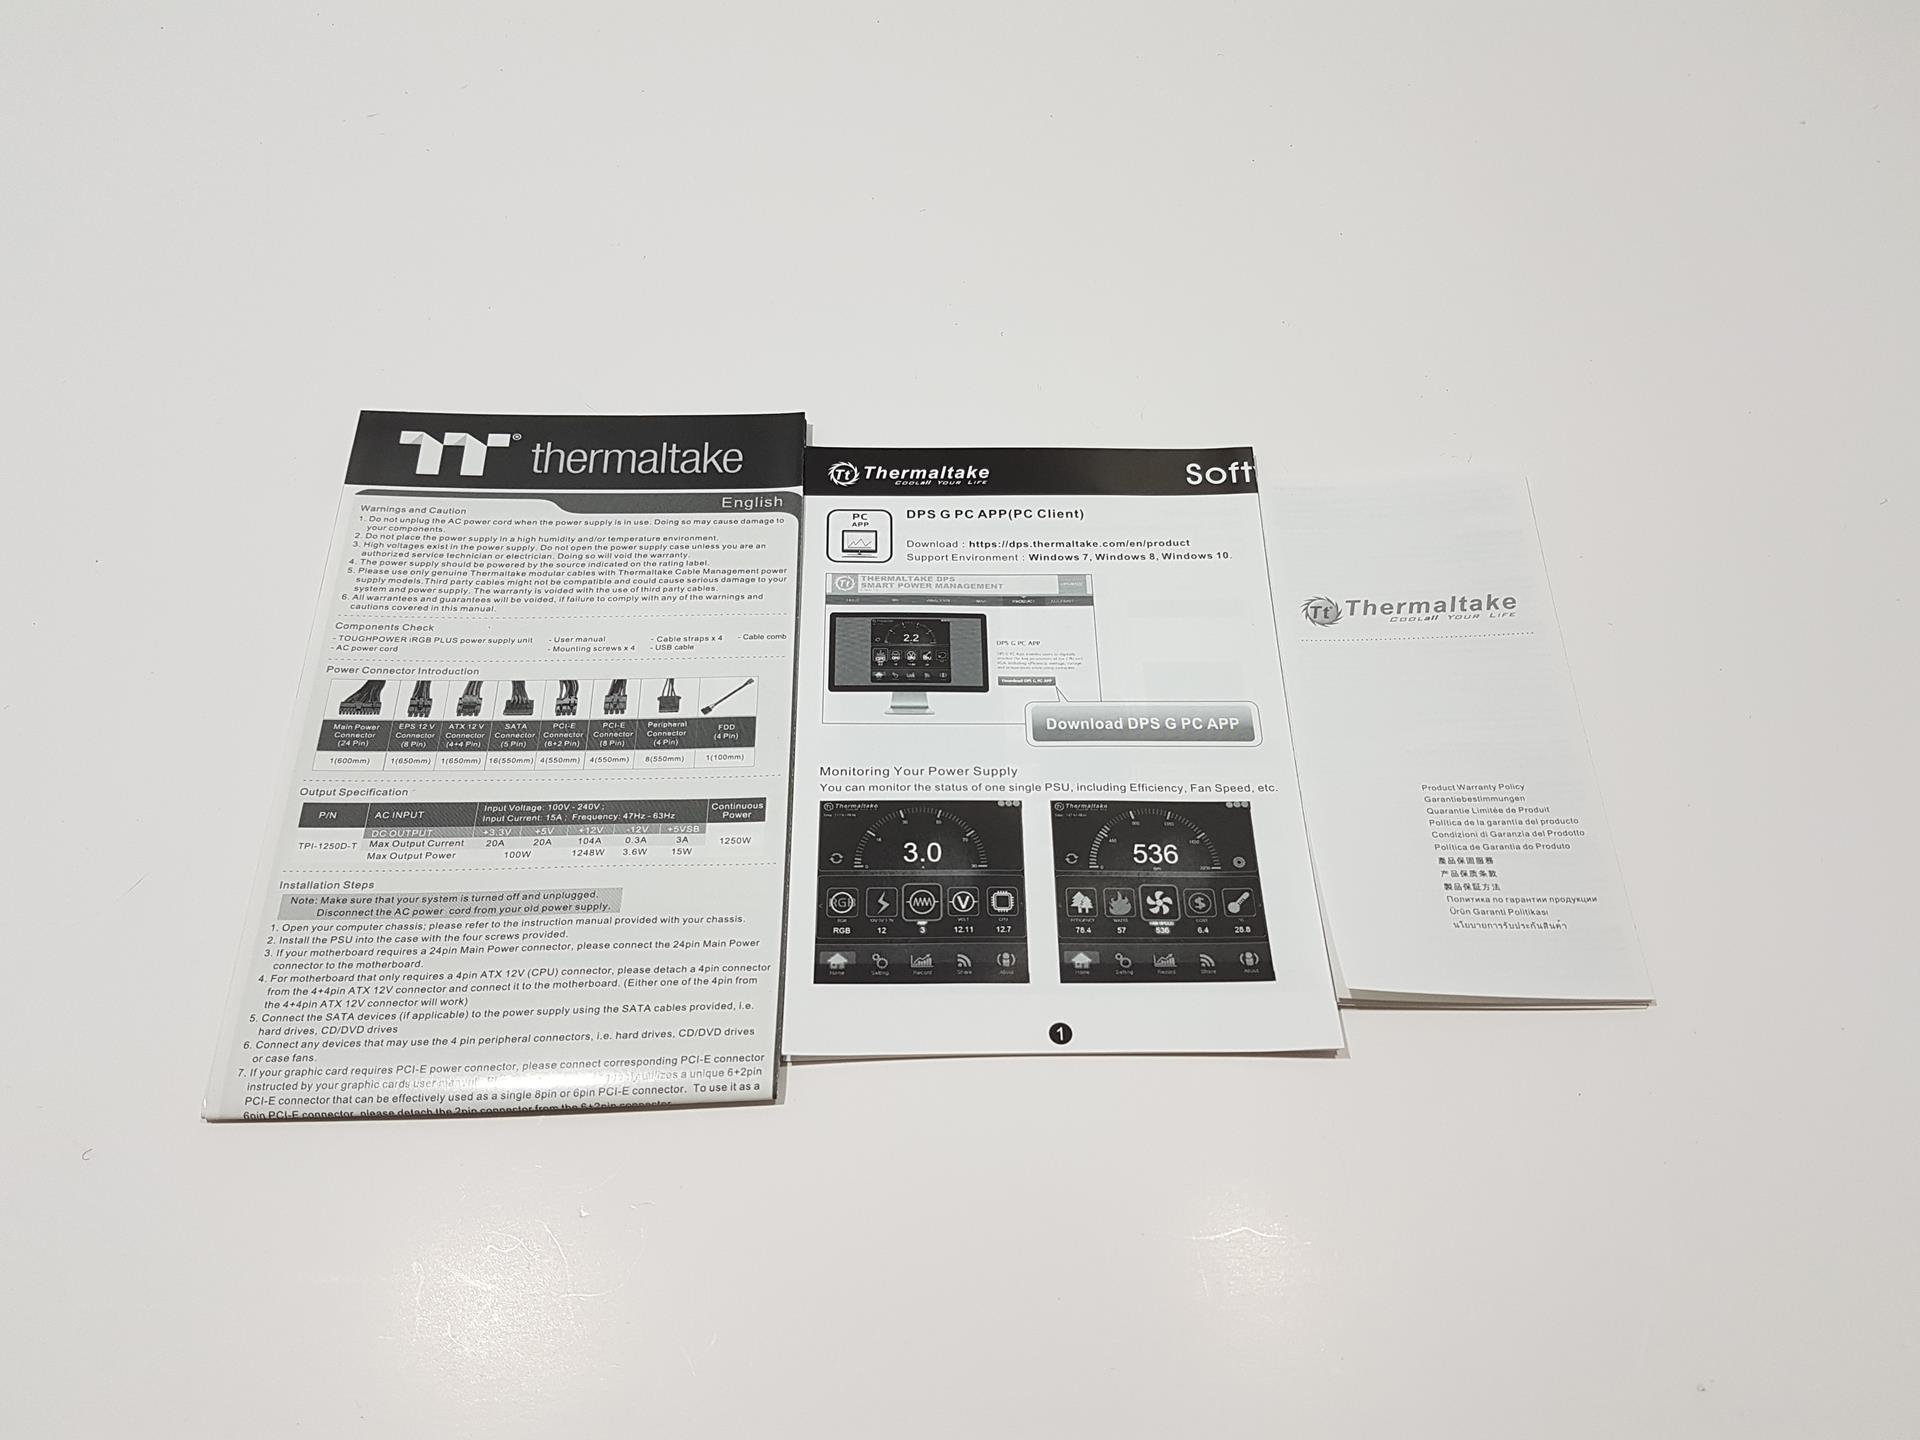
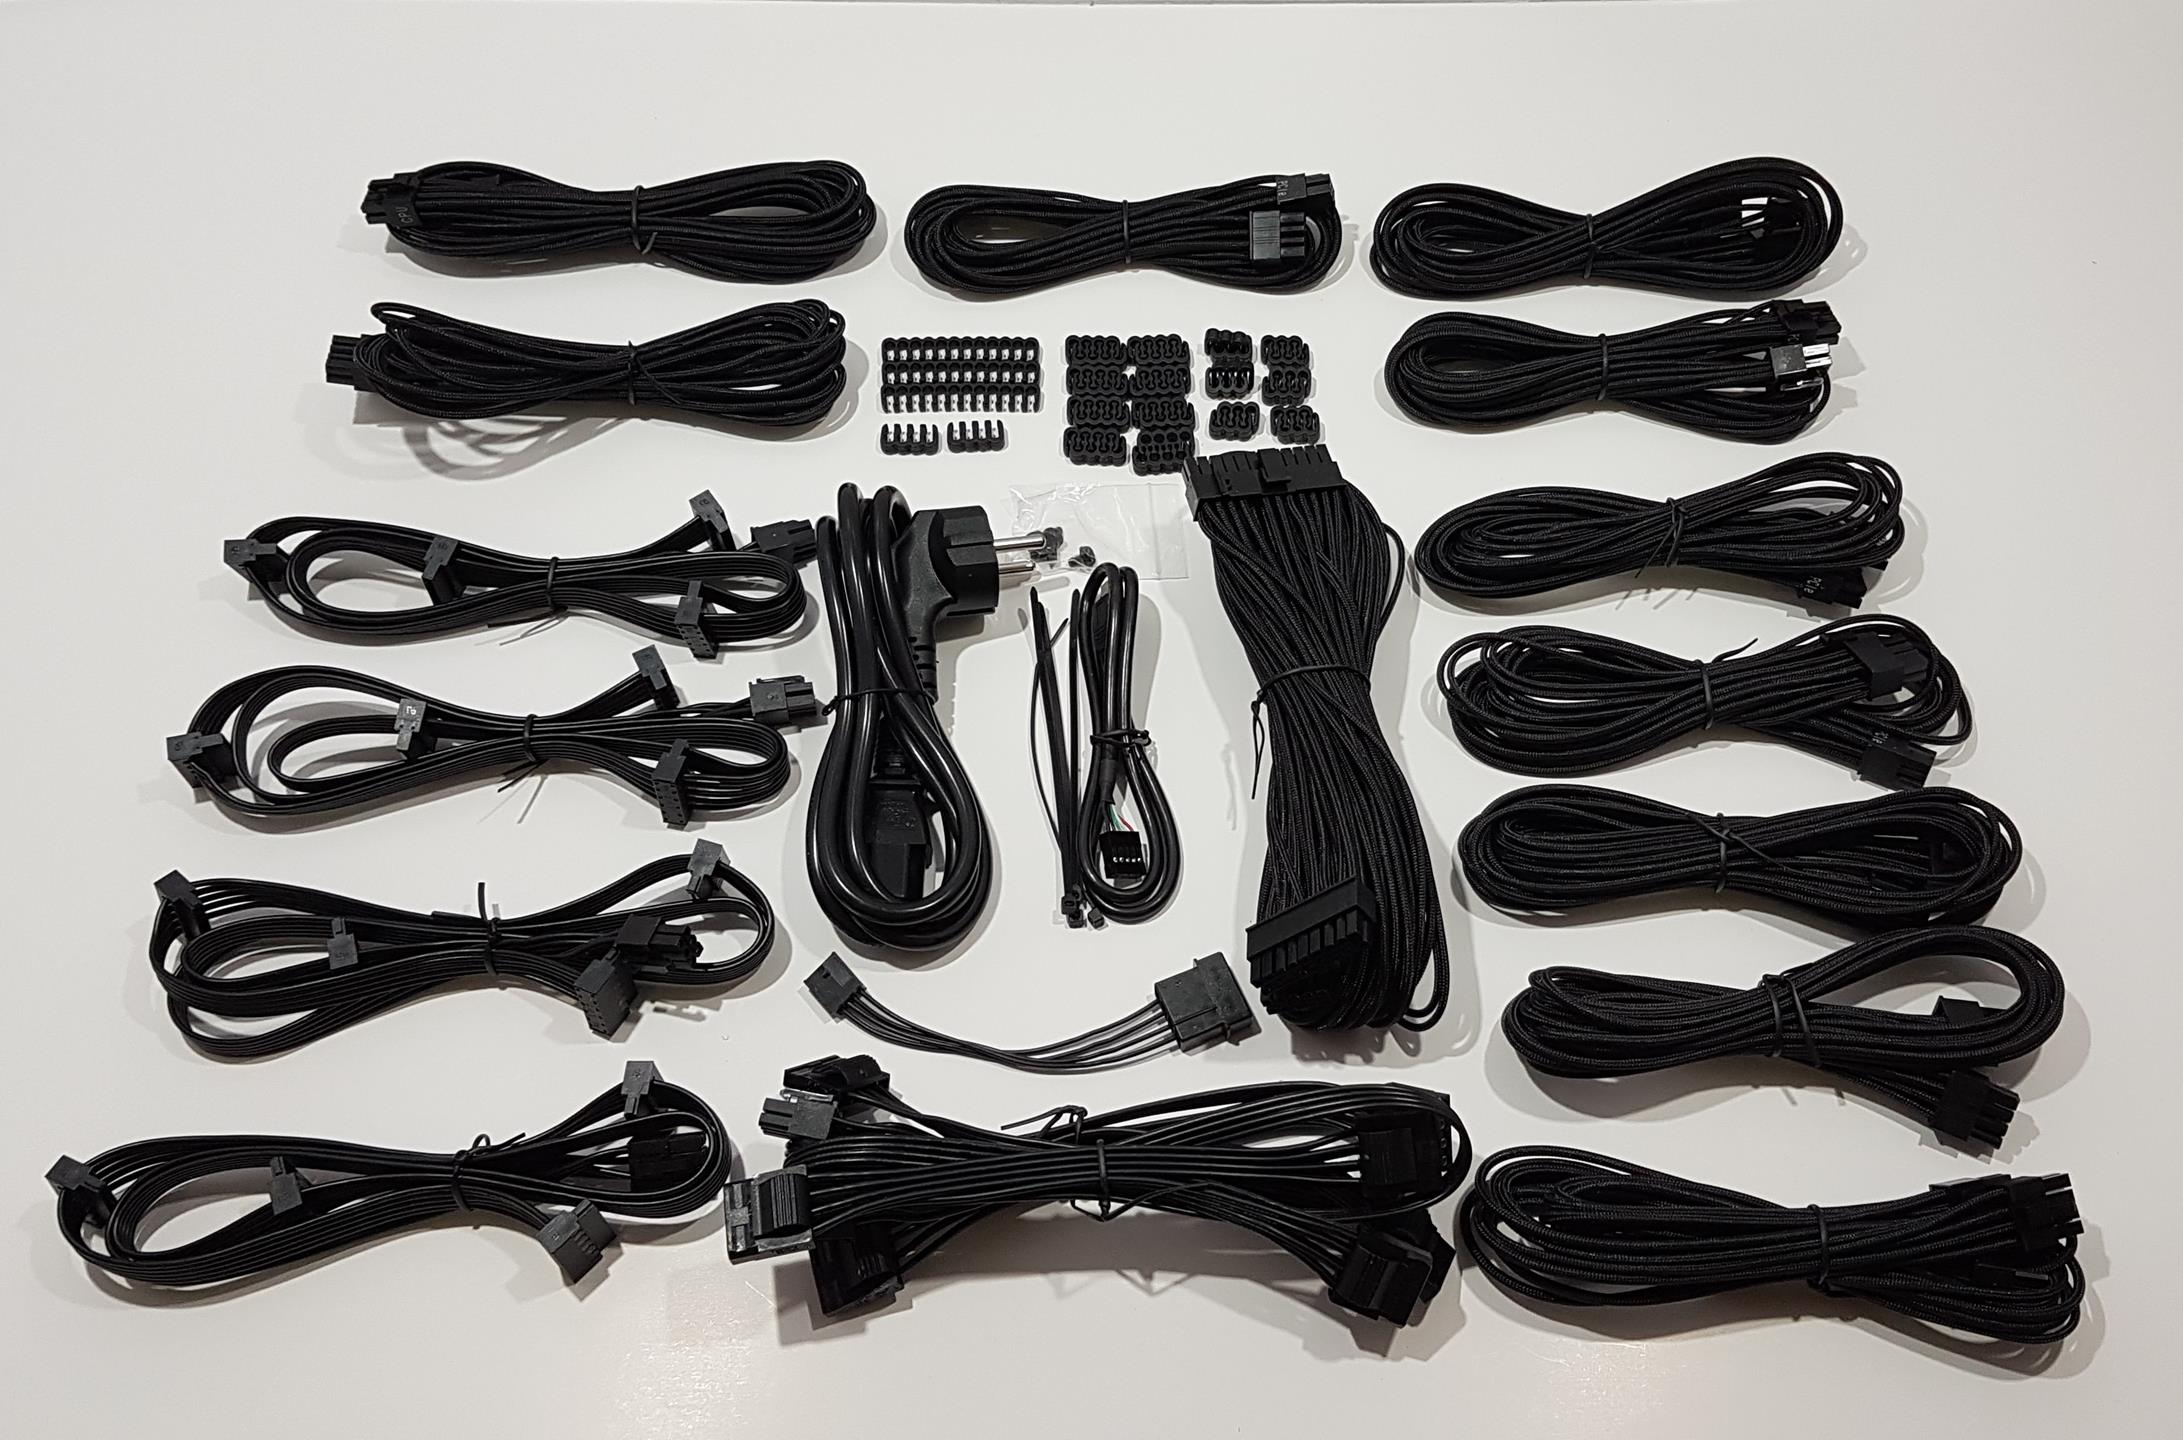
When we opened the box, there was a user manual, SPM guide placed inside a transparent container on top of the contents. The PSU is placed inside a black color cloth which is sealed with the Thermaltake logo. For safety, the PSU is enclosed inside black color thick Styrofoam paddings. There is a nice pouch included in the box with Thermaltake brand name printed on the front side. It has all the cables and accessories.
Contents
These include:
- 4x Mounting Screws
- 4x Cable Straps
- A set of Cable Combs
- 1x AC Power Cord
- 1x Mini USB Cable
- PSU
- 1x 24-pin ATX Cable
- 8x PEG Cables (4x 6+2pin, 4x 8pin)
- 2x EPS Cables
- 4x SATA Cables
- 1x Molex Cable
- 1x FDD Cable
Closer Look
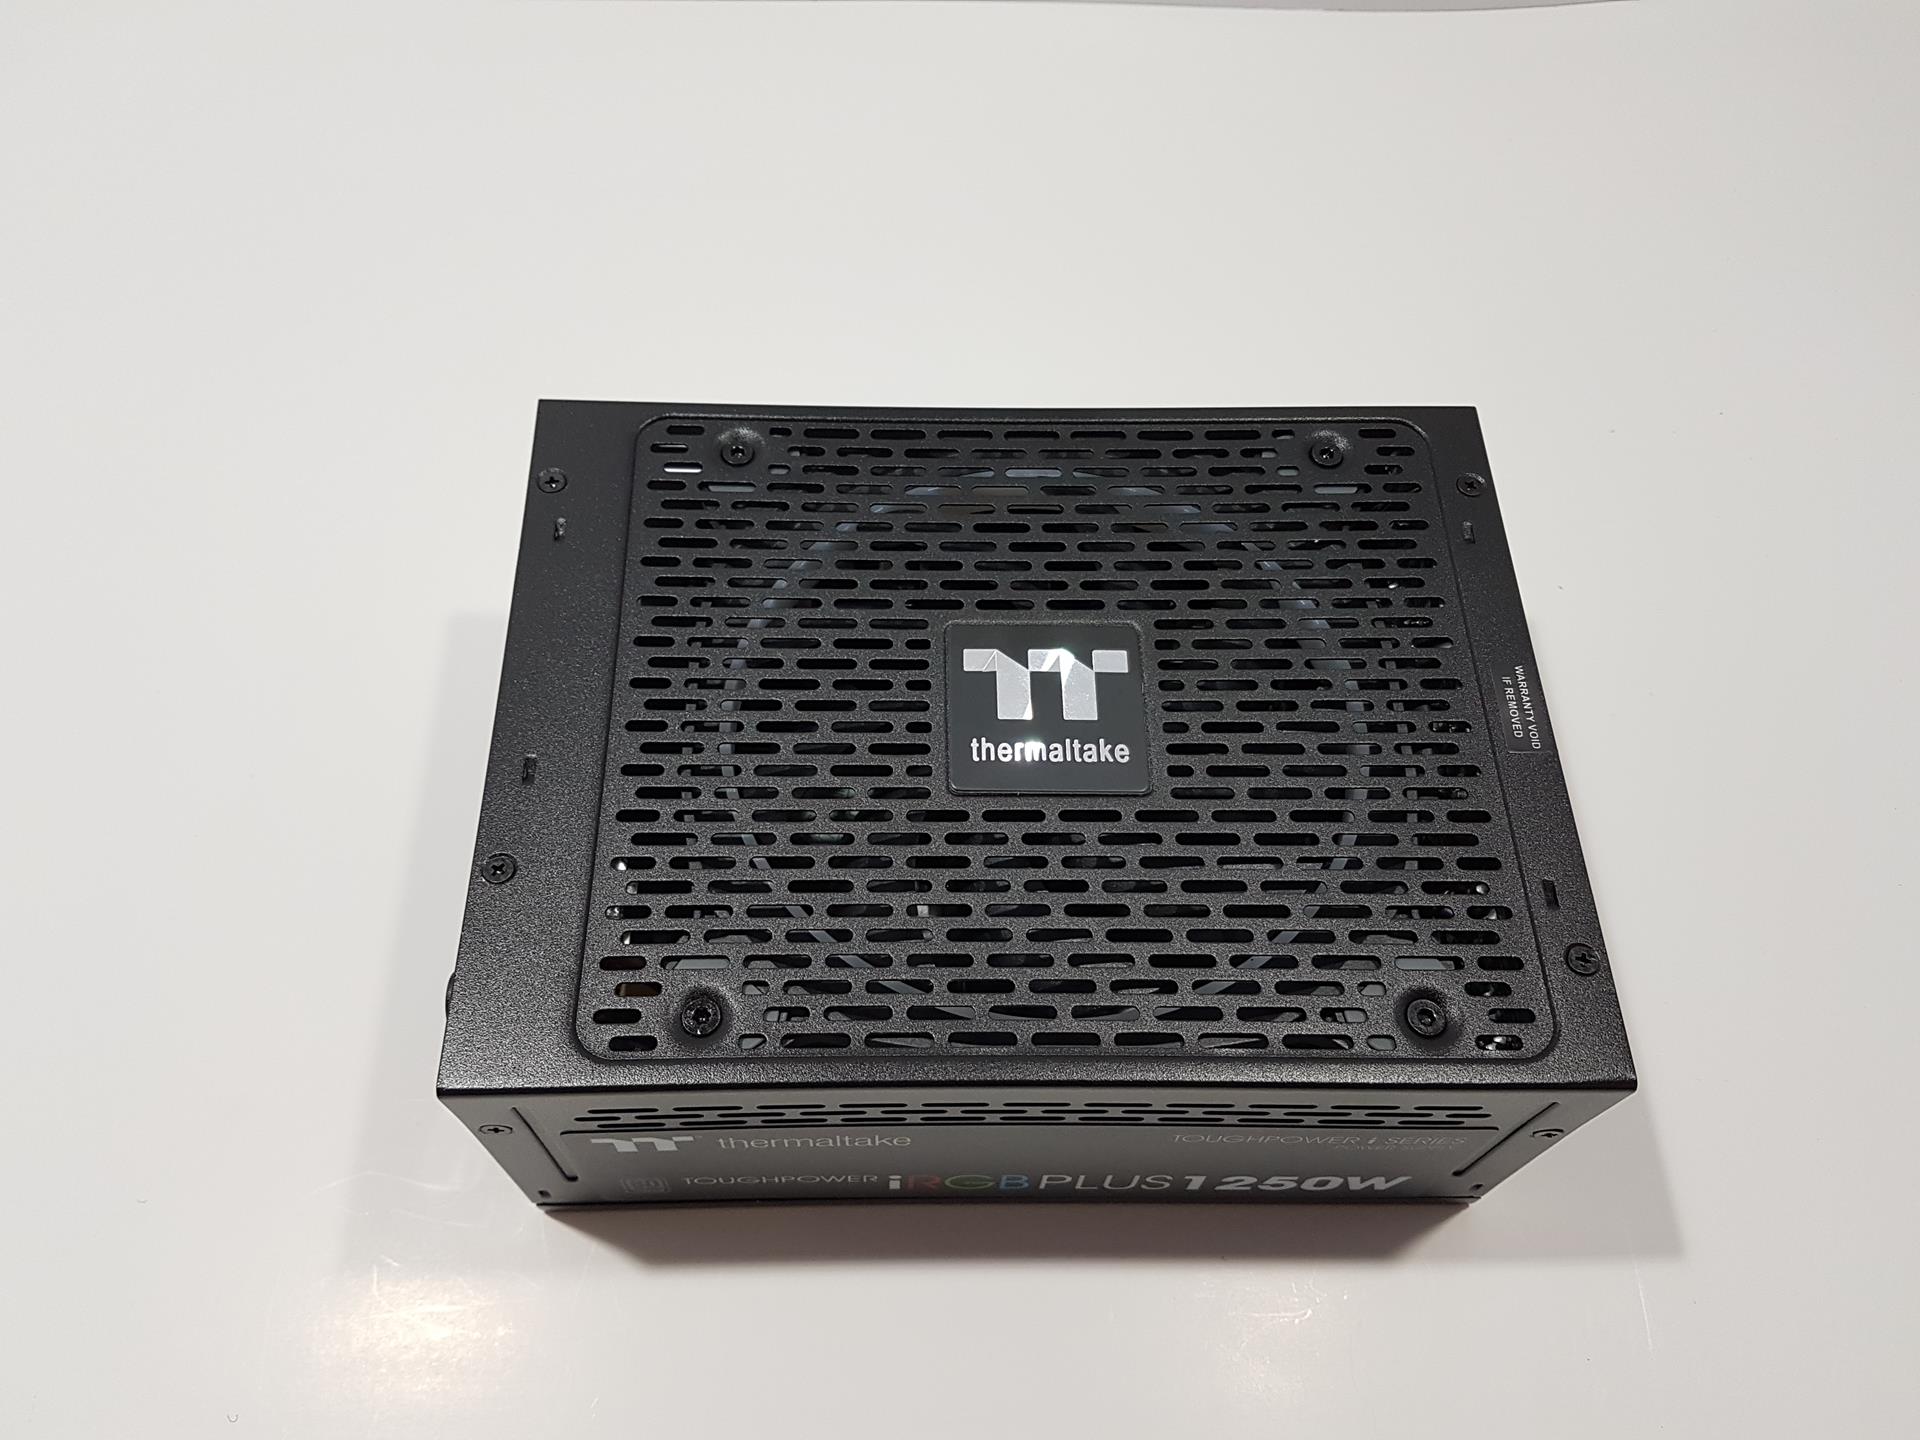
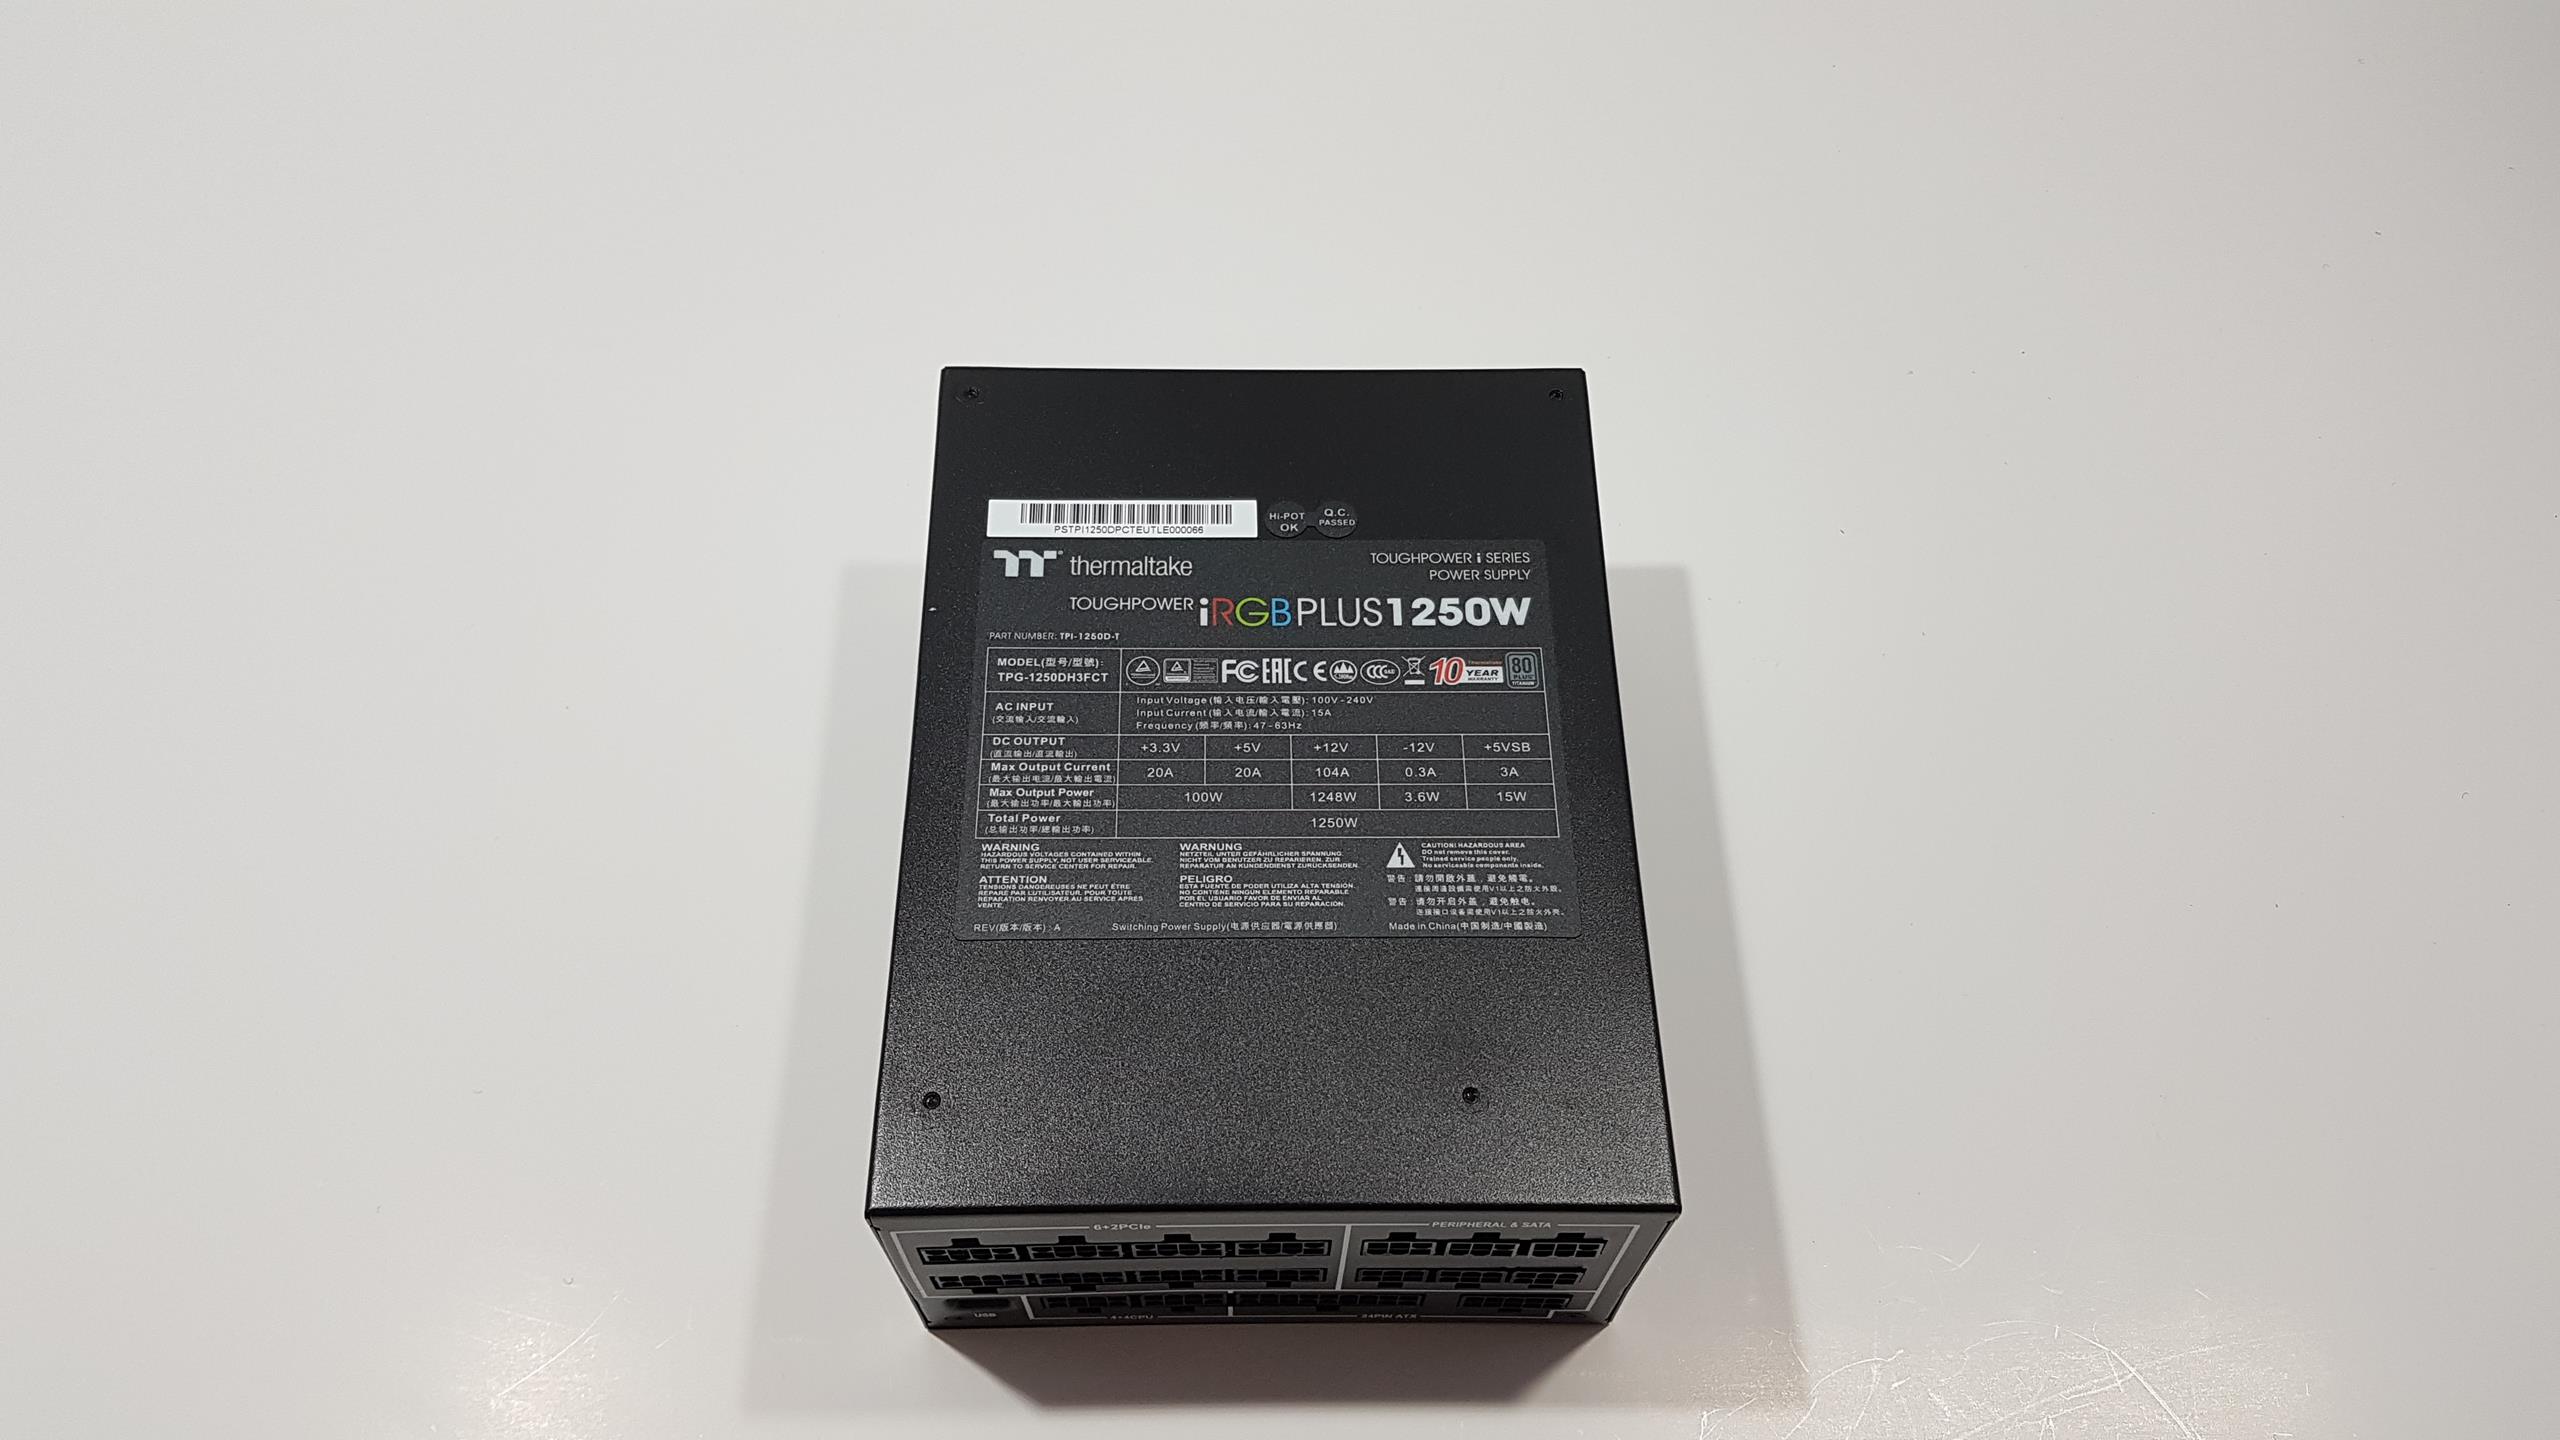
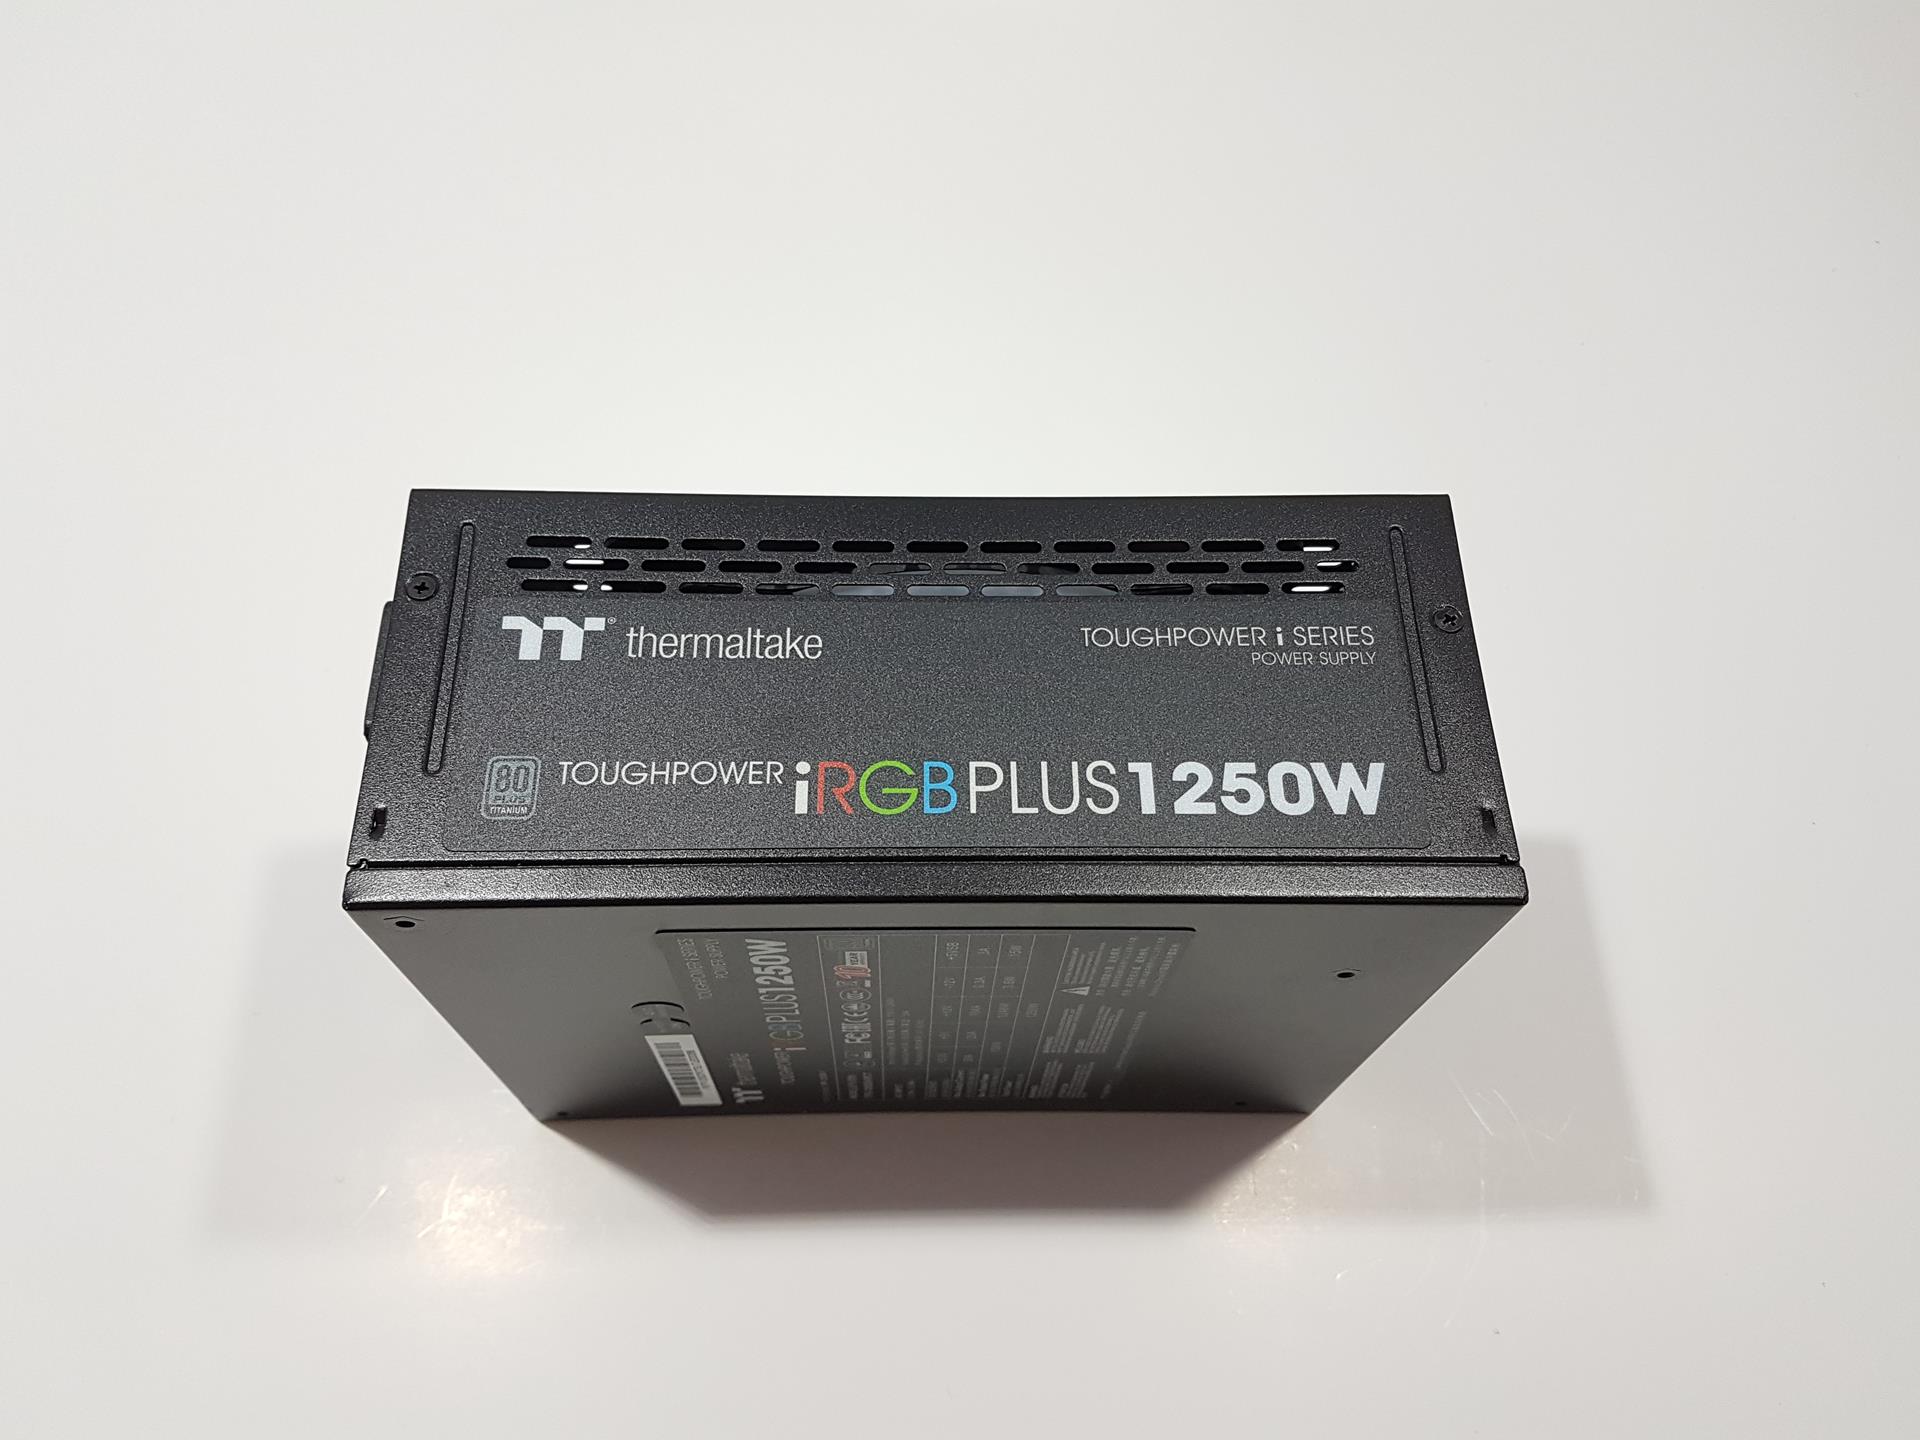
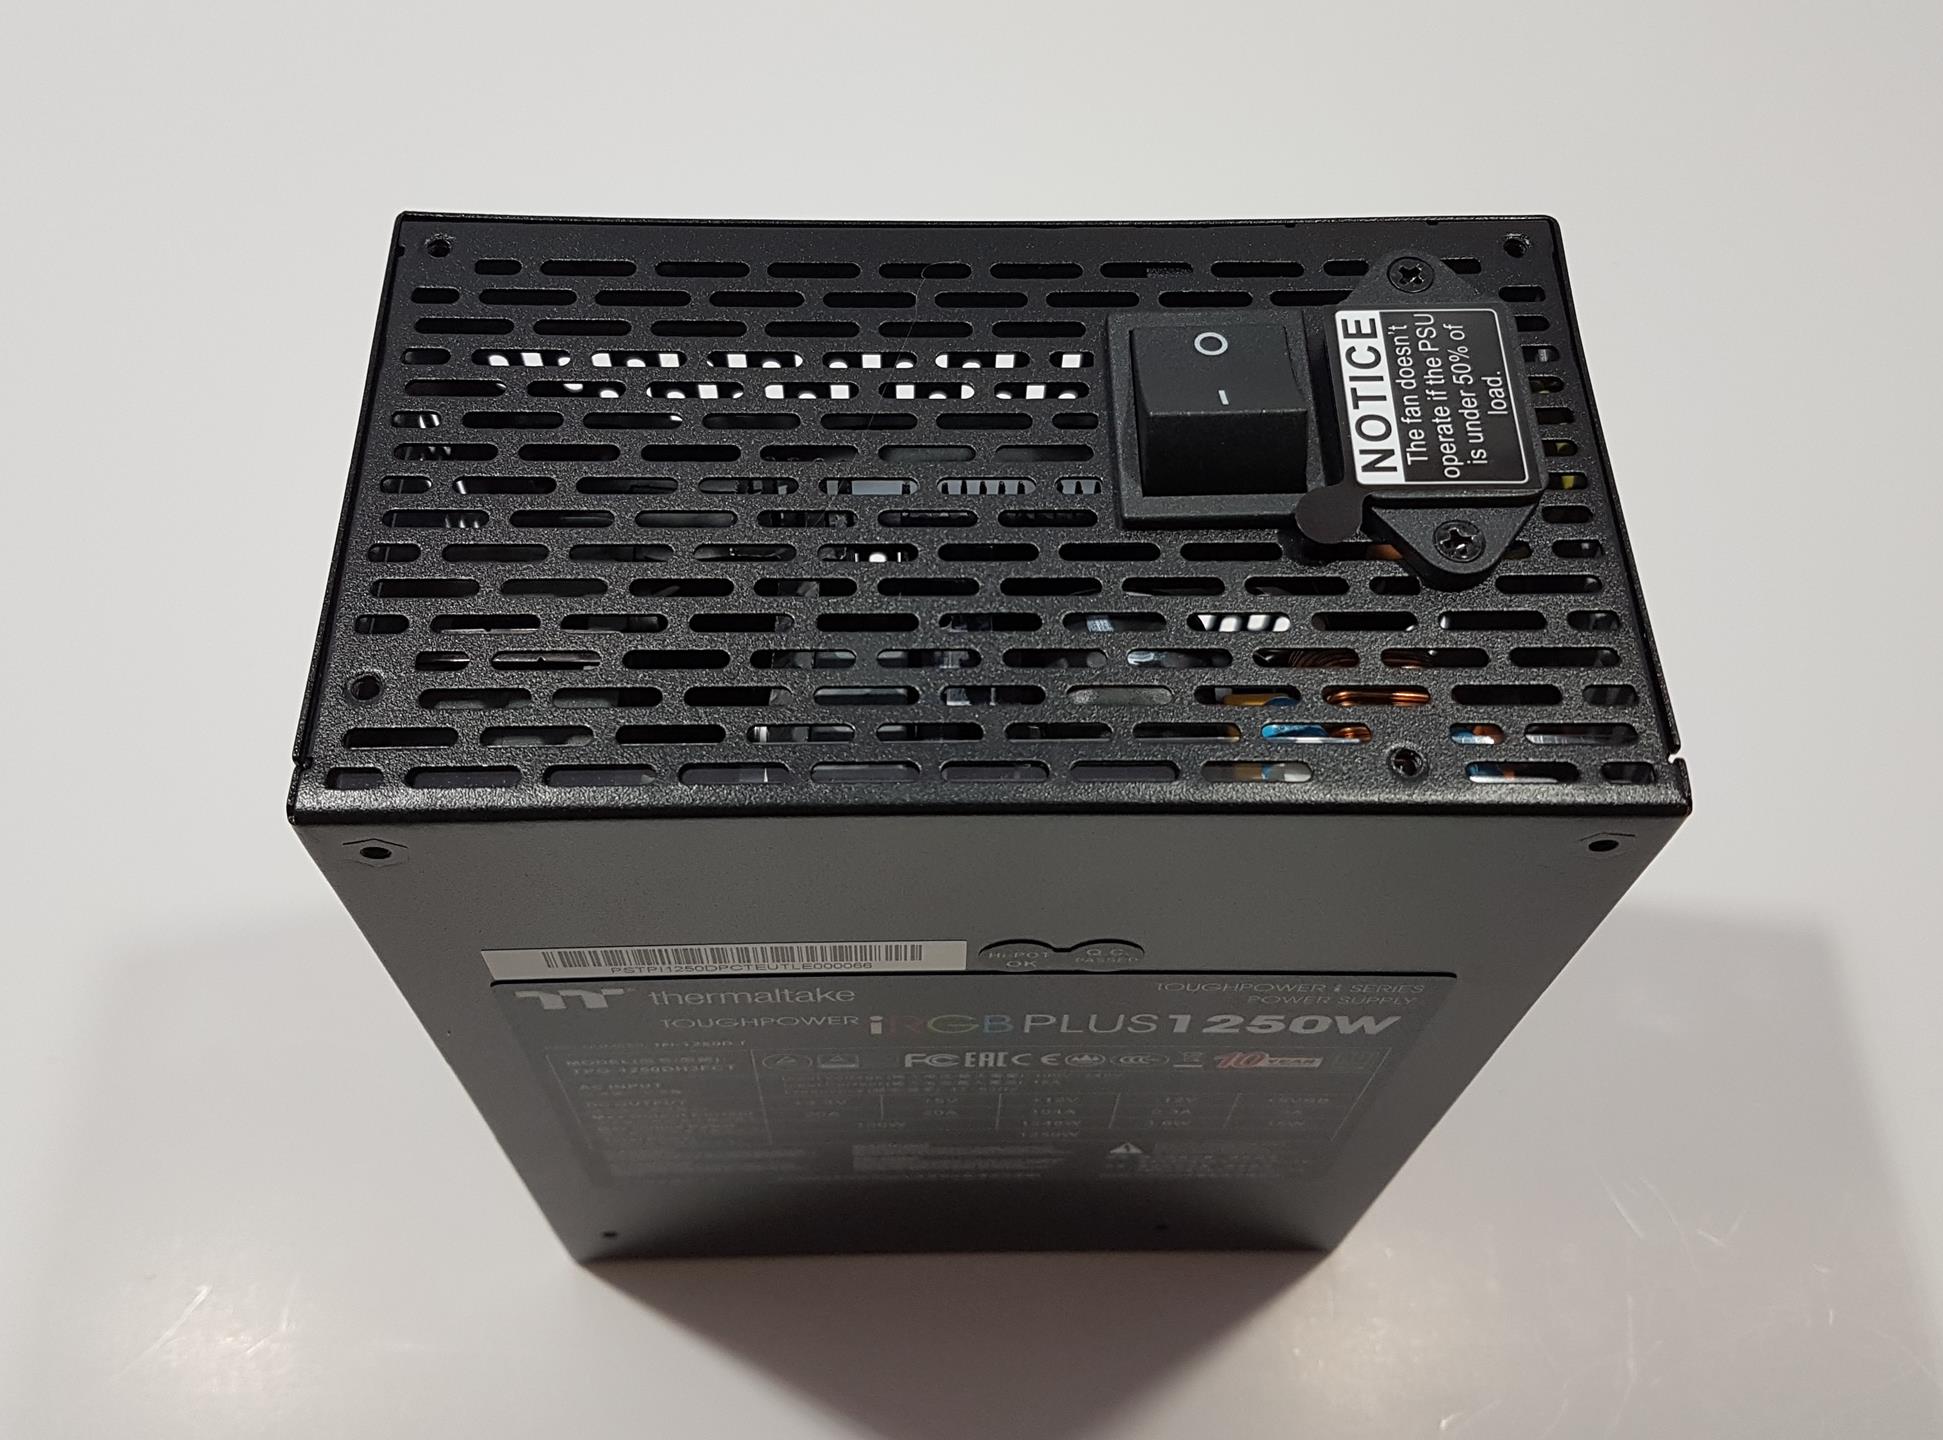
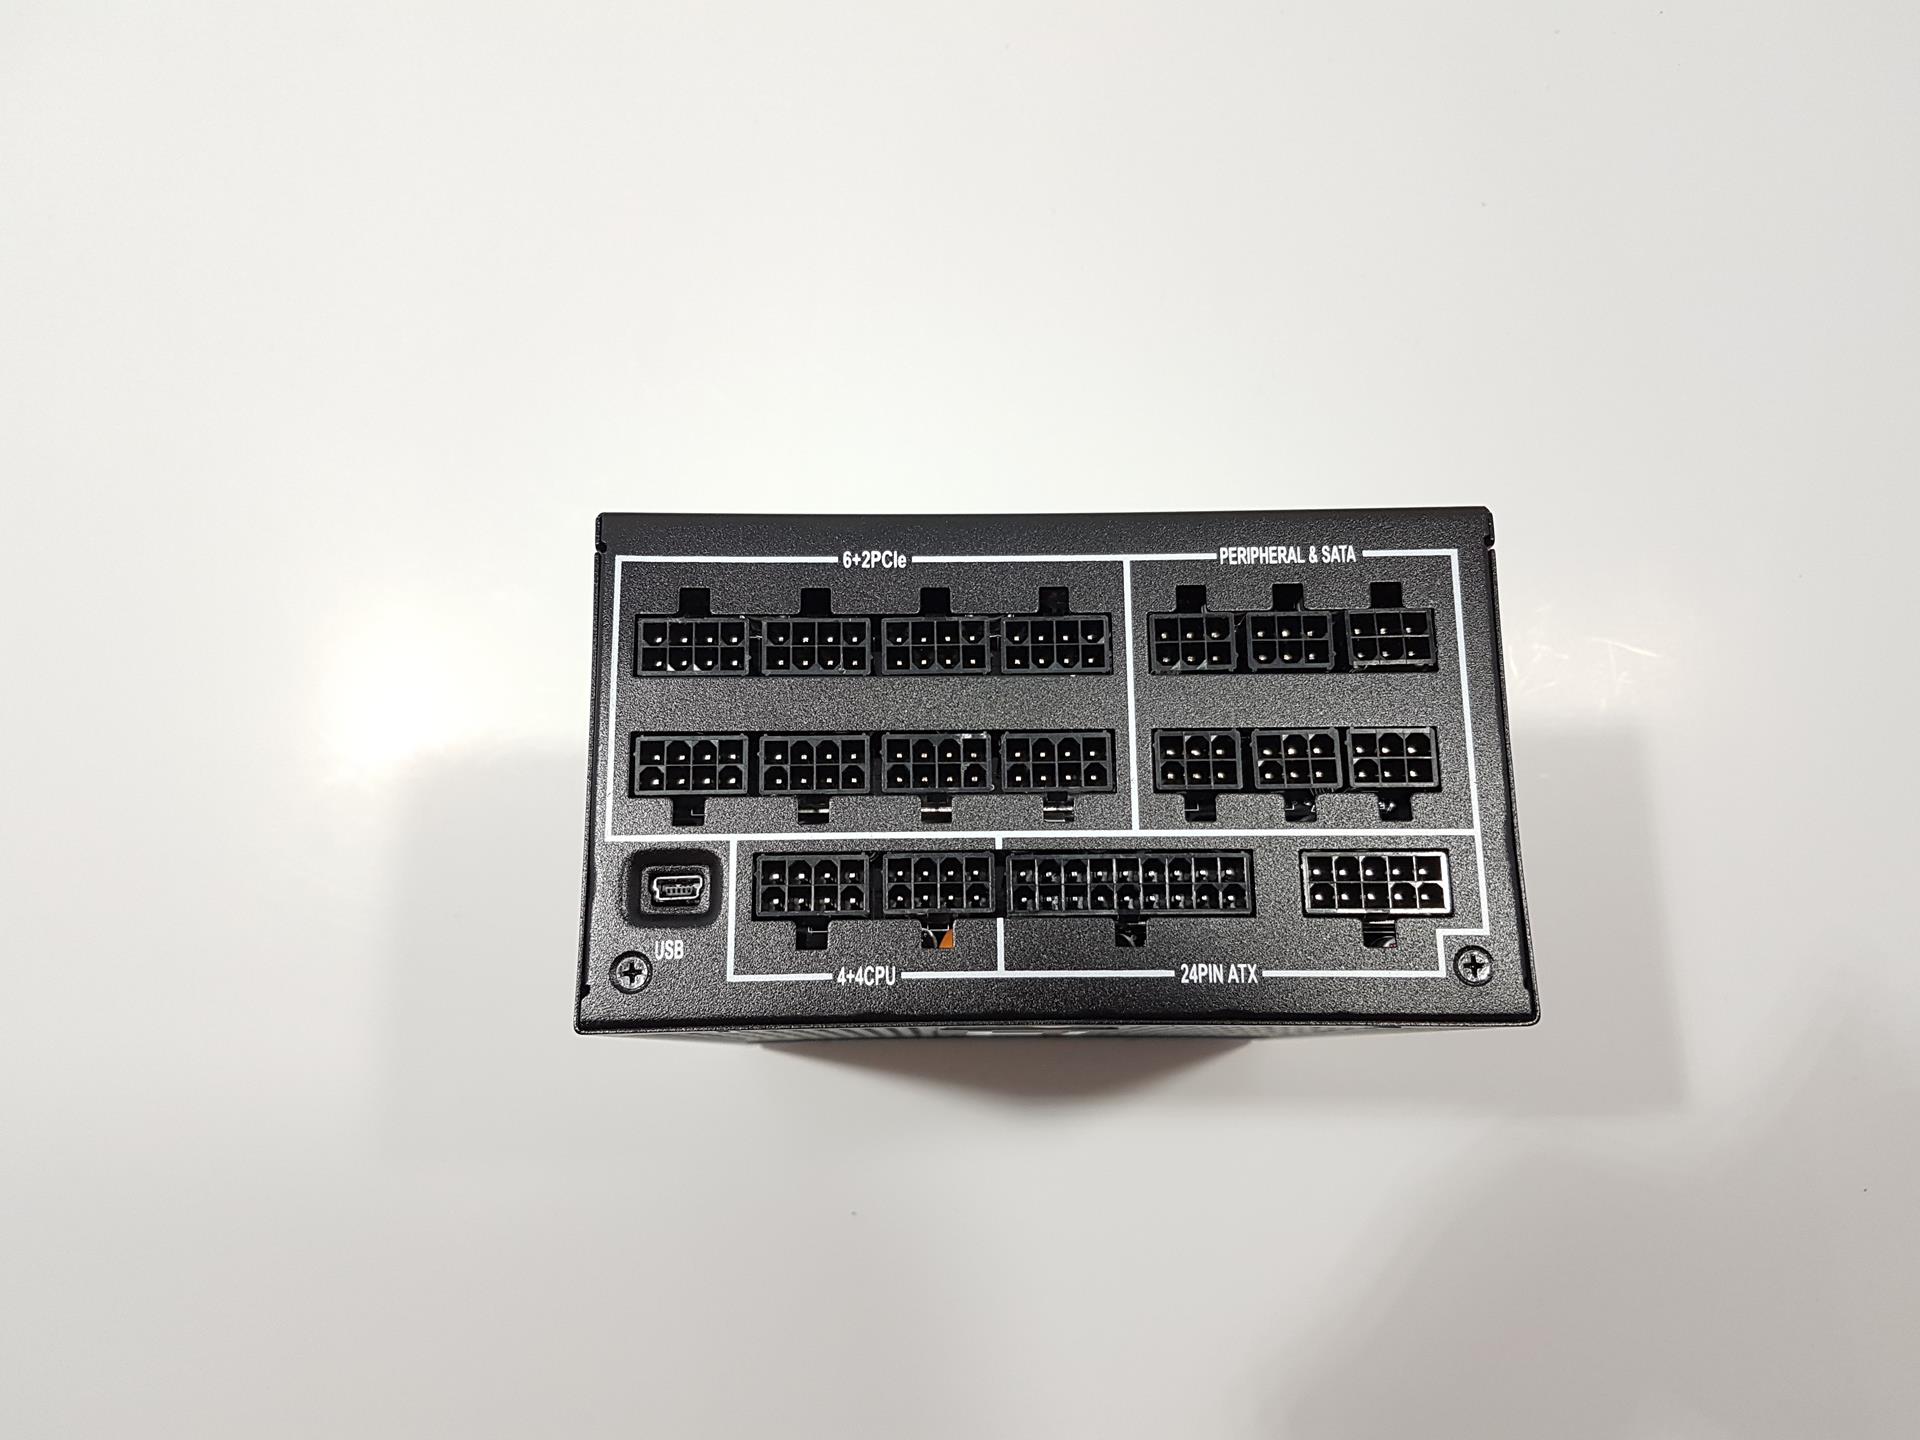
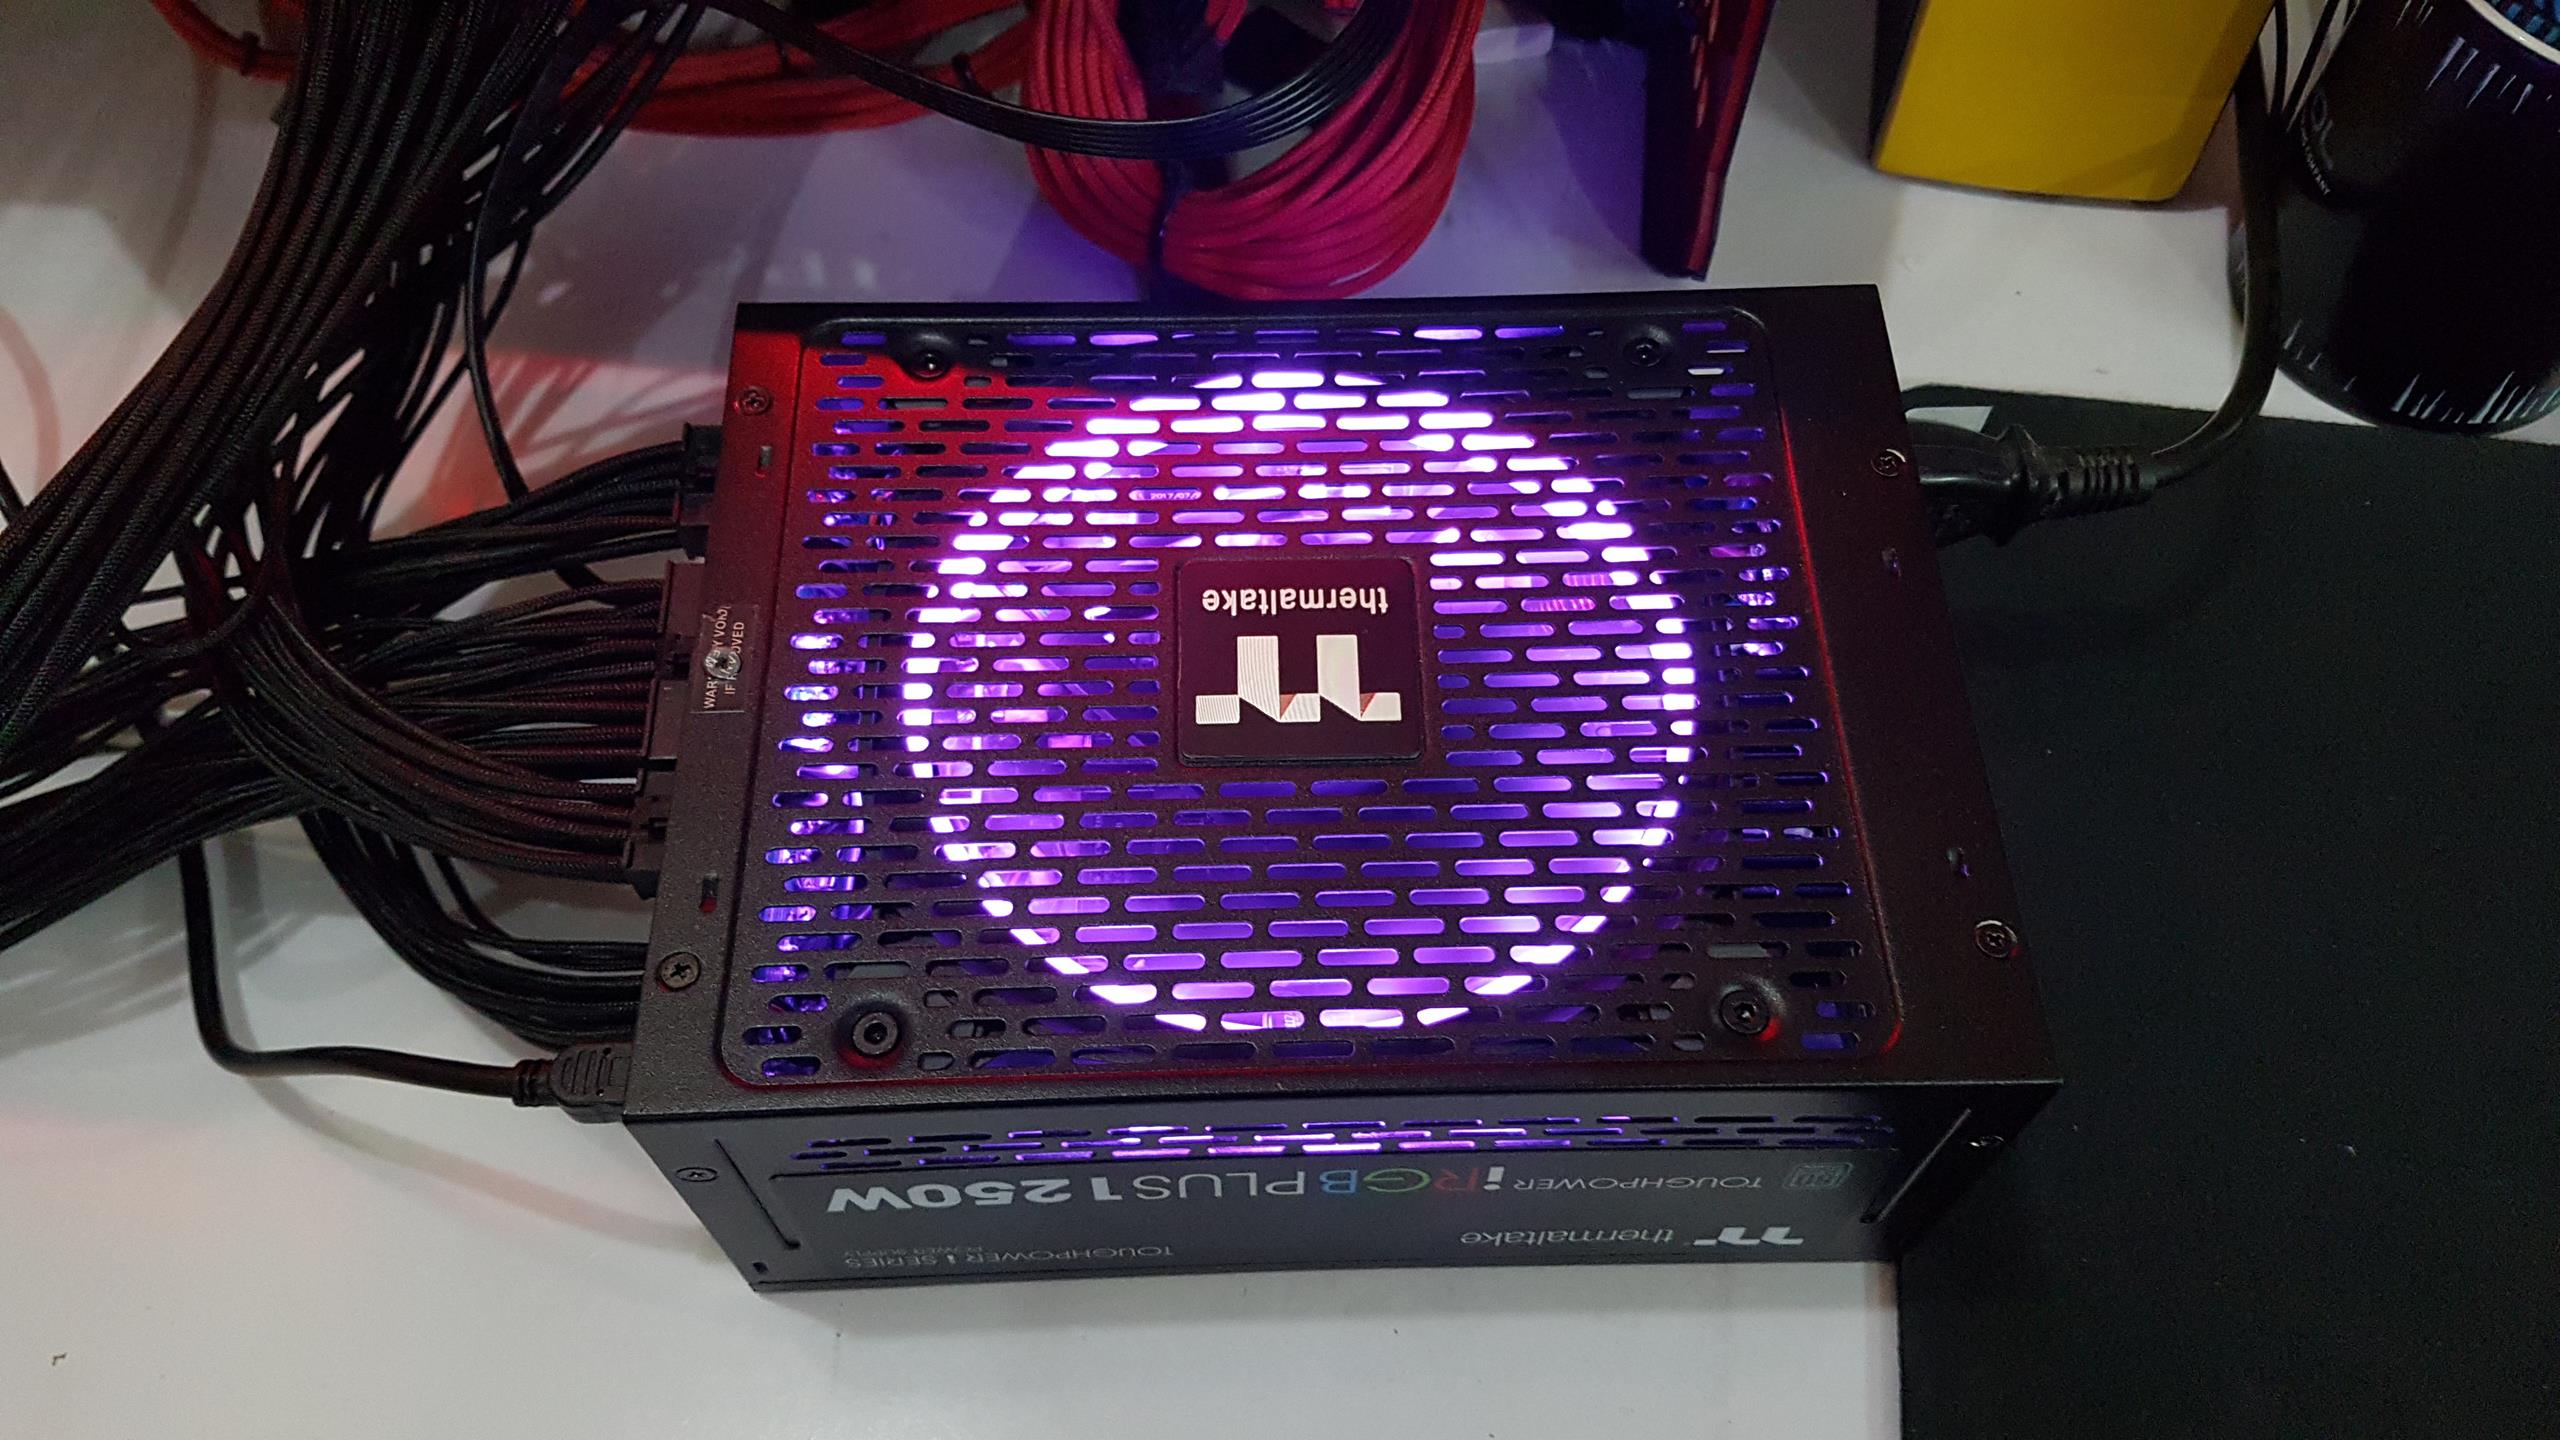
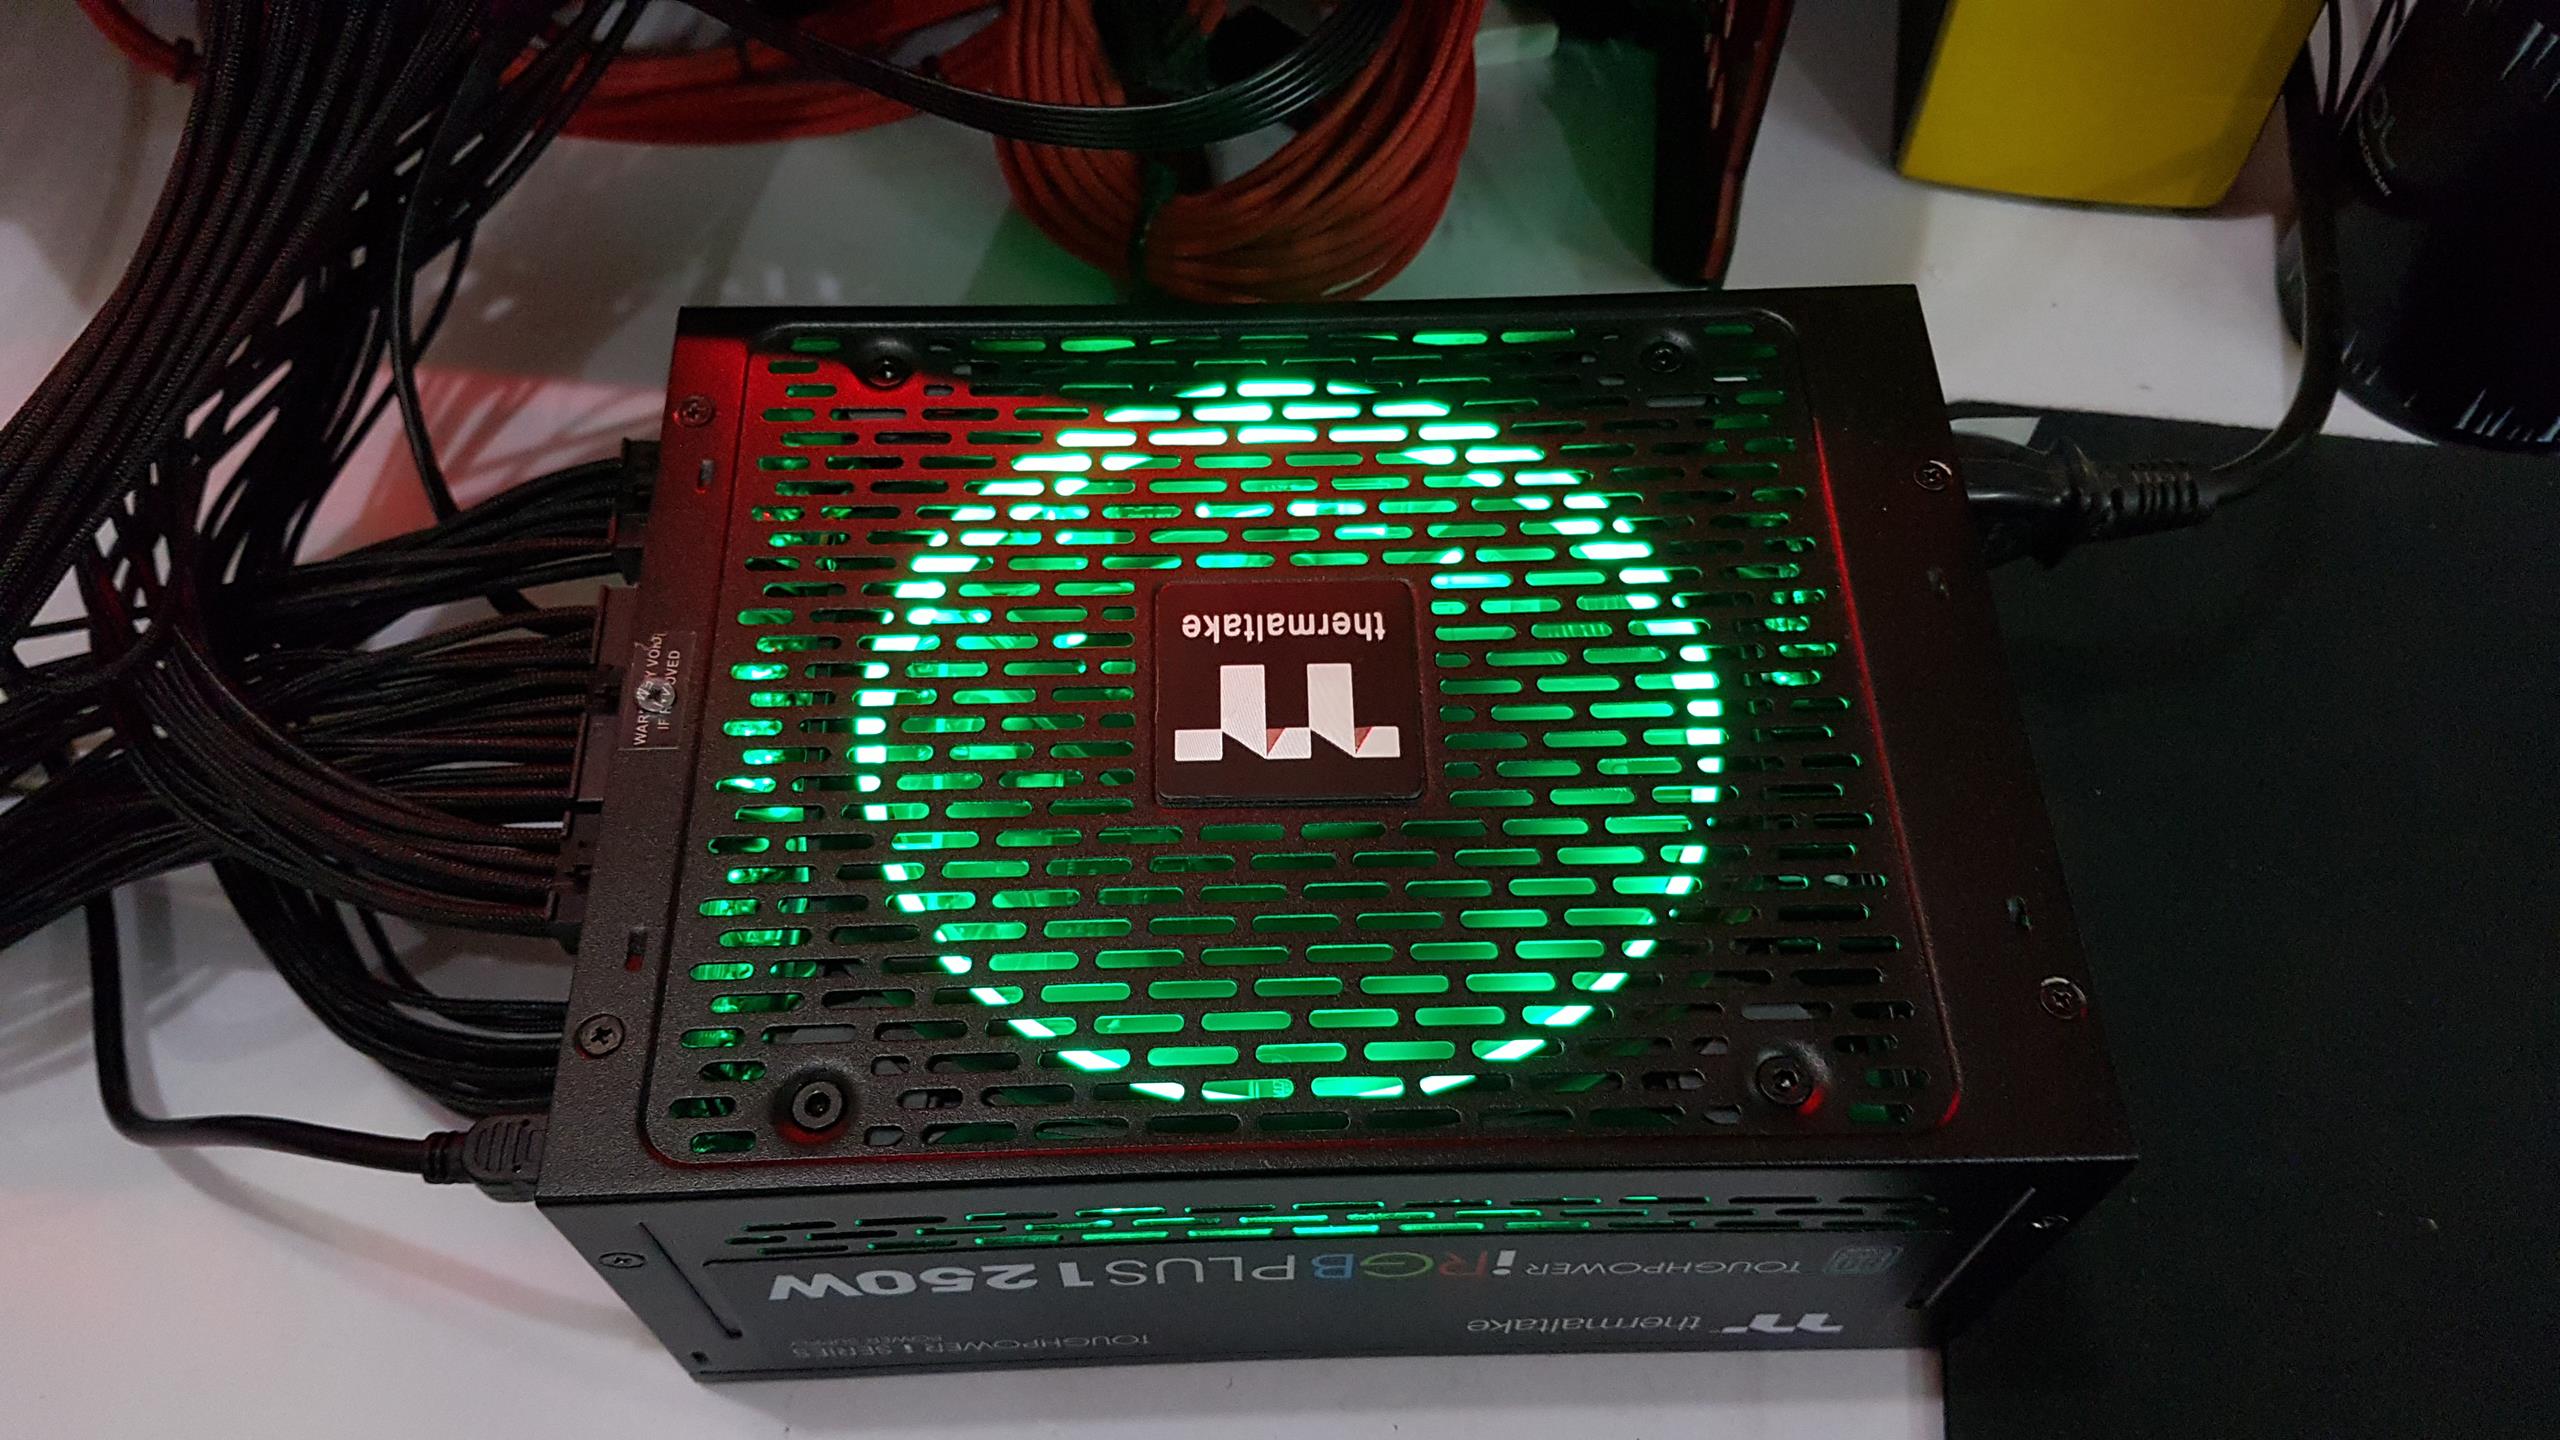
Since, we don’t have proper equipment to test the power supply, we will be giving a brief of the circuit overview of the unit followed by the Digital aspect of it and software. Let’s start with the exterior of the unit. The top side of the unit has a vented mesh style which is same as we saw on their Toughpower DPS-G RGB 750W PSU earlier. There is a beautiful sticker pasted in the center with Thermaltake Premium brand logo printed on top and Thermaltake printed at the bottom in silver color. It definitely adds more to the looks on this side. The large vented area is helpful for better airflow and to show off the stunning RGB lighting effects on this unit. There is a Warranty void sticker pasted on one side which has one screw under it. There are total 5 screws that need to be taken off to open the cover. Two are on the right side and three are on the side with Warranty Void sticker. It is clear that 4 screws were enough but one extra is placed for the Warranty sticker. The left and right sides are identical. Take a note on the three rows of the same style vented area as we saw on the top. While it is helpful for the airflow but its major purpose is to show the RGB lighting and effects through the sides as well and this does look that good in person. Applaud to their design team for this thinking. There is a large size-sticker pasted on the remaining portion. It has Thermaltake Premium brand logo and name printed on the top left side. Toughpower iSeries Power Supply is printed on the top right side. 80 Plus Titanium sticker is on the bottom left side. 80 Plus is a voluntary certification that classifies the PSUs by their efficiency levels. Idea was to promote the energy efficiency in consumption by encouraging the manufacturers to produce units with efficiency of 80% and above at 20%, 50%, 100% of the units rated load. It also takes into consideration power factor which should be 0.9 or higher at 100% load. All this to ensure that less heat is generated in wasted energy; this would also put less stress on the utility bills. Model of the unit is printed in multiple colors on the bottom. Sticker design looks good in person. The rear side of the unit has a Power On/Off switch followed by the 3-pin header for AC Power Cord. Rest of the area has a same vented mesh style as we saw on the top side. When light up, we can see the circuitry and sub-components from this side. The front side has all the magic and shows the total modular aspect of this unit. Starting from the left side, we have 8x 6+2 PEG or PCIe connectors followed by 6x Peripheral and SATA connectors. They are all enclosed with a white color borderline. The bottom left side has a mini USB header followed by 2x 4+4 CPU/EPS connectors. The bottom right side has 24-pin ATX connectors. The bottom side of the unit has a large sticker pasted on it. There is a Serial No sticker pasted on the top left side followed by Hi-POT Ok and QC Passed labels. For our those readers who may not be well versed Hi-POT term, it stands for High Potential and in simple words it indicates that unit has been tested and verified for electrical insulation using electrical safety testing instruments. Thermaltake Premium brand logo and name are printed on the top left side of the sticker. This is their Toughpower iSeries unit. The model of the unit printed under the brand name. Part No of the unit is TPI-1250D-T. Output specification table is printed in the middle. This is a switching power supply.
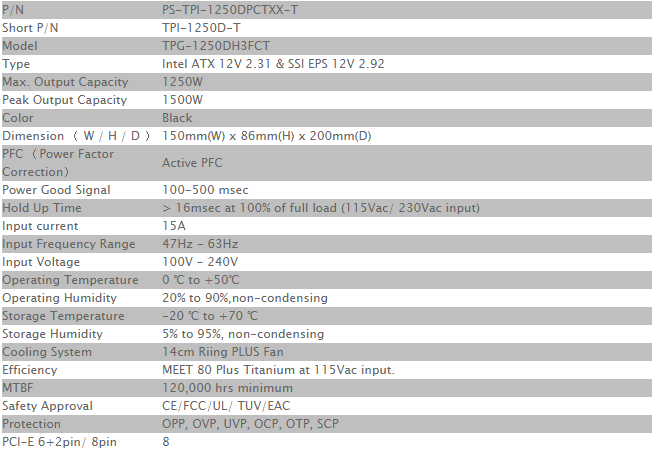
The Thermaltake Toughpower iRGB Plus 1250W PSU is Intel ATX 12V 2.31 & SSI EPS 12V 2.92 rated. It has a maximum output capacity of 1250W and peak output capacity of 1500W. The unit is in a black color steel frame. The dimension of the unit is 150x86x200mm (WxHxD). Here Depth means the length of the unit. It is following the Active Power Factor Correction (PFC). Power Good Signal rating is 100 ~ 500ms. Hold up time is > 16ms at 100% of full load (115Vac / 230Vac input). Input Current is 15A. Input Frequency Range is 47Hz to 63Hz. Input Voltage is 100V to 240V. Operating temperature range is 0°C to +50°C. Operating humidity rating is 20% to 90% non-condensing. Storage temperature requirement is -20°C to +70°C. Storage humidity rating is 5% to 95% non-condensing. The cooling system has 140mm Ring Plus fan. The efficiency rating is 80 plus Titanium at 115Vac input. MTBF is 120,000 hours minimum. Safety approval conformance is with CE/FCC/UL/TUV/EAC. Protection features include OPP, OVP, UVP, OCP, OTP, and SCP. Here is the detail for the Over Voltage Protection points:
| Voltage Source | Protection Point for Voltage | Protection Point for Current |
| +3.3V | 4.3V Max | 30A ~ 40A |
| +5V | 7.0V Max | 30A ~ 40A |
| +12V | 15.6V Max | 120A ~ 135A |
The power supply will shut down and latch off if the wattage is 115% ~ 135% over the continuous power. This unit meets the FCC regulations for EMI and meets the CE, FCC, UL, TUV, CB, EAC, and CCC safety standards.
Cables
This PSU is fully modular. The modular approach has made it convenient for the users and saved them the hassle of dealing with the cable clutter. Now, users can connect only the required cables and keep the not needed cables away. This would help in better cable management and improve airflow (later is a subjective term). Thermaltake has taken their game to the next level by providing 24 pin ATX cable, all PEG and EPS cables in individually sleeves in black color. This is too good a deal for sure. The peripheral and SATA cables are flat. Not only that but they have also included cable combs for the sleeve cables.
Here is the info regarding the cables for this unit:
| Type | Quantity (No) | Length (MM) |
| Main Power Connector 24 Pin | 1 | 600 |
| ATX 12v [4+4 Pin] | 1 | 650 |
| EPS 12V Connector [8 Pin] | 1 | 650 |
| PCI-e Connector 6+2 Pin | 4 | 550 |
| PCI-e Connector 8 Pin | 4 | 550 |
| SATA 5 Pin | 16 [4 cables with 4 connectors per cable] | 550 |
| Peripheral (Molex) 4 Pin | 8 [2 cables with 4 connectors per cable] | 550 |
| FDD 4 Pin | 1 | 100 |
In addition to above, we have a main power cable and a USB cable. USB cable is connected with any USB 2.0 header on the motherboard to enable the digital monitoring of the unit. PCIe connectors are in red color. Color coding is helpful in identification of PEG cables from EPS cables.
Output Specification
| AC Input | Input Voltage: 100v – 240v
Input Current: 15A Frequency: 47HJz – 63Hz |
||||
| DC Output | +3.3V | +5V | +12V | -12V | +5VSB |
| Max Output Current | 20A | 20A | 104A | 0.3A | 3.0A |
| Max Output Power | 100W | 1248W | 3.6W | 15W | |
| Continuous Power | 1250W | ||||
This unit has a single +12V rail with 104Amps on it. It is clear that this unit is designed to meet the extreme power requirement of the rig with multiple graphics cards and high-end desktop CPUs. I’ve tested the PSU on X99 platform using i7 6850k and GTX 1060. Unfortunately, I don’t have multiple high ends cards but a single GTX 1080 FE otherwise I would have tested the power supply accordingly. Maximum power draw was 300W which is peanut given the continuous output power of 1250W. The user guide has one warning to the users which is that warranty will void with the use of the third party modular cables and users should only use genuine TtI modular cables. Though this is to ensure the maximum compatibility and to reduce the risk of damage but voiding the warranty with the use of third-party module cables like CableMod sleeves which are very popular among the PC enthusiasts, could have been relaxed.
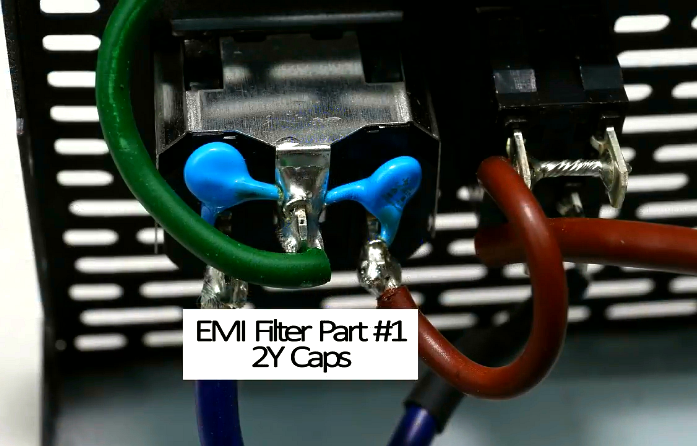
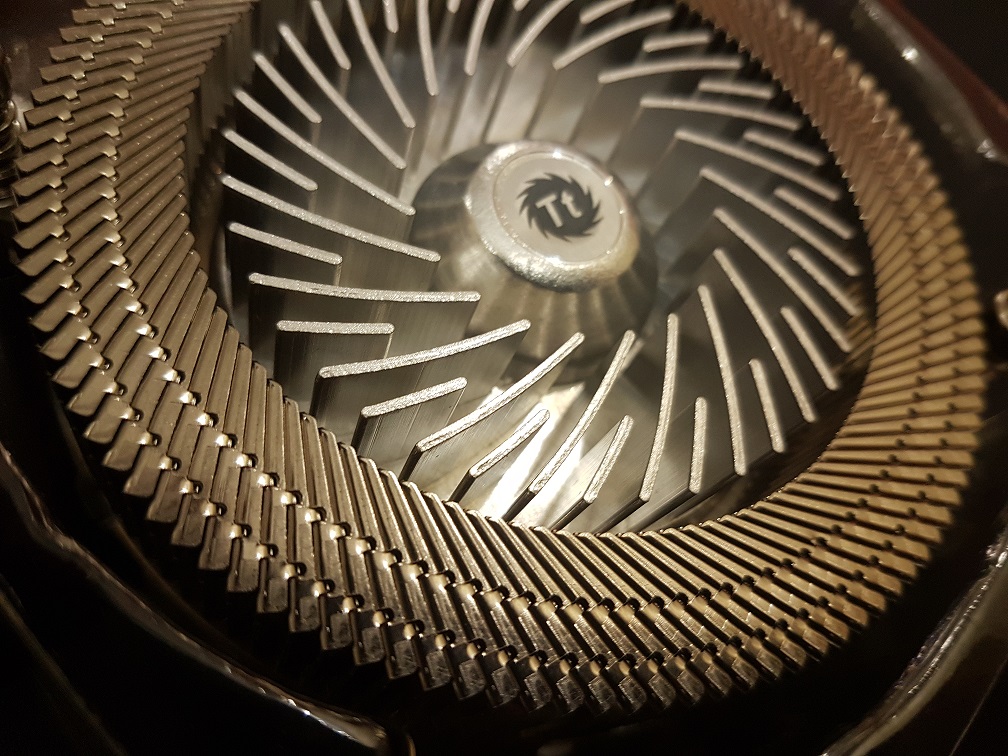
Let’s take a look at the circuit. This section is contributed by Mr. Hassan Khalid. When we start the anatomy of the Thermaltake Toughpower iRGB Plus 1250W, we observe that the main unit is based on the CWT CST (80 plus efficiency certified) platform mostly recommended to be used by the eighty plus titanium series power supplies. In the component by component internal examination, we observed that everything is seen to be familiar i.e not new. The only thing that grabs our attention is the 140mm fan, the Thermaltake TT-1425 (patent design Thermaltake) 16.8 million colors Riing Plus RGB fan, 12 addressable single LEDs, and high-tech components the fan support 0.7 A and 12 V.The chassis of the fan is of high quality and quite durable, fan with the chassis is shown in the Pic 8. The anti-vibration mounting system and compressed fan blade make it even more lethal. The AC input (100-240 V,15 A,47-63 Hz) to the Thermaltake Toughpower iRGB Plus 1250W is filtered through the two stages of the EMI filtering. As an EMI filter, or an electromagnetic interference filter, is an electronic passive device which is used in order to suppress conducted interference that is present on a signal or power line. The EMI Filter 1 consist of Two Y Capacitor as shown in the below picture.
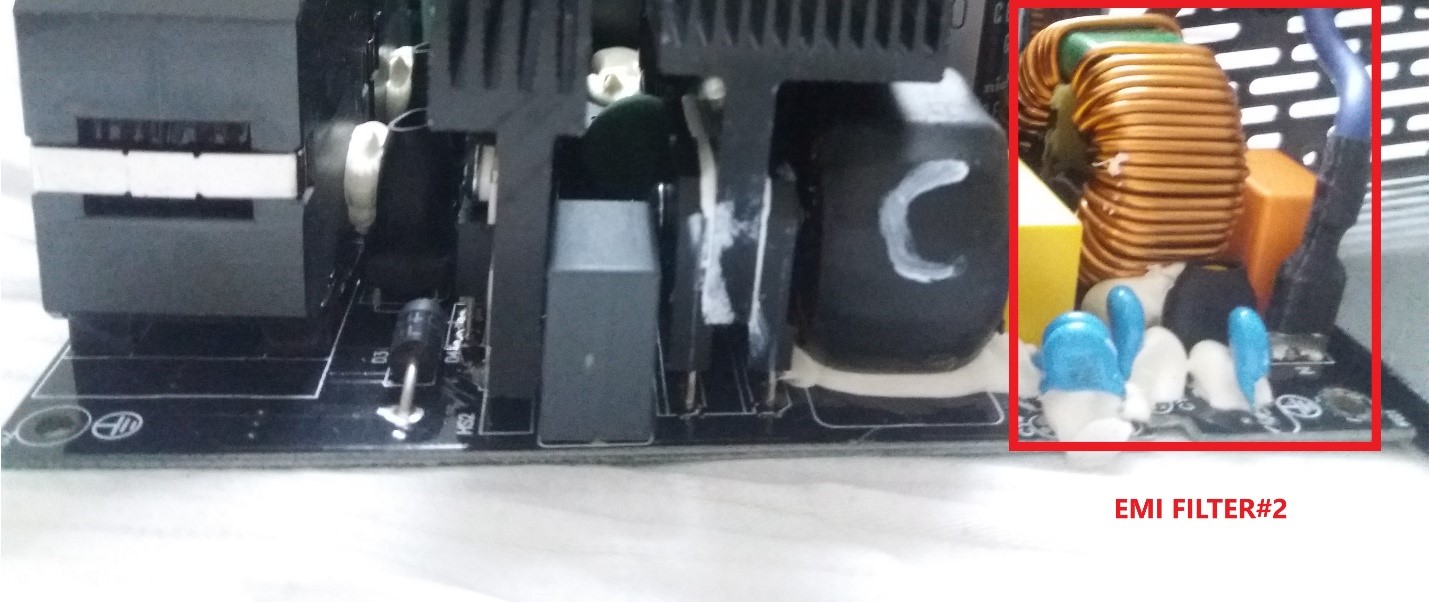
The EMI Filter 2 consist of 4 Y type capacitors,2 X type capacitors,2 X type common mode chokes and 1 X type metal oxide varistor. The EMI filter 2 is shown in the Pic 2. All the good quality components are used in both filtering stages. Here the use of varistor can even provide protection to sudden high voltage change as the resistance of the varistor decrease with the increase of the applied voltage, so when very high voltage appeared across varistor its resistance decrease dramatically and so could act as high voltage protection device.
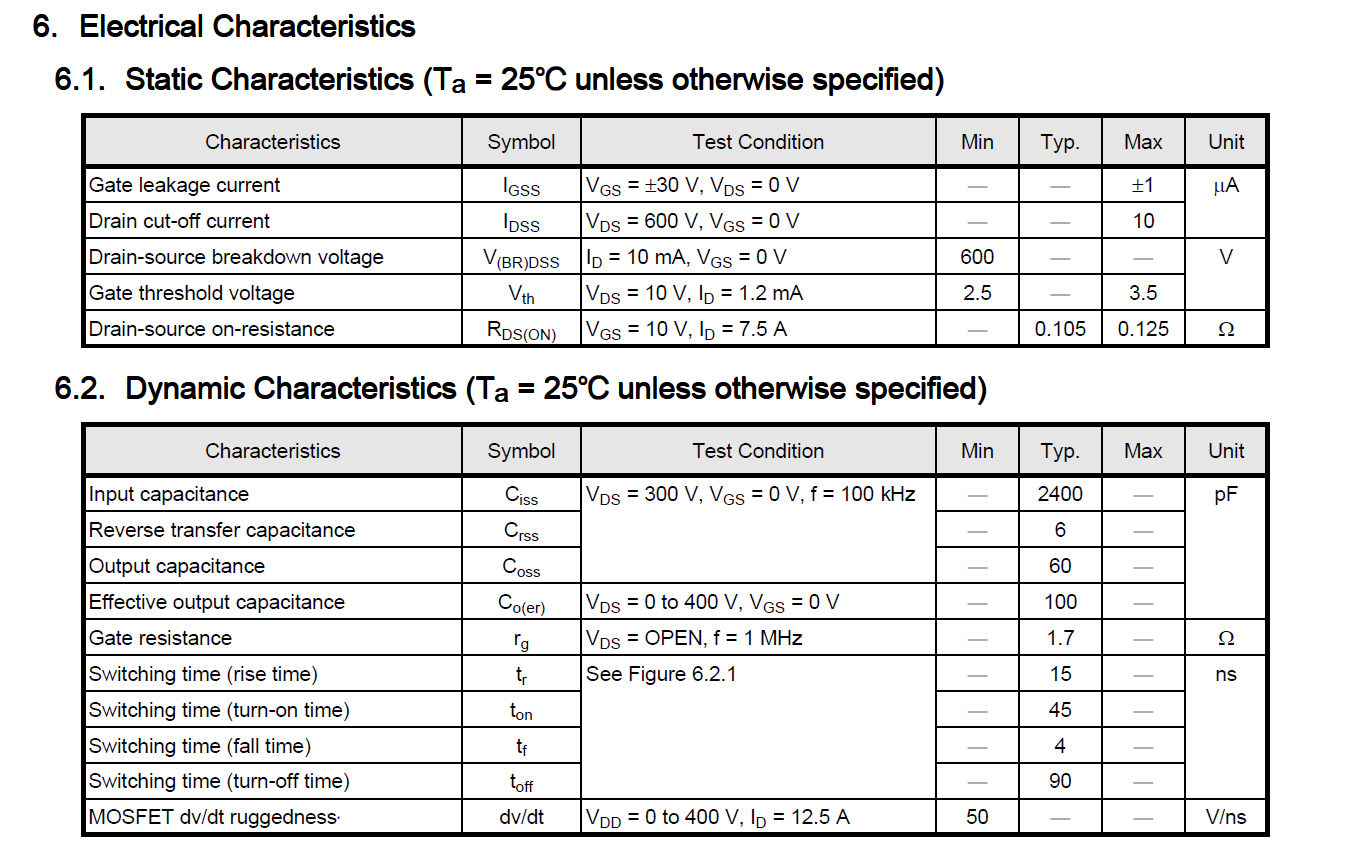
After the input filtering stage is the rectification stage. The rectifier consists of two Single-Phase Single In-Line Bridge Rectifiers paired with heat sinks. The model of the rectifiers is LVB2560 or equivalent. The Electrical characteristics of the rectifier are given in the Pic 3 below. The Electrical parameters values in the table are indicating the rectifiers used is well suited for the designed application. This is the most common type of the rectifier observed in the power supplies nowadays.
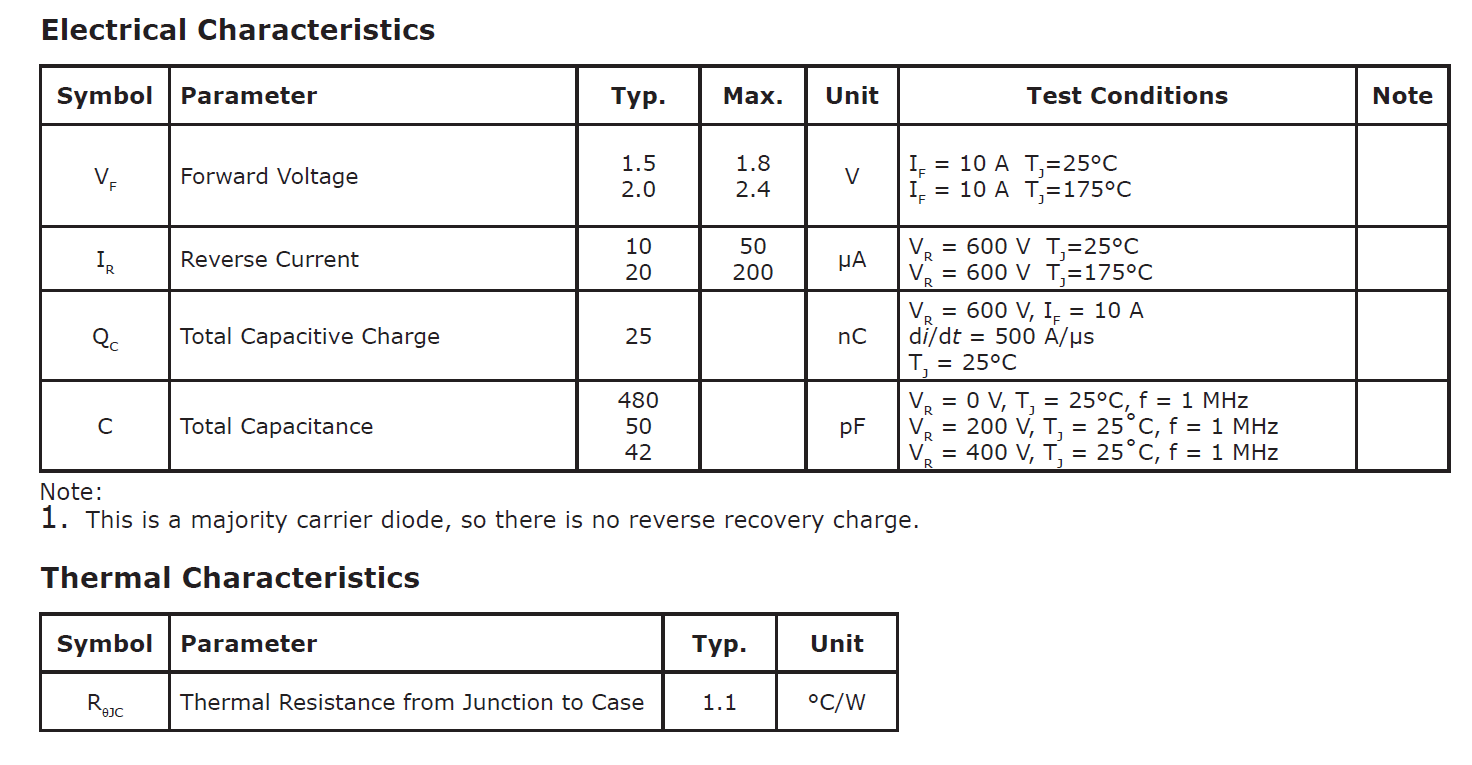
In order to avoid the inrush current problem, the Inrush protection is added. The protection circuitry consists of a negative temperature coefficient (NTC) thermistor and a relay mounted on the main board. In order to make the device more efficient the main board also consist of automatic power factor converter. The automatic power factor converter (APFC) consists of Boost Diodes and APFC FETs. The Boost diodes used are CREE C3D10060A and FETs used are Toshiba TK25N60X. The electrical and thermal characteristics for FETs are shown in Pic 4(a) and Pic4(b) while for Boost diodes are shown in the Pic 5. It can be seen that both FET and Boost diodes selected have good electrical and thermal characteristics as per the designed requirement.
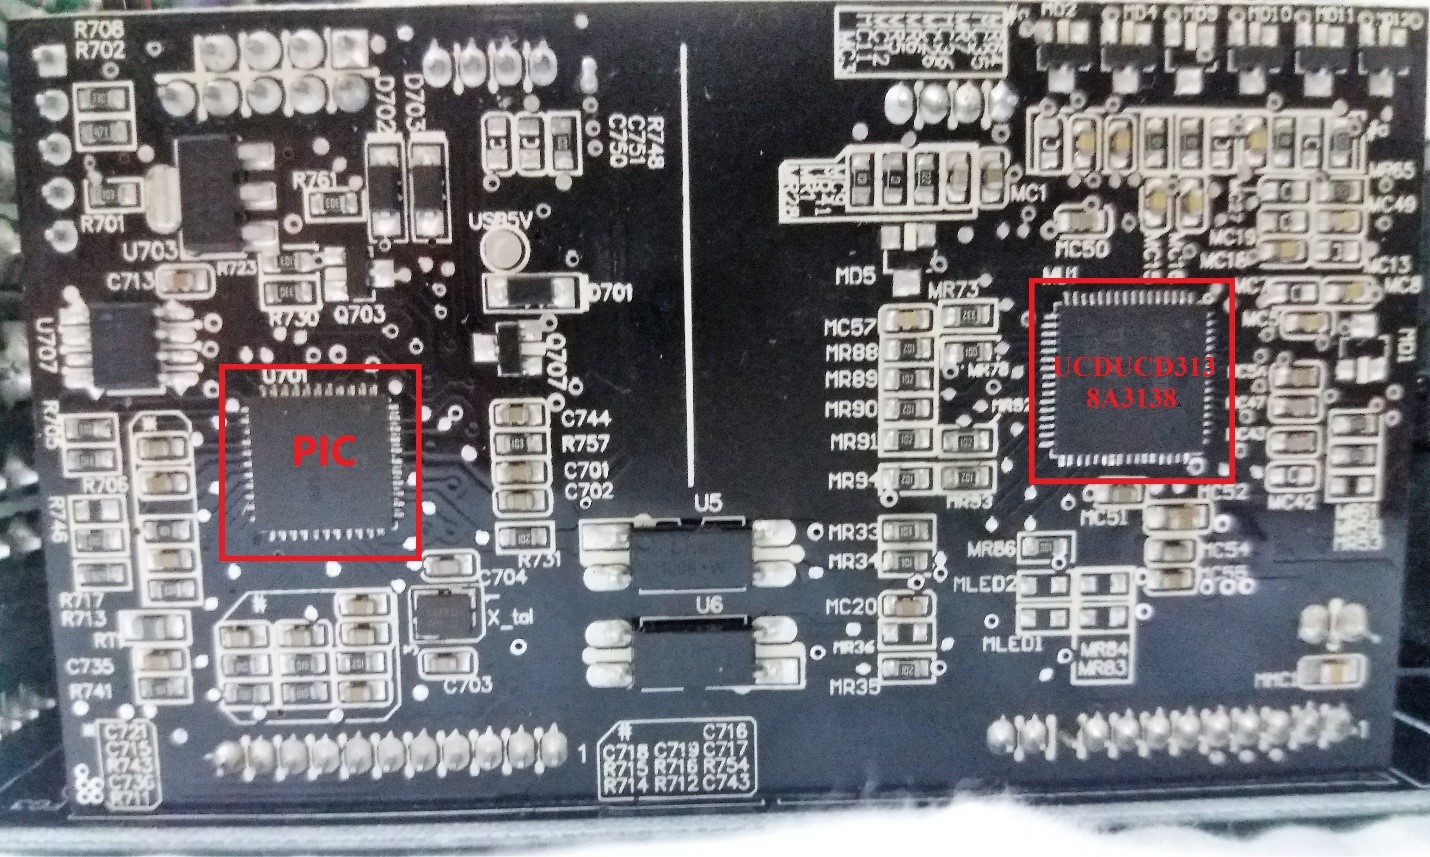
The Mainboard also consist of a mounted main digital control card. The card consists of two microcontroller units. One for automatic power factor correction and other for USB interface and other primary digital tasks. The main controller used is PIC MX230F064D. It consists of a 32-bit chip,16 KB RAM, and 44 pins. The automatic power factor correction MCU is Texas instrument UCD3138A. It is consist of 32-Bit ARM7TDMI-S™ Processor, 32 KB of Program Flash, 2 KB of Data Flash with ECC and 4 KB of Data RAM. The main MCU card is shown in below pic.
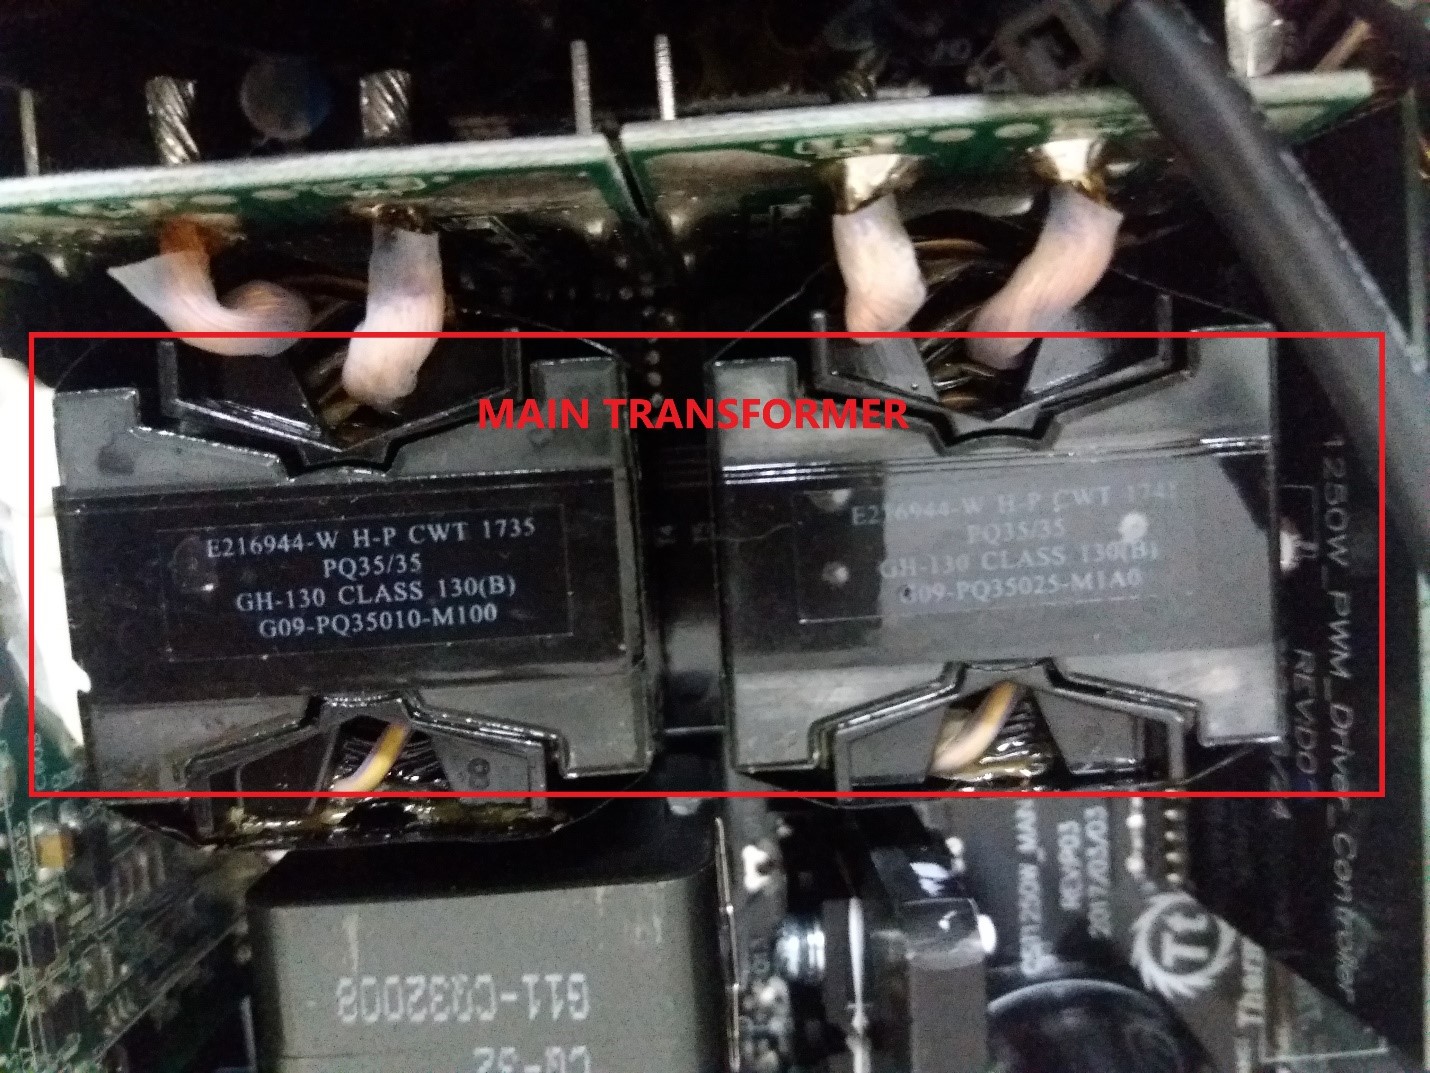
In the middle of the main PCB are the 1250 watt PWM driver controller card and the main input bulk capacitors. The main input bulk capacitors used are Nippon Chemi-con and Nichicon. The Nichicon is rated at 400v 680uF 105oC while the Nippon Chemi-con is rated at 420v 680uF 105oC. Moving forward we noticed the Main transformers CWT 1735 and 1741 as shown In below pic.
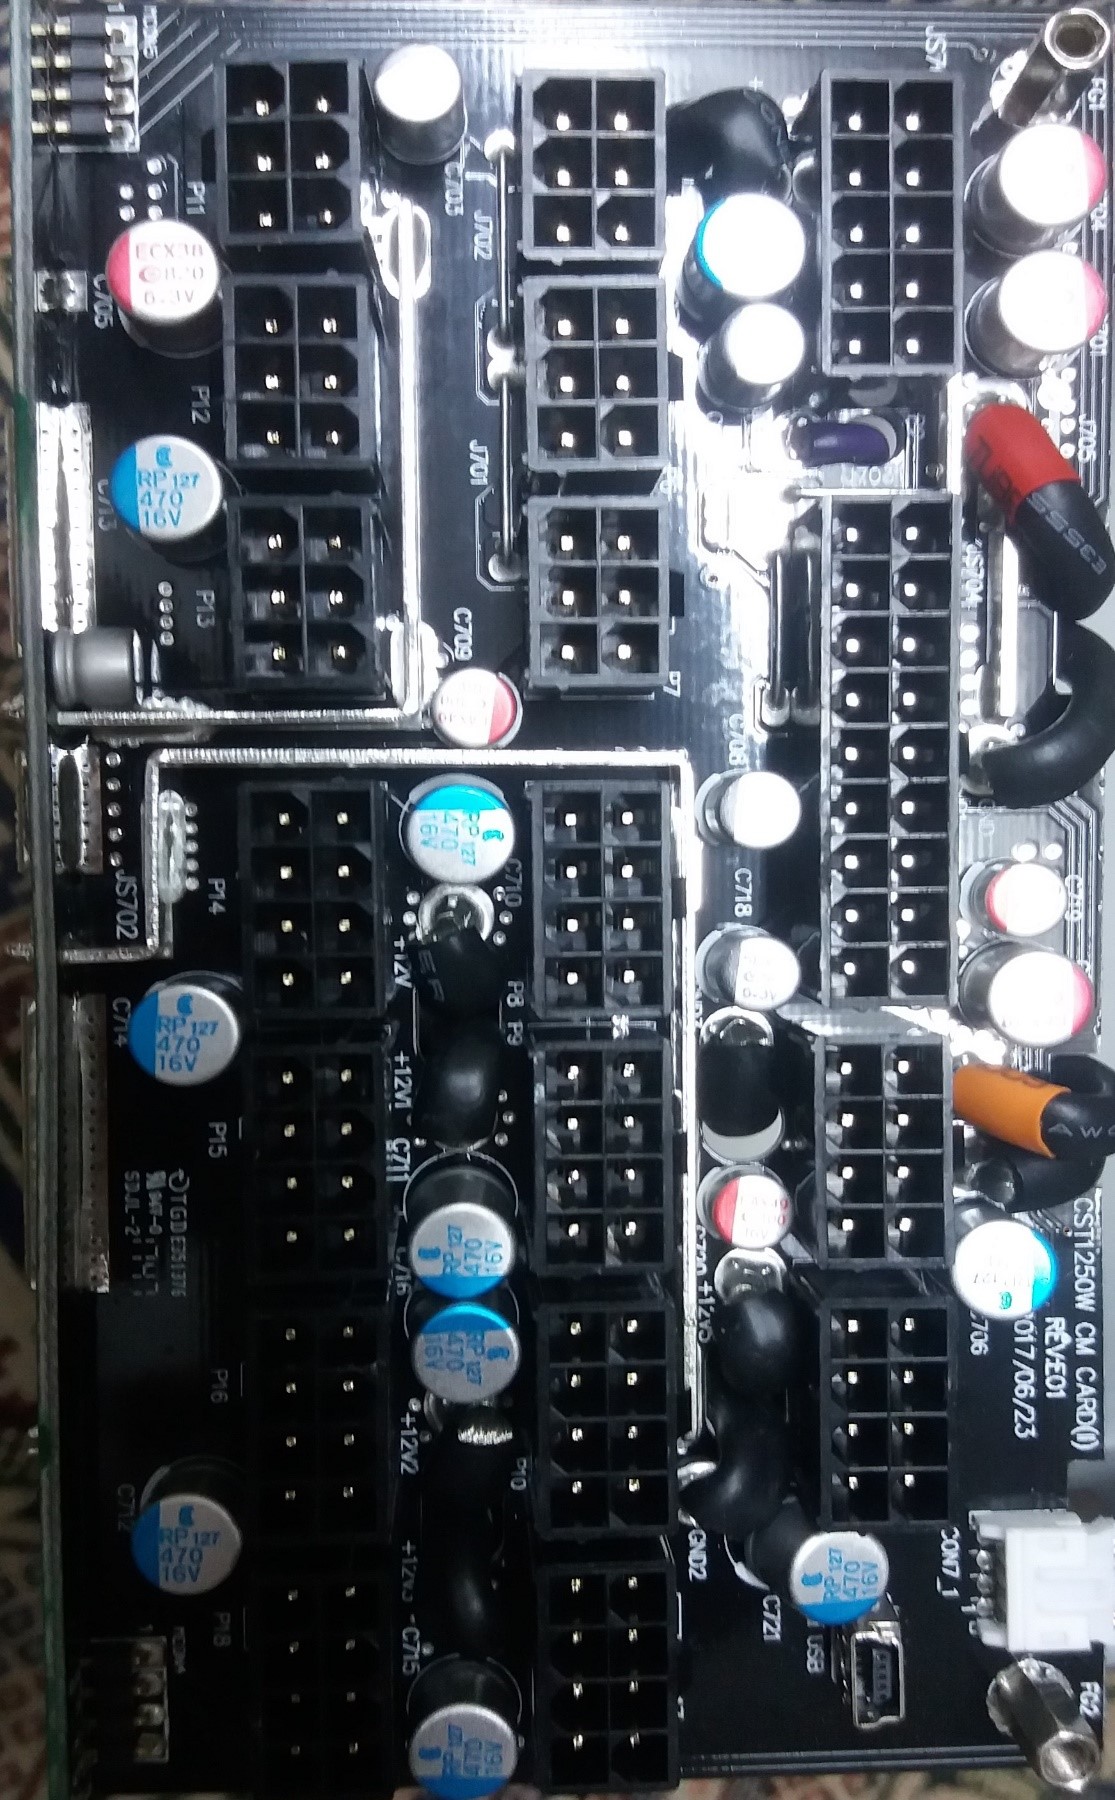
They are the same type of transformers used in the other power supplies of Thermaltake. Just after the transformers are the DC-DC VRM that is housed on an add-in PCB. Another add-in PCB is used this is the LLC converter board. In this area, we also found scattered Apaq solid capacitors with Nippon Chemi-con standard capacitors. After that comes the modular PCB which is very neatly and sophisticatedly manufactured, Apaq solid capacitors are also observed there as can be seen in the front view shown in below pic.
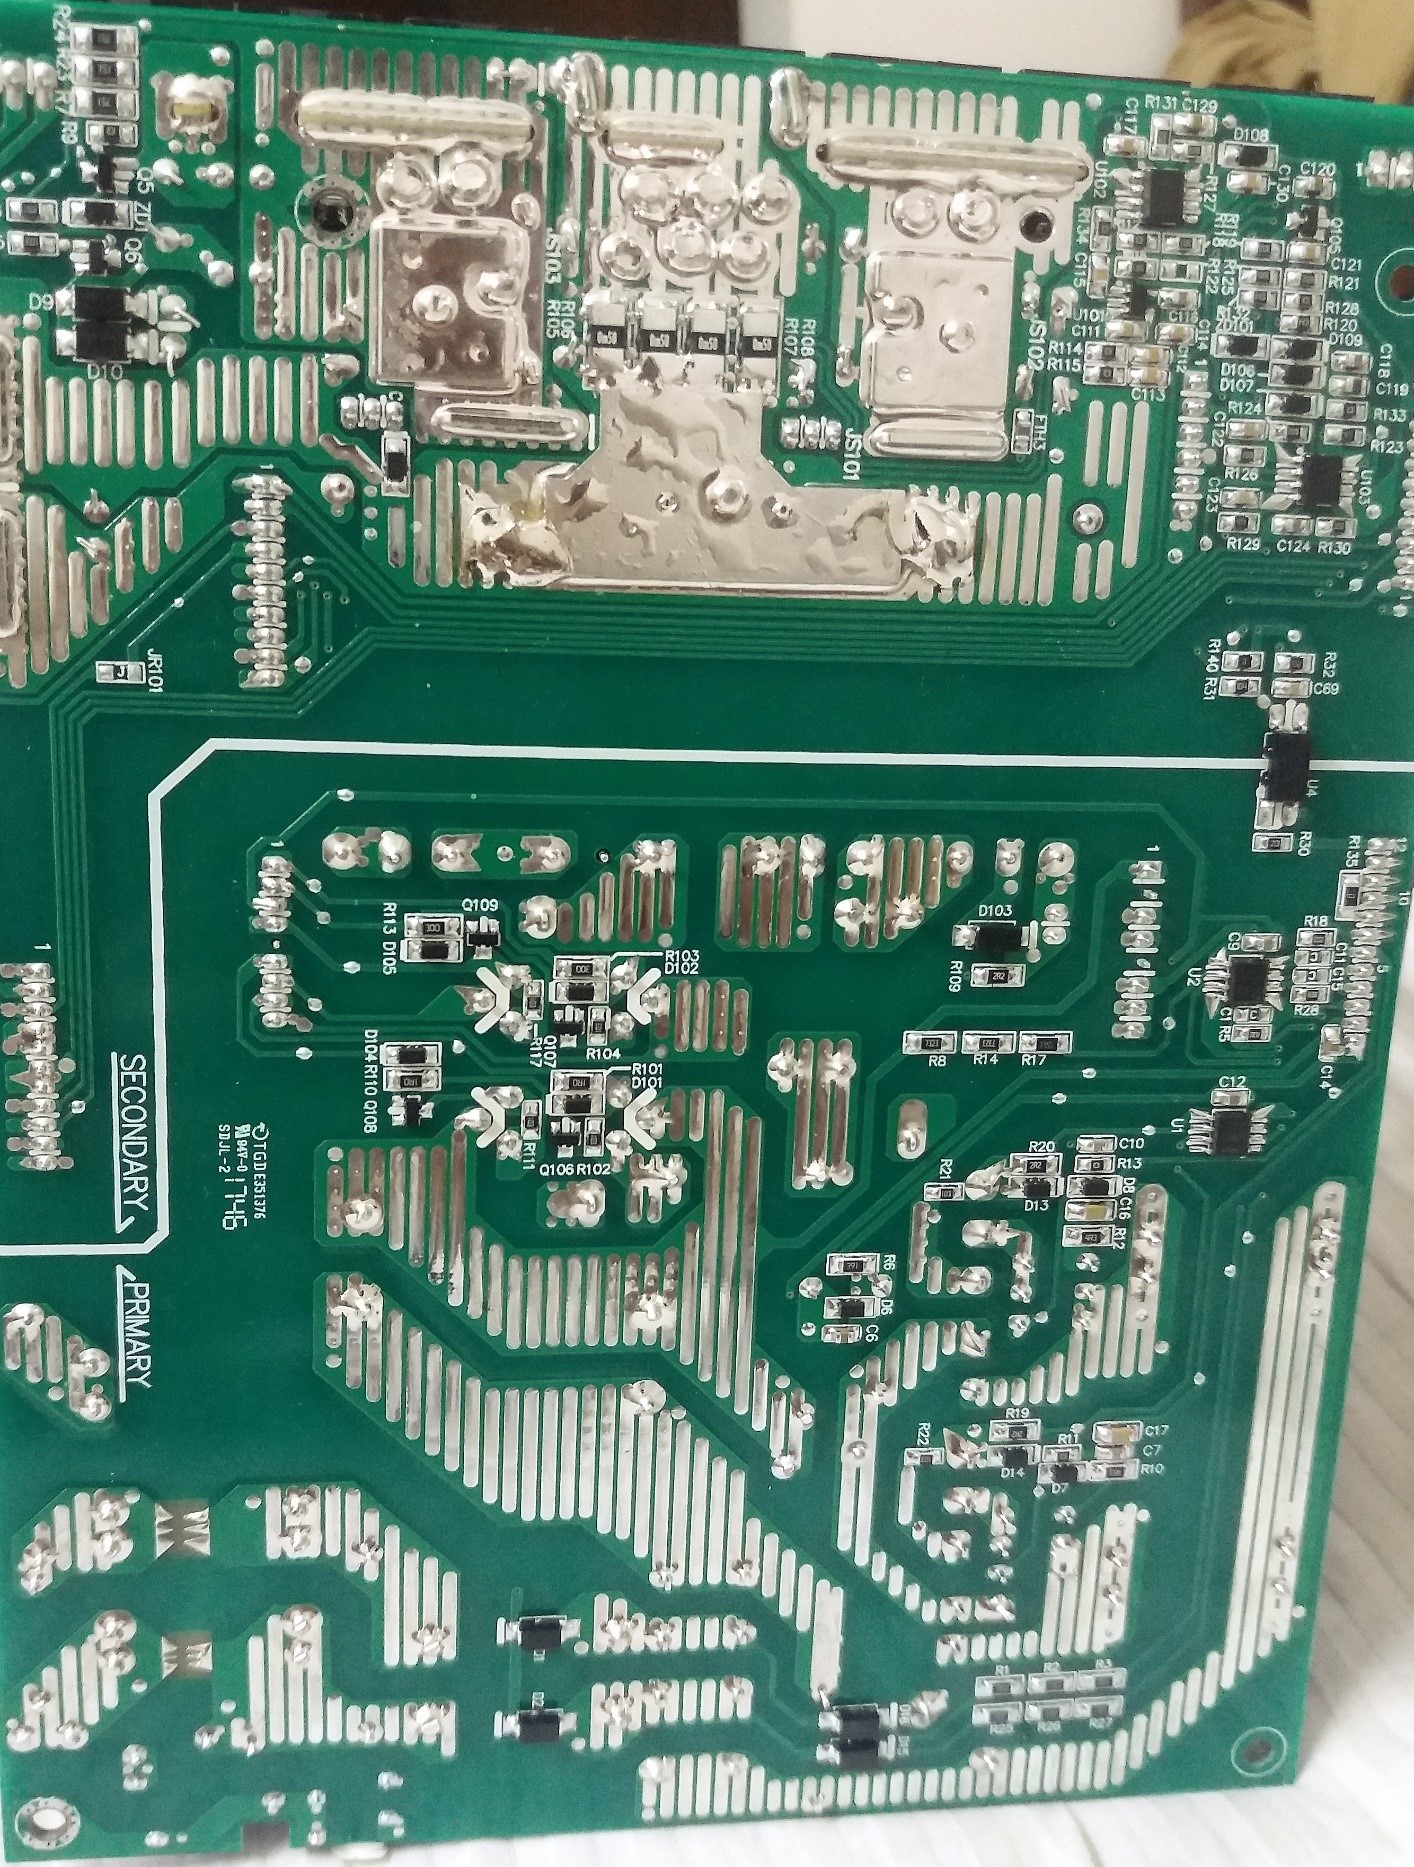
The overall quality of components used by Thermaltake is very good. Soldering of the main board as shown in Pic 10 is very neat and of the high quality. Cables are properly sleeved, however, more proper management of cables could be done. The input current rating of the power supply is 15A is quite high company should work to decrease the required input current rating to a reasonable optimal value. The overvoltage, Inrush current, and overcurrent protection are available. However, under-voltage passive protection was not observed.
Digital Control and SPMA
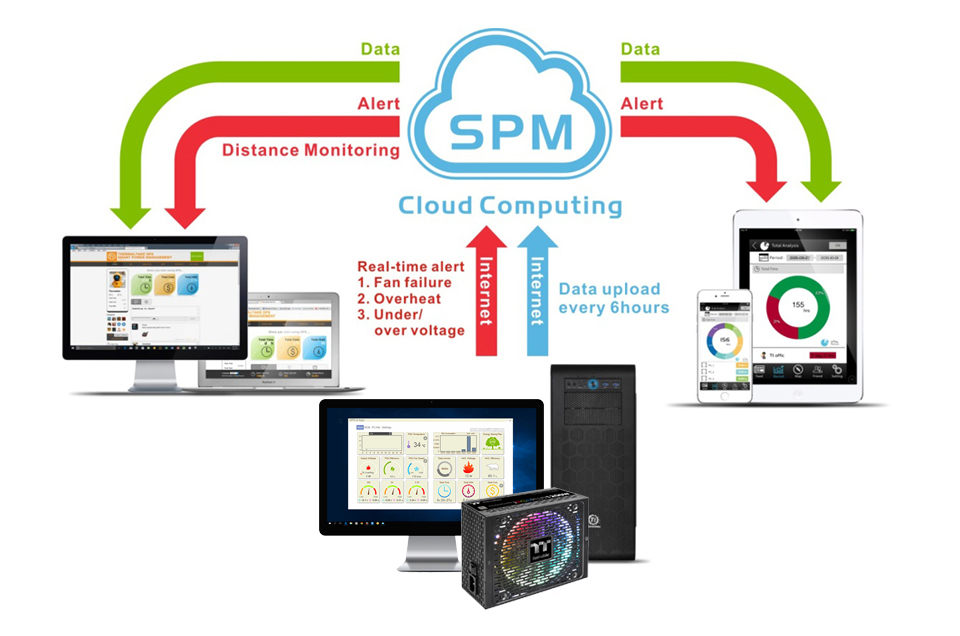
The core of the digital control on this PSU is a 32Bit Microcontroller Unit (MCU) from Microchip Technology. The 32Bit MCU is a small computer on a single integrated circuit containing a processor core, memory, and programmable input/output peripherals. Digital power supplies sports high-efficiency switching transistors that perform only necessary steps and waste less energy given off as heat. In this section, we will take a look at the Digital aspect of the power supply and see how the integrated approach under Smart Power Management could help the user take full advantage of the unit. The Smart Power management architecture followed by the Thermaltake Toughpower iRGB Plus 1250W is shown below.
The feature of Smart power management allows the user to monitor the real-time data of the supply at anywhere he is. The only condition is the connectivity with the internet using WiFi or SPM cloud. Moreover, the real-time data of the supply is consisting of fan failure, over temperature (over 140℉/60℃) and abnormal voltage level (over/under 5% of normal level) warning alert. Whenever any abnormal activity occurred the warning message is received on the registered mobile device and email. SPM mode not only allows the user to monitor but also control turn off the device. This is a very nice feature as when the warning is received we can turn off the computer and permanent damage could be avoided. SPM also includes the green energy concept as it allows the user to remotely shut down the computer when not working and so to save the energy and electricity cost. The user can also schedule the shutdown as well. Reports could also be generated in this mode. It is clear by now that the Smart Power Management Architecture is an umbrella of three independent yet connected sub-components which are PC Desktop App, Mobile App, and a Cloud-based management system. SPM support DPS G PC App, Cloud Management and DPS G Mobile App. DPS G PC App allows to monitor the PSU in real-time, Fan speed control, RGB LED control, Collect data and Warning alert. Cloud Management supports ECO report, Energy consumption report, Energy saving plan, Efficiency/wattage user behavior report, and PC off Remote Control. DPS G Mobile App Support Data analysis, Warning alert and PC off remote control.
In order to fully monitor and control the various aspects of the power supply and the PC components, the user must have to connect the mini USB cable to the unit and any available USB 2.0 header on the motherboard. The DGPS PC App will automatically detect the unit and will allow the user to first time configure it. Your first step towards the SPMA is to connect the power supply with the USB header and to setup DPS G App. DPS G PC App can be downloaded from the Thermaltake website. Make sure to connect the unit with the motherboard before launching the DPS G PC app. The app will ask you to register yourself with the DPS G Cloud management system. This is to make an online account for the user. It is a mandatory step. Once you are registered, the app will ask you to input the serial no of the PSU. This is somewhat confusing as the app will automatically detect and show the entry part of the serial no like in our case it was PSTPI1250D. Remaining part of the serial no is to be entered in a trailing text box. Serial No sticker is pasted on the main packaging box and on the info label of the unit. Once, the unit is registered, the app will show its complete serial no under the Settings tab.
DPS G PC App
Let’s start with the overview of the DPS G PC app. Thermaltake has redesigned the user interface of this app. This interface is effective and user-friendly as compared to the previous versions and Thermaltake has definitely put the things into meaningful perspective though there are still some things that I would like to see done in this app for further refinement. The main interface has Thermaltake premium brand logo and name printed on the top bar. Note that there is no maximize button on this app which is strange. Also, the user can’t resize the window of the app which should have been provided. There are four main sections of the App namely; Main, RGB, PC Info, and Settings. Let’s briefly discuss each and see what Thermaltake is offering to the user to monitor and control the PSU.
Main Section
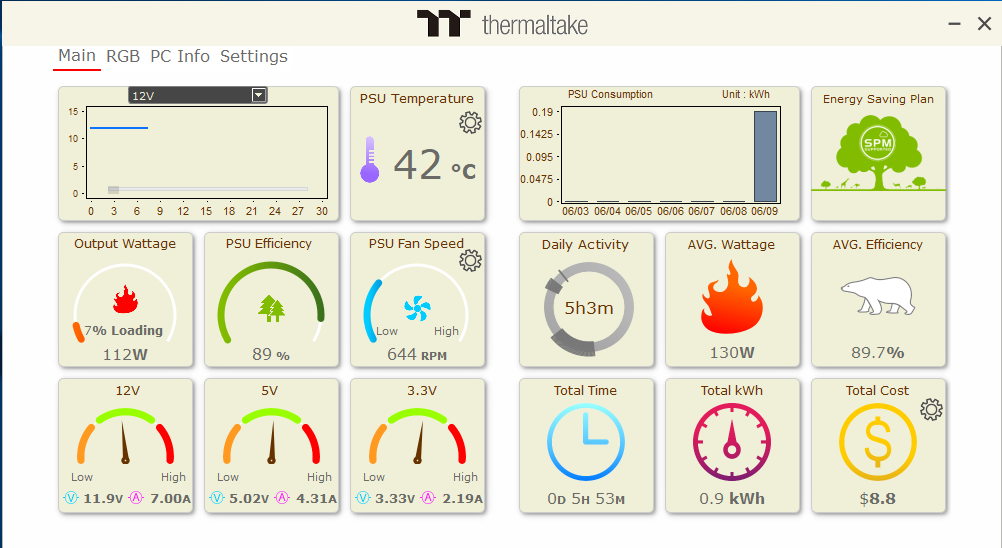
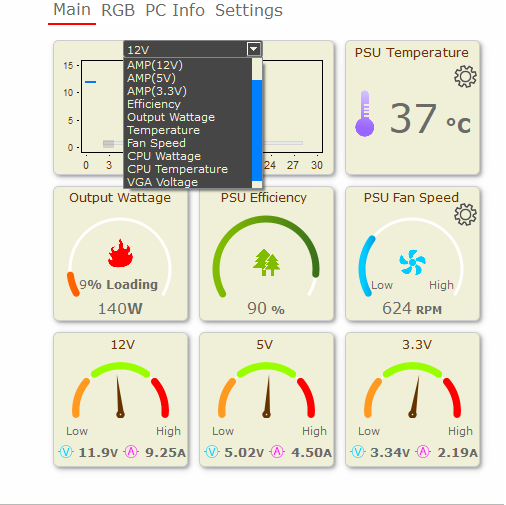
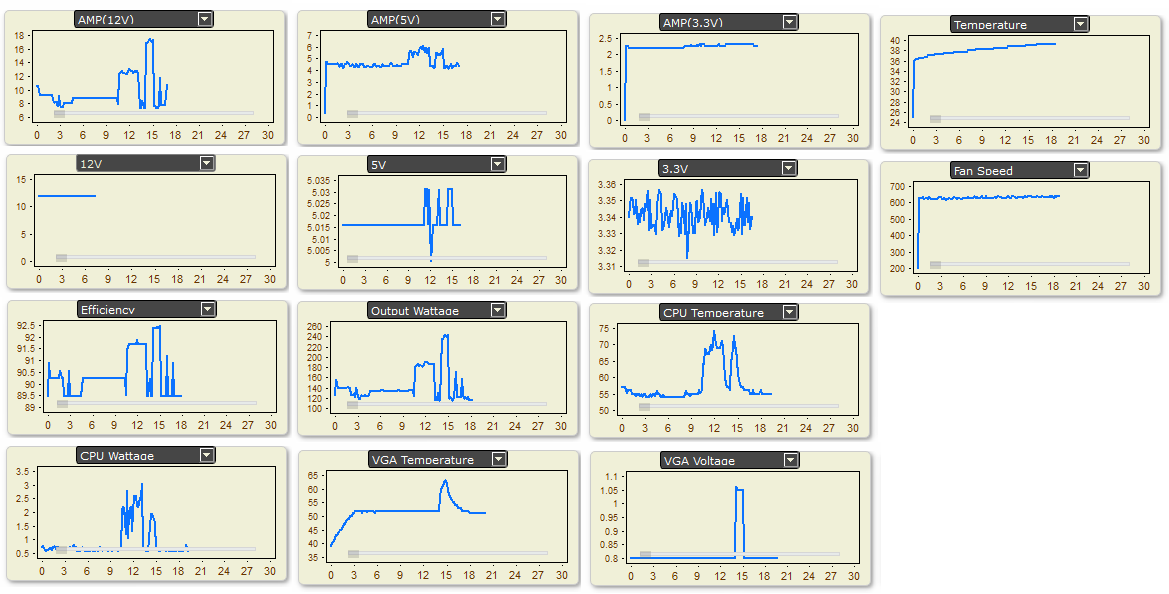
The main section of the app is where all the monitoring aspect is done. It has two sub-sections. The one on the left side has 8 sections reporting various readouts and control options. On the top, there is a graph with a drop-down combo box. The Dropdown Combo box has these options:
- 12V
- 3V
- 5V
- Amp (12V)
- Amp (3.3V)
- Amp (5V)
- Efficiency
- Output Wattage
- Temperature
- Fan Speed
- CPU Wattage
- CPU Temperature
- VGA Voltage
- VGA Temperature
The user would have to select a parameter from the drop-down combo box. It will show the graph of the recent activity against that parameter. For instance, the graph for 12V will show the activity in terms of Voltage readouts over the course of time. Same goes for 3.3V, and 5V graphs. The graph of Amp (12V) will show the current readouts of the 12V rail over the course of time. In this case, it was 17A maximum as indicated in the graph. Same goes for the Amp (3.3V) and Amp (5V). Output Wattage graph will show the output watt that the unit has provided to the PC over a course of time. The user will have to use the graph to determine the minimum and maximum values. These could have been provided by the software as well which really would be a nice feature if added. Similarly, VGA Voltage and VGA Temp will show the voltage readouts of the graphics card and temperature readings during a course of time. It is best if you put the PC under some load for some time and then check the graphs for better understanding. CPU Wattage will show the variation in the Watts of the CPU over a course of action. I was unable to determine the unit being used on the graph to display the CPU Watts. CPU temperature graph will show the CPU temps over a course of action. Its unit is °C. I wish these graphs could have been shown separately in maximized format when clicked upon.
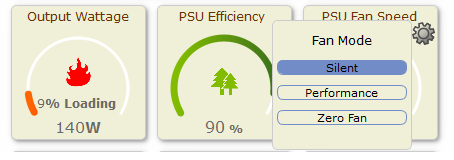
Next to the graph tile, there is a tile for the PSU temperature that will show the current temperature of the PSU. User can change the measurement unit by clicking on the settings Icon. Available options are °C and °F. Below that, we have a tile for output wattage that is showing the load on the unit in percentage and current power being used by the PC in terms of Watt. Next tile is PSU efficiency that shows the current power efficiency of the PSU. It will change subject to the load. Next tile is PSU Fan Speed. Speed is reported in terms of RPM from Minimum to Maximum on the displayed line. Following profiles are available at the user discretion:
- Silent
- Performance
- Zero Fan
By default the fan will not spin unless there is a 50% load on the unit or the temperature increases to certain level. Please, note that unit will take over the Zero Fan profile in case the temperature of the unit increase to high level. On bottom, we have three bars for the voltage readouts. First one is for the 12V. The visual indicator is designed to show the voltage reading from low to high on the graph with high being shown in red color and low being shown in the orange. Mid is in green color. There are Voltage and Ampere current/present readings on the bottom as well. Same design approach is followed for the 5V and 3.3V bars.
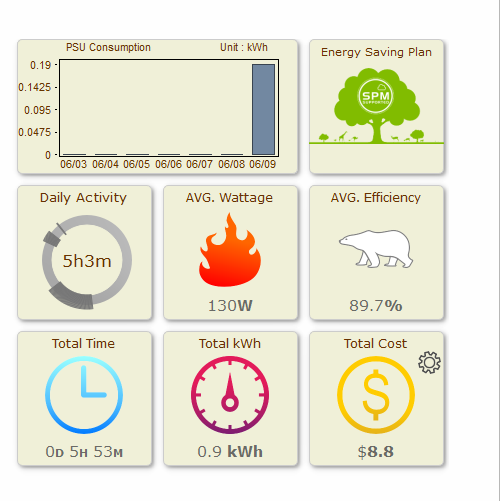
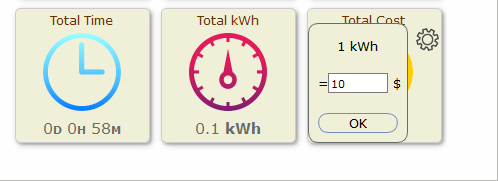
As we have taken a look at the first part of the Main section, it is time to take a look at the second part. It also has 8 bars or subsections. The top one is a graph that shows the power consumption of the PSU day wise. The reporting unit is KWh. In order to have better idea of this section, it is suggested to use the PSU for some days and put load on it. That would make this section interesting and better readable. The tile next to the graph is Energy Saving Plan. Clicking on it will redirect to their dps.thermaltake.com website. Daily Activity tile will show the activity level of that day by grouping them. Next tile will show the Average Watt so far over the period of time. Average Efficiency will report the average of the efficiency over the period of time. Total time will show the time used with this PSU. It is in Day, Hours, Minutes format. Next tile will show the Total power that has been consumed in KWh format. The last tile is Total Cost that will show the user the total cost of electricity that this particular PC has consumed during the period of time. There is a setting icon on this tile. Click on it. It will open a new window where the user will be able to define the electricity rate in terms of $ per KWh. Default is 10 which I did not change. Also, there is no way in this app to change the currency which would have been a nice option for sure.
Next section is RGB which we will take a look at, later.
PC Info Section
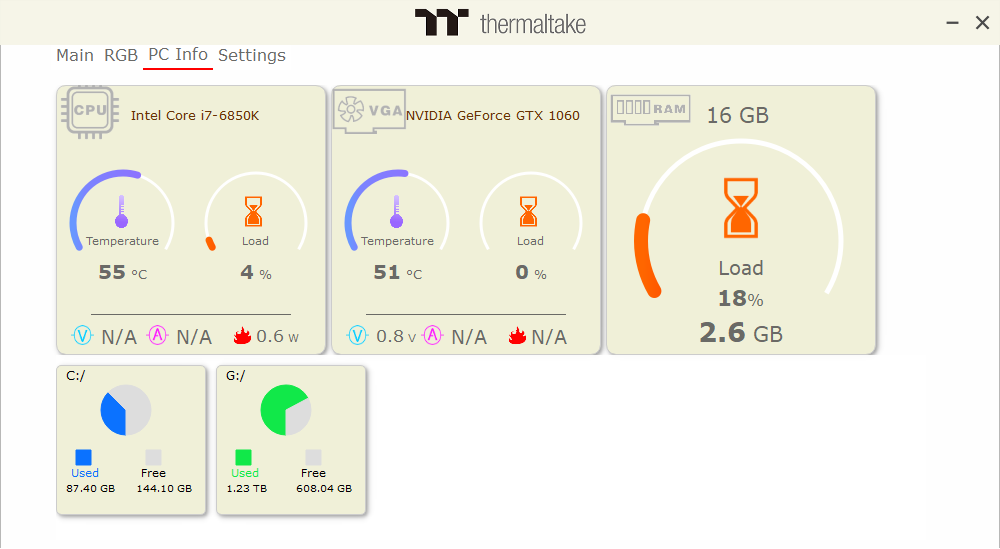
In this section, the summary is shown to the user. This section summarizes the CPU, Graphics Card, RAM, and Storage Drive(s) information for the user. CPU will show the model of the chip which in my case is Intel i7 6850k. We have two visual indicators. One shows the temperature of the chip and the other shows the load on the chip. Unfortunately, the reported temperature for the chip under the load was not accurate and other applications (AIDA64 and RealTemp) were showing the temps to be 38°C. On the bottom of this tile the Voltage (V), Current (A) and Power (W) information is shown. All were missing for my CPU. Next is the Graphics Card information. On top it shows the model of the card which in my case is Gigabyte GeForce GTX 1060. Seems like app can only distinguish between the OEM of the chips i.e Nvidia and AMD. Visual indicators show the temperature and the load of the card. On bottom, we have Voltage reading which was being displayed as 0.8V. The Current (A) and Power (W) readings were not displayed. Next is the RAM information area. It shows the total capacity of the installed RAM on the top. The visual indicator shows the usage of the RAM at the moment in %age as well as used RAM in GB unit. Last it will show the storage drive(s) information individually. It does not report the make and model of the storage drive(s). We have C: Drive info with visual indicator showing the used portion in blue color and free portion without color. On the bottom, it shows the legend for the visual indicator. Blue color box is for the used portion which is mentioned to be 87.40GB and free space is 144.10GB. Same goes for the G: drive.
Settings Section
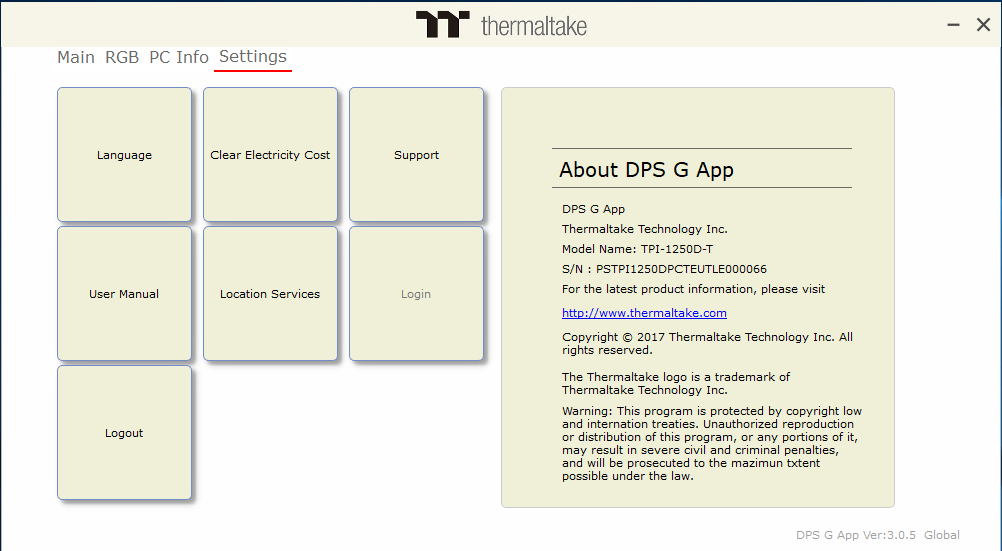
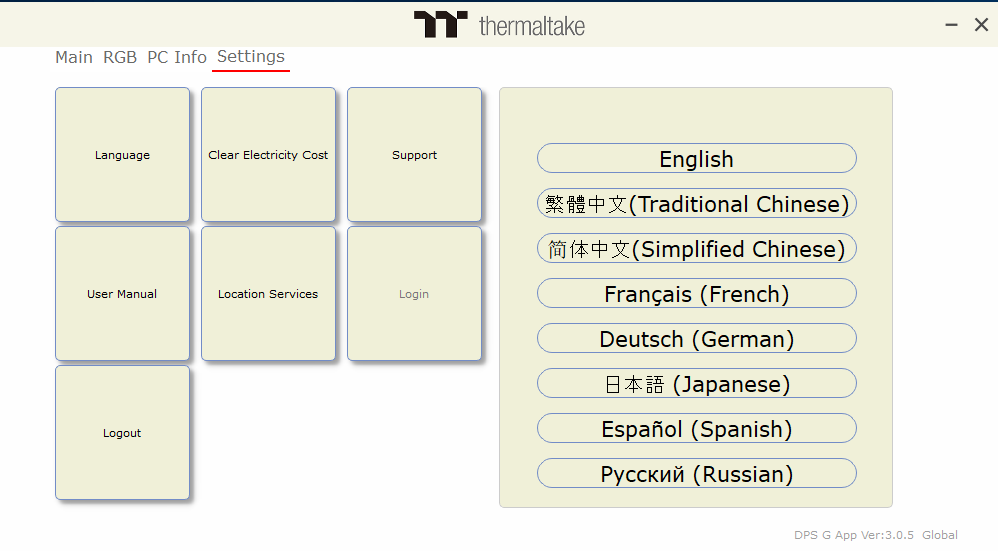
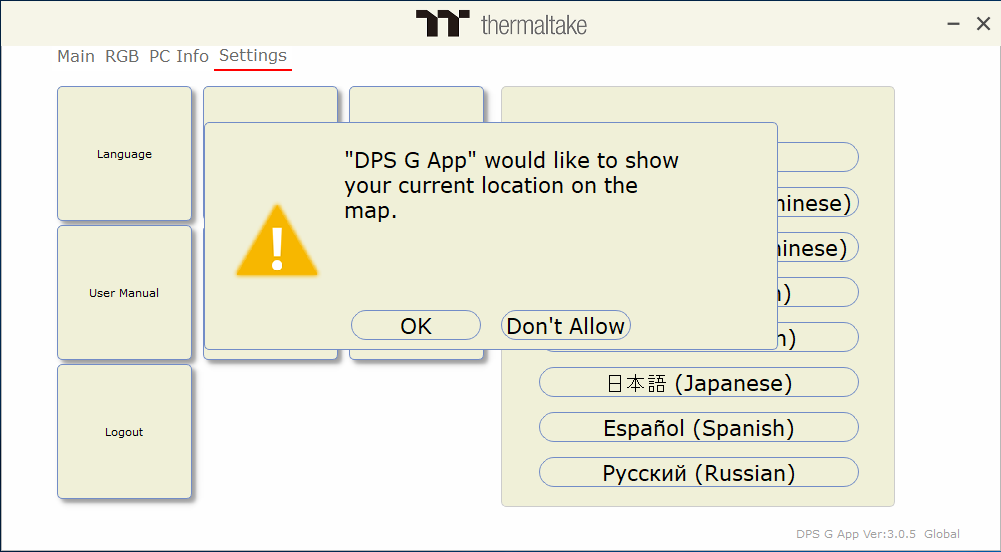
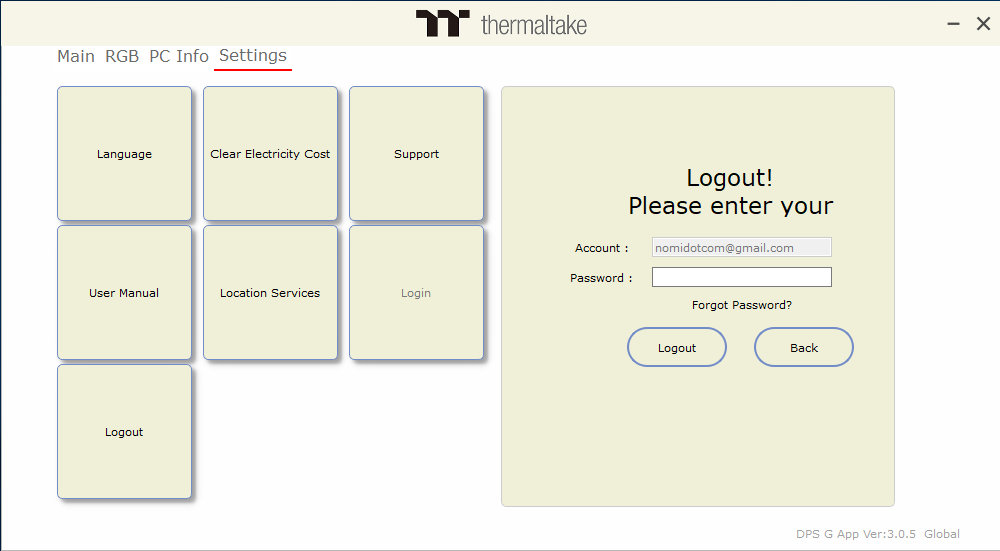
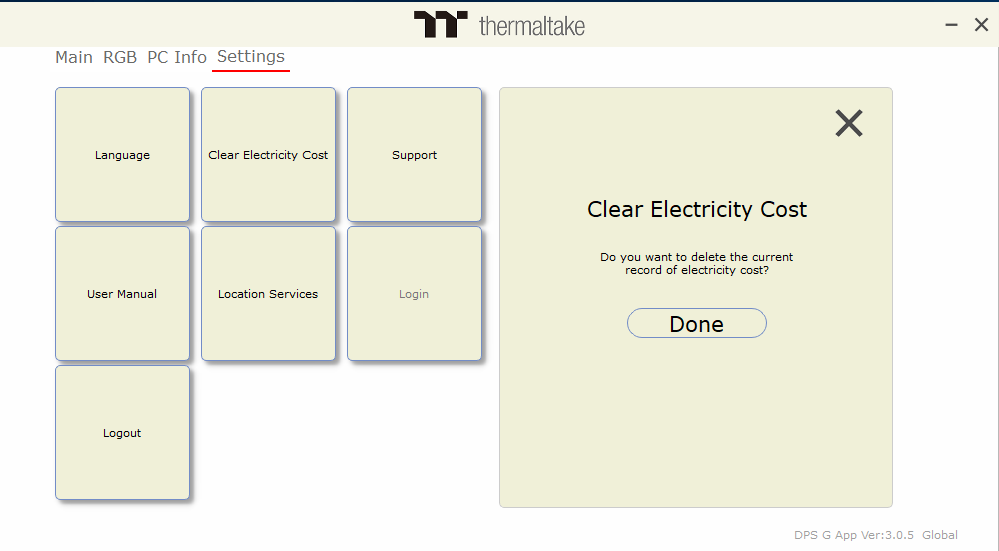
This is a configuration area of the DPS G PC app. Clicking on the language will show a list of languages. Language can be chosen from the list. Click on Clear Electricity Cost will clear the calculated electricity cost so far. The app will prompt the user to confirm the action. Clicking on Support will redirect to their website with the respective web page that can be used to contact technical support of Thermaltake. Clicking on User Manual will redirect to the online PDF use guide at their website. That user guide has not yet been updated and is showing the interface of this app’s previous version. Location Services will let the user configure their current location to be shown on the Google Map. This is optional and the app will ask if the Location is to be allowed or not. Next is a Login tile. If you have already login to the app for the first time then this will be grayed out. Otherwise, click on it and enter your credentials to log in. Click on Logout if you want to. The app will ask for the password before logging you out. This is a safety feature in case PC is being shared by multiple users. The right side of the window is showing the About information of the DPS G app. It will also display the complete serial no of the unit.
DPS G Mobile App
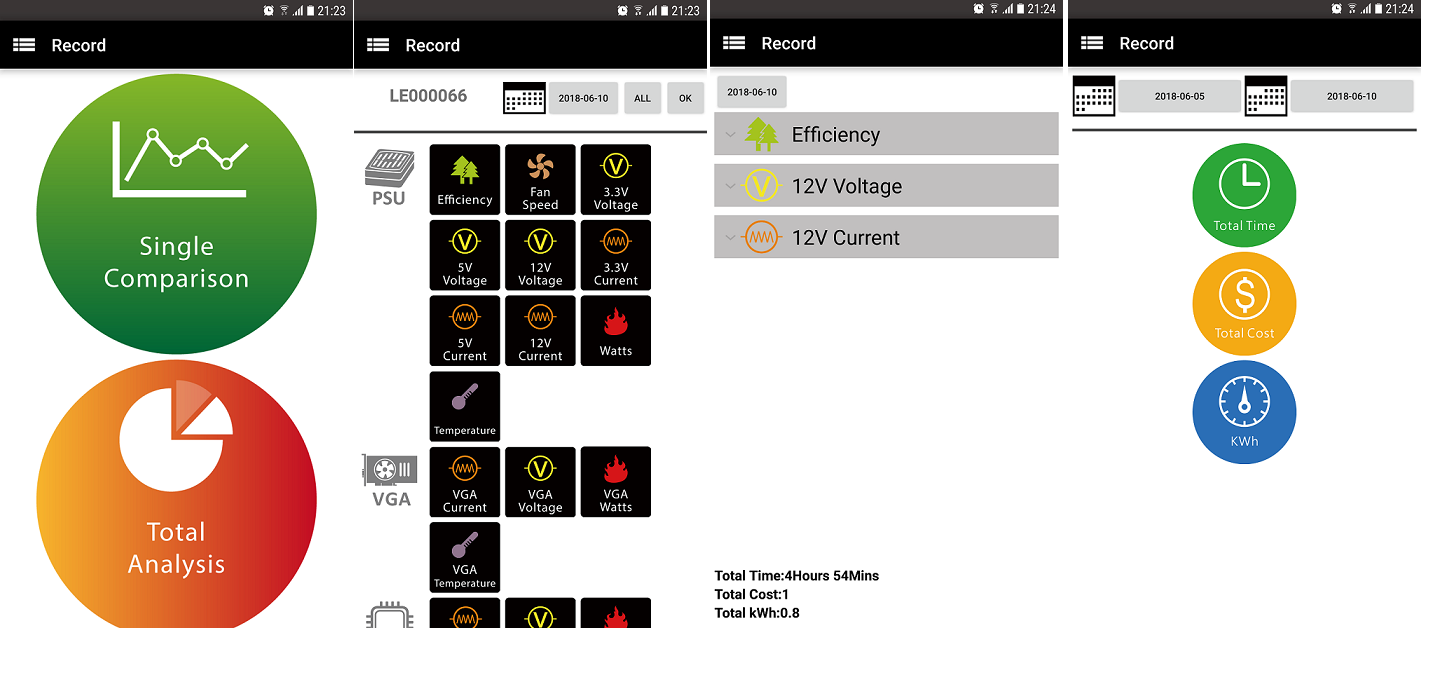
This was about the DPS G PC app. Let’s take a look at their DPS G Mobile app. You can download the app from Google Play Store. I have tested the app on Samsung Galaxy S7 Edge hence mentioned about the Google Play store. Unfortunately, this app is buggy and it was continuously crashing. After several attempts I got it to work. It has a simple interface. The menu has the same options as is on the DPS G PC app and Cloud management. We have following menu:
- Record
- Remote
- Feed
- RGB
- Map
- Friend
- Settings
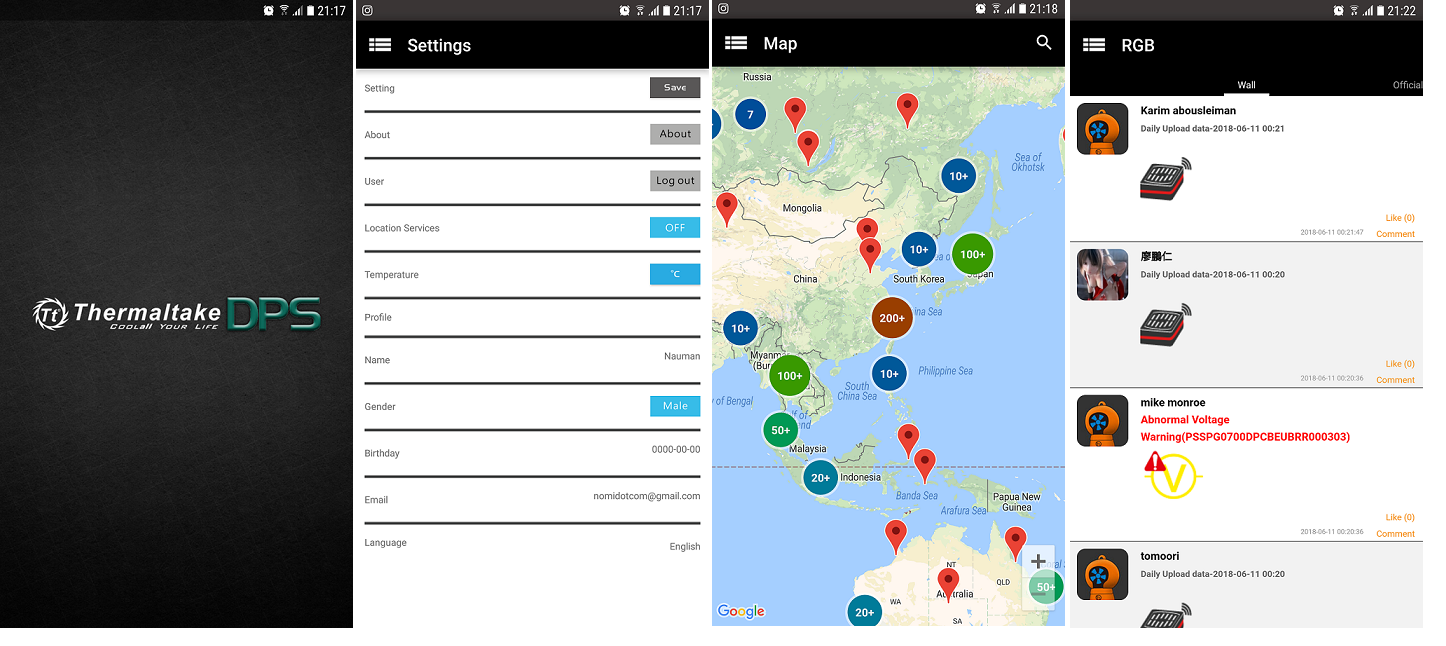
The application will ask you to provide login credentials before using the app. The Record is a default menu option. The Setting option will show the login user information and let the user to define certain settings like changing the preferred unit of thermal measurement from °C and °F and enabling/disabling the location services. It will show the username, email address, gender etc. Once, you have made some changes, tap on the Save button at the top to save the changes. The Map will show the Google Map with other users on it. It will also display the no of users in various regions/areas as well. The Feed option will show the Feed from the Cloud management services with users’ status updates. The Remote option will let the user to remotely restart or shut down the PC.
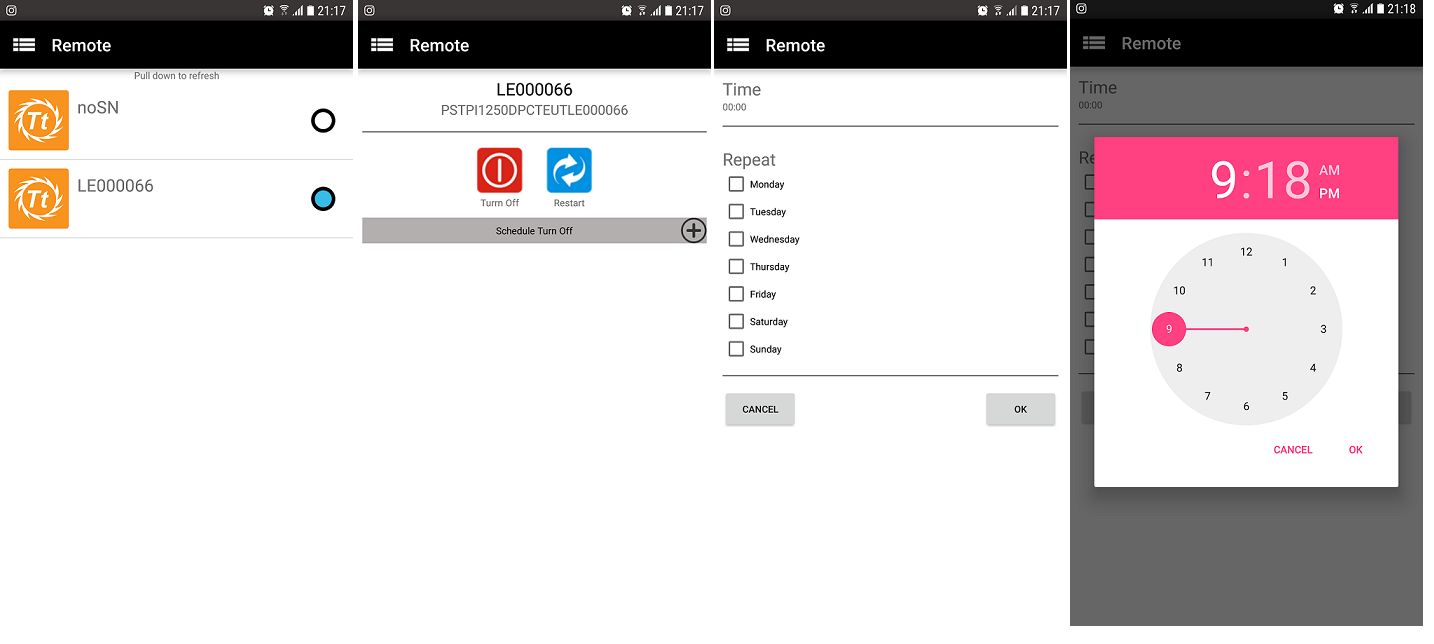
Click on Remote from the menu list. It will show you the connected devices by using their serial no. If the device is not present, simply pull down the screen from the top and raise your finger to refresh the list. The connected devices will show up. Tap on the desired device and it will show the further options. There will be a complete serial no printed on the next screen. There will be two icons in this window. The red color one is to shut down the PC and the blue one is used to restart the PC. On the bottom, we can see one more option which is Schedules Shut Down. Click on the + button to see more options for it. Next window will show the Time and Repeat options. Tap on the time area and it will show a clock that can be used to pick up a time. Tap on the days if you want to and it will mark the PC to be powered off on the selected time and days. This is definitely a handy feature.
Also, Notifications are received automatically on the app. In case the unit is getting into some trouble, it will send a notification to your mobile device showing the cause of the issue and you can instantly turn the unit down remotely. This is designed for a case scenario where your system is up and running and you are not around. Mental peace is the two words that would best describe the user convenience in this functionality. Tap on the Record menu to show the next window in which you can have Total Analysis of the unit or a single comparison. Clicking on it will show the further options to be selected from like, Voltage readings, Current on voltage rails, the temperature of the CPU, GPU, Output Wattage, Efficiency etc. The user can select as many parameters as he/she would desire or alternatively, can select all parameters. It will take you to the next window with the list of the selected parameters. Tap on any and it will show a graphical presentation of its data. Unfortunately, I could not get any data as the app was continuously crashing as soon as I tap on any parameter.
Cloud Management Service
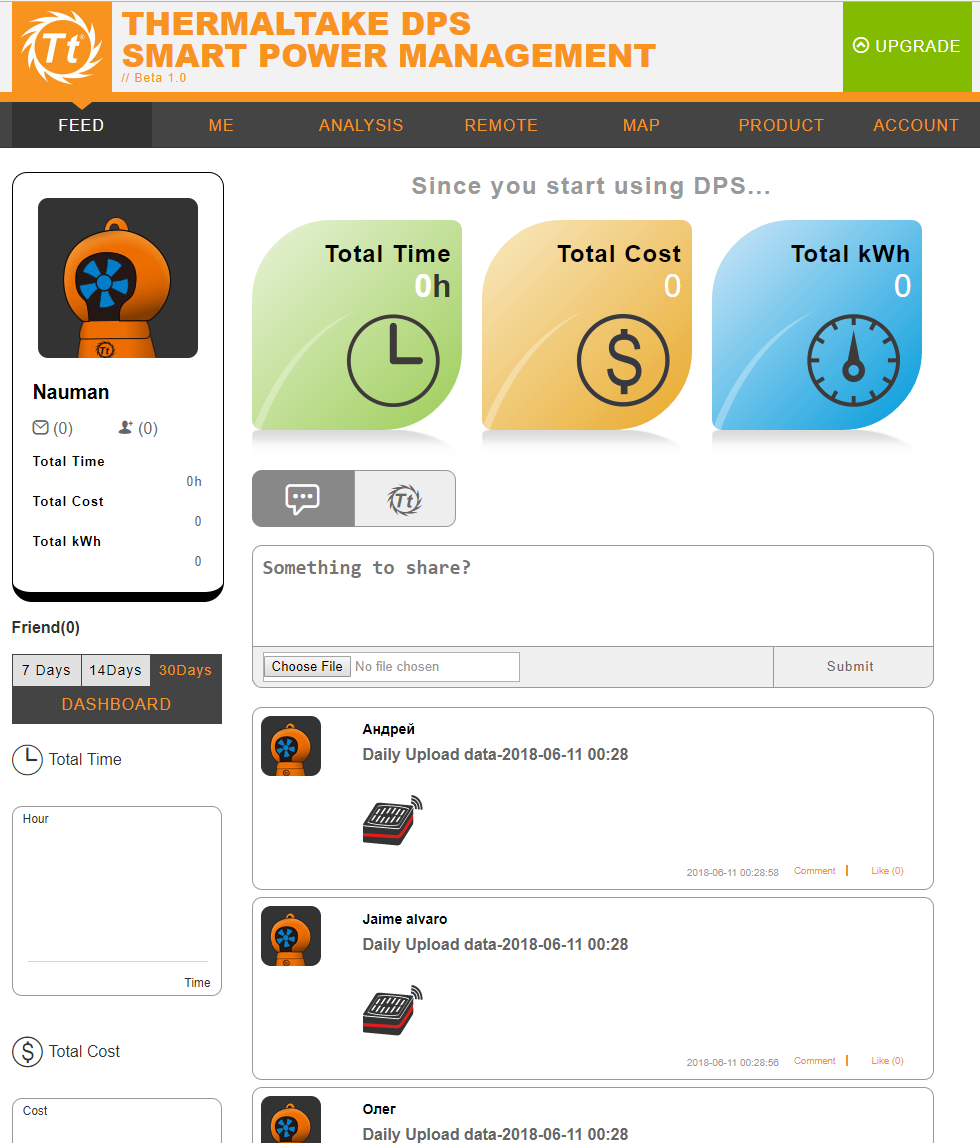
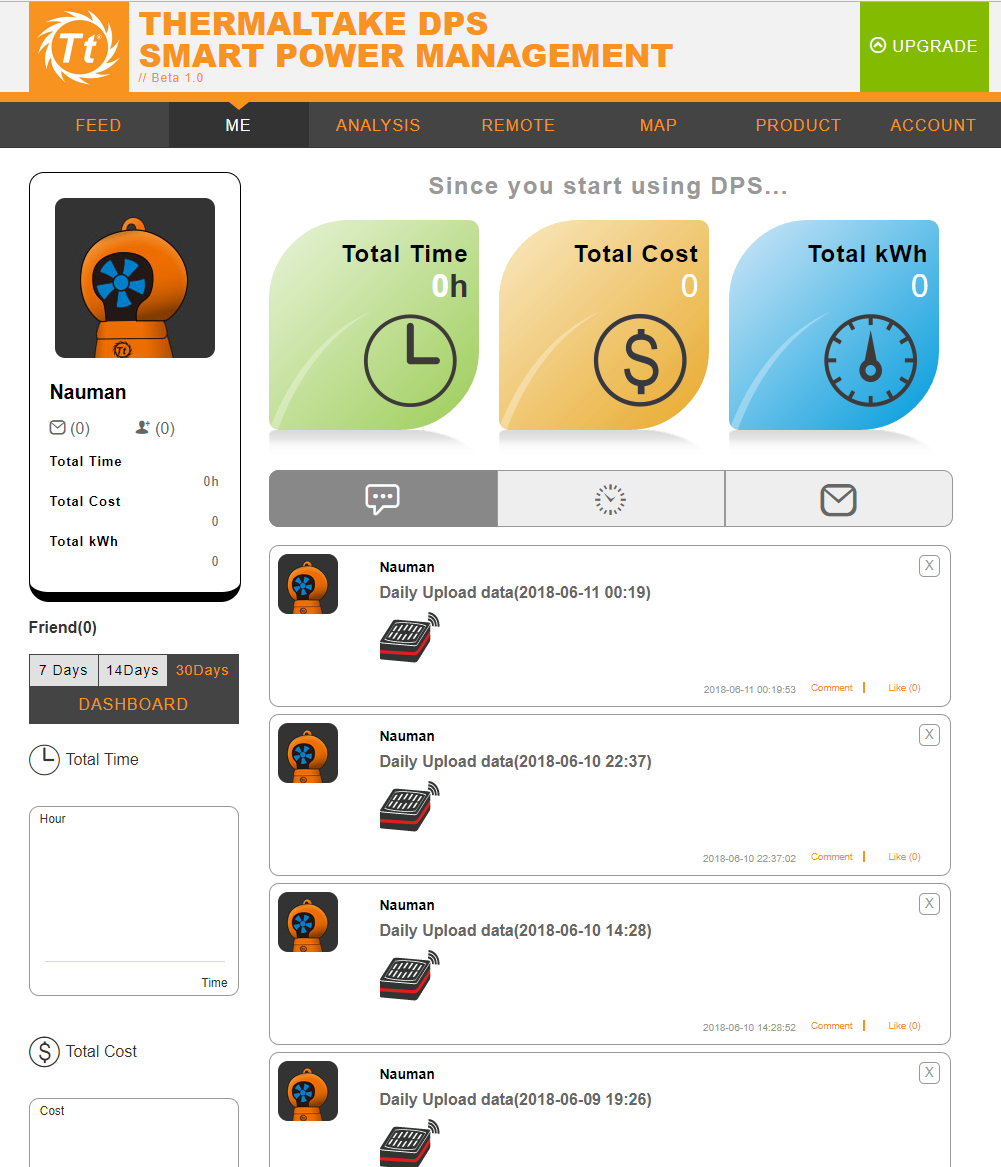
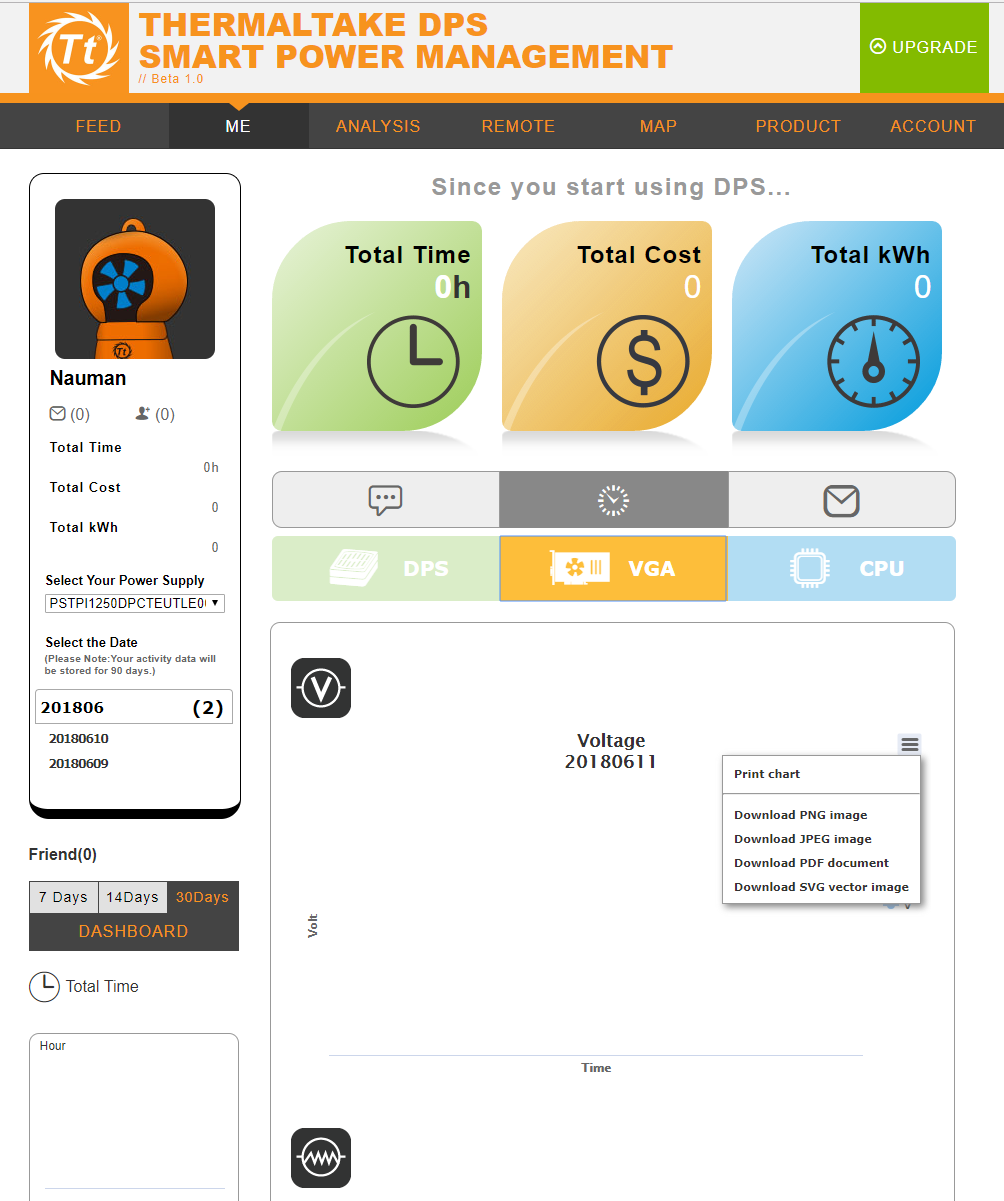
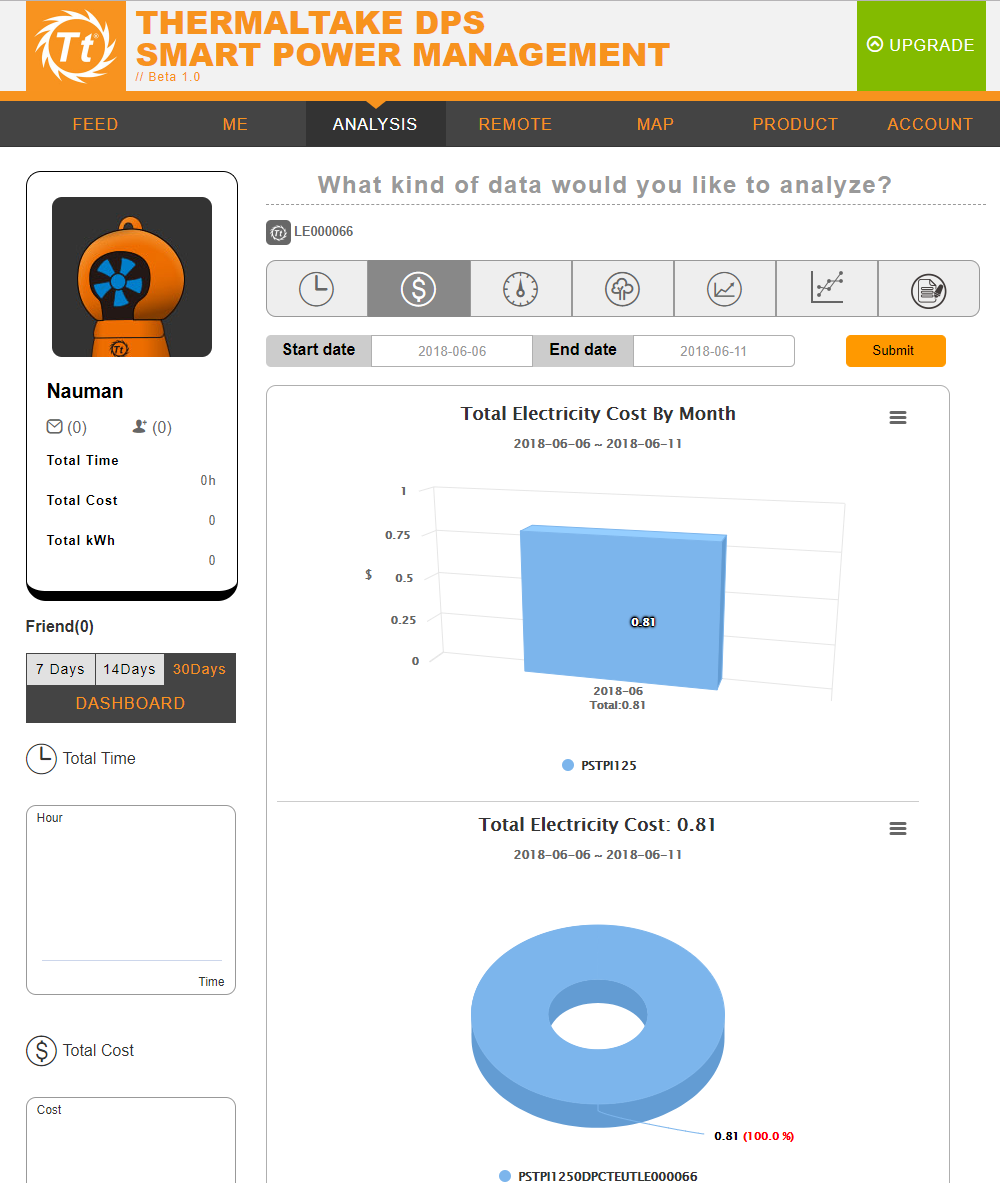
The Cloud management service is what is sitting in between the DPS G PC and Mobile apps. The data from the DPS G PC App is synced on the cloud from where it is accessed by the mobile app. User can access this service by going to dps.thermaltake.com. It will ask the user to get registered. If you have not done it already, do it now to proceed further with this interface. Interface is simple and convenient. Once, the user is logged in, it will take the user to Feed’s page. This is like a Dashboard area with summary of power consumption in terms of Total Time, Cost and KWh. You can also share an update post on the feed. It is like a community’s social interactive place. Daily uploads are the default behavior of the DPS G apps. The app will upload the daily data from to the cloud. On the top there are more options to navigate through. Clicking on me will simply change the Feed from public to the logged in user’s only posts. Rest of the Dashboard information will remain the same. Clicking on the time clock icon located right next to the message icon above the news feed, user will get more options to generate reports about various parameters. We have DPS, VGA, and CPU options. Clicking on any will show corresponding parameters against which graph can be obtained. There is an icon on the right most side of the parameter. Clicking it will let the user to print the chart as well download the graphs in various picture formats and PDF as well.
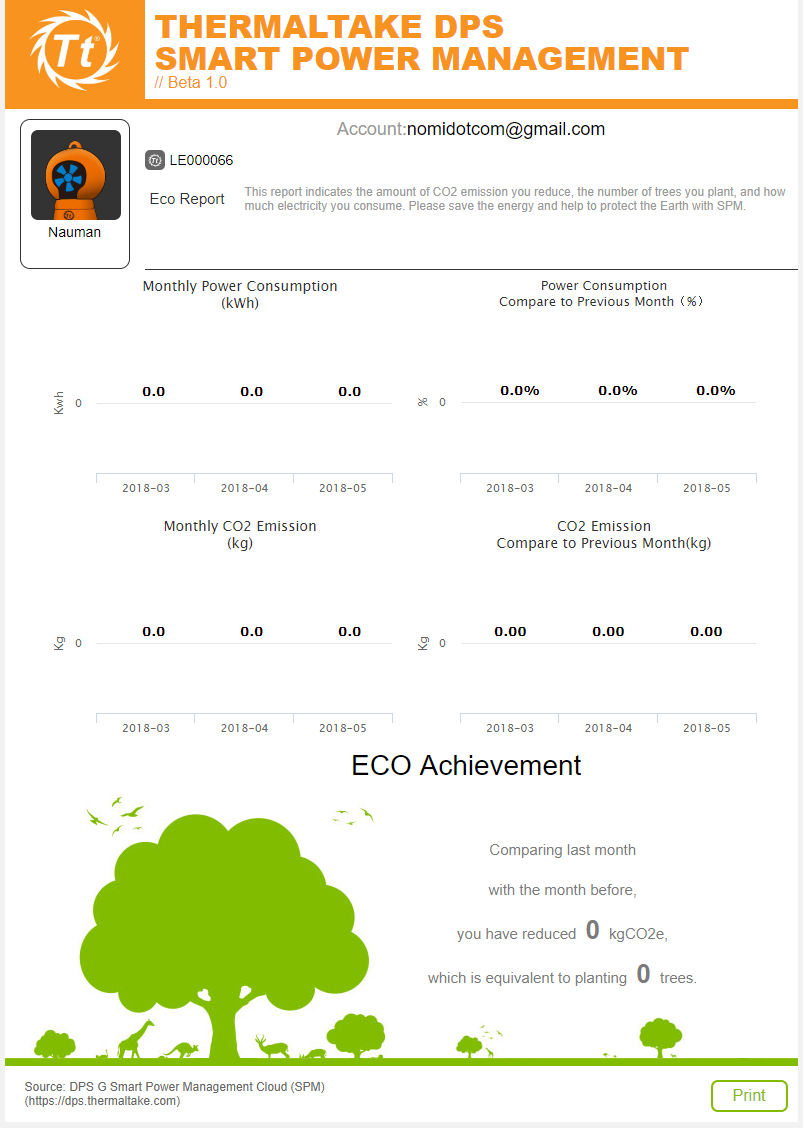
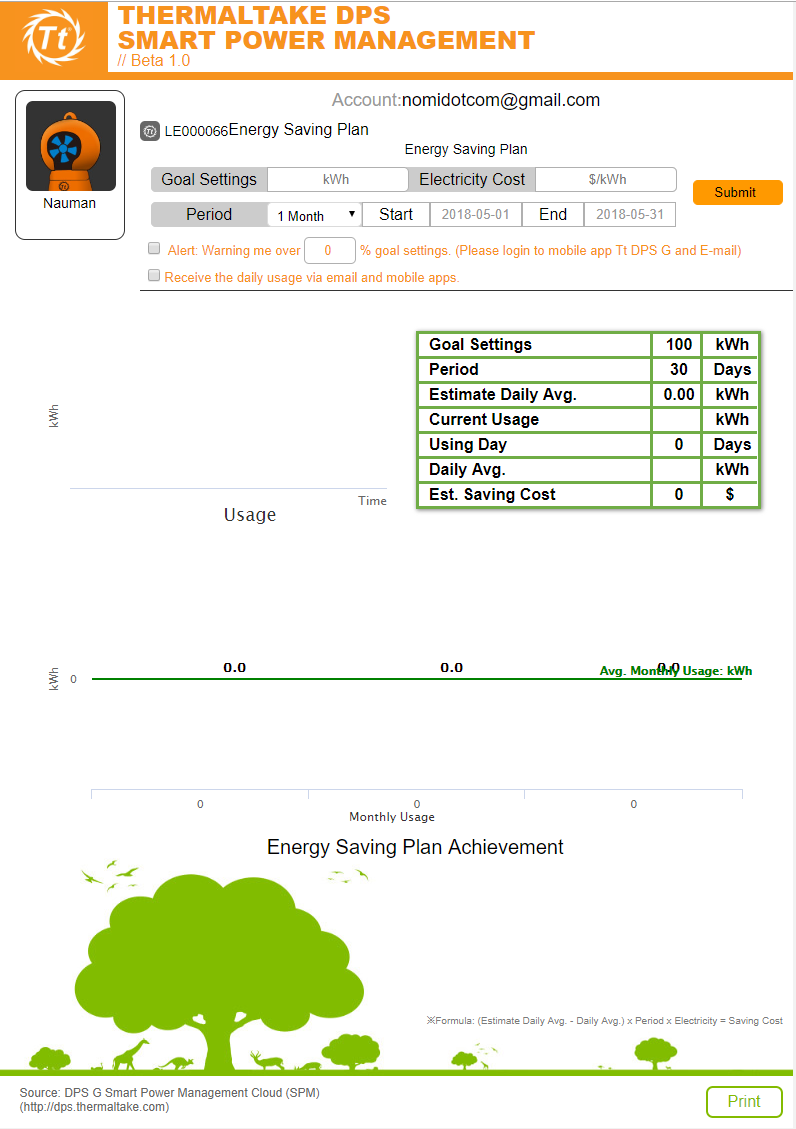
Next, in the menu is Analysis option. Clicking it will show multiple icons. Each has its own parameters and the reports accordingly. These include:
- Total Time
- Total Cost
- Total Watt
- Eco Report
- Energy Consumption Report
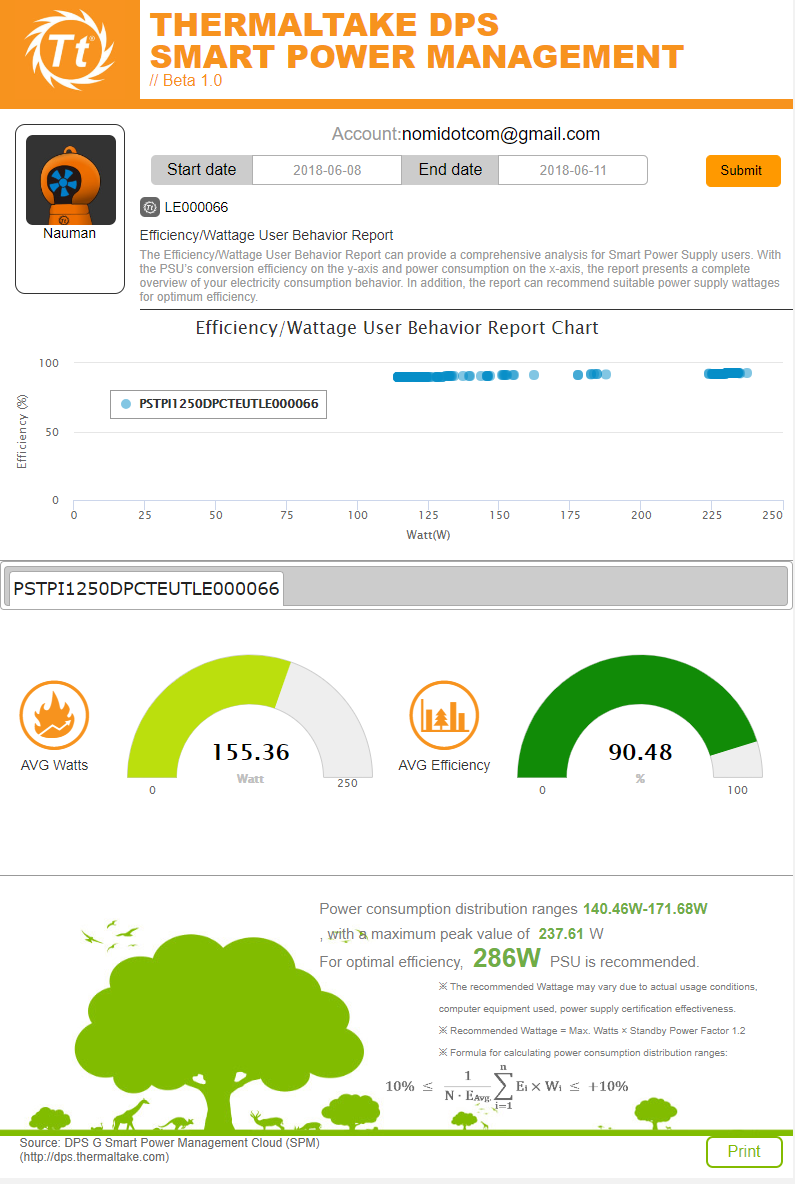
- Efficiency/Wattage User Behavior Report
- Action Plan for Energy Saving Report
The Eco Report will compare the energy consumption of the previous month with the current month and will report to the user about their contribution towards reducing CO2 emission. Idea here is to save energy, help by planting more trees to help protect the earth. The Energy Consumption report focuses on five aspects;
- Total Time
- Total Cost
- Total KWh
- Average Watts
- Average Efficiency
This report is generated for the user given time duration. Next, the report is Efficiency/Wattage User Behavior Report can provide a comprehensive analysis for Smart Power Supply users. With the PSUs’ conversion efficiency on the y-axis and power consumption on the x-axis, the report presents a complete overview of your electricity consumption behavior. Ultimately, this report recommends suitable power supply wattages for optimal efficiency. In my case, it suggested 286W for optimal efficiency. Next option in the main menu is Remote which will allow the user to restart/power off the unit remotely. The registered devices are displayed by their serial no. There are three icons in front of each serial no. Red color icon is to power off the unit. The blue color icon is to restart the unit and green color icon with the calendar is used to schedule power off. Map will show the Google map showing the no of users in various regions. Under Account option, users can access their profile. It has same options as we saw in DPS G Mobile app.
Now that we have looked at the three corner stones of the Smart Power Management Architecture, it is time to take a look at RGB part of the unit along with the software.
RGB Lighting and Software Control
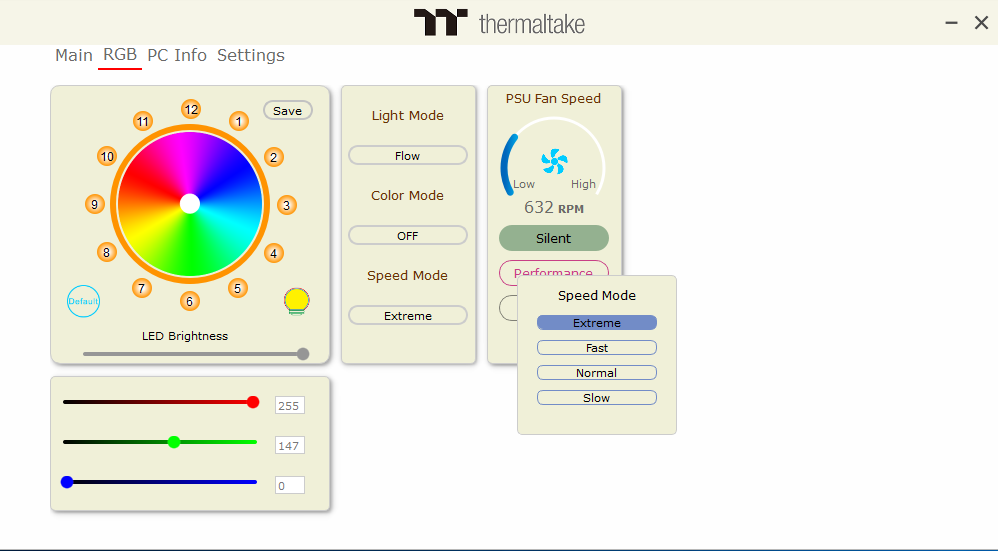
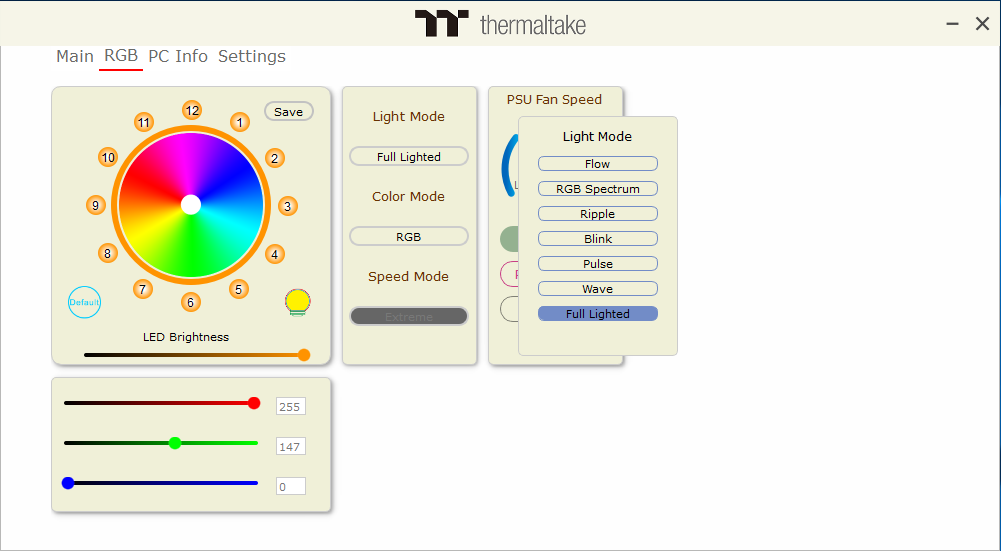
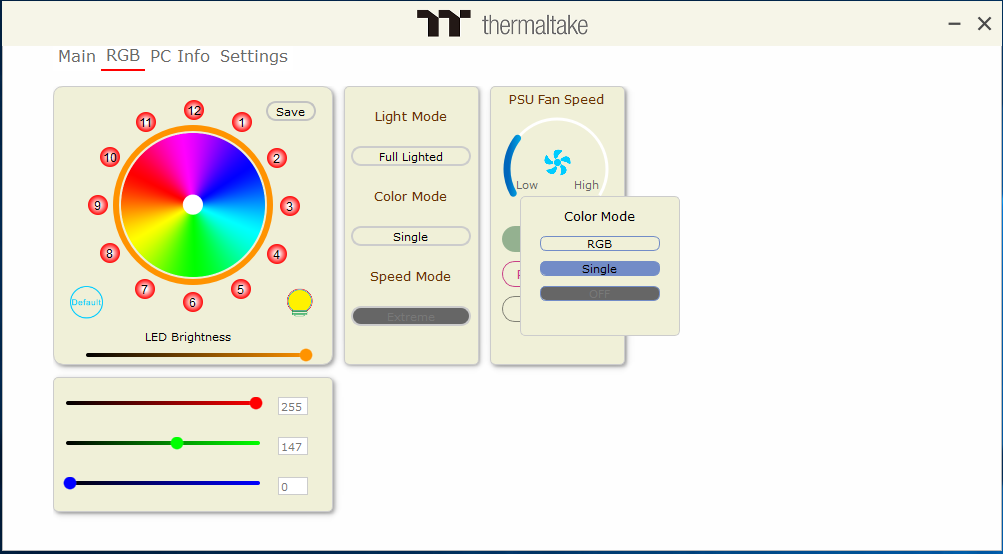
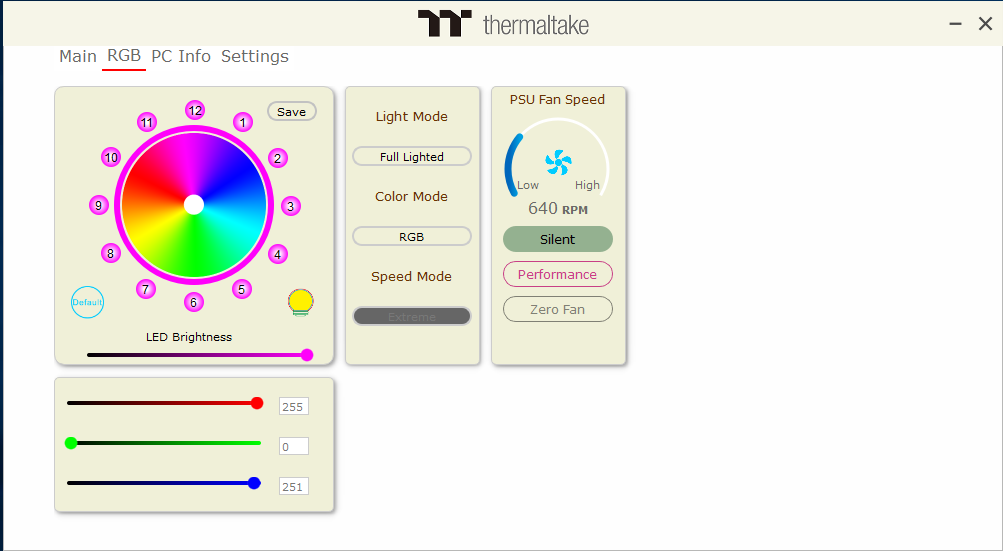
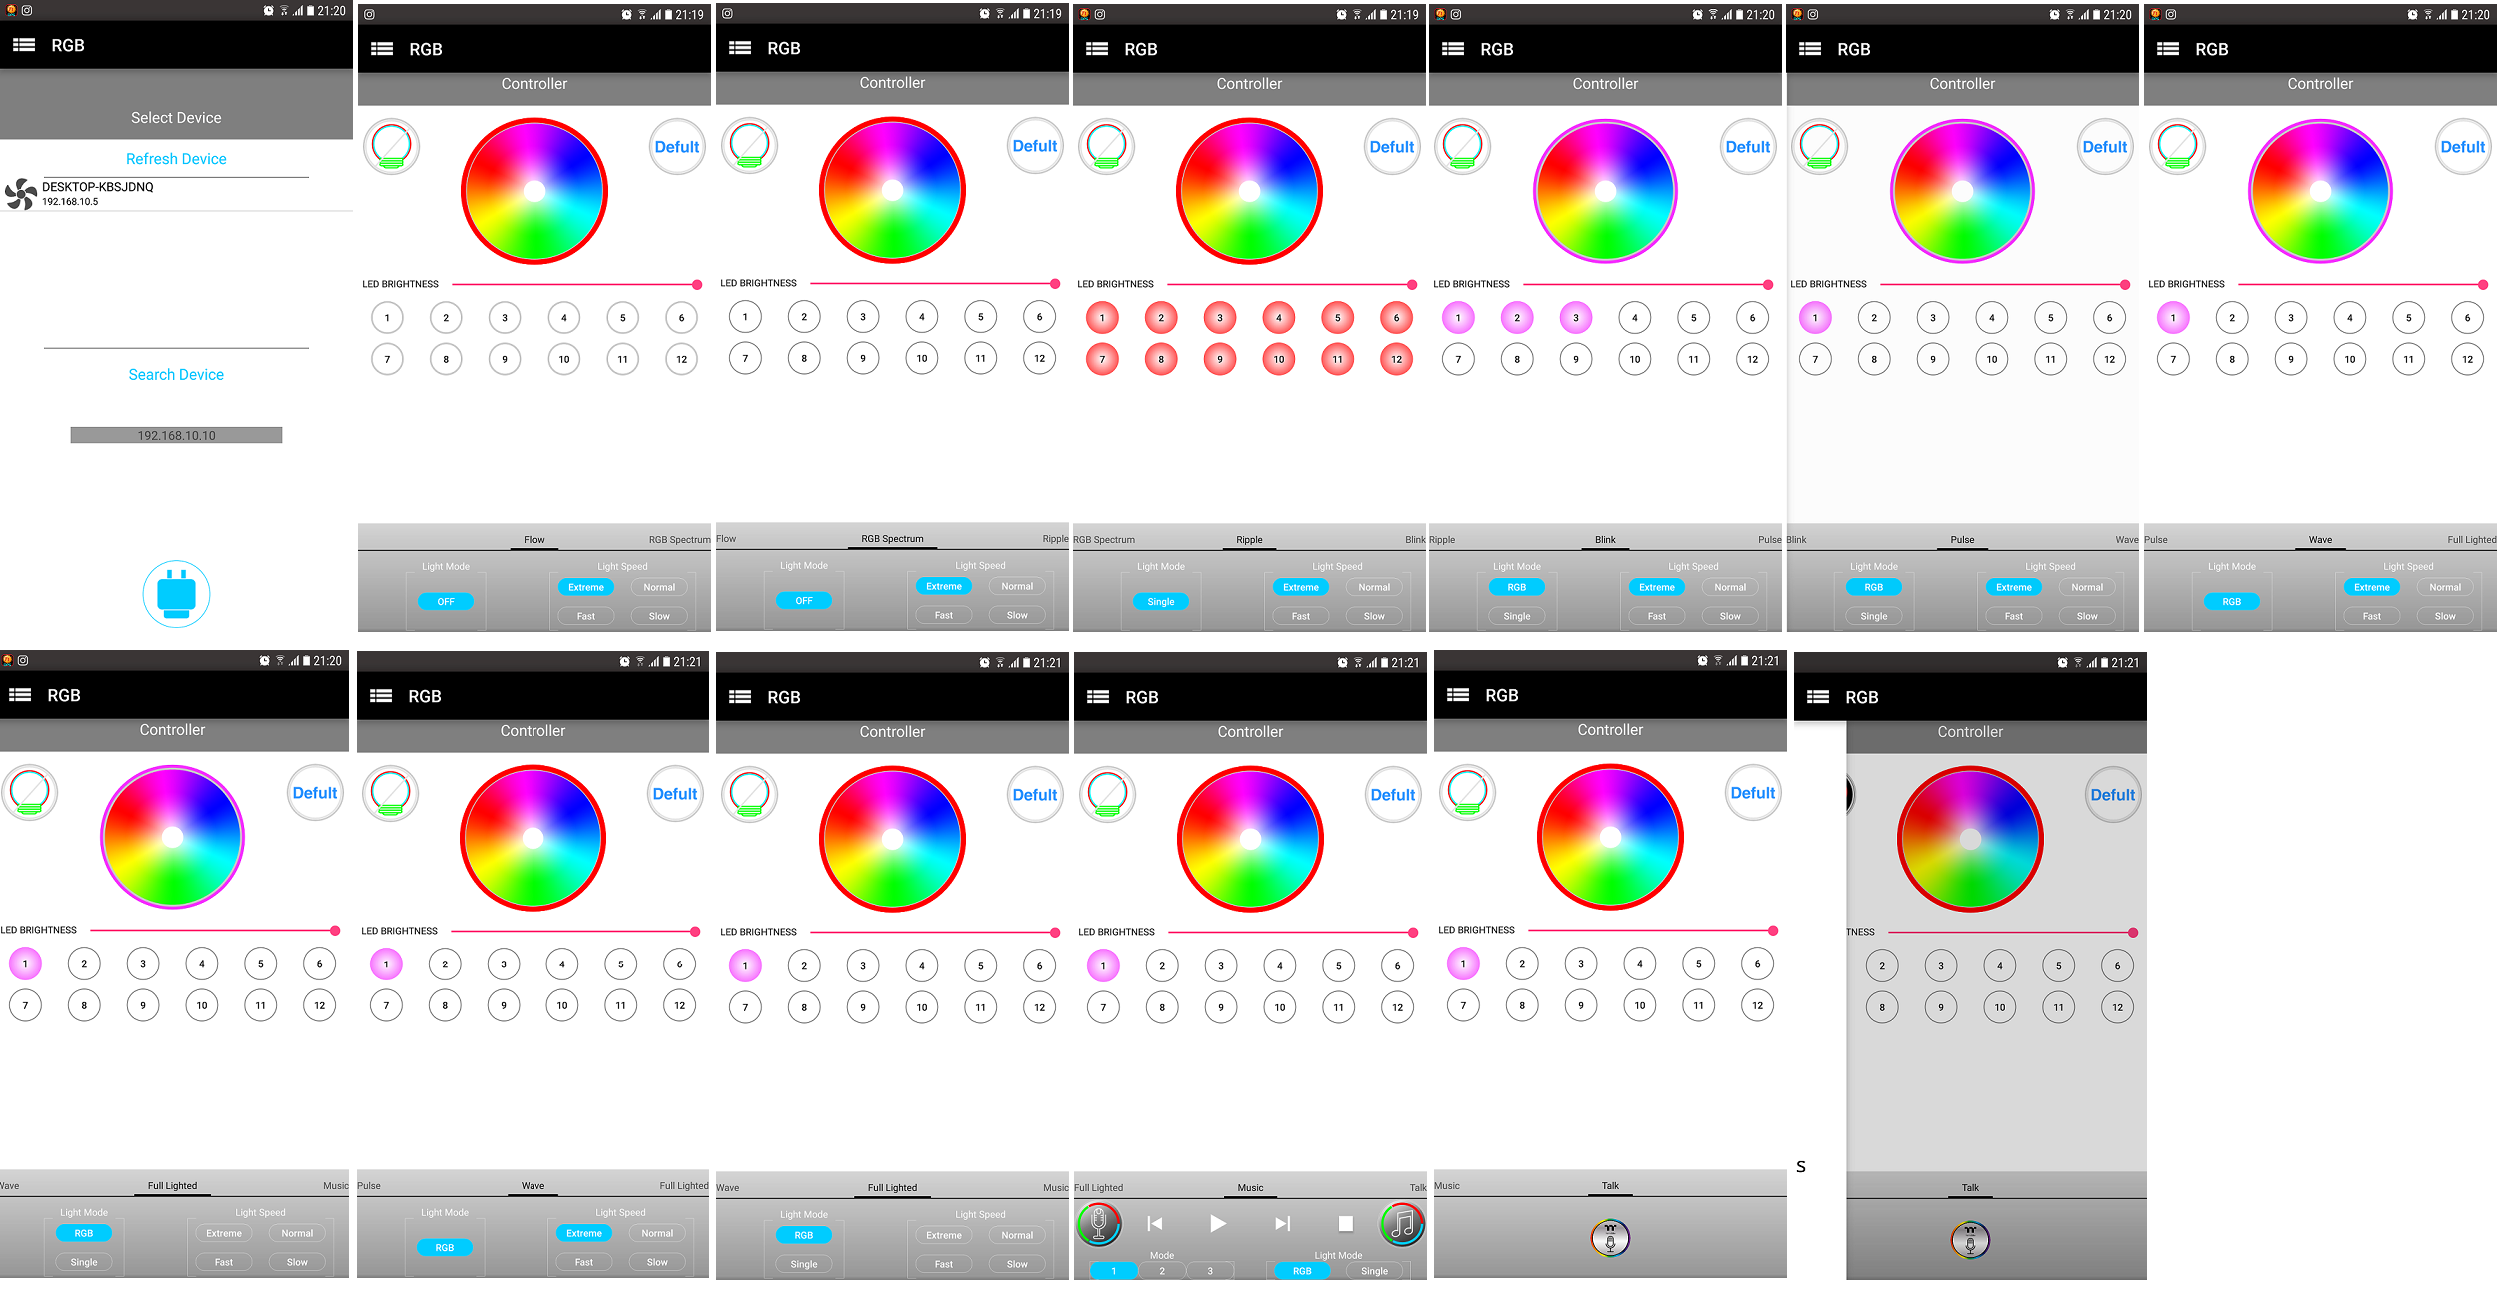
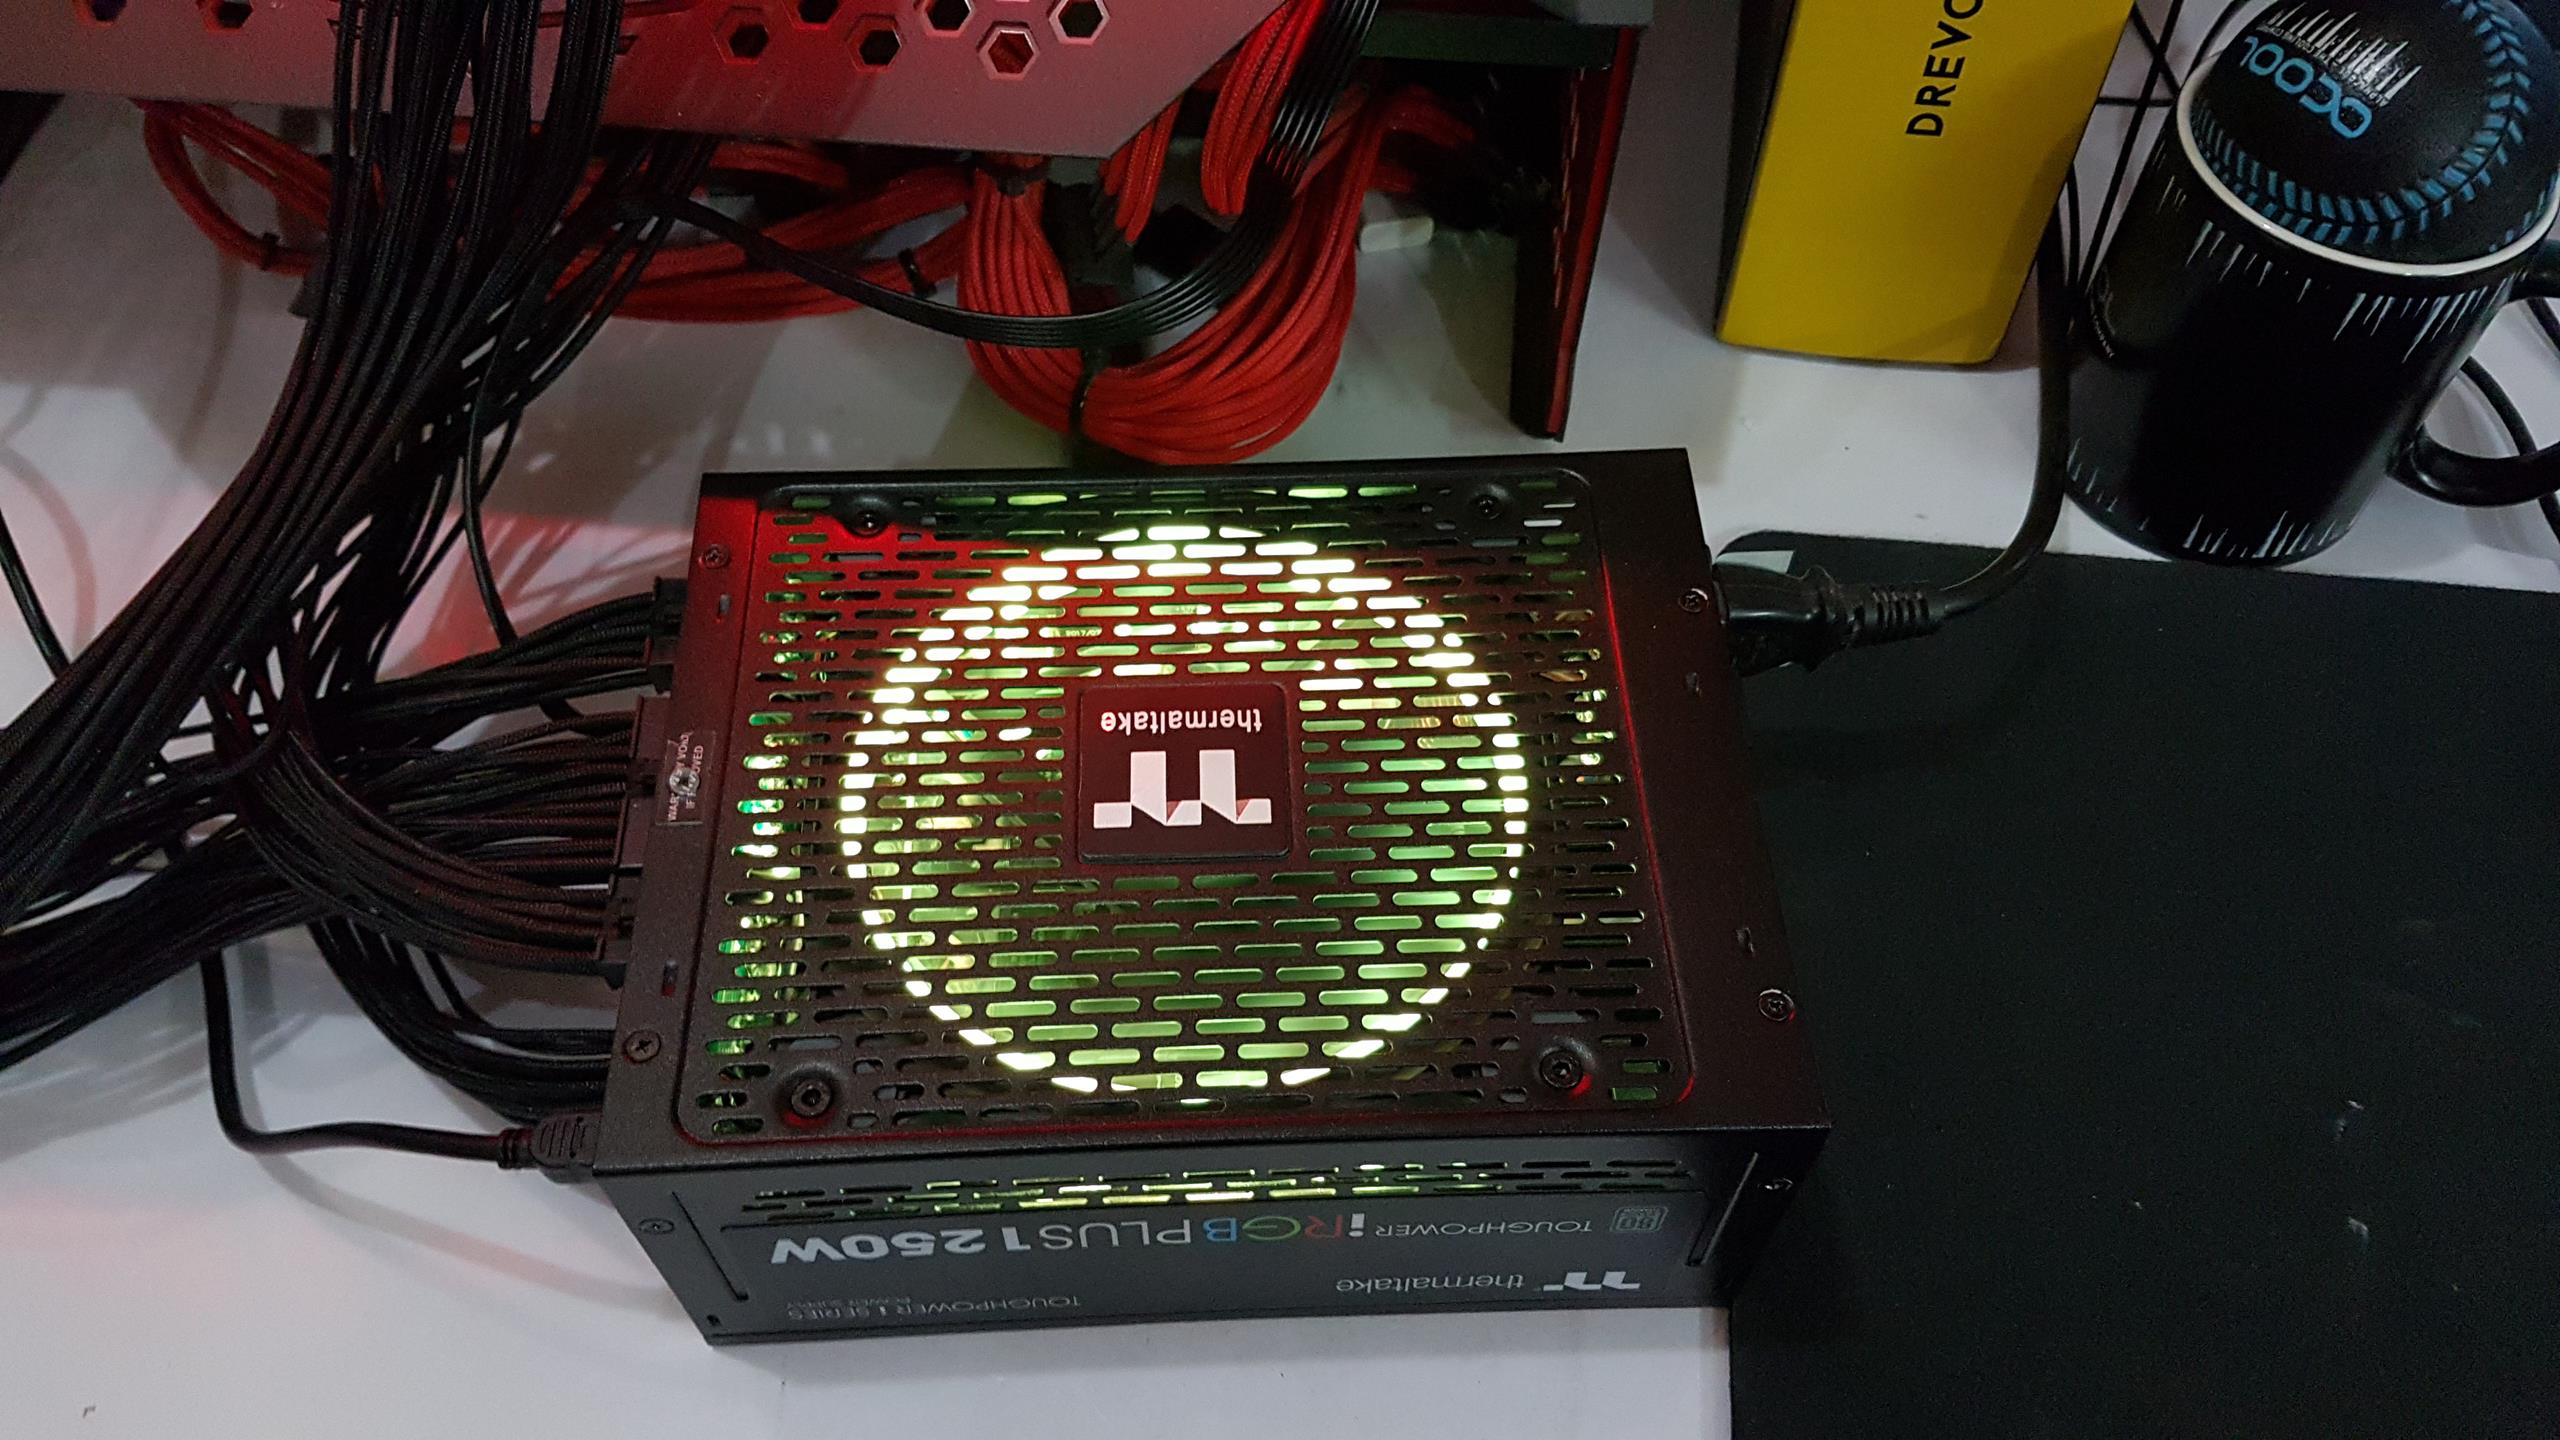
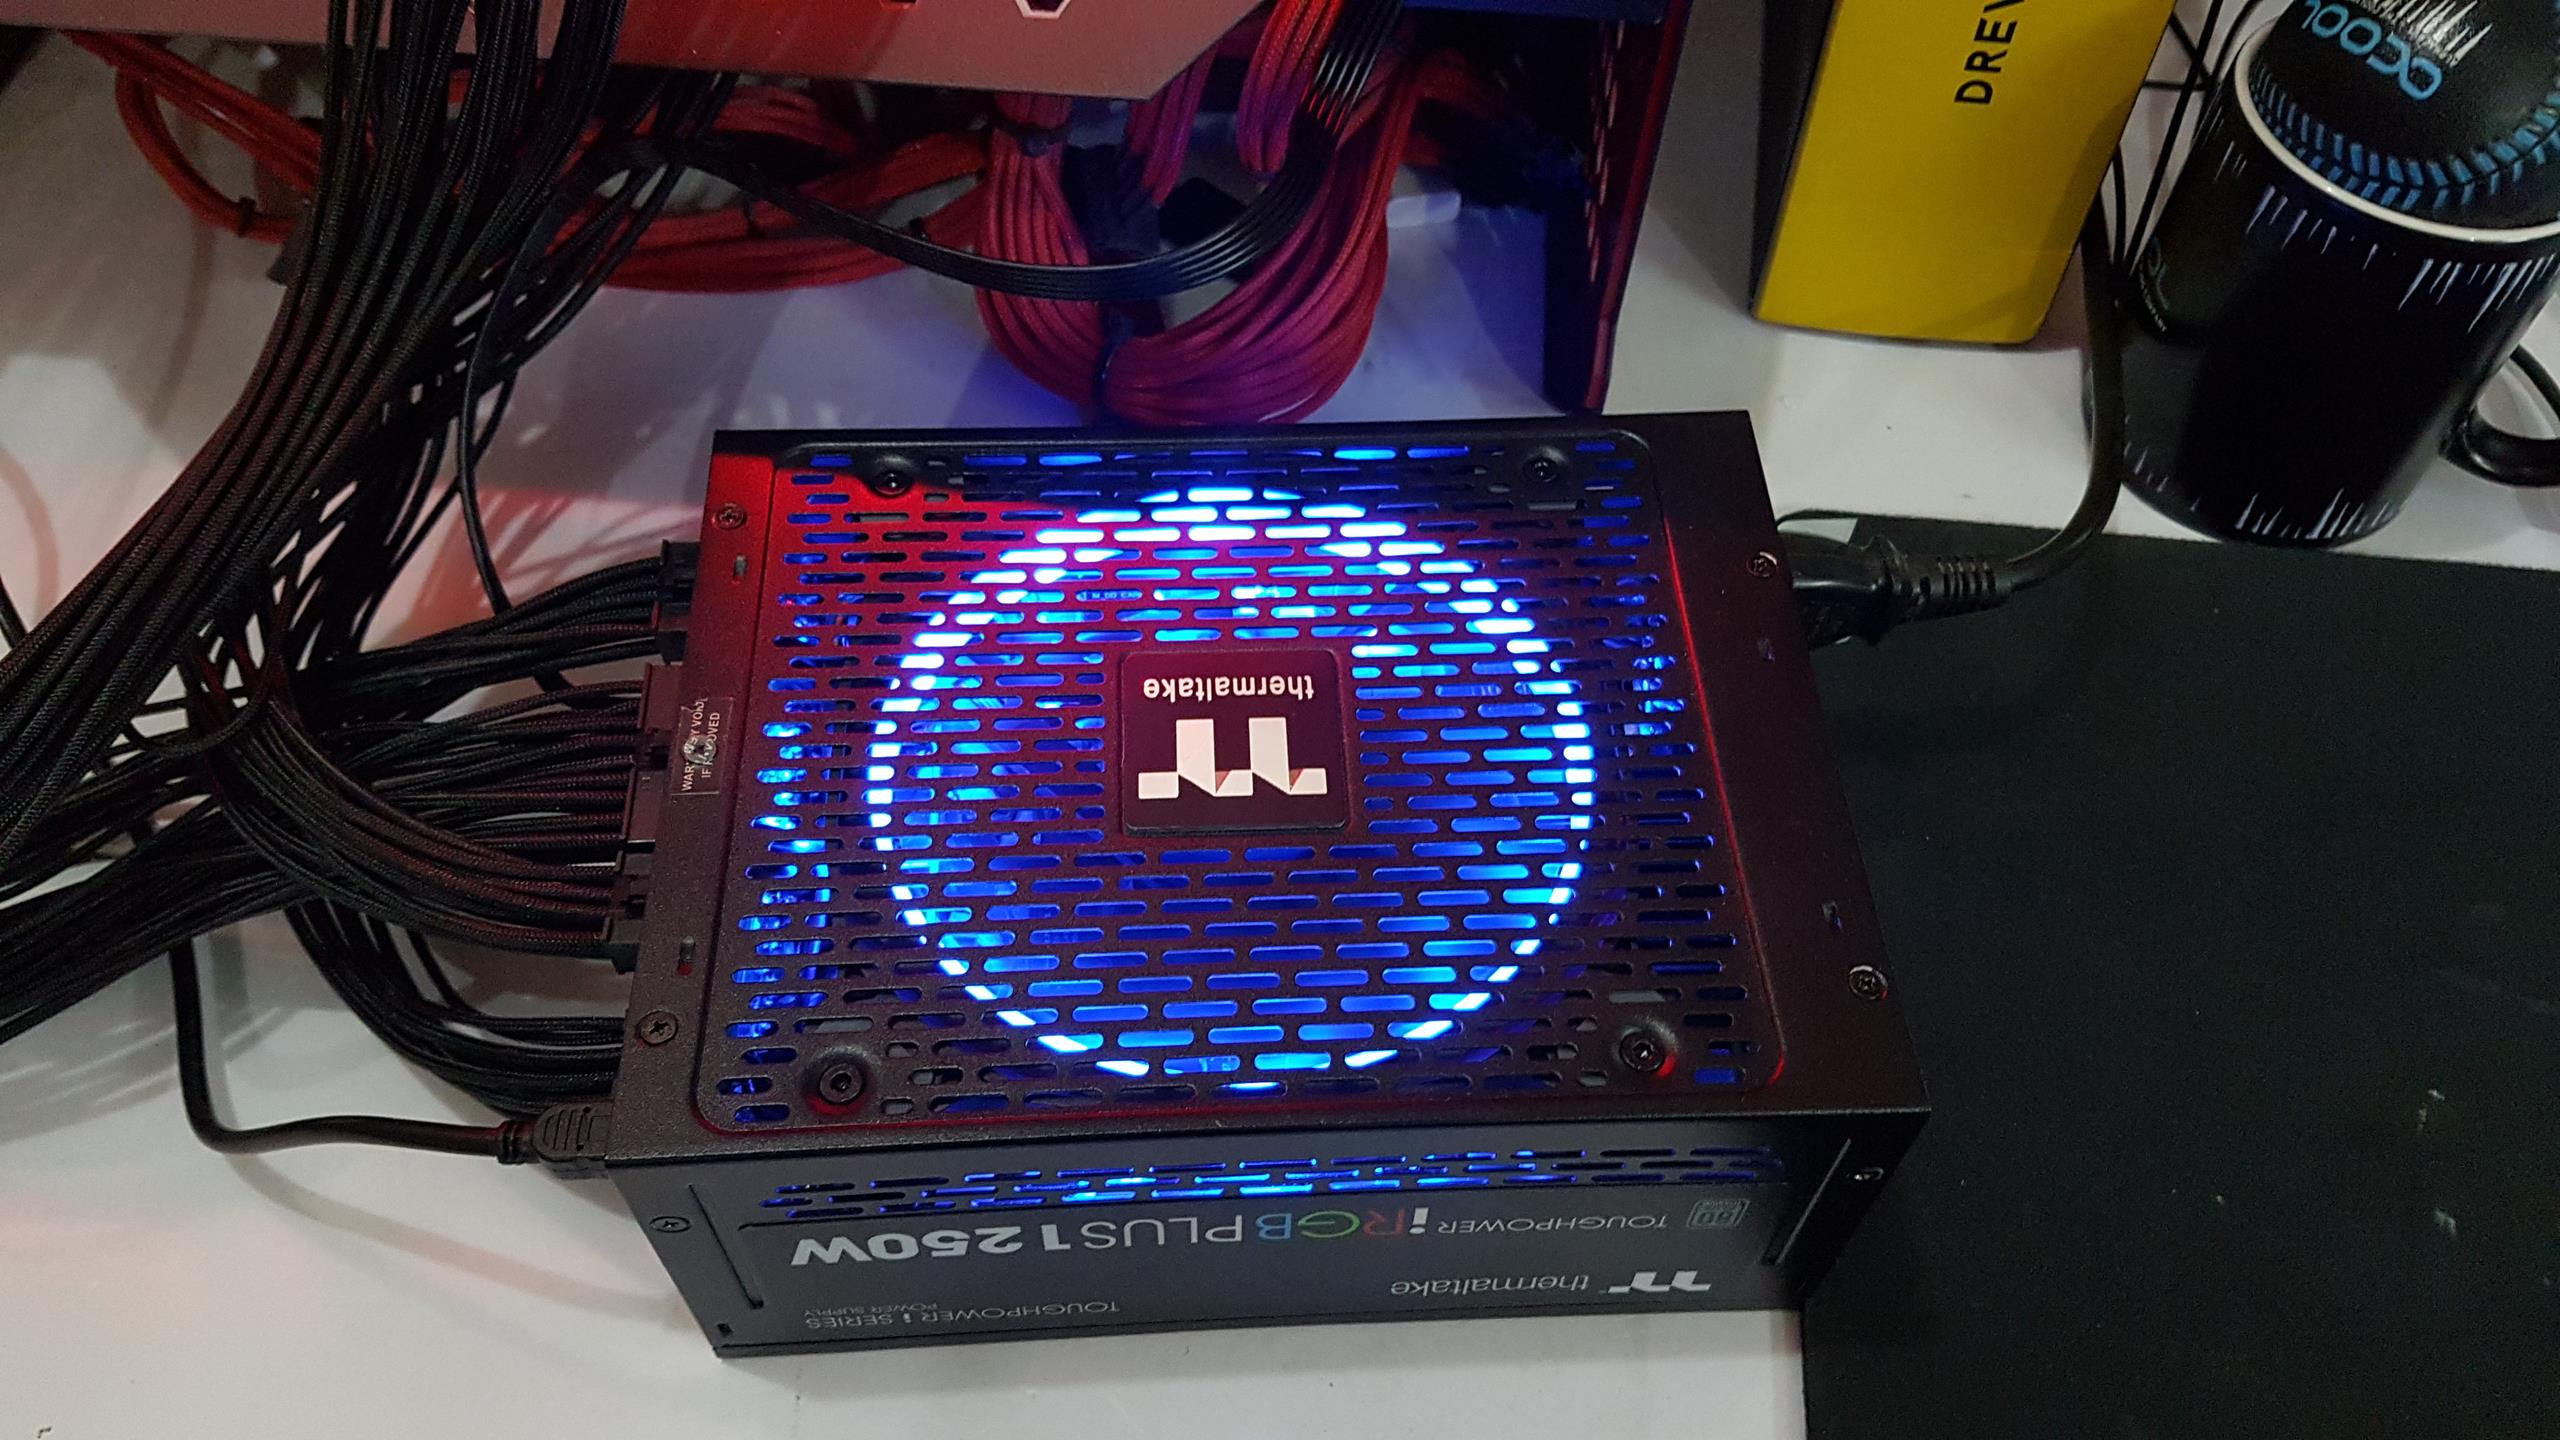
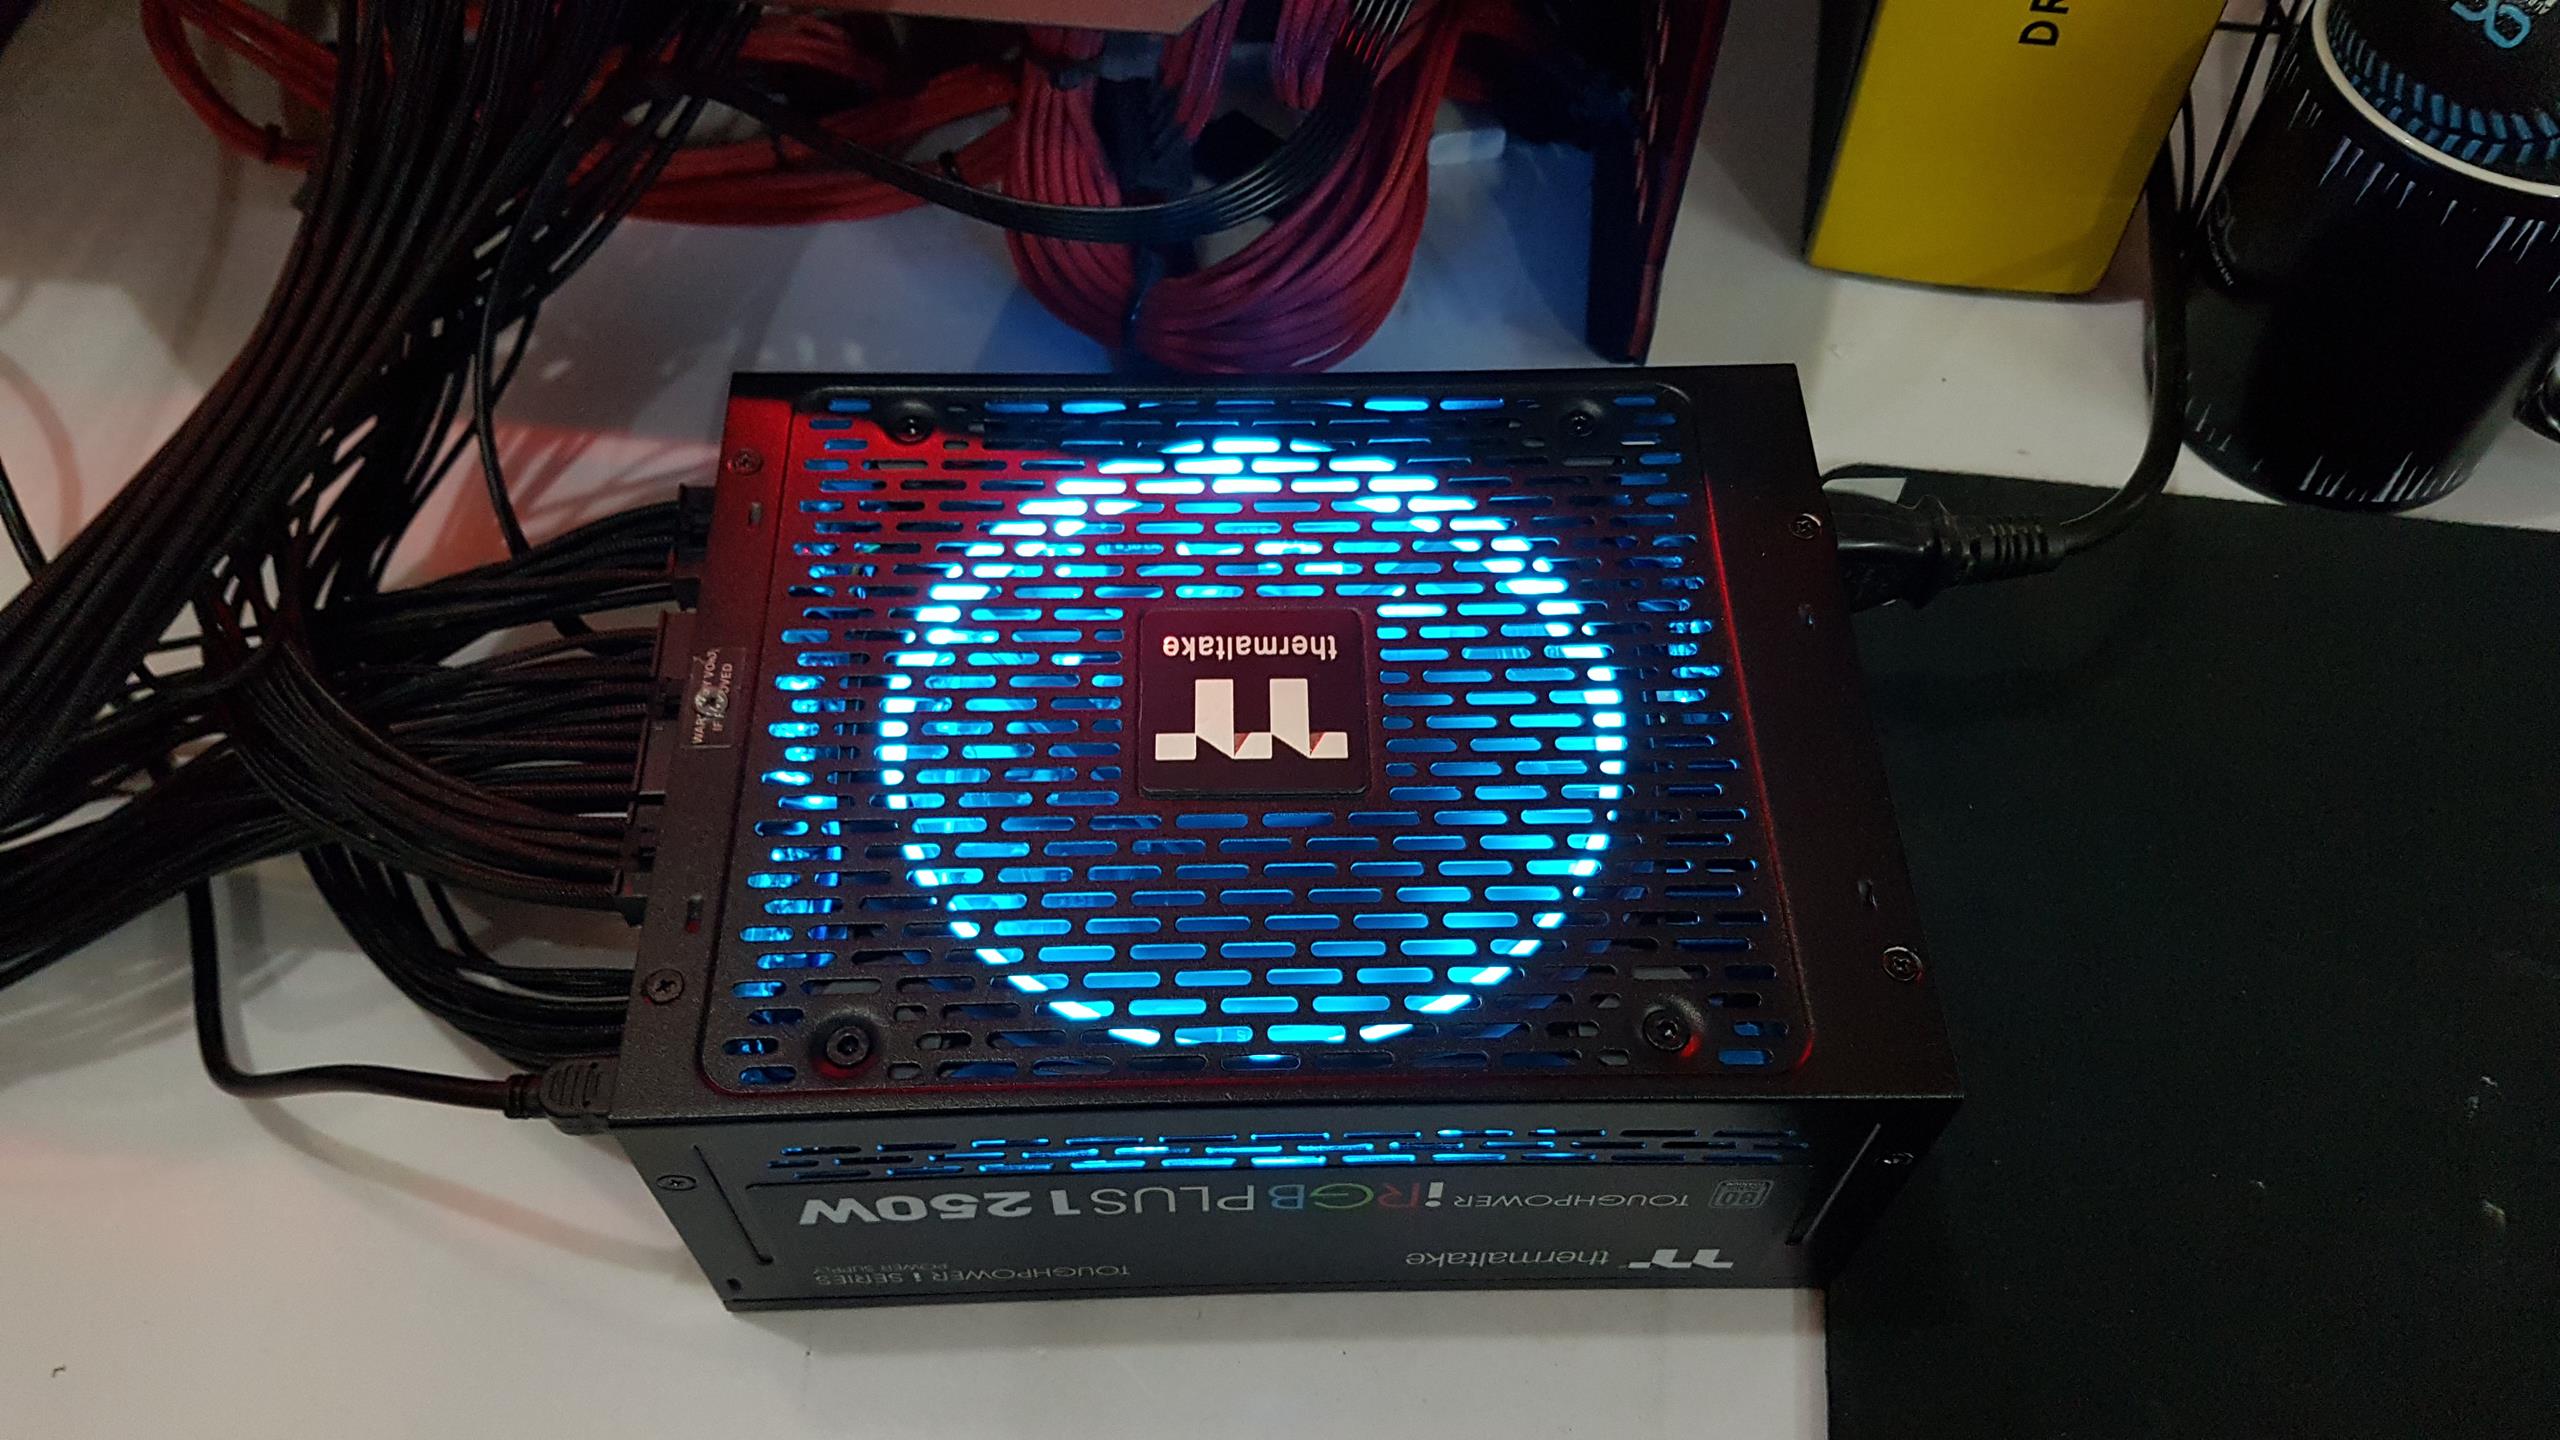
Thermaltake has provided a 140mm Riing Plus fan in this PSU. This is their premium high end fan for the water cooling enthusiasts. The RGB lighting effects and visuals on this fan are sublime and stunning. The fan has 12 RGB addressable LEDs that can be configured independently. The RGB lighting can be controlled via DPS G PC app and DPS G Mobile app. Let’s take a look at the software control options starting with the DPS G PC app. On the main menu, click on the RGB to access the control options. The first tile on the left side has a color palette in a circular manner. There are numbers printed along this circle. Each number corresponds to the addressable LED on the fan. As shown in the picture, each of the numbered circles has different color showing their addressable nature. Each number can be clicked and configured for the color. There is a Default button at the bottom left side of this tile. Clicking it will reset the RGB lighting to the factory default. There is a yellow bulb icon on the bottom right side, clicking it will turn off/on the lighting. It is a toggle button. There is a LED Brightness slider at the bottom. User can control the brightness of the lighting using this slider. The bottom tile has sliders for Red, Green, and Blue colors. User can also create a color using the combination of these sliders. Following Light modes are available at user discretion:
- Full Lighted – A static lighting with user color choice, including RGB colors and single color.
- Flow – Directional RGB colored flow across the individual LED of the ring.
- RGB Spectrum – A seamless transition through the entire 16.8 million RGB color spectrum.
- Ripple – Lights ripple out across the entire fan with user choice of 16.8 million colors.
- Blink – Lights keep flashing on and off with single color or RGB colors.
- Pulse – A slow fade in and fade out with your color choice.
- Wave – A RGB wave flows across the entire fan.
Following Color Modes are available:
- RGB
- Single
- Off
Following Speed modes are available:
- Extreme
- Fast
- Normal
- Slow
Controlling the RGB LED Lighting using the DPS G PC app is convenient and not complex. Thermaltake has also provided the Fan Speed control in this section. The last tile on the right side is showing the PSU Fan Speed controls. There is a visual indicator on the top showing the fan speed in speedometer concept. Low is printed on the left side and High is printed on the right side. Current speed of the fan is printed at the bottom of this indicator. There are three modes of speed control:
- Silent
- Performance
- Zero Fan
Being a digital PSU, the fan of the unit can be set to not spinning under certain loads. If the load of the unit crosses 50% the fan will start spinning. Similarly, if the temperature of the unit increases, the unit will take over the user setting and make the fan to spin for thermal regulation. In my opinion the fan speed control should be in the Main section as this section is only dealing with the RGB lighting controls.
Let’s take a look at the DPS G Mobile app. Launch the app on your mobile device and under menu, tap on the RGB. Next window will search for the connected RGB device and if successful will list the device under the Refresh Device button. In my case it was Desktop-KBSJDNQ. Tap on the connected device for further options. The interface is intuitive and does not need any help with. There is a button on the top left side which is a toggle one. It will turn off/on the lighting of the connected device. There is a Default button on the top right side that will reset the lighting to the factory settings. There is a circular shaped color palette in the middle. User can tap inside this circle on any color to load it. There is a LED brightness slider right under the color palette. Use to it control the brightness of the lighting. There are two rows of small circles each one numbered under the brightness slider. Each numbered circle corresponds to the addressable LED on the Riing Plus 140mm fan. This is same what we saw on the DPS G PC app. Color modes are at the bottom of the window. At a time single mode is displayed starting with Flow mode. Modes are the same what we saw in the DPS G PC app. The Light speed options will continue to be displayed under each mode. To switch to other mode, simply swipe on the bottom section in left or right sides one at a time. This will switch to previous/next mode. There are two more modes that were not available in the DPS G PC app. These are:
- Music Mode
- Talk Mode
In music mode, the control will let the user to play a music file and will make the lighting effect to be changed as the beat changes in the playing file. Talk is the new mode that Thermaltake has introduced with their Sync All theme recently. There are commands that can be downloaded from their website. User can speak to control the lighting effects. This would eliminate hand operations.
Thermaltake has designed the chassis of the unit in such a way that user gets to experience the RGB LED lighting not only from the top cover as it is totally vented design but also from the left and the right sides as well. The top section of these sides has same vented design as is on the top cover. This in totality creates visually pleasing effects.
Conclusion
Thermaltake ToughPower iRGB Plus 1250W is their TP iSeries family PSU which is a new addition in their lineup of PSU. This power supply is their high end, enthusiast grade offering at the moment. This is a digital PSU which is rated at 80 Plus Titanium under certain loads. It has Thermaltake’s premium Riing Plus 140mm fan with 16.8M colors for vivid lighting effects. This fan has 12 addressable LEDs in the ring for true color customization. Thermaltake is offering 10 years of warranty on this unit which speaks for their confidence in this design. This is not all as this unit is fully modular that would help in the cable management. Thermaltake has gone all out by giving the users individually sleeve in black color for the 14-pin ATX cable, PEG and EPS cables. Finish quality of the sleeves is top notch and they look fantastic when installed. The peripheral and SATA cables are flat which is a wise move in my opinion.
The Thermaltake Toughpower iRGB Plus 1250W PSU is Intel ATX 12V 2.31 & SSI EPS 12V 2.92 rated. It has a maximum output capacity of 1250W and peak output capacity of 1500W. The unit is in a black color steel frame. The dimension of the unit is 150x86x200mm (WxHxD). Here Depth means the length of the unit. It is following the Active Power Factor Correction (PFC). Power Good Signal rating is 100 ~ 500ms. Hold up time is > 16ms at 100% of full load (115Vac/230Vac input). Input Current is 15A. Input Frequency Range is 47Hz to 63Hz. Input Voltage is 100V to 240V. Operating temperature range is 0°C to +50°C. Operating humidity rating is 20% to 90% non-condensing. Storage temperature requirement is -20°C to +70°C. Storage humidity rating is 5% to 95% non-condensing. Cooling system has 140mm Ring Plus fan. Efficiency rating is 80 plus Titanium at 115Vac input. MTBF is 120,000 hours minimum. Safety approval conformance is with CE/FCC/UL/TUV/EAC. Protection features include, OPP, OVP, UVP, OCP, OTP, and SCP. This unit has single +12V rail with 104Amps on it. It is clear that this unit is designed to meet the extreme power requirement of the rig with multiple graphics cards and high end desktop CPUs. User guide has one warning to the users which is that warranty will void with the use of third party modular cables and users should only use genuine TtI modular cables. Though, this is to ensure the maximum compatibility and to reduce the risk of damage but voiding the warranty with the use of third party module cables like CableMod sleeves which are very popular among the PC enthusiasts, could have been relaxed.
In our circuit analysis, we observe that the main unit is based on the CWT CST (80 plus efficiency certified) platform mostly recommended to be used by the eighty plus titanium series power supplies. The AC input (100-240 V,15 A,47-63 Hz) to the Thermaltake Toughpower iRGB Plus 1250W is filtered through the two stages of the EMI filtering. The EMI Filter 1 consist of Two Y Capacitors. The EMI Filter 2 consist of 4 Y type capacitors,2 X type capacitors,2 X type common mode chokes and 1 X type metal oxide varistor. It is evident that good quality components are used in both filtering stages. . The rectifier consists of two Single-Phase Single In-Line Bridge Rectifiers paired with heat sinks. The model of the rectifiers is LVB2560 or equivalent. The Inrush protection circuitry consists of a negative temperature coefficient (NTC) thermistor and a relay mounted on the main board. The automatic power factor converter (APFC) consists of Boost Diodes and APFC FETs. The Boost diodes used are CREE C3D10060A and FETs used are Toshiba TK25N60X. The Mainboard also consist of a mounted main digital control card. The card consists of two microcontroller units. One for automatic power factor correction and other for USB interface and other primary digital tasks. The main controller used is PIC MX230F064D. It consist of a 32-bit chip,16 KB RAM, and 44 pins. The automatic power factor correction MCU is Texas instrument UCD3138A. It is consist of 32-Bit ARM7TDMI-S™ Processor, 32 KB of Program Flash, 2 KB of Data Flash with ECC and 4 KB of Data RAM. In the middle of the main PCB are the 1250 watt PWM driver controller card and the main input bulk capacitors. The main input bulk capacitors used are Nippon Chemi-con and Nichicon. The Nichicon is rated at 400v 680uF 105oC while the Nippon Chemi-con is rated at 420v 680uF 105oC. Moving forward we noticed the Main transformers CWT 1735 and 1741. The overall quality of components used by Thermaltake is very good. Soldering of the main board is very neat and of the high quality. Cables are properly sleeved. The input current rating of the power supply is 15A.
In order to fully utilize the digital aspect of this unit, user must connect the unit using the miniUSB cable to the motherboard’s USB 2.0 header. Thermaltake is using what they referred to as SPMA aka Smart Power Management Architecture. Tis architecture is at the core of their digital PSUs and it consists of application suites and cloud based management system that will allow the users to monitor and control the unit remotely. This is a very handy feature as it will provide a comfort and peace of mind to the users by knowing that is something goes wrong, they will get notification right away on their mobile device(s) and Thermaltake app allows the user to restart or power off the unit. SPMA consists of DPS G PC app, DPS G Mobile app, and Cloud based service. User would need an active WiFi connection for this interconnectivity. DPS G PC app allows to user to monitor the voltage, current, watt, efficiency of the main unit on the voltage outputs as well temperature, voltage of the core components like CPU, Motherboard. This app also sends the data on daily basis to the Cloud based service which can be accessed at dps.thermaltake.com. This app also allows the user to enter the electricity rate per KWh and this will let the app calculate the cost of the electricity that has been consumed in addition to the total energy consumption. Similarly, the DPS G Mobile app lets the user to generate reports, access news feed, load map and restart/shutdown as well as schedule the power off at the given date and time. On Cloud based Service, user can generate many reports with graphical presentation. Three key reports are ECO report, Energy Consumption Report and Efficiency/Wattage User Behavior report. Thermaltake is trying to achieve the optimal efficiency of the given PSU and to reduce the energy consumption hence contributing in less CO2 emission. Company has also taken initiative to encourage the users to plant more trees to safe earth and to have green environment. They are definitely going all out on their social responsibilities. The RGB effects on this unit are sublime and visually pleasing. Both apps provide easy interface to control the lighting effect. The DPS G Mobile app has two more modes which are Music and Talk. Talk mode allows the user to voice control the lighting effect for which the commands can be downloaded from their site.
This unit is rated at Rs.41000/- at the time of the review. This is definitely a high price tag but given that it is 80 Plus Titanium rated with 1250W Continuous output, has individually sleeved black color cables, is a digital PSU with comprehensive suite of application software and cloud based management, backed by 10 years of warranty, top notch quality sub-components, this unit is totally worth it. We don’t have appropriate equipment to test the PSU hence we are giving an overview of the unit but based on what we have seen in the circuit analysis, this is one heck of a design and comes recommended by us.
We are thankful to Thermaltake for giving us the opportunity to overview their Toughpower iRGB Plus 1250D Titanium PSU. Special thanks to Mr. Hassan Khalid for his valuable input.


