Rajintek DELOS RBW Tripple Fan CPU Cooler Review
Introduction
Manufacturer: RAIJINTEK
Product Page: DELOS RBW
Purchase: $59.99 at the time of review at Newegg
With the aim of designing high-end products for Lifestyle, Computer, and Day-to-Day usage, RAIJINTEK was established in 2013 to accomplish the future of IT and Lifestyle products. This task and aim lead us to grow and toward a global brand. Not only highly recommended IT products but we also provide Gaming Gear such as Chassis, PSU’s and Lifestyle products for Smartphones and all your tablet PCs. Fully dedicated to developing best Products for global users, RAIJINTEK’s R&D team never forget the aim to provide a friendly and performing product. Decades of experience in the industry, RAIJINTEK management would never give up service and product quality to value customers. Alliances with strong partners and global suppliers, RAIJINTEK is able to achieve its aim – the future of IT and Lifestyle products for all valuable customers.
Today we are taking a look at another of Raijintek’s RBW tower air coolers. This time a dual tower, triple 92mm fan tower cooler. The RBW series of coolers also include the MYA and JUNO PRO air coolers as well as the ORCUS 120/140/240/280/360mm line up of AIOs. The triple-fan design of the DELOS is sure to force a lot of air through the fin stack, but coming in at almost 200g lighter than the MYA RBW we recently reviewed, can it compete? Well, let us dive in and see.
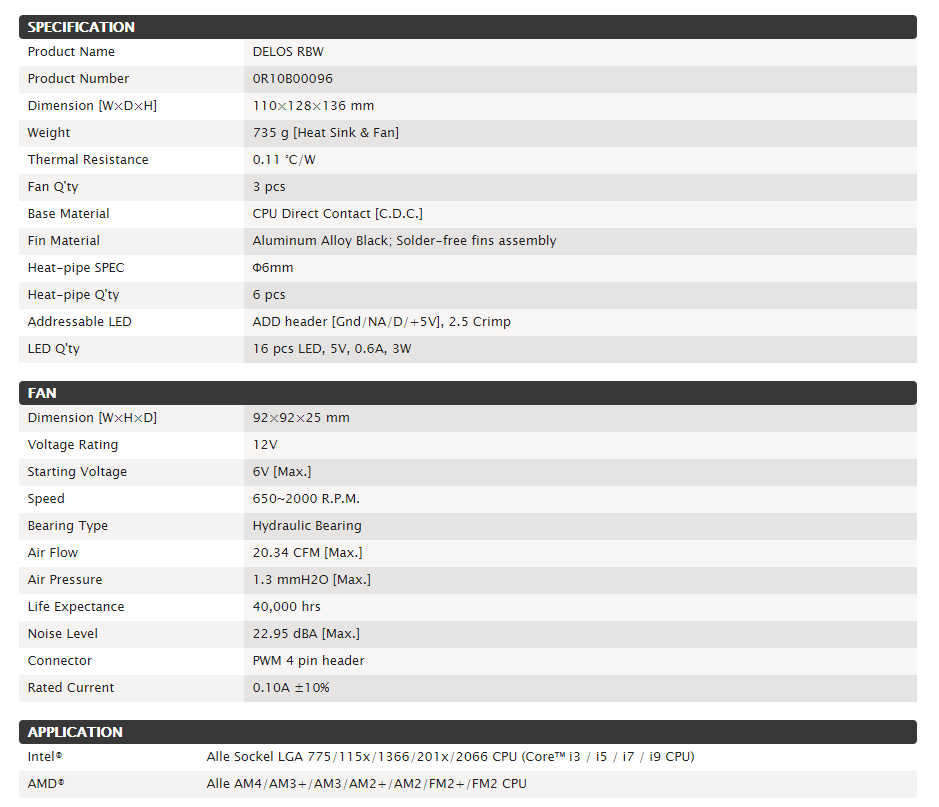
Specifications
Closer Look
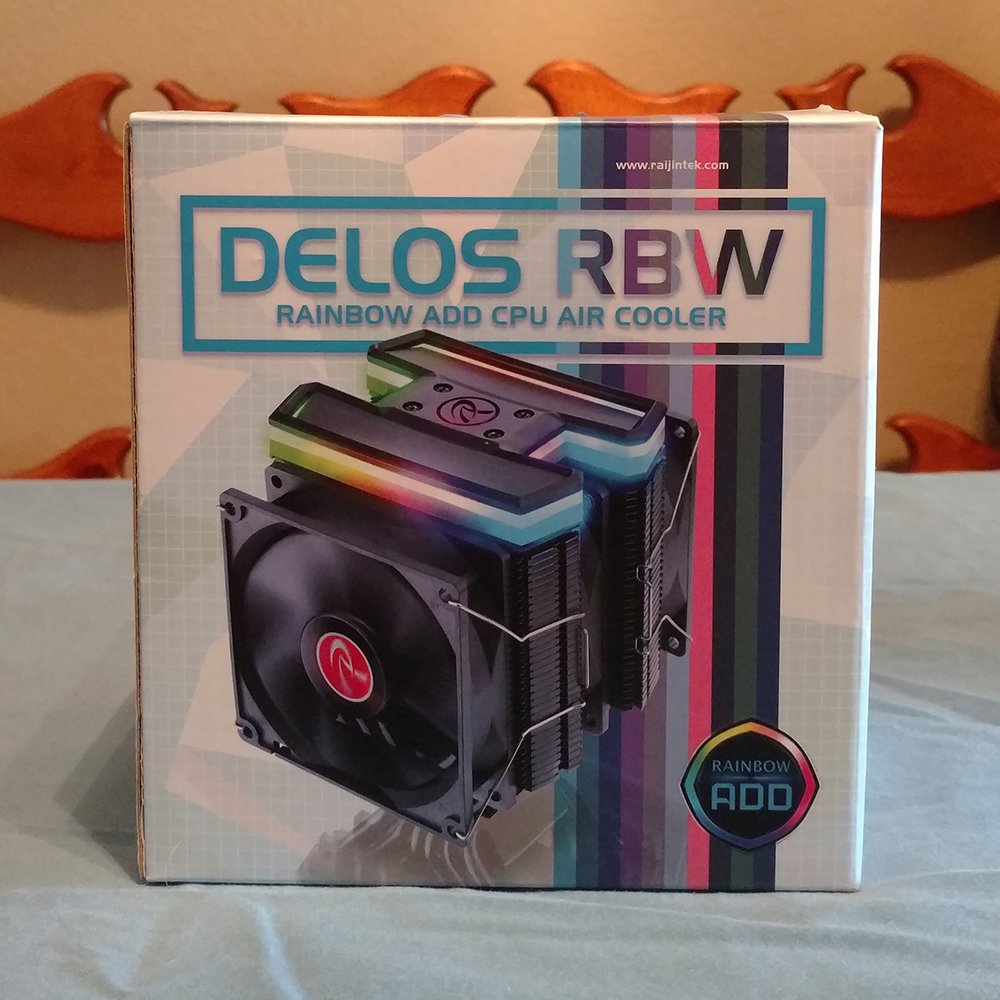
The front of the box has a bit of a busier and brighter logo than we saw on the MYA RBW recently reviewed. Again there is a small reflection of the cooler on the bottom a Rainbow ADD logo and the coolers name and cooler branding.
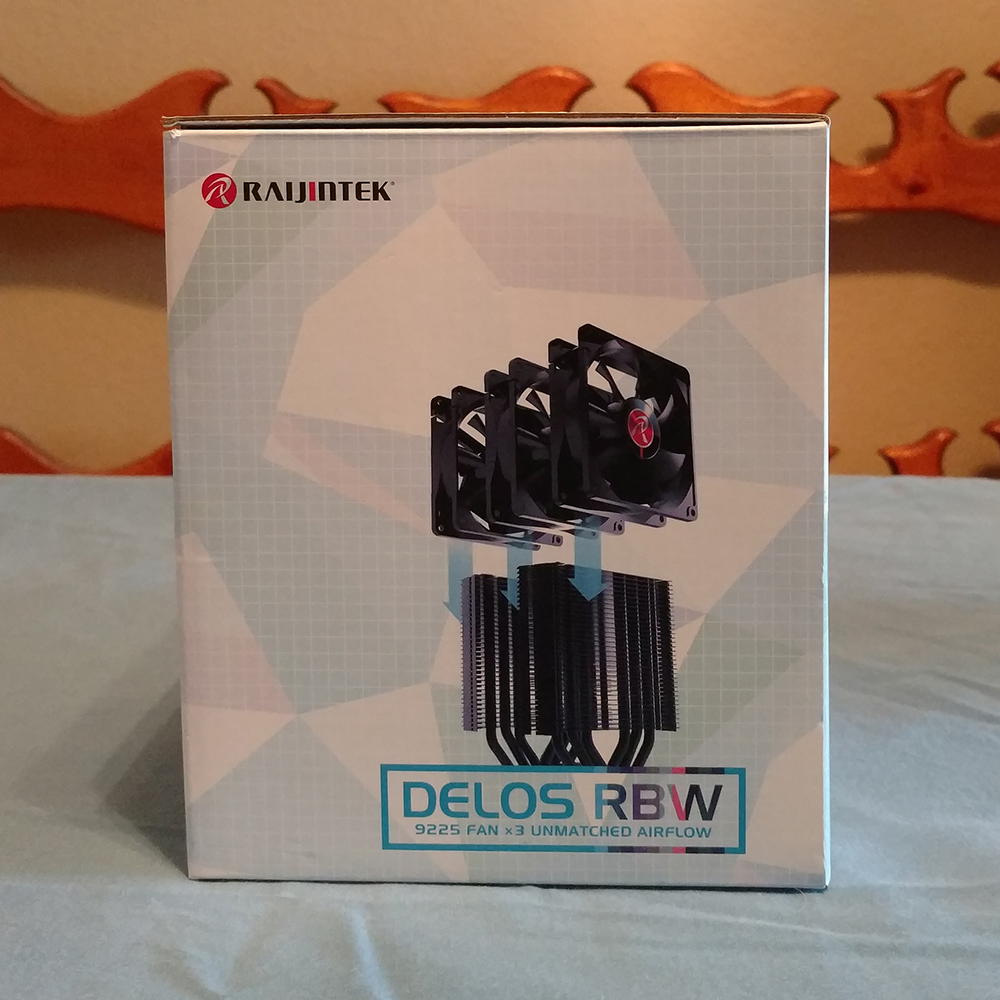
Here on another side, we see a pulled apart image of the cooler with another DELOS RBW logo and the fan type used in the design, the 9225 Fan or if you would rather 92x92x25mm fans.
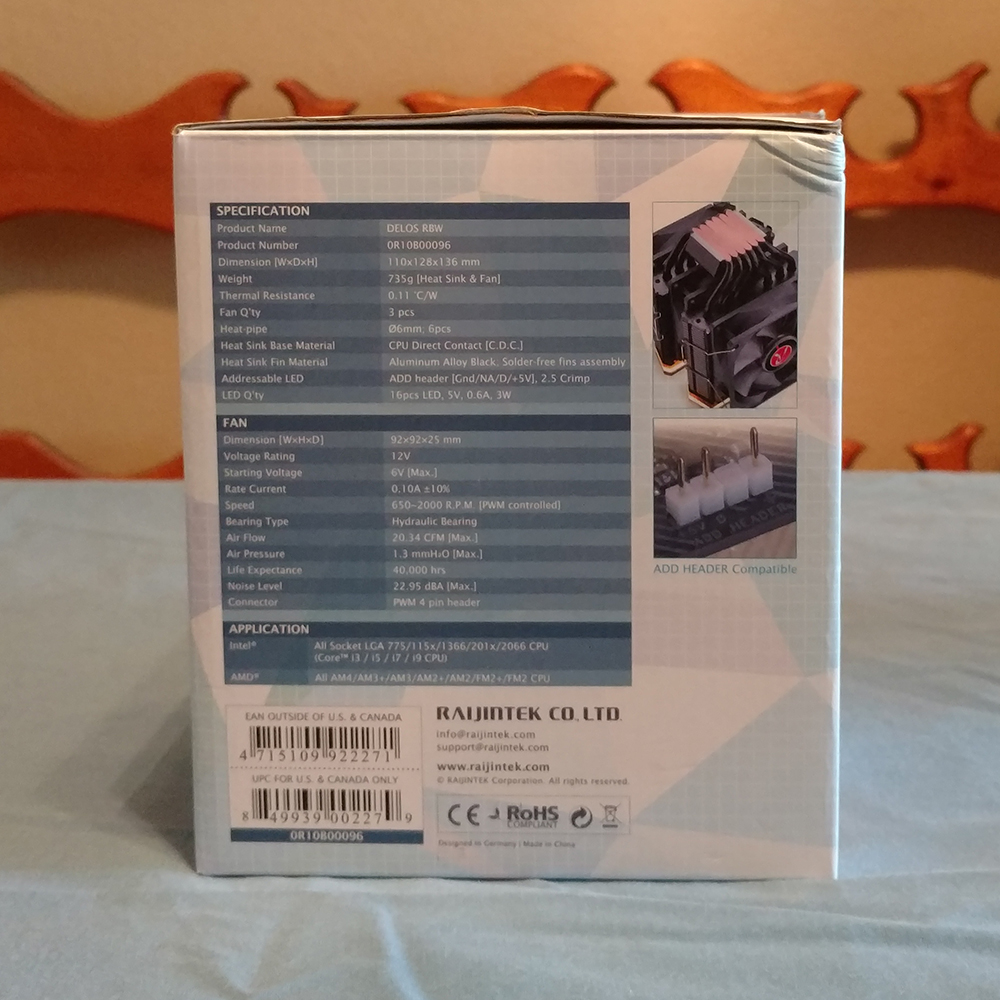
On the backside of the box are the DELOS RBW specifications, here you will find a list of handy data you will need to help make a decision on a new cooler for your CPU.
Unboxing
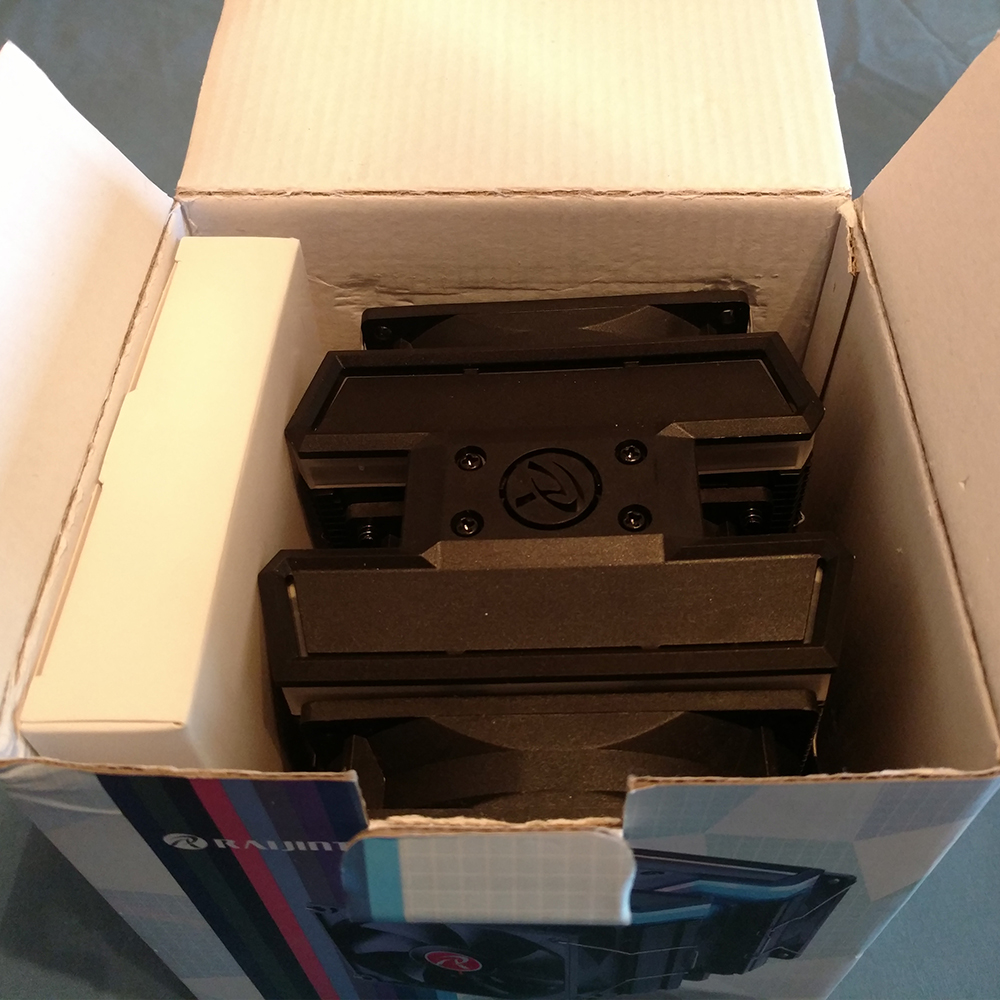
Opening up the box and you will be greeted with a thin foam layer over the manual and the DELOS RBW Tower Cooler and box of Intel and AMD components. The three fans come pre-installed, the two outer fans via clips and the middle fan is held in place via a metal bracket by 4 screws in the top holes of the fan. You can kind of see that from here in the middle on each side of the cooler.
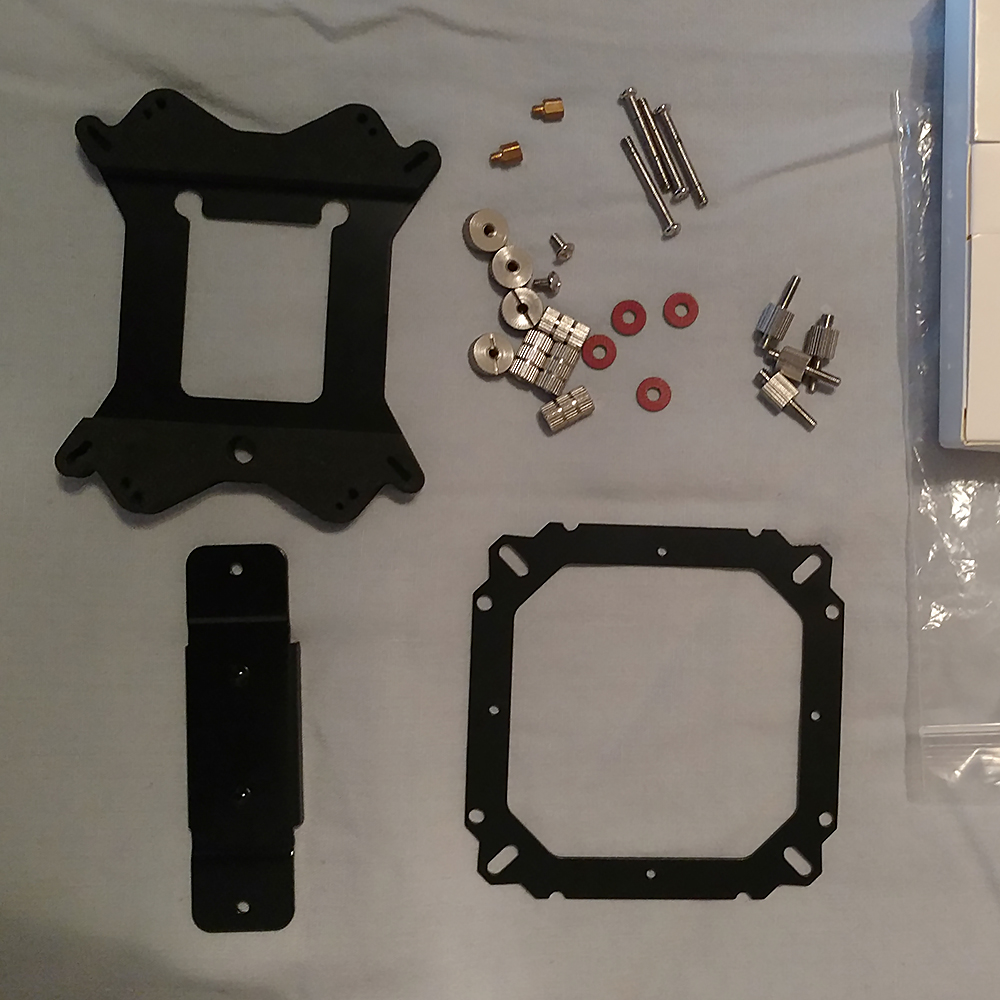
Here are all of the included Intel and AMD mounting hardware.
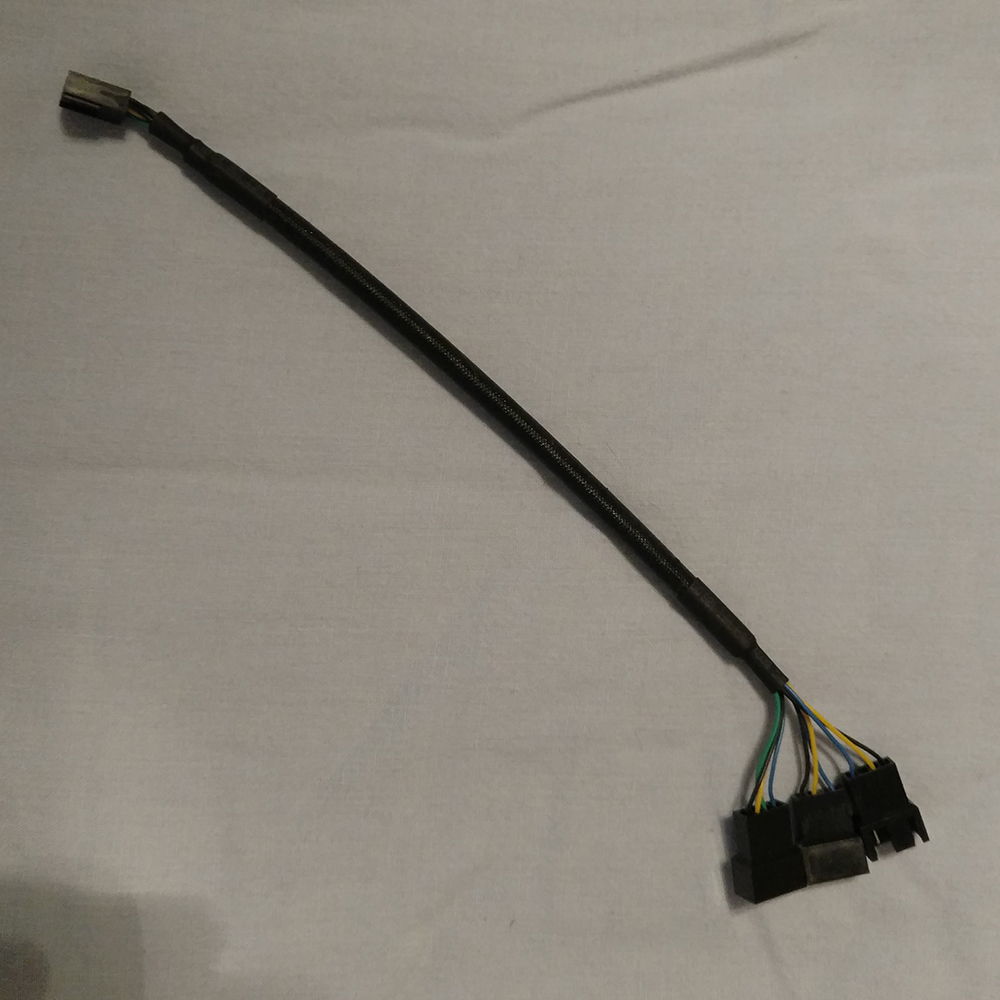
There is also a rather nice triple fan splitter included helping you plug all of the cooler’s fans into one PWM fan port.
Getting the DELOS RBW out of the box, first impressions are that it is a much larger cooler than the 735g weight specifications convey. That is just because of the fans and amount of space this cooler can eat up in your build. This is one cooler that can fill out the middle of any build pretty easy, even overlapping the first two ram slots.
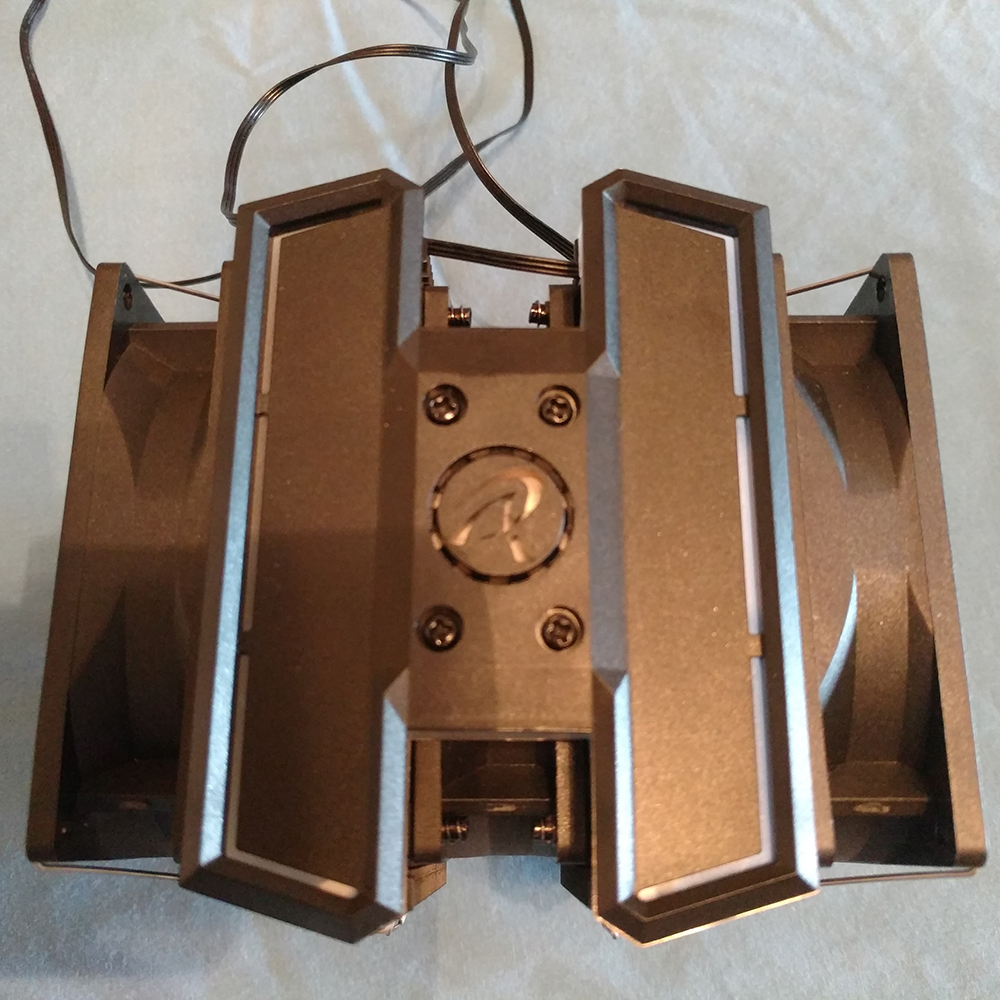
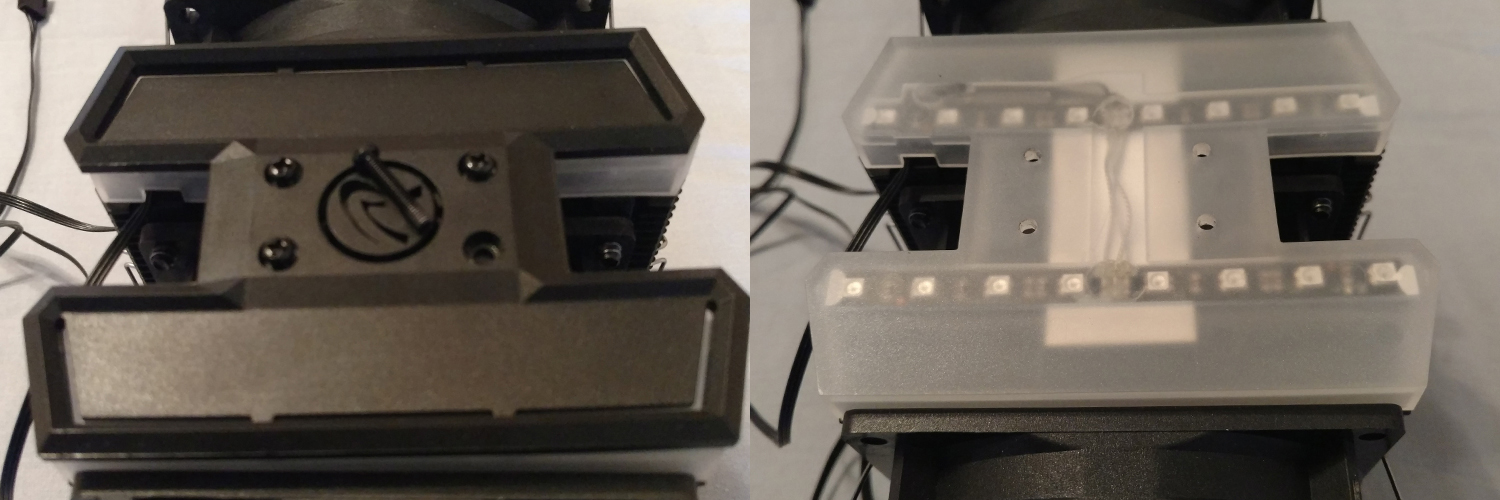
A peek at the top here shows cutouts where the Rainbow ADD RGB lighting will show through when lit up and you can also better see how the middle fan is held into place. I do think that Raijintek should consider something like rubber/foam pads or another bracket to help hold the bottom of the middle fan in place. There was some vibration during my testing that was fixed by taking the cooler apart and loosening, adjusting and retightening the screws on the middle fan mounting hardware. This is not really ideal but is most likely only an issue on my unit.
Now I want to stop here and address my fan issues a little and we might as well take a look under the hood so to speak. After a round of testing and a second install after checking thermal paste spread, I noticed a slight noise coming from my PC. Long story short, the middle fan had shifted and was rubbing on the fin stack. It wasn’t a big issue but one I would like to address since something as simple as a full fan mount to stop the bottom end of the middle fan from shifting or some rubber/foam pads would completely avoid this potential issue.
First, you will want to remove the four screws in the middle of the top here. Once that is done you can pull the black plastic top plate off exposing the Rainbow ADD RGB light-diffusing surface, which houses two RGB strips with 8 addressable LEDs each.
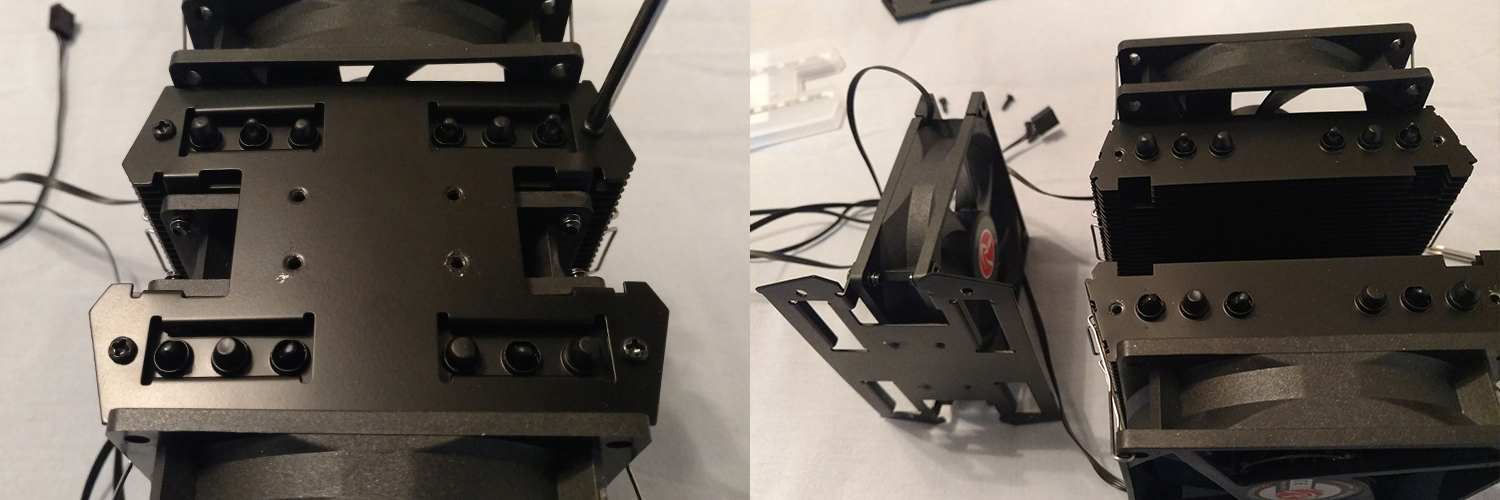
Taking the RGB stuff off exposes the middle fan mount and four more screws that need to come out. After you remove those the middle fan will simply slip out. Here on the left, you will see the first bit of where things might have gone wrong with my unit. I think that it was simply an assembly line error and when the screws were applied something didn’t line up. There is a little damage to the fan bracket here on the top, and this might of bent things out of whack.
Looking closer here there is no damage or anything looking out of place. The fan bracket on the right was fixed with a small adjustment to the screws as I put things back together. Being careful to put pressure on the side that would not let the fan blade catch on the fin stack.
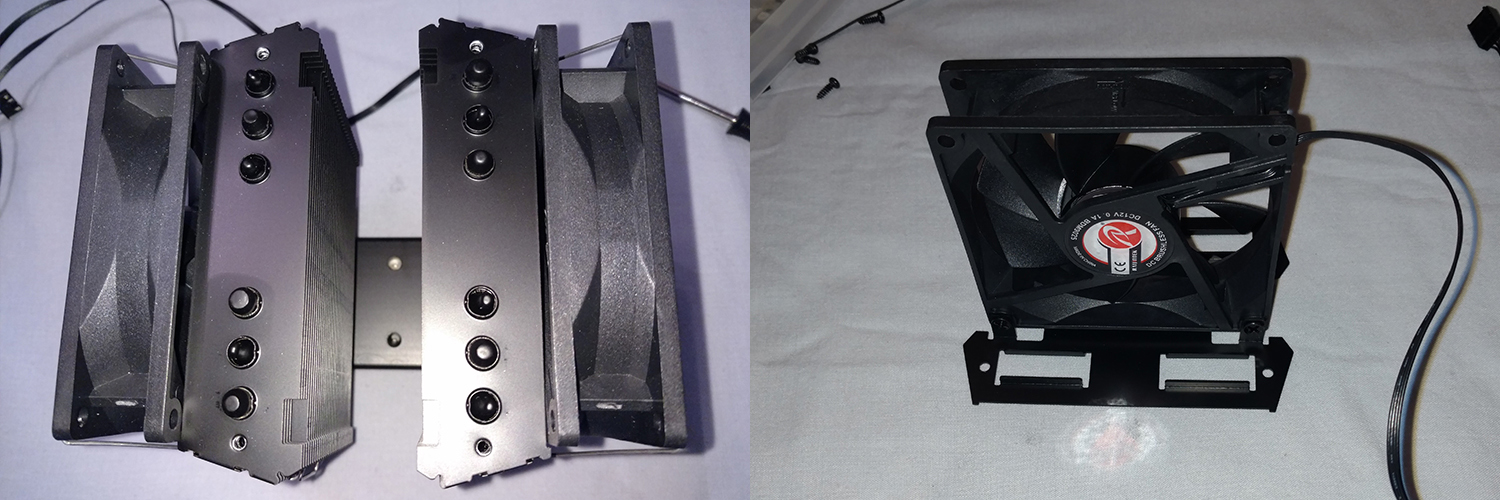
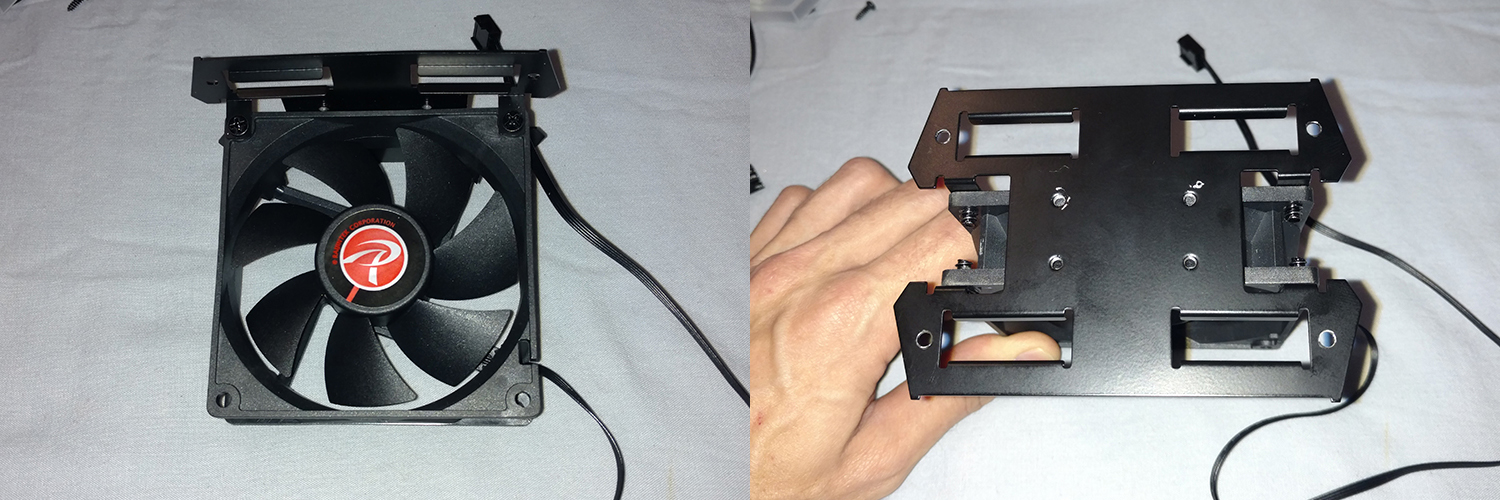
Taking a closer look at the middle fan mount used here you can see that one end of the fan is free to shift. Something as simple as installing the cooler or potentially even normal operational vibrations could cause this to shift and potentially rub like mine. In my case, I think it happened while I was installing it and I pressed on the middle fan. I do not want to however ignore the one thing I did find taking a look at what the issue was. There are some clear scarring marks on the top of the fans mounting bracket, in machine assembly lines this can happen from time to time and usually is not a big deal. I just cannot ignore it since it is on the section of the cooler I had issues with.
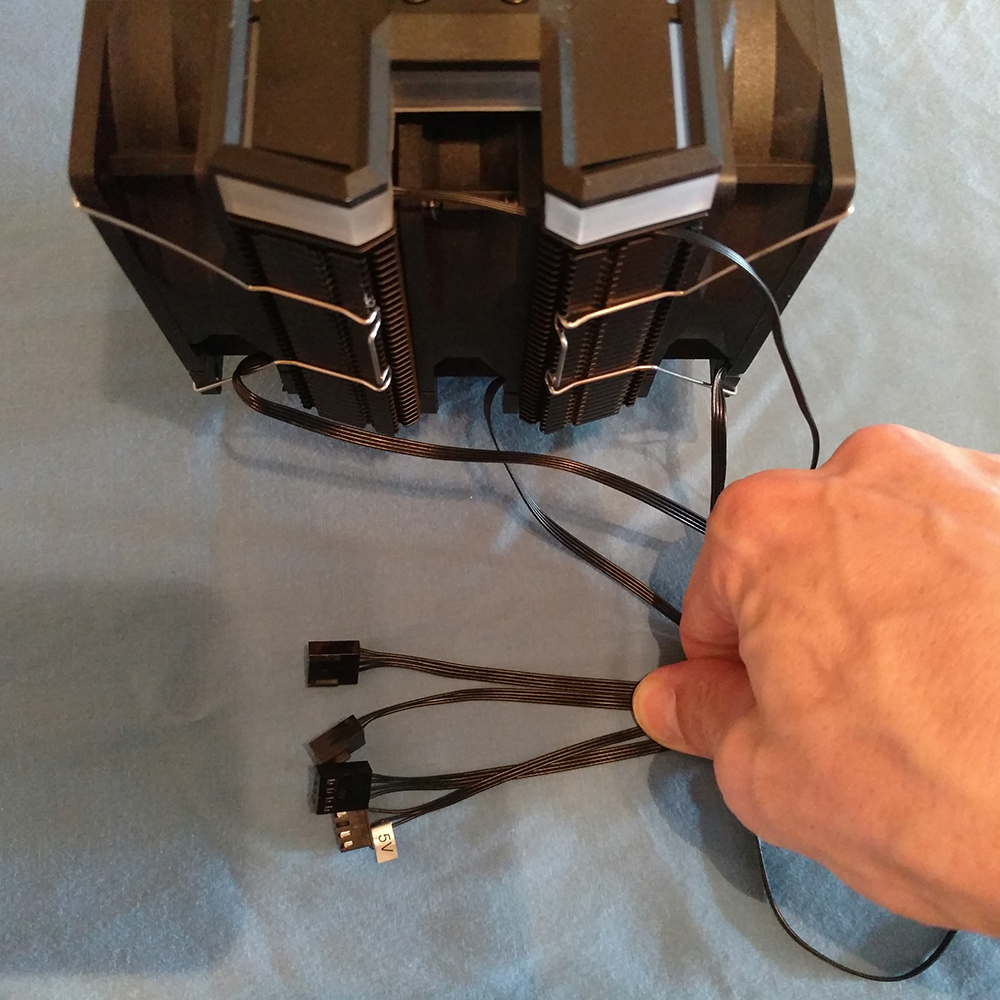
Here is the mess of cables you will need to address with this cooler. Not too bad but there are 3 PWM fan headers and a 3pin RGB header.
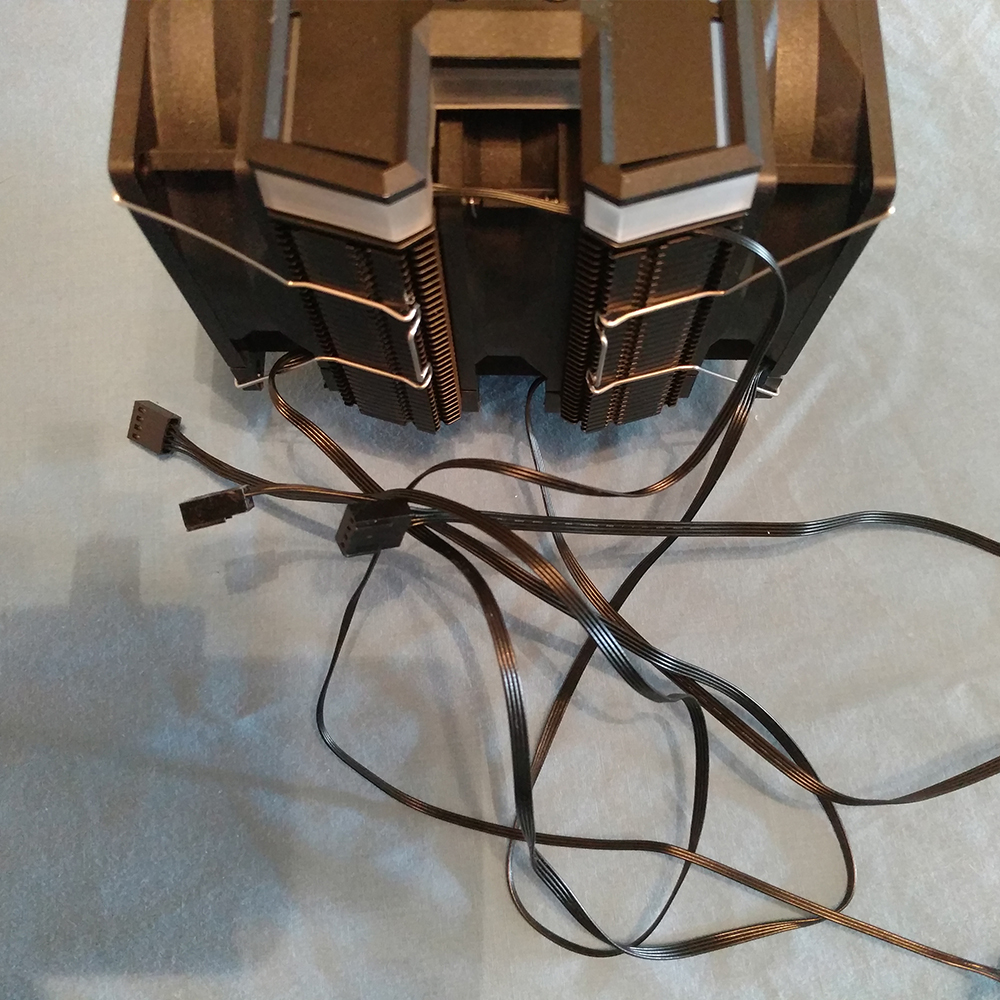
Another look at the cables loose on the table. Wow, that’s a lot to manage, but its nothing a zip tie or two cannot handle.
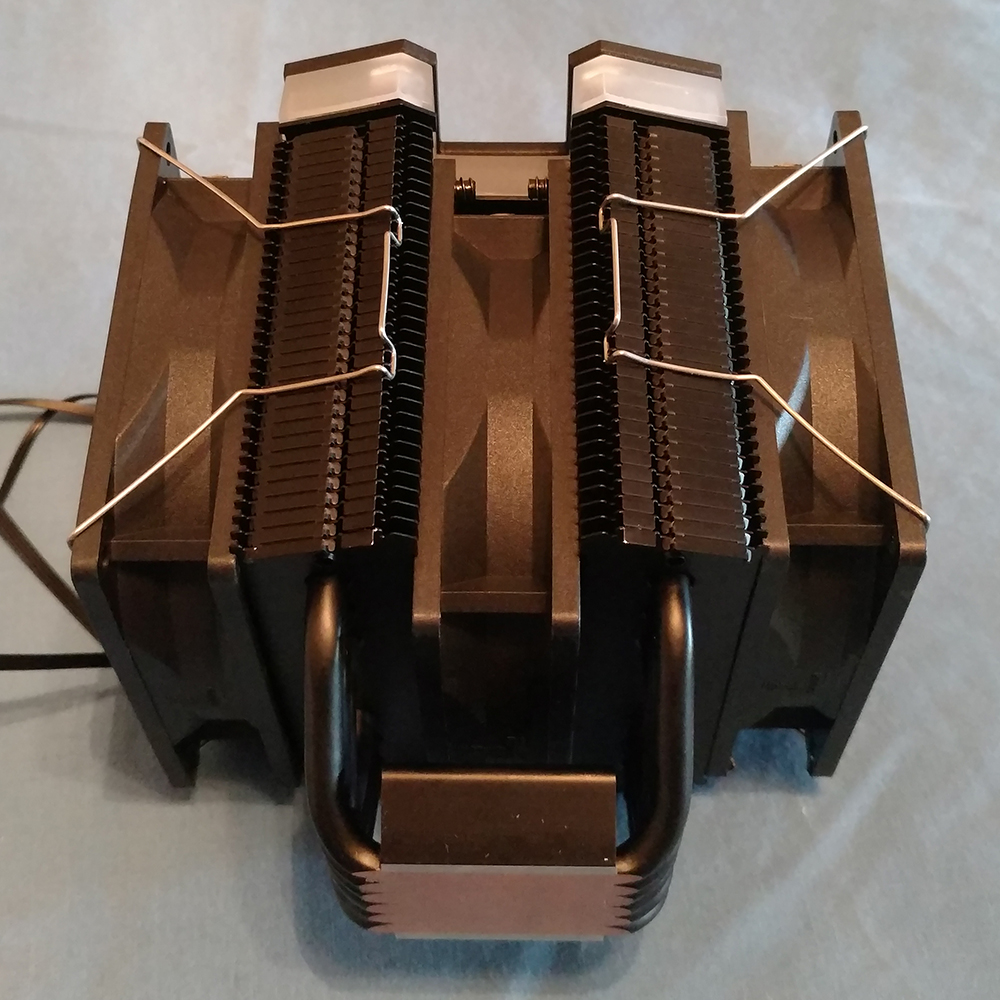
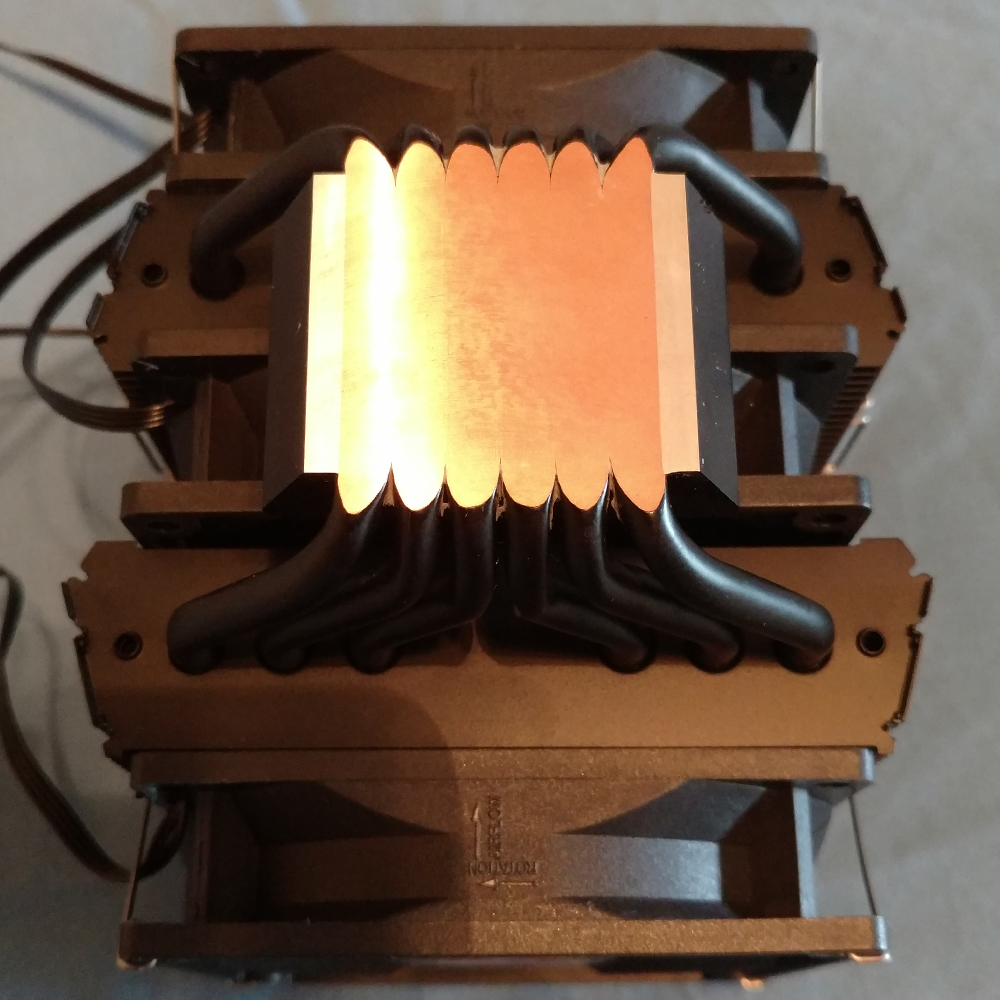
Here we have the direct contact heat pipes there are 6 of them going into the two stacks of heat fins to help dissipate the heat.
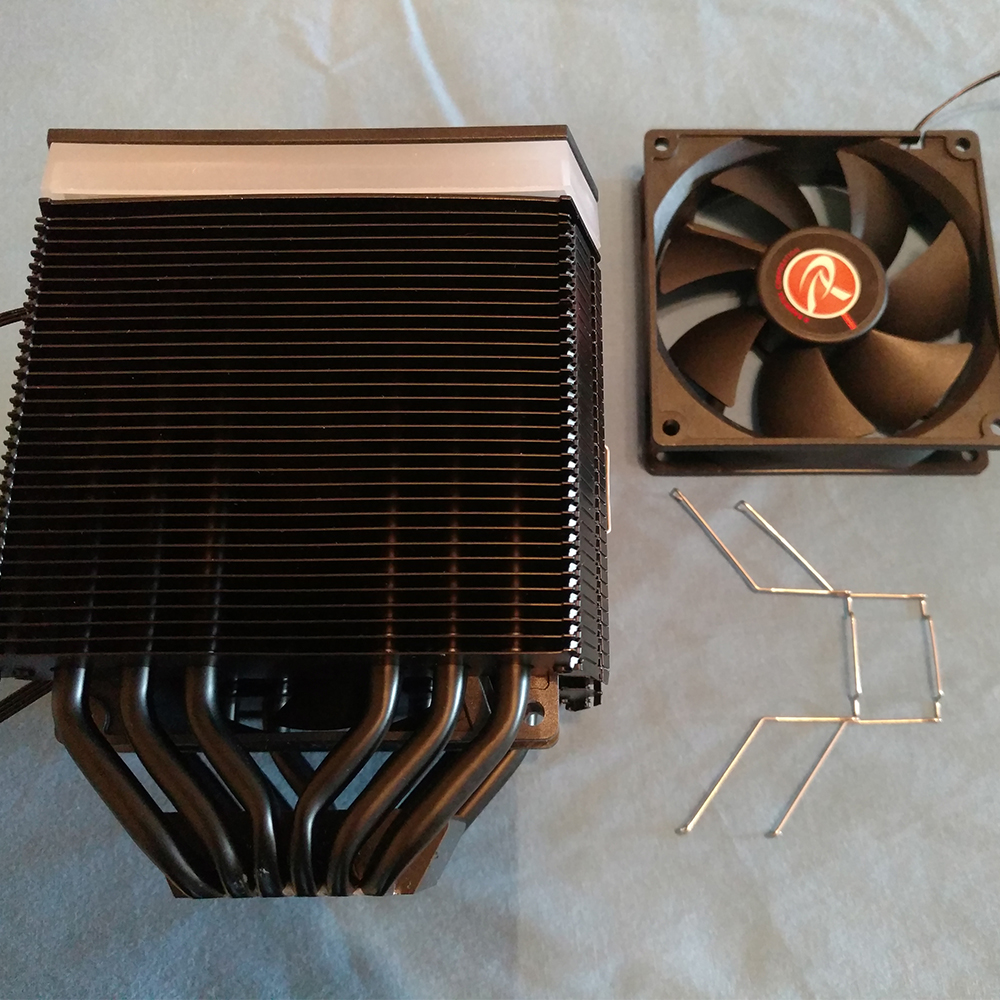
Here we can see the fin stack on one side there are 32 fins per tower for a total of 64 fins between the dual towers to help dissipate heat.
RGB Effects
Below is a short video displaying some of the effects I was able to get with the additional cable I purchased to connect the DELOS RBW to my ASUS Aura Sync build. To be clear this is the 3 pin out connection with one pin missing in the 4 pin layout.
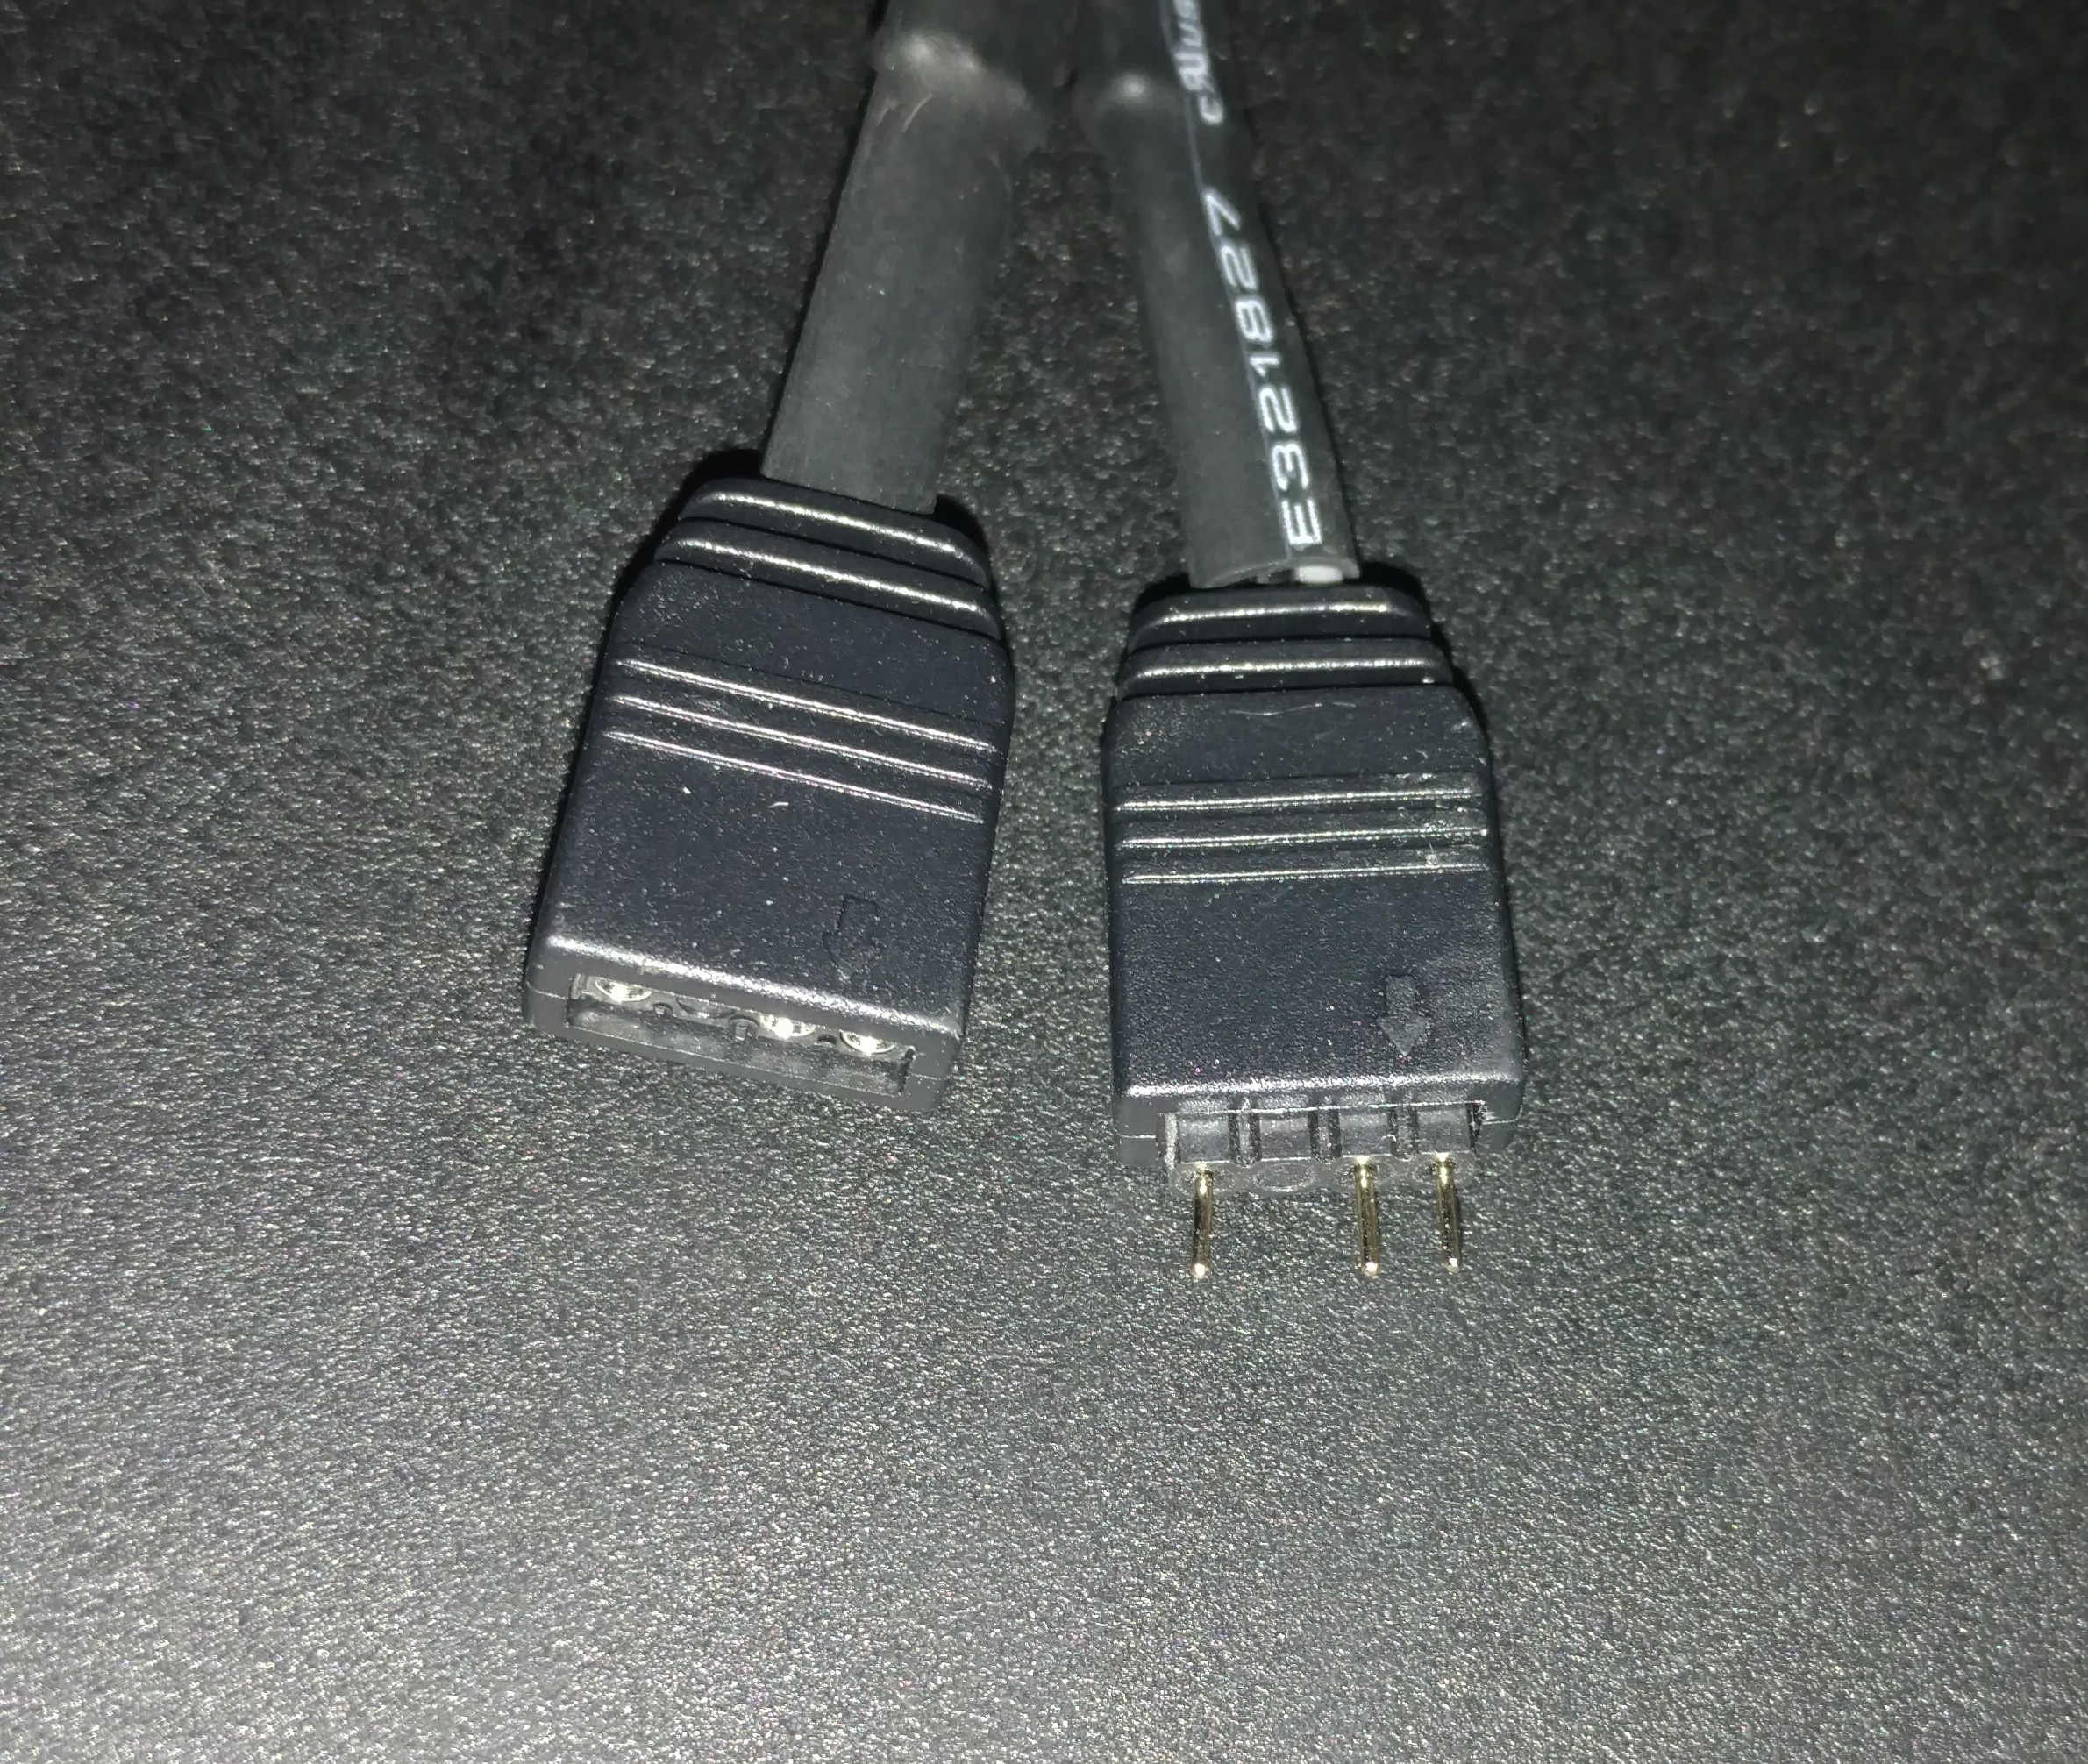

I also want to note that if you do not have this specific RGB pinout on your motherboard you will need an adapter cable like I used or Raijintek’s controller box that will allow both motherboard and remote control. Outside of that, there is no way to connect the RGB out of the box minus having a “Rainbow ADD” RGB header. A small SATA powered RGB controller like I picked up would be a nice addition for Raijintek to consider here to make their cooler work with more systems.
Installation
This one is a little complicated and you need to make sure you get all your parts snug and into the right place. This process is virtually no different from the MYA RBW cooler we recently reviewed here. For the most part, the backplate and mounting clip are fine and rather easy to set up and get installed. Once it comes to mounting the cooler with the crossbar the story changes a bit. This one you do not have to thread a hole to install but you will still need a long Phillips head screwdriver to reach the two mounting clip screws. Once you get through that hurdle you simply have to snap the fans into place with the provided fan clips, which were pre-installed.
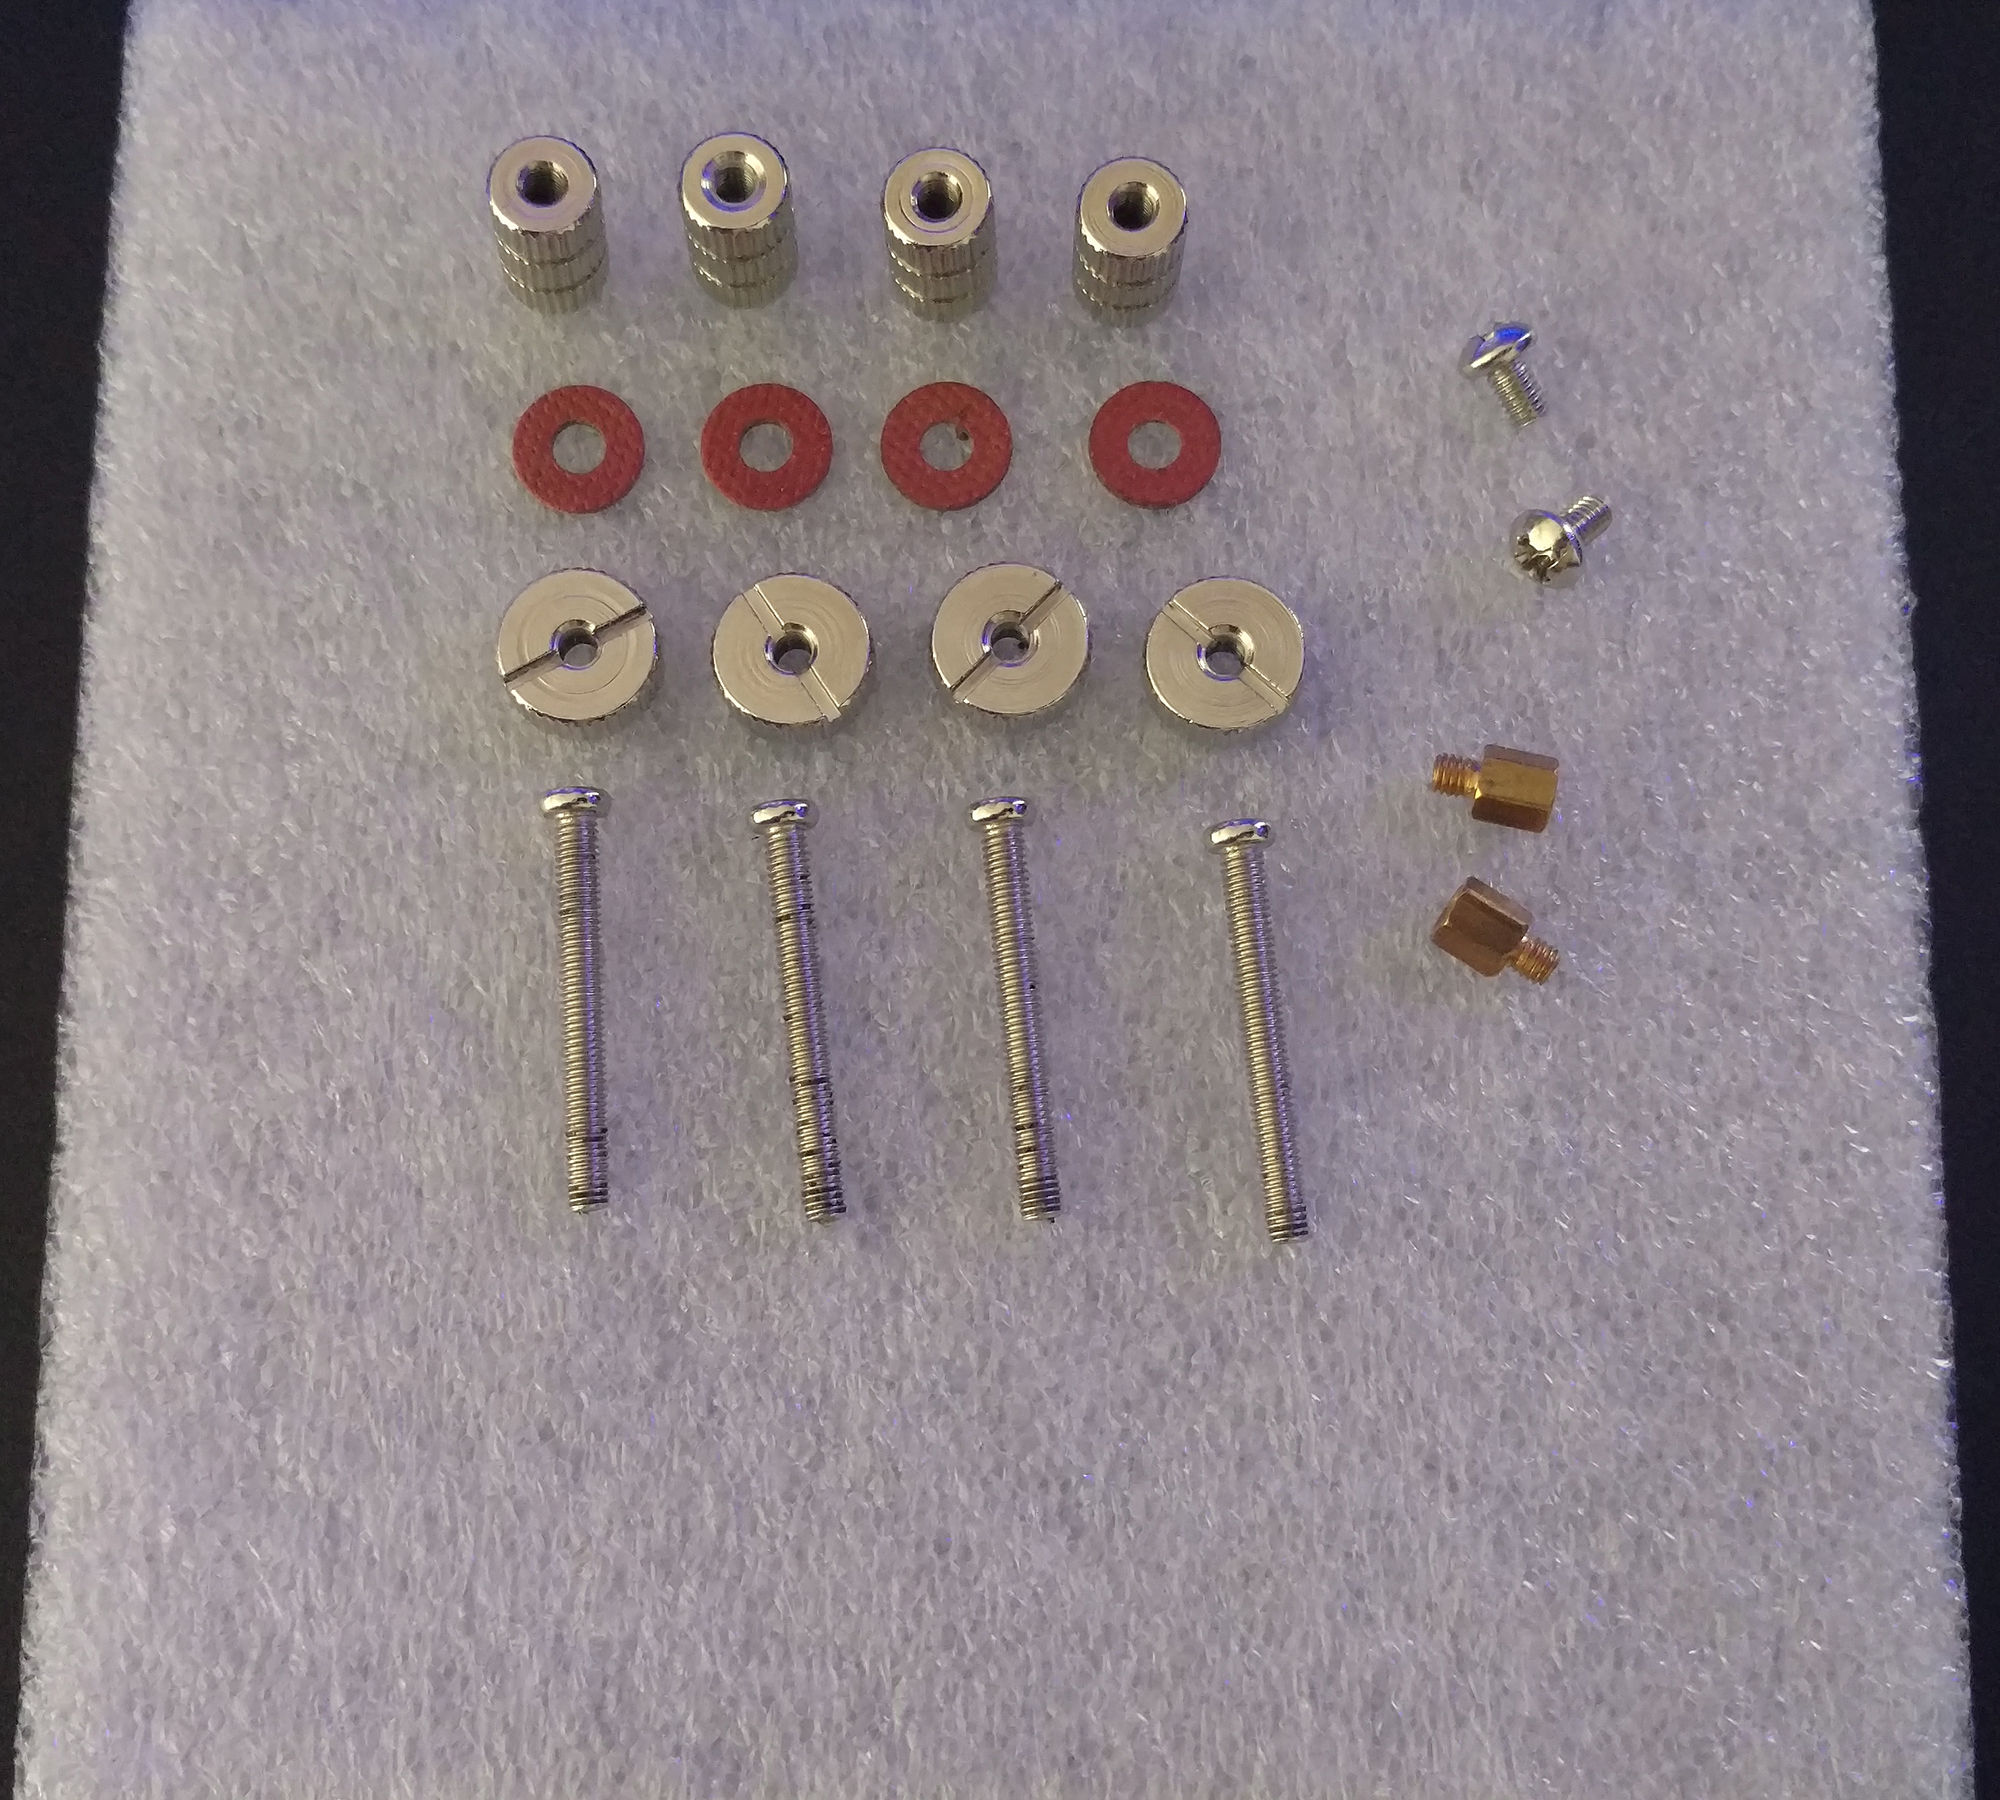
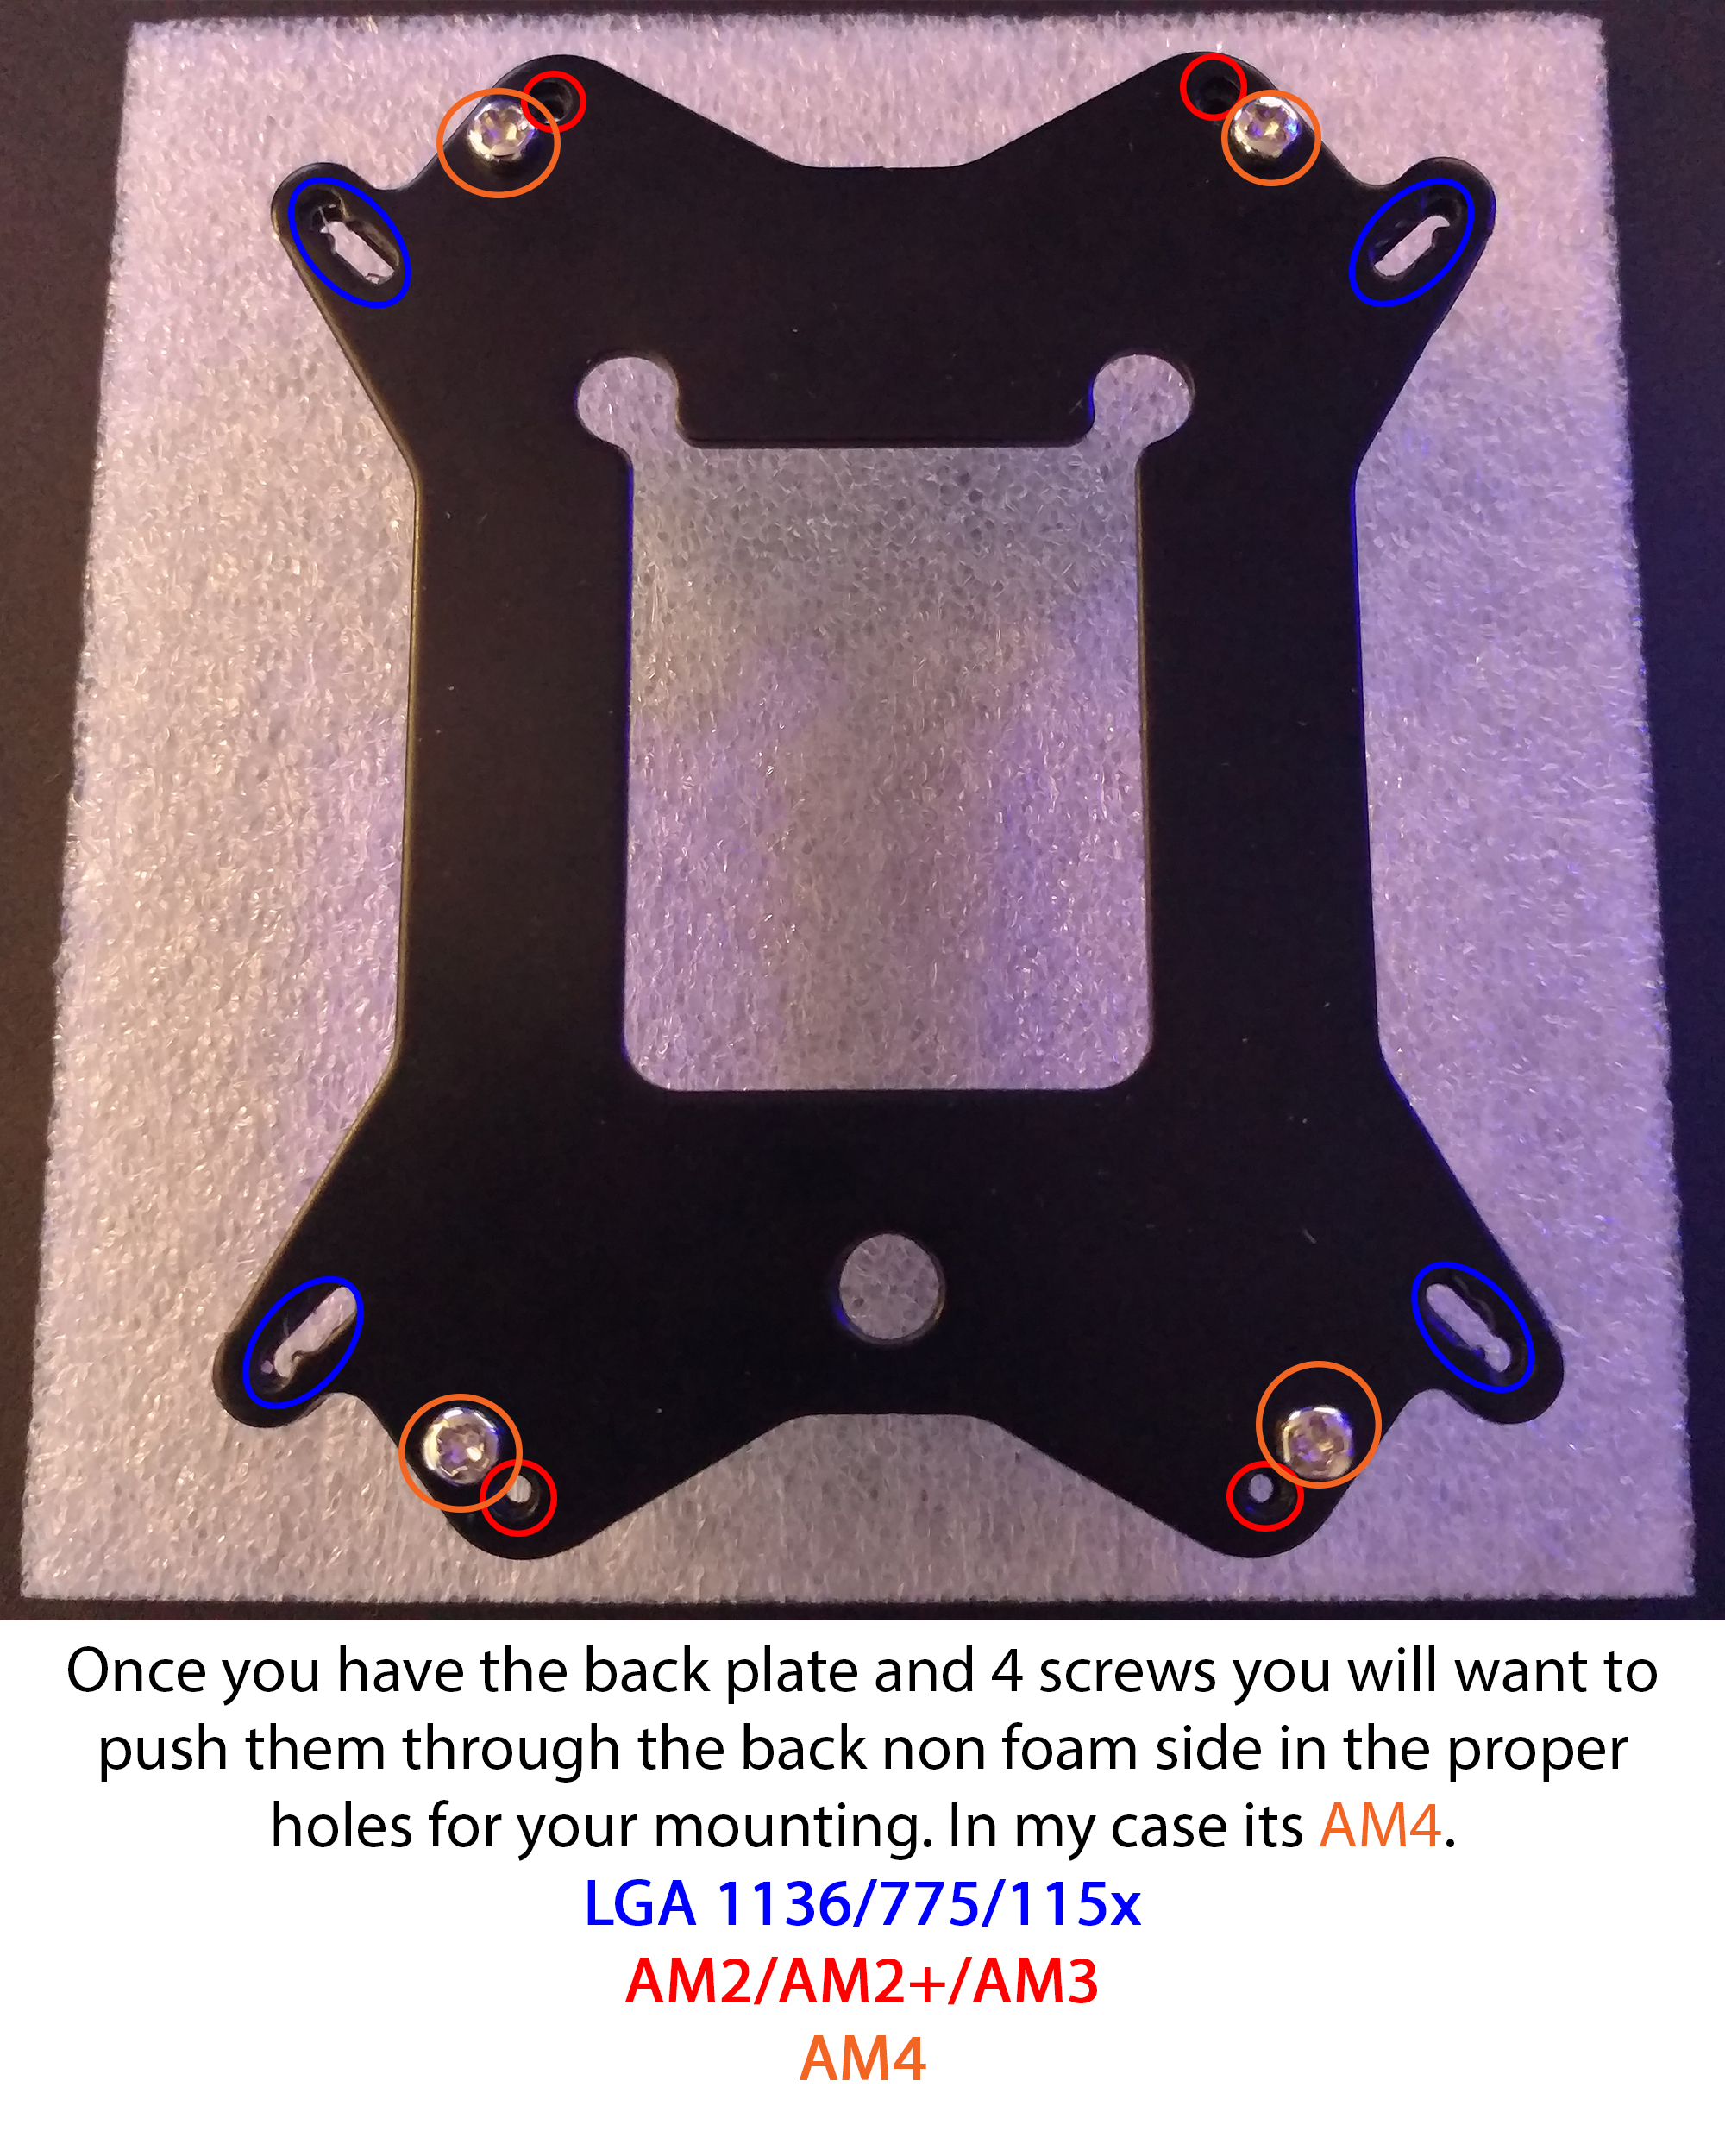
All of the little parts needed to install the DELOS RBW on an AM2/AM2+/AM3/AM4 socket (note different sockets will use different holes on the backplate dependant on socket type).
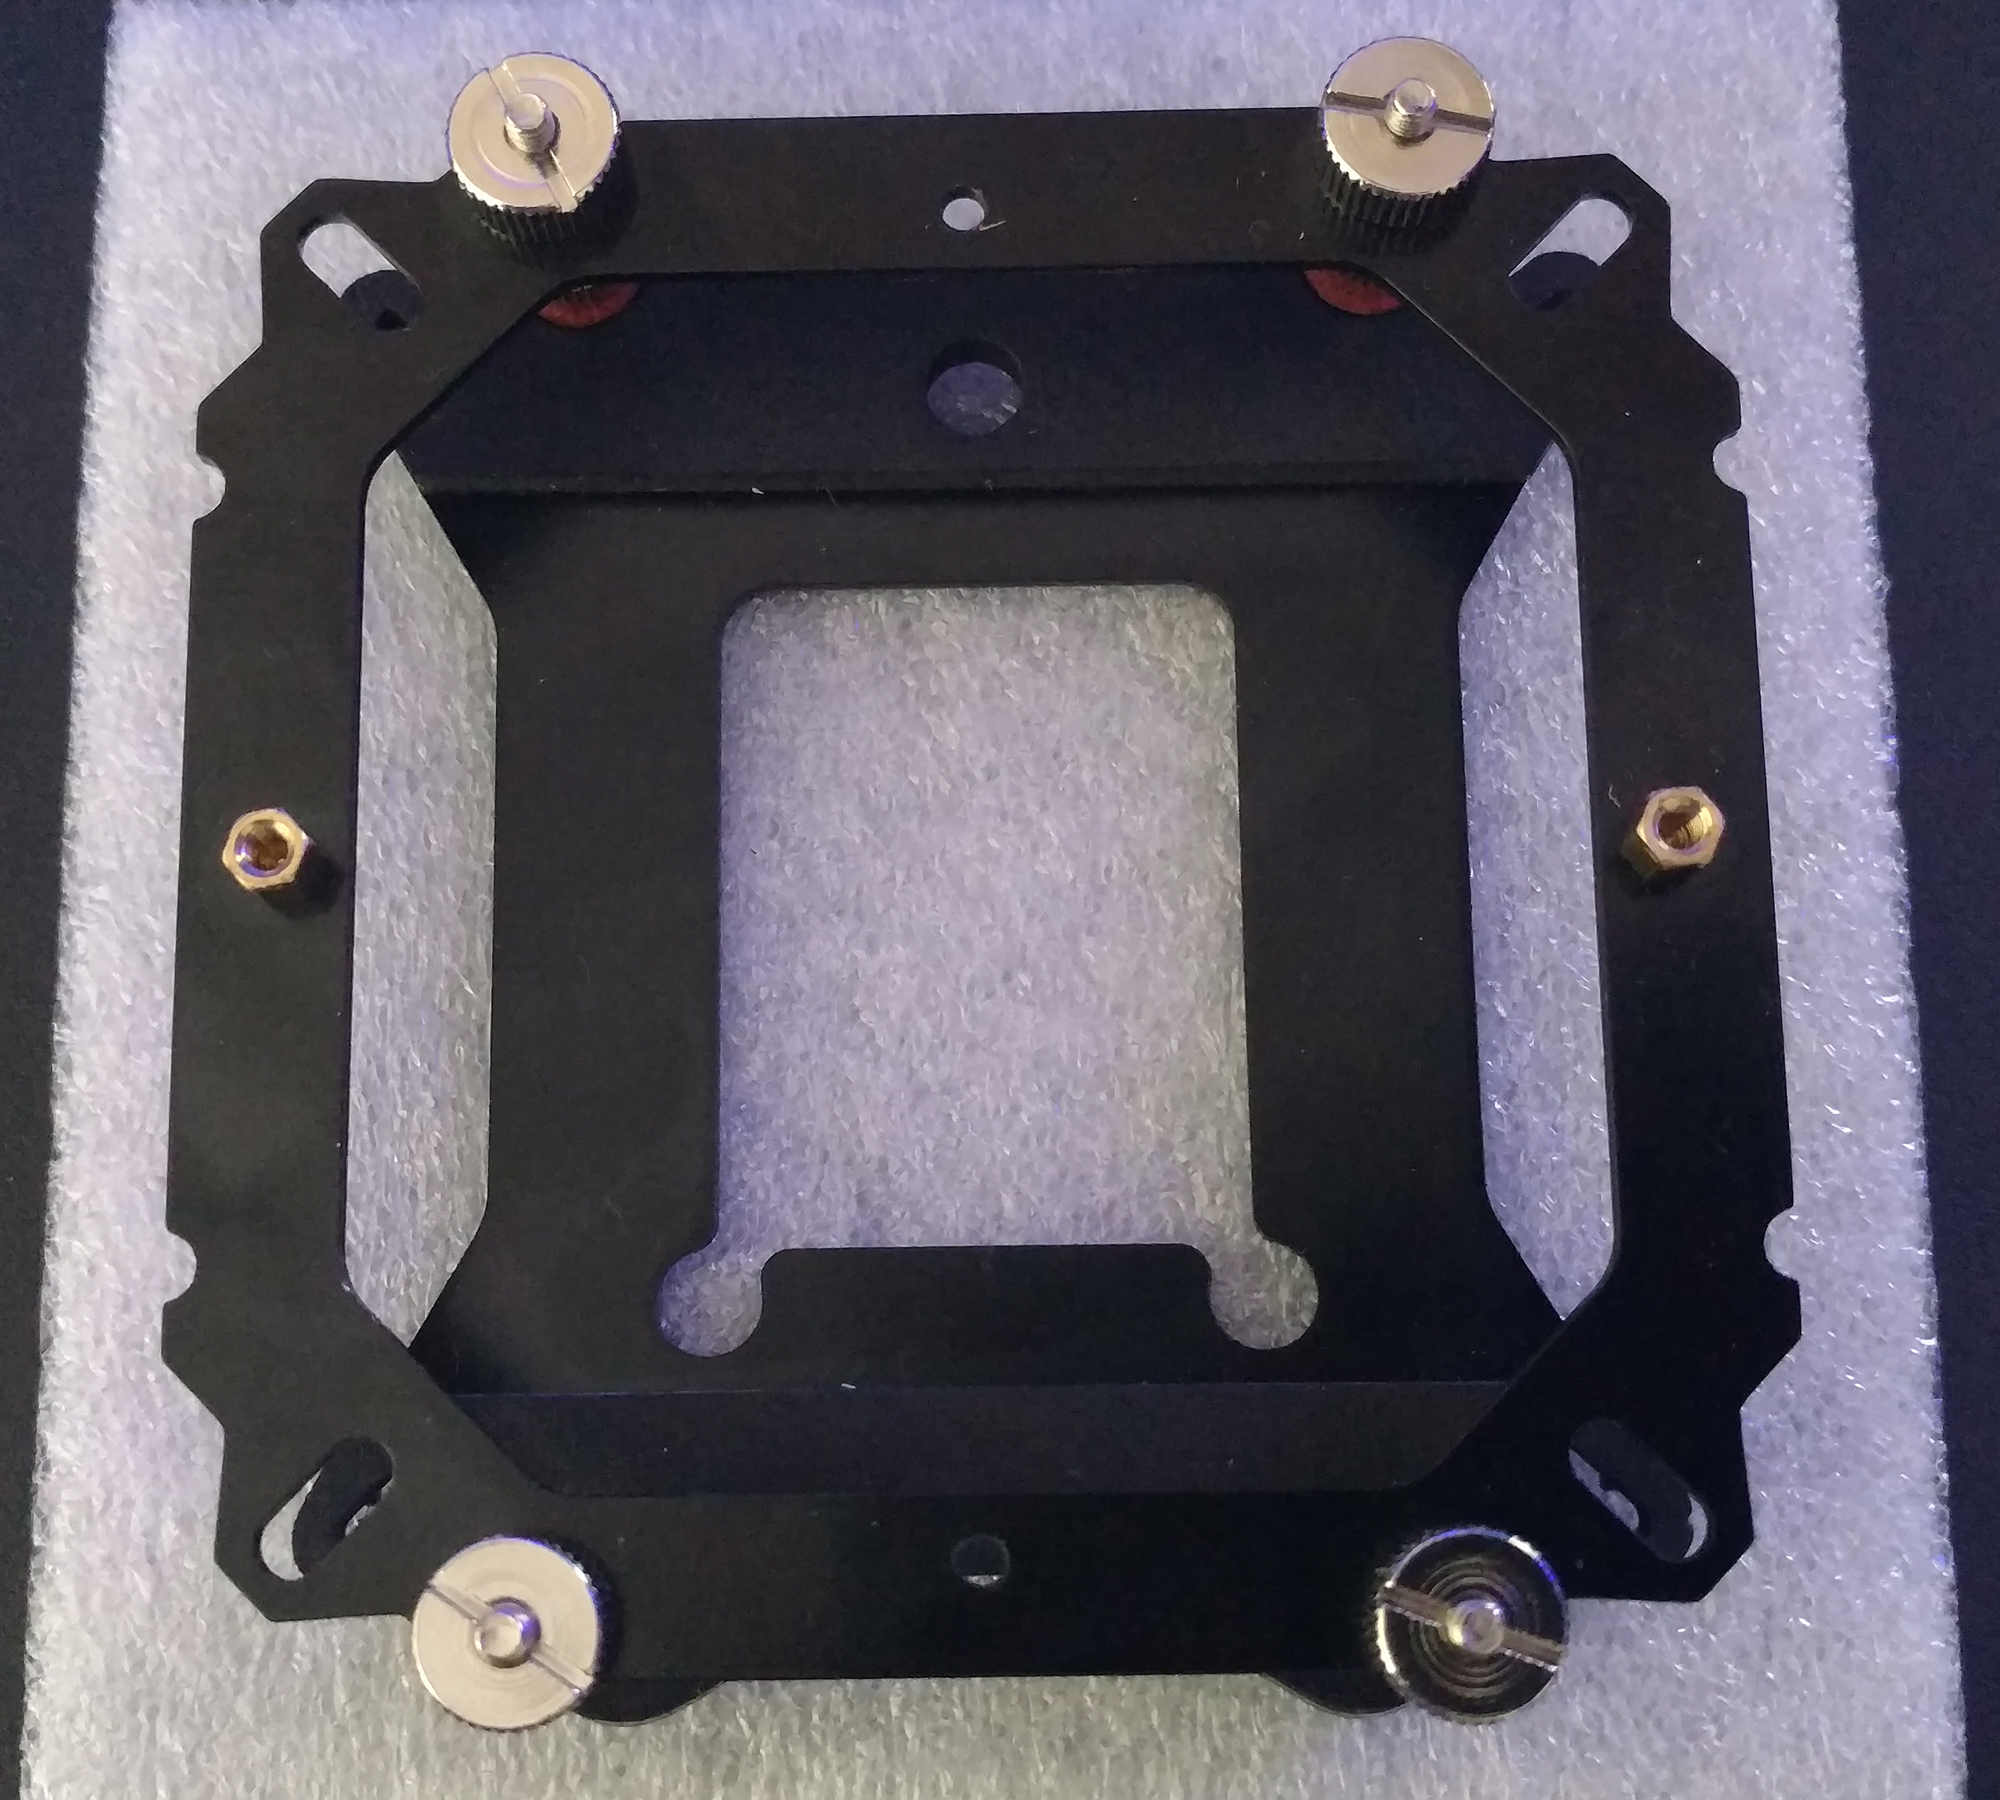
First, you will need to find the Backplate and the 4 longer Knurled threaded screws.
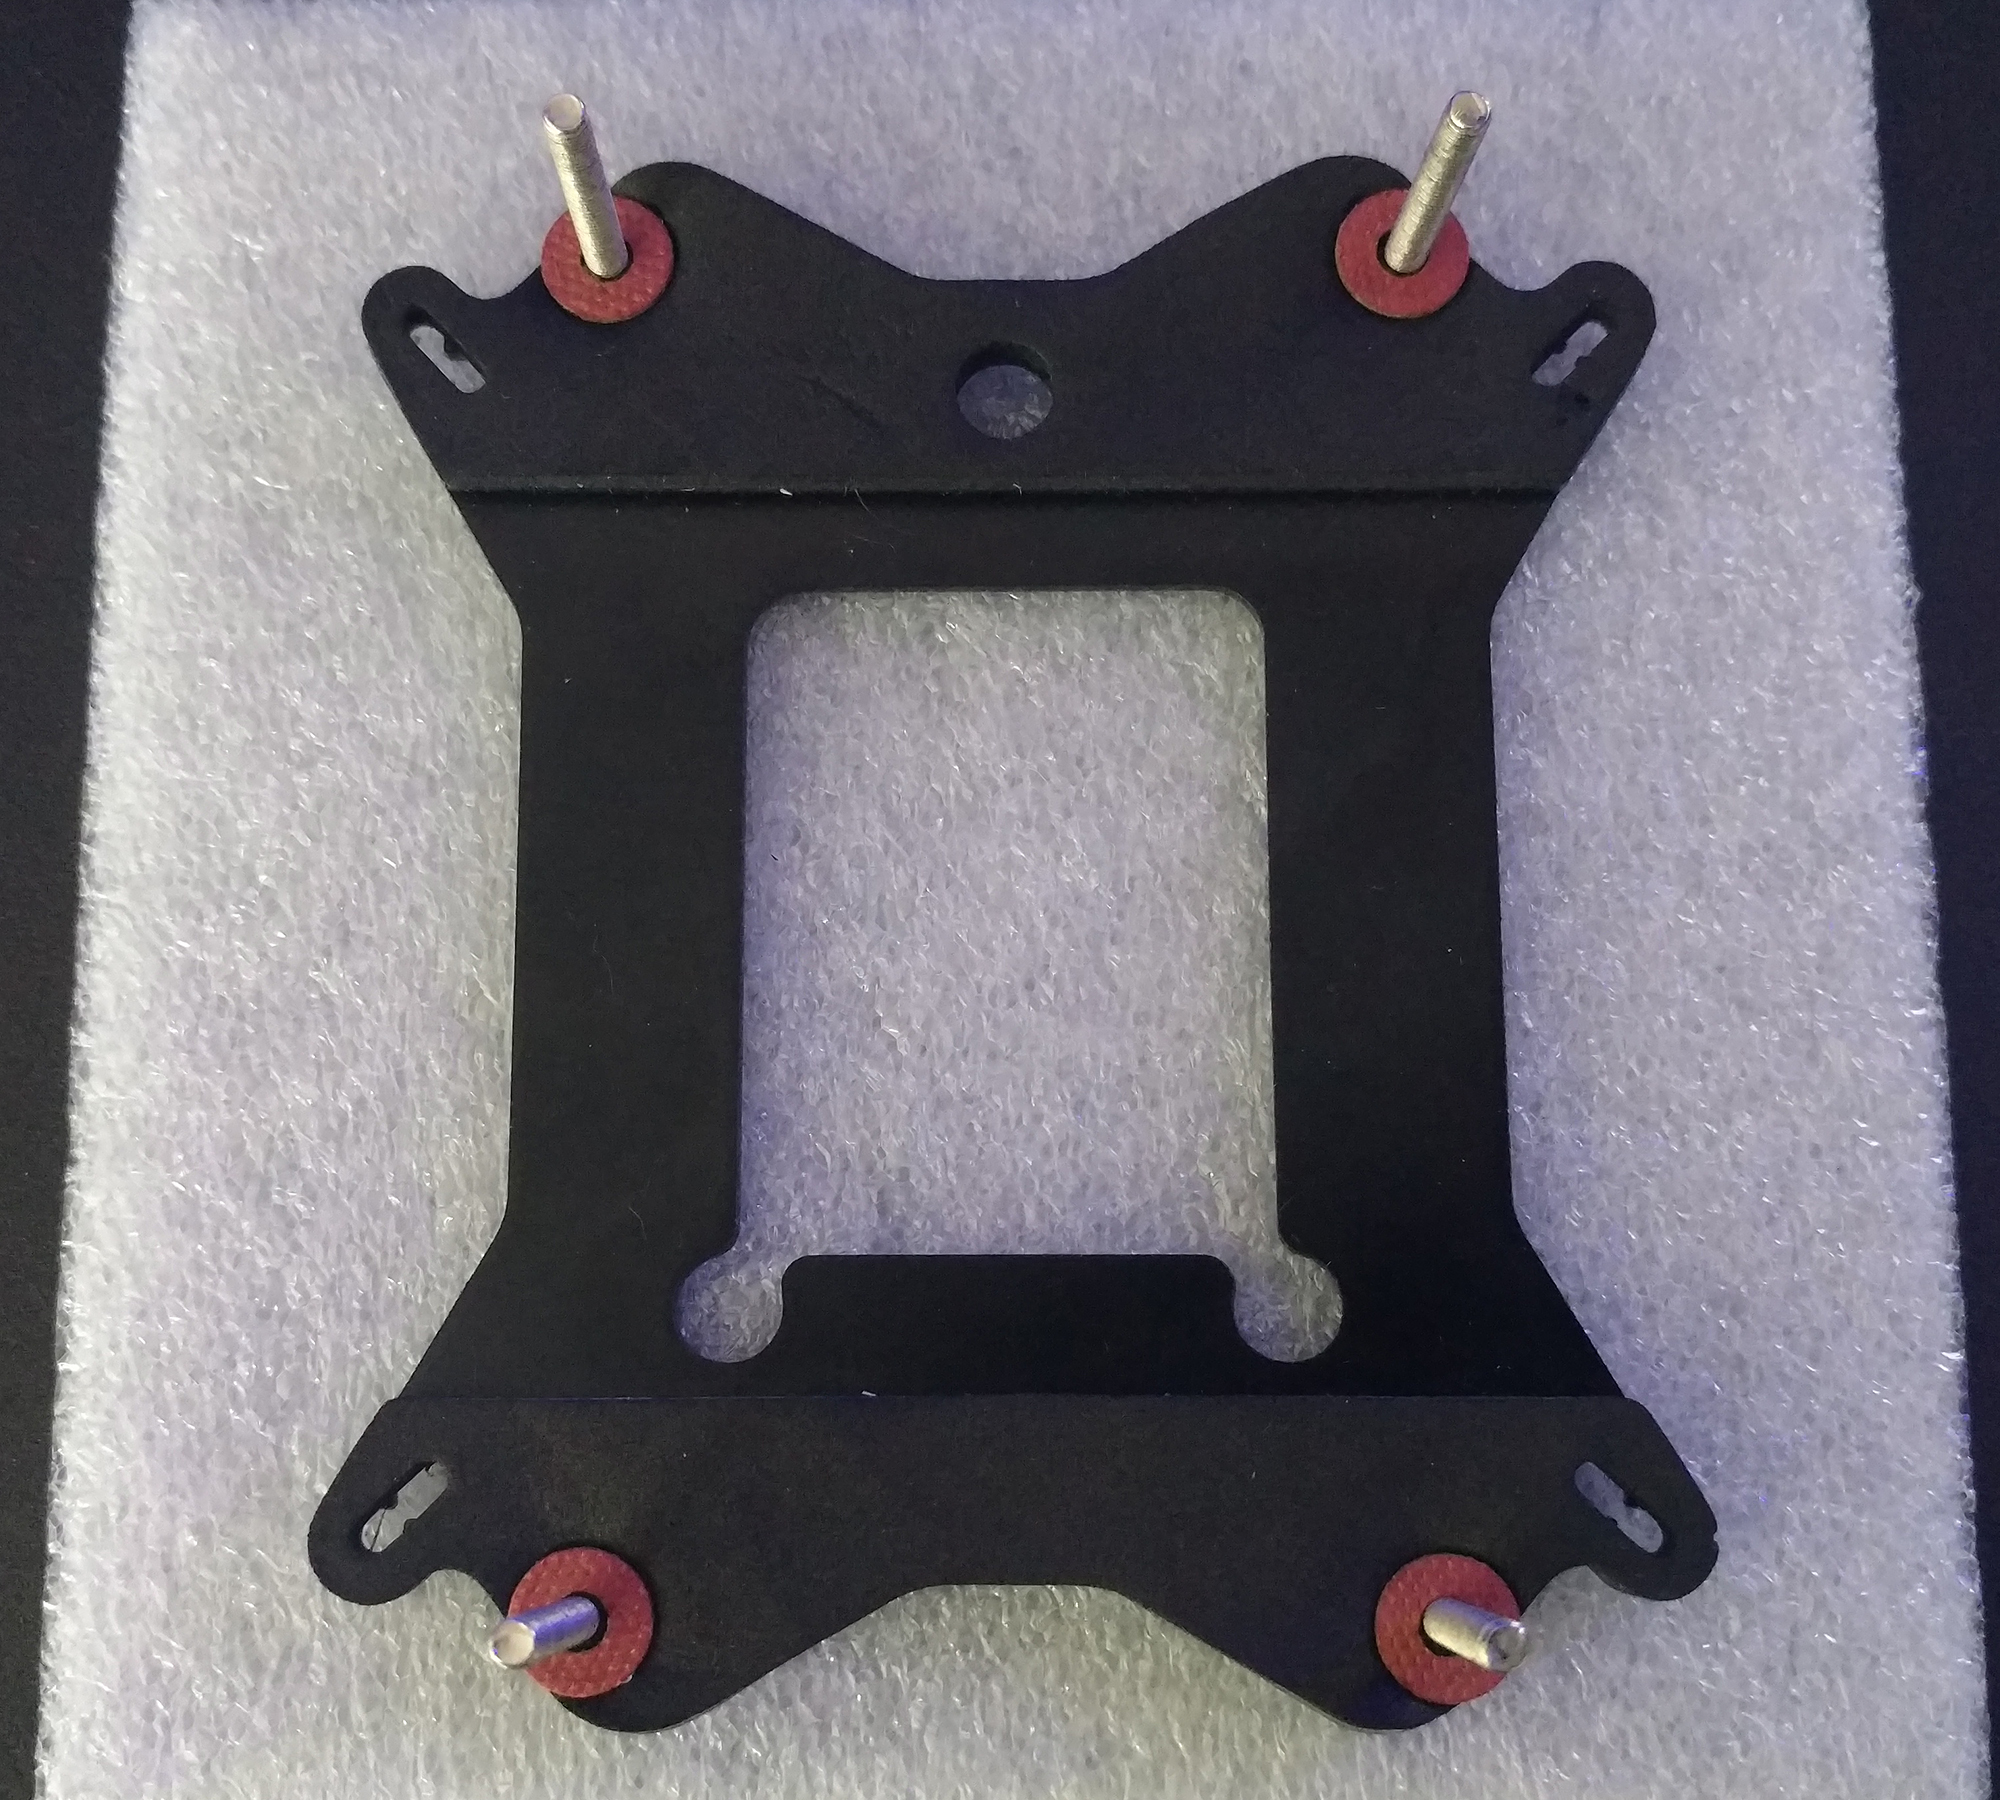
With the backplate in place on the back/bottom of the motherboard, you will want to find the red Washers and put one on each screw sticking out the front/top side of your motherboard.
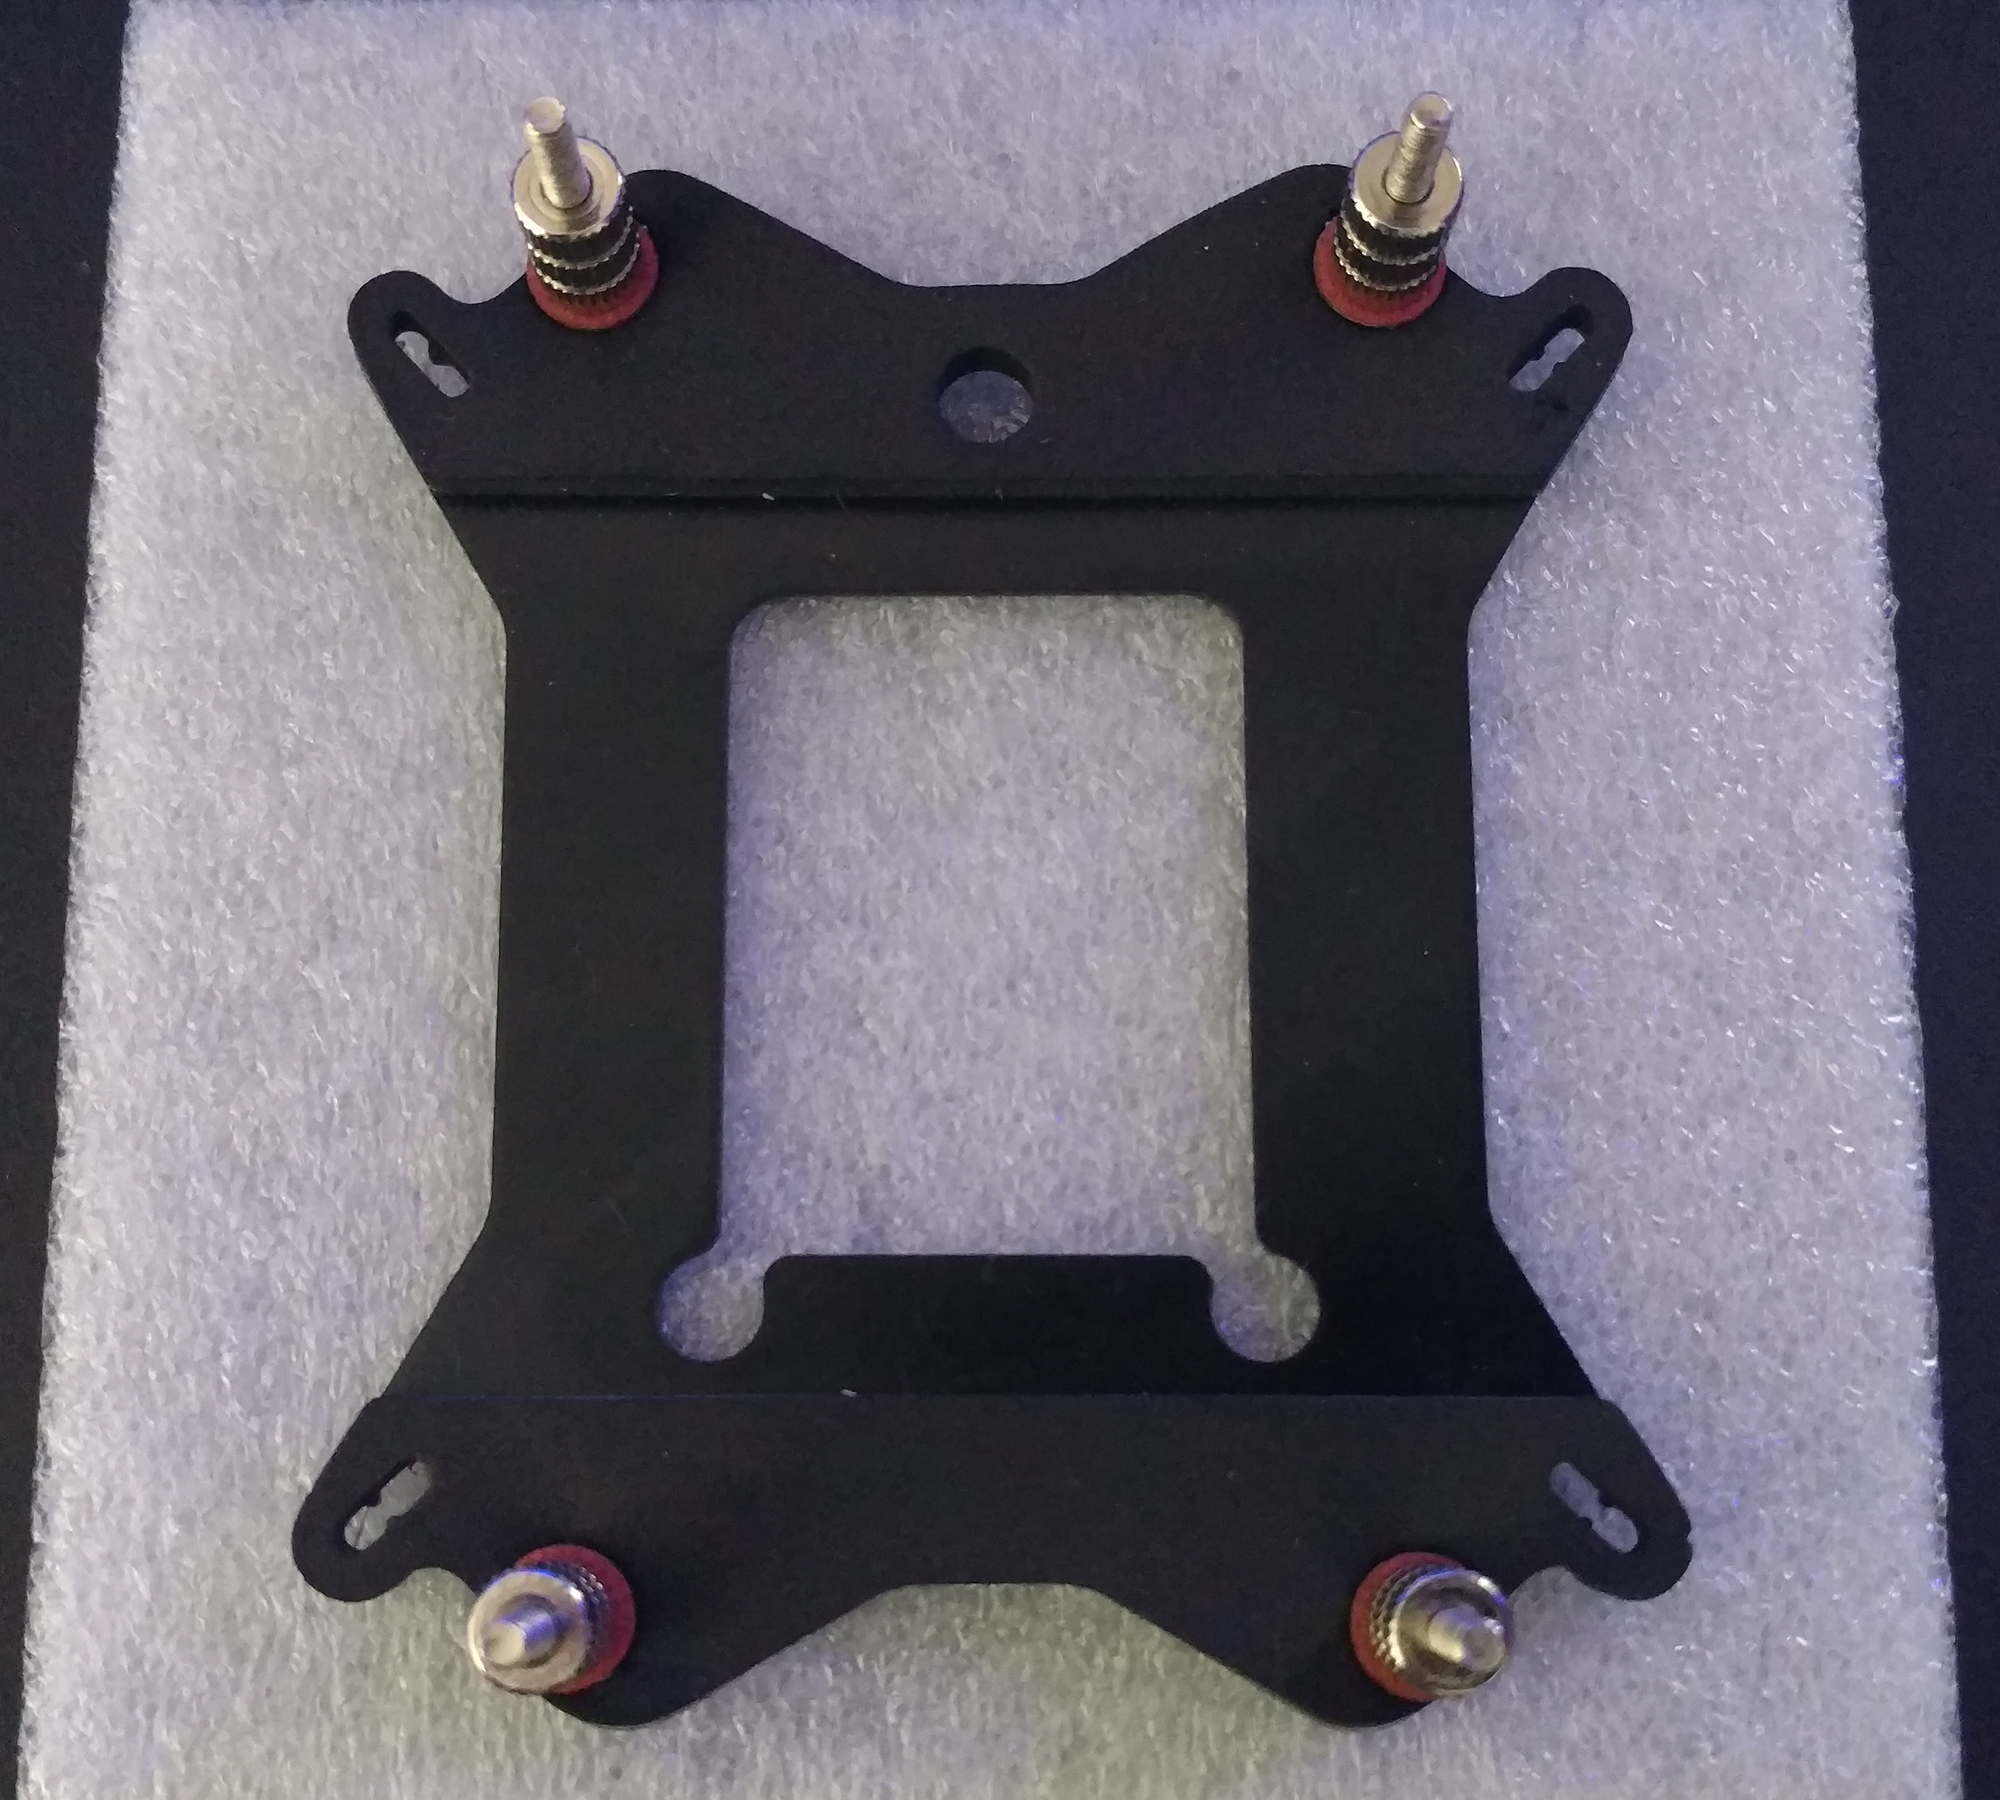
With the backplate under your motherboard and the red washers installed on the top side, your next step is going to be the 4 longer Metal-nuts. Tighten each one down nice and firm, to the point the foam pads on the back squish down a little. You might have to thread each Metal-nut first and then lift the motherboard using a screwdriver from behind to hold the screw while you tighten the Metal-nut.
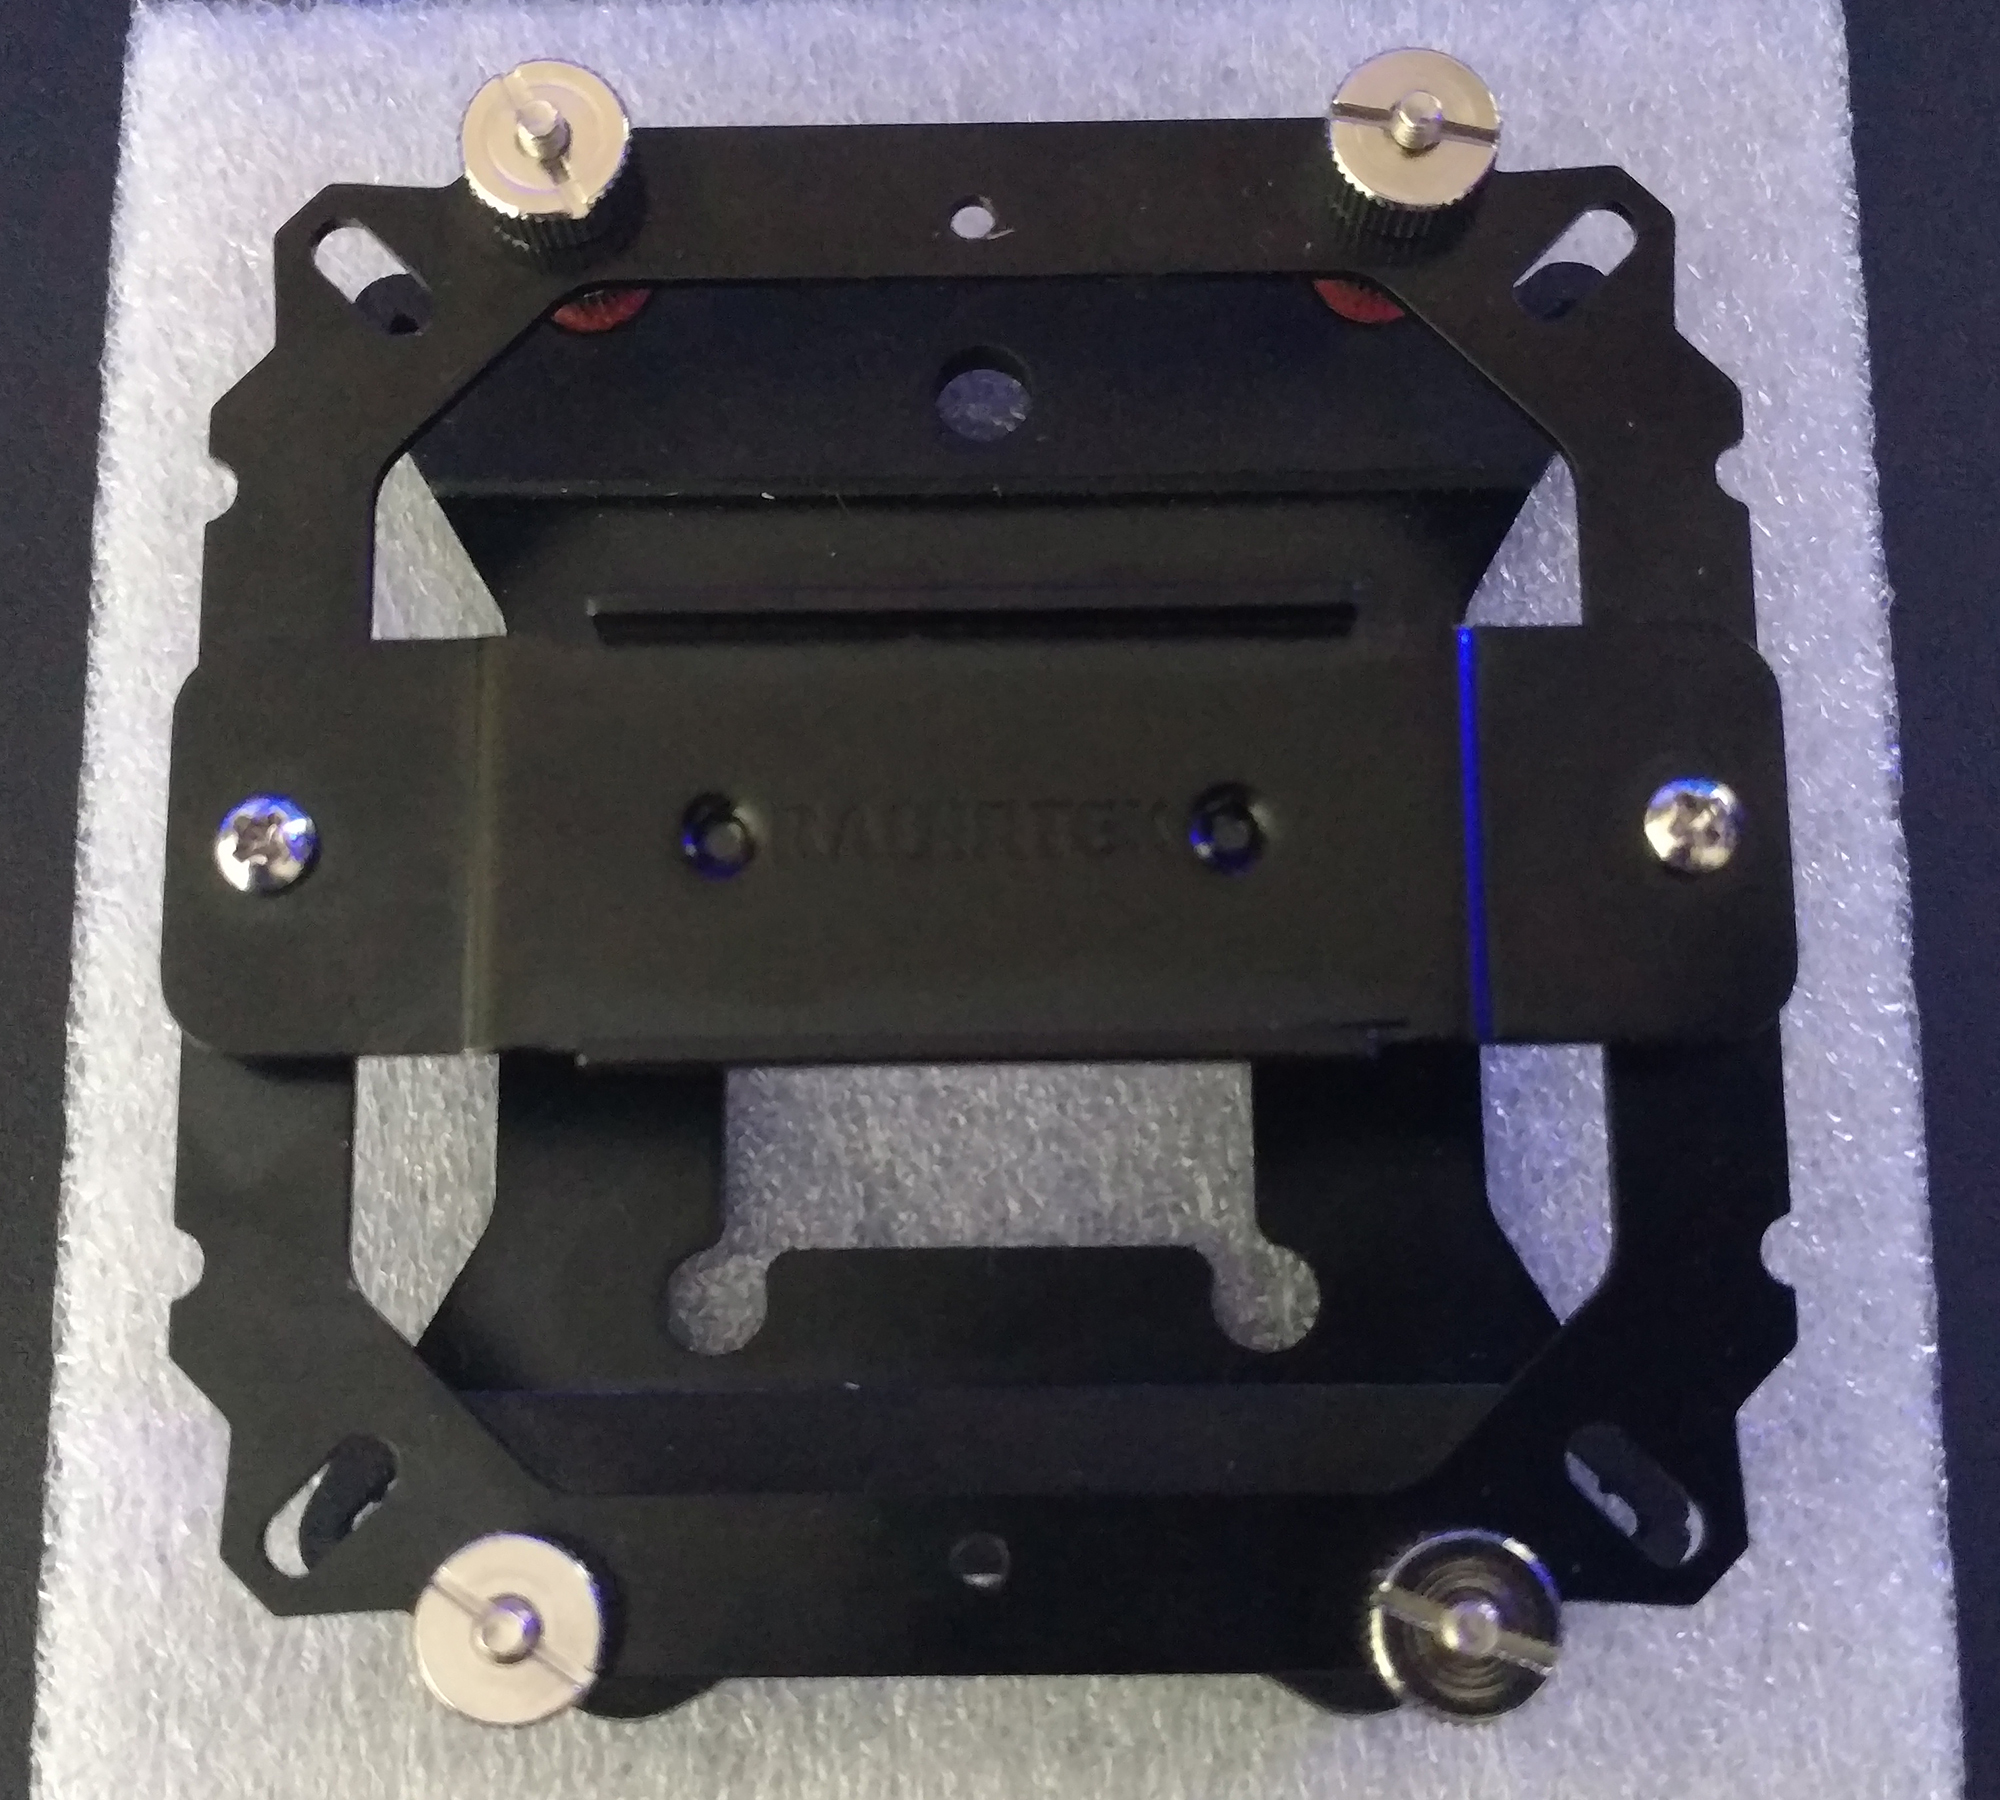
Now that you have the 4 longer Metal-nuts installed to hold the backplate in place, it is time to install the Mounting-Clip. Note the way this is set up with the two gold Stand-Offs will point the cooler airflow from front to back.
Now that the Mounting-Clip is in place you will need to secure that with the 4 shorter Metal-nuts. Tighten each one down checking to see that everything is going on even as things tighten down. You basically want the same amount of screw sticking out the top of the shorter Metal-nuts to ensure even mounting pressure.
The last part to mount the DELOS RBW is the Crossbar. This part is tricky and will require a rather long screwdriver for the screws since the only way to access them is through the top of the cooler itself.
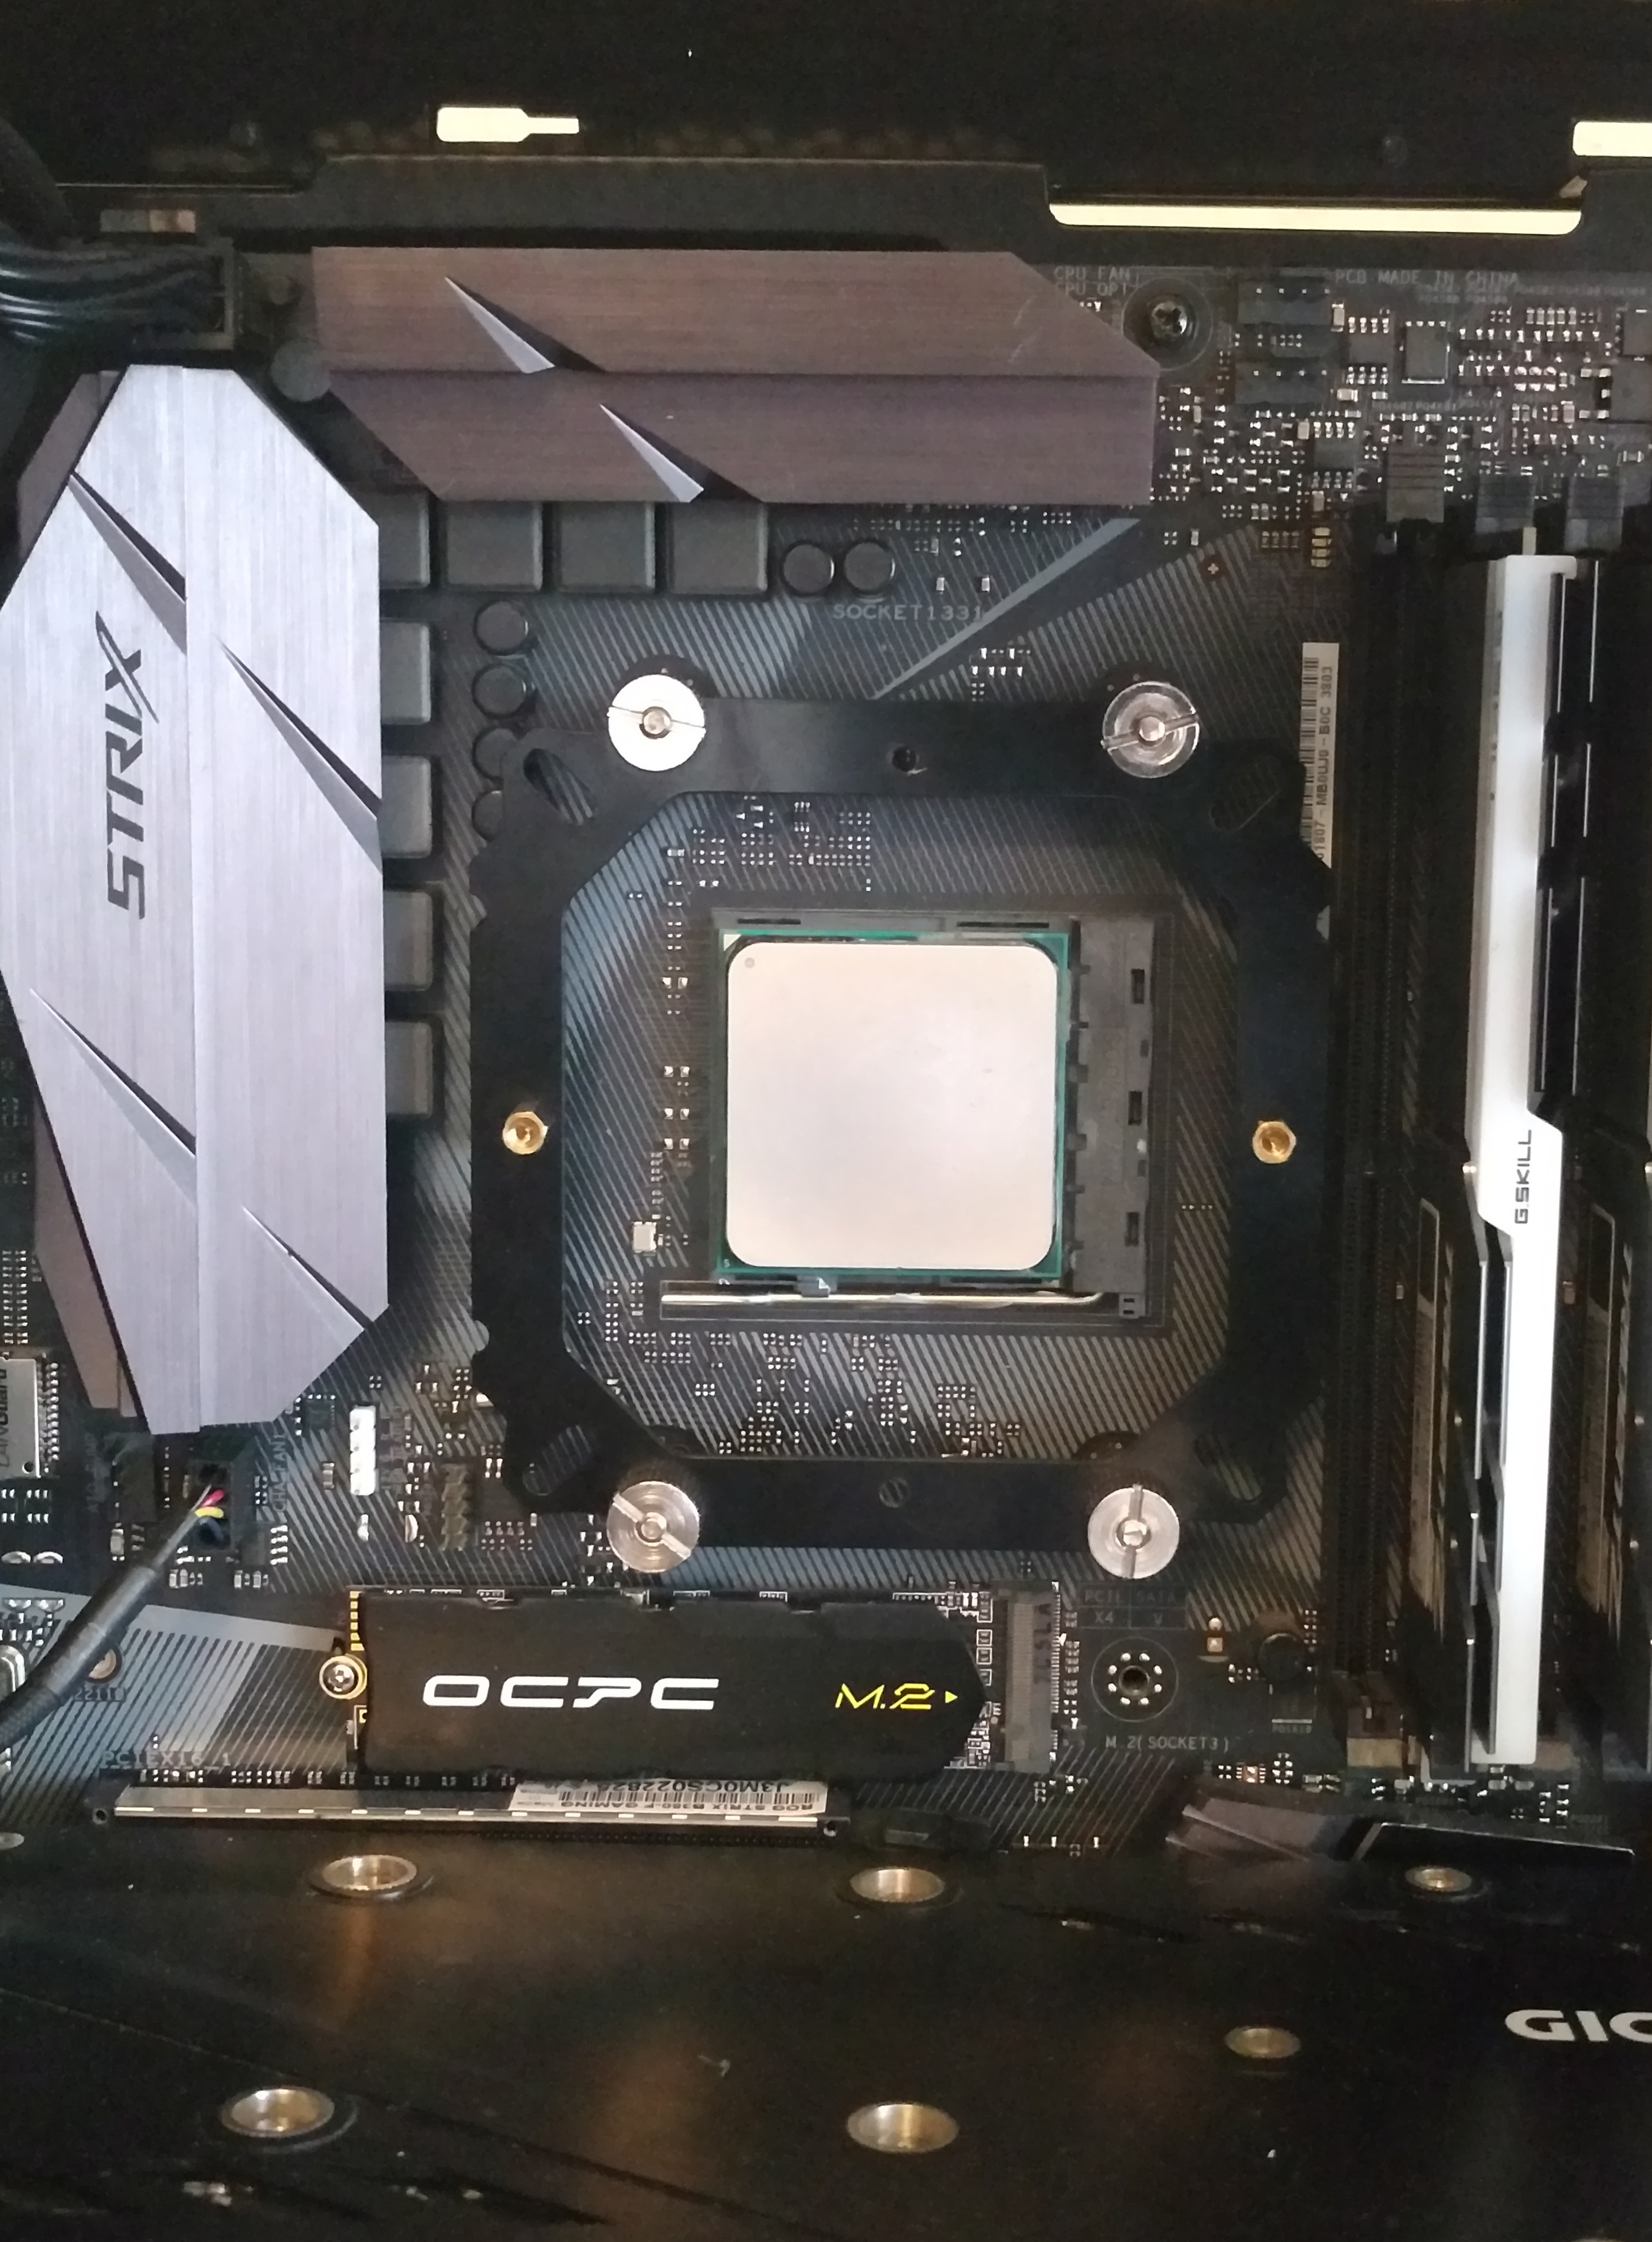
A view of the Mounting-Clip and Bracket in place from the top side of the motherboard before the DELOS RBW is installed.
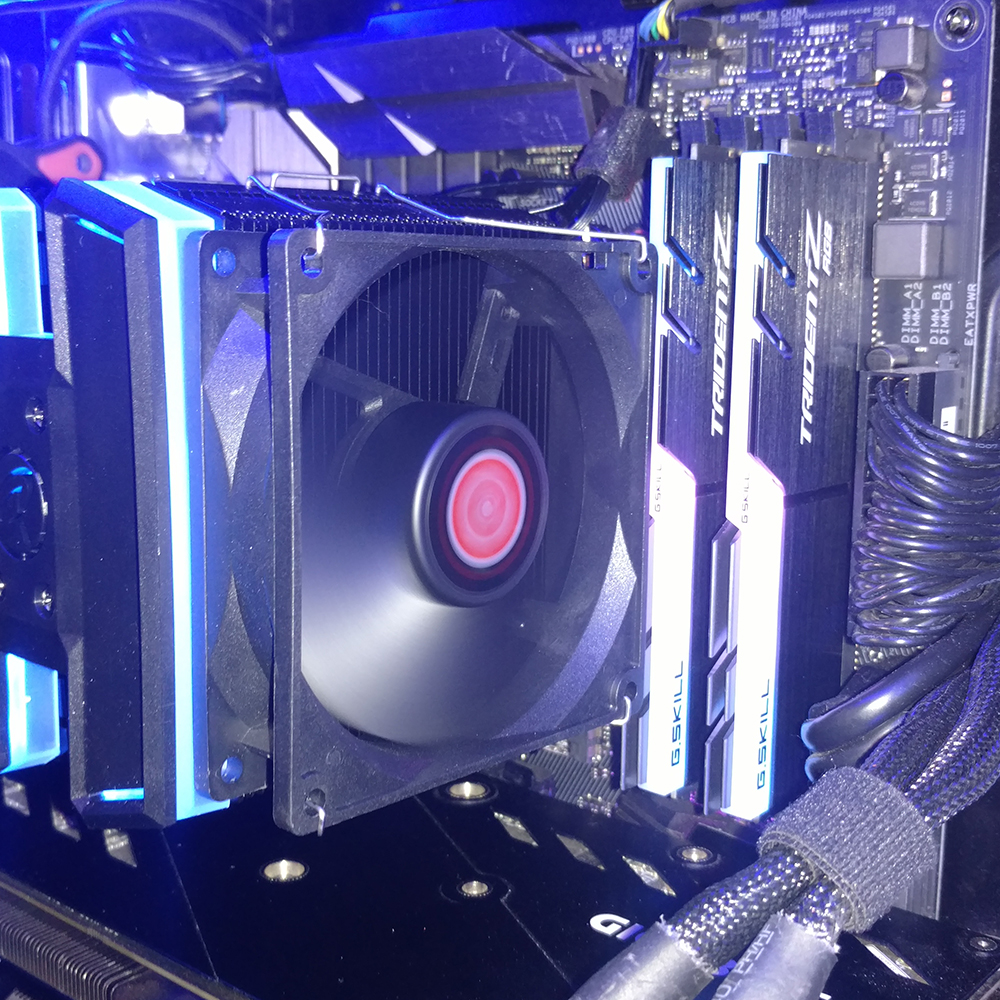
Here we can see how the DELOS provides more than enough clearance to comfortably rest over a kit of Trident Z RGB with about 4mm to spare. You can also see how I chose to deal with the 4 cables running off the cooler itself. I will say that zip ties will serve better and will look cleaner than a velcro strip but this serves for cooler testing better than cutting zip ties out all the time.
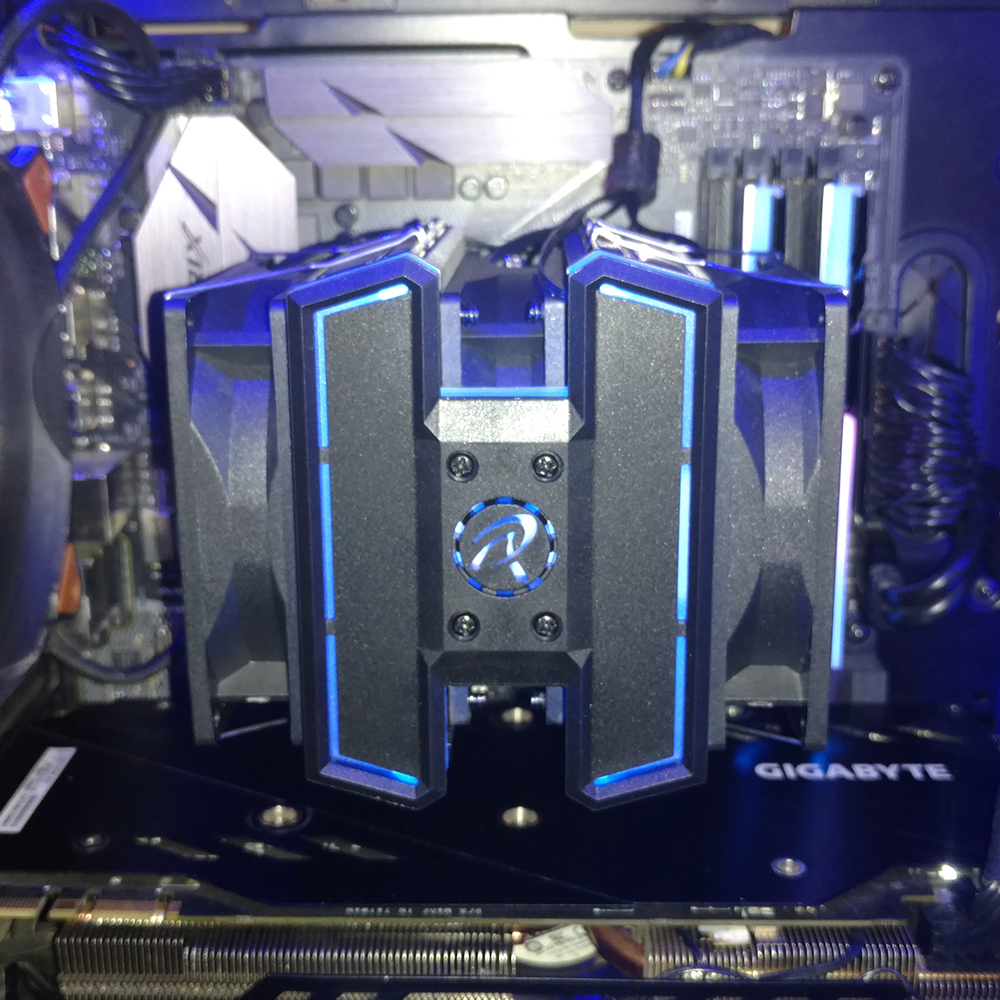
The Raijintek DELOS RBW will certainly serve to fill the interior of your tower out with an interesting centerpiece of a cooler. The triple-fan dual tower design eats up quite a lot of space for its relatively low footprint of 735g and it manages to move a lot of air which will help it keep up with CPU thermals in most cases.
Test System and Methodology
Test System
- OS: Windows 10 Up To Date
- CPU: Ryzen R7 1700 @ 3.8Ghz 1.25v
- Mobo: ASUS ROG Strix B350-F Gaming
- RAM: G.Skill Trident Z RGB 2x8GB DDR4 CL16 3000MHz
- PSU: EVGA G3 850
- Case: Phanteks P400TG
Methodology
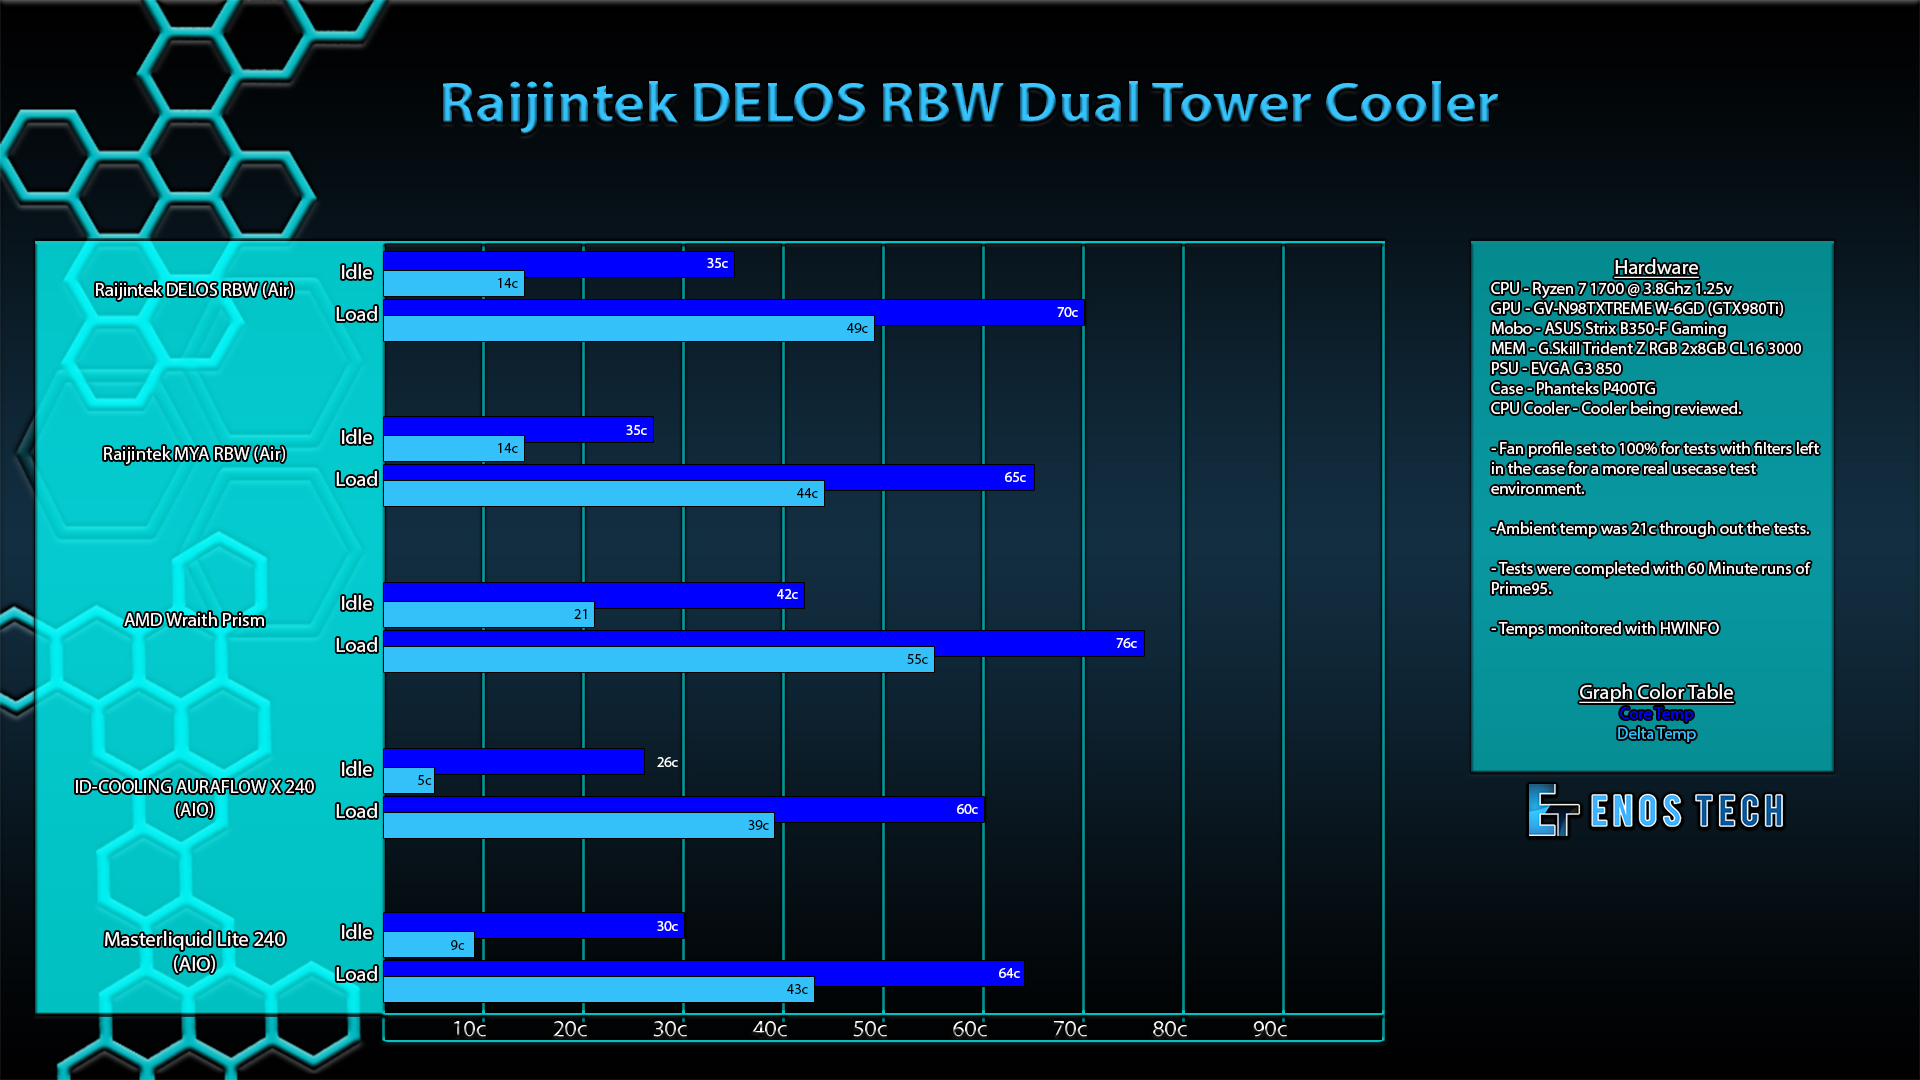
For our testing, we used the Prime95 stress test program to max all of our CPU cores out at 100% for 60min. We then monitor and take note of the max core temperature. We then subtract this number from the ambient temperature to get the temperature delta. Also letting the computer sit idle for 15 minutes before each run to stabilize the min results.
Software
Final Thoughts
Performance
The Raijintek DELOS RBW Dual Tower Tripple Fan cooler is quite an interesting cooler. I would not say this is the cooler for high end overclocking on something like a Ryzen 8 core processor, but I would say at stock it will do stellar on any Ryzen chip and will comfortably keep any Ryzen 5 cool even overclocked. The DELOS performed well enough I would consider it for something like my media PC which I use to capture gameplay when streaming and or serves media to the rest of the house. My specific test setup once it hits 70c + starts to become unstable and requires more voltage, the DELOS crept right up to that point and though things stayed stable it is too close to the point of needing more voltage for me to clear it for any heavy overclocking on higher-end chips. I use 3.8Ghz with 1.25v as my overclocked baseline for my thermal tests. With any decent air cooler, this is fine and there are absolutely no worries with even a 120mm AIO with these settings. So I choose these settings to push a cooler to see if it would fit an overclocking use case as much as an aesthetic one. In the case of the DELOS RBW you are trading some of your cost on performance for aesthetics, and where that is not entirely bad that means that this cooler is here to perform decently while looking really good doing it. The DELOS RBW is not a stellar performer in the $50-70 tower cooler department but it is one fine looking cooler that is capable enough for a solid mid to high-end CPU depending on the use case of course.
Design
The design of the DELOS is really neat looking and again a blacked-out cooler. No silver heat fins here which are always nice. There are a few flaws with the middle fan mounting but I think that can be solved pretty easy with an adjustment or two at the factory in the design. Outside that one flaw in the design, this was a really neat looking cooler to test and it was able to perform without sounding like a jet which was a surprise, I really think this was designed for smaller builds that might need some help moving air like in a cube style case for a media center. It would most certainly catch people’s eye seeing something like that lit up in the living room. Again there was no way outside the 3pin Rainbow Add header to control the coolers RGB, so you will need a cable like the one I shared above in the RGB section of the review or one like it which is a small additional cost.
Value
For $60 at the time of review, you are getting a decent performer that looks really good. I would not recommend purchasing this cooler for high end overclocking but rather as a decent performing cooler that looks good for a media center or gaming system with a Ryzen 5 or Intel mid-range chip. In that use case, I think this cooler will show its value best allowing decent overclocking headroom while looking great in the process. The one thing I keep falling back to with Raijintek coolers so far as a gripe is the lack of a way to control the RBW lighting outside a small ecosystem of motherboards. I would really like to see Raijintek consider adding even a cheap Molex or SATA controller solution in the box. These can be had really cheap in mass production and don’t even need to be loaded down with options. Just to have the ability to select a few settings/colors without having to spend extra on an RGB Controller or cable after the fact bringing the cost of these coolers to a questionable state.
All in all, I can recommend this cooler to anyone with a mid-range CPU and Rainbow ADD compatible motherboard. Everyone else should weigh their options on this one and maybe consider the MYA we recently reviewed instead if you need a little more thermal headroom.


