Cryorig H7 CPU Cooler Review
Introduction
- Manufacturer Website: Cryorig
- Product Page: H7
- Purchase: £41.99 At the time of review
Cryorig has been nice enough to send in one of their H7 coolers for us to test out. Following on from our review on their A40 AIO Cooler it will be interesting to see how their H7 stacks up against the competition. Cryorig is known for offering coolers that not only perform well but are also quite pleasing on the eyes. If by now, you’ve yet to look into Cryorig for cooling your PC, I suggest you at least have a gander at some of the products they have to offers.
The H7 is a single tower heatsink that comes equipped with one QF120 fan as standard. The H7 is designed to cooler CPUs with a TDP of up to 140W so while it may not be the biggest cooler on the block, it should be able to hold its own. Featuring 40 fins in the tower array and a nickel plated copper base, there is no denying the H7 definitely looks good on paper. However, we will need to throw it up on top of our 6700K before we can make a final verdict. Will it live up to Cryorigs reputation? Will it fall short? Only time will tell so let’s get to it!
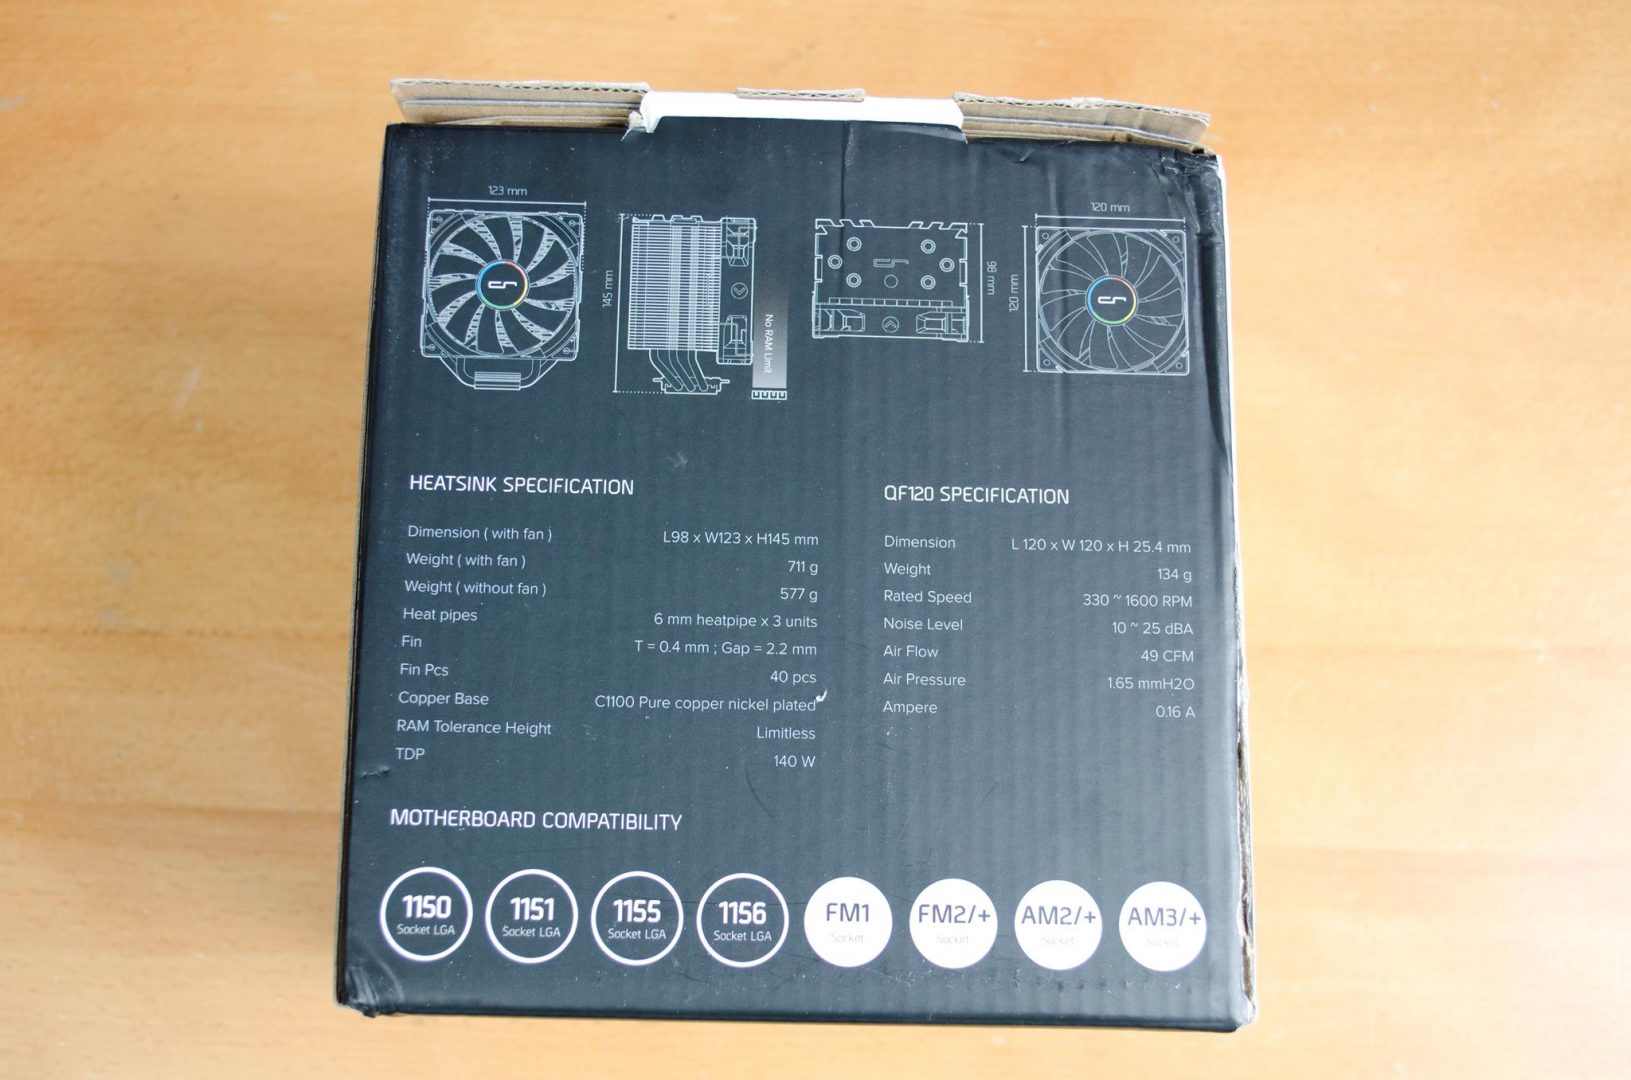
| HEATSINK SPECIFICATION | |
|---|---|
| Dimension ( with fan ) | L98 mm x W123 mm x H145 mm |
| Weight ( with fan ) | 711 g |
| Weight ( without fan ) | 577 g |
| Heat pipes | 6mm heatpipe x 3 units |
| Fin | T = 0.4 mm ; Gap = 2.2 mm |
| Front Fin Pcs | 40 pcs |
| Copper Base | C1100 Pure copper nickel plated |
| RAM Tolerance Height | Limitless |
| TDP | 140 W |
| QF120 BALANCE SPECIFICATION | |
|---|---|
| Dimension | L120 mm x W120 mm x H25.4 mm |
| Weight | 134 g |
| Rated Speed | 330 ~ 1600 RPM ±10 % |
| Noise Level | 10 ~ 25 dBA |
| Air Flow | 49 CFM |
| Air Pressure | 1.65 mmH2O |
| Ampere | 0.16 A |
In true Cryorig fashion, the front of the box features an oversized image of the cooler inside. There is also a short description of the cooler and what Cryorig feel the H7 represents.
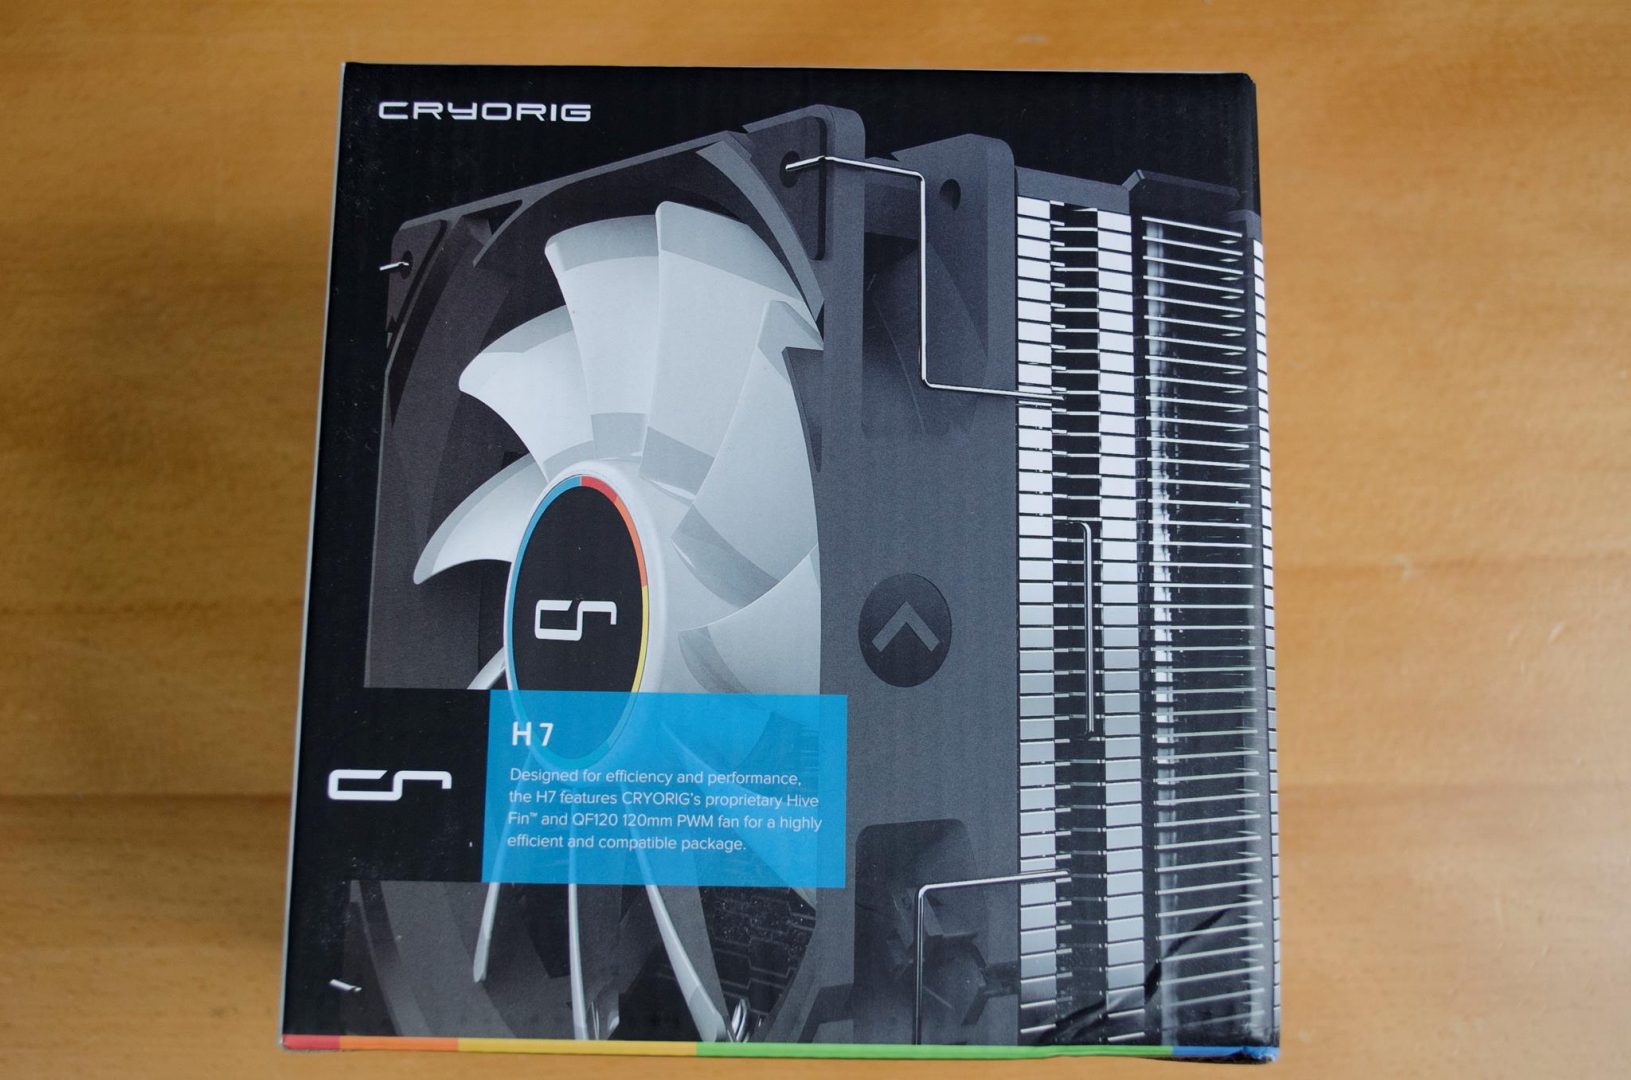
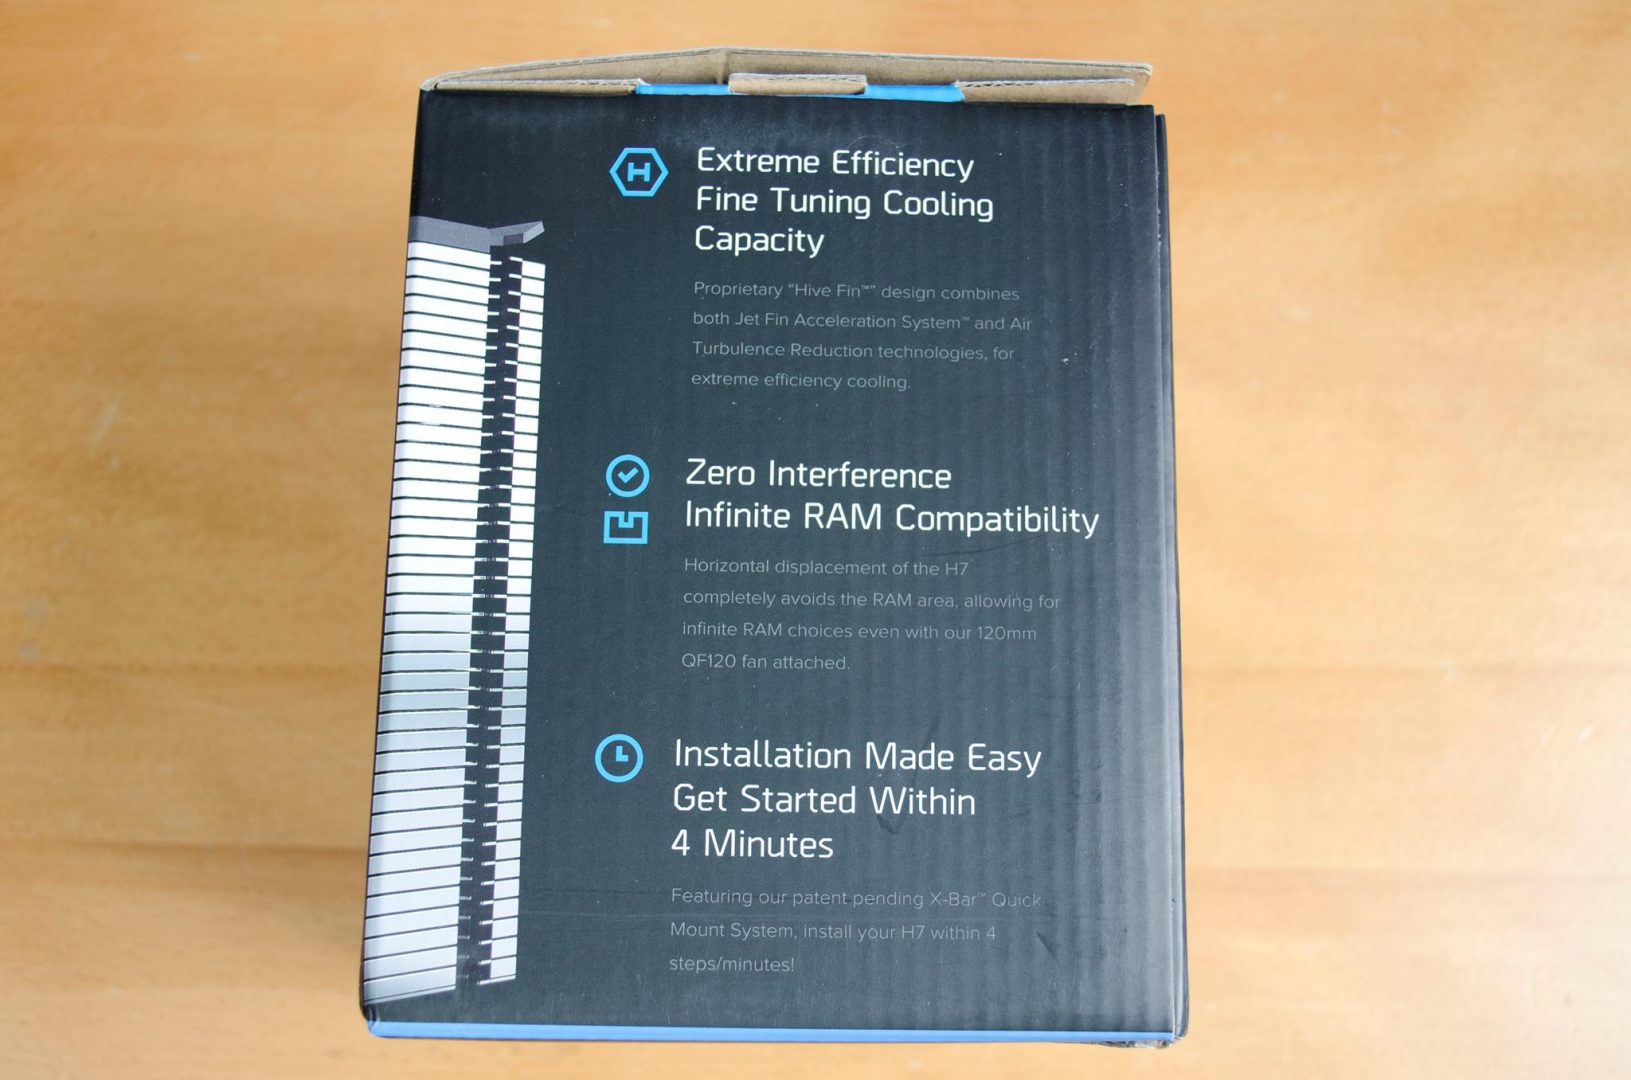
Having a look at all sides of the box and on one we find a bit of information regarding the H7. Things such as the Installation and RAM compatibility are mentioned here in a bit more detail.
On the backside, we can see the official specifications of the H7 and the QF120 fan. Here, we can also get a proper look at the dimensions of the coolers VIA the easy to understand diagrams so we can make sure this cooler will fit where it’s needed.
Making our way into the box and opening the top flap reveals some information in regards to registering the H7 for a 3-year warranty.
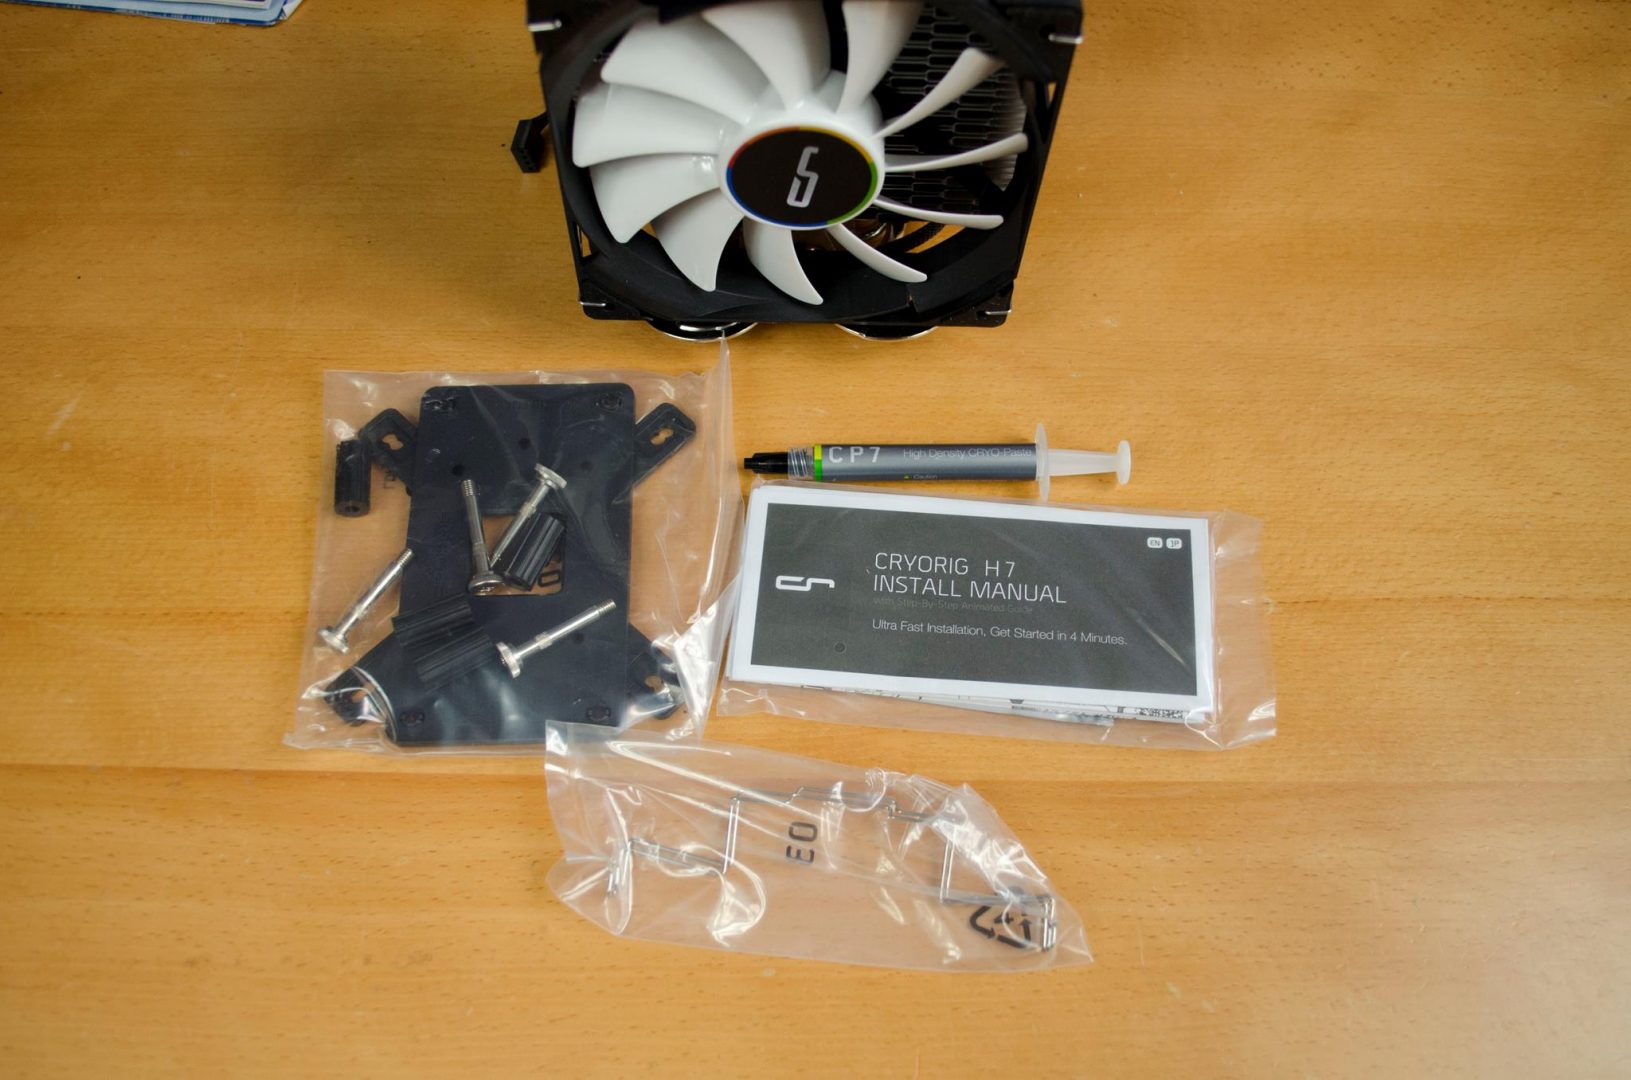
Finally, once we have opened the box and got everything out, we can see what we have. Inside the box are the cooler, fan, mounting kit, thermal paste, instructions and the 2nd set of fan retention brackets.
Closer Look
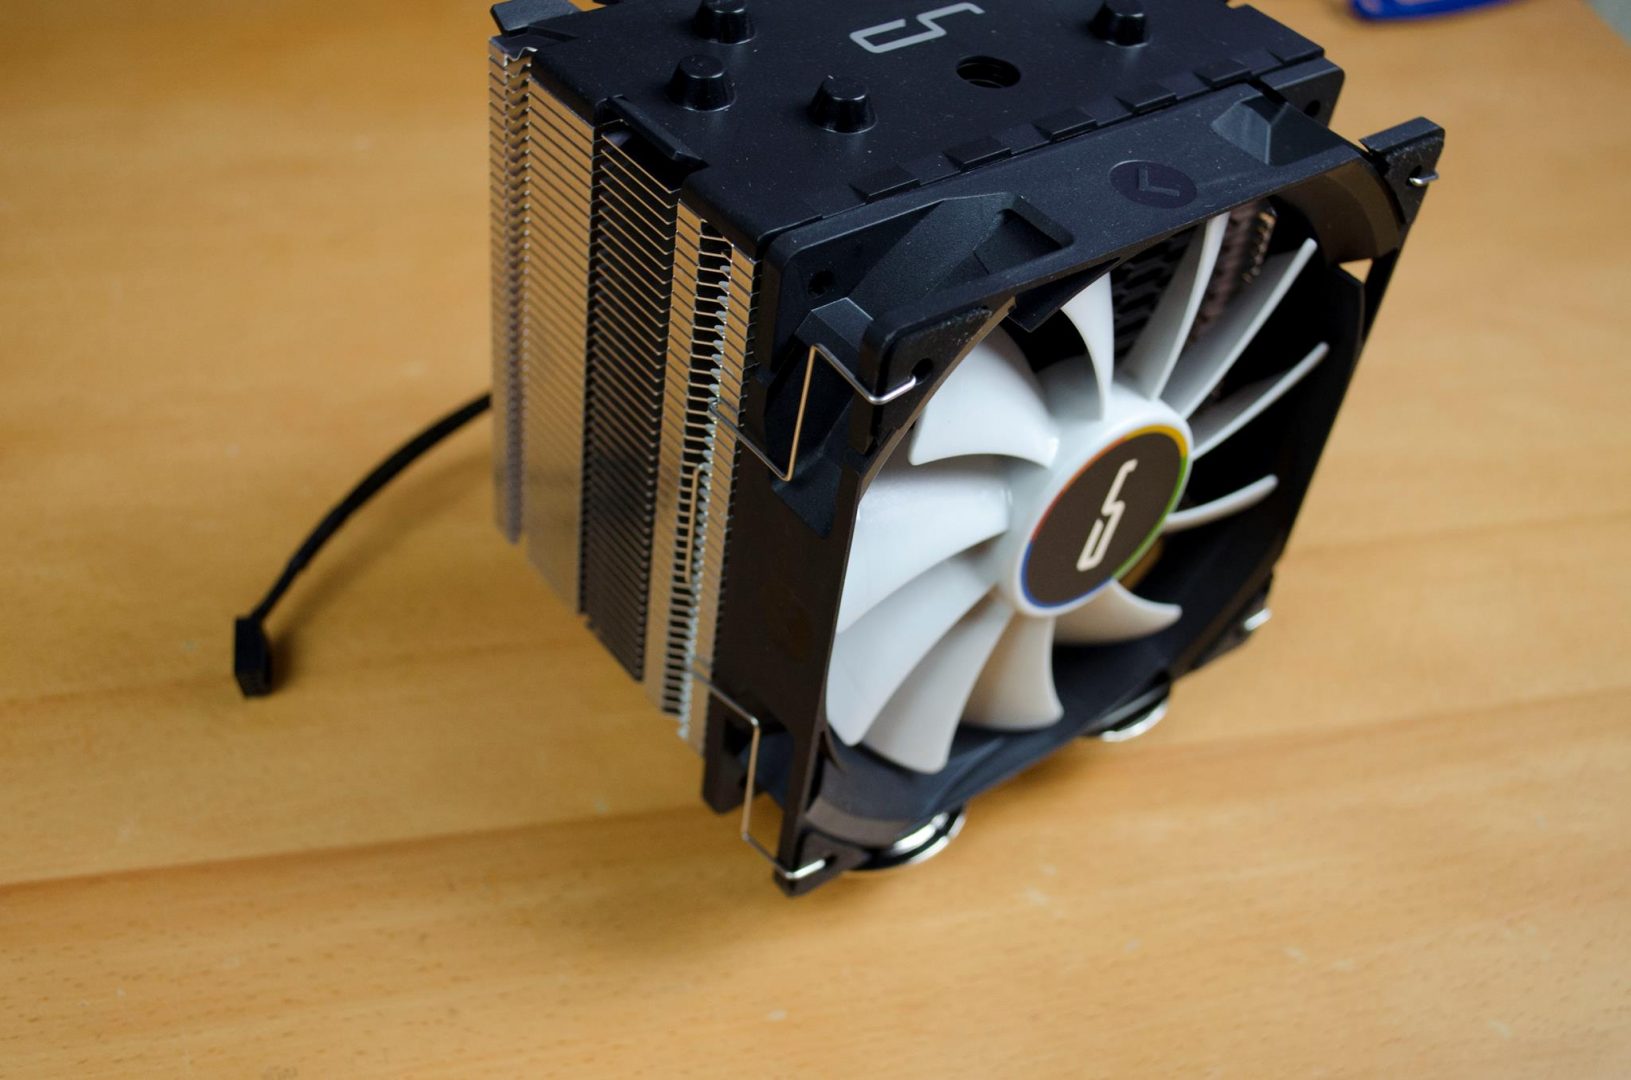
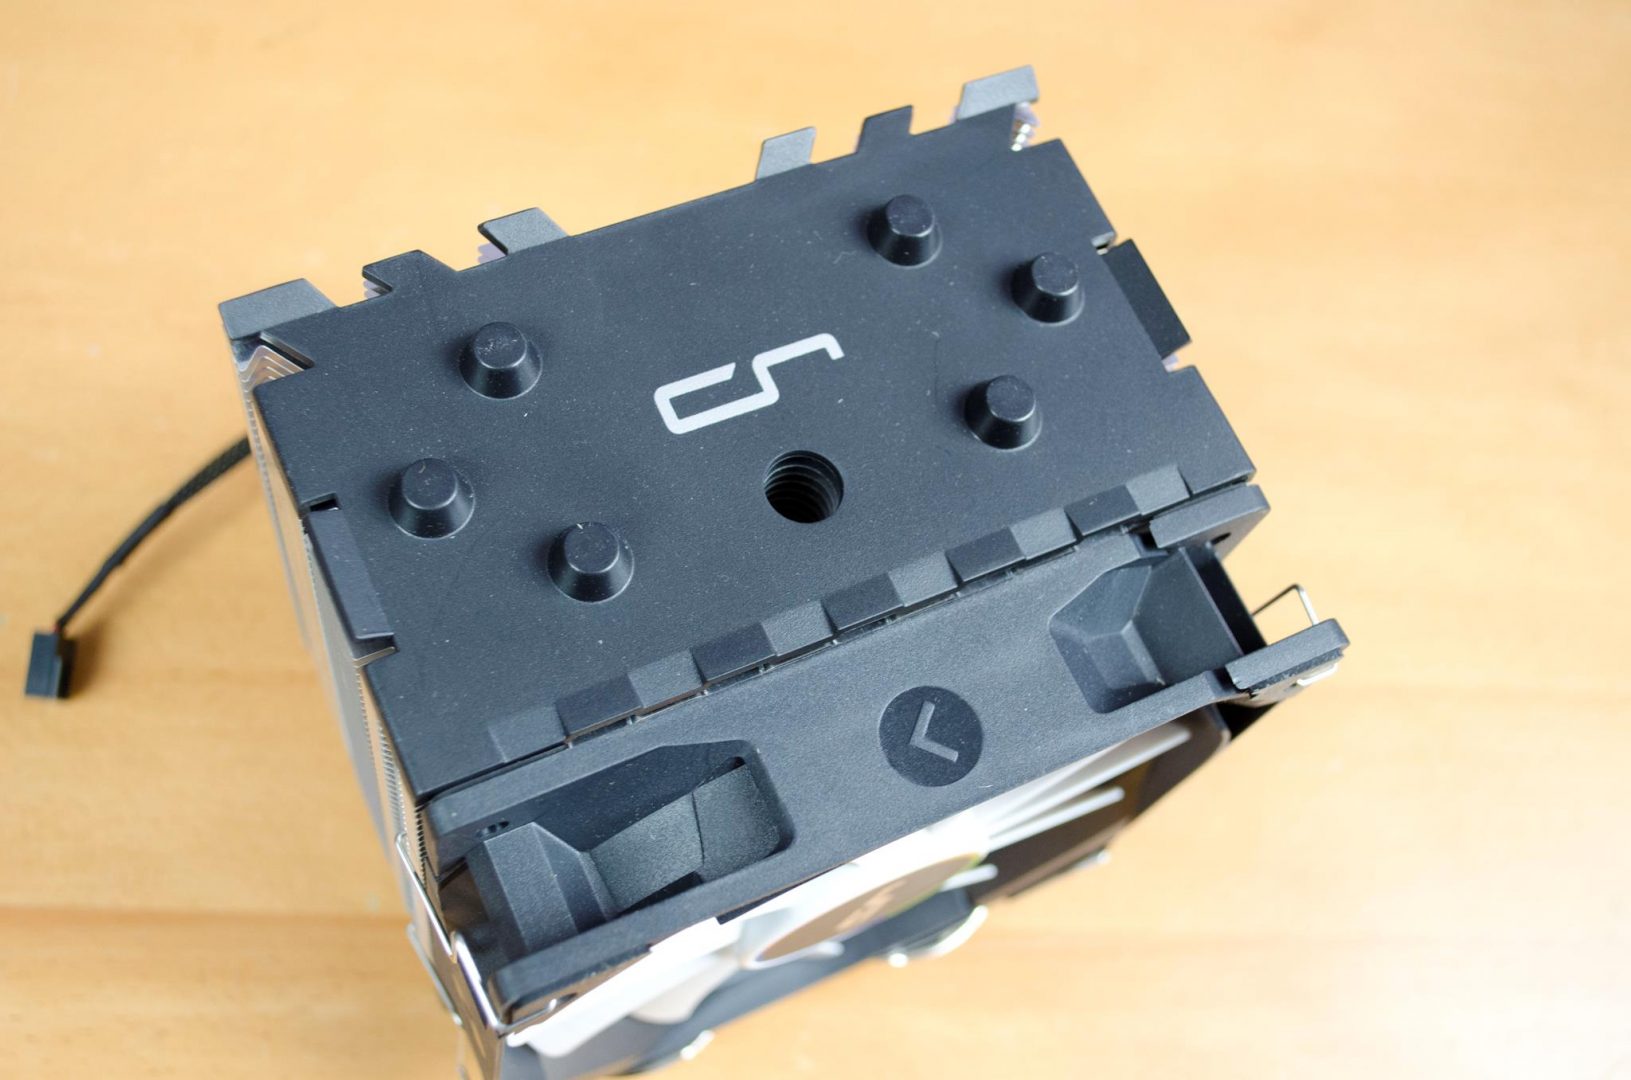
Cryorig pays great attention to detail and one of the places this is very evident is the top of their AIR CPU coolers. While a lot of companies don’t spend too much time making these look nice, Cryrorig makes sure theirs look top-notch. Cryorig wants you to want to show off your build and you can’t do that if you’re not happy with how things look. Too many companies just let the heat pipes stick out the top with no real work done to them, Cryroig has capped them off on their H7 and even added a top black fin/layer for a better aesthetic appearance.
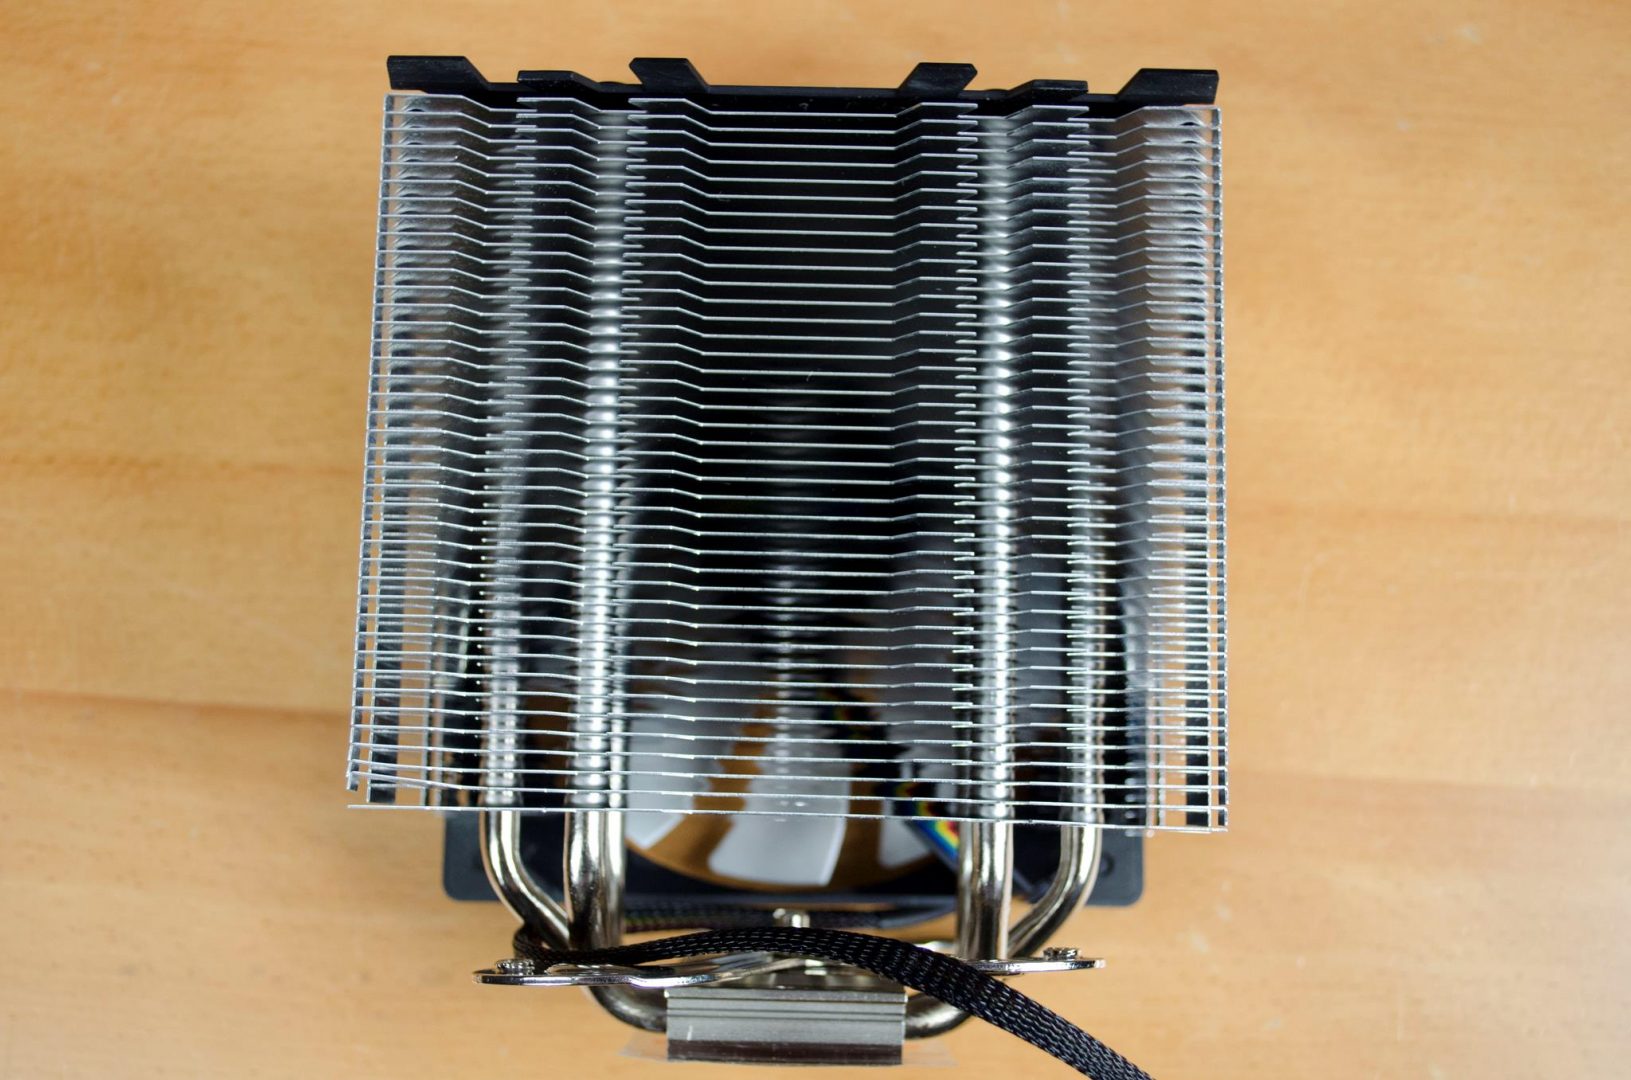
Not only that, they also have some of the nicest fin arrays out there. Cryorig wants their coolers to look as good as they perform and it really shows. The h7 features 40 fins and as you can see, they are all meticulously added to the fin array. The fins are also designed to help with the overall airflow of the cooler and even meant to cooler the warmer air quicker.
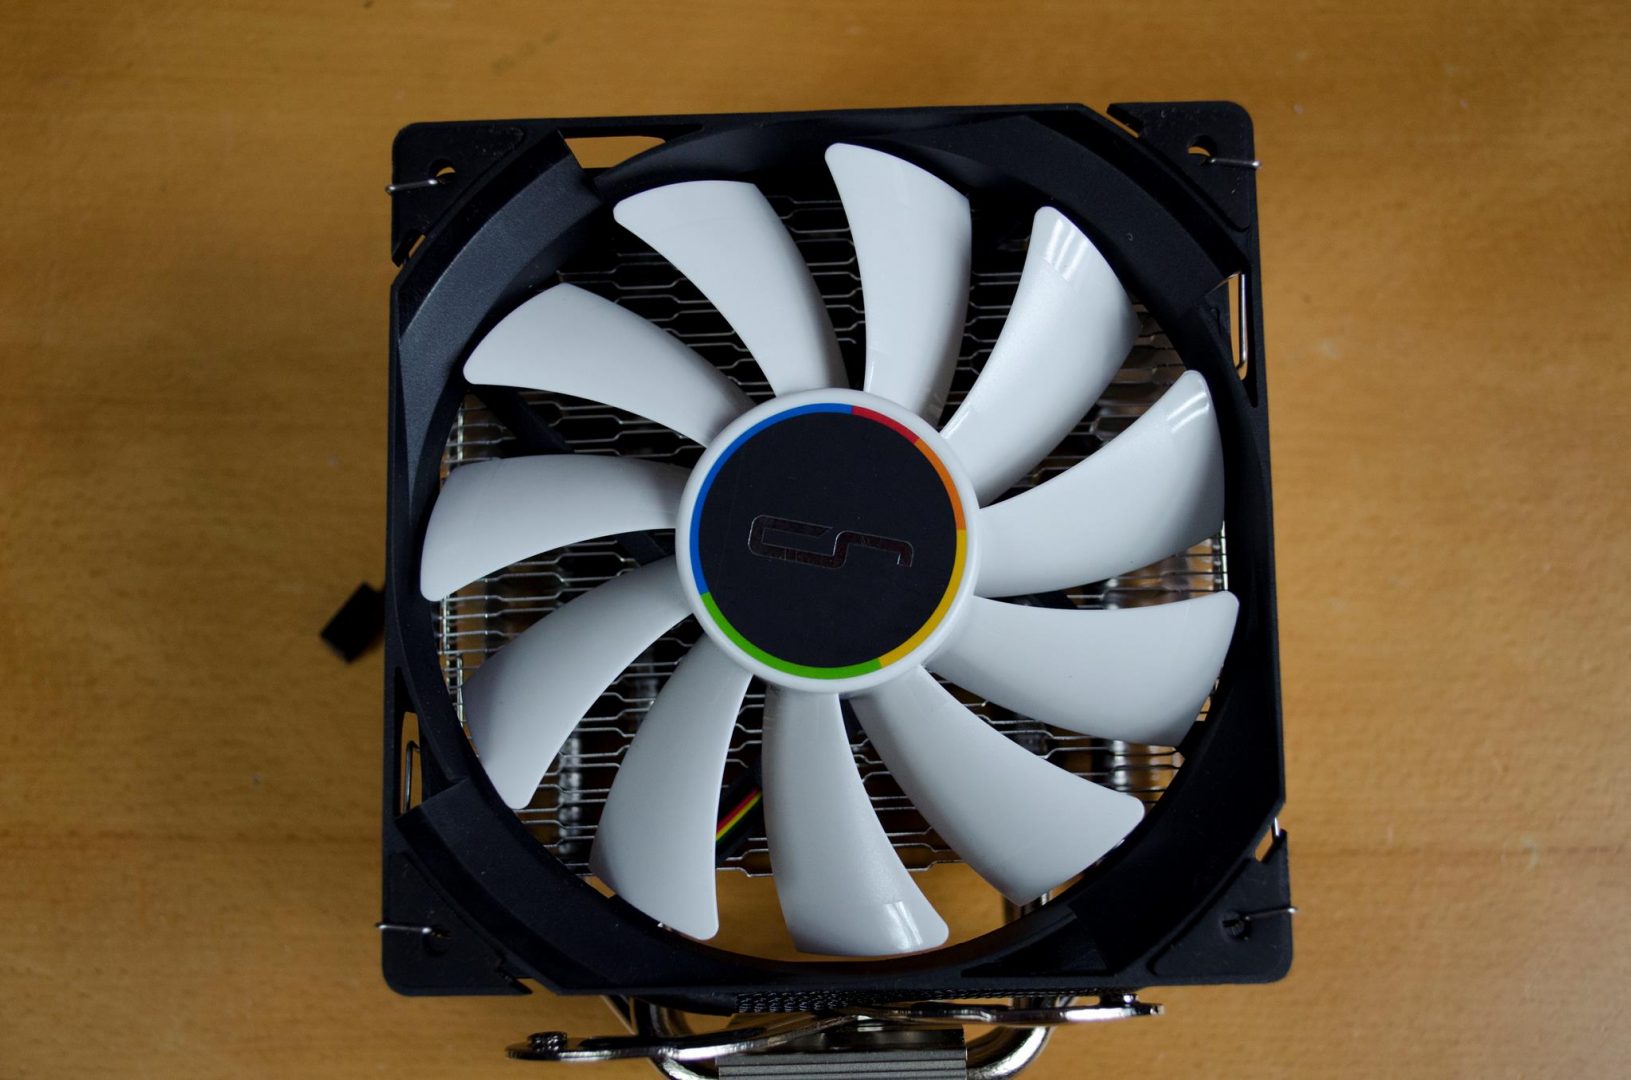
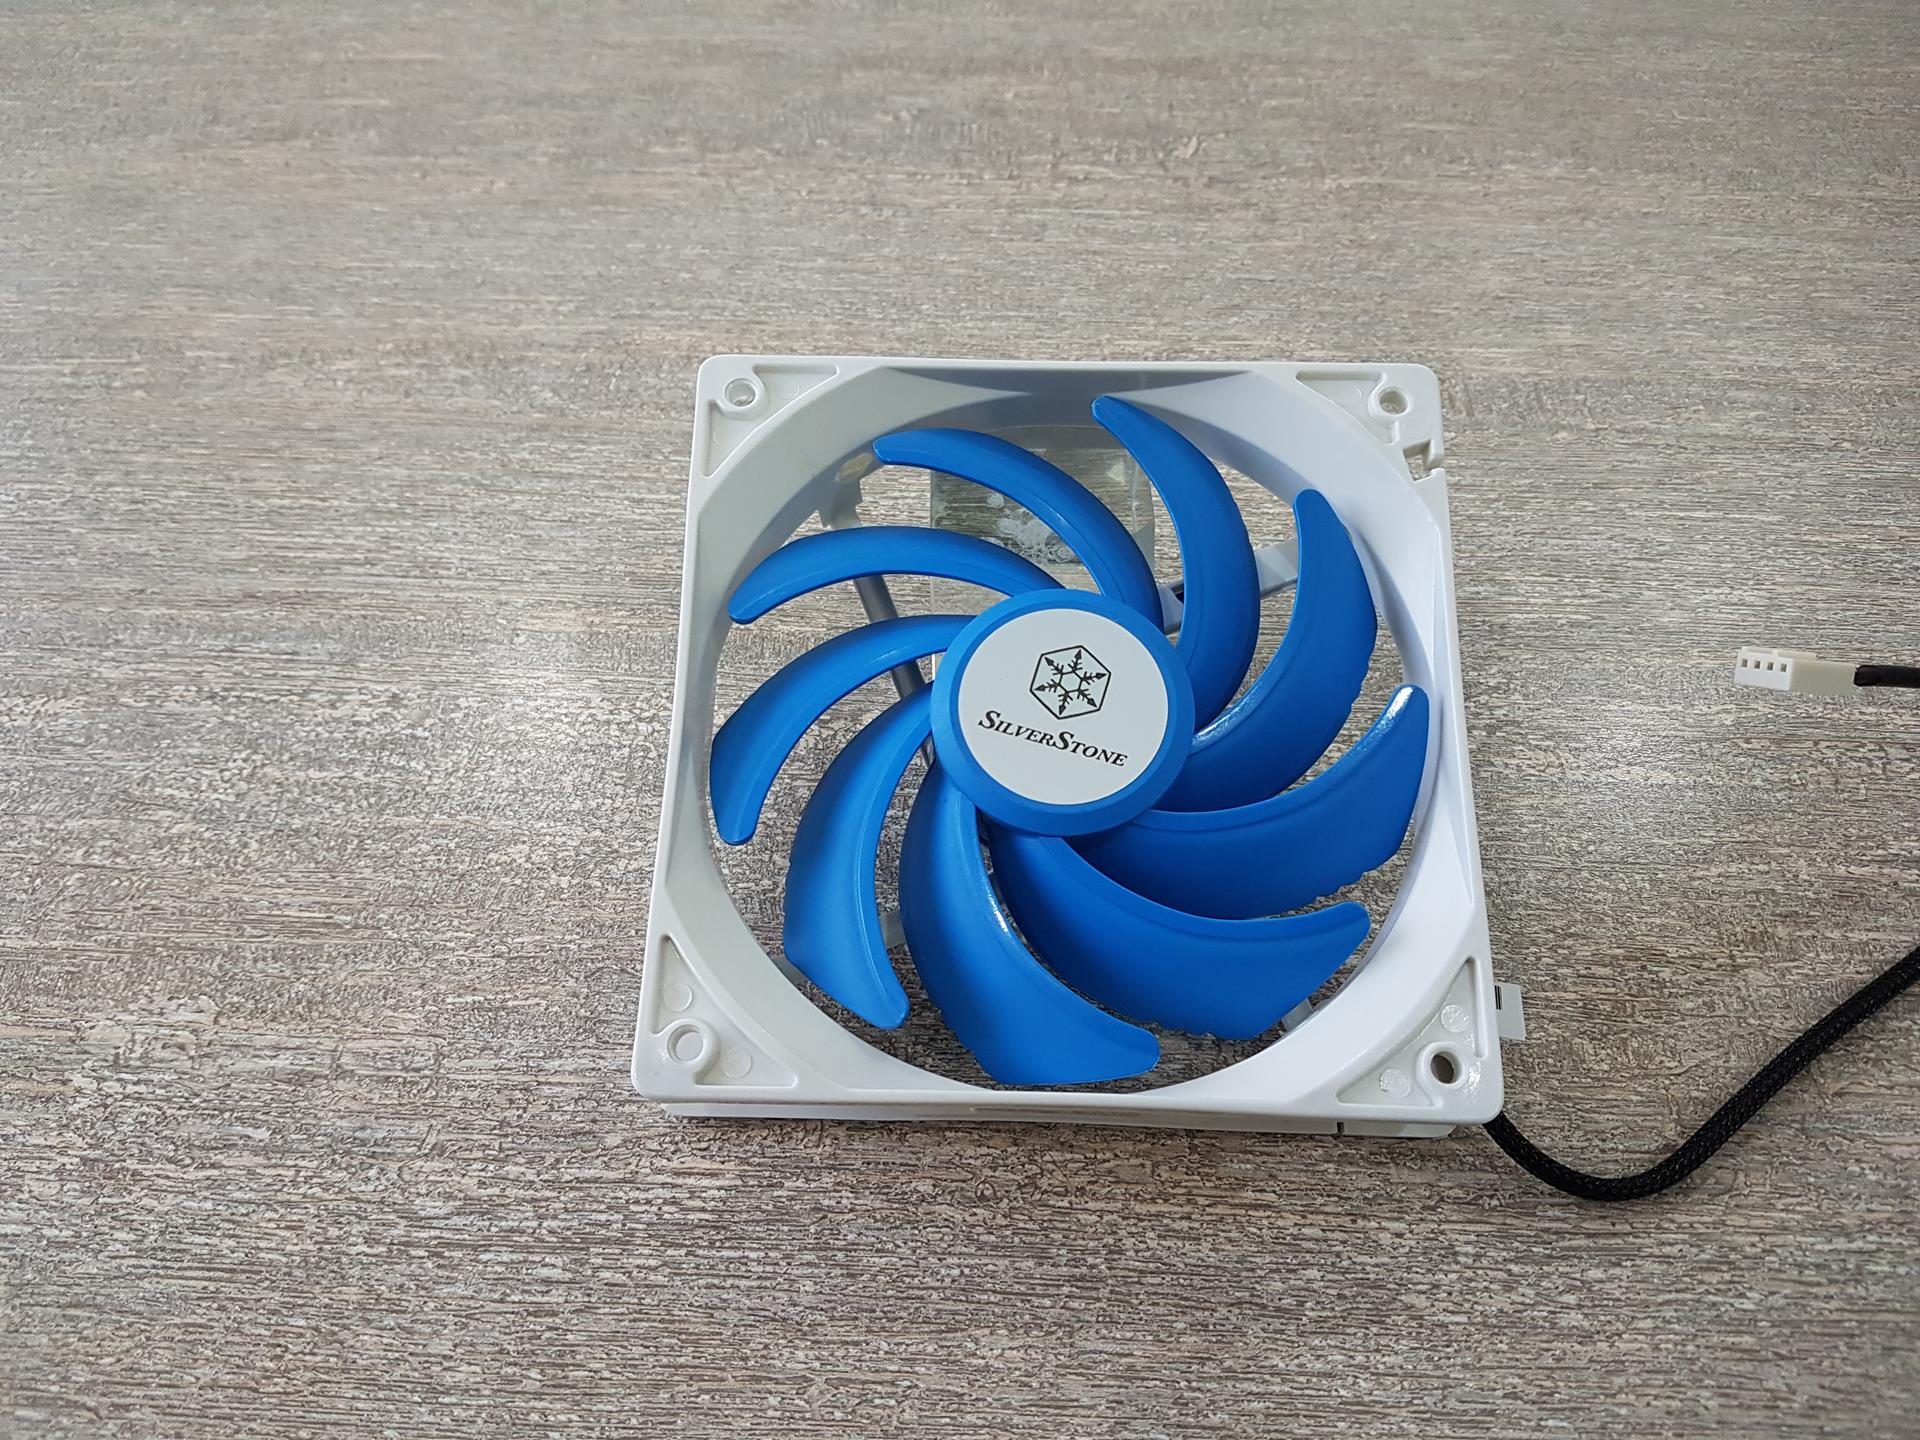
The QF120 is a 120mm fan that features a black frame with white blades. As per normal, the middle of the fan features the ‘CR’ sticker which has the colour ring around the outside. The fan itself features 11 blades with a max speed of 1600 RPM.
While you are more than welcome to install a 2nd fan onto the H7 should you have one available, Cryorig have still gone ahead and made sure even this area was designed with the utmost importance. Looking at the fins and we can see their unique design which is said to help dissipate heat quicker and more quietly which should result in lower temps overall.
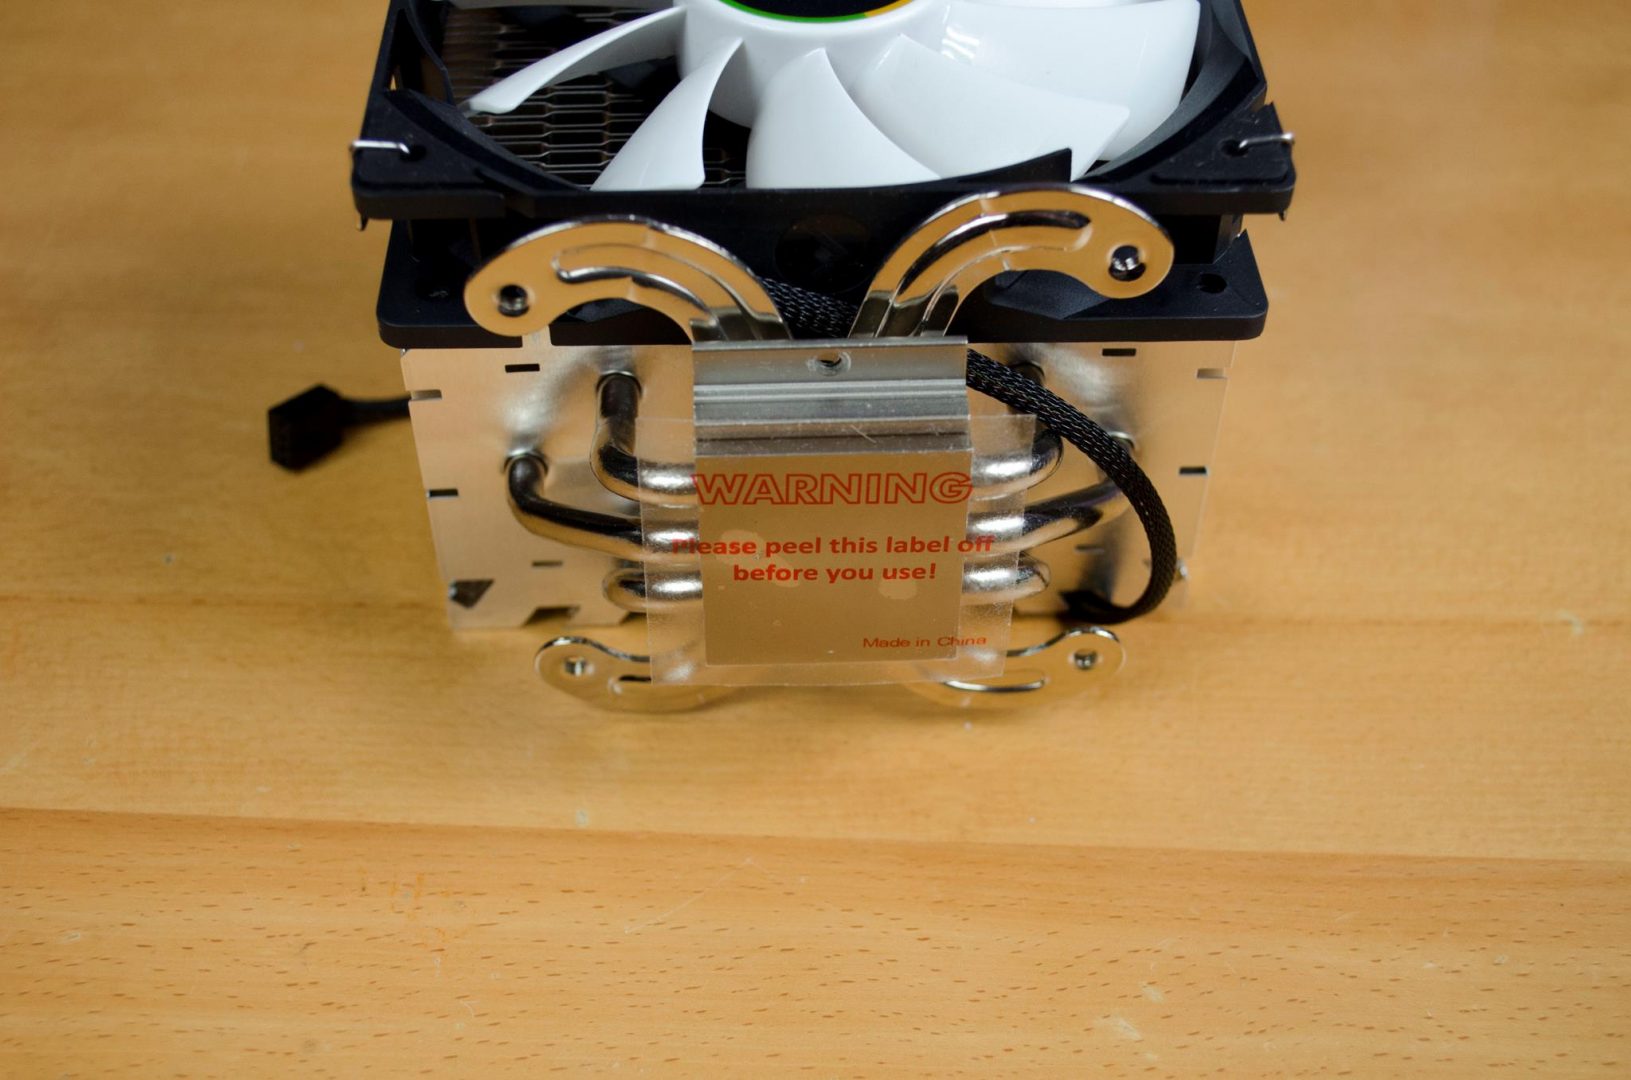
The base is made of nickel-plated copper and so are the 3x 6mm heat pipes. To keep the base of the cooler safe, there is a warning sticker that will need to be removed before installation.
Installation
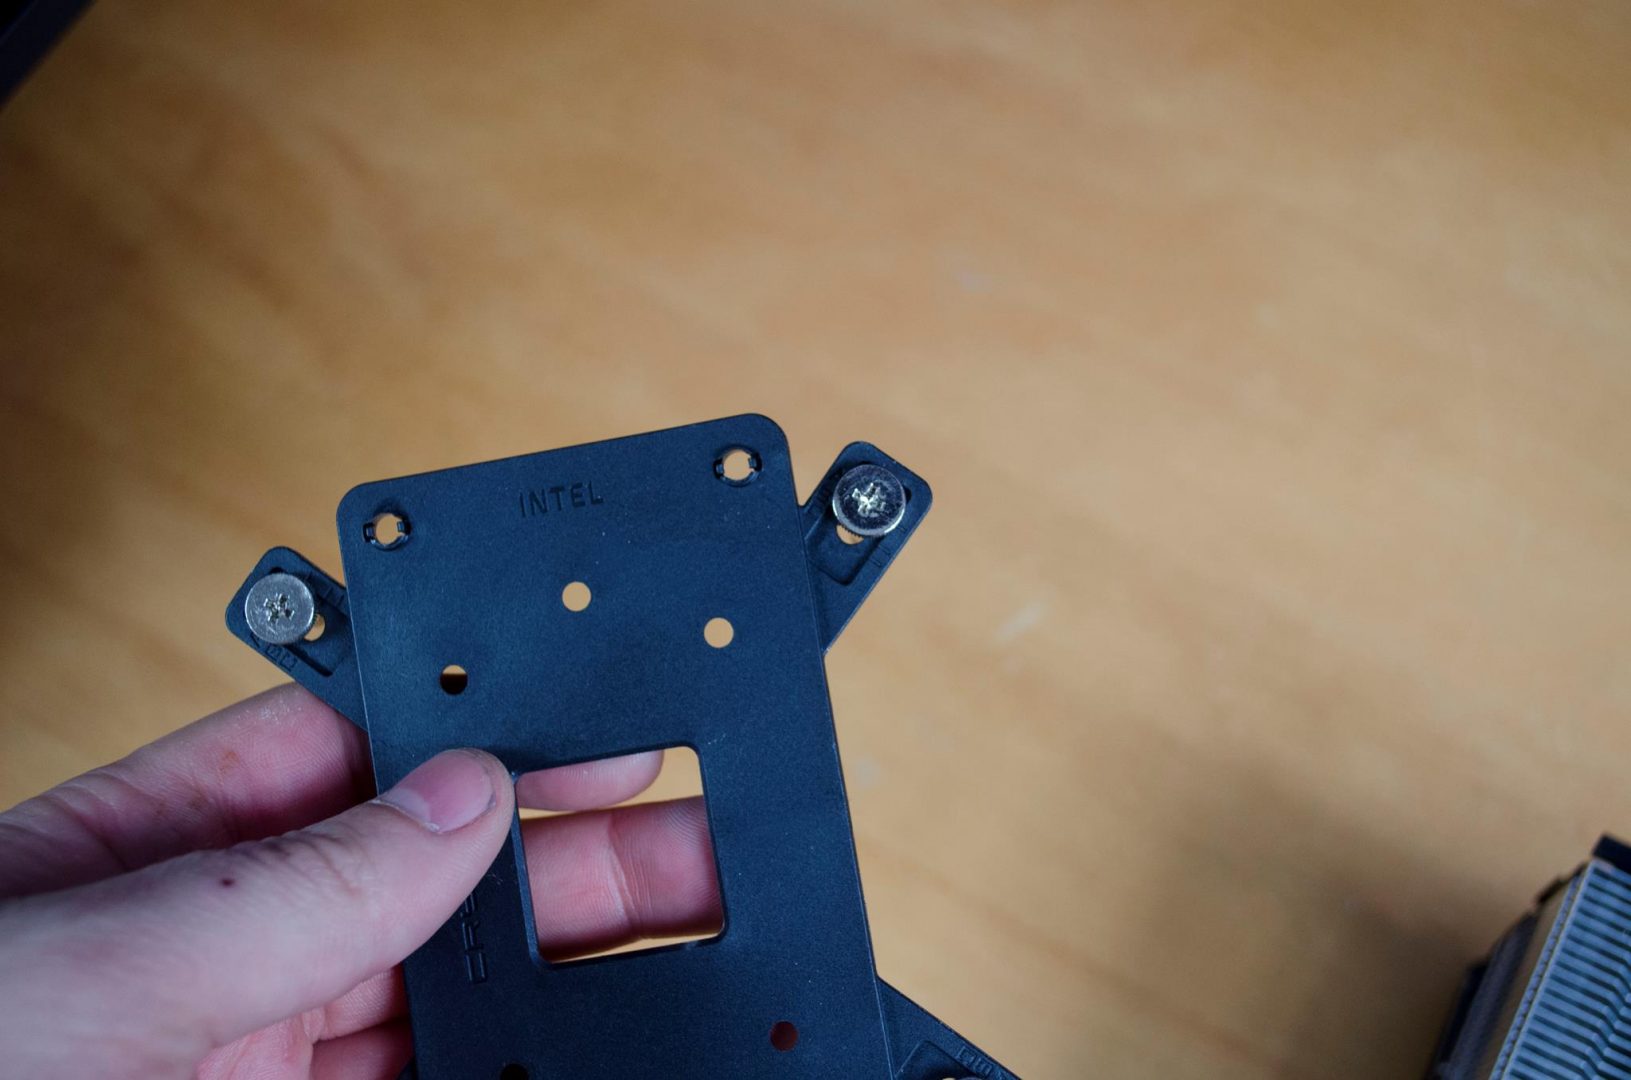
It only takes a couple of minutes to get the H7 installed and running. First, you will want to get the backplate and screws ready for your CPU socket type.
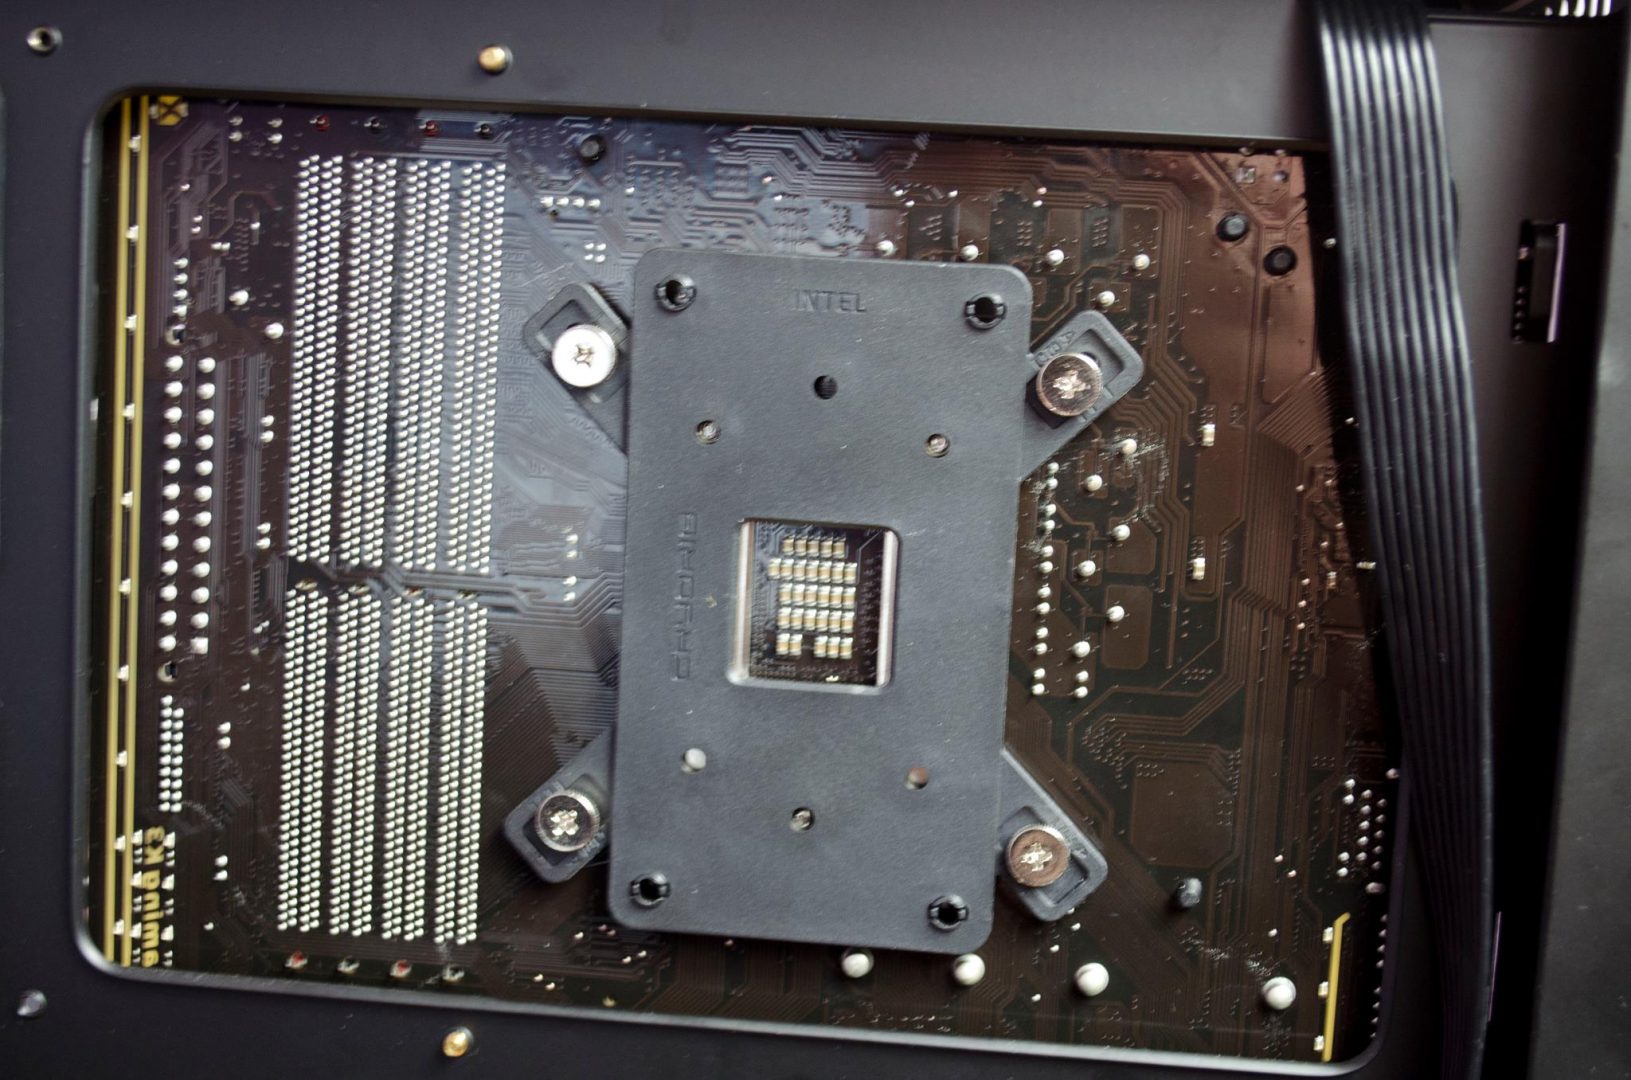
Place the screws through the corresponding holes around the CPU socket on the back side of the motherboard.
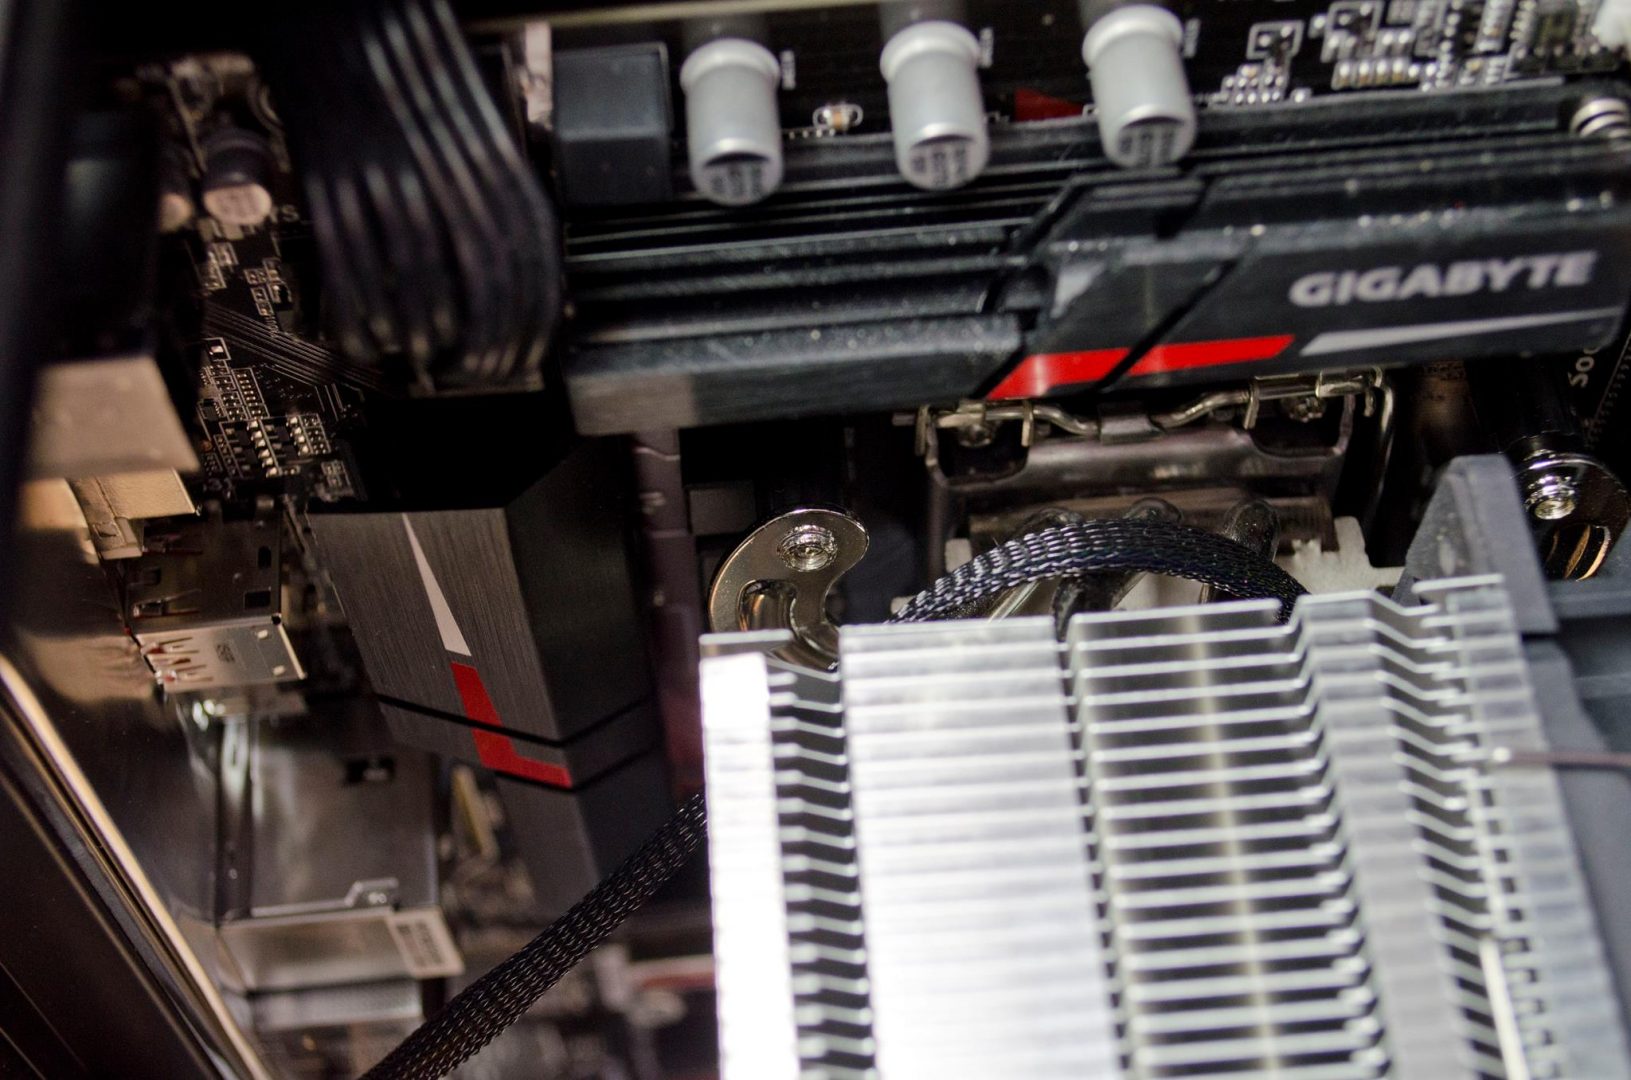
Next, put the black screw holders/height adjusters on, apply your thermal paste and then set the cooler on top of the screws. Once you’ve done this you will need to tighten the screws from the backside of the motherboard so they screw into the holes on the cooler brackets.
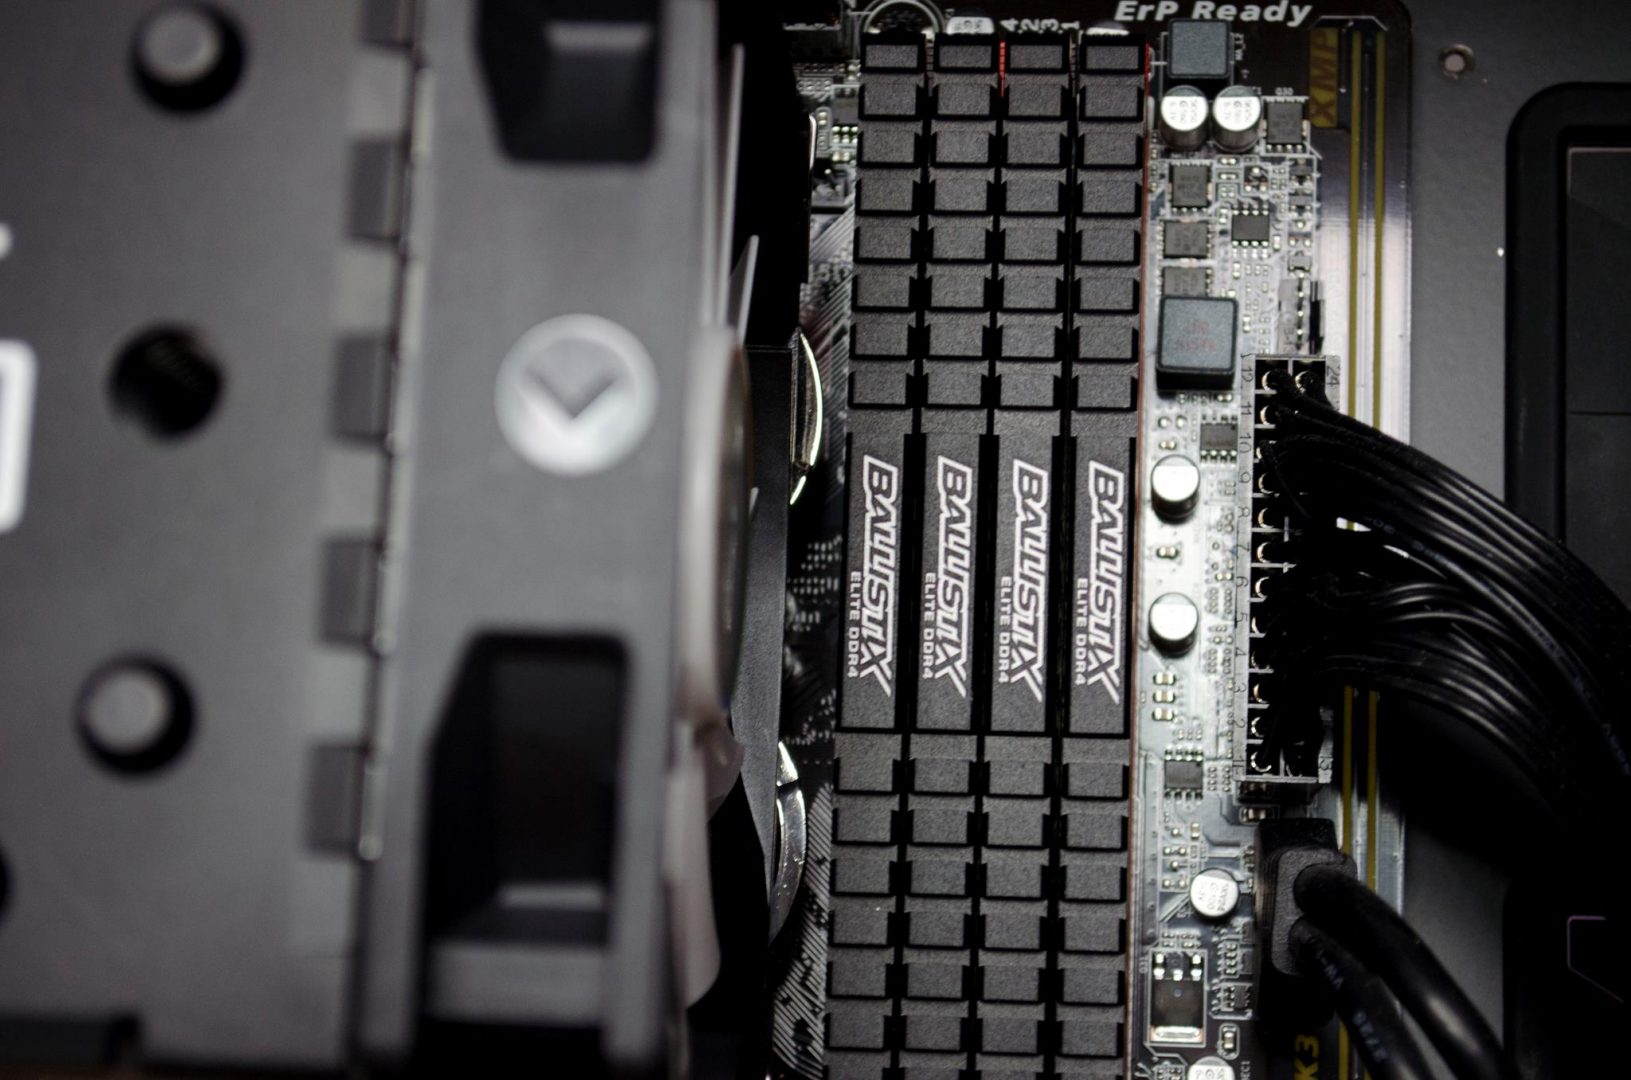
As Cryorig stated, there is no problem at all with RAM compatibility. Even with the fan on, there is still a few mm of space between the fan and the RAM sticks.
Test System and Methodology
Test System
Test System
- Windows 10 with all the latest updates
- Intel i7 6700K CPU Stock / 4.5GHz @1.400V OC
- Gigabyte Gaming K3 Z170 Motherboard
- 16 GB Crucial Ballistix Elite DDR4 4x4GB
- 2x HyperX Fury 120GB SSD
- Coolermaster V650 PSU
Methodology
For our testing, we use the Prime 95 stress testing program to make all the cores on our CPU run at 100% for 10minutes then we monitor them with CoreTemp and CPU-Z. We then take all the individual core temperature readings and add them up, then we divide that total by the number of cores and finally, we subtract the ambient room temperature to achieve our final result.
To have the best chance of having like for like results, all testing is done in a Cooler Master Master Case Pro 5 with both side panels off.
Programs
Performance and Testing
Final Thoughts
Performance
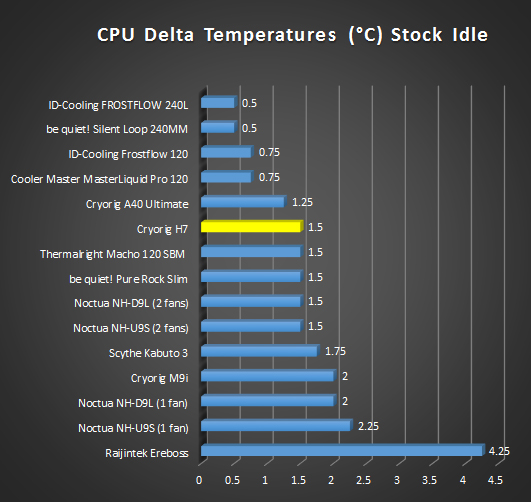
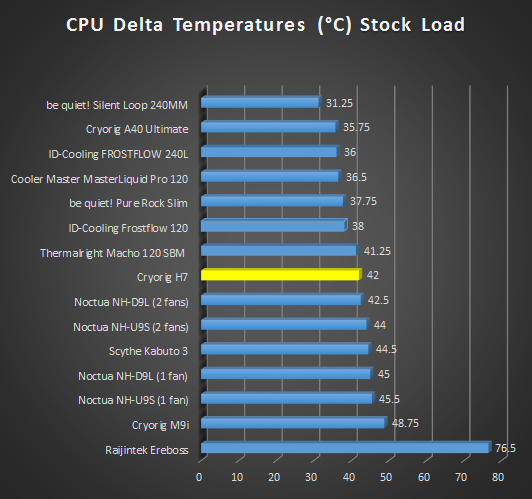
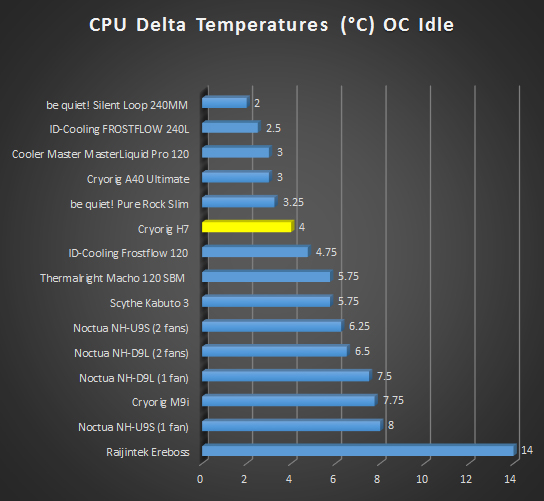
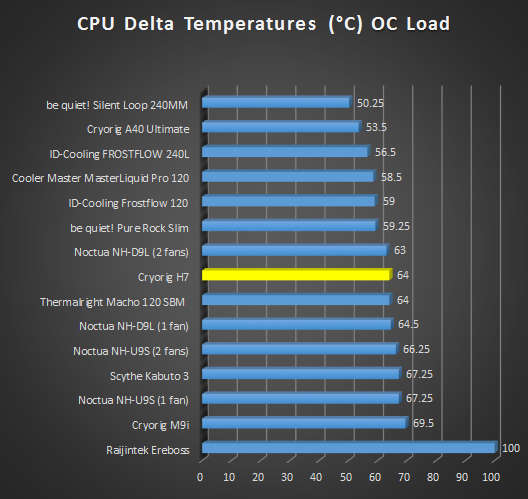
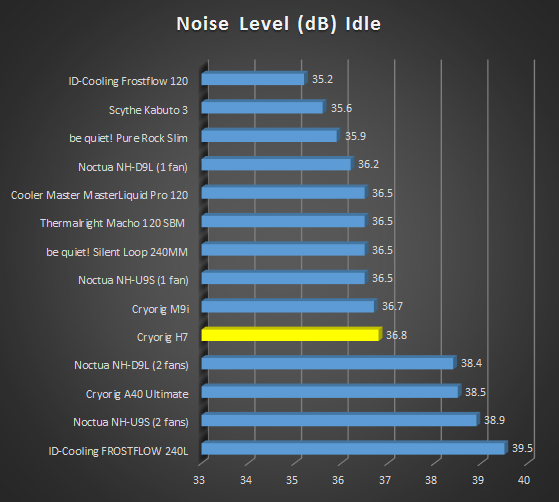
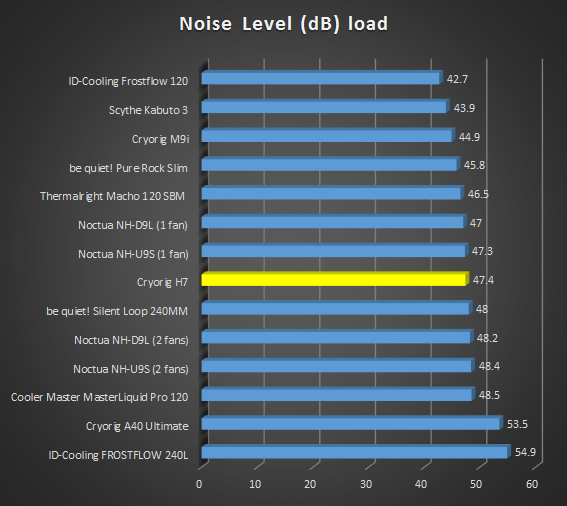
For a single fin array CPU cooler, the Cryorig H7 can hold it’s own. Referring back to the benchmark results and it falls right in line with where it should be. The most important factor for me is the overclock results which were 64c at full load while outputting 47.4 dB. This is more than sufficient when you consider this is on a 6700K with 1.4V running through it. Most users won’t run at 1.4V for a 24/7 overclock but for the sake of testing coolers, this is what we use on all of them. Doing this really allows us to get a good feel for what the cooler can handle and in the case of the H7, it passed with ease.
Design
Cryorig put a lot of thought into designing all of their products. The things that make them stick out for me, especially with the H7 is the top of the cooler. The H7 features an all black top and the heat pipes have been capped off to allow for a more appealing look. Too many times now have we seen companies just get lazy at this point and just let the bare heat pipe protrude through the top of the cooler. Even the design of the fin array speaks highly on how much Cryorig prides themselves on their designs. Cryorig has been around for a good few years now and they are doing a great job at making sure they offer an aesthetically pleasing product
Value
The H7 can be had for around £40 at the time of review. This is a fairly good price for a cooler that offers this type of performance and looks. While there may be a few out there that perform a bit better for cheaper, they may not always look as nice as the H7. If you are after raw performance, it may be worth having a little look around. However, if you are after something that looks nice, such as the H7 that offers more than acceptable performance, the H7 may just be for you. These days, £40 is not much to ask for a cooler so it’s nice to see Cryorigs H7 offering at this price range.
Many thanks to Cryorig for sending in a sample of their H7 CPU cooler for this review!


