Alphacool Eiswolf GPX-N 1080Pro-M01
Introduction
When it comes to the liquid cooling solutions, the Alphacool is not a new name. Based on their years of experience and expertise, the users can benefit from high-performance Cooling Solutions including their All-In-One and the All-In-One Connected cooling solutions not to mention the complete custom loop setup possibility. Their ideas are innovative and their expertise has allowed for far more industrial applications of their solutions than just the cooling setup for the PCs. They are also the OEM partners of the various brands including Fractal Design, Cooler Master, Be Quiet, Sapphire, Asus, Nocatech to name a few which speaks of their excellence in the design and development of the cooling solutions. Their Eisbaer, Eiswolf, Eiswand are a few products that are quite popular among the PC Enthusiasts.
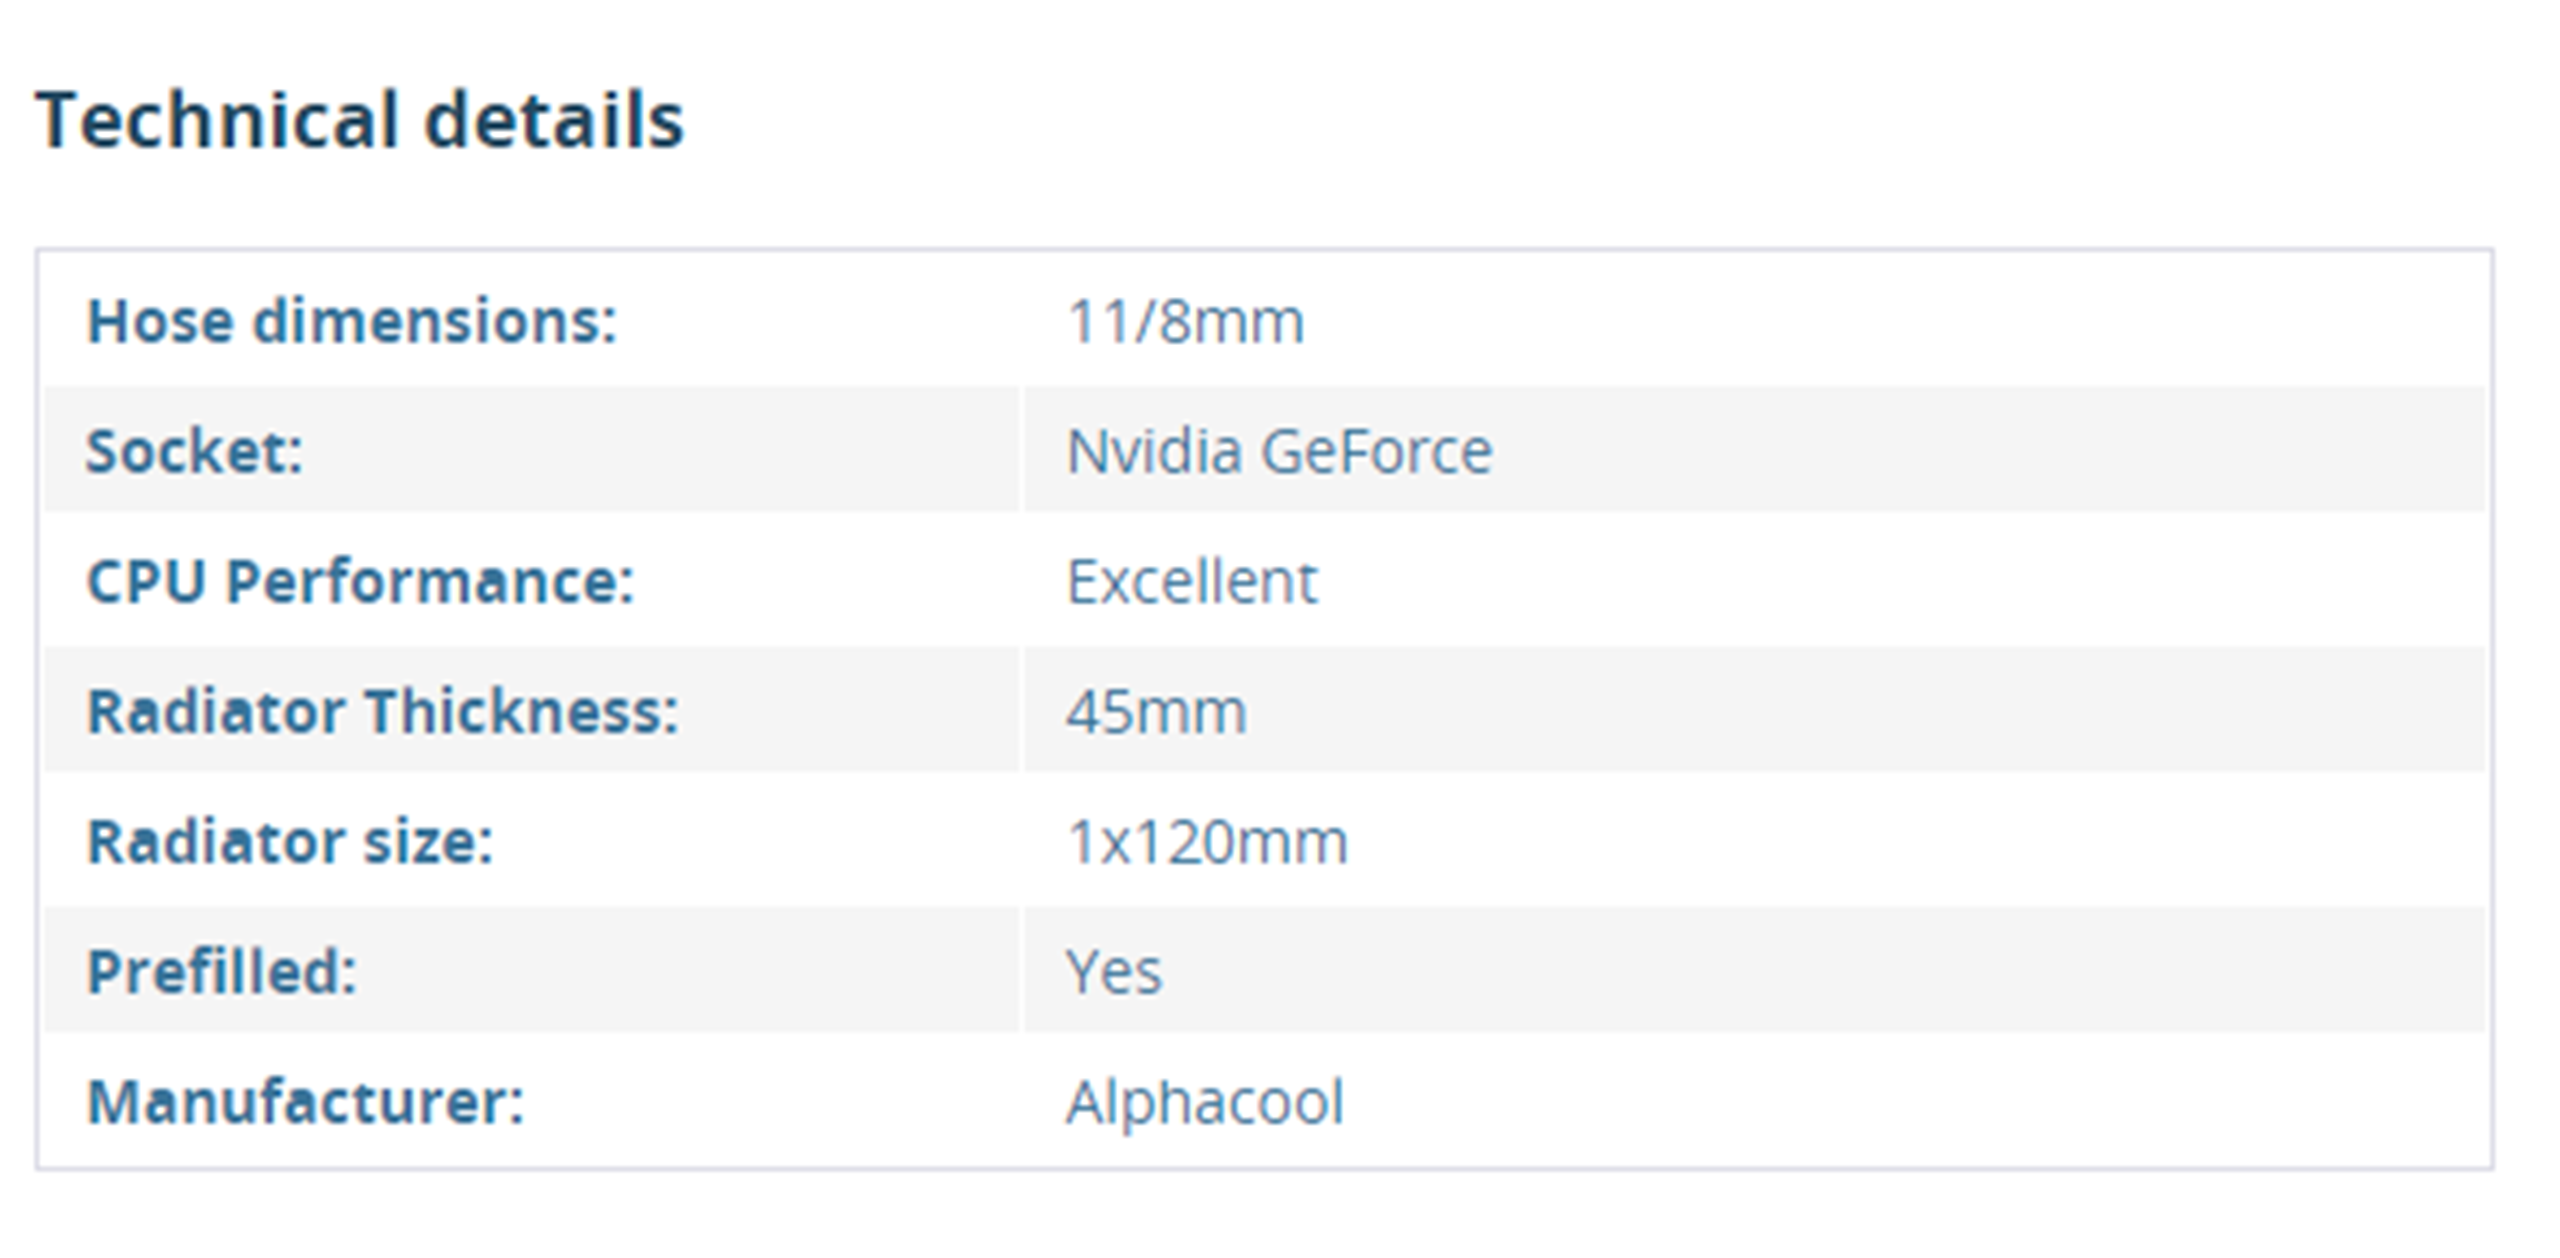
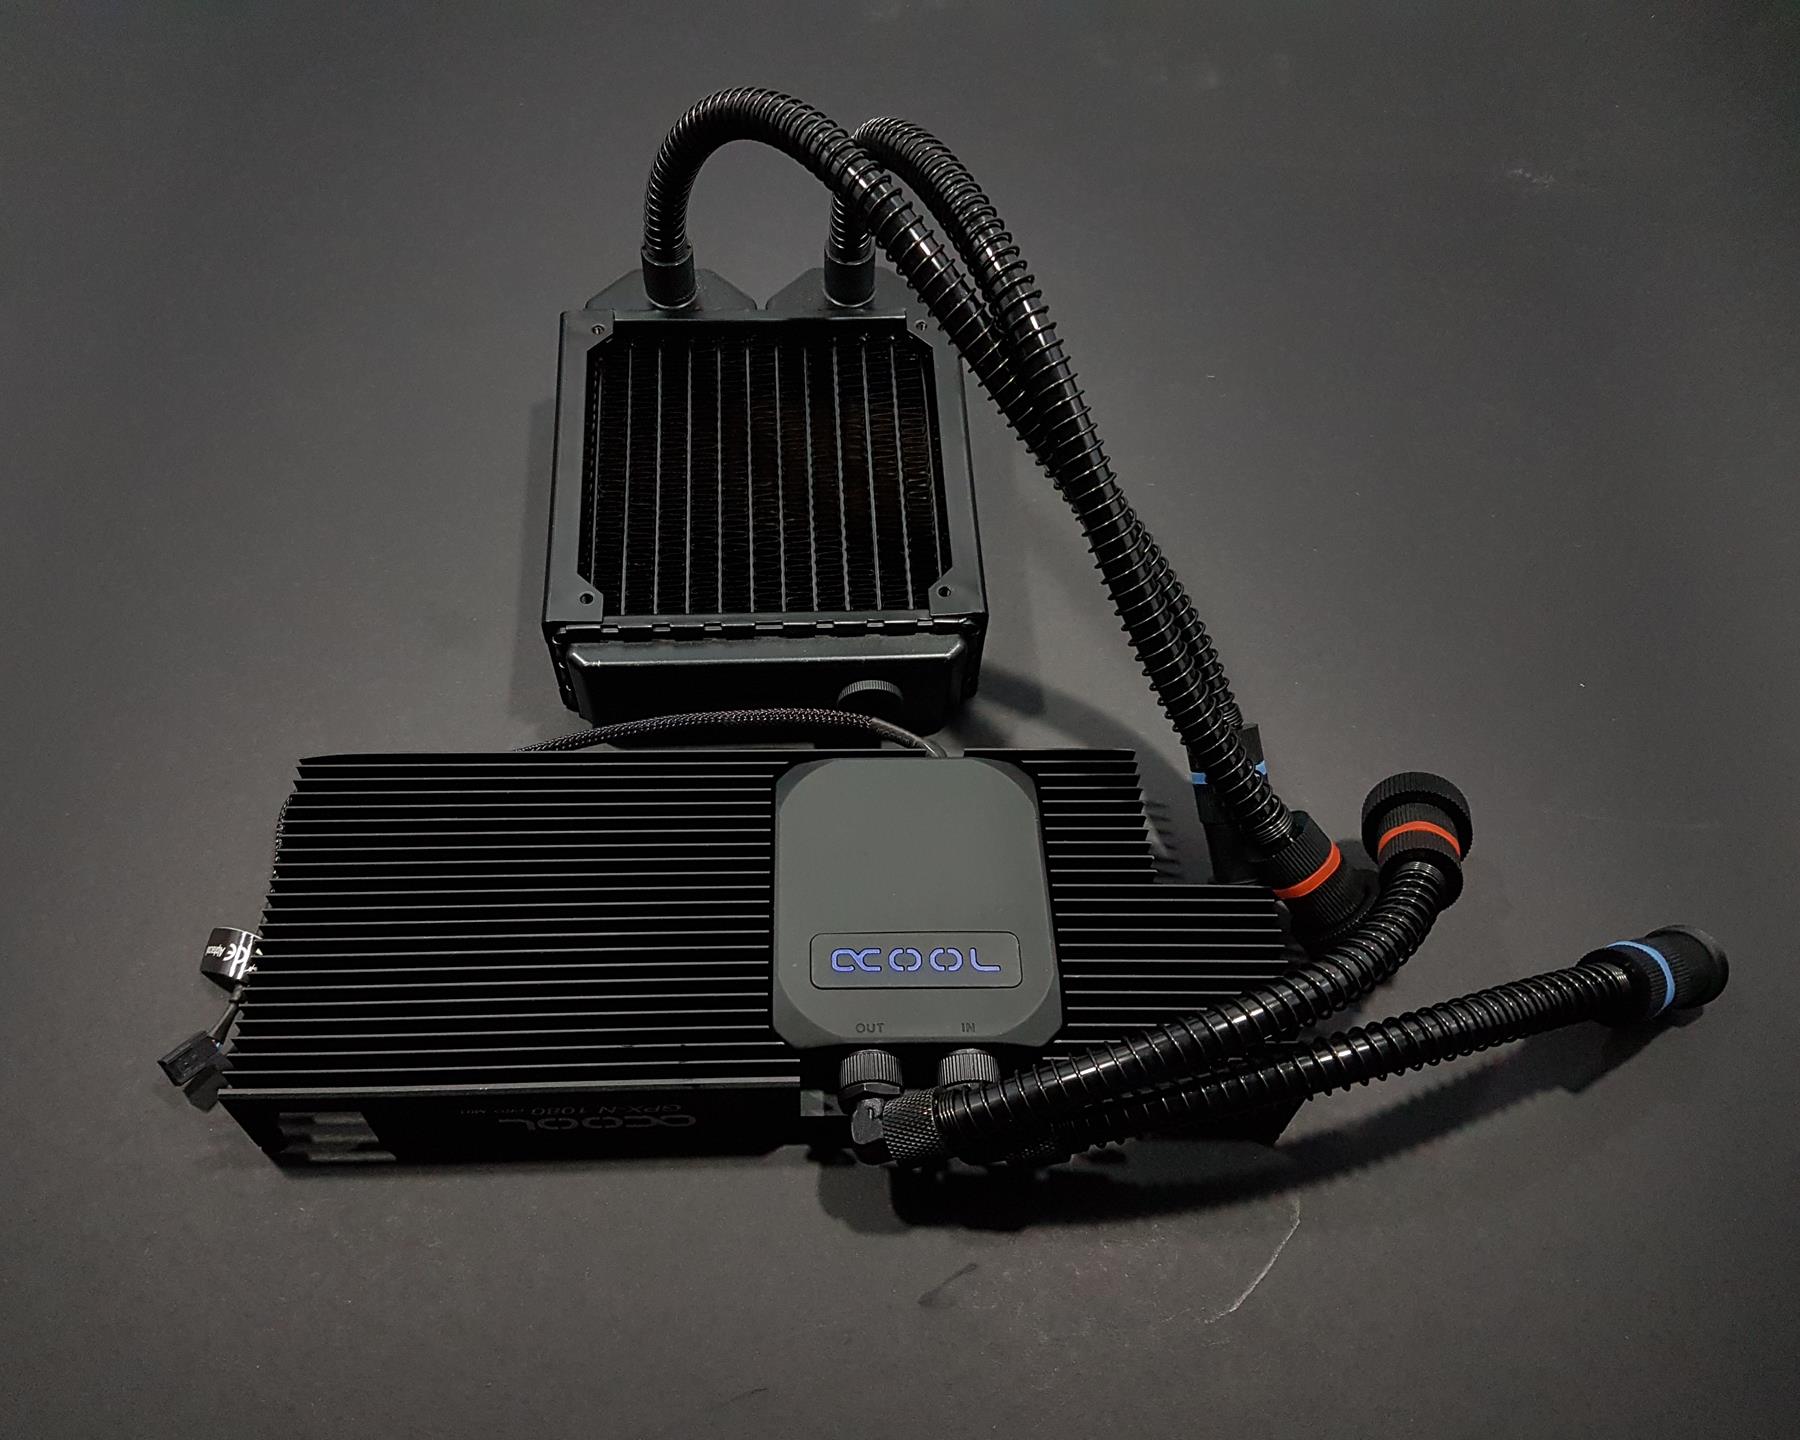
The Alphacool has sent me their Eiswolf GPX-N 1080Pro-M01 graphics card cooler. This particular model is designed for the reference edition or founders edition version of the GTX 1080. With Eiswolf, the Alphacool has taken a different approach. It is not a full water block like what we see from the other water cooling companies. It is also different from the hybrid solutions being manufactured by the likes of the EVGA and MSI/Corsair. Alphacool has developed a completely new pump design to minimize the pump’s volume and increase performance. The result is their suction pump design being featured on the Eiswolf coolers. Through its suction principle, less turbulence is created in the water, allowing for a more even flow with less noise. It comes in multiple configurations like with 120mm radiator, 240mm radiator or solo version which does not have any radiator. The solo is intended for use with the Eisbaer series of the coolers or if the user already has a radiator with quick release fittings. The 120mm radiator is fully implemented in the copper which is another difference from the traditional CLCs in the market. It features 11/8mm size PVC hoses with standard g1/4 threading and standard compression fittings. It is from their ever-popular NexXxos series. I won’t be saying much here but in the closer look section of this content.
Item: Eiswolf GPX-N 1080Pro-M01
Manufacturer: Alphacool
Price: €179.95 [at the time of the review]
Specifications
Packaging and Unboxing
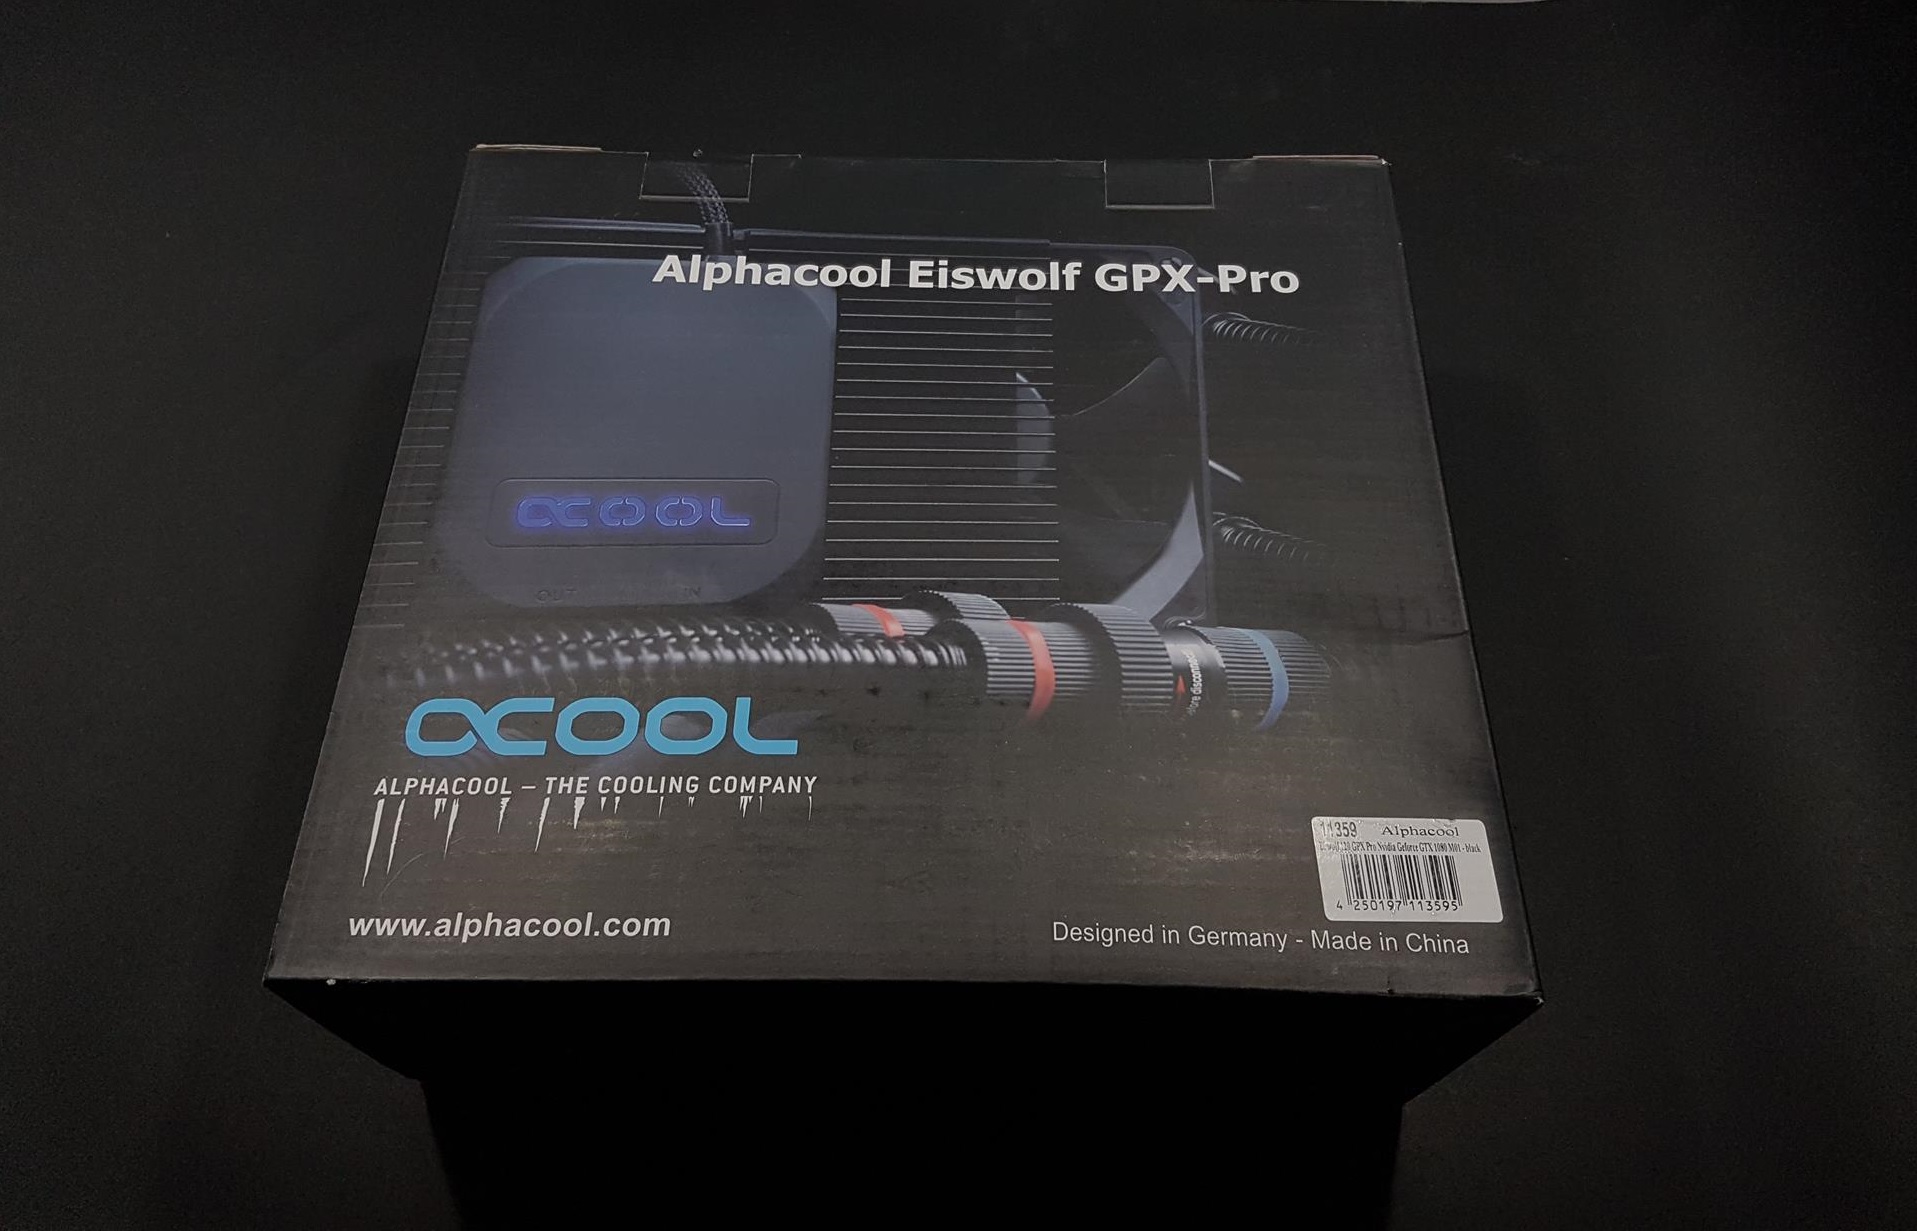
The unit comes in a typical Alphacool designed packing box made of the cardboard box in the black color. The front cover has a picture of the block with pump unit in main focus. Alphacool Eiswolf GPX-Pro is printed on the top side of the picture. OCool, Alphacool are printed under the picture. The website address of the company is printed on the bottom left side. The unit is designed in Germany and made in China.
The backside has a same design and layout as is on the front side. There is an info label pasted on the bottom right side. It has the complete model of the unit printed on it along with the barcode.
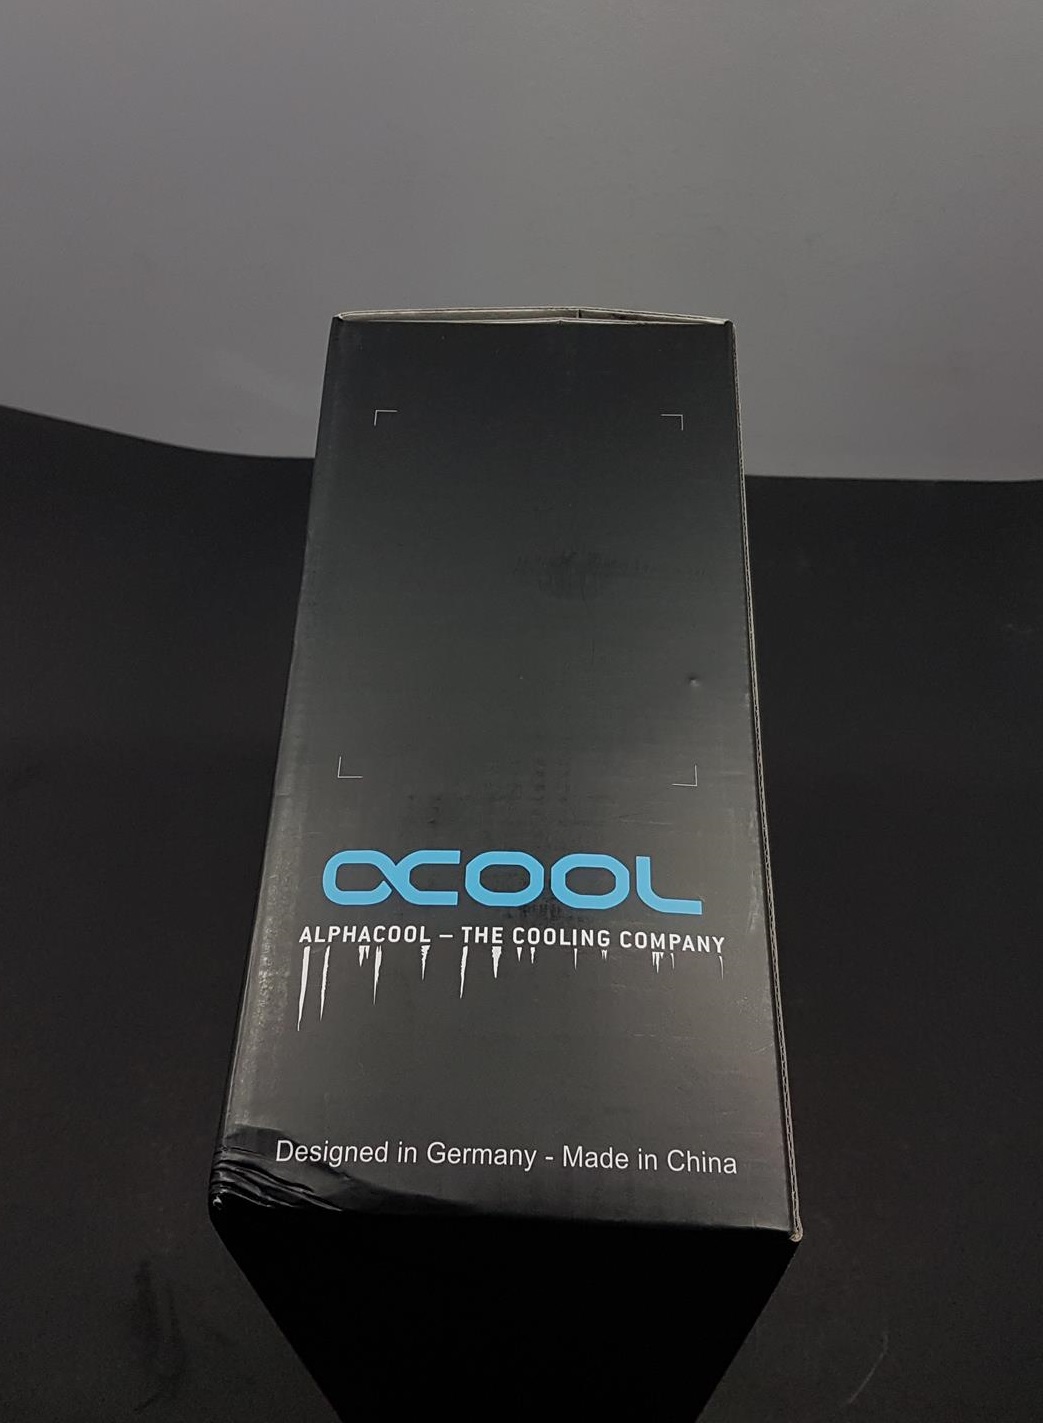
The left and the right sides have same design and layout. OCool and Alphacool are printed on the bottom side with design and made in info at the very bottom.
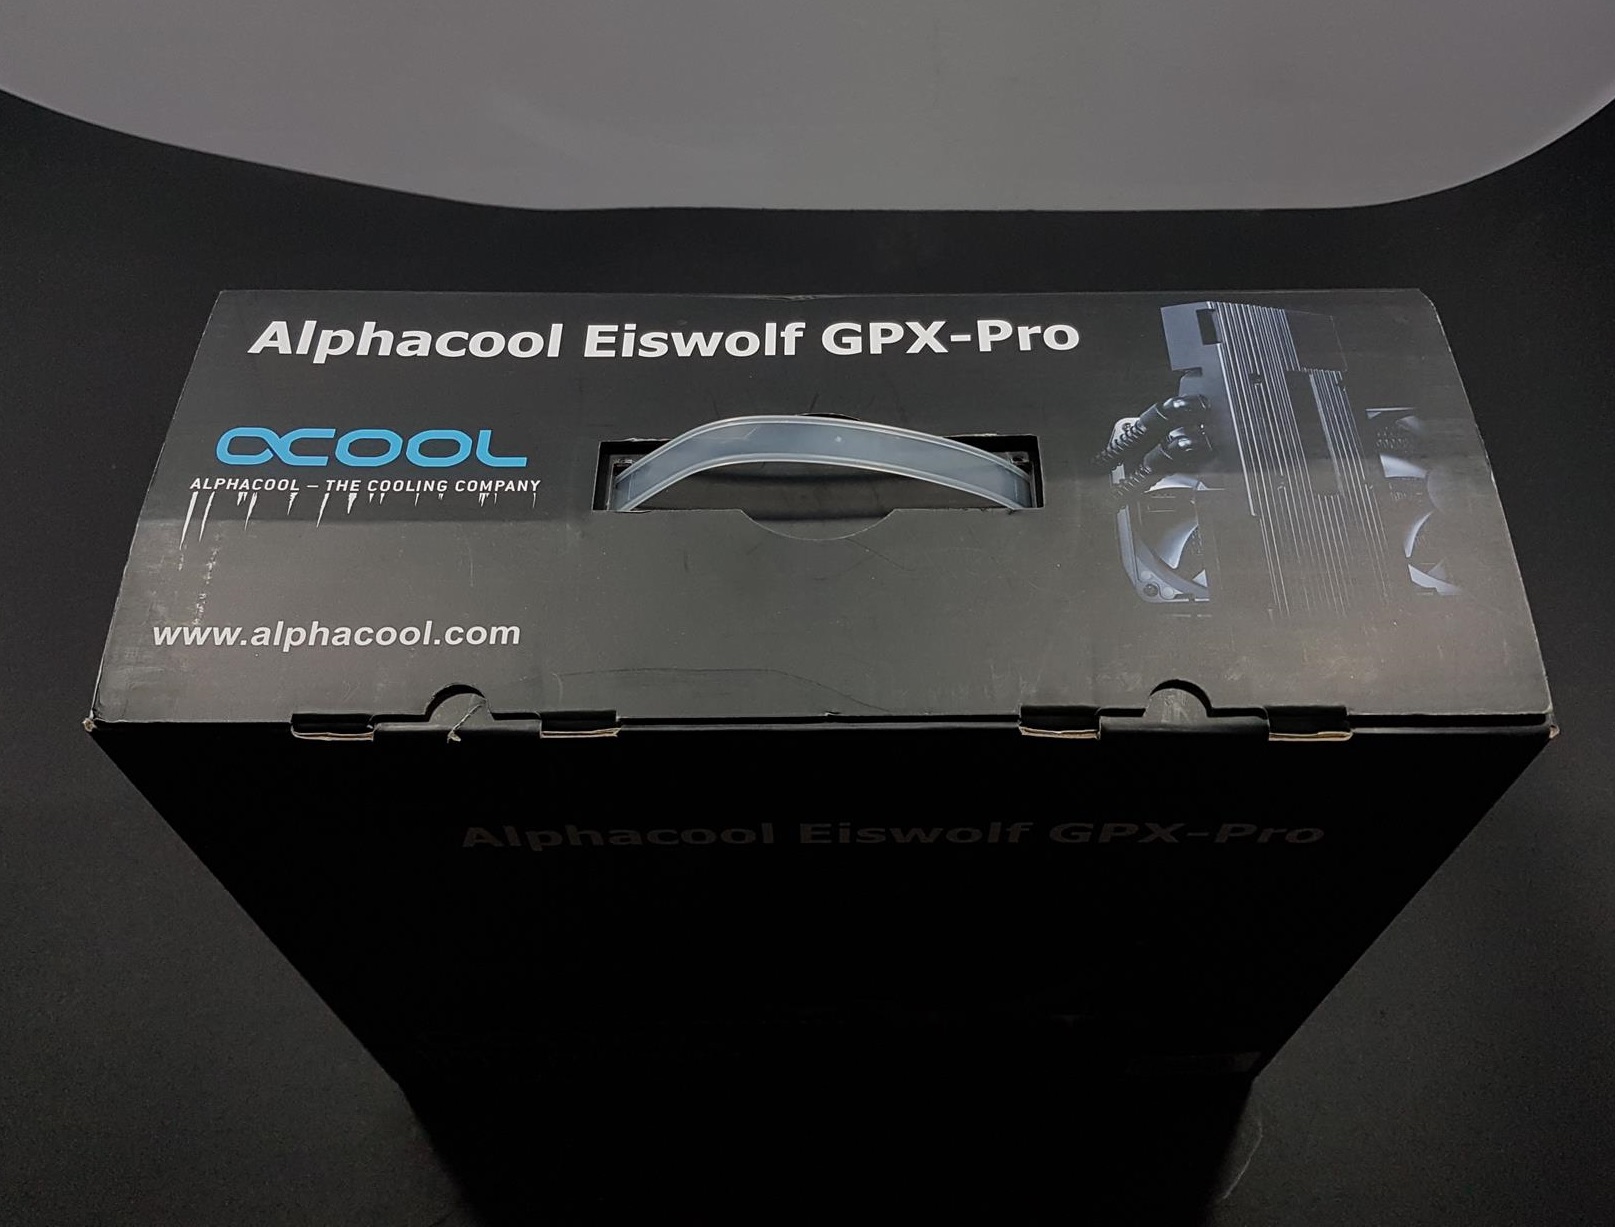
The top cover has a plastic grip handle coming out of the middle. One can easily carry the box around. Alphacool Eiswolf GPX-Pro is printed in the white color on the top. OCool is printed in the blue color on the left side. Company’s website link is printed at the bottom.
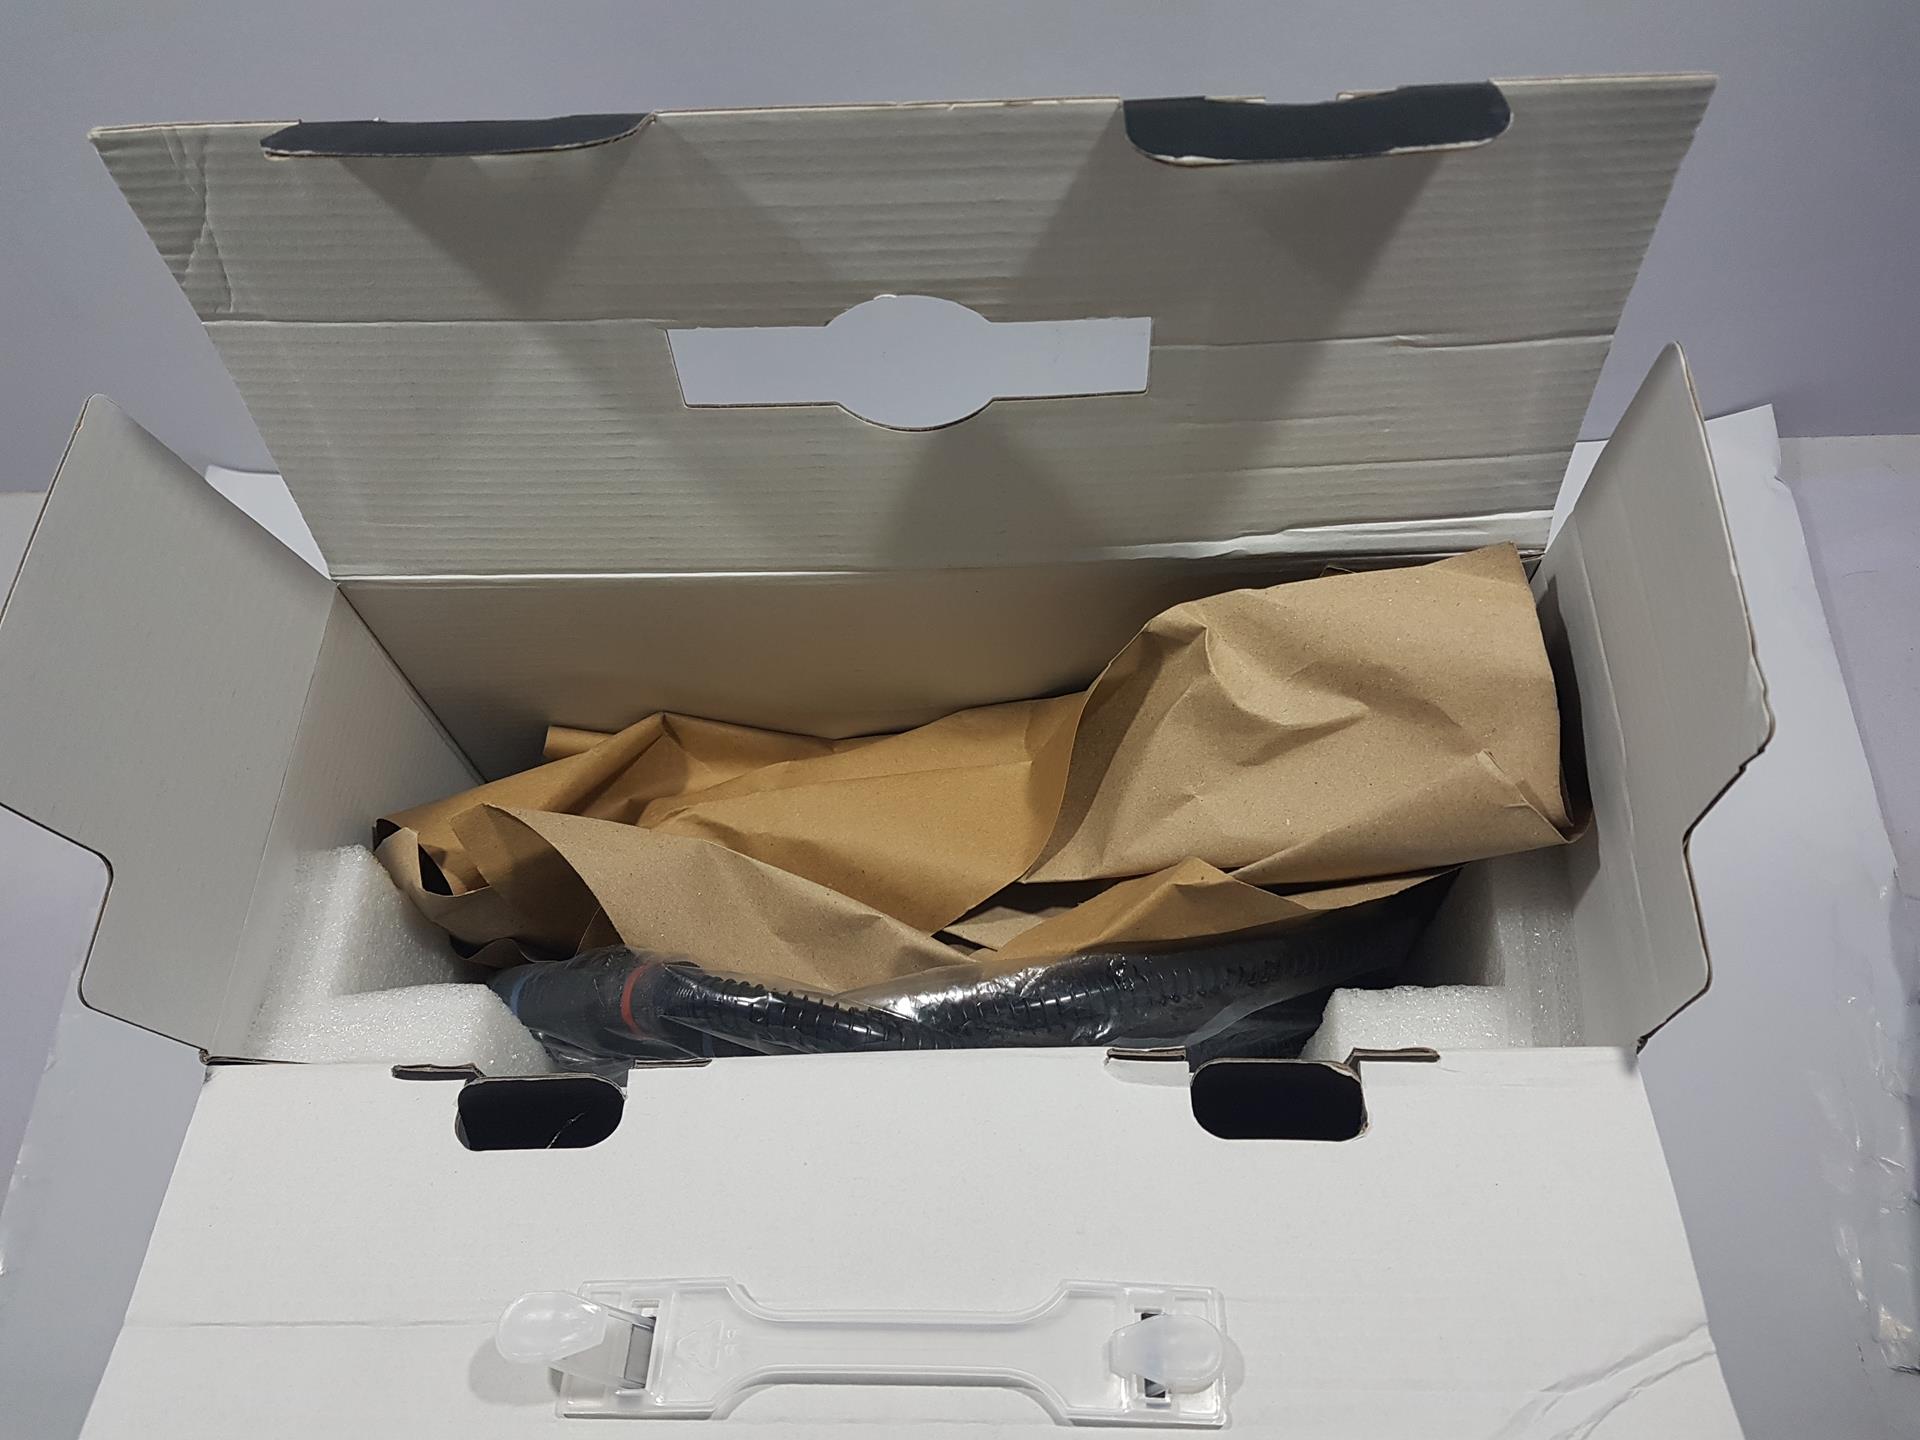
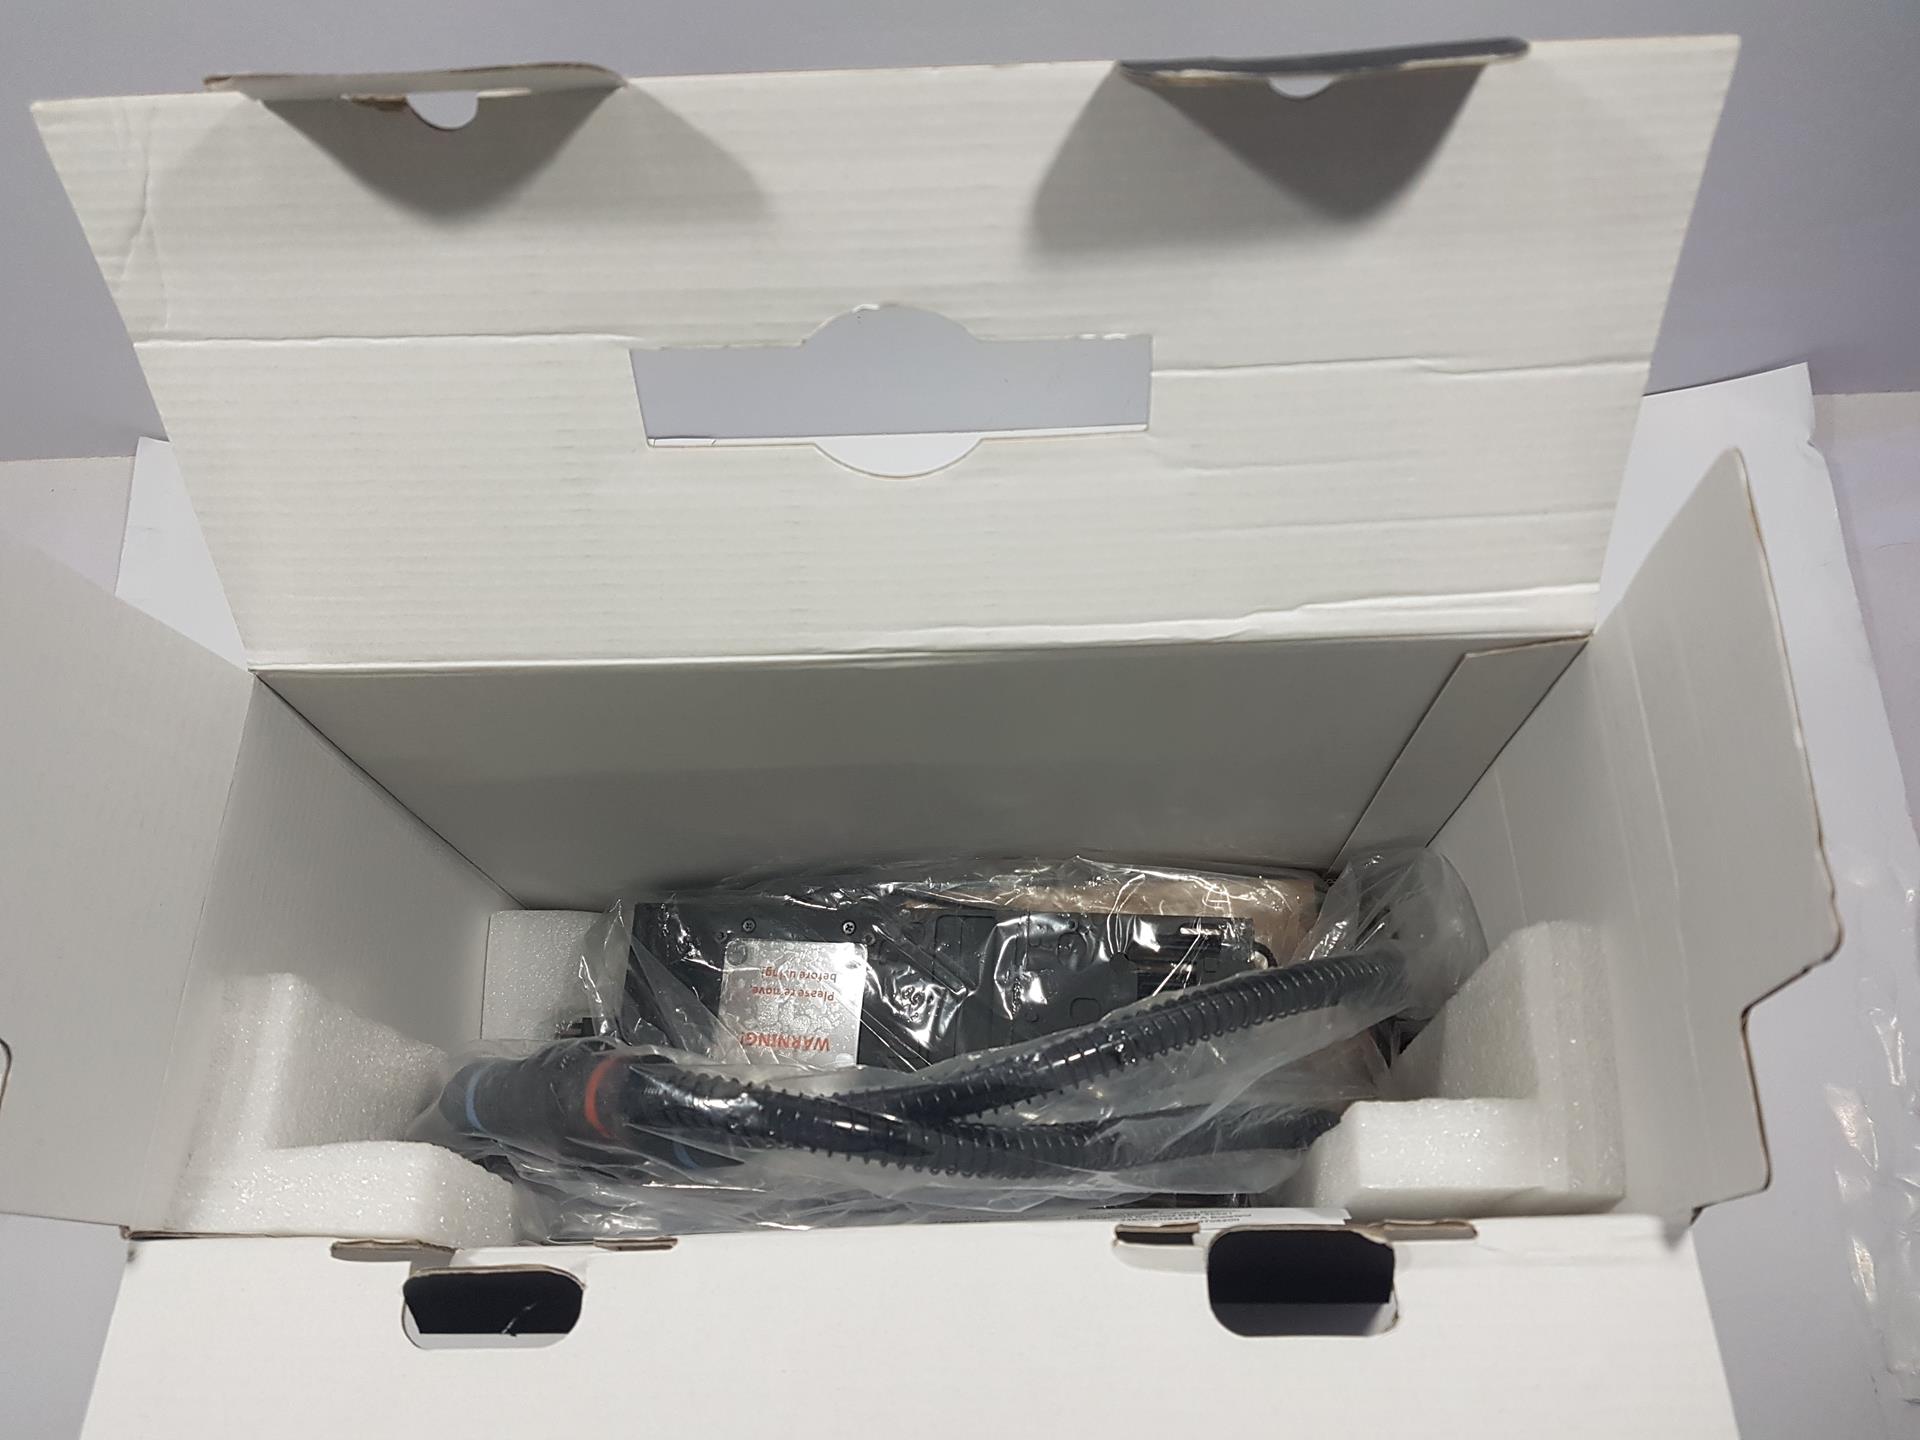
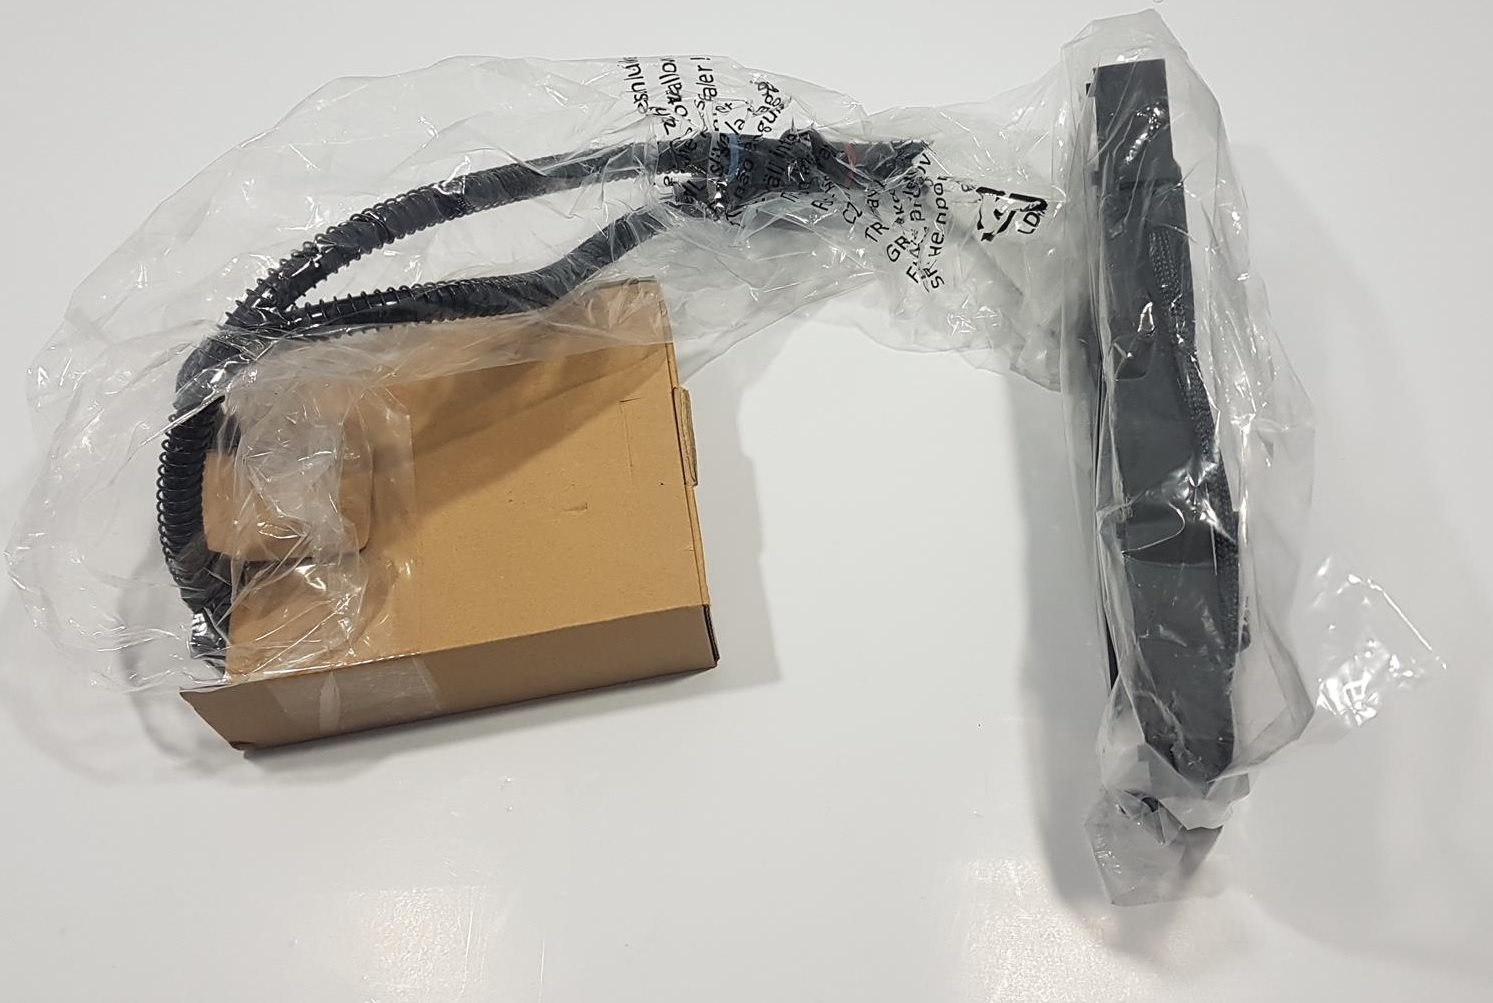
Opening the box would reveal the recycled packing material surrounding the contents. Taking these out would show the block nicely wrapped in a plastic sheet. The radiator is placed inside a cardboard box.
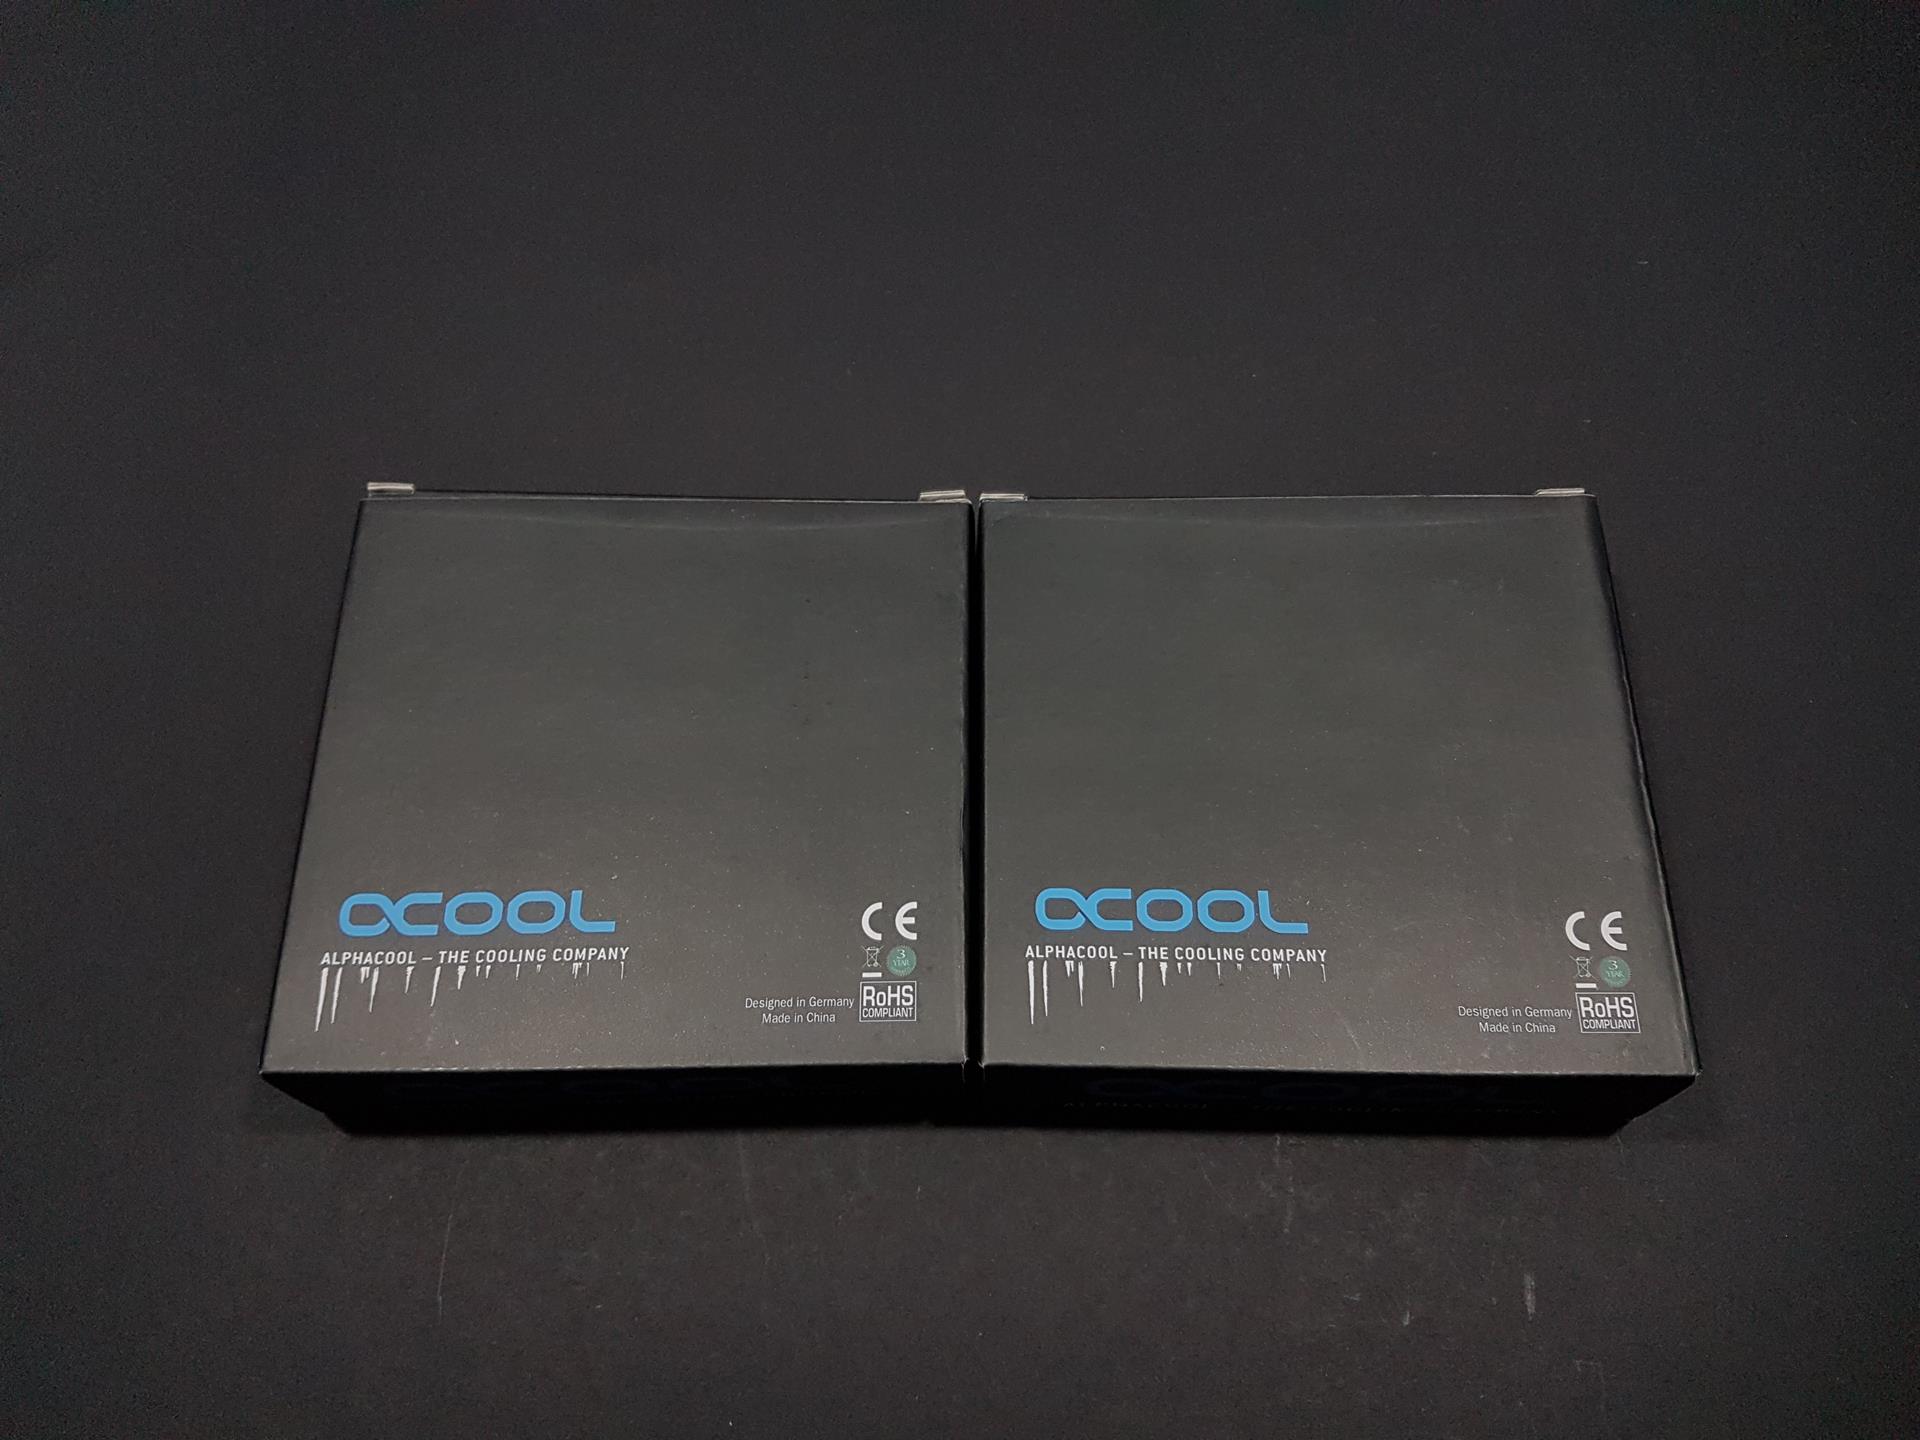
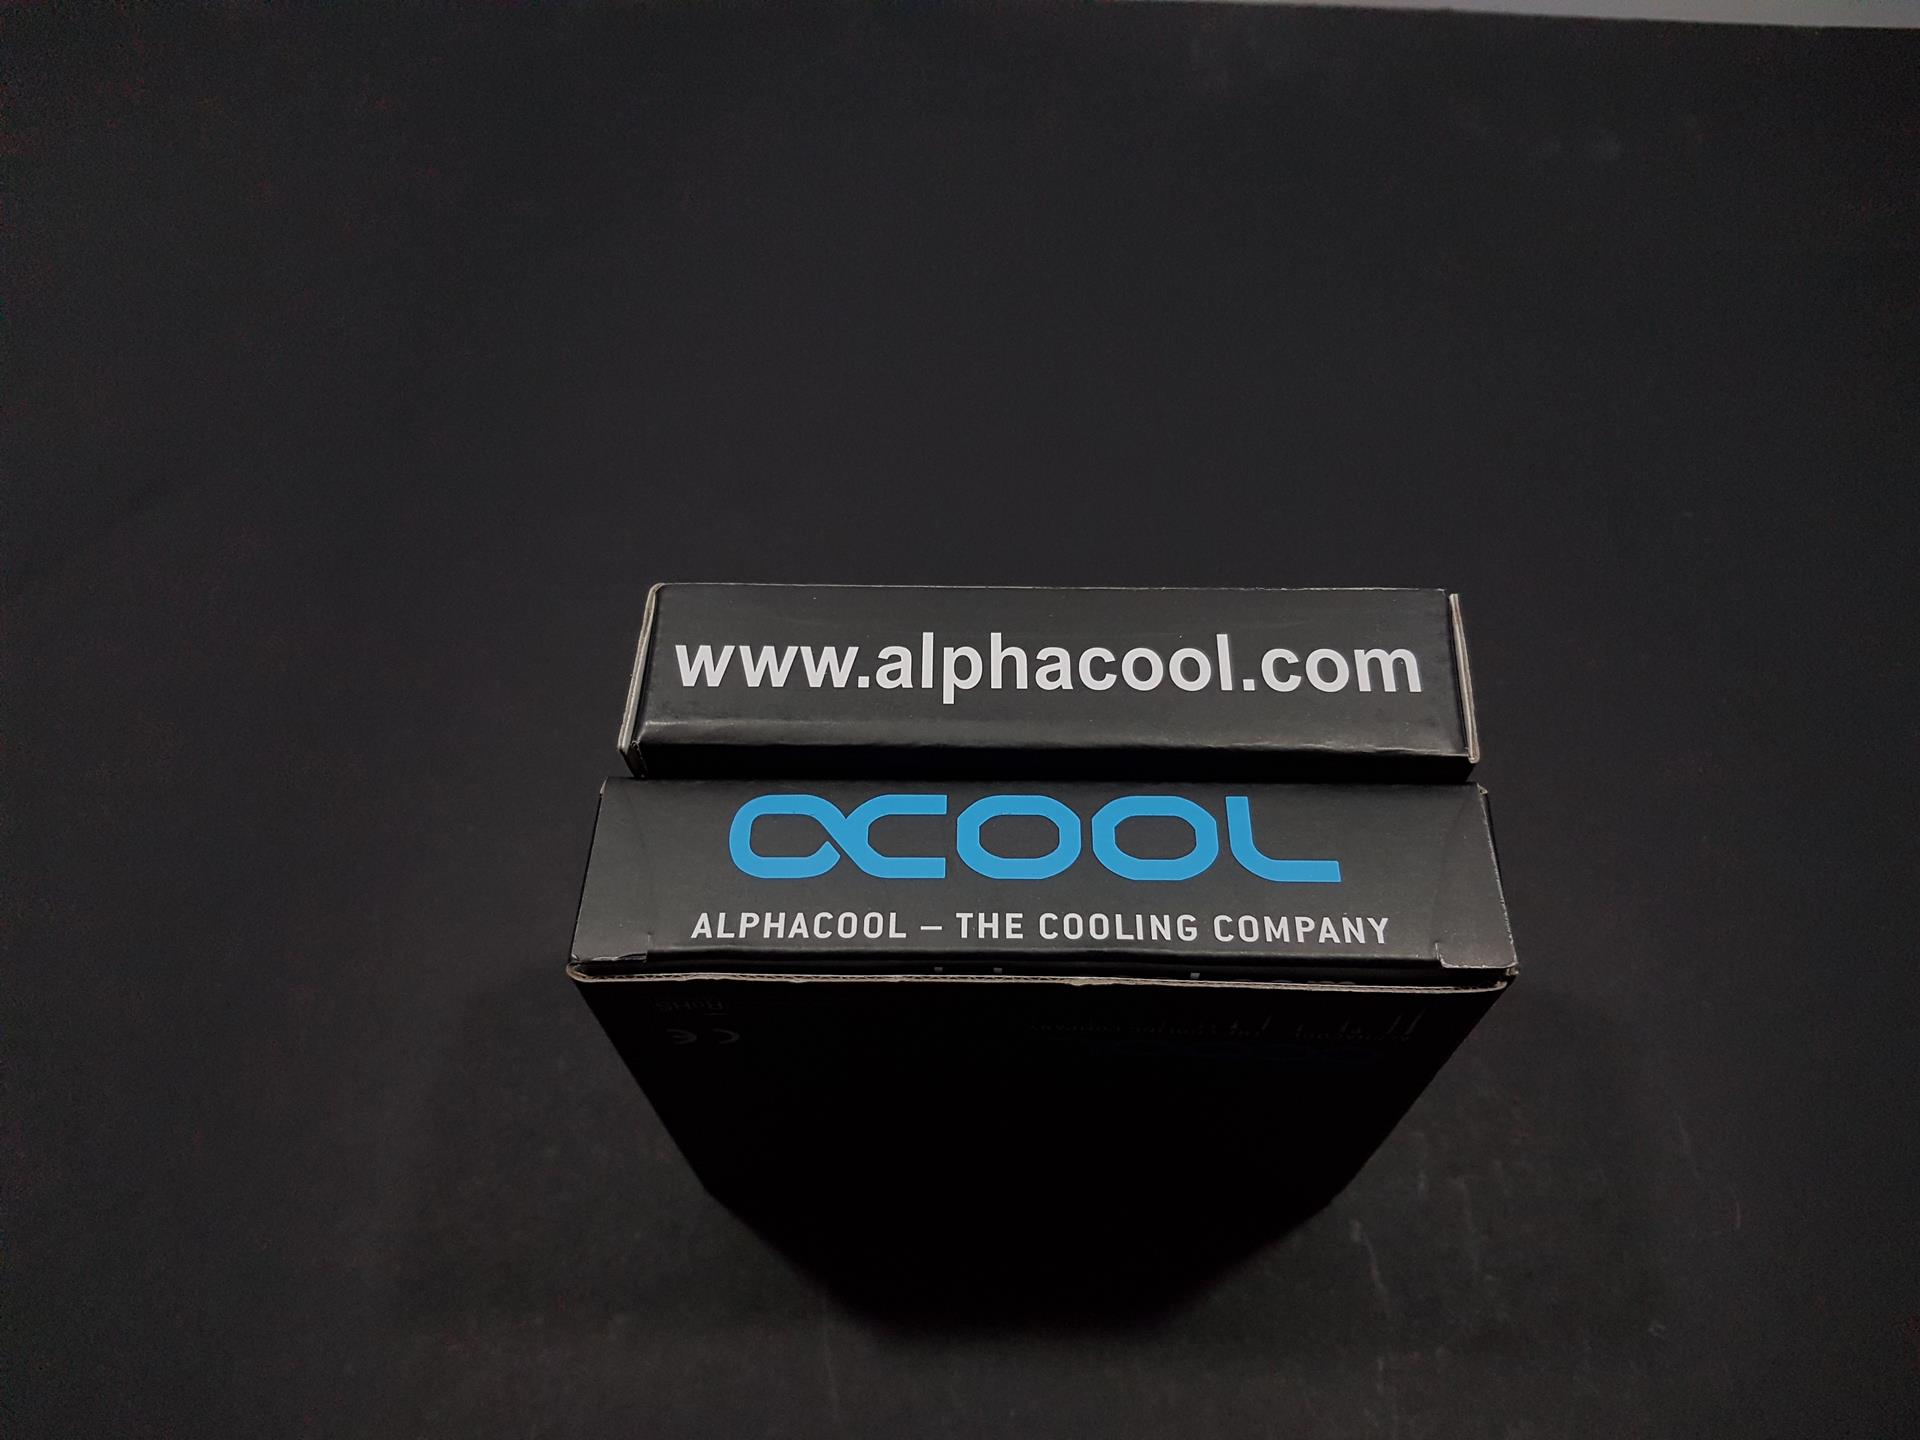
Two Eiswind 12 fans have been provided with the parcel for push/pull setup. These are nicely placed inside black color Alphacool design boxes. These boxes have the OCool and Alphacool printed at the bottom side along with the URL of the company’s website.
Accessories
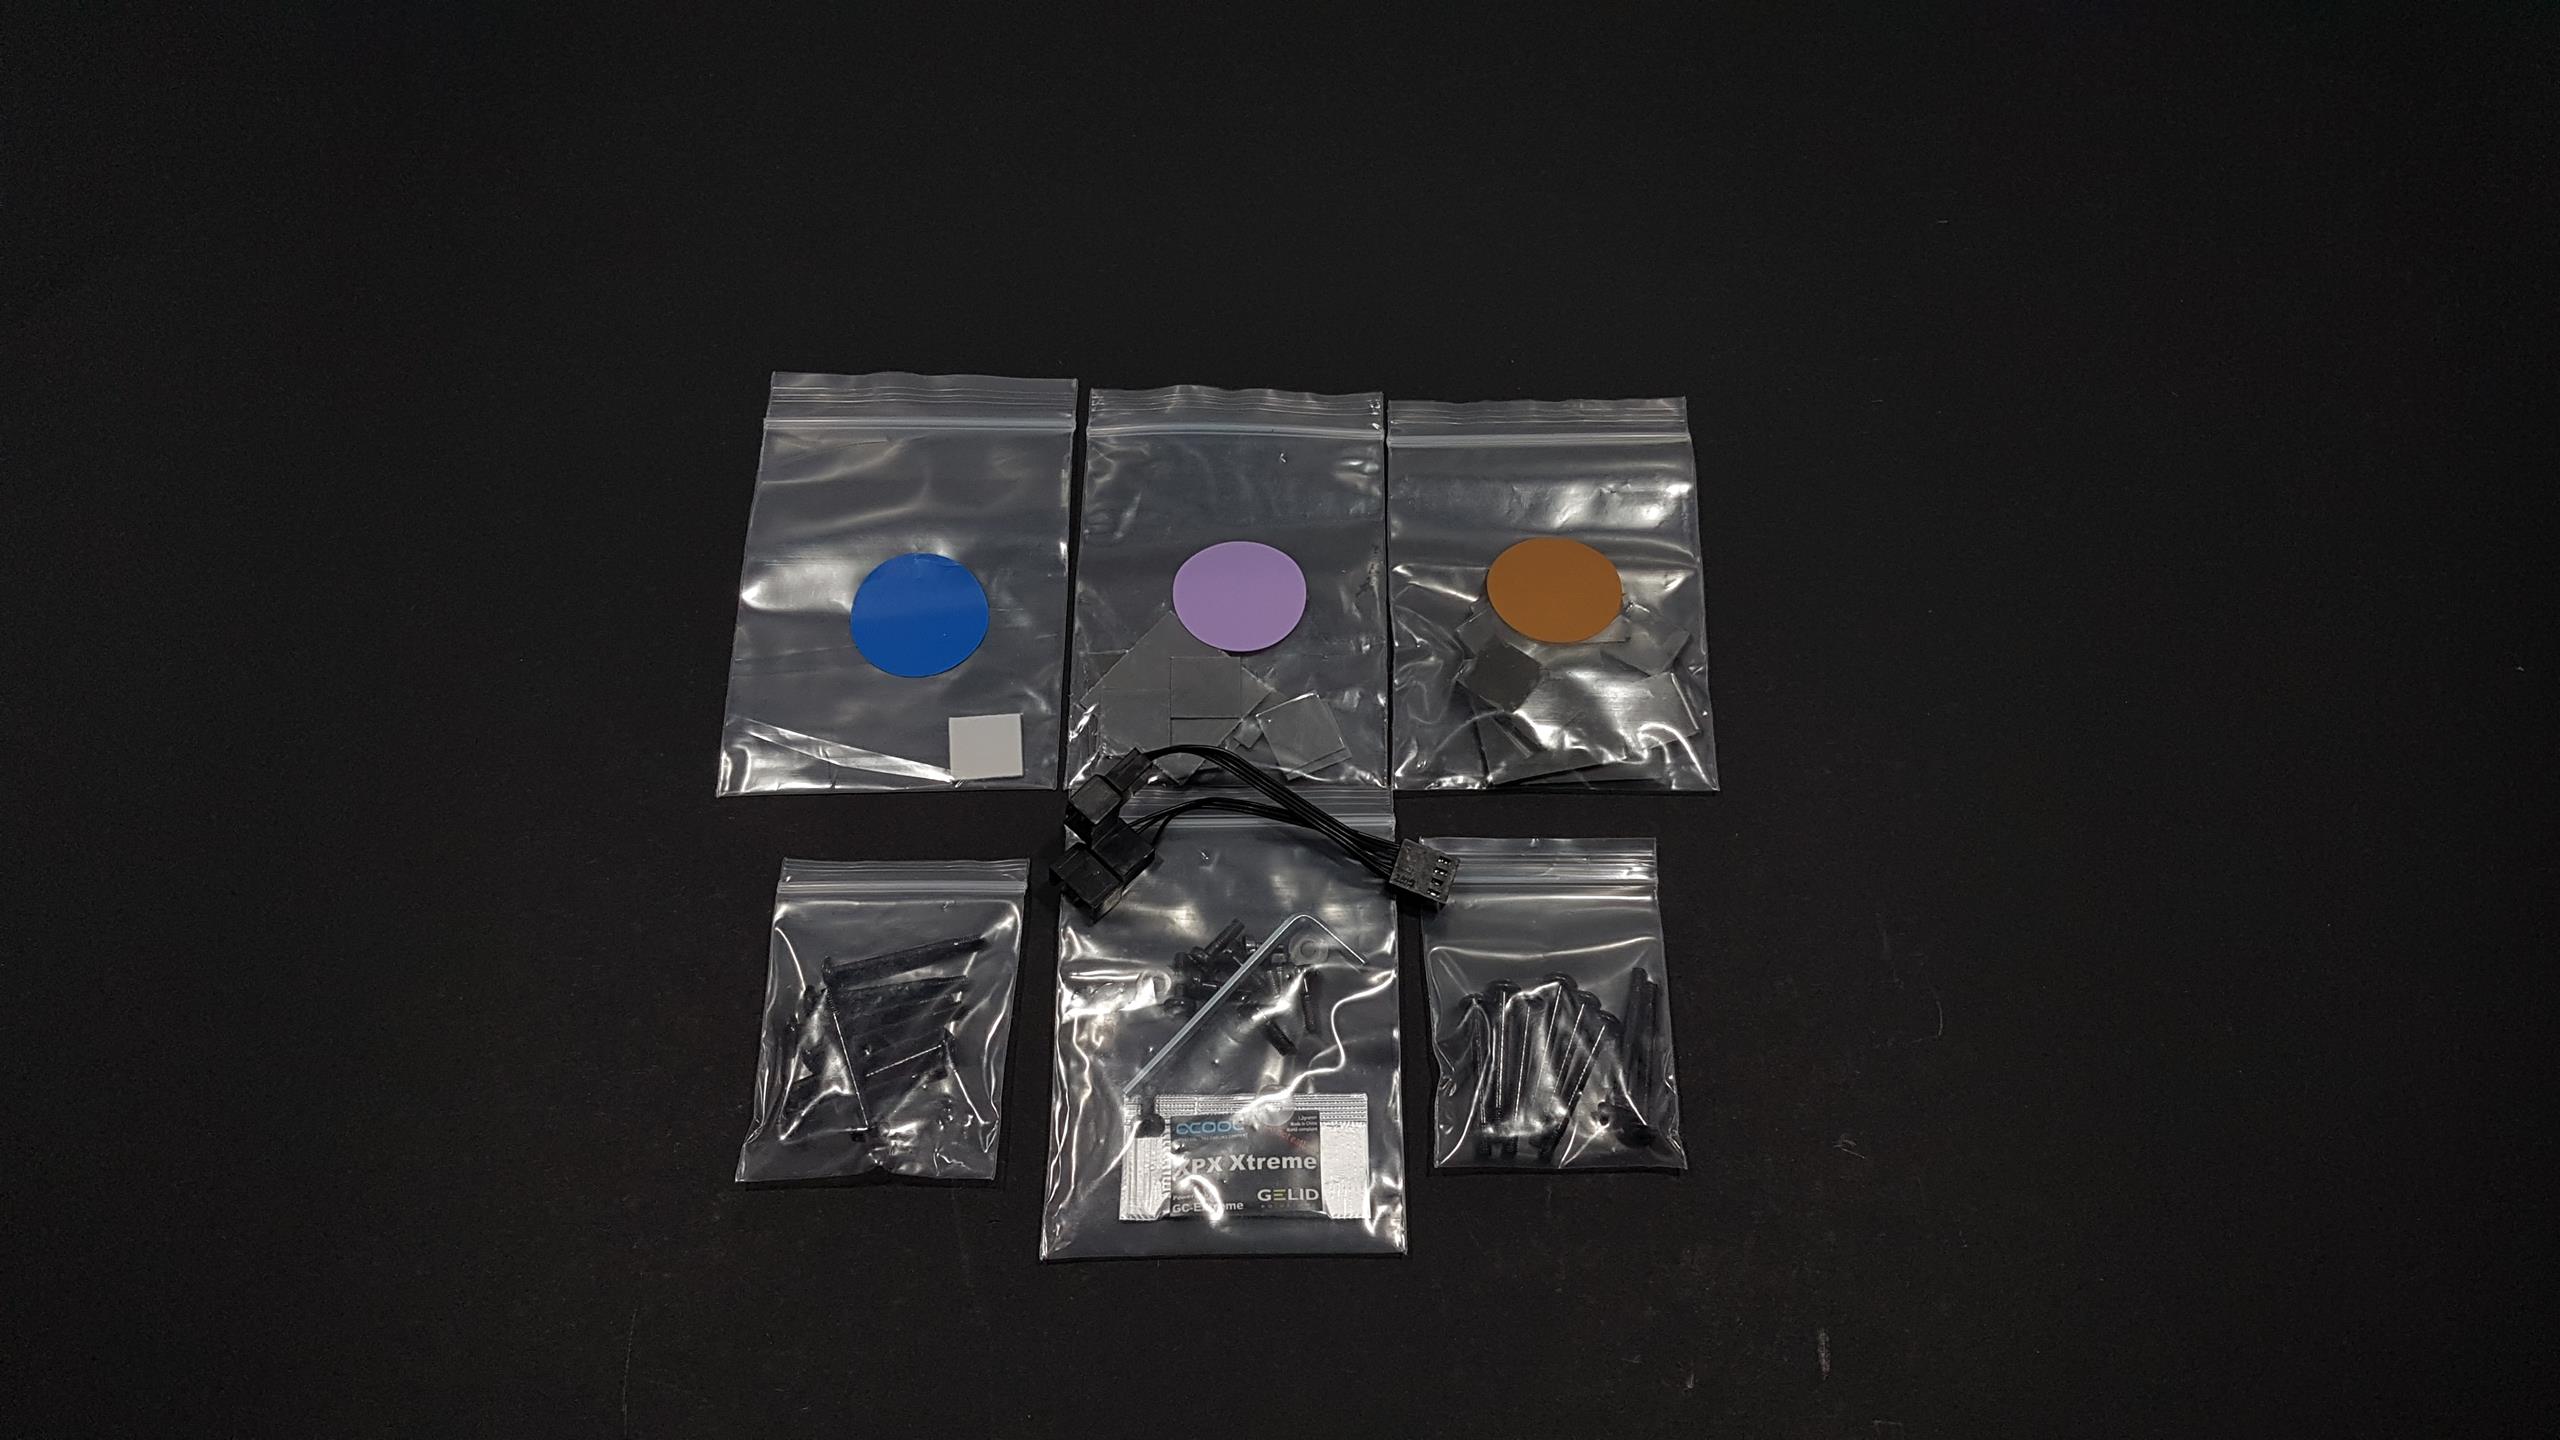
The Alphacool has provided following accessories: –
- Blue color coded plastic container with a thermal pad
- Purple color-coded plastic container with thinner thermal pads
- Brown color-coded plastic container with thicker thermal pads
- Two sets of 8 long screws.
- Y-Splitter
- Alen key
- Gelid Thermal Paste
- 6x M3x10 Screws
- 3x M3x6 Screws
- 3x Silicon Washers
- Installation Manual
- Eiswolf Info guide
Closer Look
The Alphacool Eiswolf GPX-Pro is a semi AIO/CLC water cooler for the graphics card. It is neither hybrid nor a full water block hence had I written semi above. It has a 120mm copper based radiator with 45mm thickness and comes with two Eiswind 12 fans. What exactly is the semi-concept here and how does it differ from the other designs? Let’s find out by taking a look at it.
The complete block is made of aluminum which is high precision milled. The idea here is that the complete block acts like a heat sink. Only the nickel-plated copper base is making a contact with the GPU die. Nothing else on the PCB comes under water. This differentiates it from the regular full water blocks. It has a pump and a base as we can see on the hybrid solutions but there are two major differences with respect to the hybrid design. No 1 is that the complete block acts as a media for heat transfer and in doing so there is no active air cooling on the VRM, MOSFETs and other power delivery sub-components. On the hybrid solutions, there is 80-90mm fan on the shroud blowing the fresh air on the VRM MOSFETs etc. Shroud on the hybrid itself is made of the plastic and does not contribute towards heat transfer as such. No 2 is that the hybrid designs are neither expandable nor refillable. Unit when fully assembled measures 269x33x100mm.
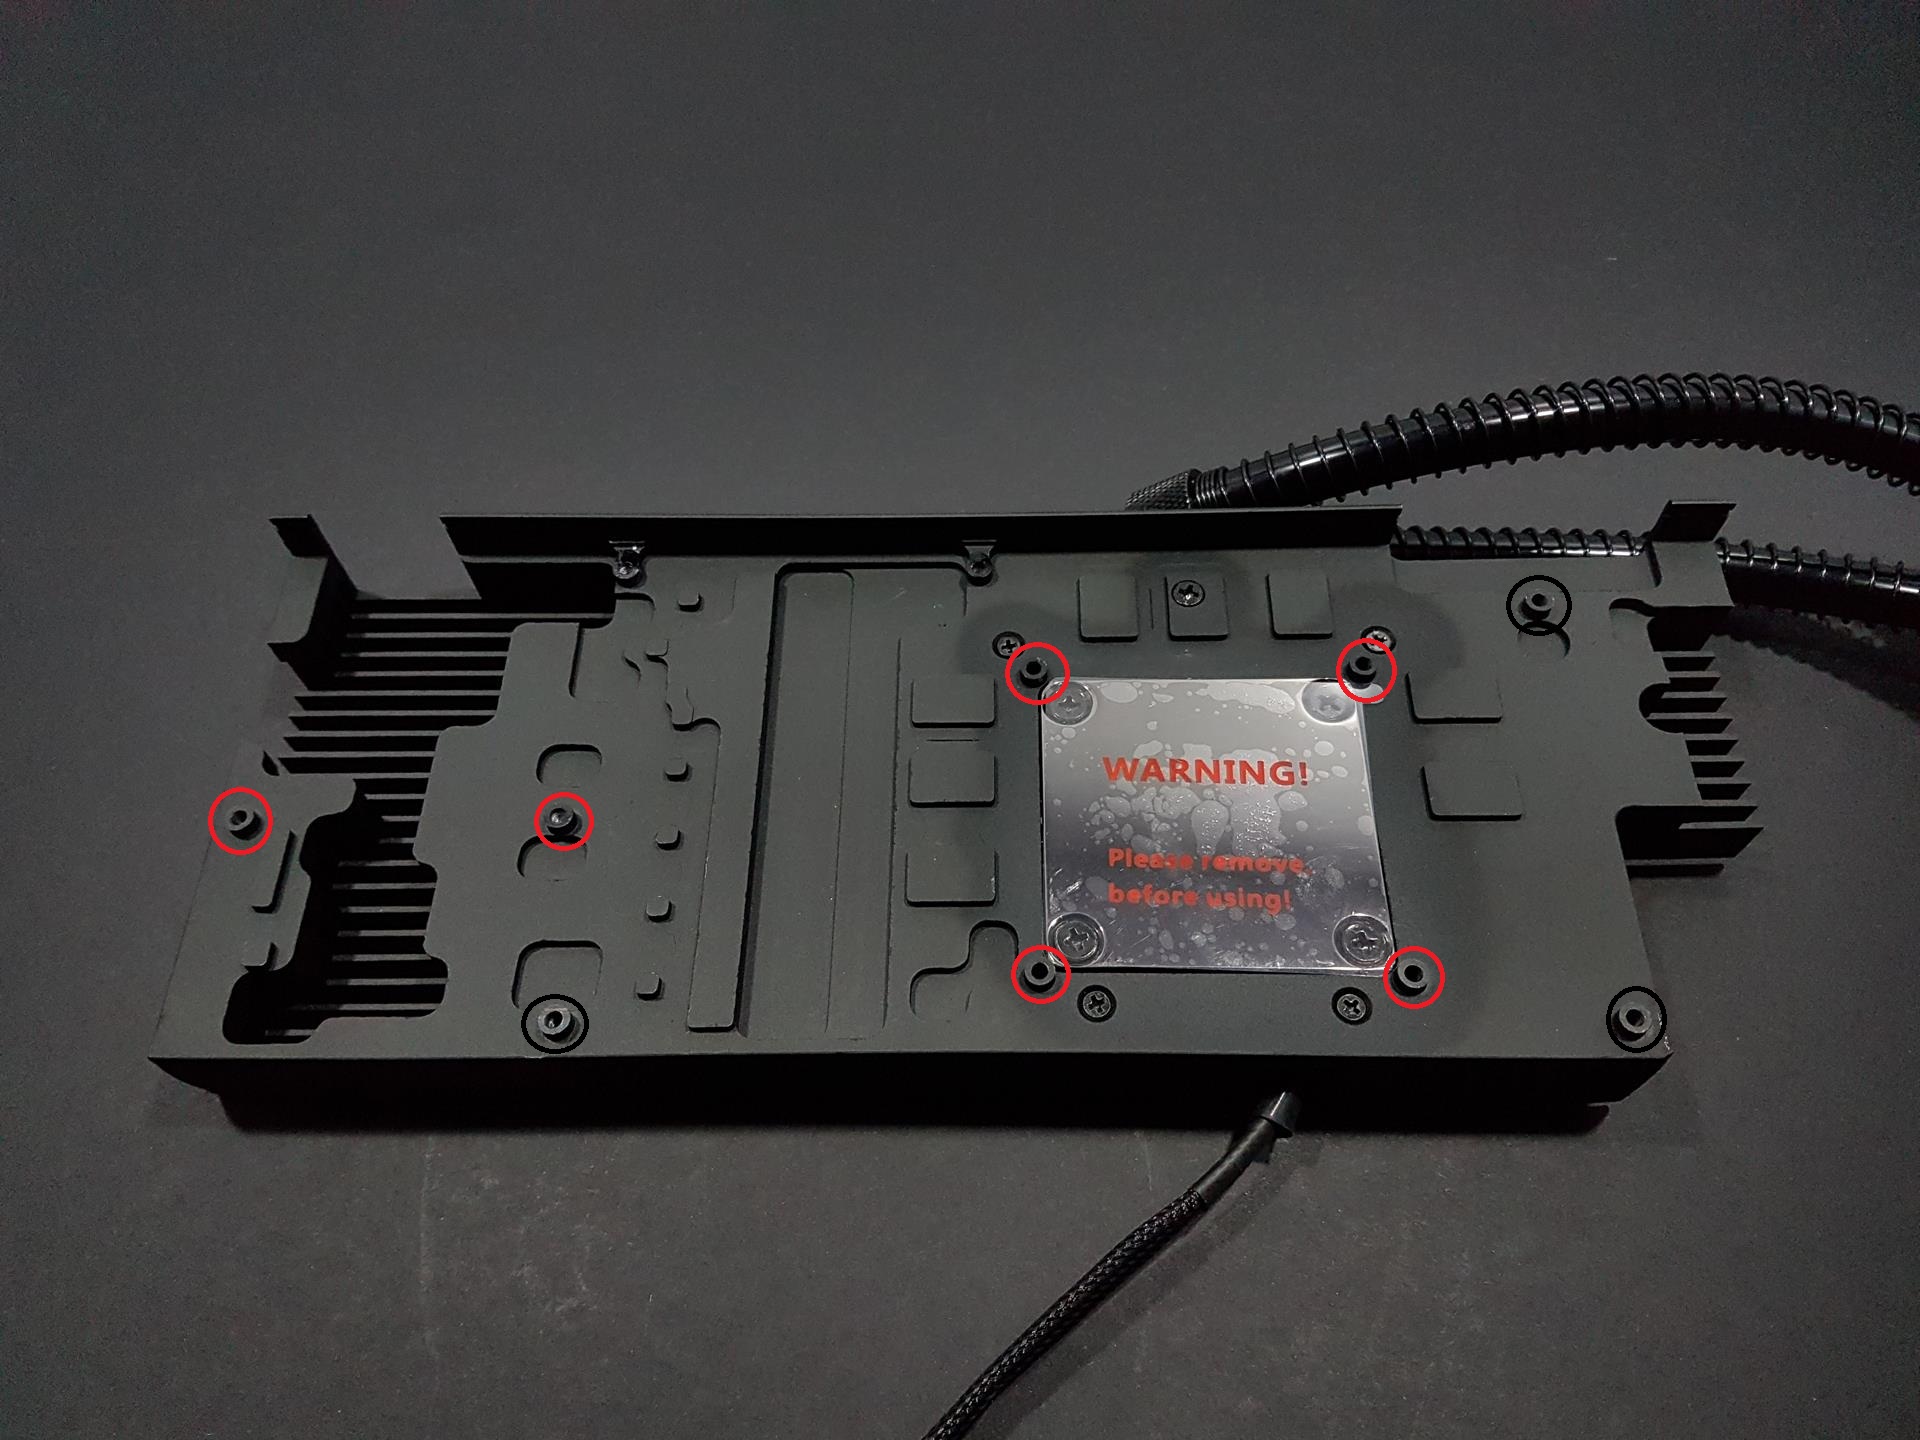
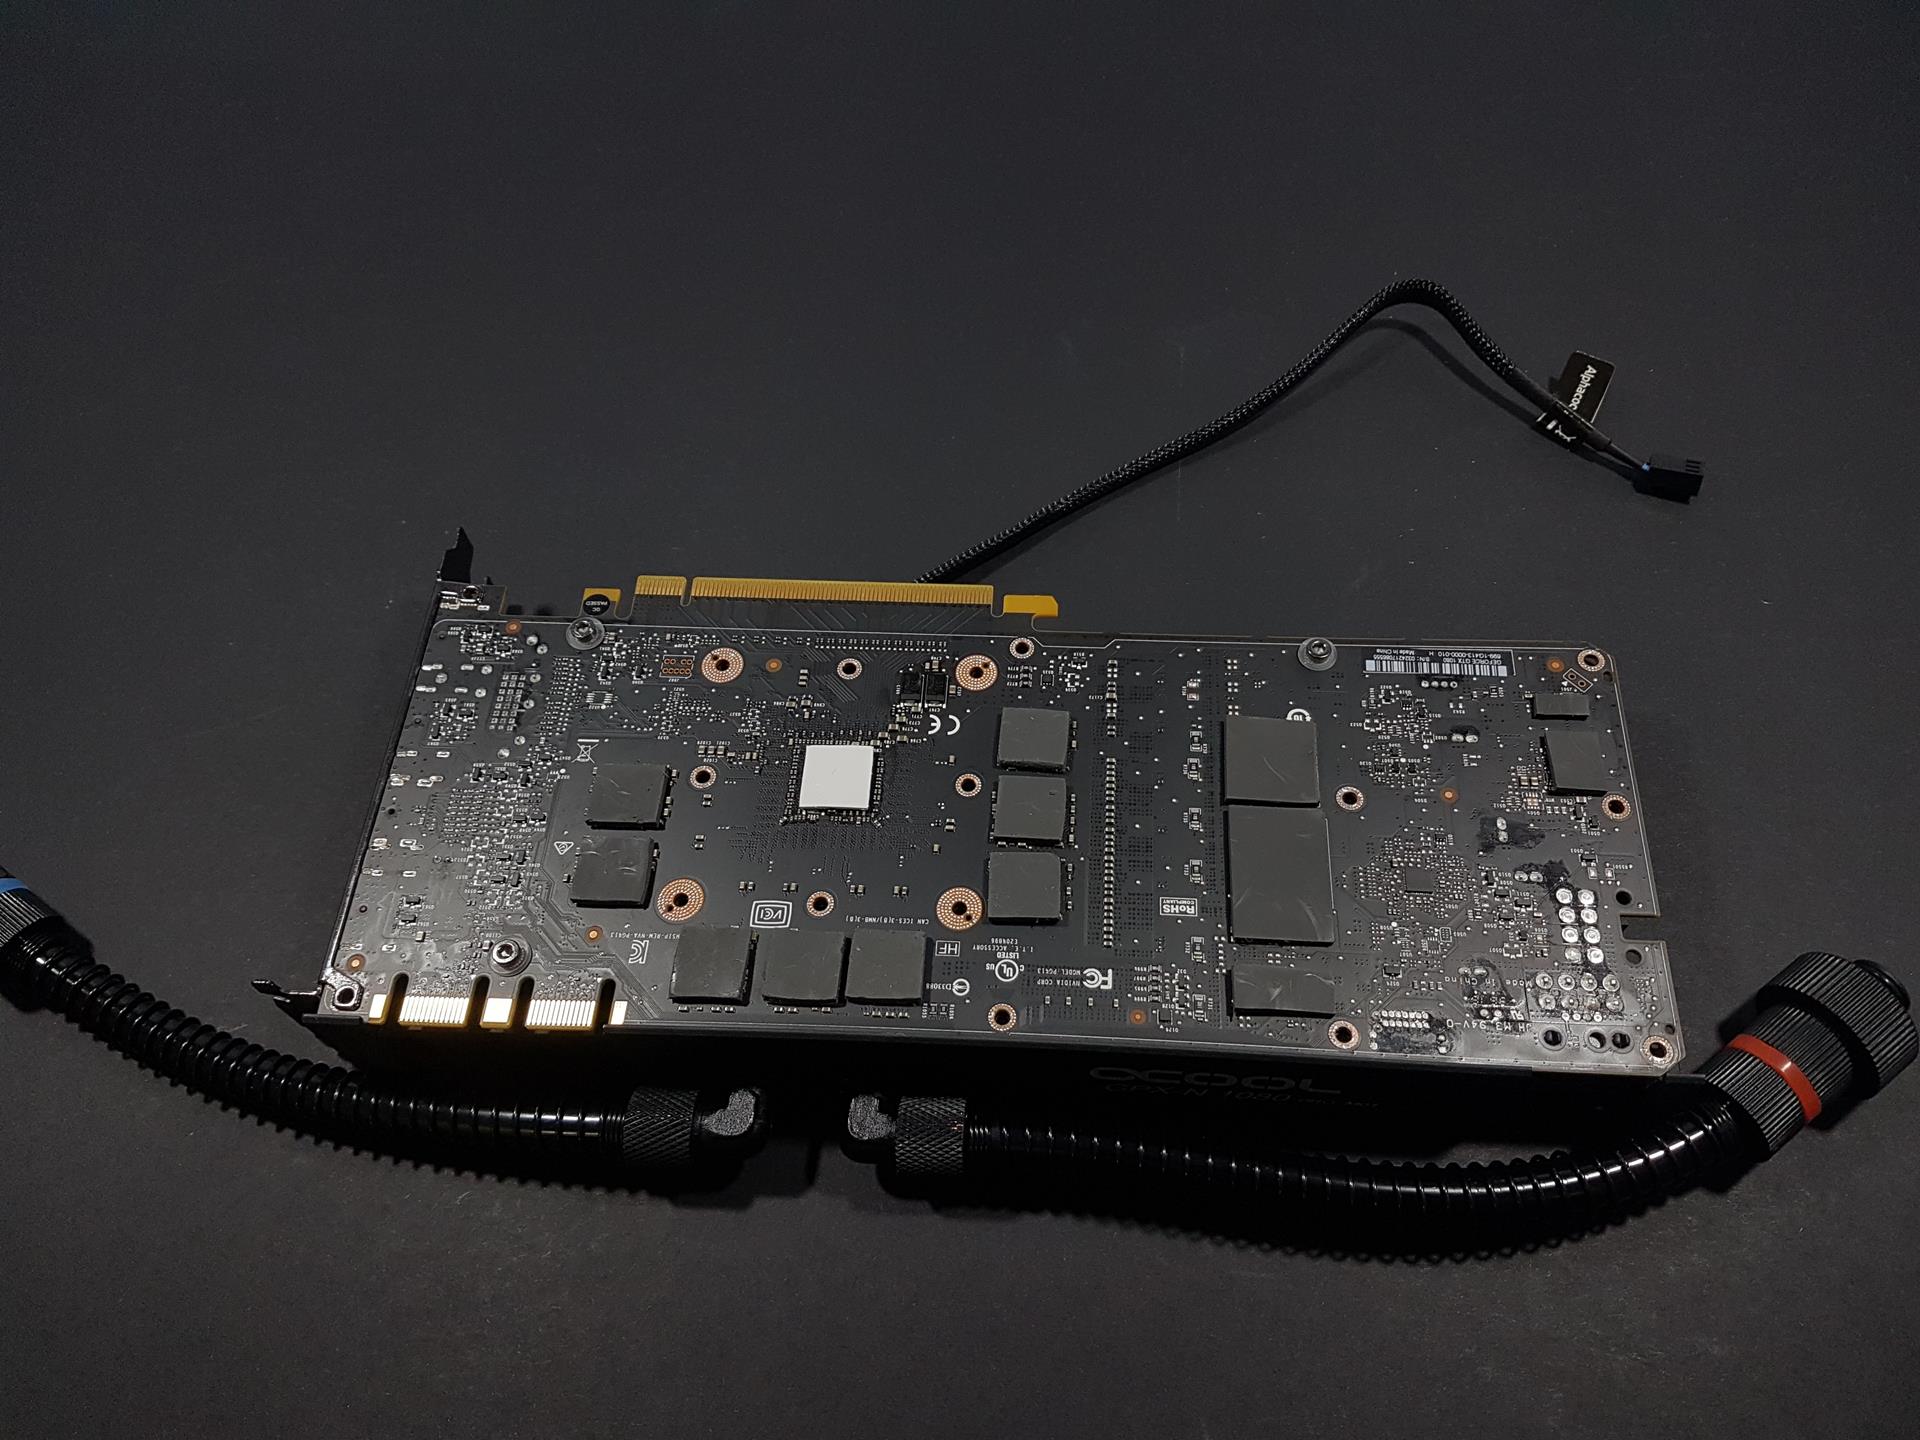
Let’s take a look at the block’s underside for all the magic up its sleeves. I will cover the front side afterward. The complete block is a single piece of aluminum in an industrial outfit. On the right hand side, we can the 8 raised tabs which matches and aligns with the VRAM chips on the PCB. As they make direct contact with the VRAM we don’t need thicker thermal pads for the heat conductance. Hence the Alphacool has provided thinner thermal pads in the purple color-coded container. For more details, please check our Installation section. These VRAM contact points surround the nickel plated copper base of the pump unit which makes direct contact with the GPU die. Only the GPU on the PCB comes under the water. It has a safety sticker pasted on it cautioning the user to peel it off before mounting. There are four mounting holes (shown circled in the red color) around the base. These align with the holes on the backplate supplied with the unit. The holes circled in the black color are used to mount the PCB of the graphics card on to the block. The 6 holes encircled in the red color are used to mount the backplate on to the block. Coming towards the left side, we see mounting positions that are precisely designed to make contact with the VRM, MOSFETs etc. The groove or inset on the right side of the MOSFETs contact point is where the chokes will make contact with the block. There is a cut out in an uneven design. This is left open so that fresh air can makes its way on this part of the PCB. Close look towards the bottom will show the fins design. We will take a look at that side shortly. The bottom section of the far right side does not have a full length. This is where the DVI-D/I port makes contact. There are large cutouts on each end of the top plate. The left cutout is for the power connector clearance and the right cutout is for the SLI fingers clearance. Overall, this is a well thought out design with form and functionality built right into it.
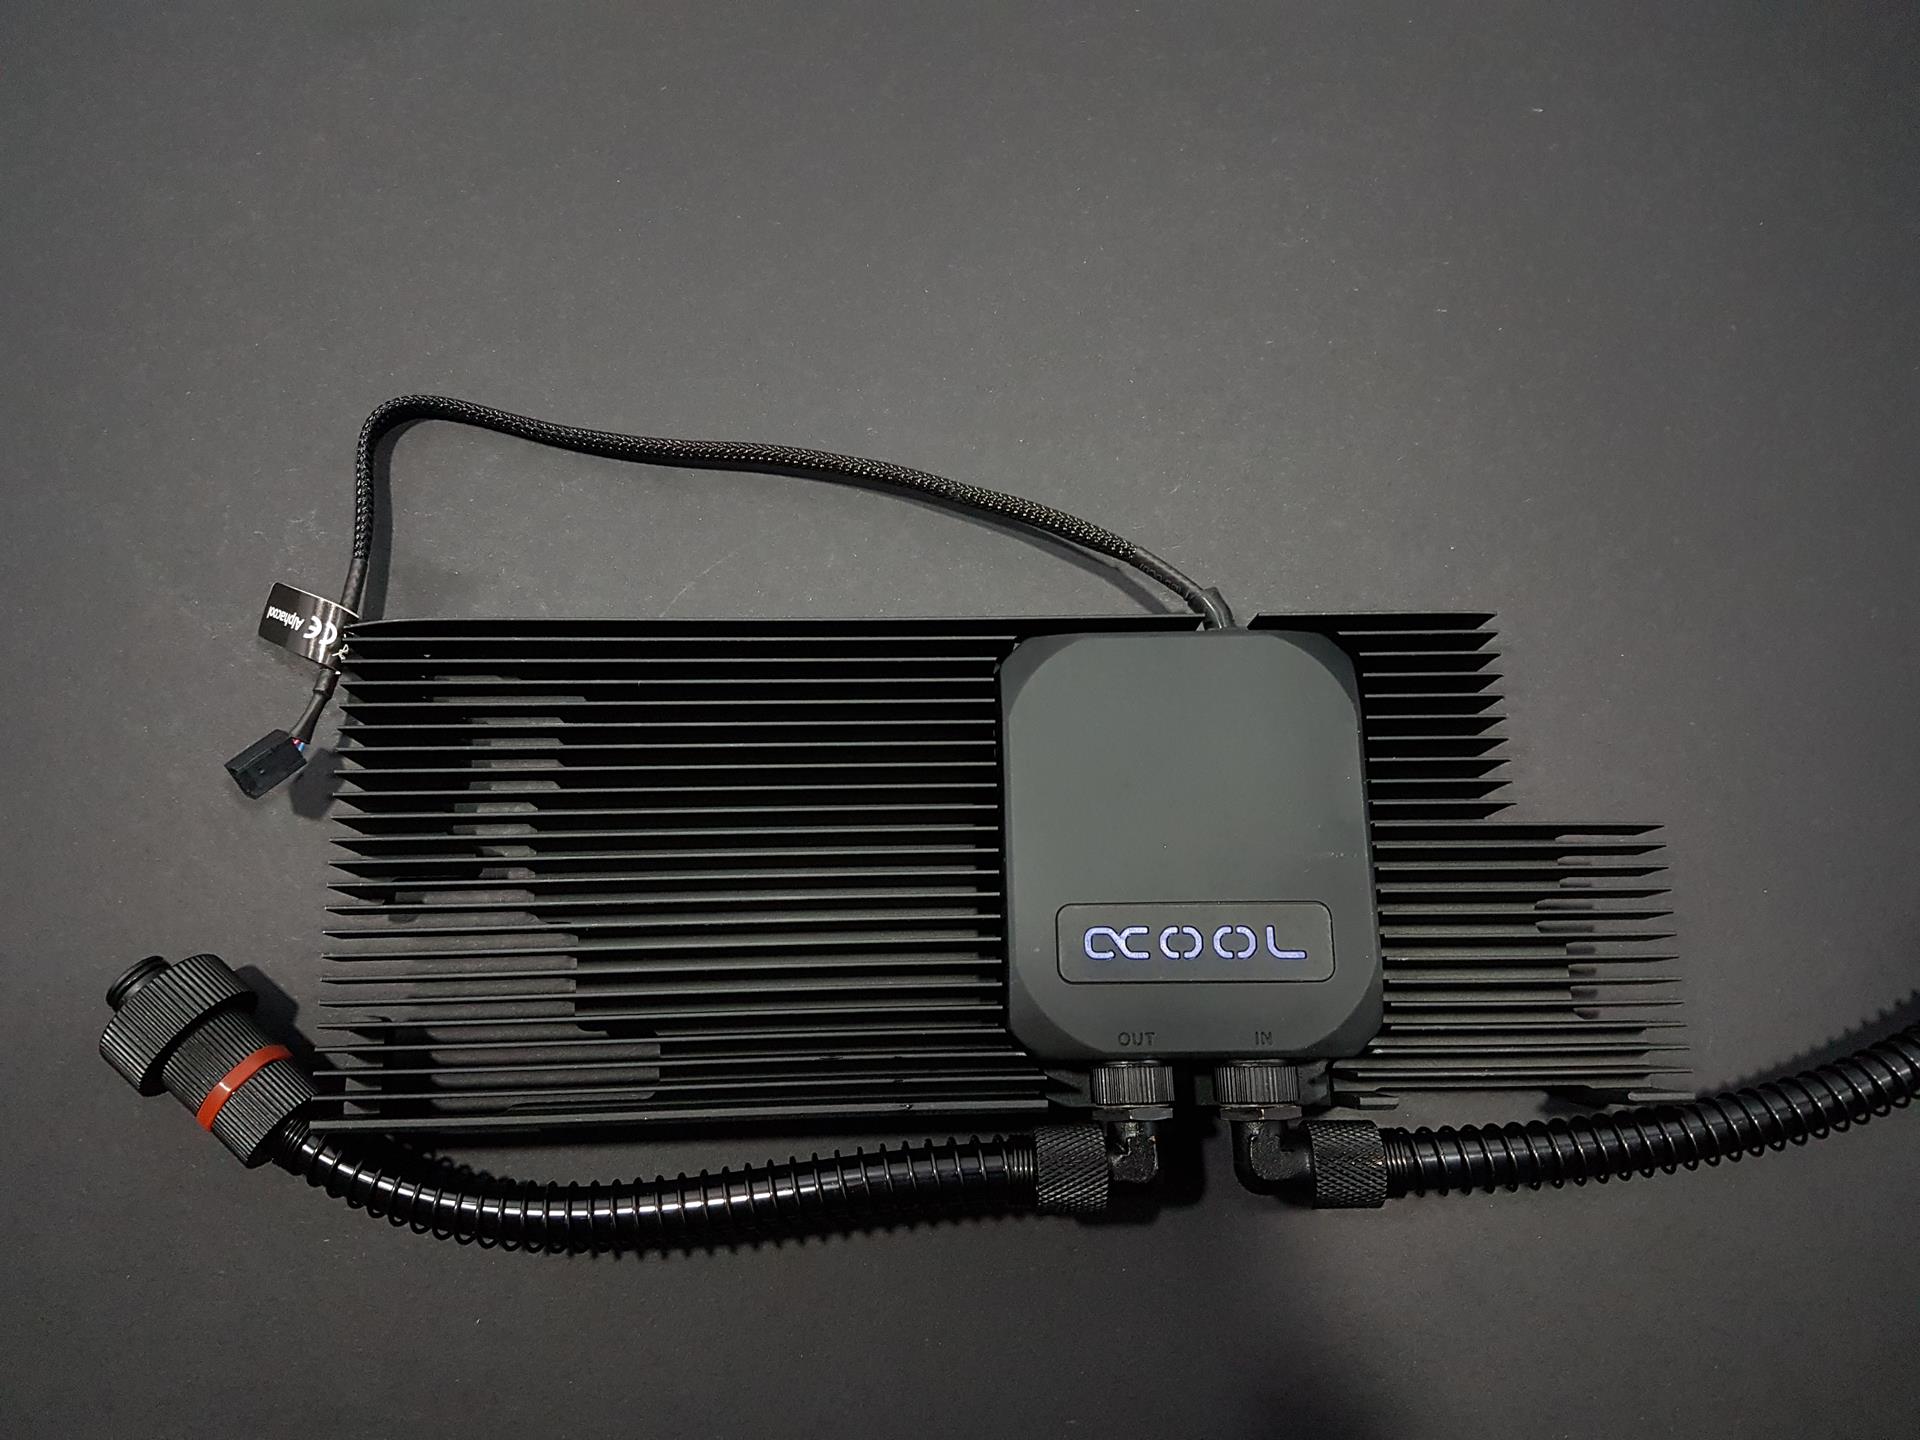
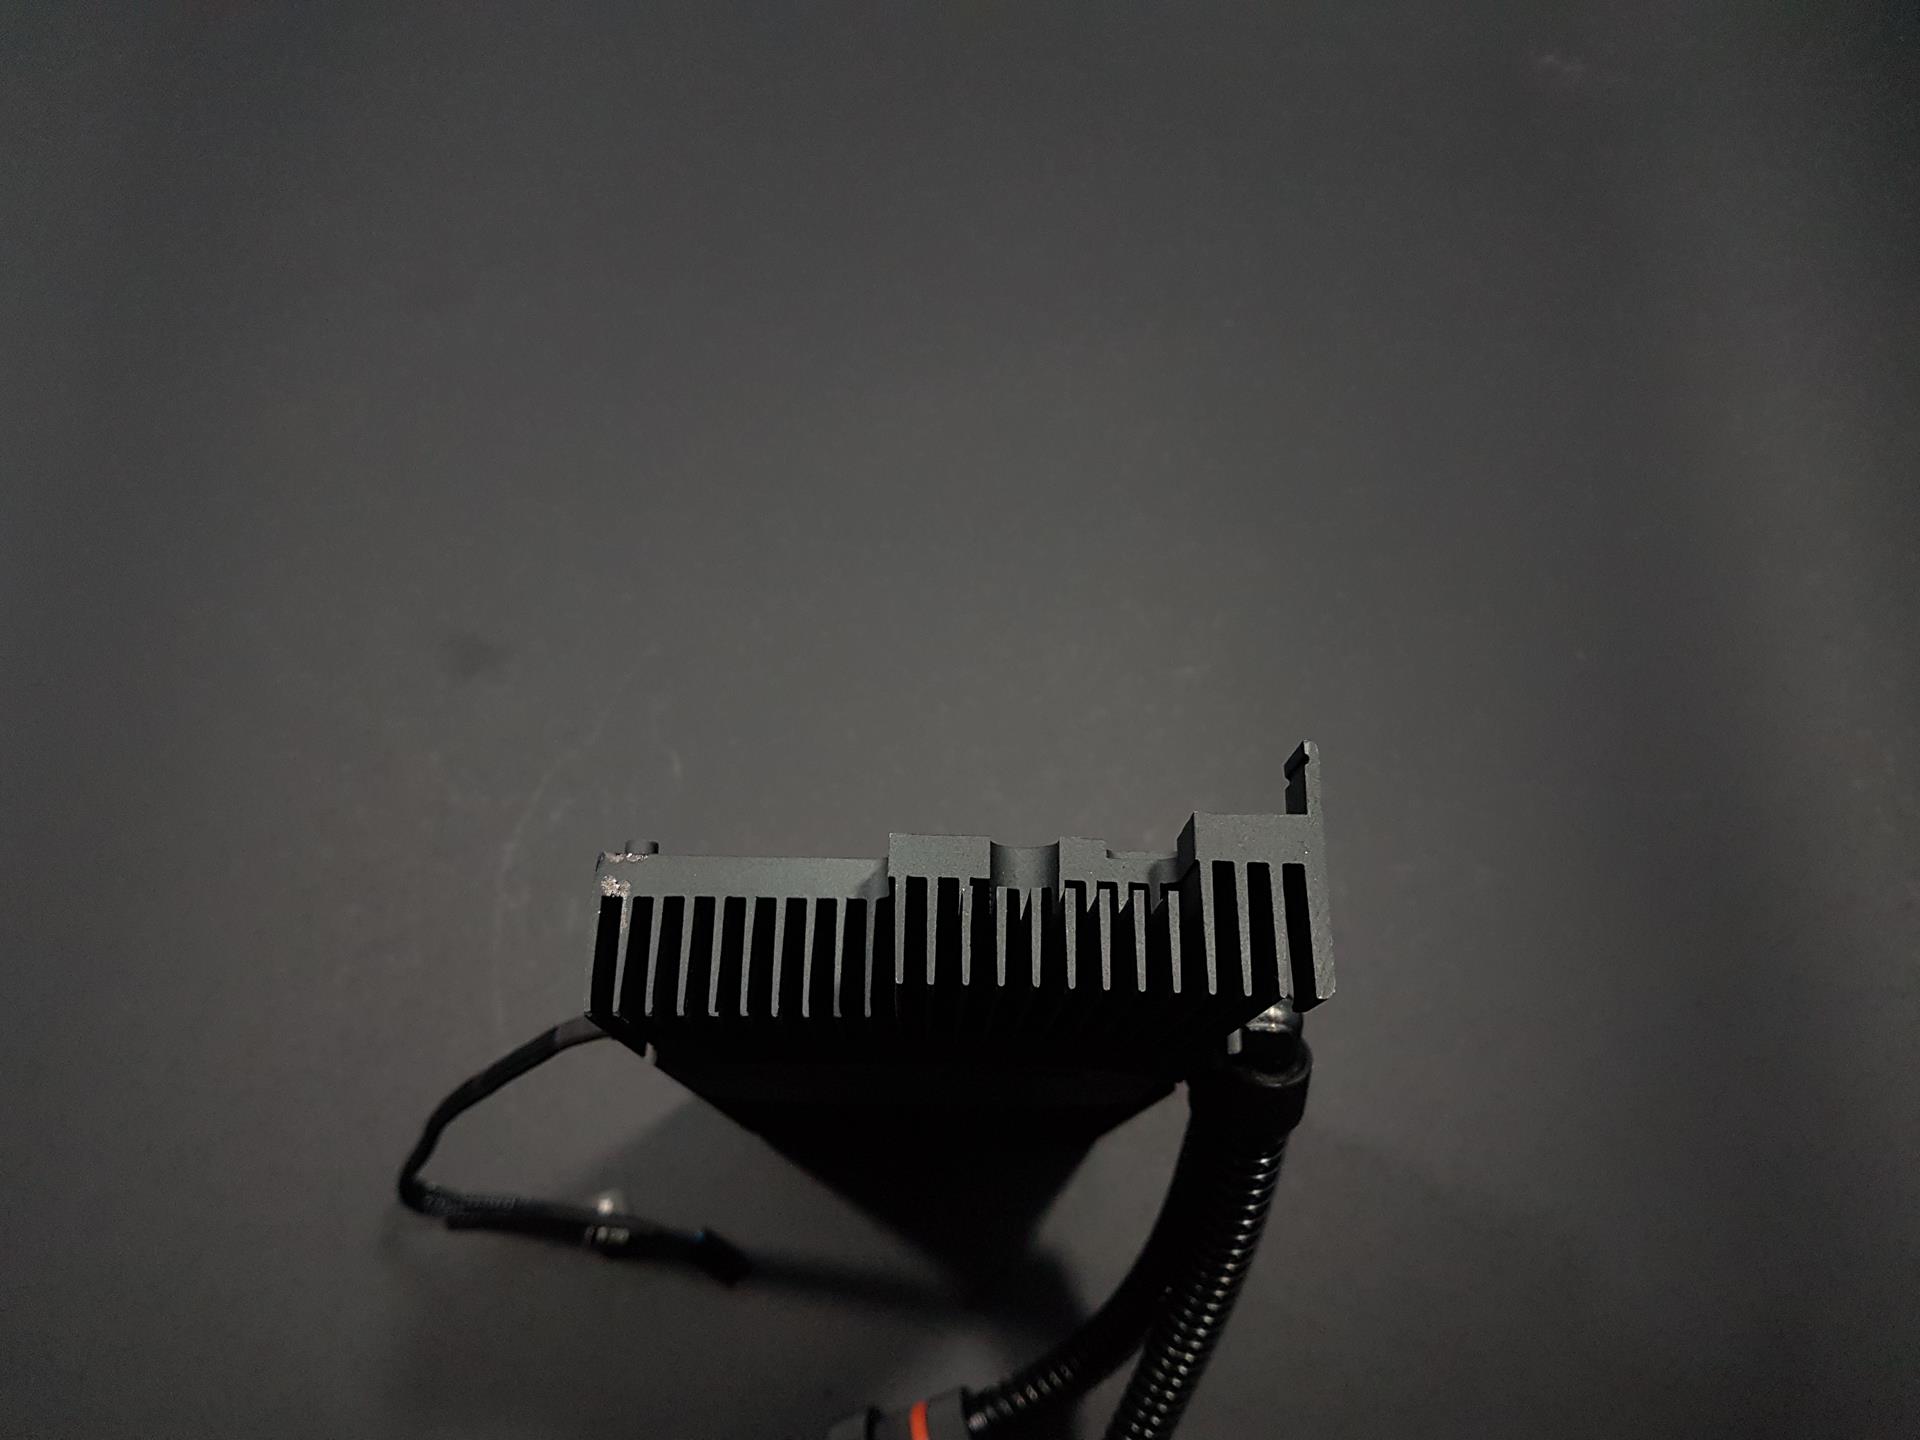
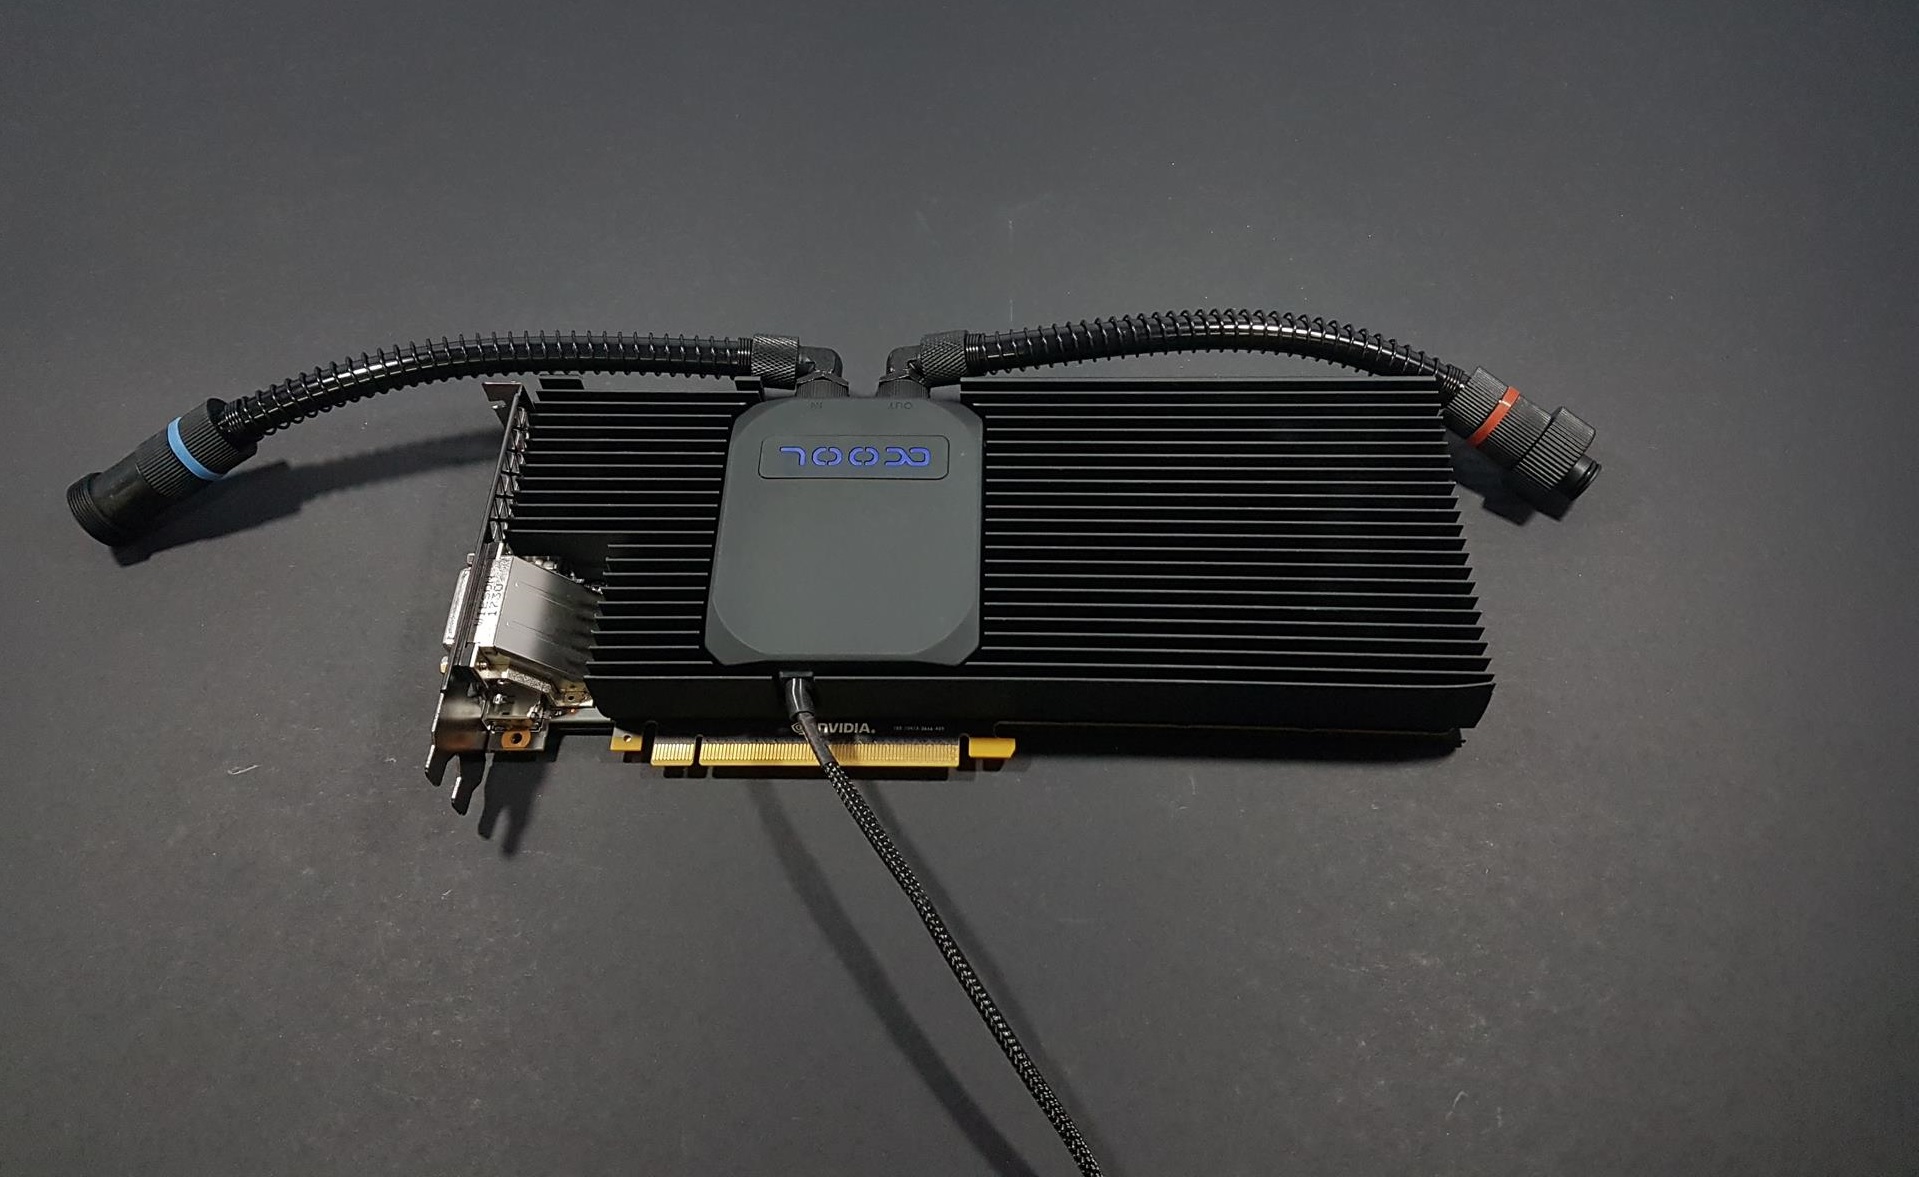
Let’s take a look at the front side of the block. We can clearly see the fin stack design from this side. There is no mounting point on this side as none is needed. The edges of the fin plates are bit sharp so take note of that. The block has a dull matte finish on it which really looks subtle and pleasing from overall look and feel. The pump unit is pre-mounted with the block and we can see its larger surface from the front side. In and Out ports are clearly labelled. The Alphacool has used the standard compression fittings in the unit. The thread size is g1/4 which is a common standard in the water cooling industry. This approach has enabled the Alphacool to provide the users to convert the unit into a custom loop easily or can swap the PVC hose with the hard tubing or transparent tubing without much hassle. This unit has the flexible PVC hoses. These hoses are easier to arrange and move into the right position, much thanks to the 90° angled fittings. Both the hoses have anti-kink springs to avoid unnecessary bends resulting in the blockage of the water. The 11/8 mm size is also a standard in the water cooling field, alongside the 13/10 and 16/10.
Both hose features the quick-release fittings. This feature has enabled the unit to further expand so that more blocks or the radiators can be added without much hassle. This quick-lock mechanism is compatible with Alphacool HF quick-lock closures (1010383, 1010394, 1010395, 1010442). This closure has the length of the 83mm. The part of the closure with the red ring has the diameter of the 28mm whereas the one with the blue ring has the diameter of the 20.5mm. To expand the loop, one would need to unscrew the plastic knob till the position when the hoses come separately. The opening direction is printed on the closure along with the arrow direction. Do check for the direction indicator otherwise trying to open the closure in the wrong direction could damage it. Be careful as when you will open the closure, a few drops of the coolant will spill over. One can use anti-dip bowl over which the closure can be unlocked. The spilt coolant can be added through the refill port on the 120mm radiator if there be any need.
Alphacool has given a due consideration to the design element of the pump unit and its housing on the block. It has a complex construction. Underneath the cap is the insulation, under which is a suction pump with its corresponding inlet and outlet ports. The copper cooler has a fine fin structure, implemented under the new nozzle plate for the reverse water flow. As compared to the previous generation of the Eiswolf coolers, this pump has larger surface less noise. What is more particular about this pump is its housing on the block. The pump’s nozzle plate is also making a point of contact with the block and Alphacool has used thermal paste between these two points of contact. This is a modular design as well. The pump unit can be easily replaced. It is just a matter of taking off 4 mounting screws and disconnecting quick-release fittings. As simple as it can be. This also gives the user more flexibility should one buys a new design card, only the new block without the pump unit would be required. The OCOOL printed on the pump lights up in the blue color. The pump draws power from the 3-pin connector. The maximum speed that I have observed was near to 2100 RPM for this pump.
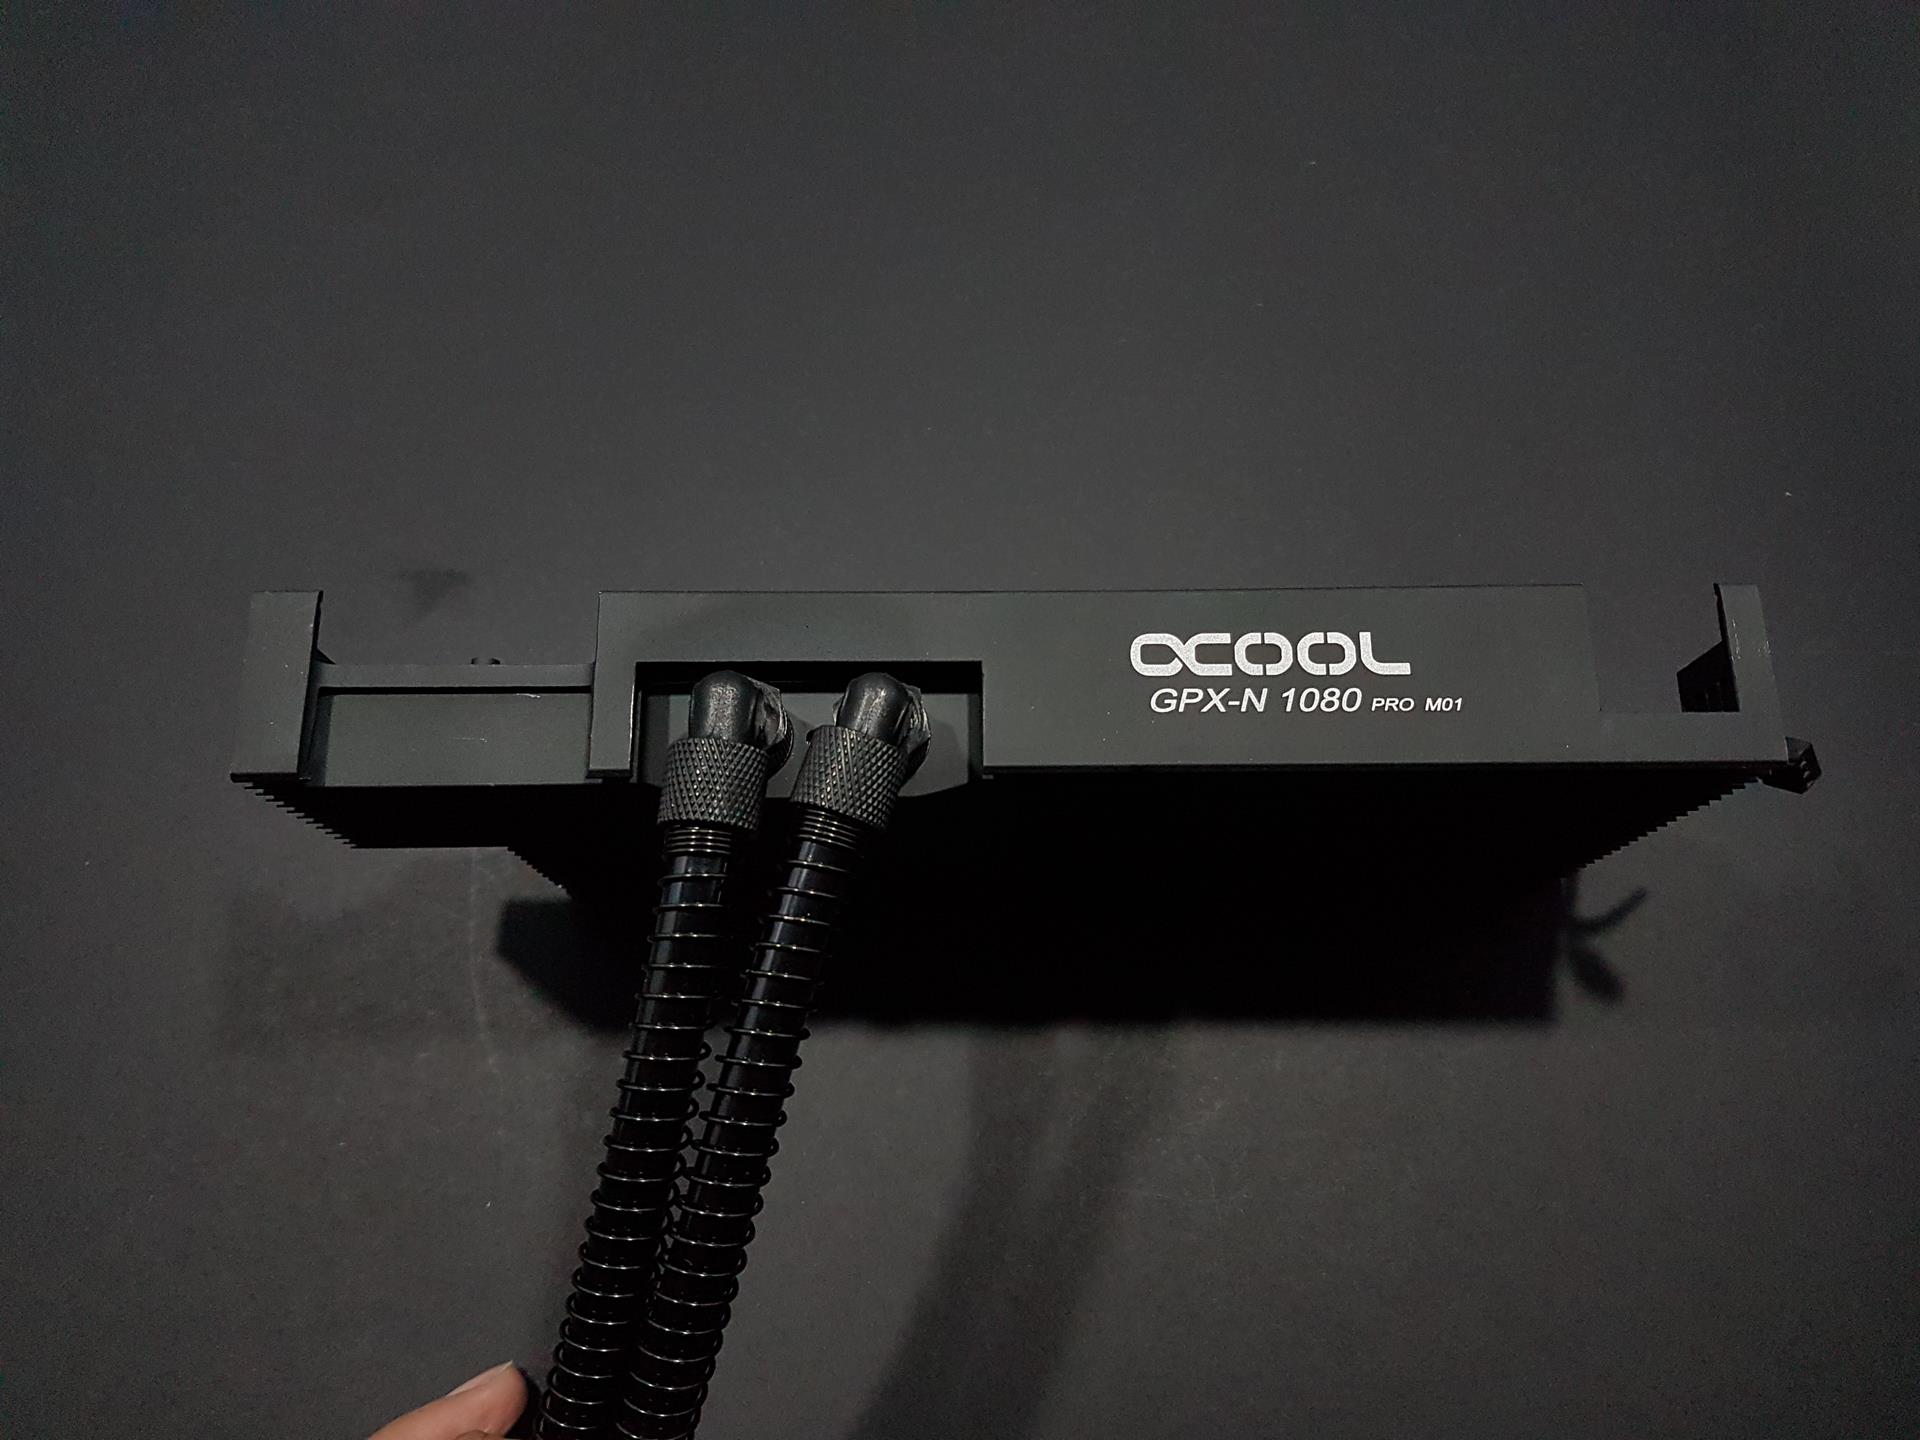
The top side of the block has OCOOL printed in the white color. The model of the cooler is printed under that which is GPX-N 1080 Pro M01. From this angle, we can clearly see the openings on the plate for the power connector and the SLI fingers of the PCB. The top side of the hoses and angled fittings are also visible.
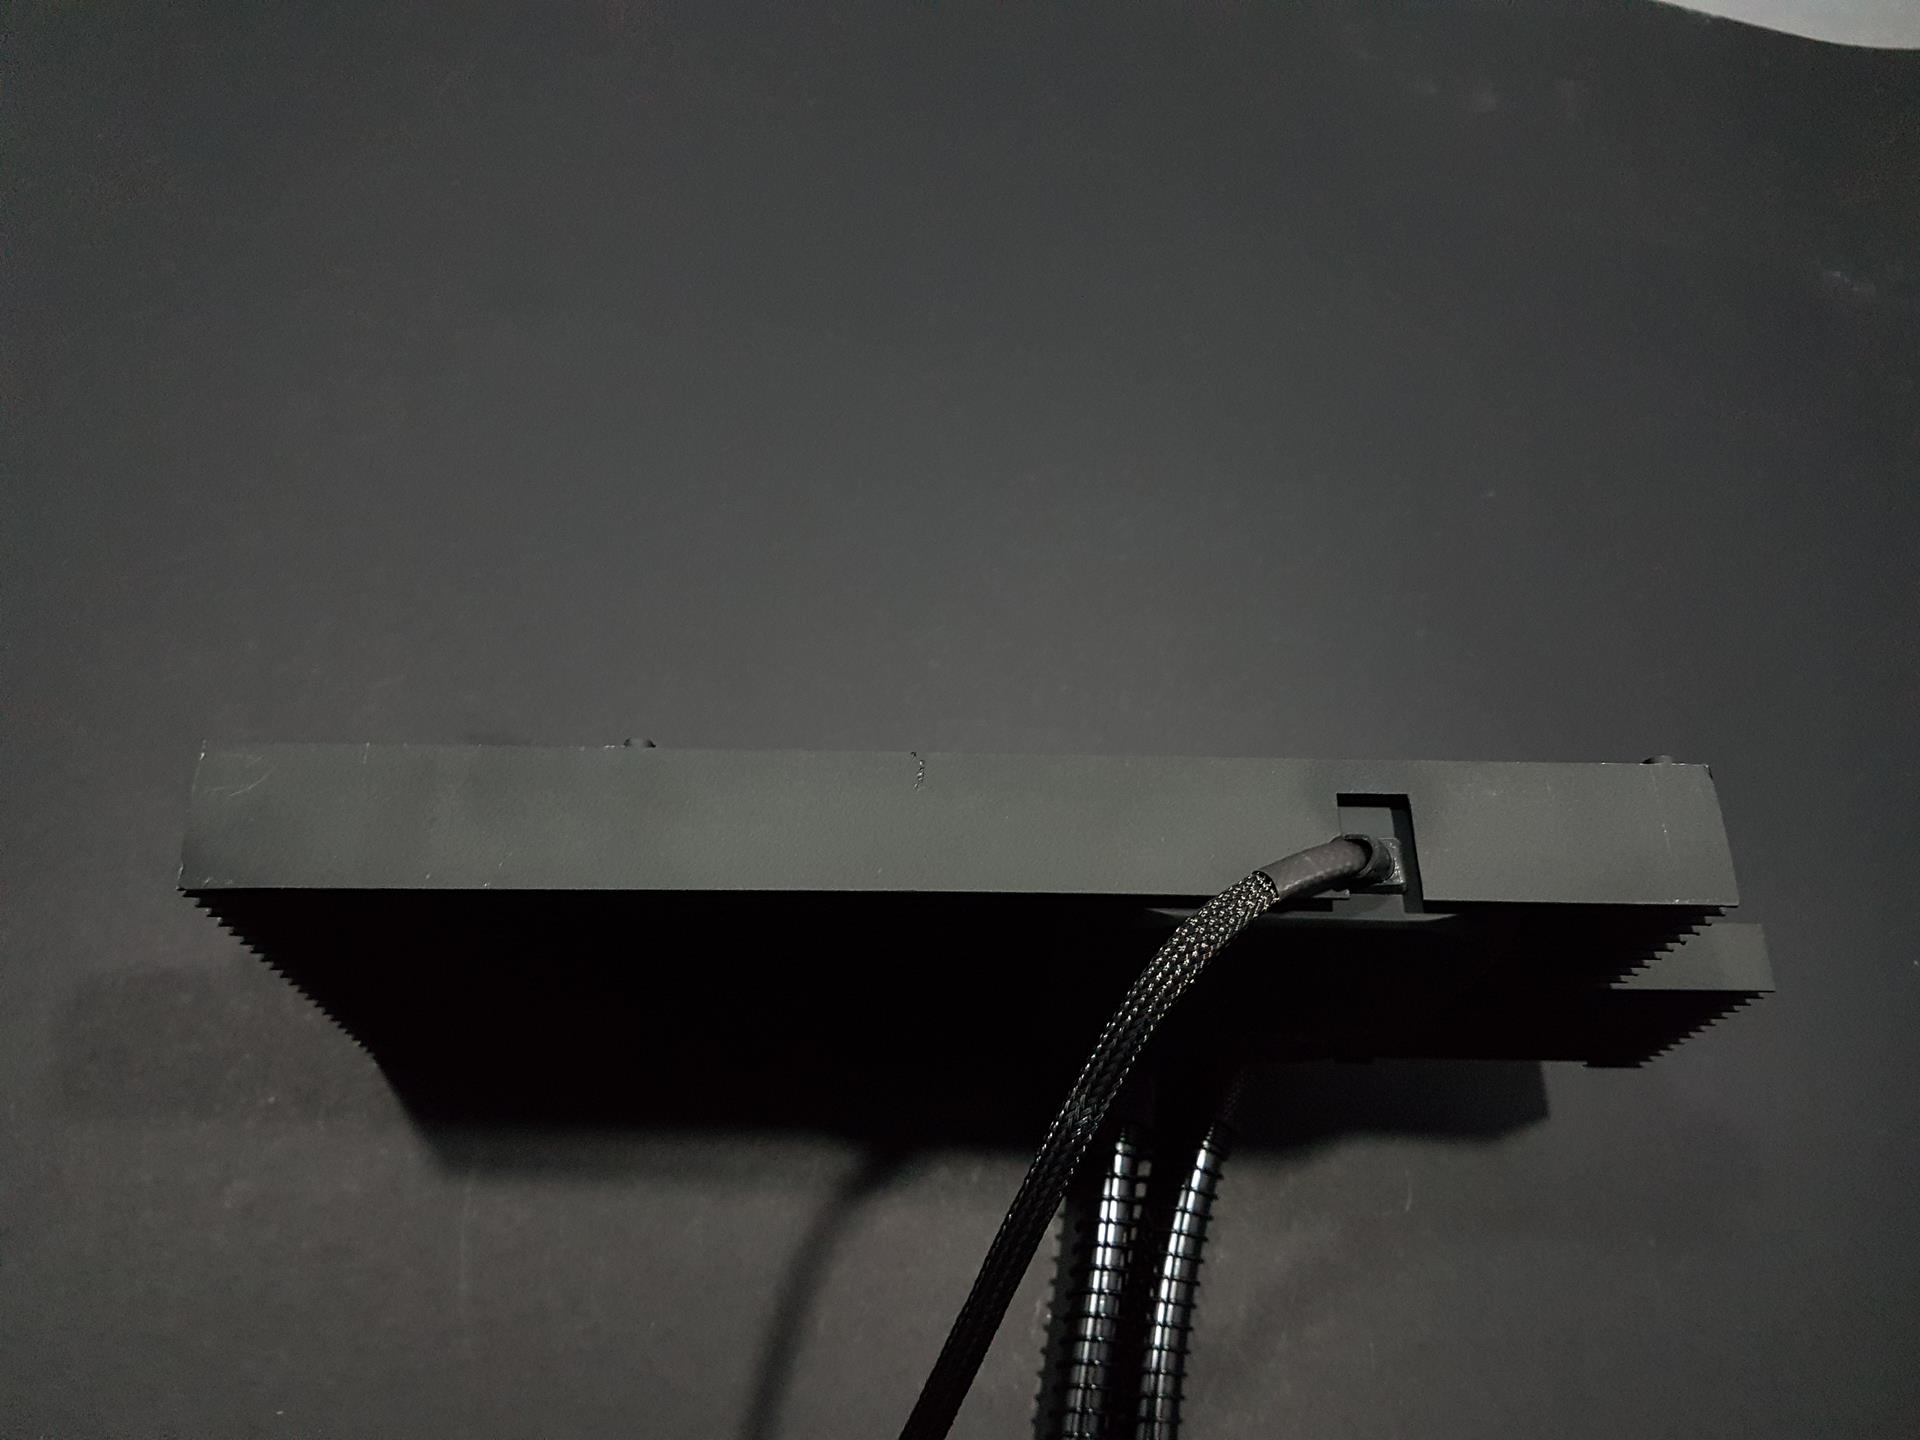
The bottom side of the block has a simple design. There is an inset on the part where the power cable is coming out. The power cable is braided in the black color. Unfortunately, the length of the cable is not that long.
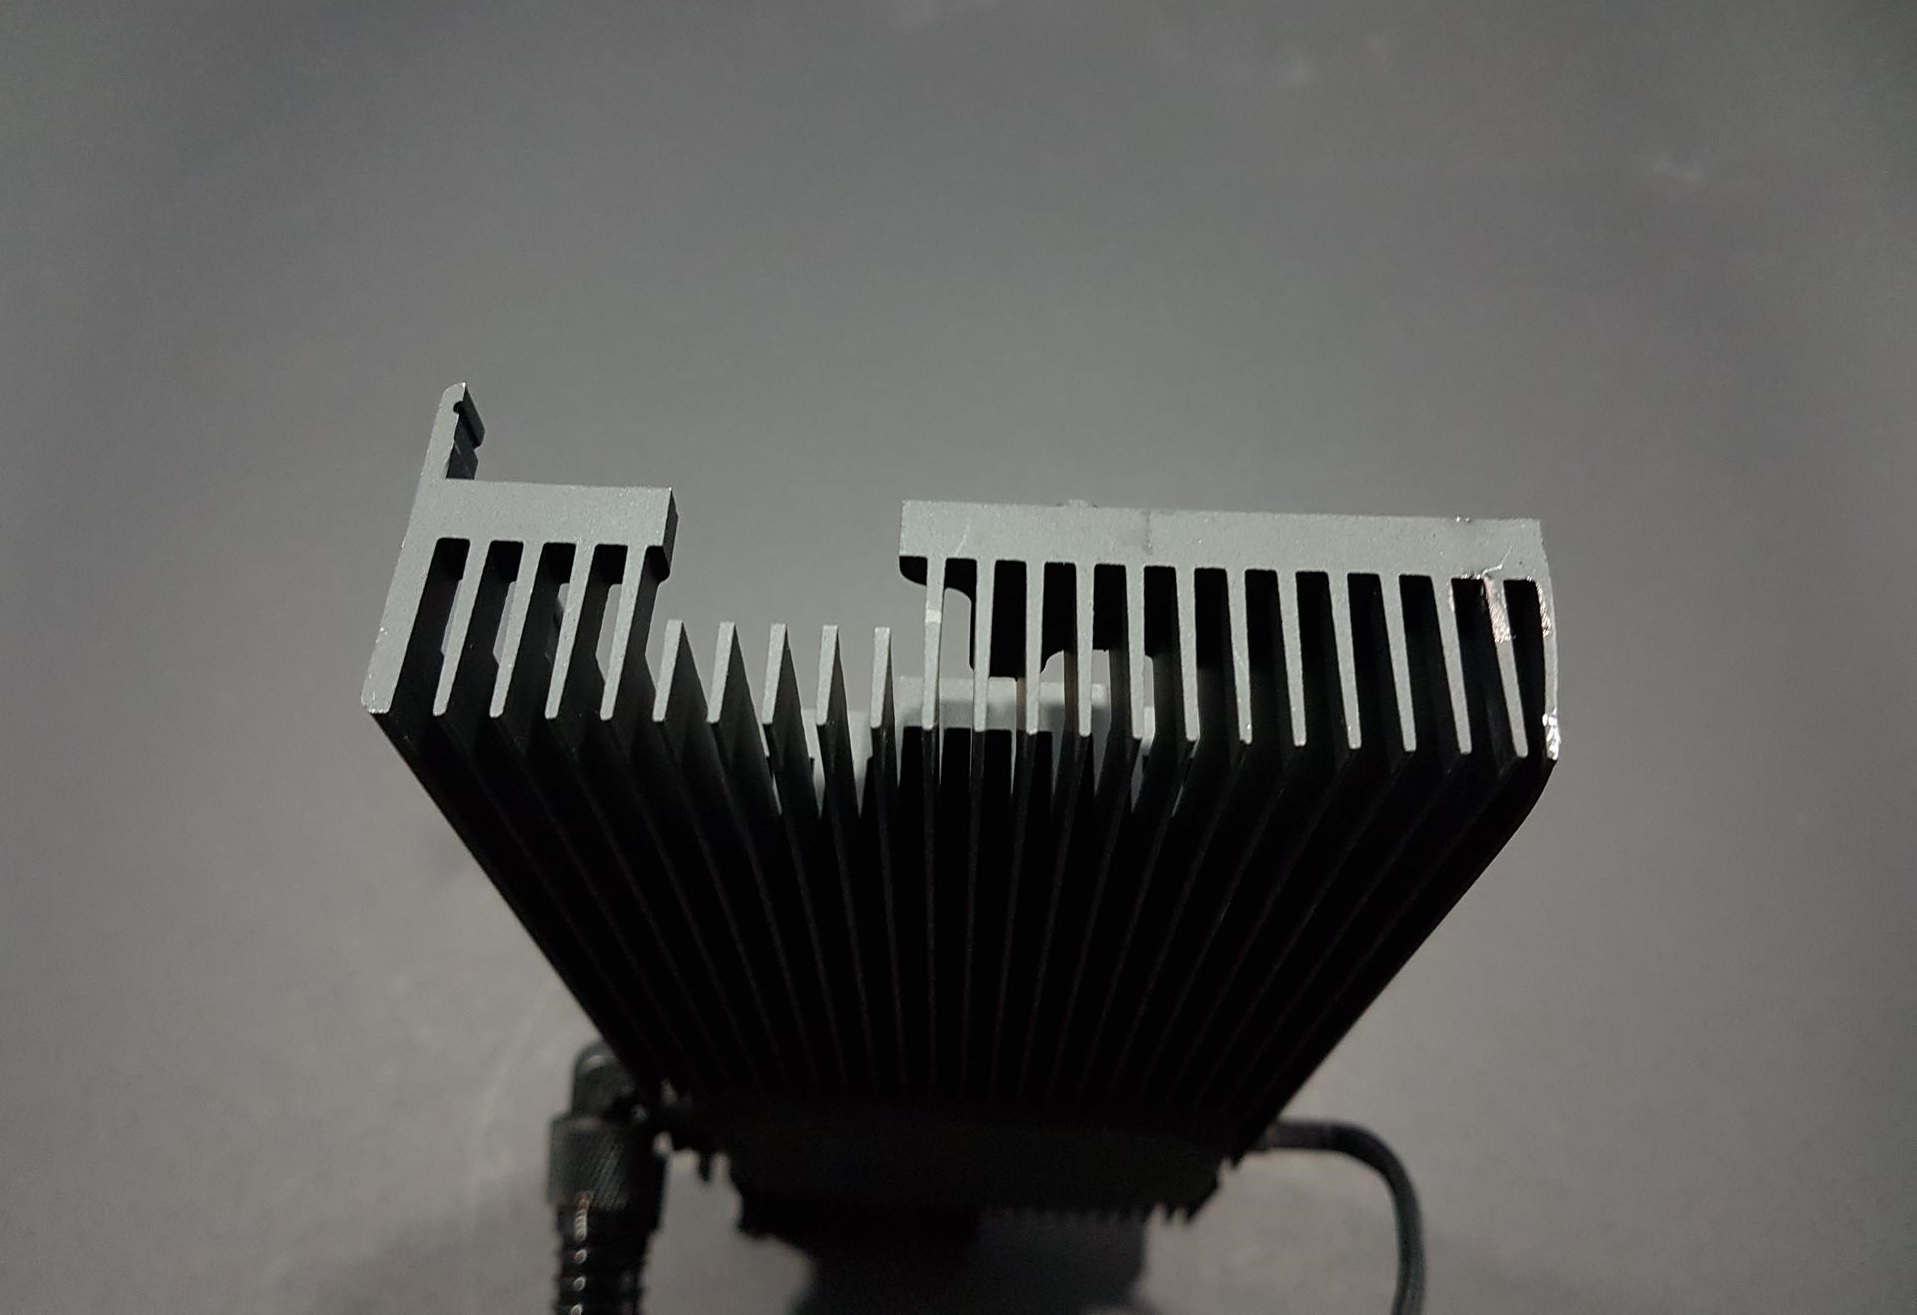
Let’s take a look at the front and the rear sides of the block. We can see 23 aluminum fins making up the stack or the heat sink and running across the entire length of the block leaving the pump housing. The rear side is designed to match and mix with the rear I/O shield area of the PCB.
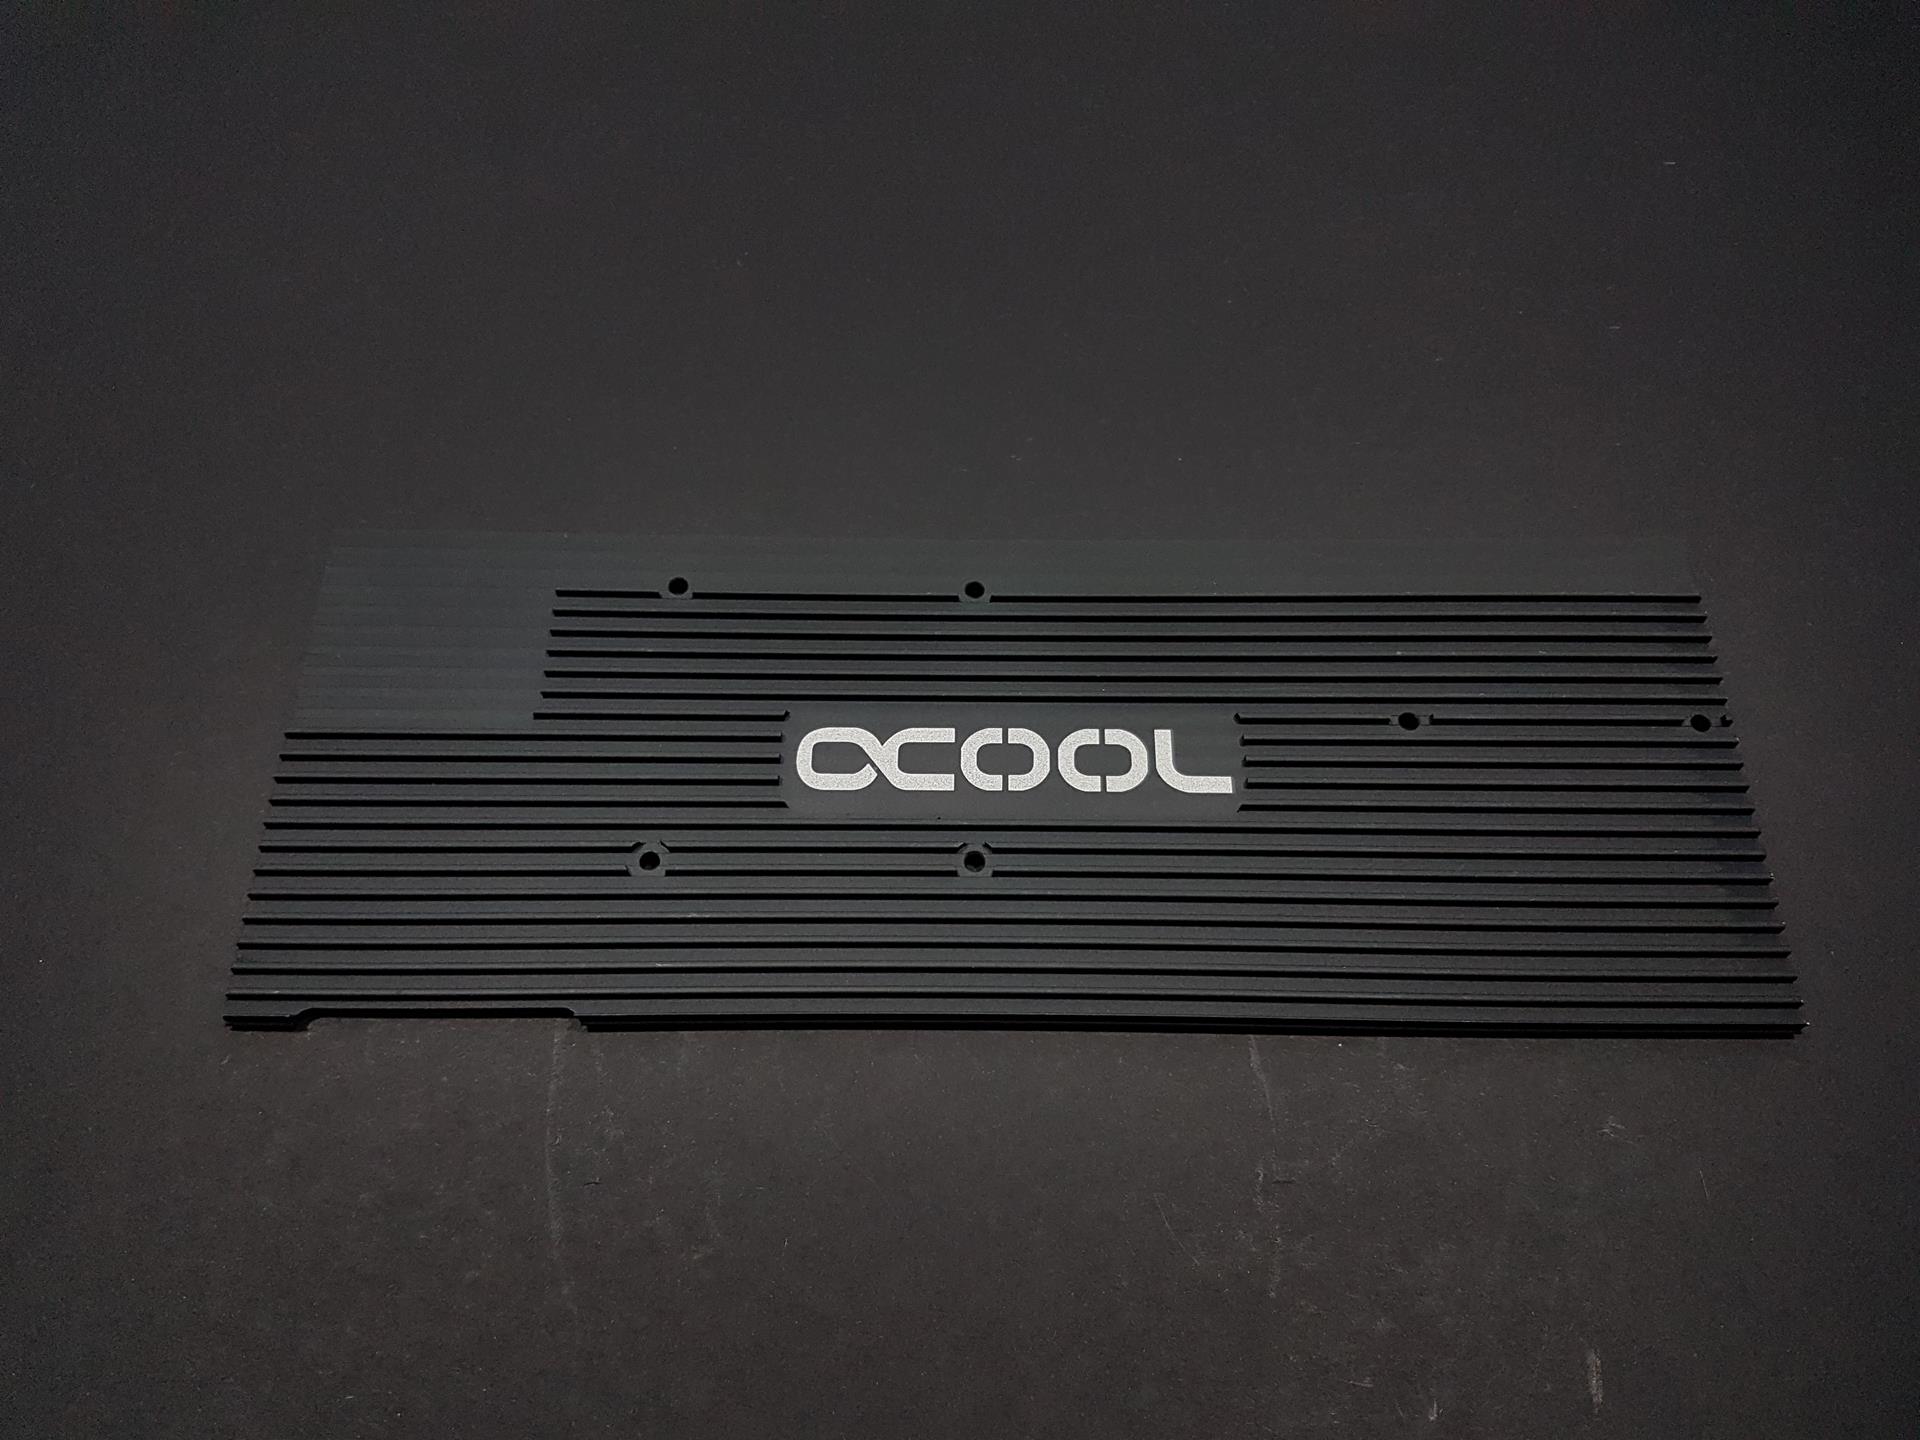
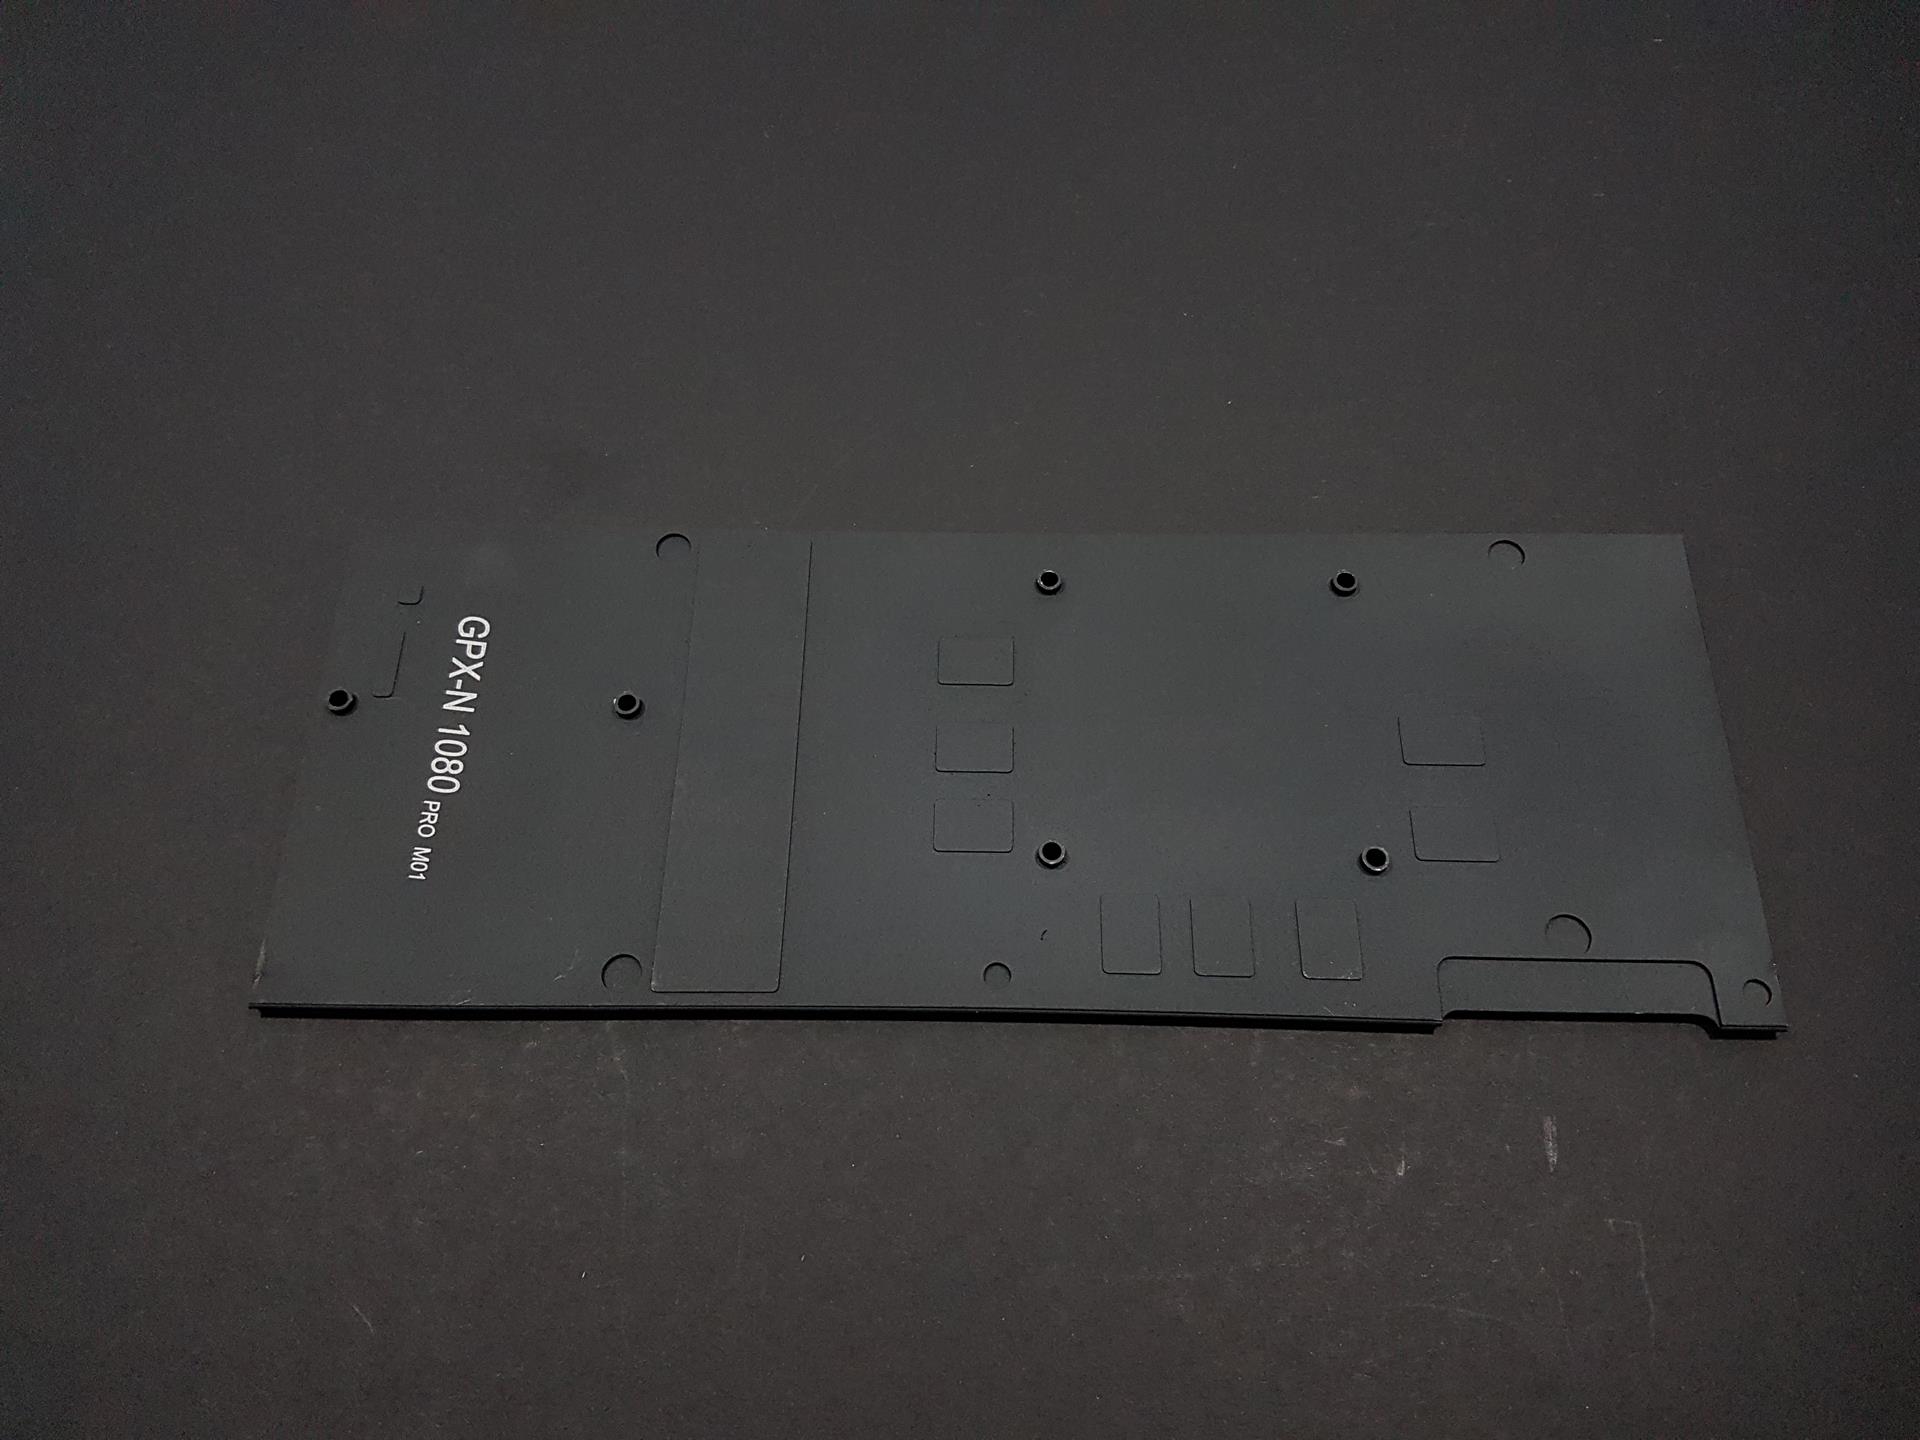
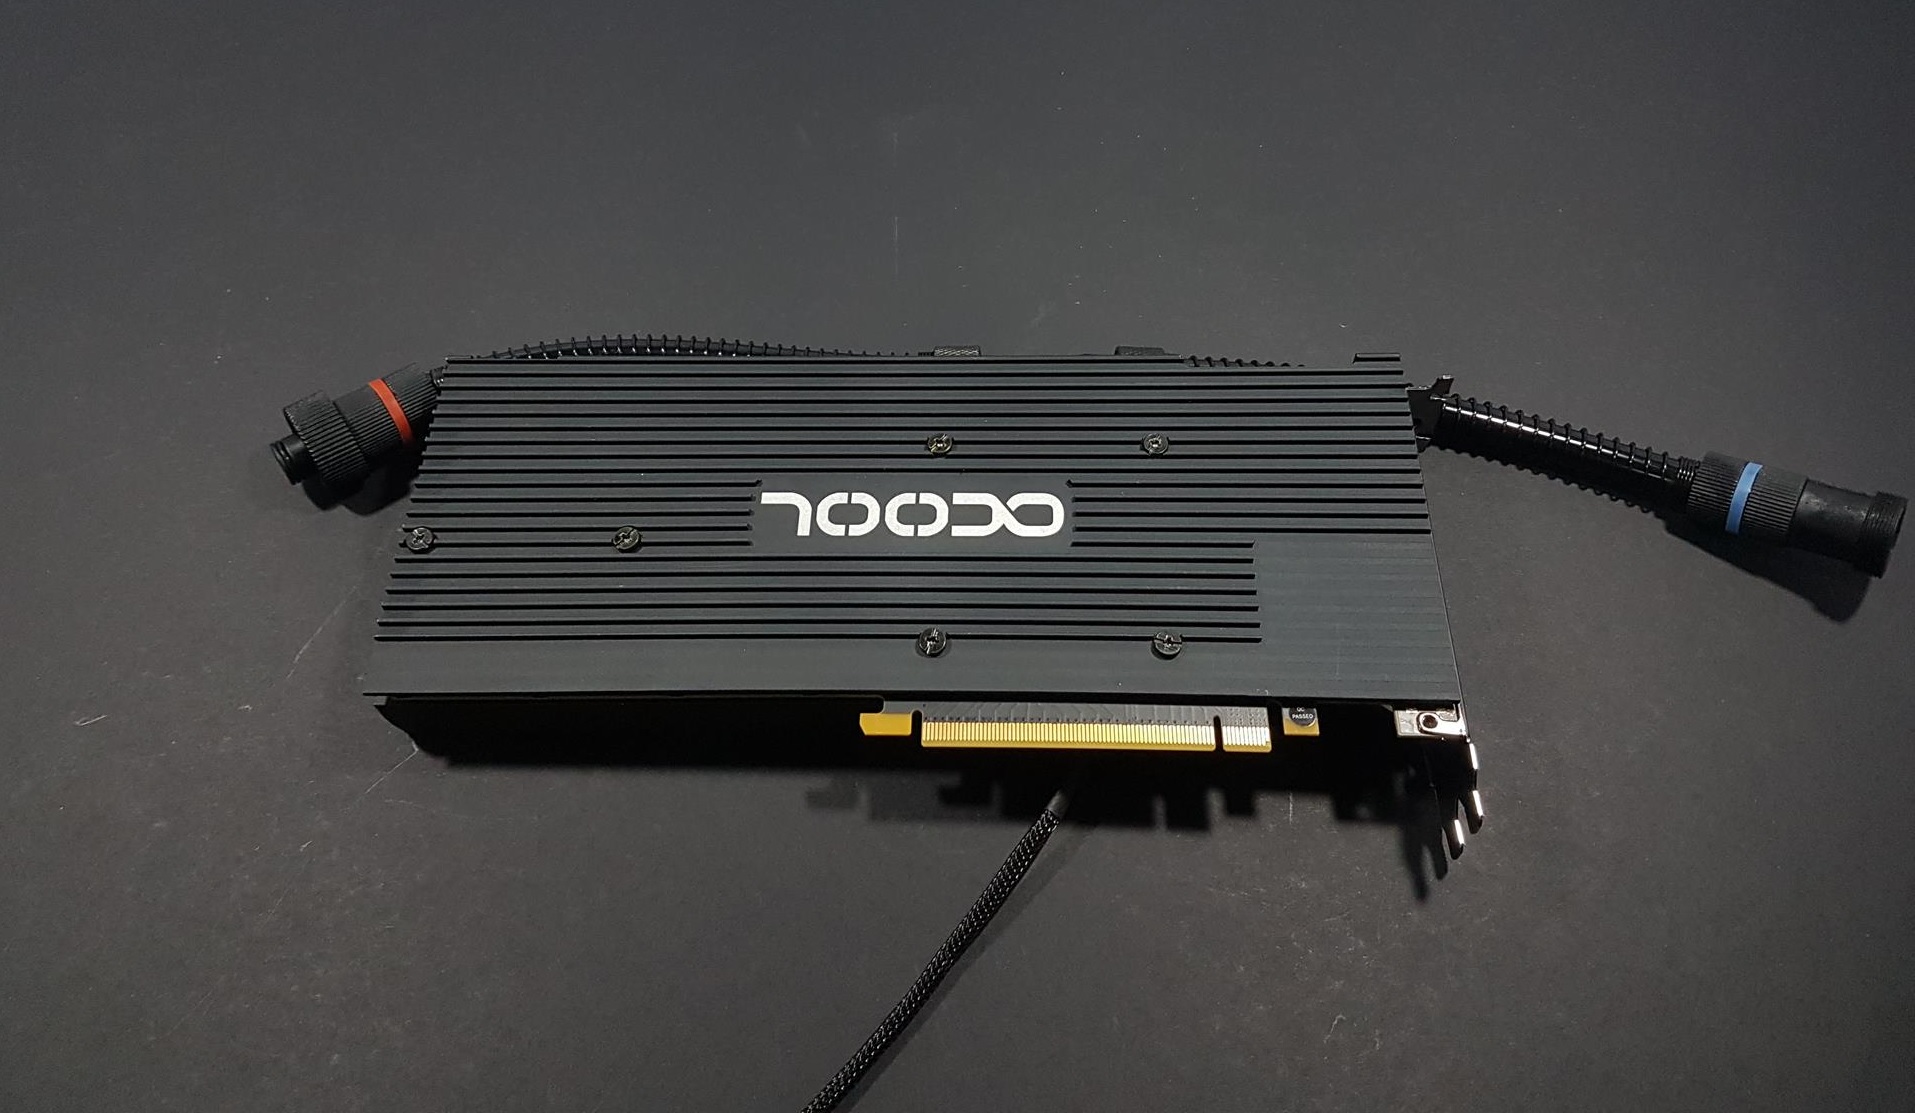
Alphacool has included an aluminum based backplate with the parcel. Its exterior or the visible side has raised lines that match with the aluminum fins on the main block. OCOOL is printed in the white color on the middle. The top side has plain surface. The overall looks and feel of the backplate are very well synced with the block design. But that is not all when it comes to the backplate design idea. Let’s take a look at the inner side of the backplate. As one can see there are 11 raised portions on this side. 8 raised tabs cover the backside of the VRAM chips. The single larger tab running across with width of the plate and two smaller ones on the left side covers the backside of the VRM/MOSFETs. Alphacool has provided thicker thermal pads in the brown color coded container. These pads are to be placed on the backside of the PCB. The backplate is placed on the backside of the PCB on top of these thermal pads for more heat dissipation or conductivity. The backplate is secured to the block using 6 M3x10 screws.
Now that we have taken a look at the design elements of the block, let’s discuss the heat conductivity before moving towards the radiator portion. What exactly is the idea of cooling here? The GPU die makes a direct contact with the nickel plated copper base of the pump unit. There is no fan on the block and no water for the VRAM, VRM/MOSFETs cooling. Rather the complete block acts as a heat exchanger. We have total 23 thermal pads on both sides of the PCB on the points of contact. The heat is well distributed across the much larger surface of the entire block on both sides and then channelled to the middle where the pump is regulating the hot water out towards the radiator(s). Does it work? I will not answer the question here. Hint: check the testing section and get surprised.
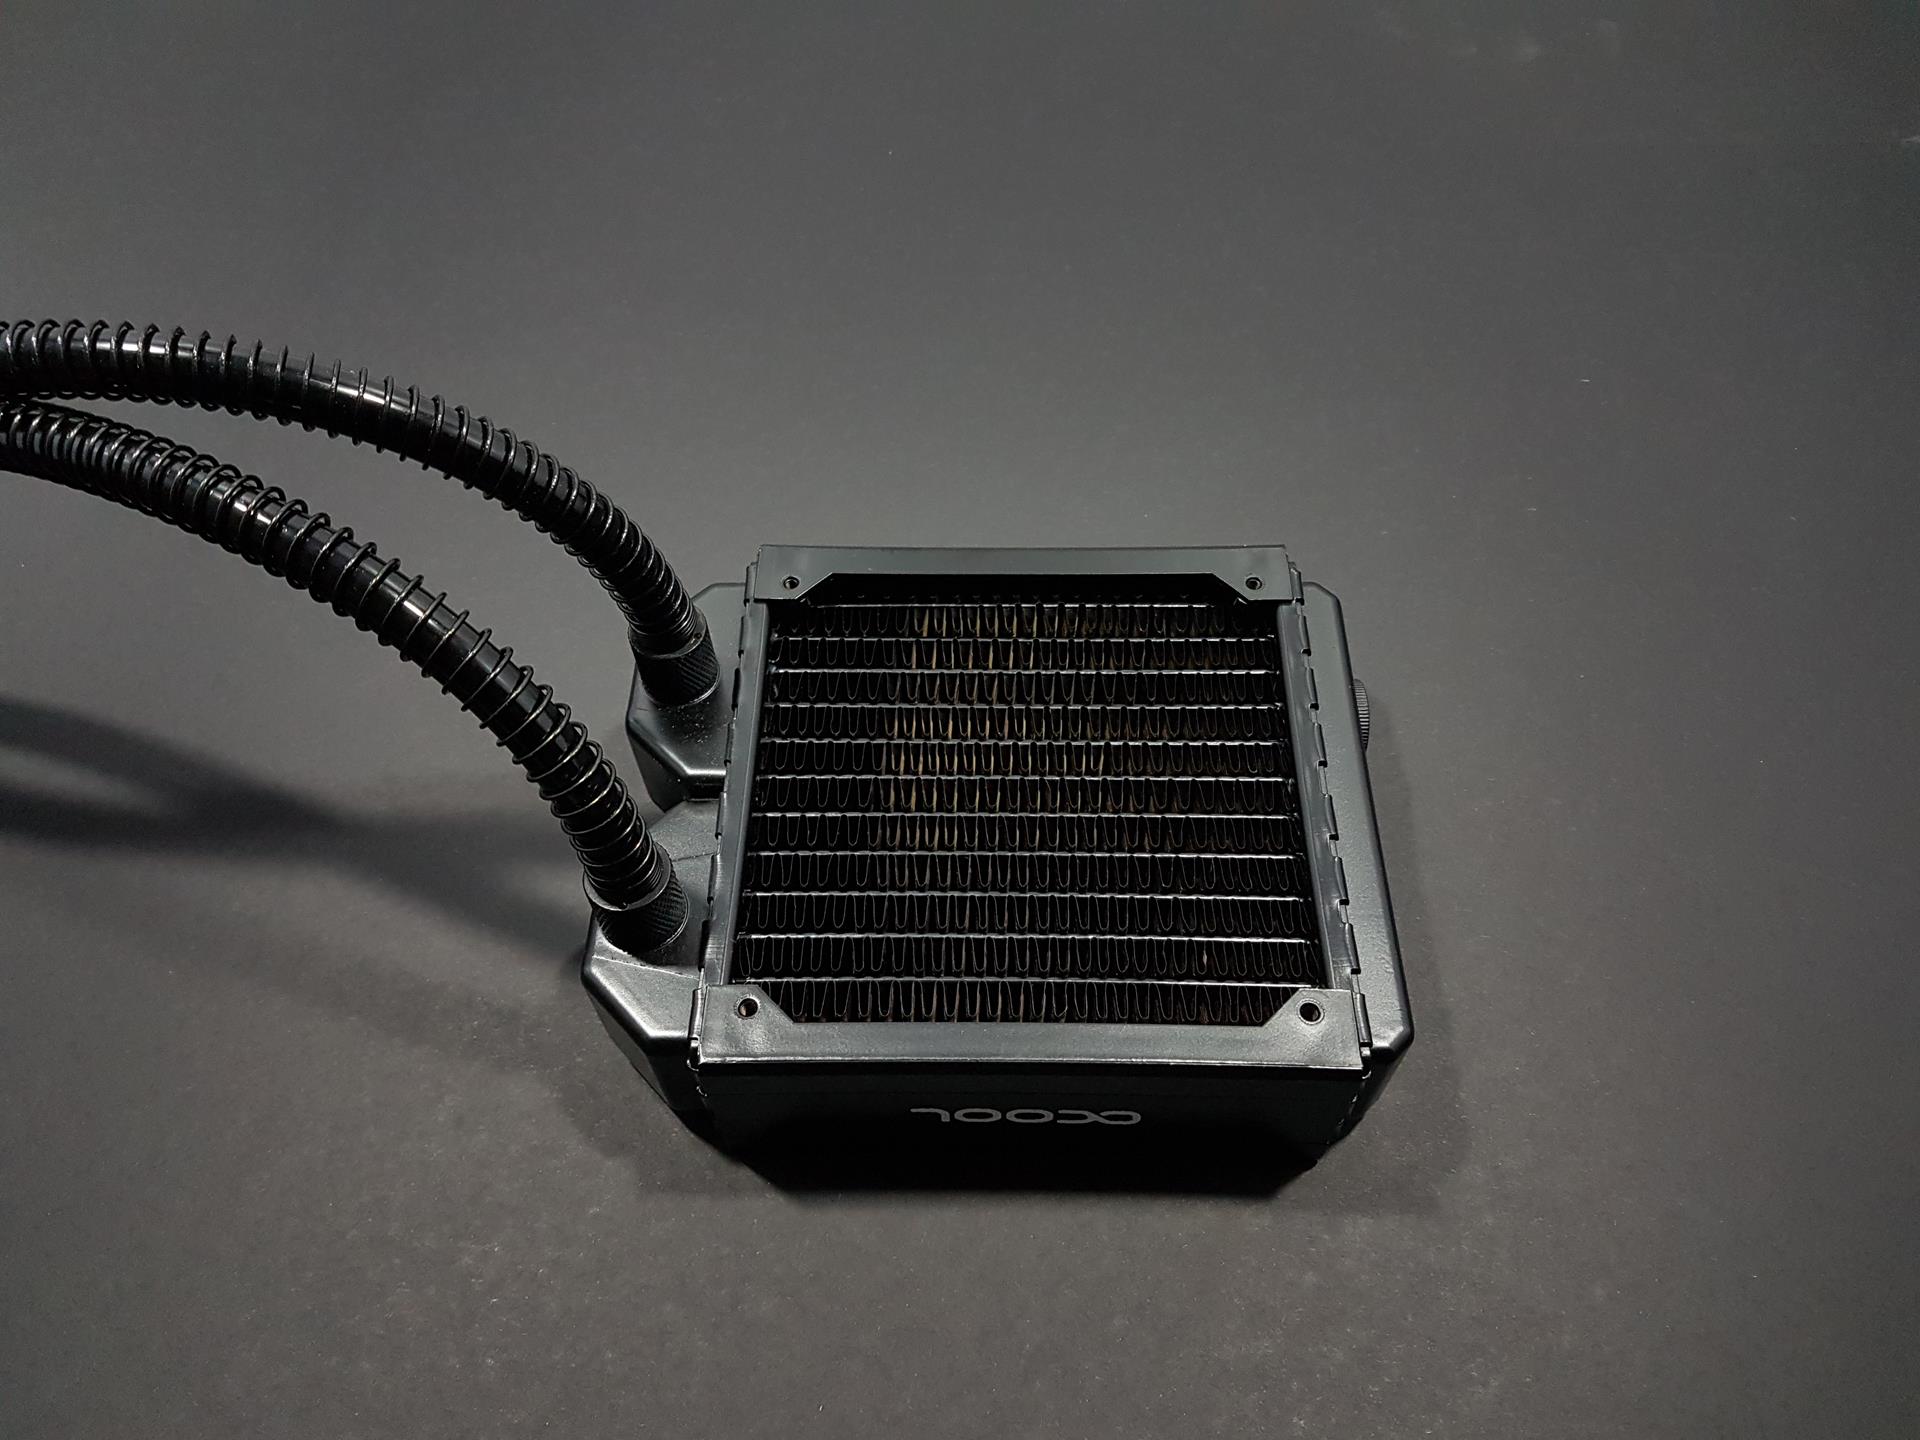
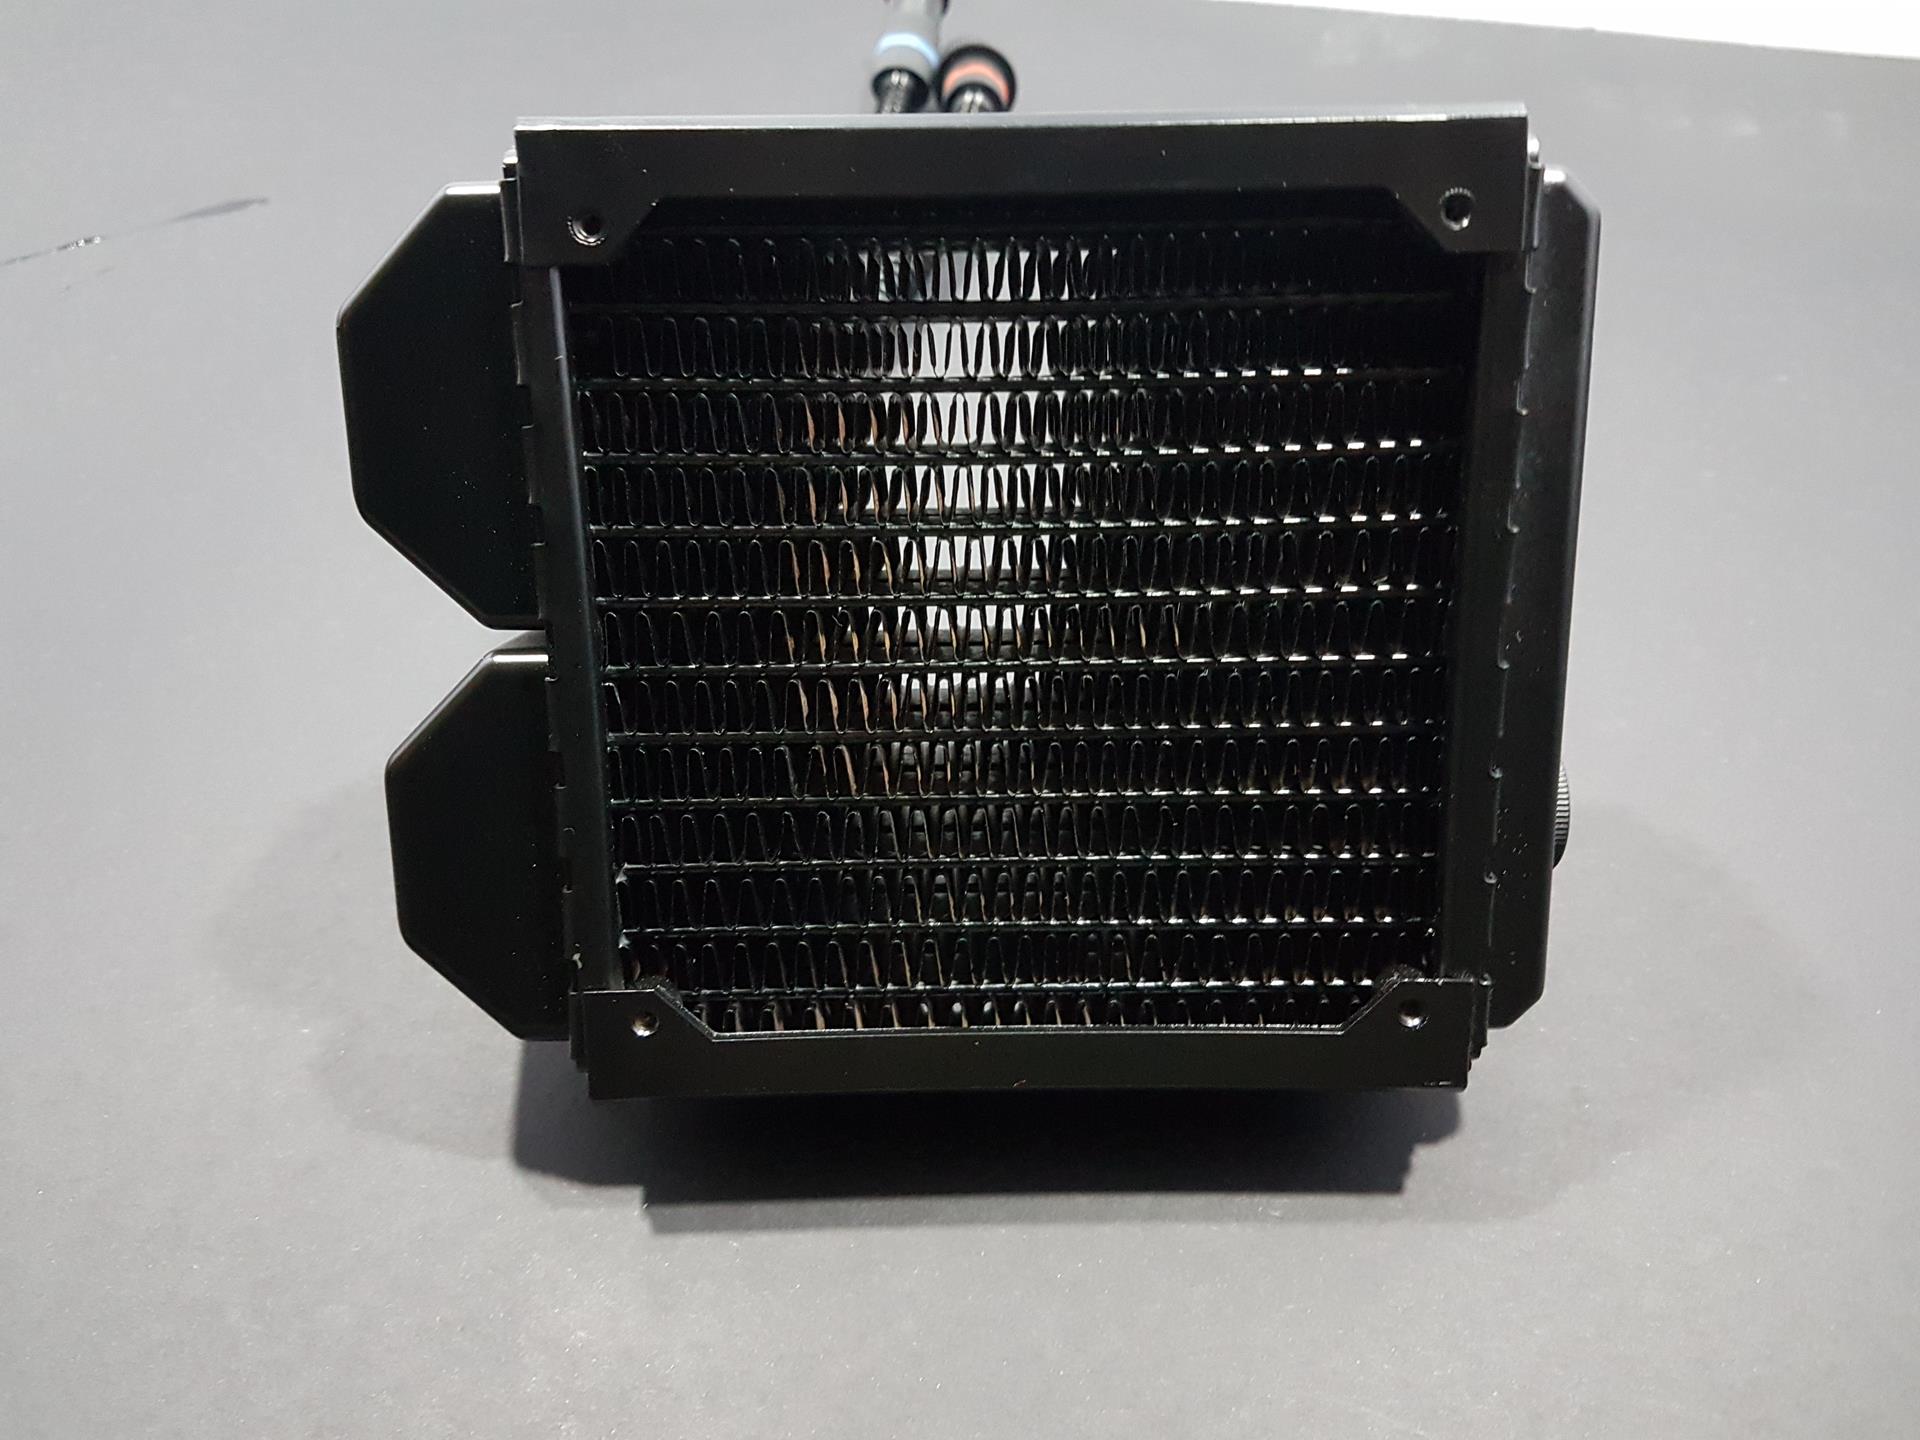
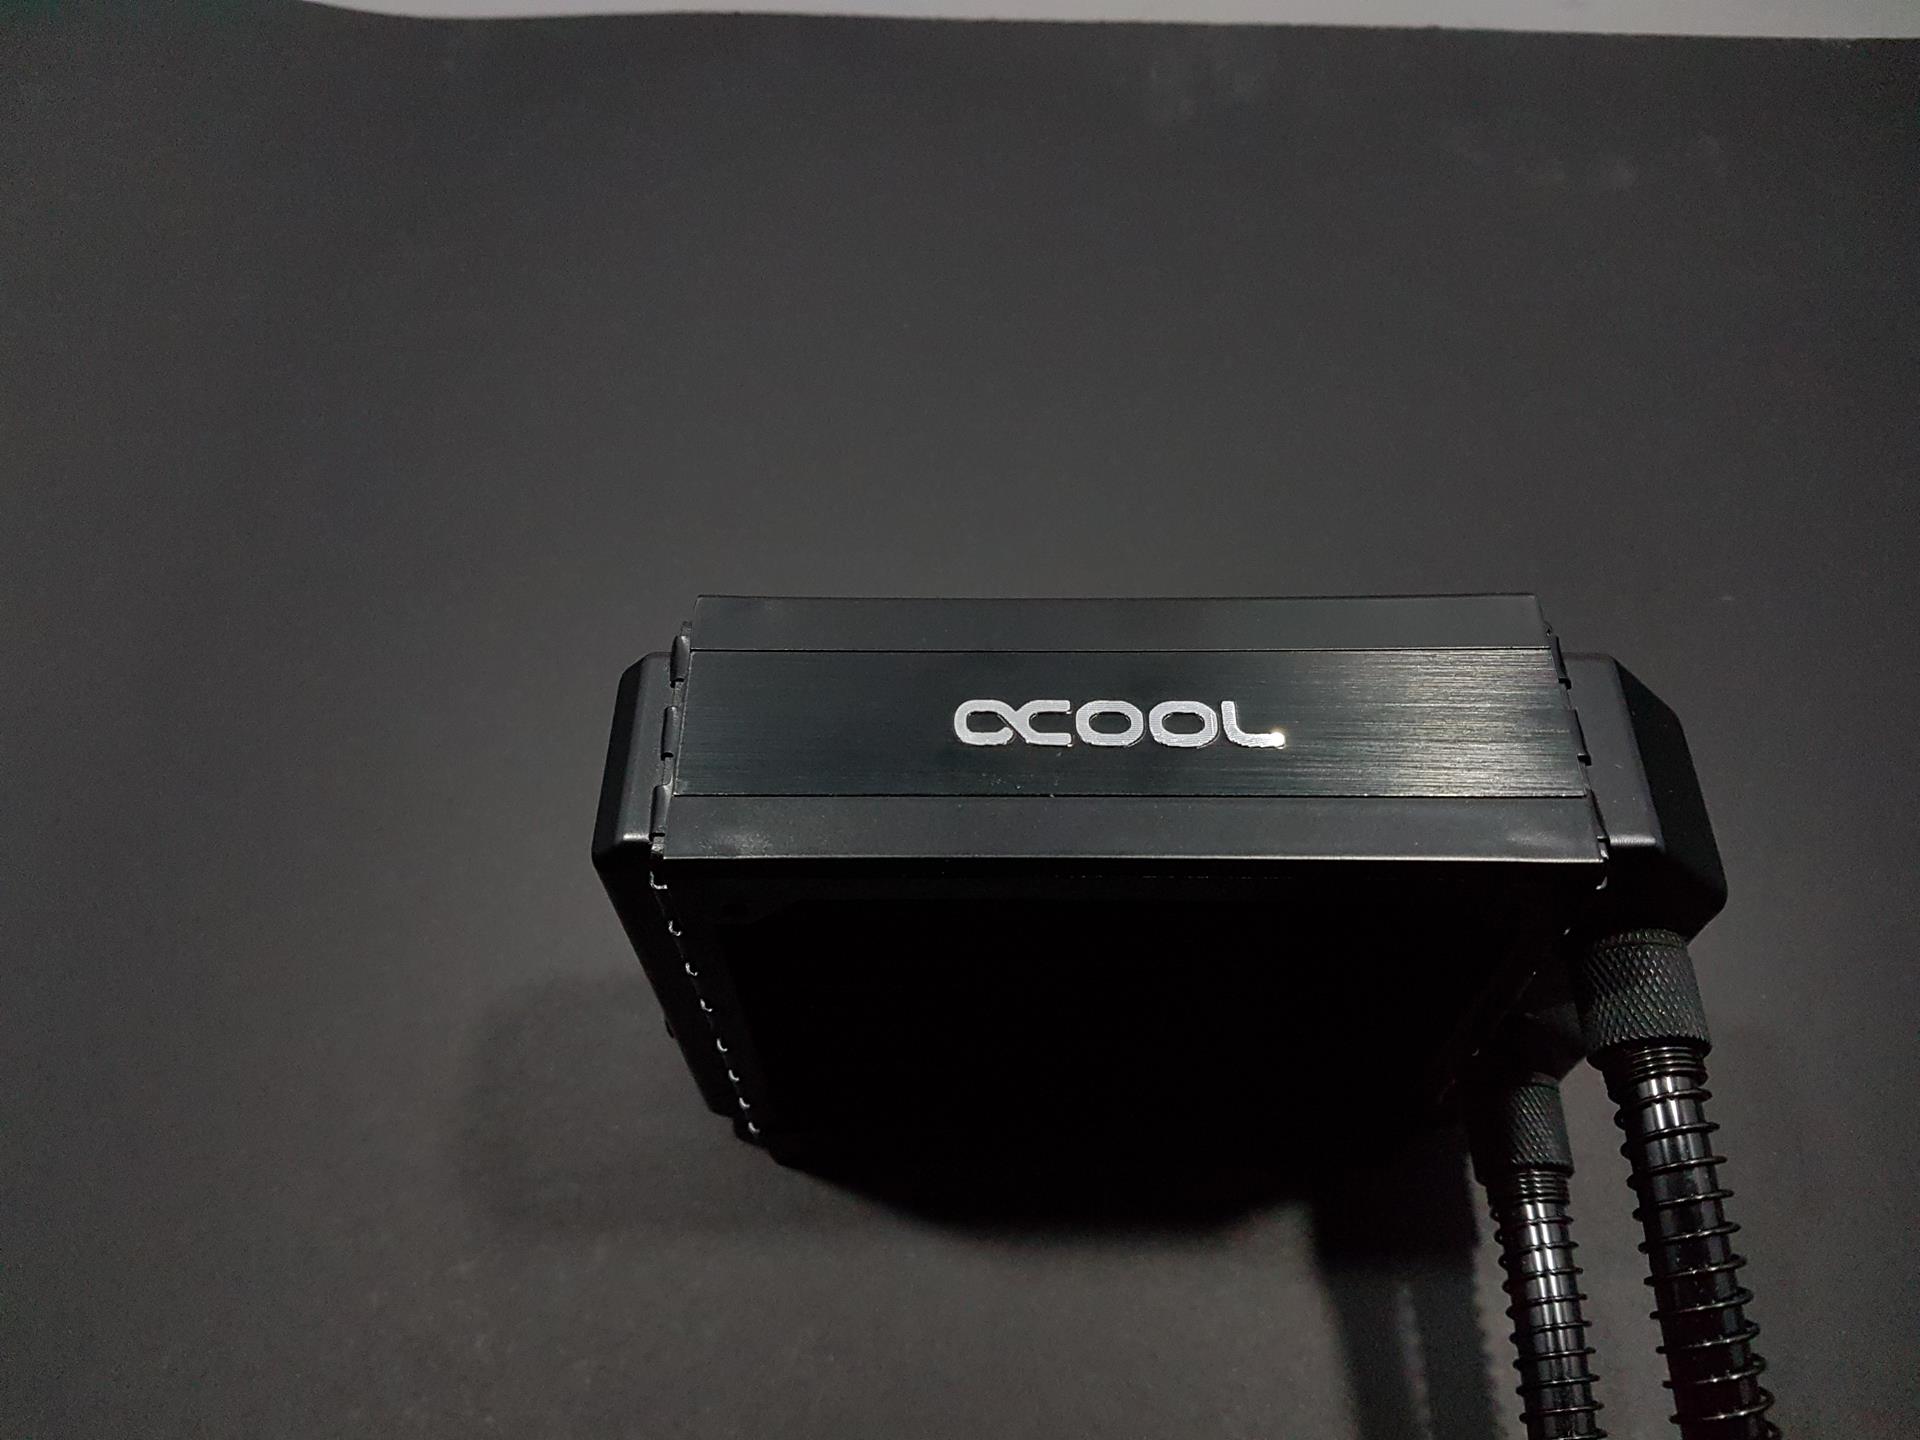
The radiator of the cooler is a 45mm thick one from the NexXxos series of the Alphacool radiators that are quite popular among the water cooling users. The length of the radiator is a 157mm and the width is 124mm. With a single fan the thickness or depth increases to 70mm and with two fans it is 95mm. So, do check with your chassis for the clearance and the compatibility. What makes the radiator substantially different from the other CLCs is that its fins, channels and the front chamber are made of pure copper unlike the aluminum being used in the majority of the CLC solutions in the market.
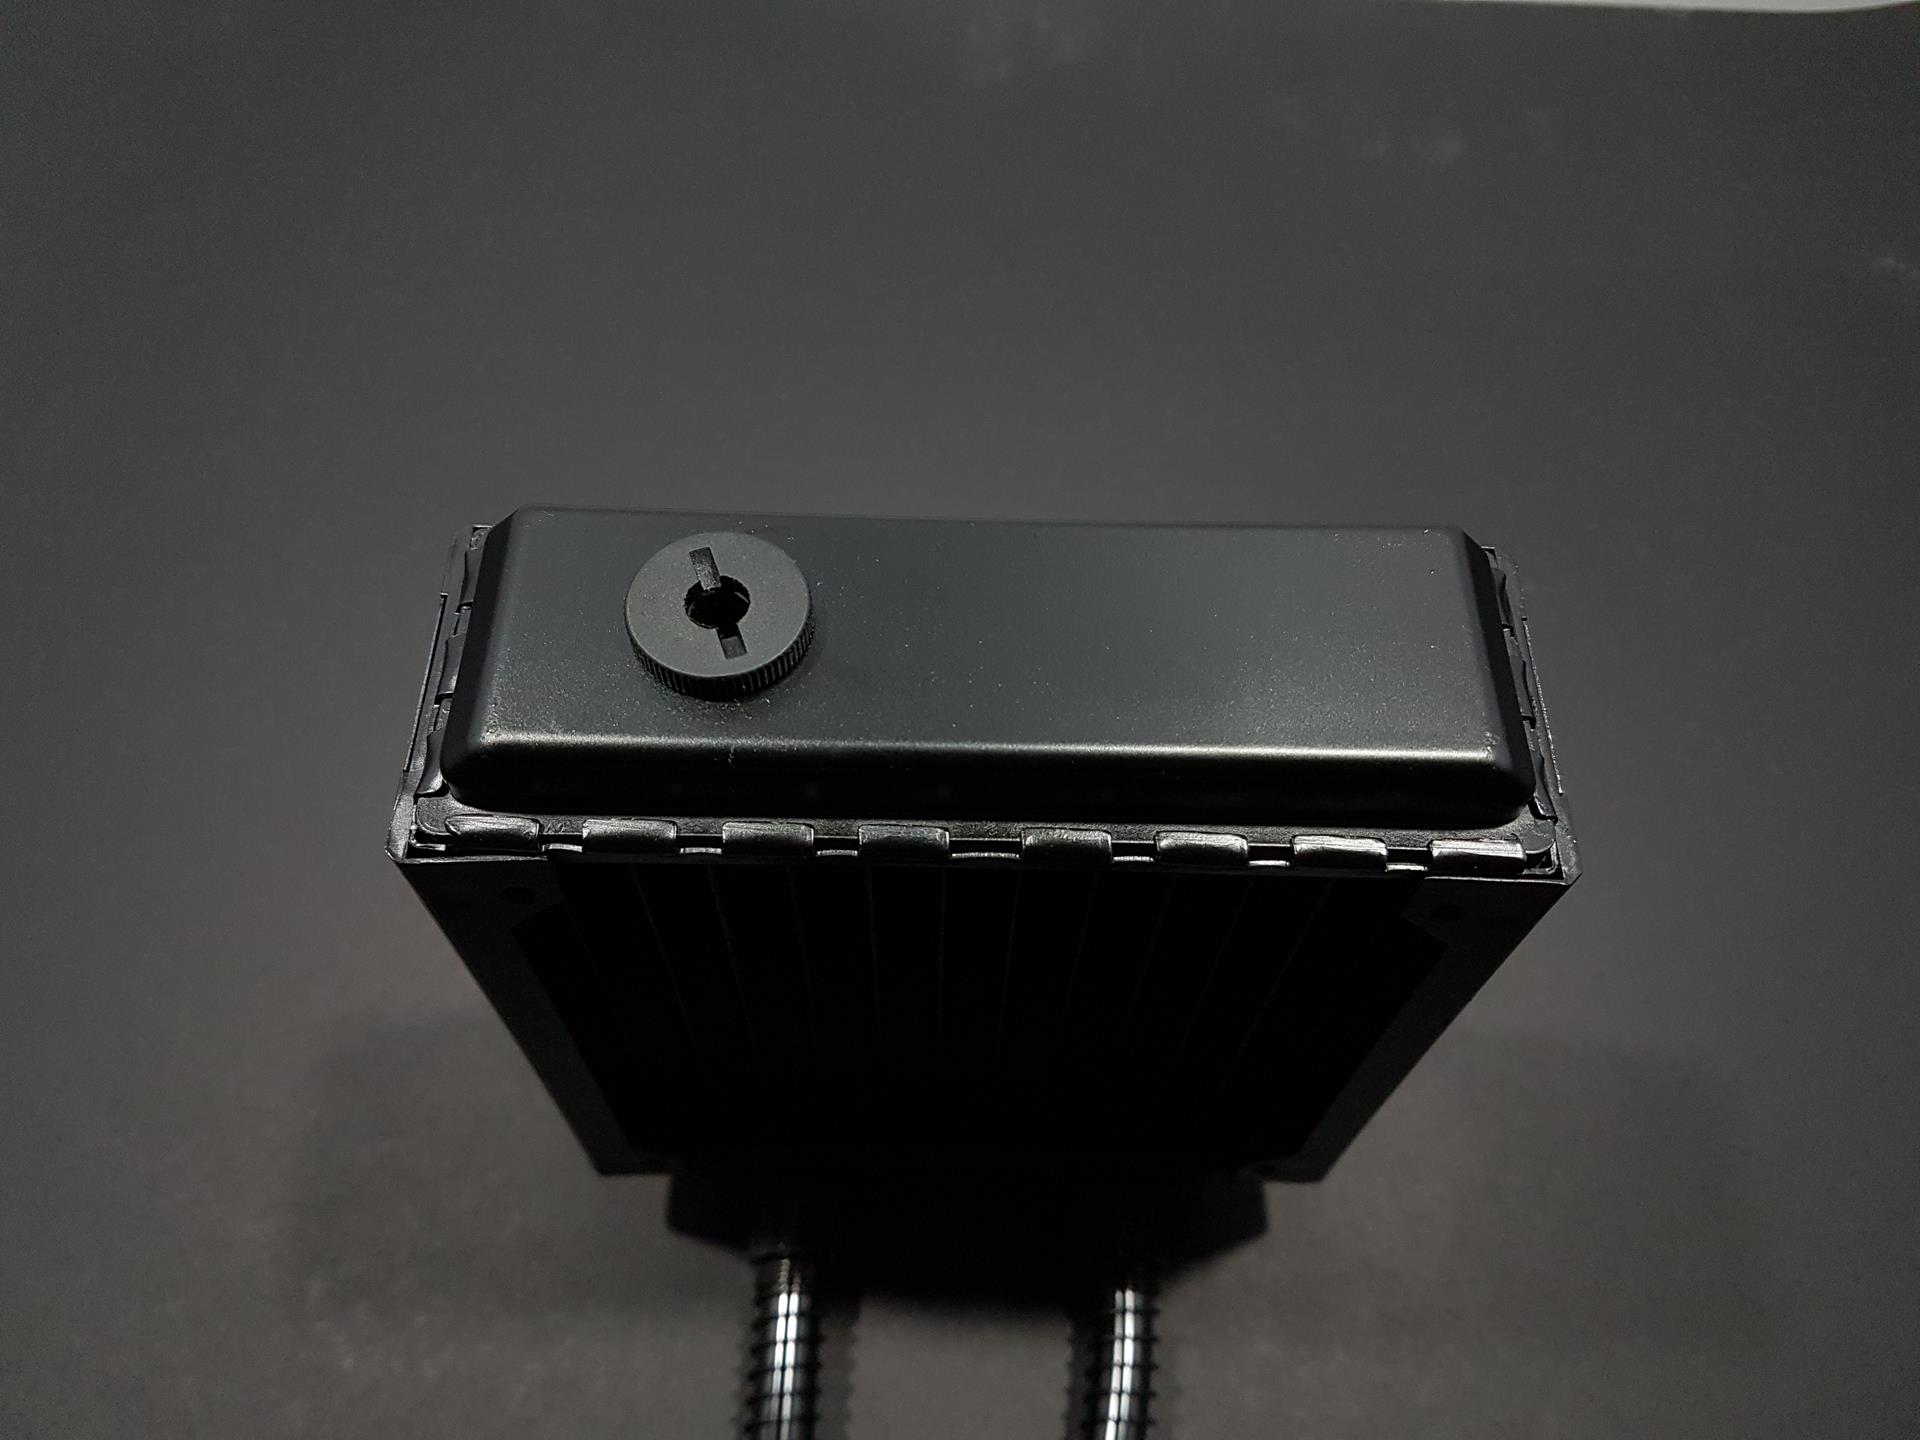
The fins of this radiator are less thick which makes it easier for the fans to rotate at low speeds yet provide the optimal cooling. There are 12 channels in the radiator divide in two groups. One is for the inlet and the other is for the outlet. Both sides of the radiator have standard 120mm fan mount holes. Push/Pull configuration can be used. There is a fill port on the far chamber. This is where the unit can be refilled if and when requires.
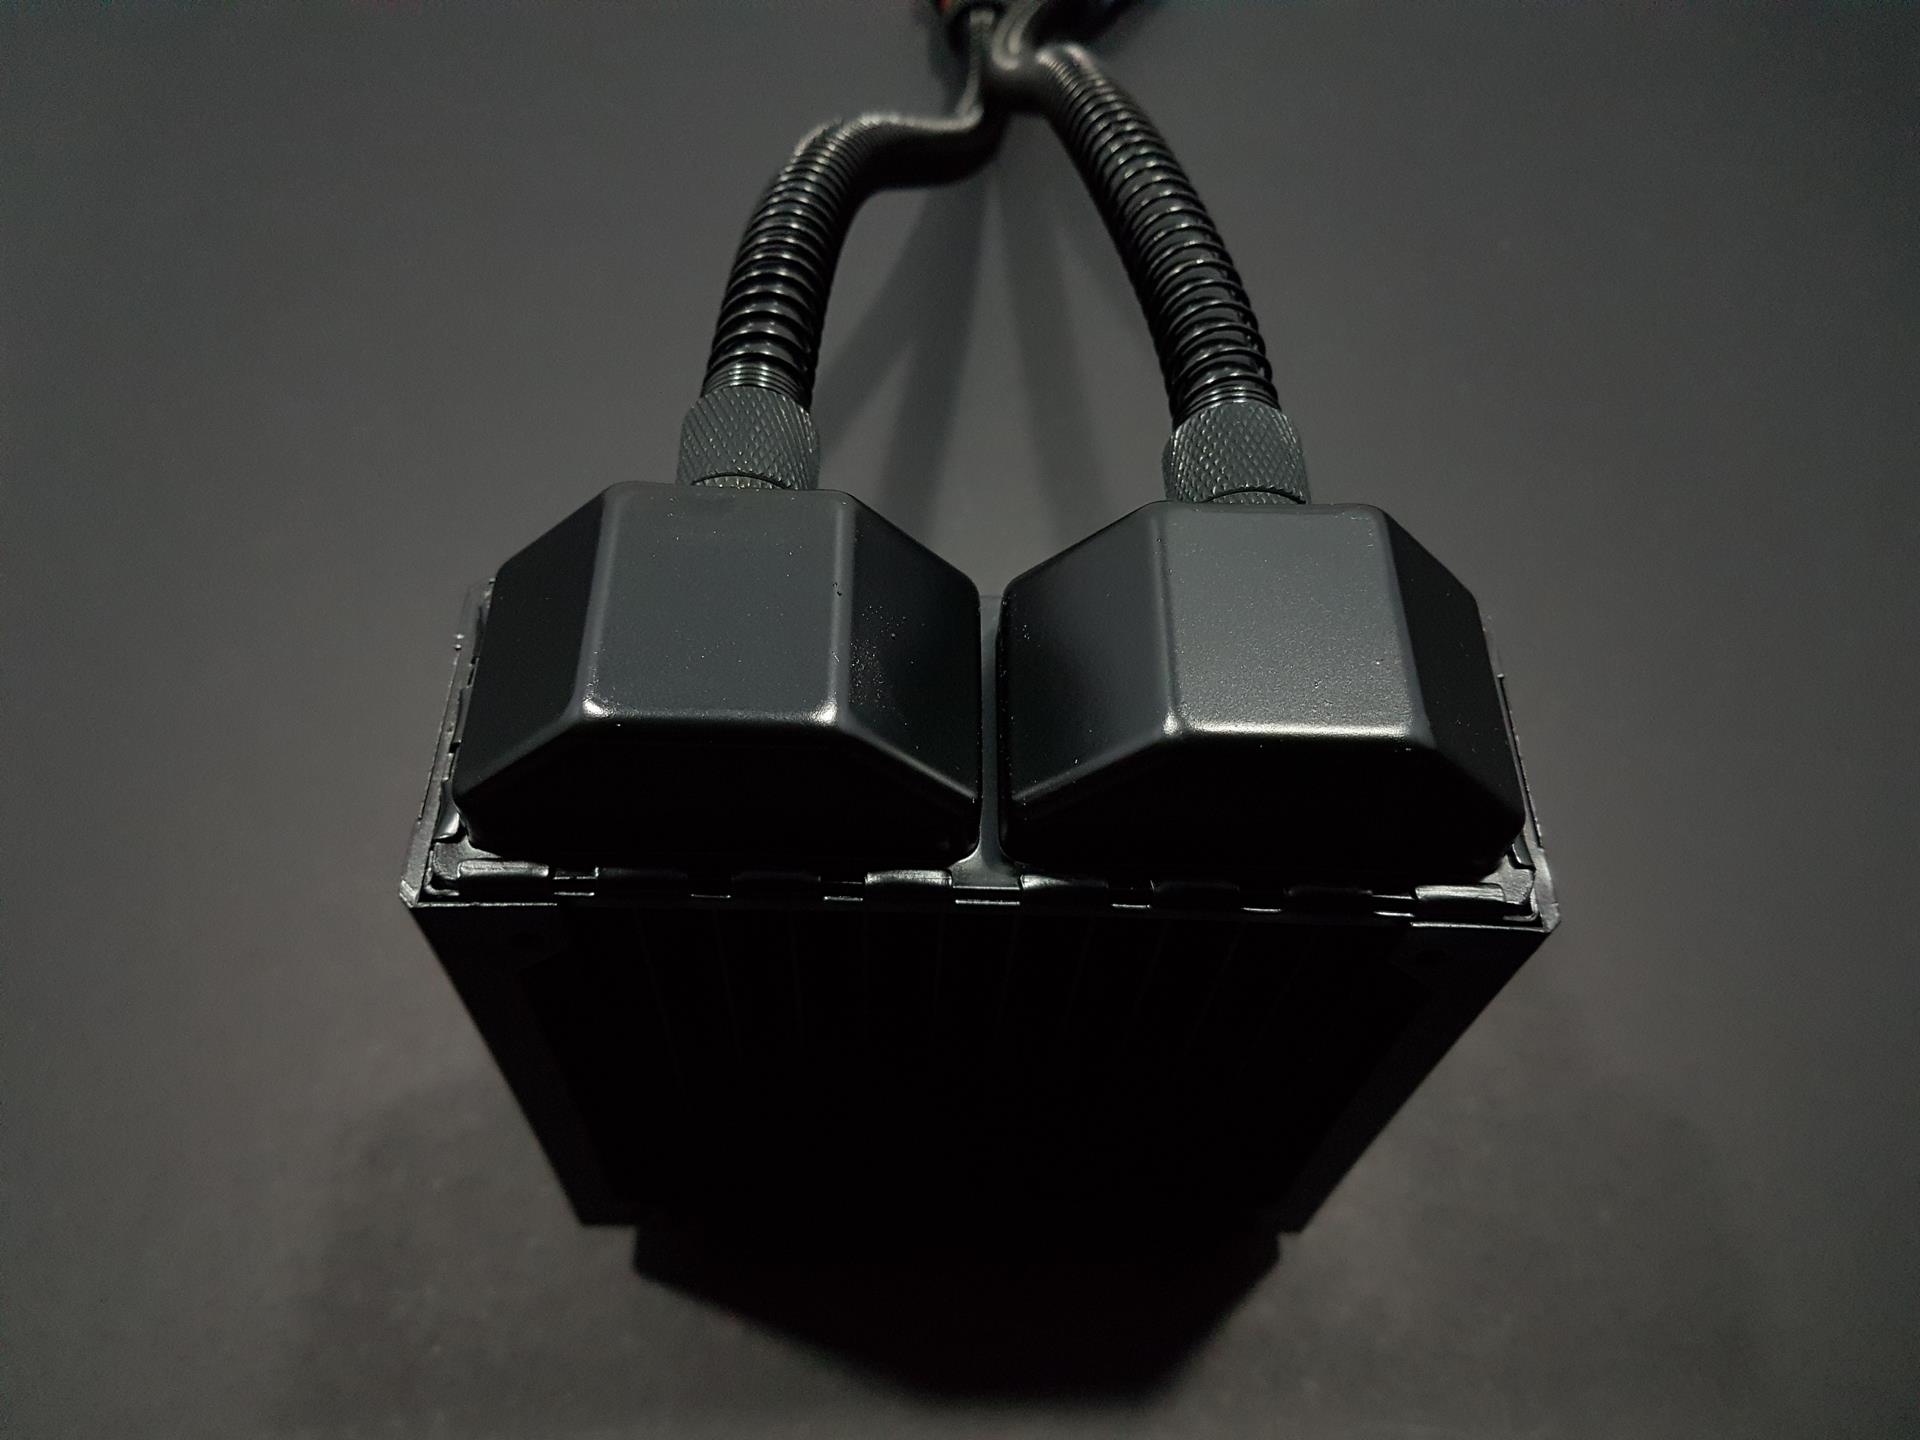
Alphacool has placed a protective sheet on the undersides of the radiator housing. This is to protect the fins from the over tightening of the screws. The inlet and the outlet blocks are divided and this design gives a bold looks to the radiator. The other end of the radiator has an angular design as well which goes well in the overall symmetry of the design.
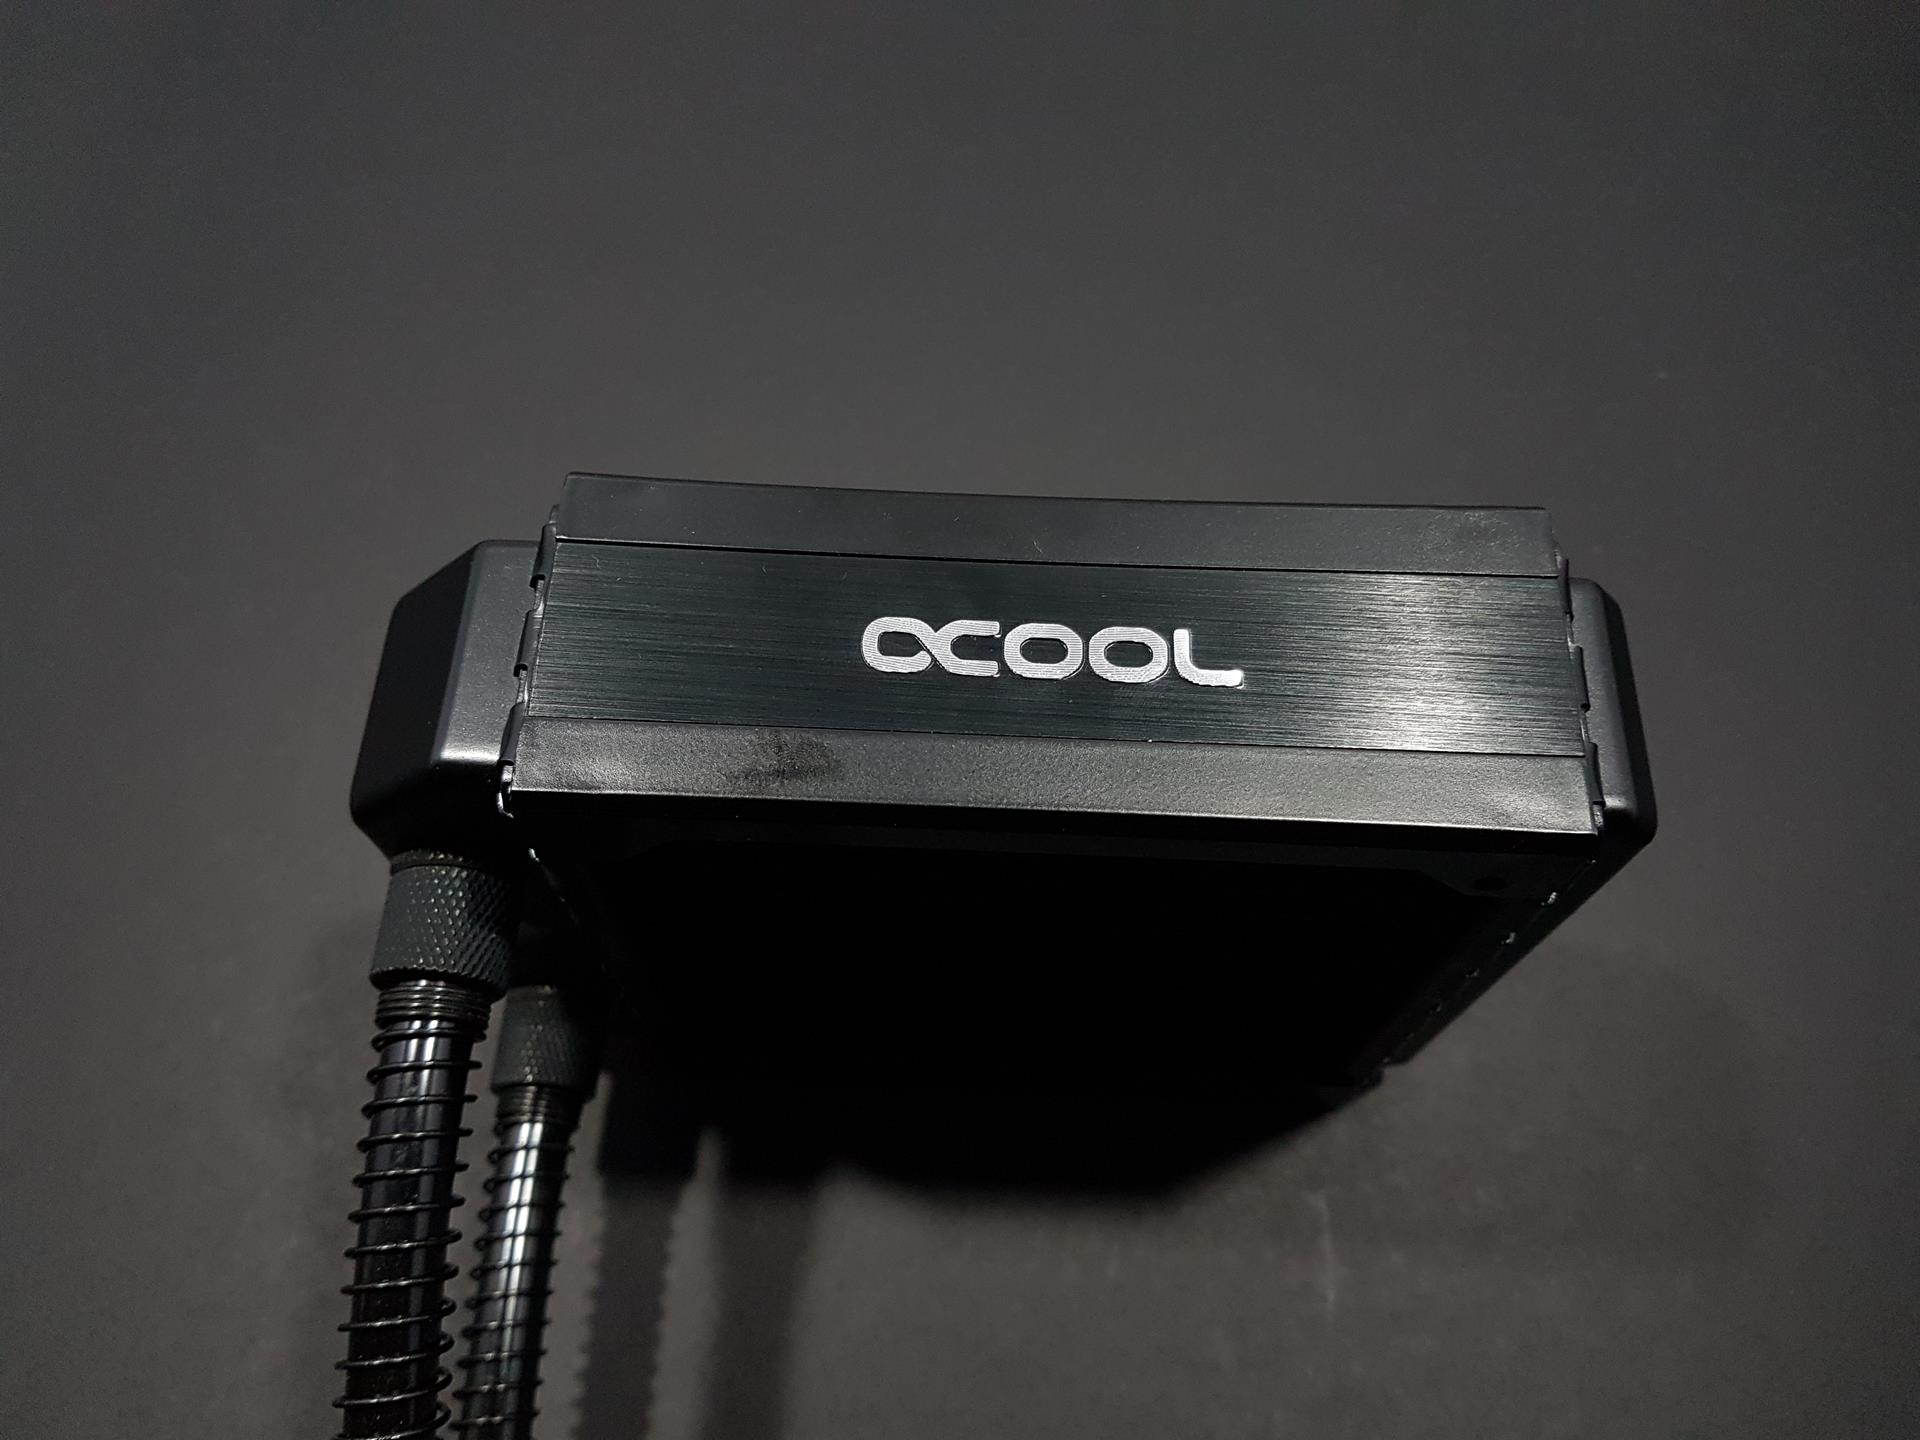
Both sides of the radiators have OCOOL printed in the blue color. The surface is fingerprint magnet, something to keep in mind while installing. Below picture highlight the copper made fins. Both hoses of the radiator have quick-release fittings making it suitable to use with Eiswolf and Eisbaer units for further expansion of the loop.
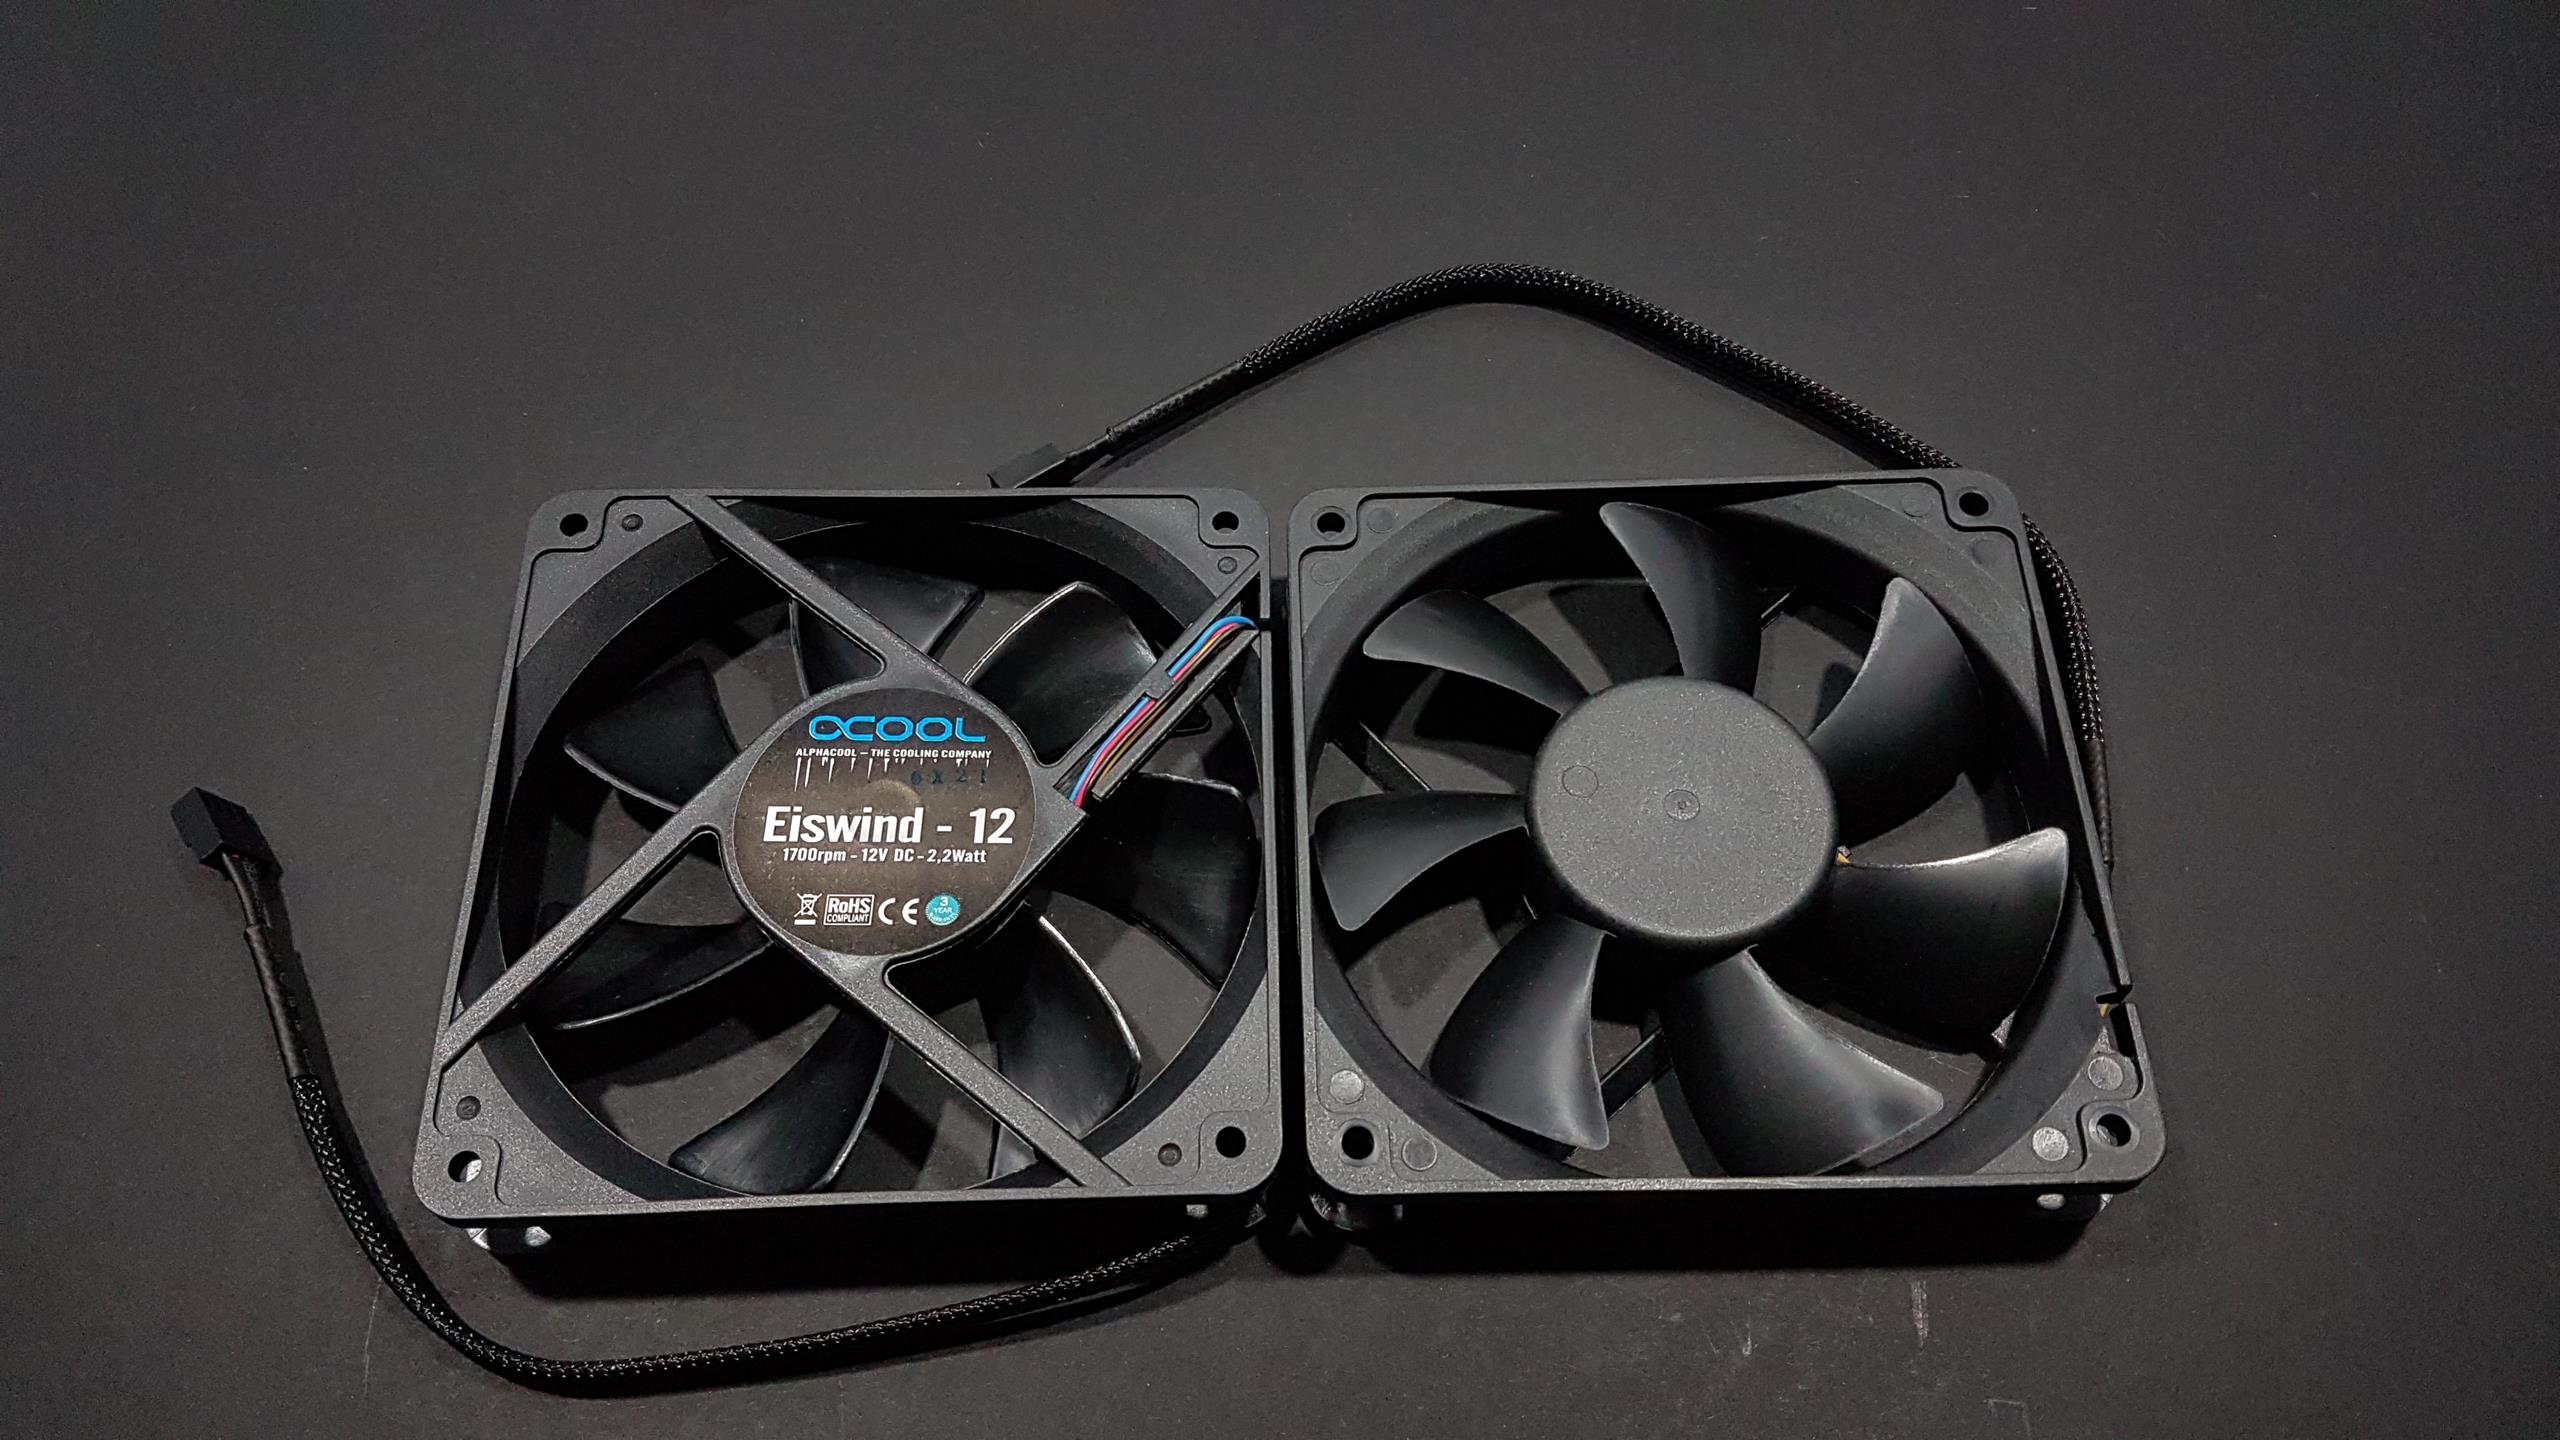
The Alphacool has supplied two Eiswind 120mm fans with the unit. These fans have sleeved bearings and are static pressure optimized for use on the radiators. There are 7 blades in a fan. The central motor hub does not have any sticker on it from the front side. There are no anti-vibration paddings on the corners of the fans.
The fans operate on the 12V DC. They are 4-Pin PWM fans with the rated speed of the 55-1700 RPM with ±10%. Airflow rating is 63.85 cfm with the static pressure rating of the 1.66mmH₂O. Sound rating is 29 dBA per fan. The backside of the fan has a sticker pasted on the motor hub. Eiswind – 12 is printed in the middle. Each fan draws 2.2W. That would mean each fan is rated at 0.183Amps. The motor hub is mounted on a 4-arms assembly which is connected with the main frame. The power cable is black sleeved and has approximately 290mm length.
Installation
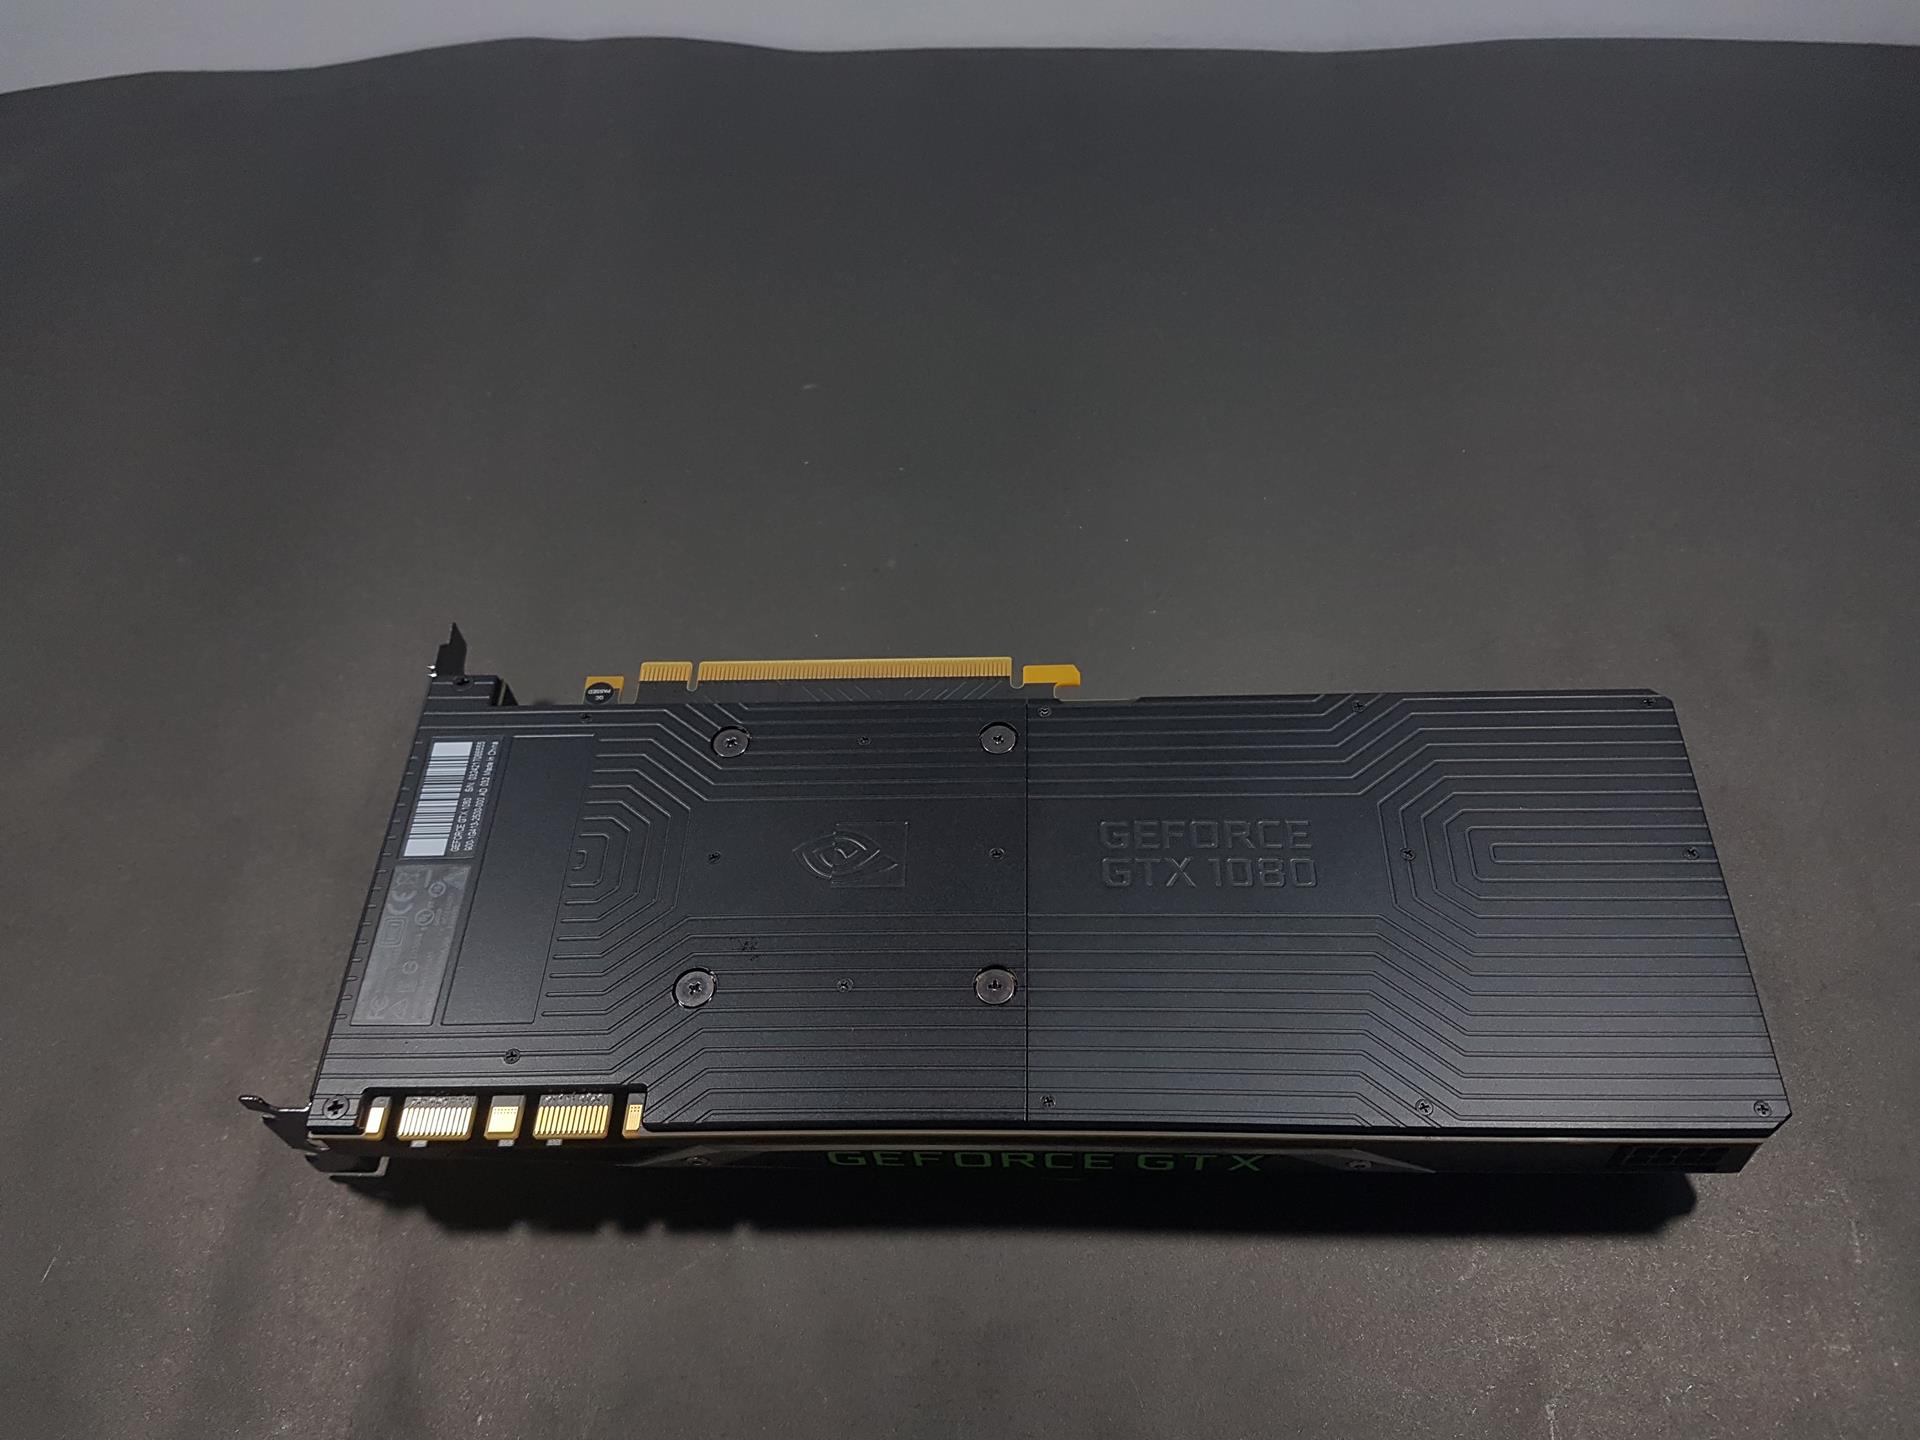
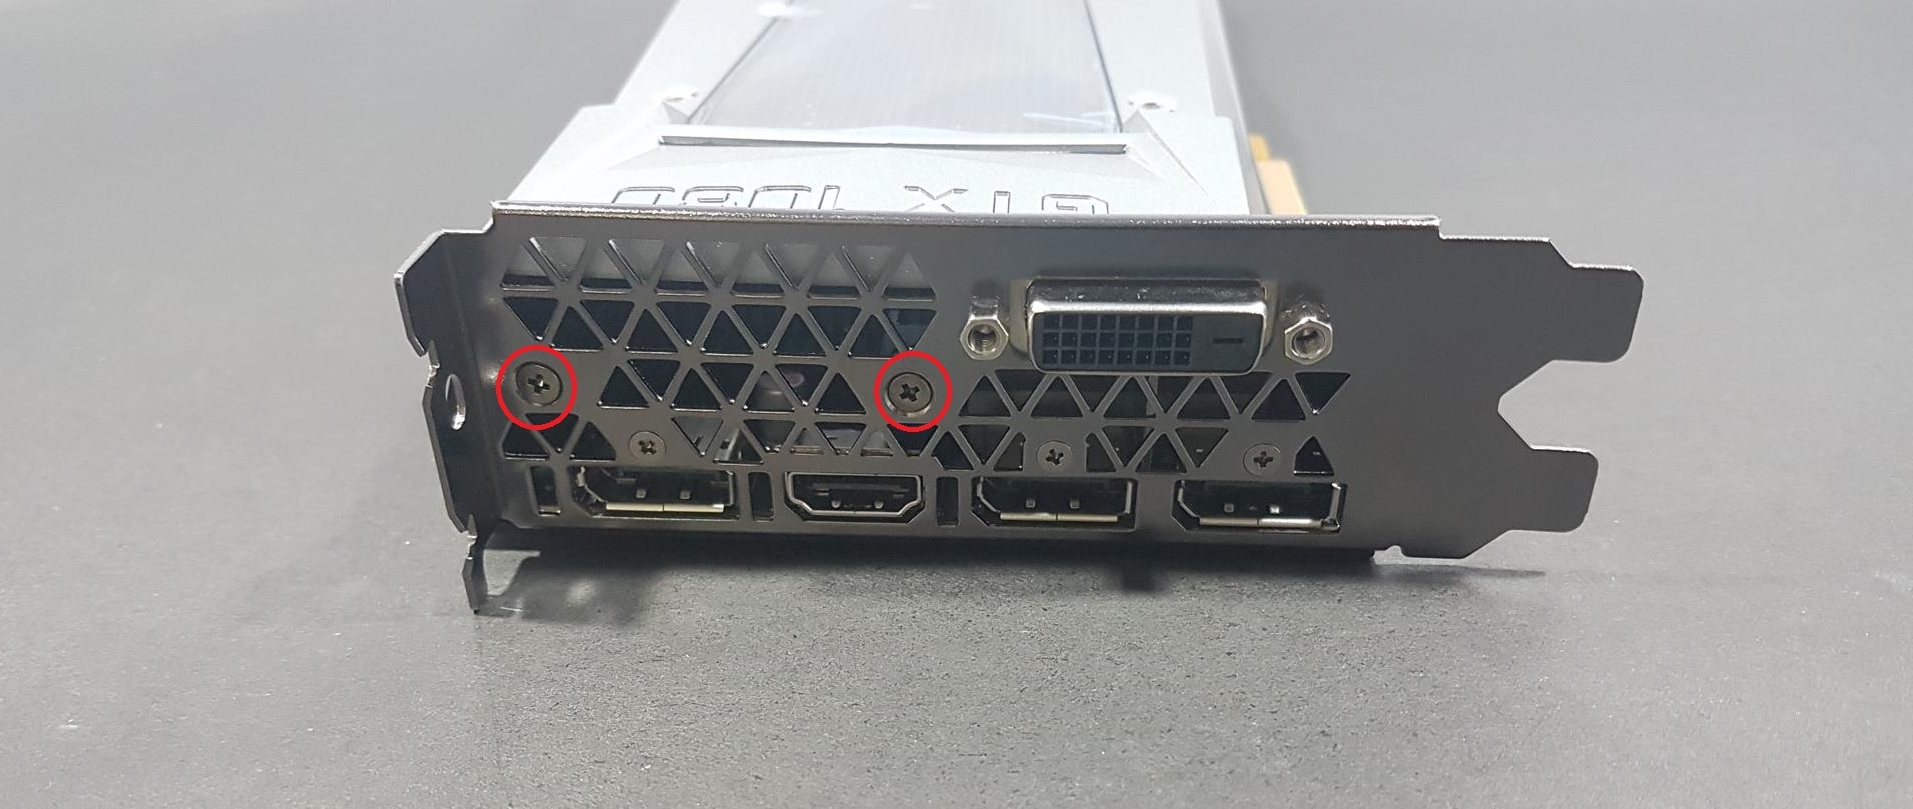
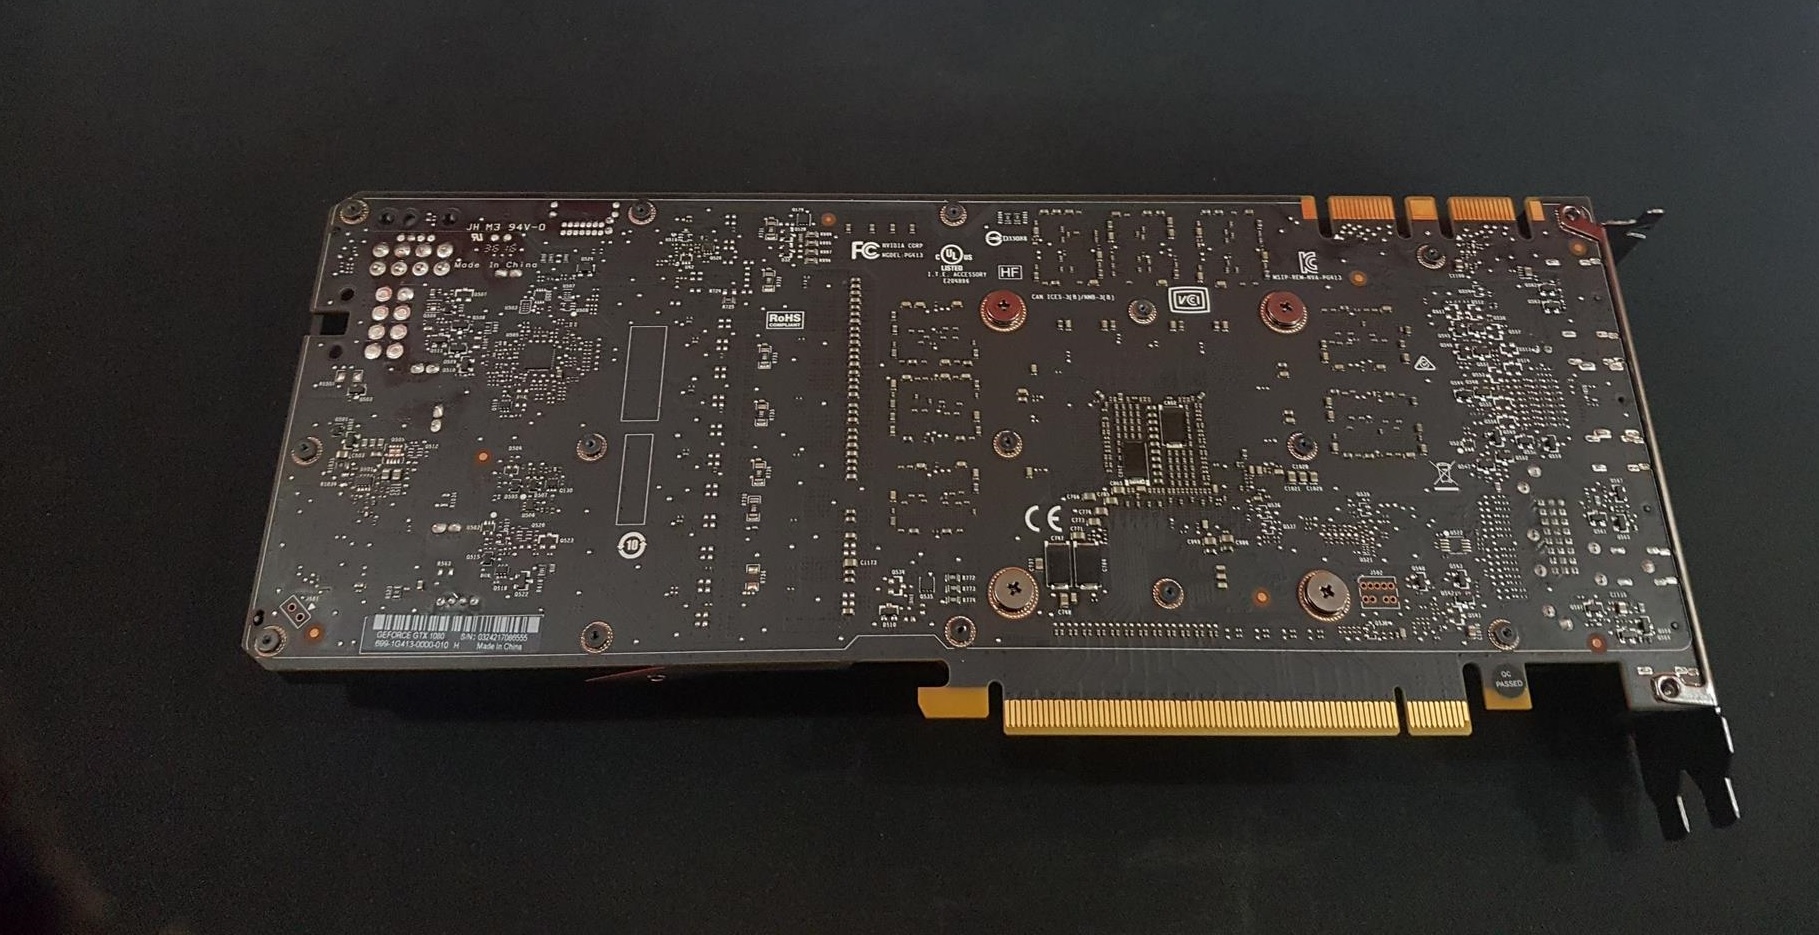
The Alphacool Eiswolf was tested on the Nvidia GeForce GTX 1080 FE. It is a reference design card. To install the cooler on the GTX 1080 FE card, we have to take off the stock cooler. To do that, the user would have to remove the two screws from the rear I/O panel of the card. Then remove the 14 small size screws off the backplate. This will remove the backplate from the PCB. At this point, you will be able to see the backside of the PCB. There are 12 bolts that need to be taken off. Make sure you have right tools for this job. After taking them off, remove the two screws mounting the I/O shield of the PCB to the cooler. Finally, remove the spring loaded 4 screws behind the GPU.
Now, carefully lift off the PCB. Don’t put excessive force as there are two power cables connecting the PCB with the cooler. There is a black color header and a white color header. Carefully disconnect the cables from their respective headers. One is for the LED lighting and the other is for the blower fan. Also, take off any thermal pad on the PCB and paste it on the cooler’s side facing the PCB. Make sure to take pics of every step before disconnecting as it would help in re-assembling the stock cooler on the card. Bolts can be mounted on the cooler along with the two I/O shield screws. This would help in safe keeping the screws and cooler. I put the screws in a plastic container with sealed opening and put the cooler in the anti-static container that came with the card and put them all in the card’s original packing.
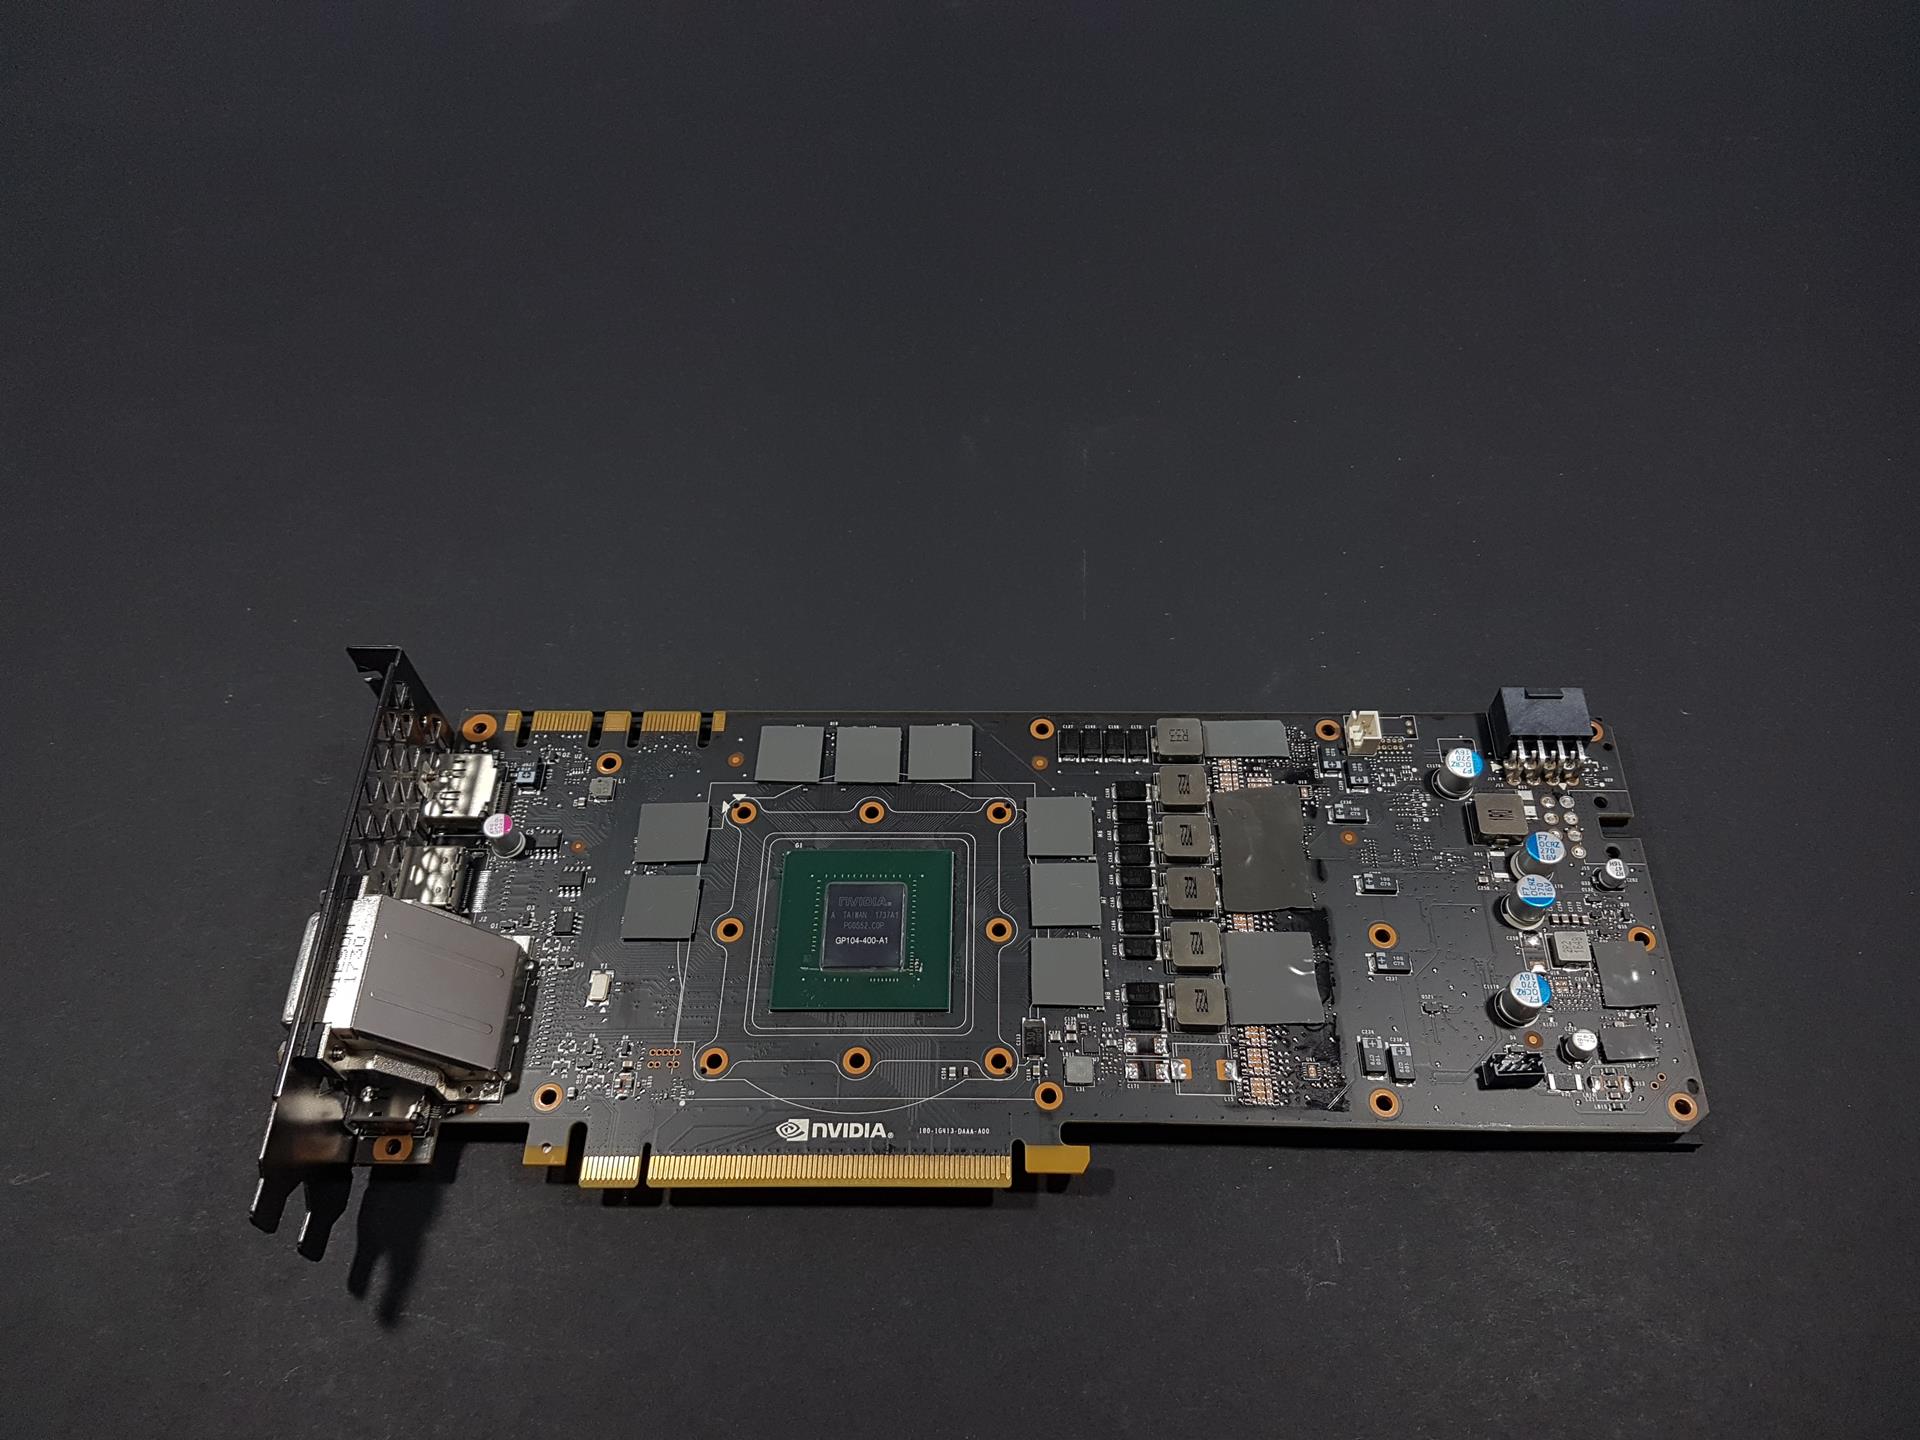
Place the PCB on an anti-static mat and ground yourself as well. Now that we have PCB separated from the cooler, clean the thermal paste residue off the GPU. The Alphacool has provided three bags of the thermal pads. Each bag is color coded. One is blue, second is brown and the third is purple. There is only one thermal pad in the blue color coded bag. Thermal pads in the purple color coded bag are thinner than the ones in the brown color coded bag.
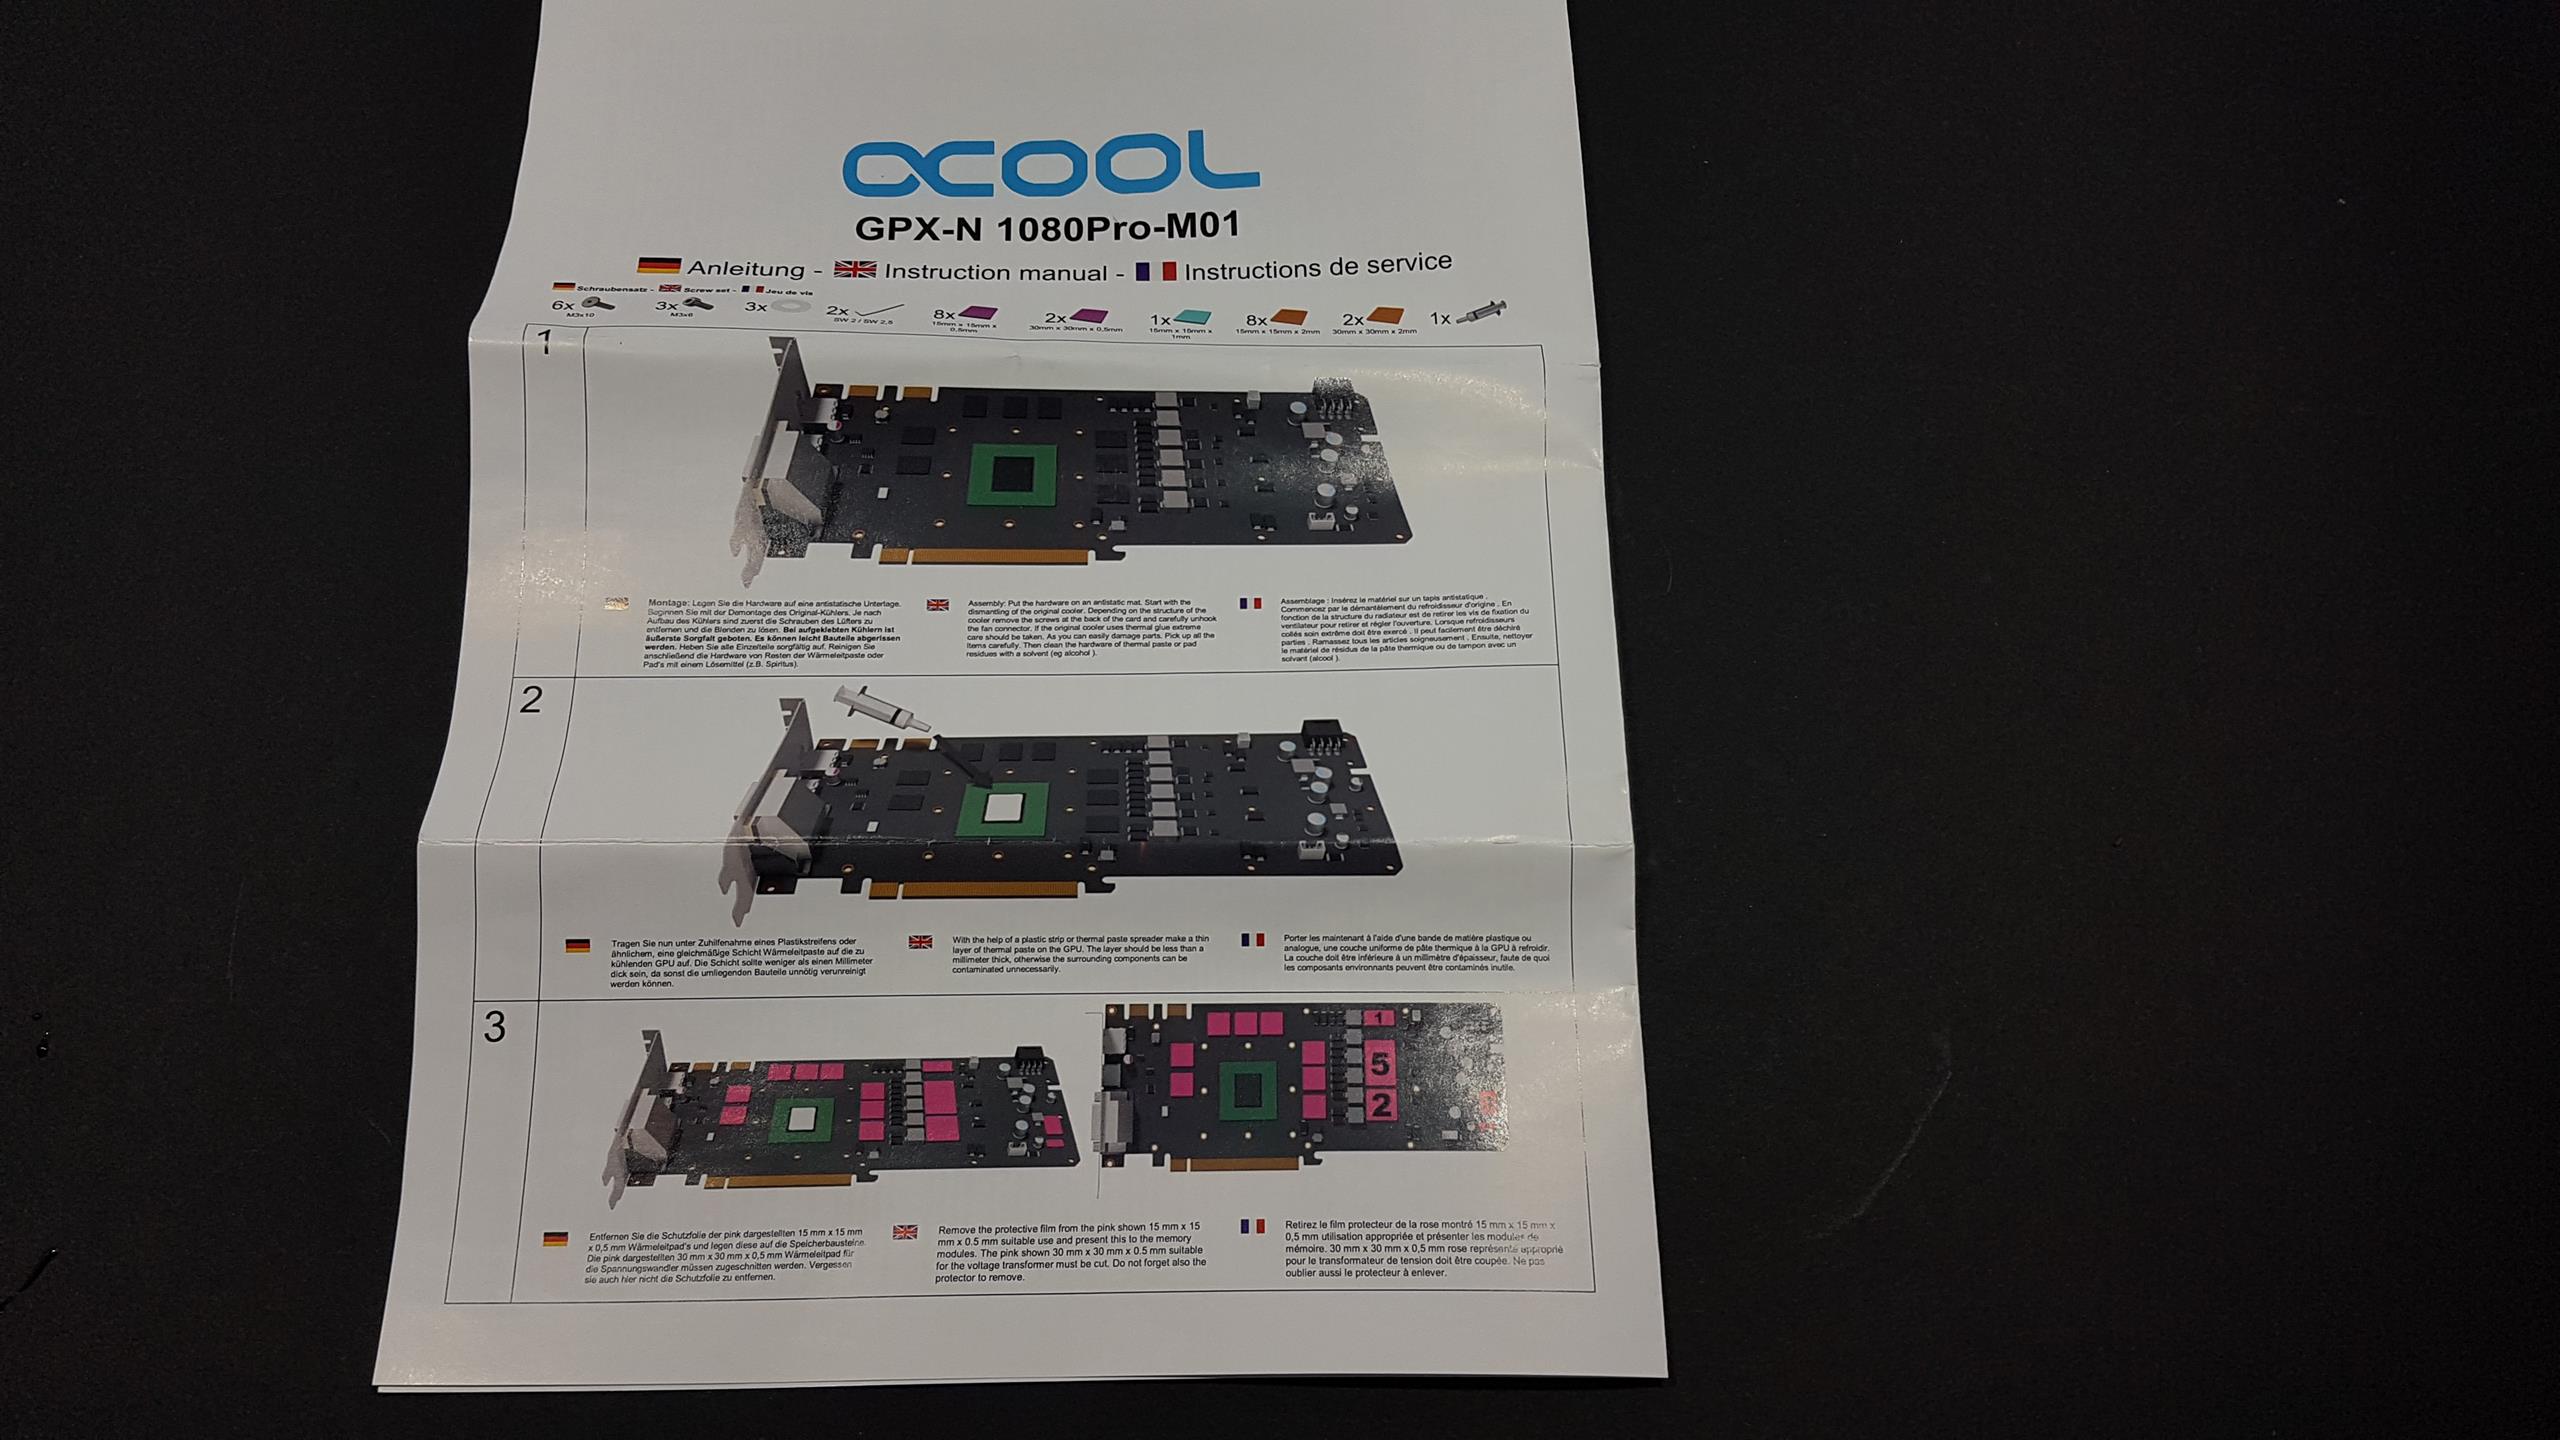
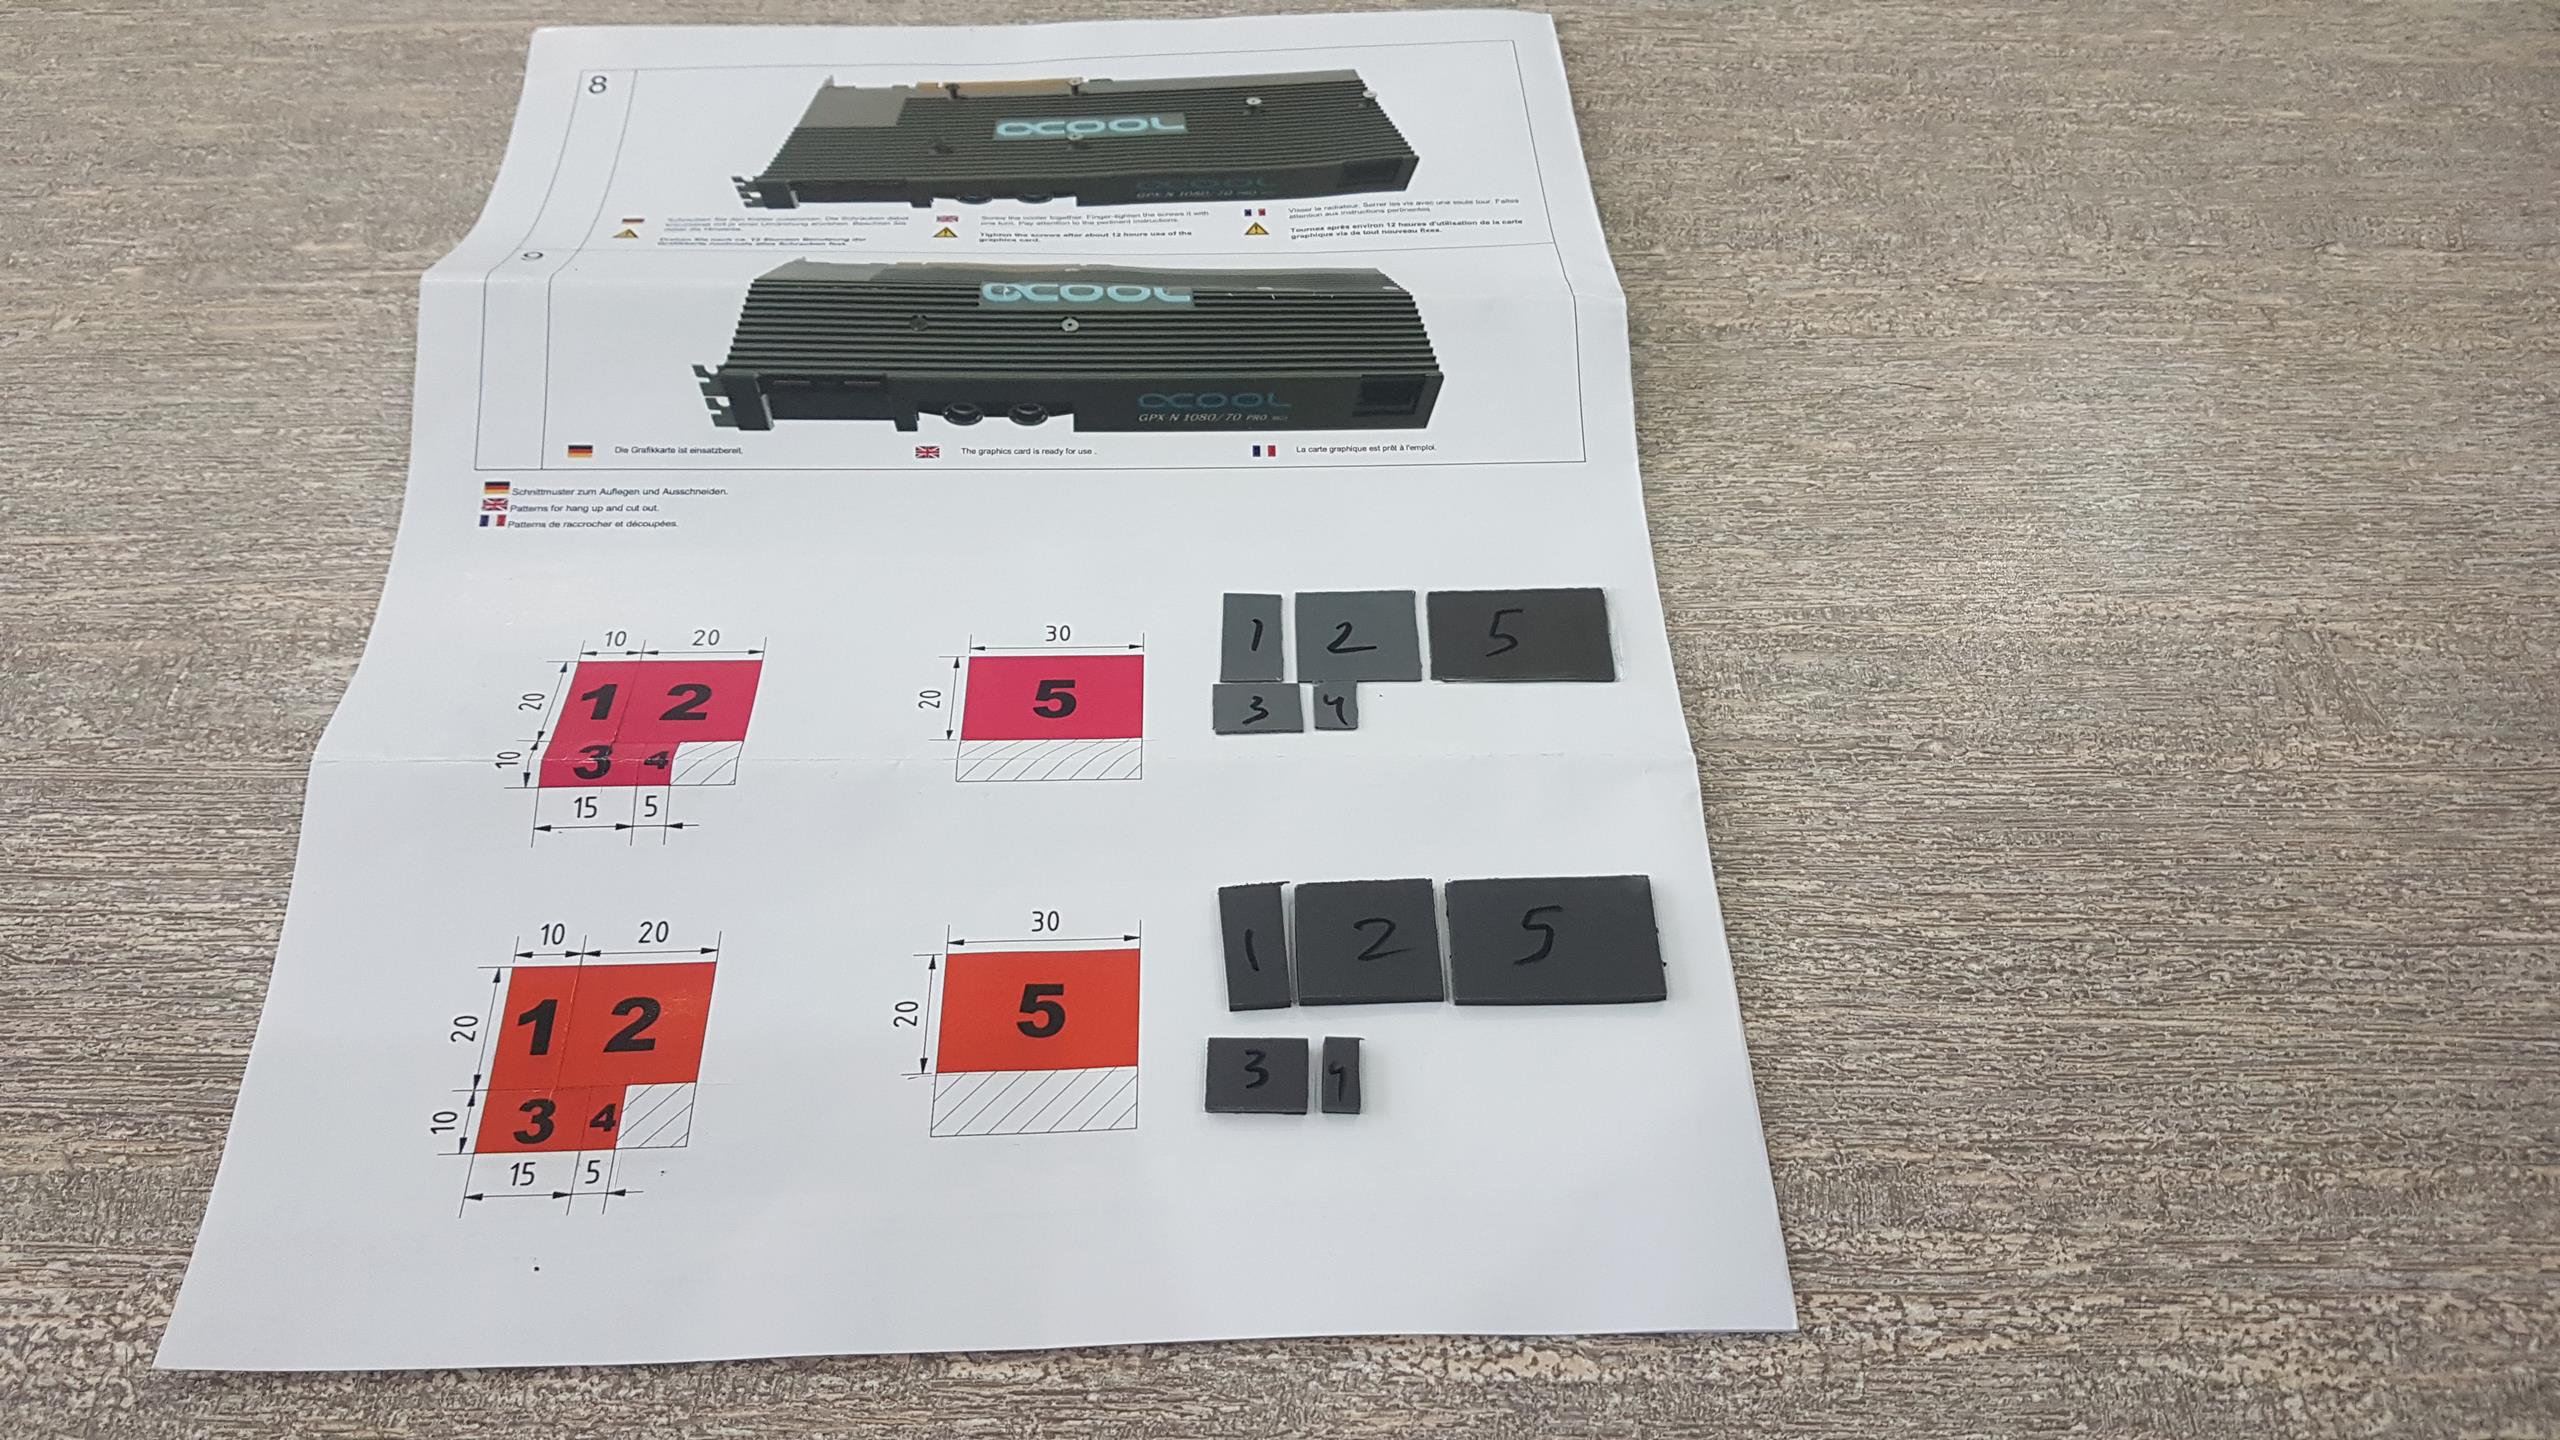
Open the purple color coded bag. The thermal pads for the VRAM are precut to the size. There are protective sheets on both sides of the thermal pads. I found it easy to take off both sides sheets before placing them on the PCB though this is not mandatory and you can peel off just one before placing it on the PCB and peeling off the other after that. These pads are not very sticky. Place the 8 precut to the size thermal pads on the VRAM chips. There are two large size thermal pads in the bag which unfortunately are not cut to the size. Take out both the thermal pads. Alphacool has provided labelled pictures on the installation manual with the sizes mentioned on it.
One thermal pad needs to be cut into 4 different sizes which are 10×20, 20×20, 10×10, and 10×5 as mentioned on the illustrative diagrams. Please note that these are numbered from 1 to 4. The second thermal pad needs to be cut in 30×20 size. This is numbered 5. This number coding to establish a reference on where to place these pads on the PCB. The installation manual has numbers coded pads placed on the PCB giving visual aid and guide to the user hence making the installation easier. Place the thermal pads on the designated places of the PCB using the numbers coding mentioned in the manual.
Apply the thermal paste on the GPU. The Alphacool has provided the Gelid thermal paste for this job. I have used the Cooler Master MakerGel Nano Ultra for this job. Peel off the safety sticker from the base of the block. Clean the base. I have used Iso Propyl Alcohol for this purpose. I disconnected the block from the radiator and I suggest the users to do that before installation as it would make the installation more convenient and easy. Now, carefully mount the block on the PCB aligning the power connector side and the SLI fingers side. The PCB will be fit inside the block not just on it. Once, it is nicely tucked in, use the three M3x6 screws and the silicon washers and mount the PCB with the block by using screws on the designated holes as shown in the installation manual.
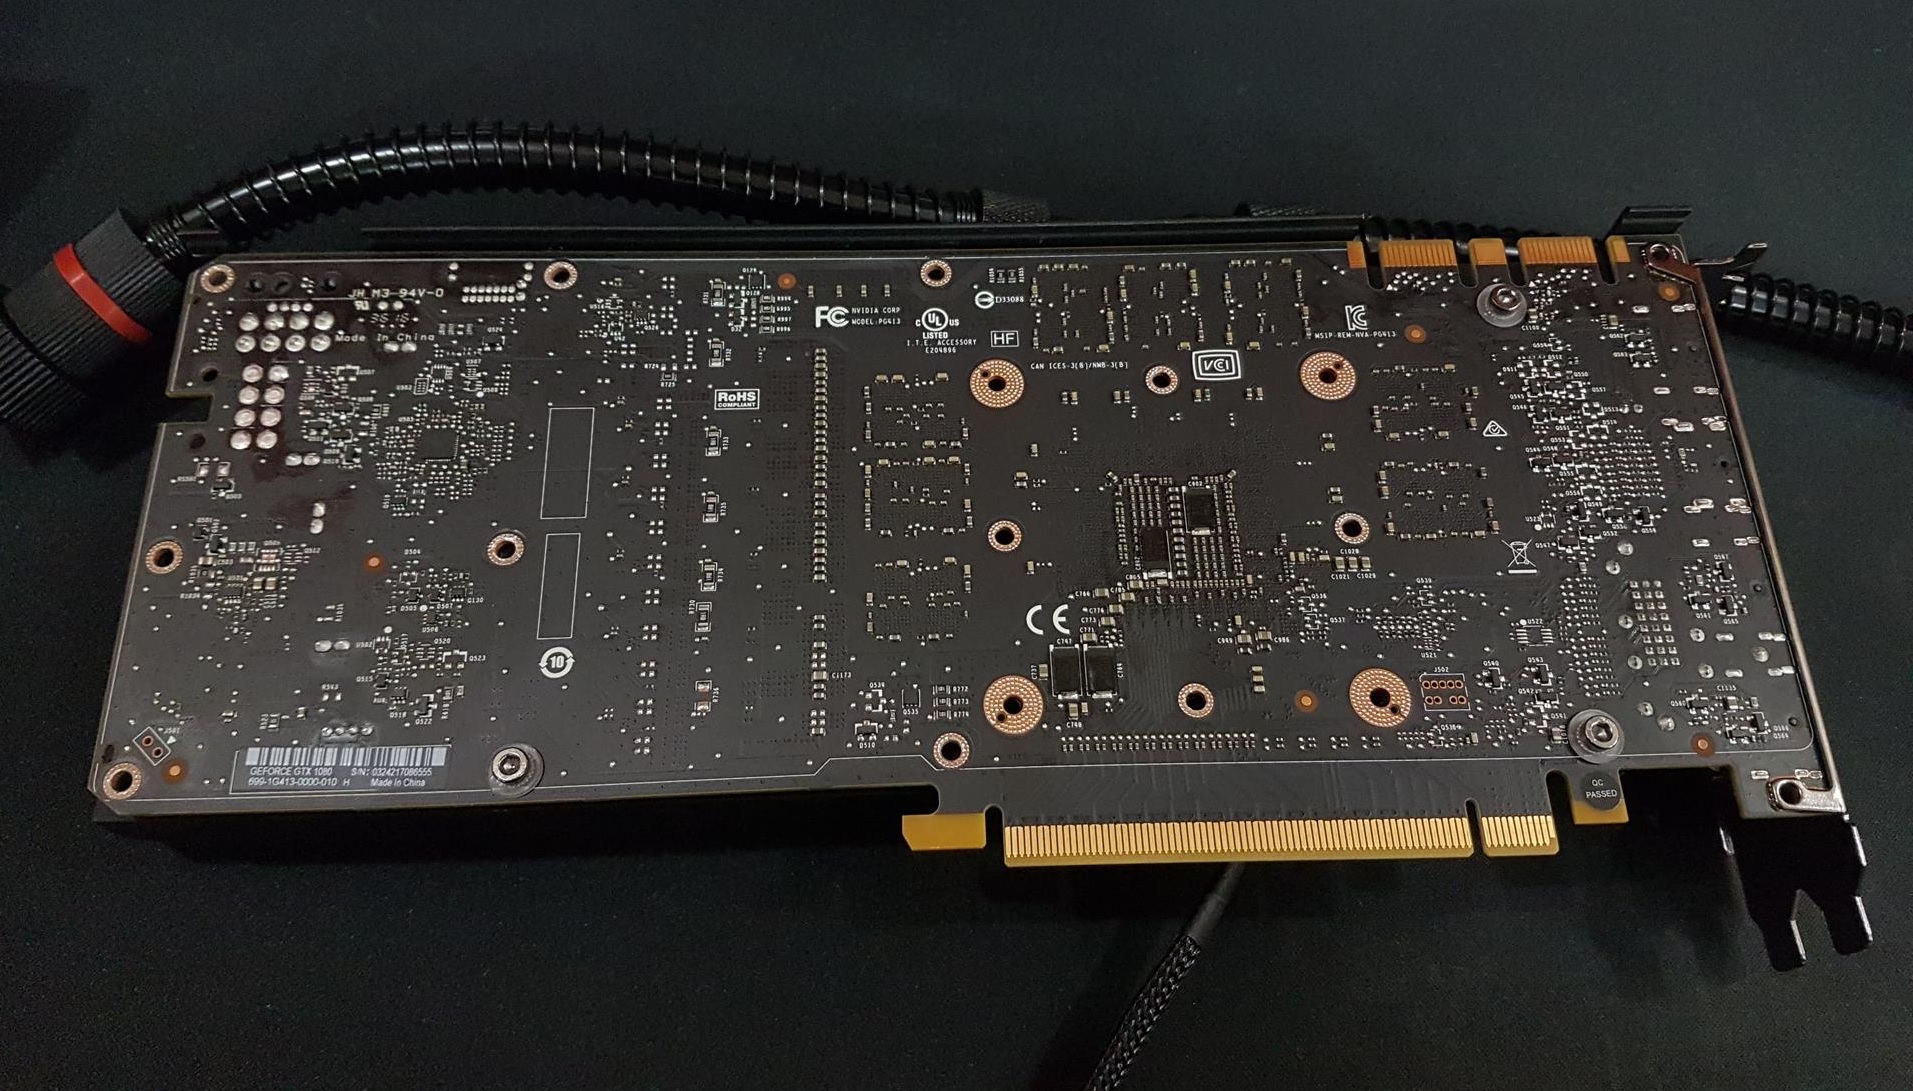
Once done, put the card in a way that the backside is now facing up. Take the brown color coded thermal pads bag and repeat the same steps as described above for the purple color coded bag’s thermal pads. In total there are 27 thermal pads that need to be placed on both sides of the PCB. Take out the precut to the size thermal pad from the blue color coded bag and place it in the middle of the backside of the GPU. Now, take out the backplate and place it carefully on the backside of the card with aligning the mounting holes on the PCB and the backplate as shown in the installation manual. You would have to press the backplate a bit as the thermal pads used on the PCB’s backside are thicker. Secure the backplate using 6 M3x10 screws. There, the cooler has been installed on the graphics card.
Now, connect the cooler with the radiator using the quick-release fittings. Remember the rule, red color side should be connected to the blue color side of the hoses and vice versa. Install the card on the desired PCIe slot. Connect the 3-pin power cable coming out of the pump unit of the block on the respective fan header of the motherboard. Install the Eiswind 12 fan on the radiator and connect its 4-pin PWM power cable on the respective fan header of the motherboard. Make sure to provide sufficient power to the pump unit of the block. Even at 100% it was not audible which is definitely a good design element.
The installation is completed and the unit is ready to be tested.
Testing
Nvidia’s Pascal series cards feature GPU Boost 3.0 which is their way of enabling the card to reach higher clocks within predetermined power target where extra power is available. Normally, when we test any cooler our focus is on the thermal performance measurement which is the prime job of any cooler. For graphics card’s coolers we also need to focus on the associated factors which are stable clocks and resultantly better gaming performance in terms of higher FPS. Why is that so? Because the GPU Boost 3.0 is at play. We have to deal with the dynamic clocking and the thermals play significant role in that. Don’t forget that these are not only the thermals but the silicon quality itself is a determining factor. If thermals are good, thanks to the good cooling solution, but the silicon is poor or average than besides better thermals, there may be limited or less performance gain.
While testing the Alphacool Eiswolf, we have focused on three factors and will report graphs of each. These are Clocks, Thermals and FPS. As the Eiswolf is shipped with the two Eiswind 12 fans for Push/Pull configuration, our testing will be done with a single fan configuration and with push/pull configuration though the later does not produce any dramatic improvements. Also, we happen to have the Alphacool Eisbaer 360 with us so the third level of testing was performed with Eiswolf connected to the Eisbaer 360 by dropping the 120mm radiator out of the equation. Mind you, you can still add that 120mm radiator in the total loop for better performance.
Here is the test bench configuration:
- Intel i7 6850k
- Asus Rampage V Edition
- Alphacool Eisbaer 360
- Corsair 4x8GB @ 2666MHz Vengeance Red LED
- Nvidia GTX 1080 FE
- Samsung 250GB EVO 840 SSD
- Seagate Barracuda 2TB
- Corsair AX1200i
To test the thermal performance of the Alphacool Eiswolf, the graphics card was tested with the Furmark run of 30 minutes on the stock cooler at the stock clocks. Then the graphics card was overclocked using the MSI Afterburner and second run of furmark was made to record the temperatures. To maintain the standardization of the coolers testing on our test bench, the reported temperatures are delta temps. We subtract the ambient temp reading from the maximum temperature of the card and report the delta temperatures on our graphs.
Maximum and average boost clocks are recorded during the gaming using the MSI AfterBurner software. This is done at stock and with OC. Three games were selected to measure the gaming performance. These are: –
- Battle Field 1
- Grand Theft Auto – V
- Assassin’s Creed Origin
Each of the game was tested on 4k resolution using maxed out settings except that MSAA was set to 4x where applicable. Each game was tested on the stock clocks and with the OC. The Microsoft Windows 10 x64 build 1709 was used and the Nvidia drivers version 388.71 were used. Following software were used: –
- MSI AfterBurner 4.4.2
- AIDA64 Extreme
Let’s take a look at the clocks graphs.
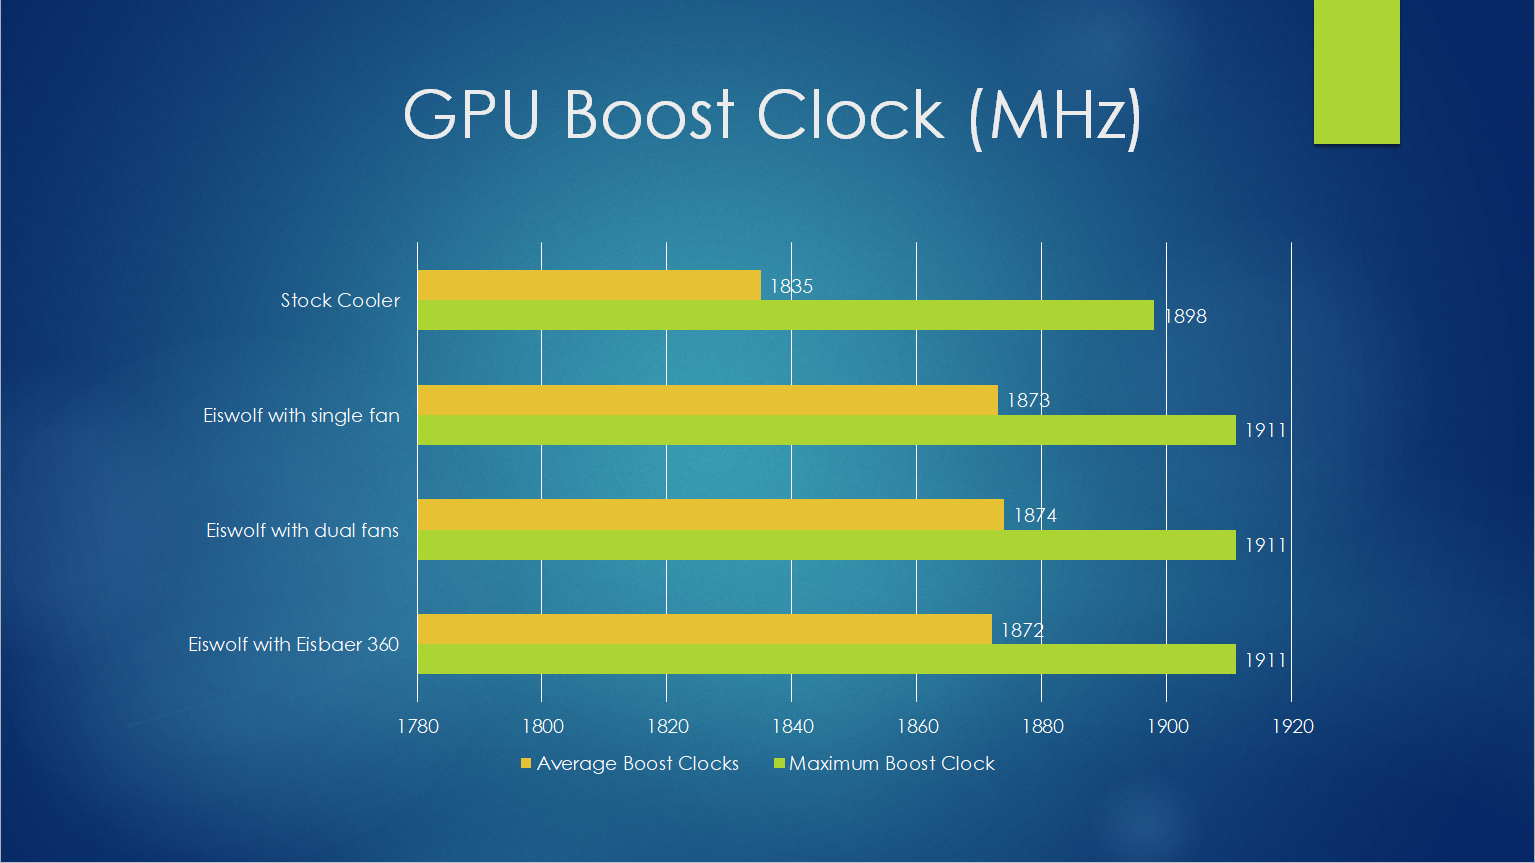
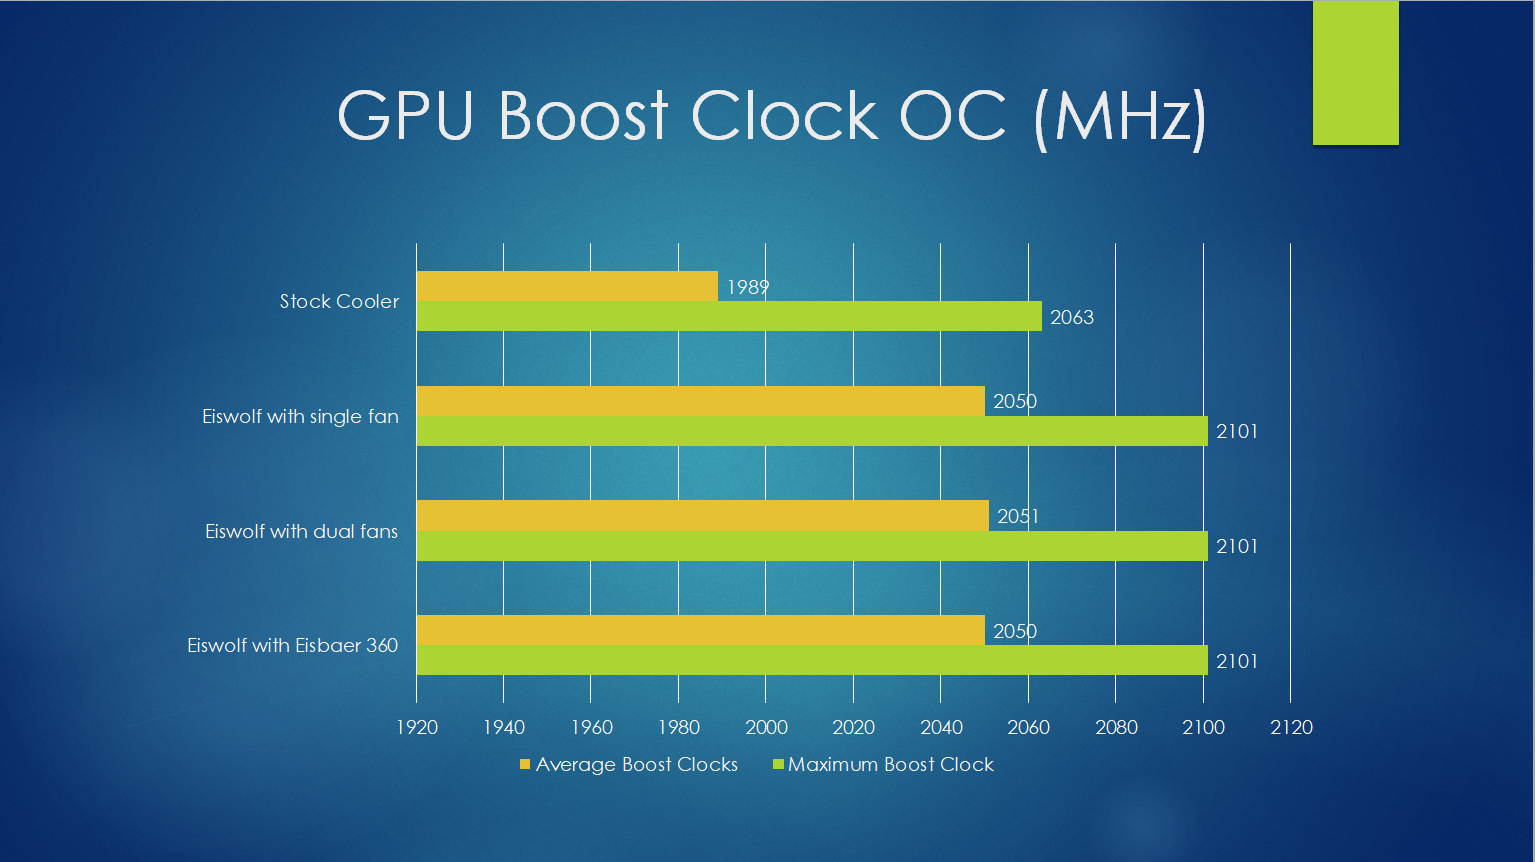
The first graph shows the GPU’s maximum and the average boost clock during gaming. With the stock cooler the maximum boost clock was 1898MHz which was further raised to the 1911MHz using the Alphacool Eiswolf. This is a marginal gain. The average boost clock with the stock cooler is 1835MHz and with the Eiswolf it is 1872MHz to 1874MHz depending upon the configuration.
The second graph shows the GPU’s maximum and the average boost with the overclocking. I was able to push the card to +200MHz on the core and +450MHz on the memory clock using the Eiswolf. With the stock cooler the overclock settings were +175MHz on the core and the +350MHz on the memory clocks. The maximum boost clock with the stock cooler was 2063MHz. This 165MHz above the maximum boost clock without OC using the stock cooler. The real effect comes from the Eiswolf cooler where the chip was able to just cross over the 2100MHz with 2101MHz being the maximum boost clock. There is a gain of 190MHz (near to the 200MHz) over the stock clocks using the Eiswolf. It is clear that Eiswolf has worked wonders here but the silicon could not be pushed any further. Temperatures were too good to believe even with the overclocking. It is clear that the limiting factor here is the silicon. Average clocks maintained their numbers across multiple configurations with a marginal difference.
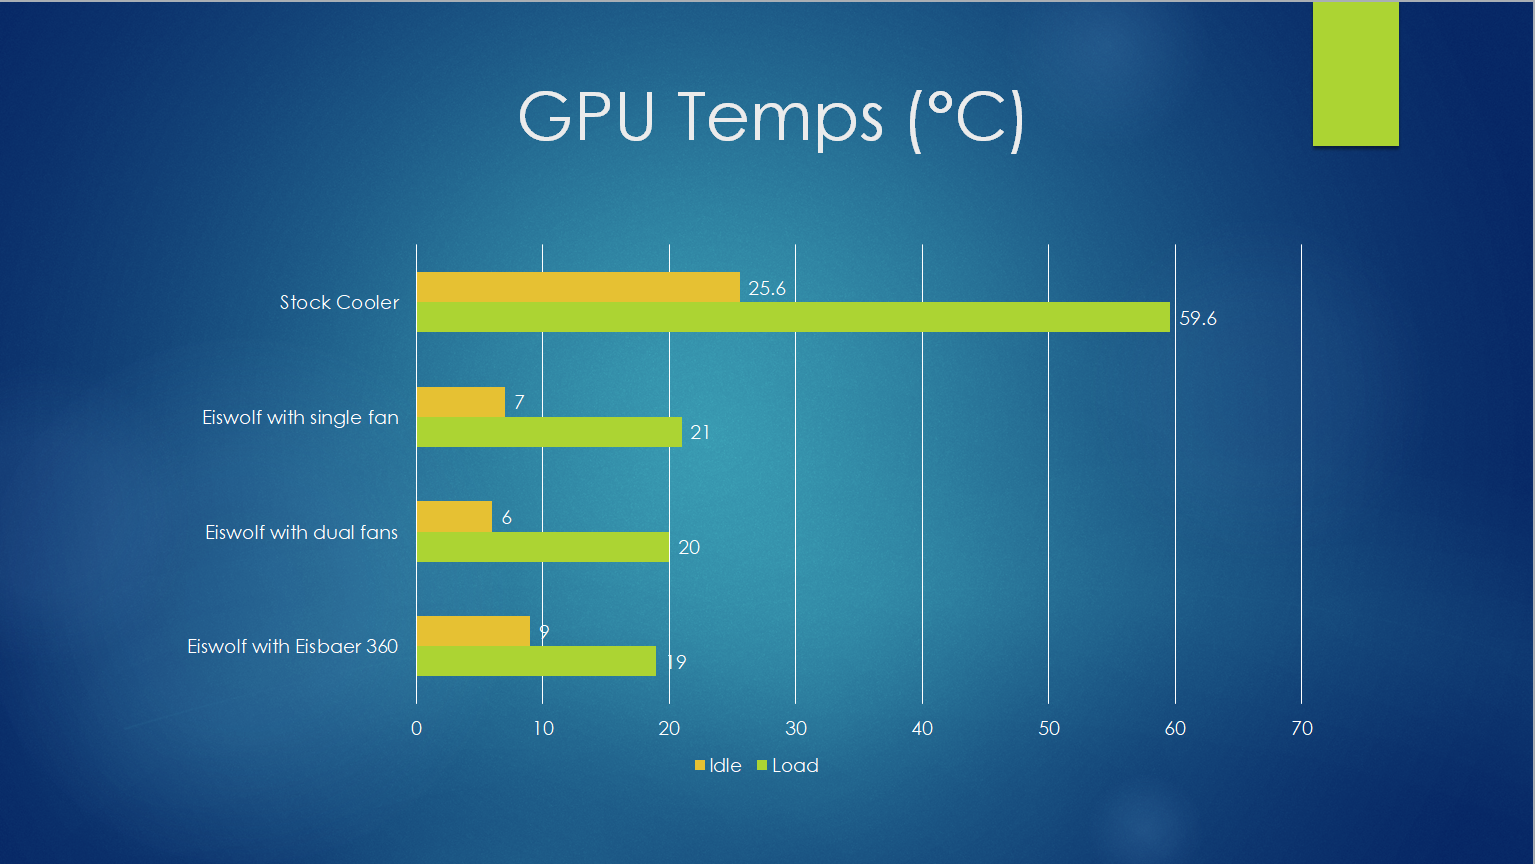
Next graph shows the thermal performance of both coolers on stock clocks and this is where the Alphacool Eiswolf has completely outshined the stock cooler. Surprisingly, the under load temp when the Eiswolf is connected to the Eisbaer 360 is 1°C less than that of a dedicated 120mm radiator. This is obvious as even though there are two blocks connected in the same loop the 360mm radiator with dual pump system was able to keep the overall temp’s bit lower.
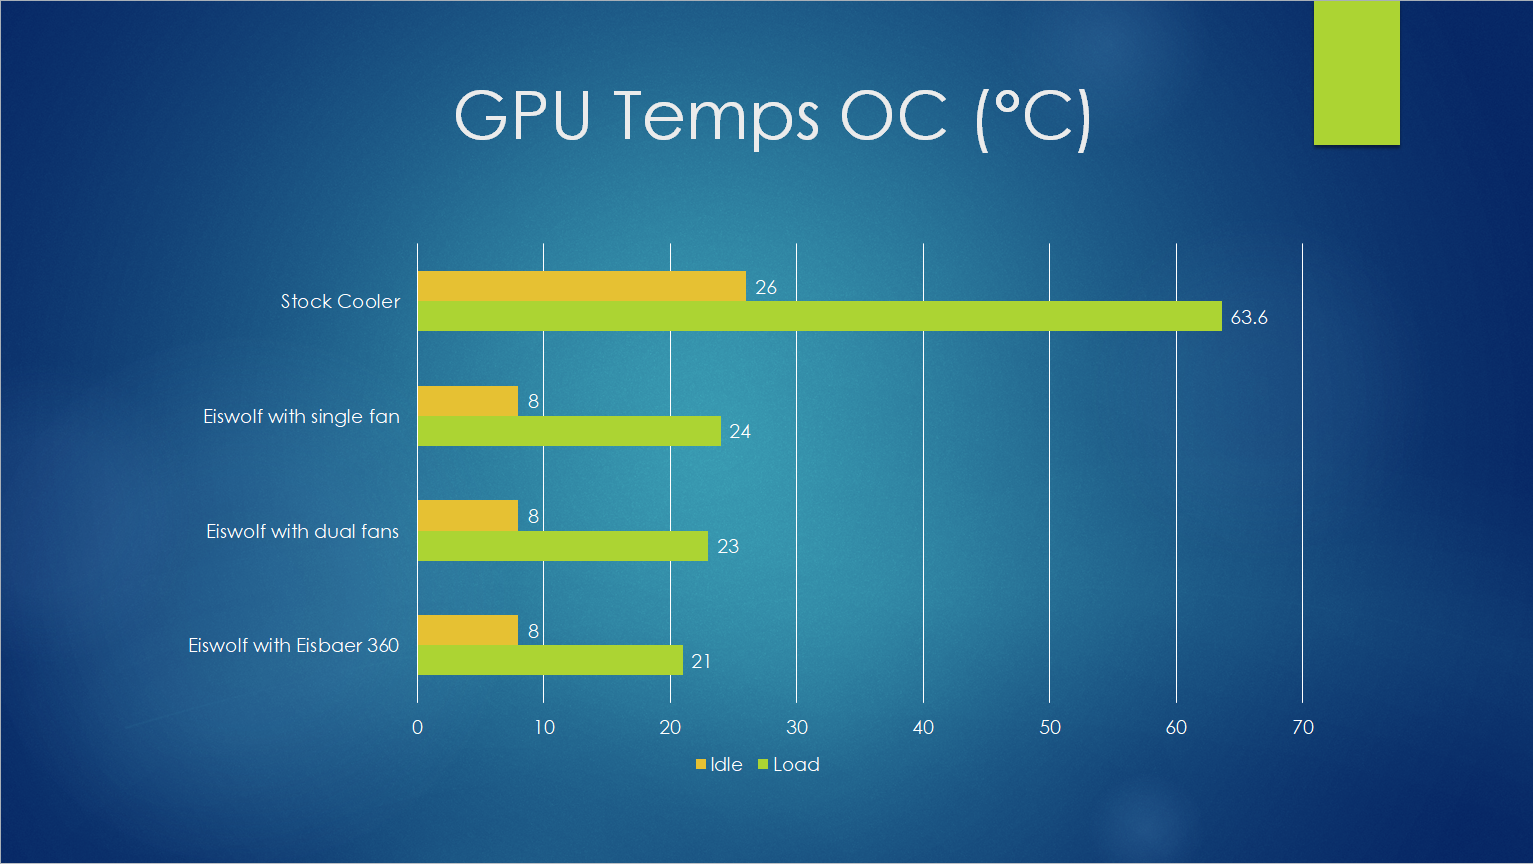
Next graph shows the thermal performance of both coolers with overclocking. Again the numbers are speaking for themselves and honestly speaking these are too good to be true. I have repeated the tests multiple times just to make sure nothing is wrong and even checked the ambient temps with more than one meter just in case. The Alphacool Eiswolf has delivered an outstanding performance. I overclocked the CPU to 4.3GGHz using 1.350V Vcore. Both overclocked components were put under the stress test at the same time using the Furmark and the AIDA64 Extreme’s stability test. Average of all cores’ temperatures was 52.83°C whereas maximum temperature of the graphics card was 23°C (Delta Temps). Good performance can be seen for the Eisbaer 360 and the Eiswolf.
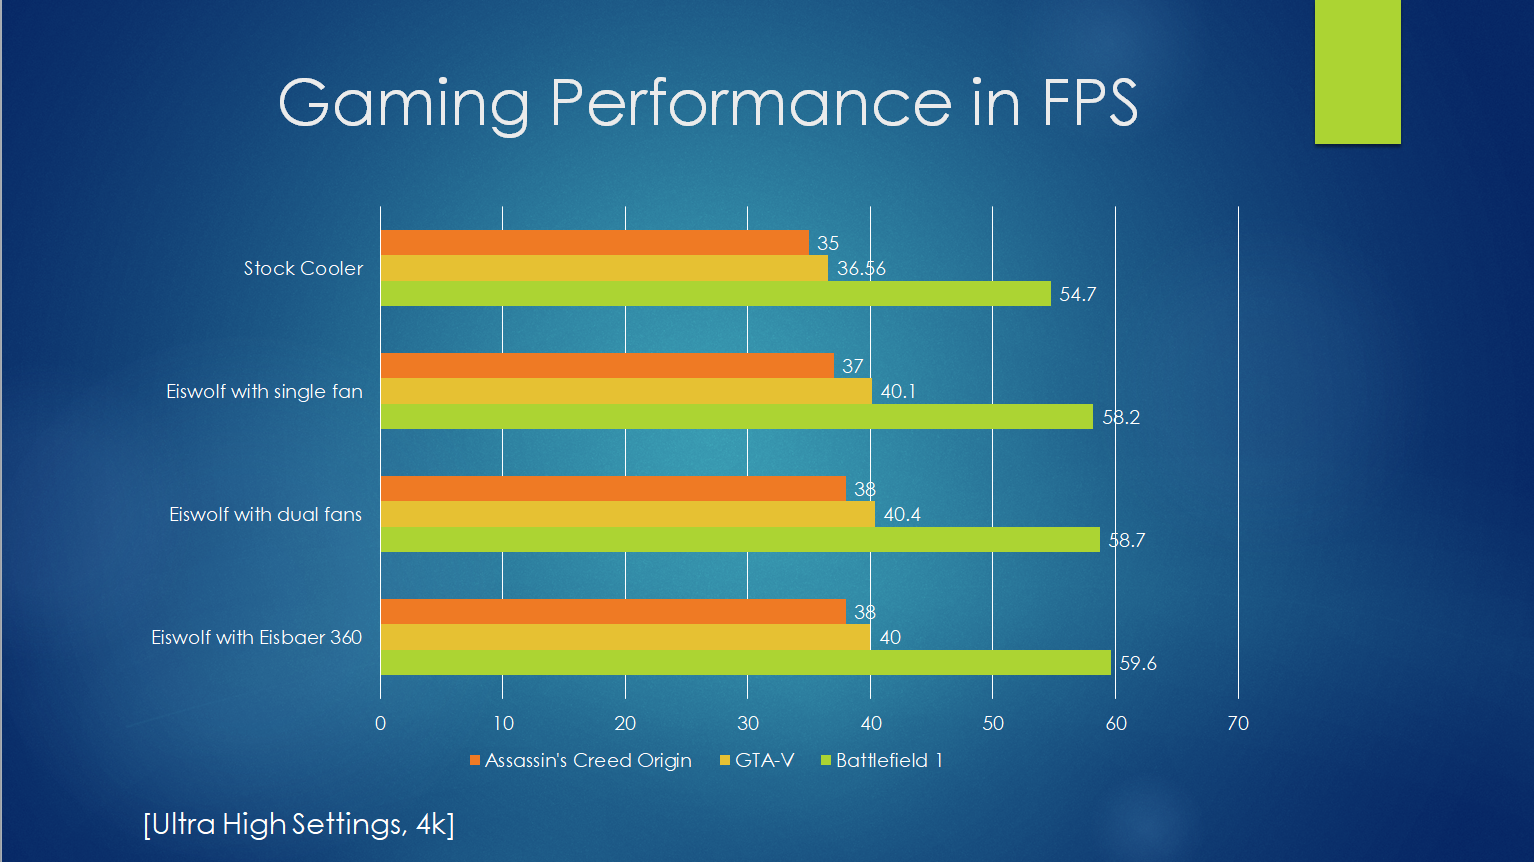
Next up is the gaming performance on stock clocks using both coolers at a time. There is a 3 to 5 FPS gain by just switching to a better cooler.
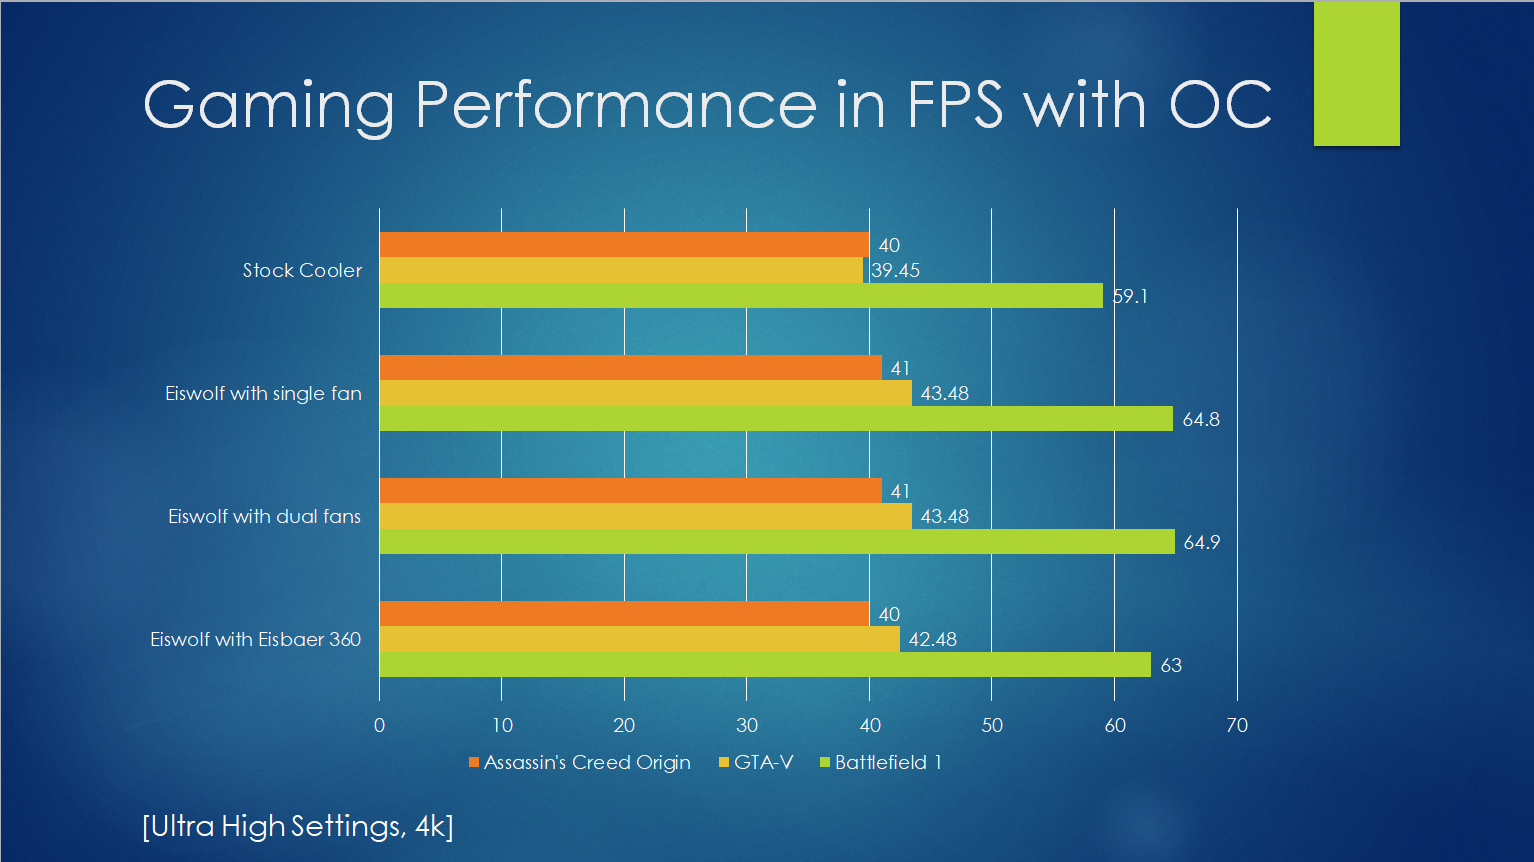
Next up is the gaming performance with the overclocking. The 7 FPS gain speaks for itself with a better cooler.
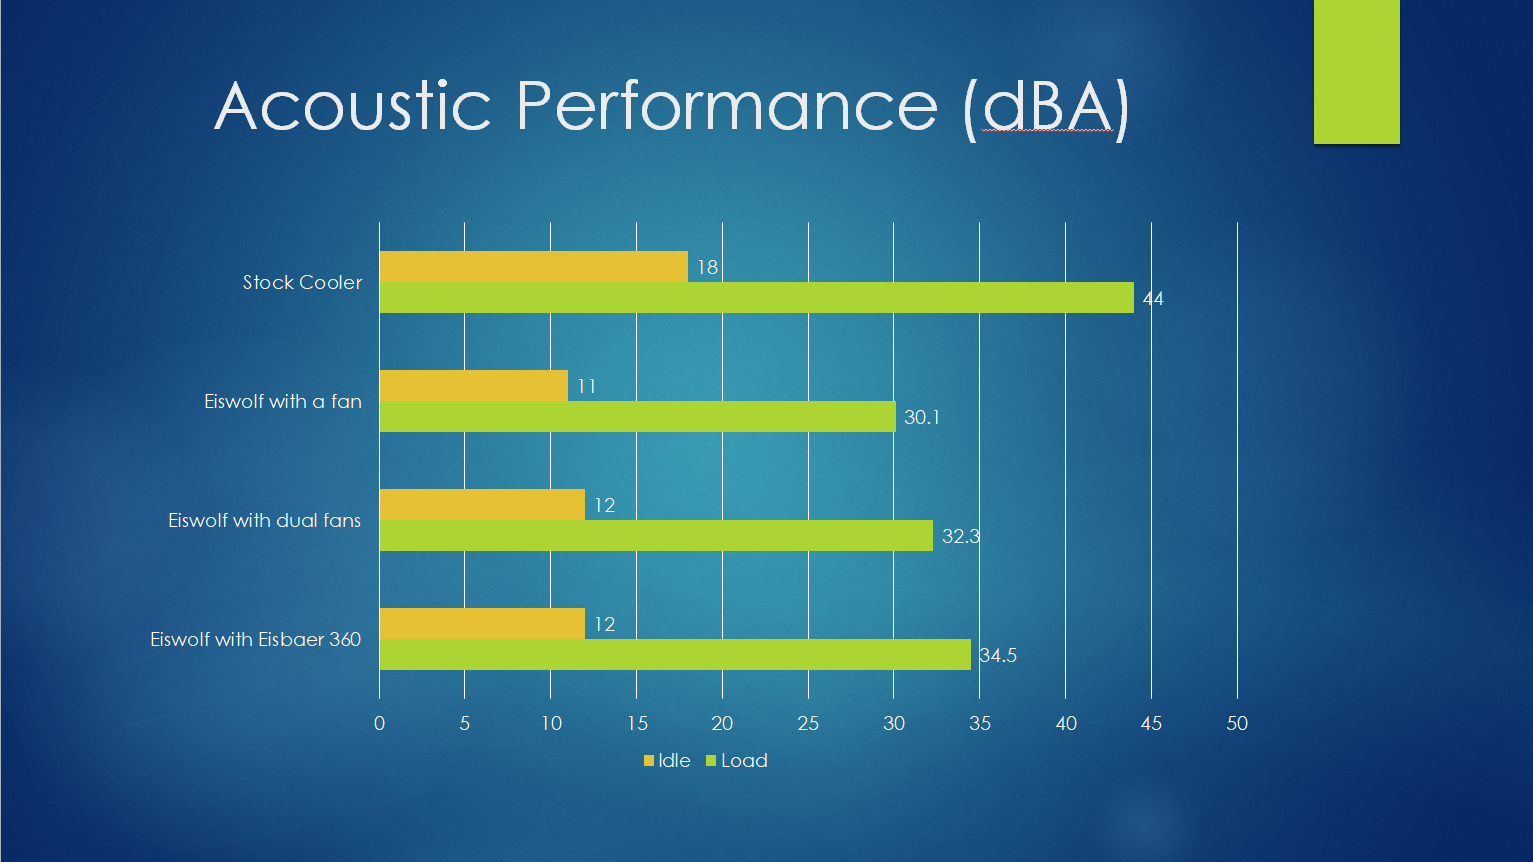
Next graph shows the acoustic performance of the cooler which is right on the money.
Conclusion
Alphacool is a cooling company at heart with expertise and facilities to provide the ultimate cooling solutions. They are working as OEM partner with the likes of the Fractal Design, BeQuiet and Cooler Master to name a few. The Eiswolf is their cooling solution in the market of the All In One or CLC coolers for the graphics card(s). But don’t take this as a regular CLC/AIO cooler. The Eiswolf is designed around the custom loop setup with the custom loop components with all the components being the top notch ones from the Alphacool.
The Eiswolf GPX-N 1080Pro-M01 is a graphics card cooler compatible with the reference design or Founder’s Edition GTX 1080 from the Nvidia and its AIB partners. The block is entirely made of the aluminum with high precision milling. Only the nickel plated copper base is making a contact with the GPU die. Nothing else on the PCB comes under water. This differentiates it from the regular full water blocks. It has a pump and a base as we can see on the hybrid solutions but there are two major differences with respect to the hybrid design. No 1 is that the complete block acts as a media for heat transfer and in doing so there is no active air cooling on the VRM, MOSFETs and other power delivery sub-components. On the hybrid solutions there is 80-90mm fan on the shroud blowing the fresh air on the VRM MOSFETs etc. Shroud on the hybrid itself is made of the plastic and does not contribute towards heat transfer as such. No 2 is that the hybrid designs are neither expandable nor refillable.
The Alphacool has used the standard compression fittings in the unit. The thread size is g1/4 which is a common standard in the water cooling industry. This unit has the flexible PVC hoses. These hoses are easier to arrange and move into the right position, much thanks to the 90° angled fittings. Both the hoses have anti-kink springs to avoid unnecessary bends resulting in the blockage of the water. The 11/8 mm size is also a standard in the water cooling field, alongside the 13/10 and 16/10. Both hoses features the quick-release fittings. This feature has enabled the unit to further expand so that more blocks or the radiators can be added without much hassle. Alphacool has given a due consideration to the design element of the pump unit and its housing on the block. It has a complex construction. Underneath the cap is the insulation, under which is a suction pump with its corresponding inlet and outlet ports. The copper cooler has a fine fin structure, implemented under the new nozzle plate for the reverse water flow. As compared to the previous generation of the Eiswolf coolers, this pump has larger surface less noise.
The radiator of the cooler is a 45mm thick one from the NexXxos series of the Alphacool radiators that are quite popular among the water cooling users. The length of the radiator is a 157mm and the width is 124mm. With a single fan the thickness or depth increases to 70mm and with two fans it is 95mm. So, do check with your chassis for the clearance and the compatibility. What makes the radiator substantially different from the other CLCs is that its fins, channels and the front chamber are made of pure copper unlike the aluminum being used in the majority of the CLC solutions in the market. The fans operate on the 12V DC. They are 4-Pin PWM fans with the rated speed of the 55-1700 RPM with ±10%. Airflow rating is 63.85 cfm with the static pressure rating of the 1.66mmH₂O. Sound rating is 29 dBA per fan. The product comes in a 3 years warranty.
The Eiswolf GPX-Pro comes in multiple configurations. It comes with a 120mm radiator, 240mm radiator and a solo version which is without any radiator and is supposedly used with the Alphacool Eisbaer. You can check the availability of the Eiswolf block for your graphics card by clicking on this link.
Value and Performance
The product is listed at €169.99 at the time of the review. A Founder’s Edition GTX 1080 is retailing at $549. Adding $170 to the equation would make the price to $719 which is price bracket for the Nvidia GTX 1080Ti FE. For water cooling enthusiasts, this is a premium price that is worth it. The unit was tested with the Nvidia GeForce GTX 1080 FE card. From cooling only perspective the drop in delta temperature from 59.6°C to 21°C is a day and night improvement. Mind you this is with the single Eiswind 12 fan on the 120mm radiator. The lowest delta temperature was 19°C when the unit was hooked up with the Eisbaer 360. This is a 64.76% improvement should we get to look at it from this angle. This is too good to be true. With such a thermal improvement the overclocking was only limited to the silicon quality which in my case was not that good. My chip made it to the 2101MHz and the maximum delta temperature was 24°C. This is when the card was put under the furmark stress test of 30 minutes run. Resultant gaming performance can be seen from the graphs.
With expandability in mind, built from custom loop components, refill capability, industrial yet pleasant looks, exceptional cooling performance the Alphacool Eiswolf GPX-N 1080Pro-M01 has won our Performance award.
I am thankful to the Alphacool for giving me the opportunity to review their Eiswolf GPX-N 1080Pro-M01.


