be quiet! Silent Loop 240MM AIO CPU Cooler Review
Introduction
As some of you will know, be quiet! announced their Silent Loop Range of AIO CPU Coolers coolers a few months back at Computex. Today, we have got our hands on one and have put it to the test. That’s right! be quiet! Have sent us a 240mm Variant of their new AIO cooler, the Silent Loop. AIO CPU Coolers have been a pretty big success over the past few years as they allow anyone to get a bit of that watercooling performance and they also just look quite nice. Having more and better options to cool your PC not only just gives users more options, in this case, it will also let them gain a bit more performance through overclocking should they choose to do so. As consumers are looking to get the most performance they can out of their hardware, a lot of people have started to learn to overclock their CPUs as this is one of the easiest ways to gain some extra performance.
- Manufacturer: be quiet!
- Product Page: Silent Loop (TBA)
- MSRP: £109.99/€129.90
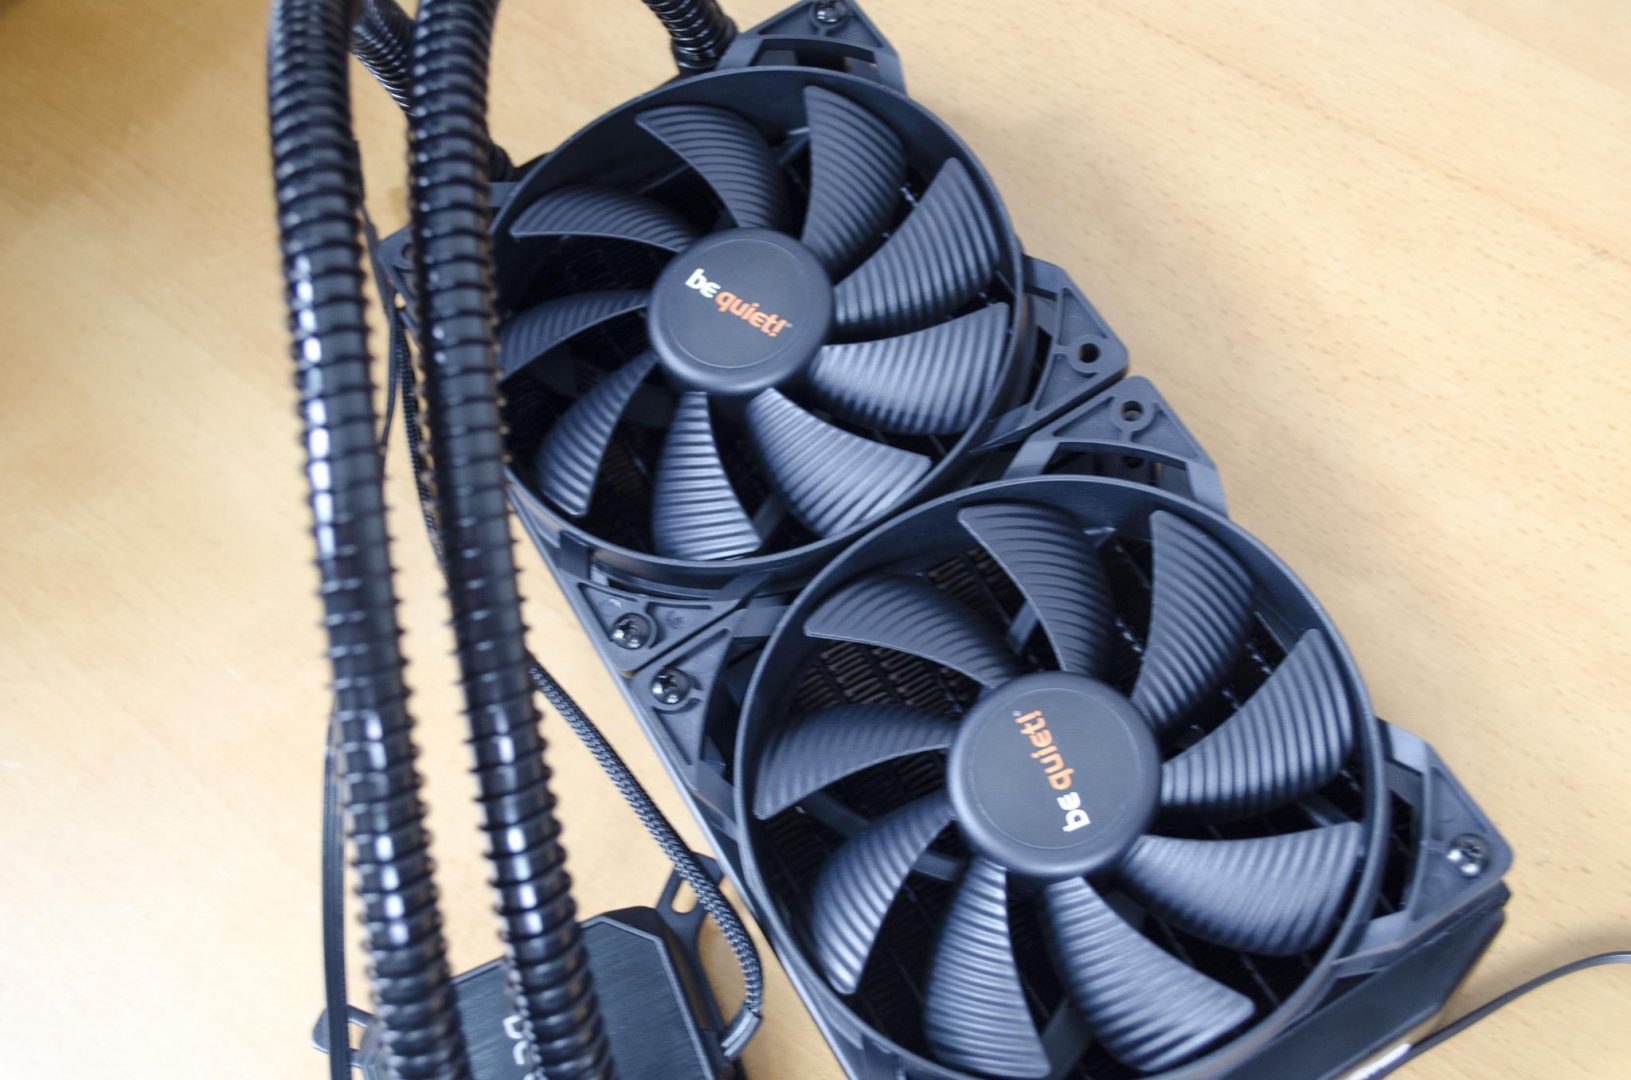
The be quiet! Silent Loop comes in 120/240 and 280mm variants, offering something for just about everyone. It would have been awesome to see a 360mm version, but maybe in the future, they will release one. Featuring an all black aesthetic except for the be quiet! logos on the fans and the top of the pump, be quiet! has kept with the darker colour scheme they are known for. Coming equipped with two of their Silent Wings 2 fans, the Silent Loop should remain rather quiet during operation and offer some good heat dissipation. The Silent Loop is also a world’s first as it is the only AIO cooler to use a reverse-flow and decoupled pump. For the more advanced users, there is also a refill port on the pump so you can top up, or replace the coolant inside. Those who are a bit unsettled about AIO coolers will be happy to know it does comes backed with a 3-Year warranty, which should be more than adequate in most cases.
Specifications
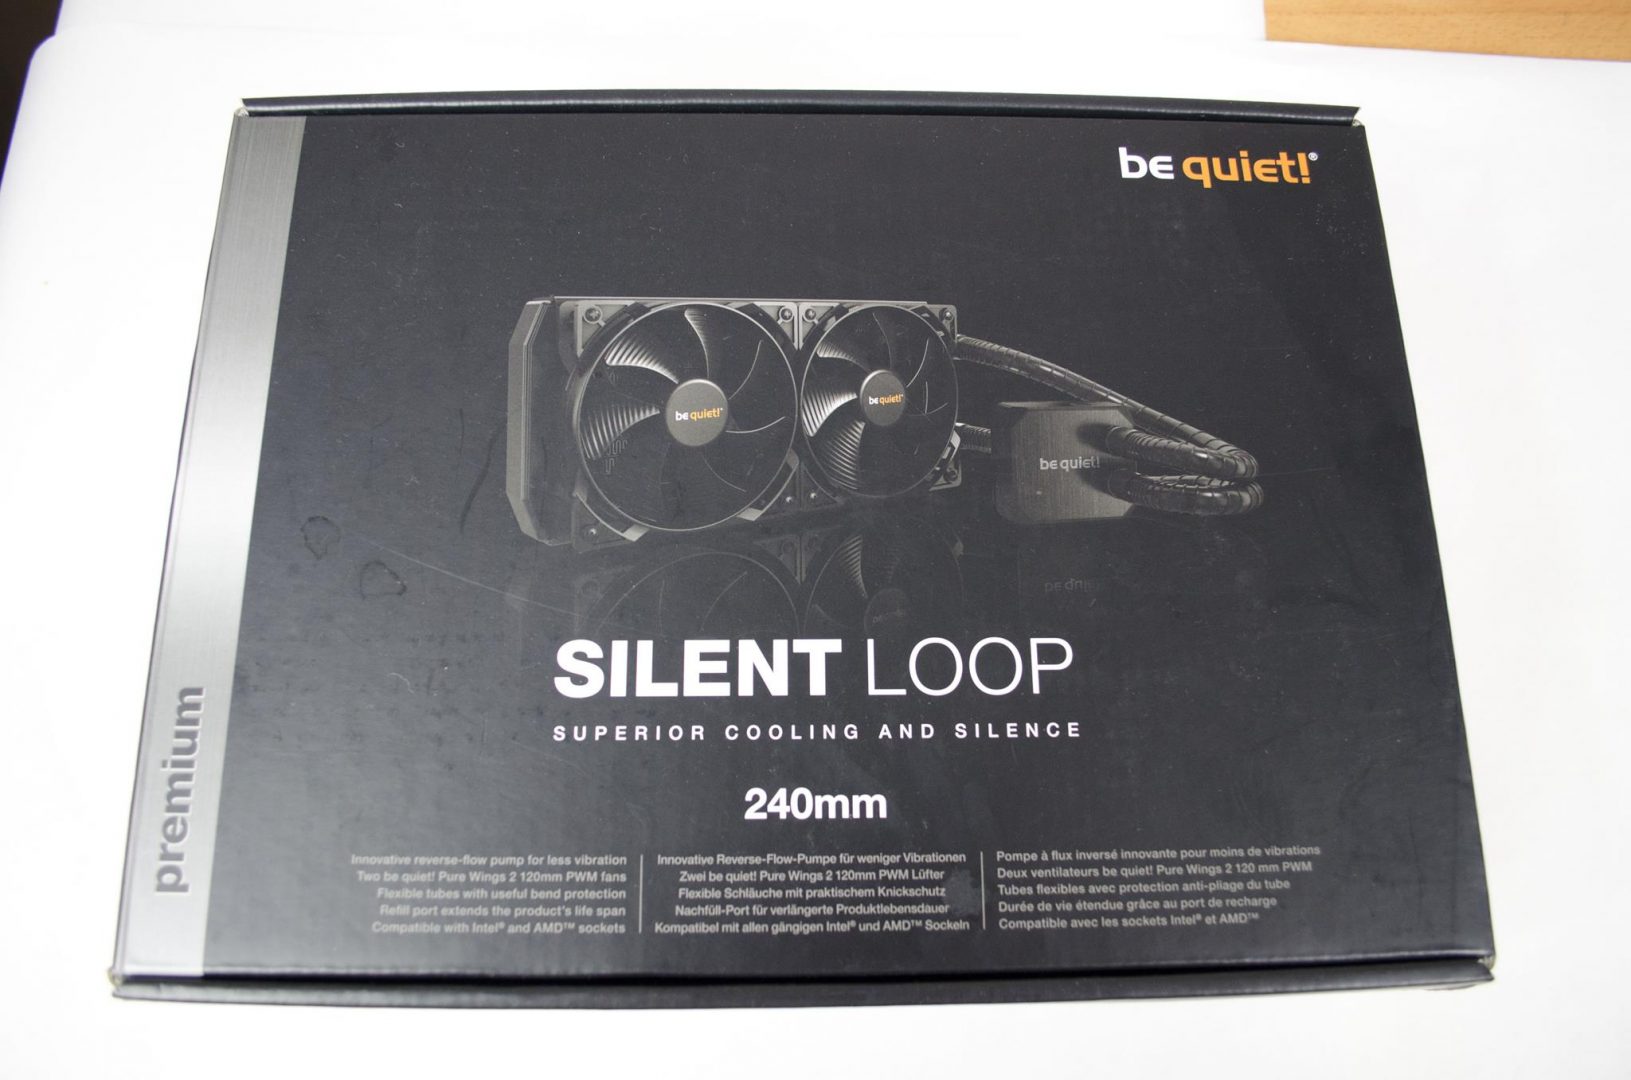
The packaging is exactly what we would expect to see from be quiet! On the front, there is a nice image of the cooler with a bit of information to help really grab the customers attention.
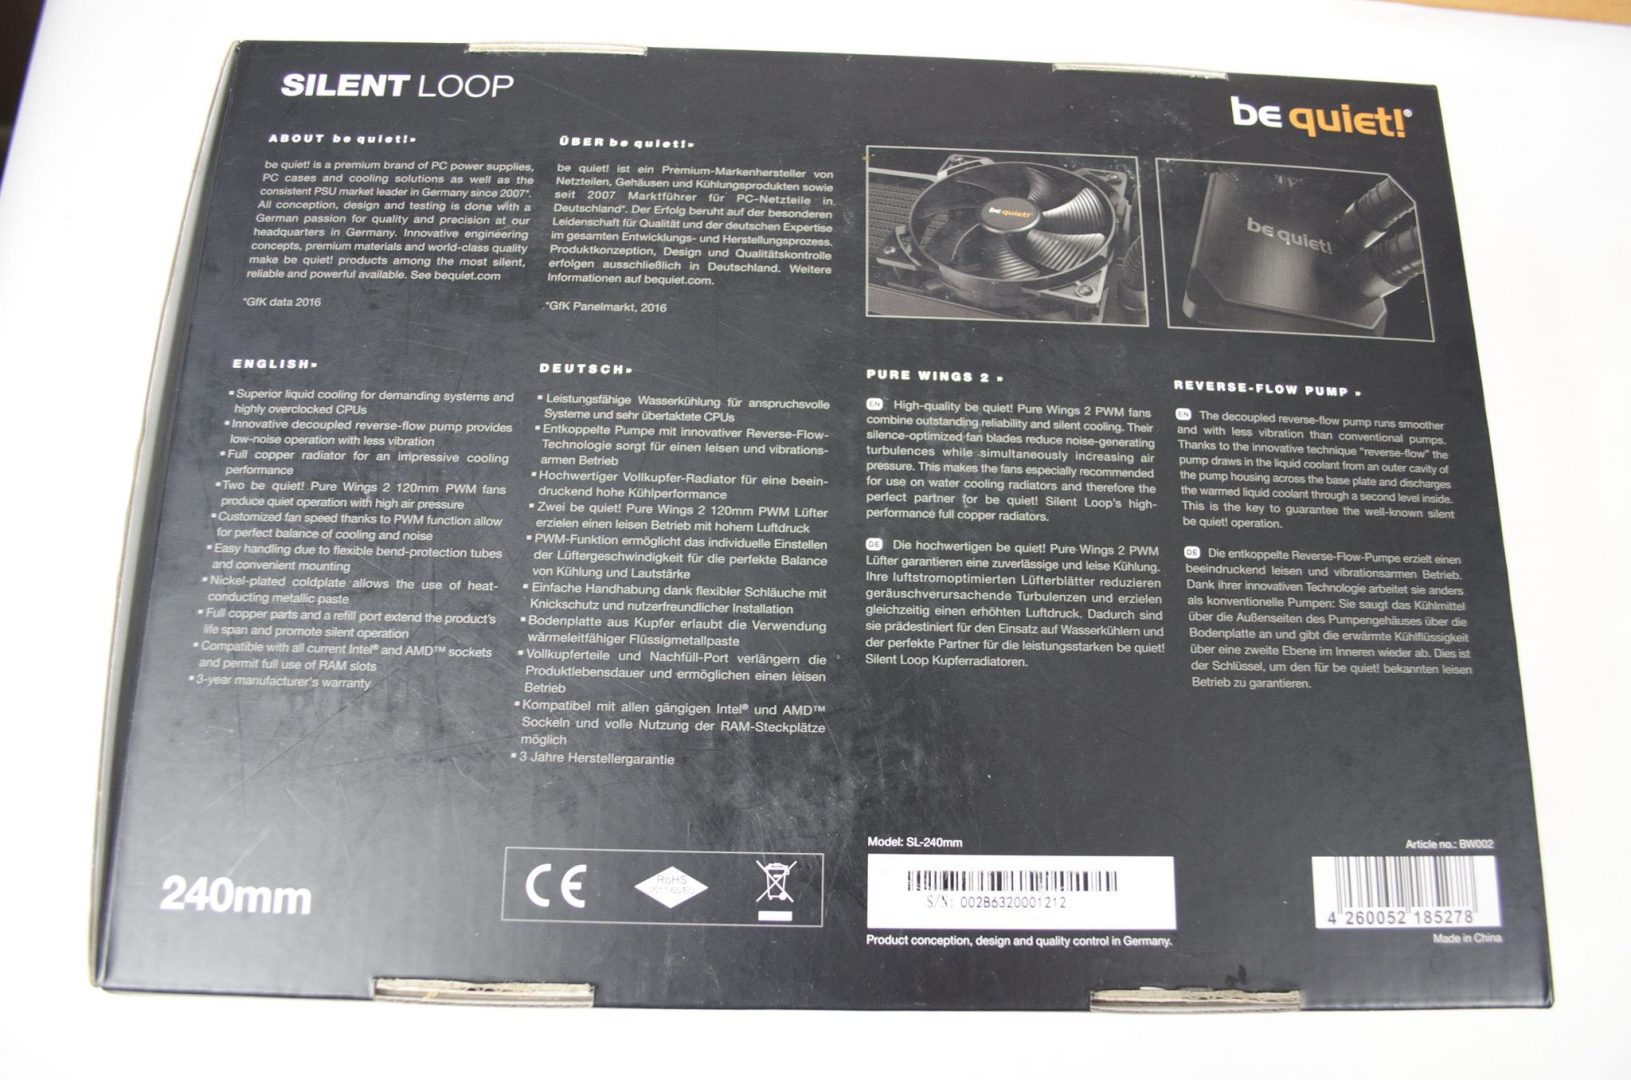
On the back of the box, be quiet! goes into a bit more detail on some of the finer points of the Silent Loop. Here we can see what this whole ‘reverse-pump’ thing is about! The reverse-pump flow actually draws liquid in from an outer cavity and discharges it through a second level. This is said to not only allow for great performance but to also allow for more silent operation.
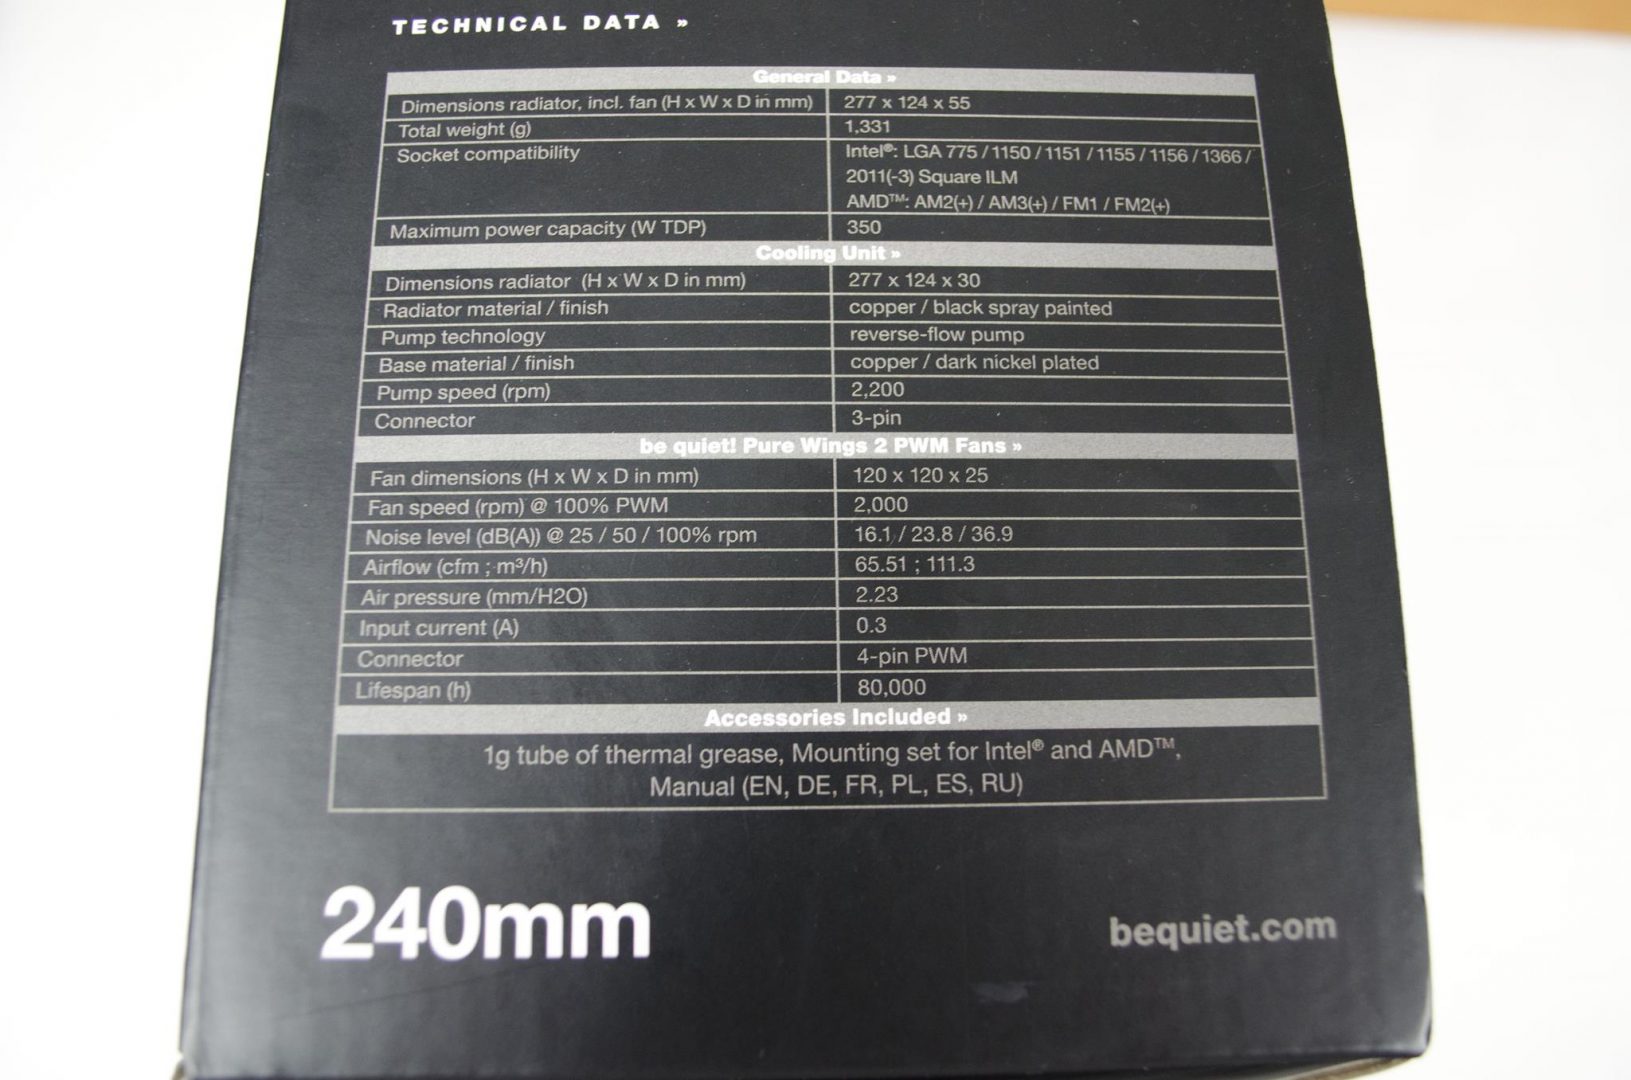
For those interested in the Technical Data, on one of the sides, you can find all the details regarding size, CPU socket compatibility, fan speeds and more.
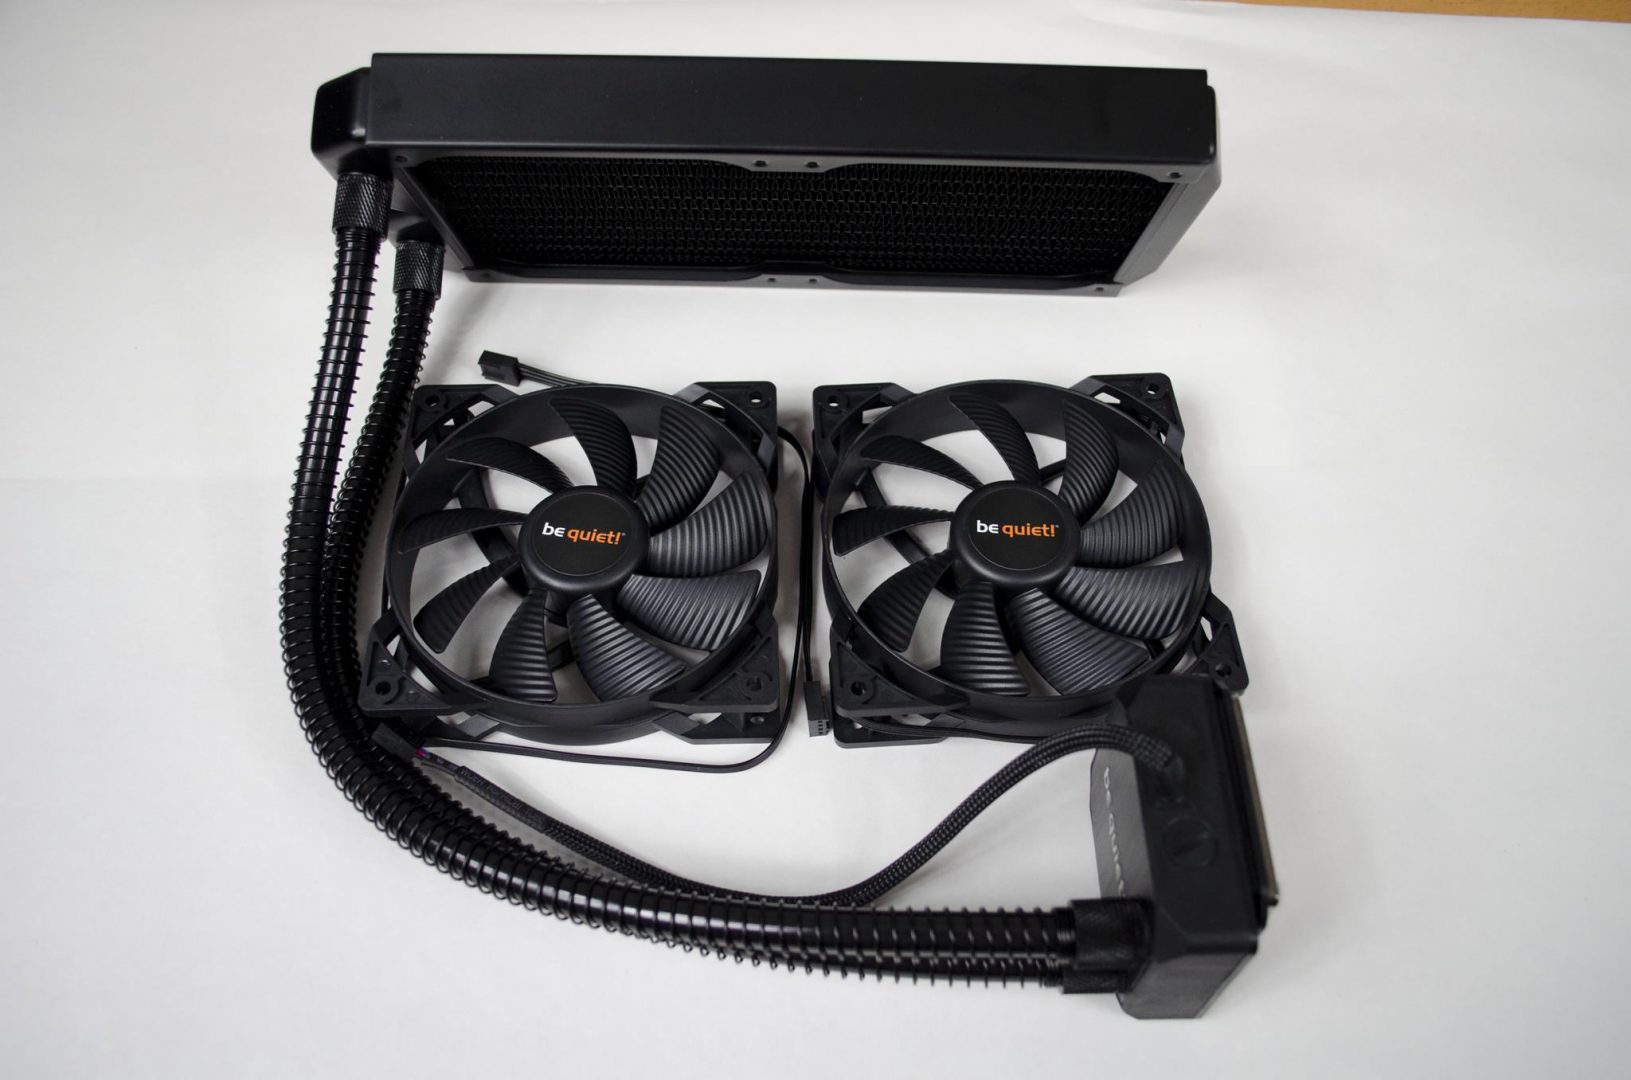
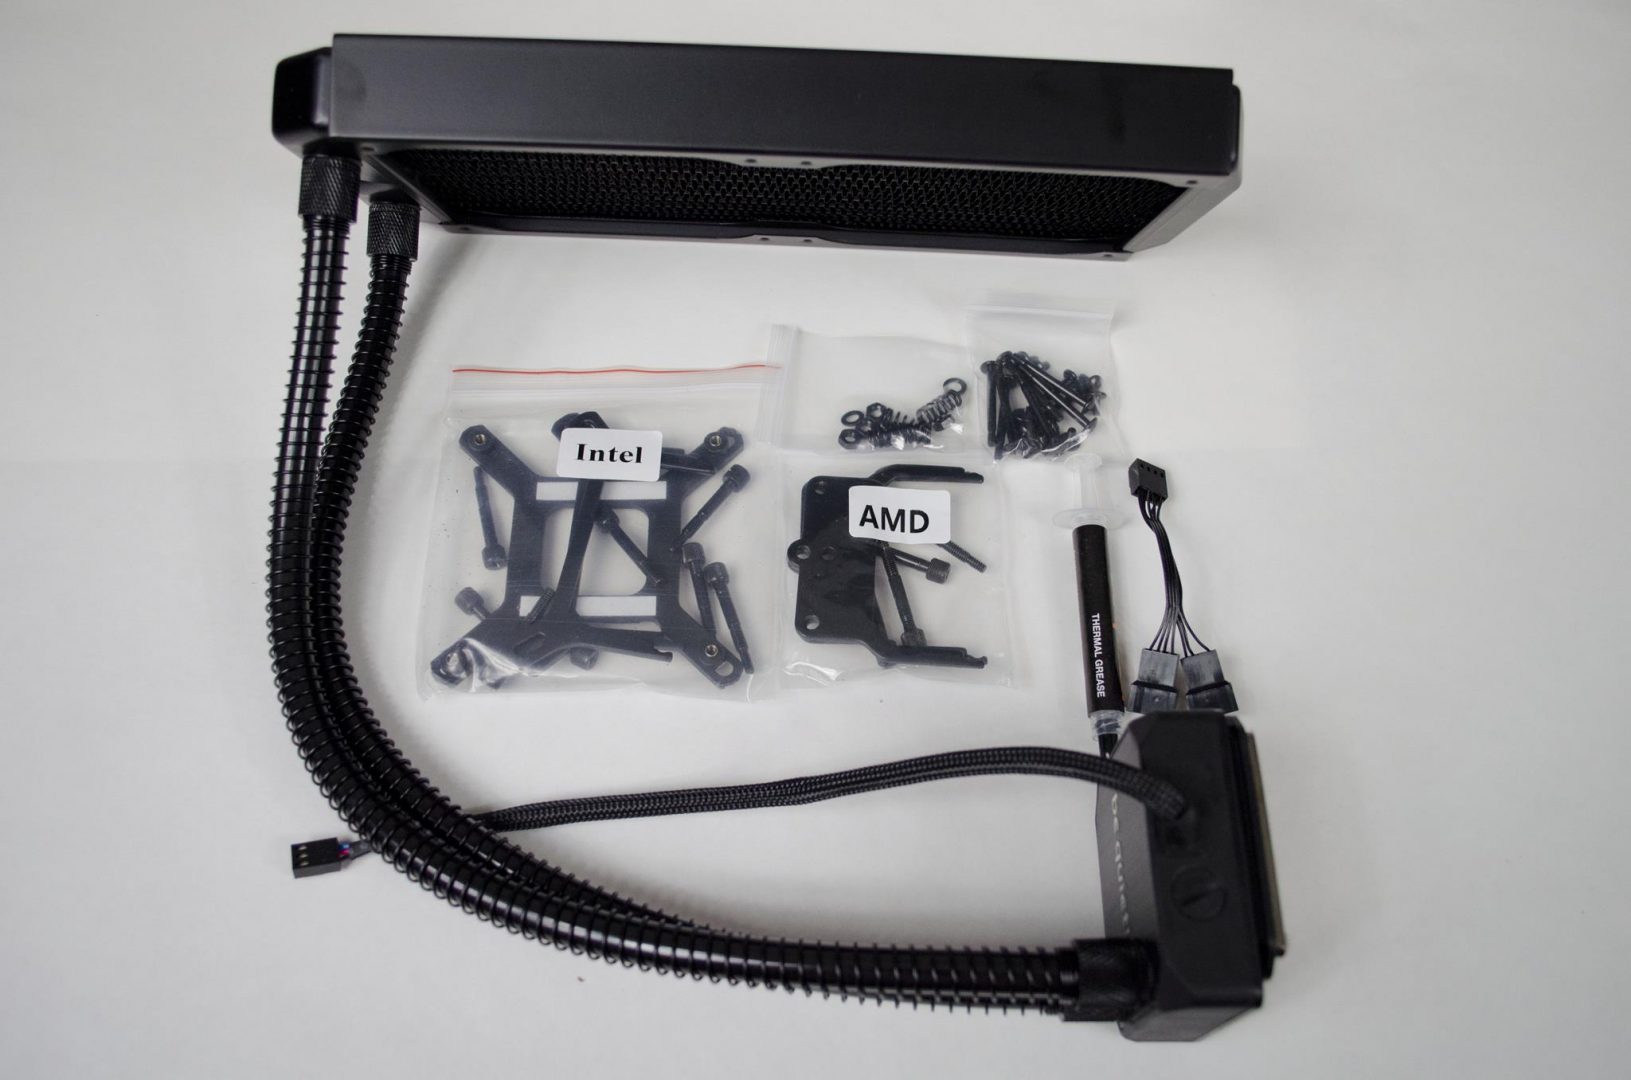
Taking it all out of the box and there is, of course, the radiator and pump combo,2x Silent Wings 2 fans and a number of mounting accessories to get this installed on various AMD and Intel CPU types.
Unboxing Videos
Long Version
Short Version
Closer Look
Taking our first proper look at things and there is no denying that the Silent Loop looks amazing. While there are only so many things you can do to make your AIO cooler different from others on the market, be quiet! has done a great job at allowing theirs to stand out from the rest.
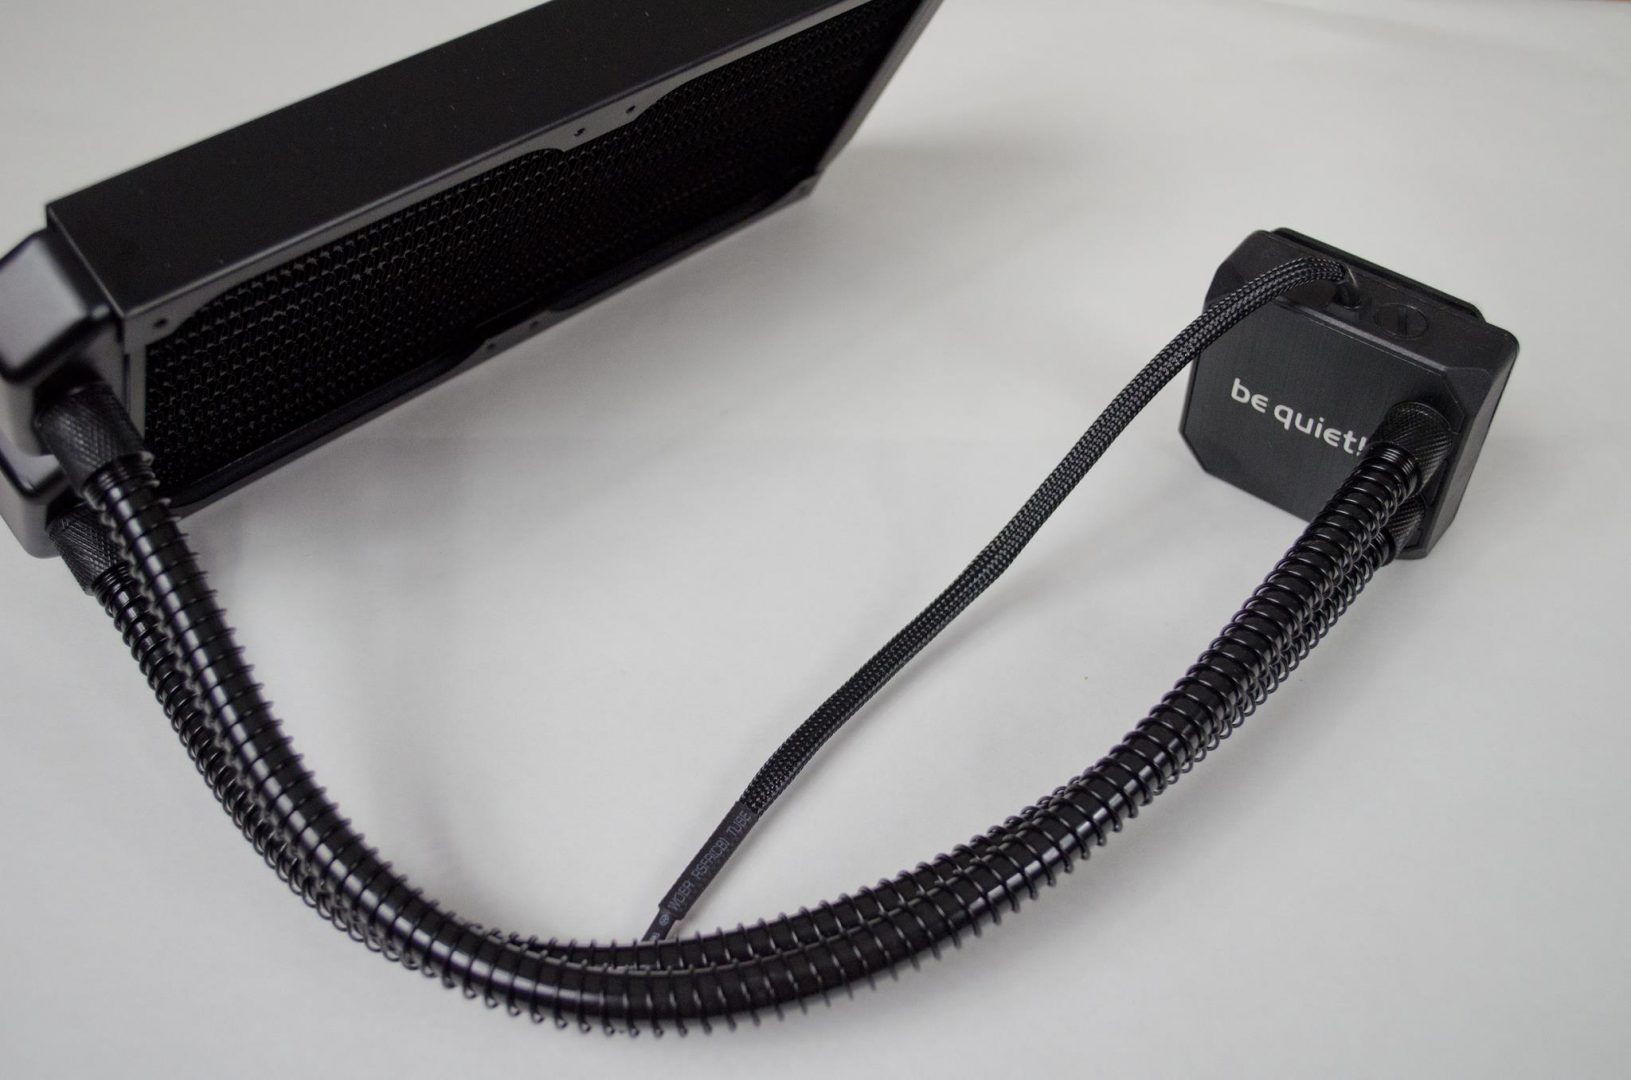
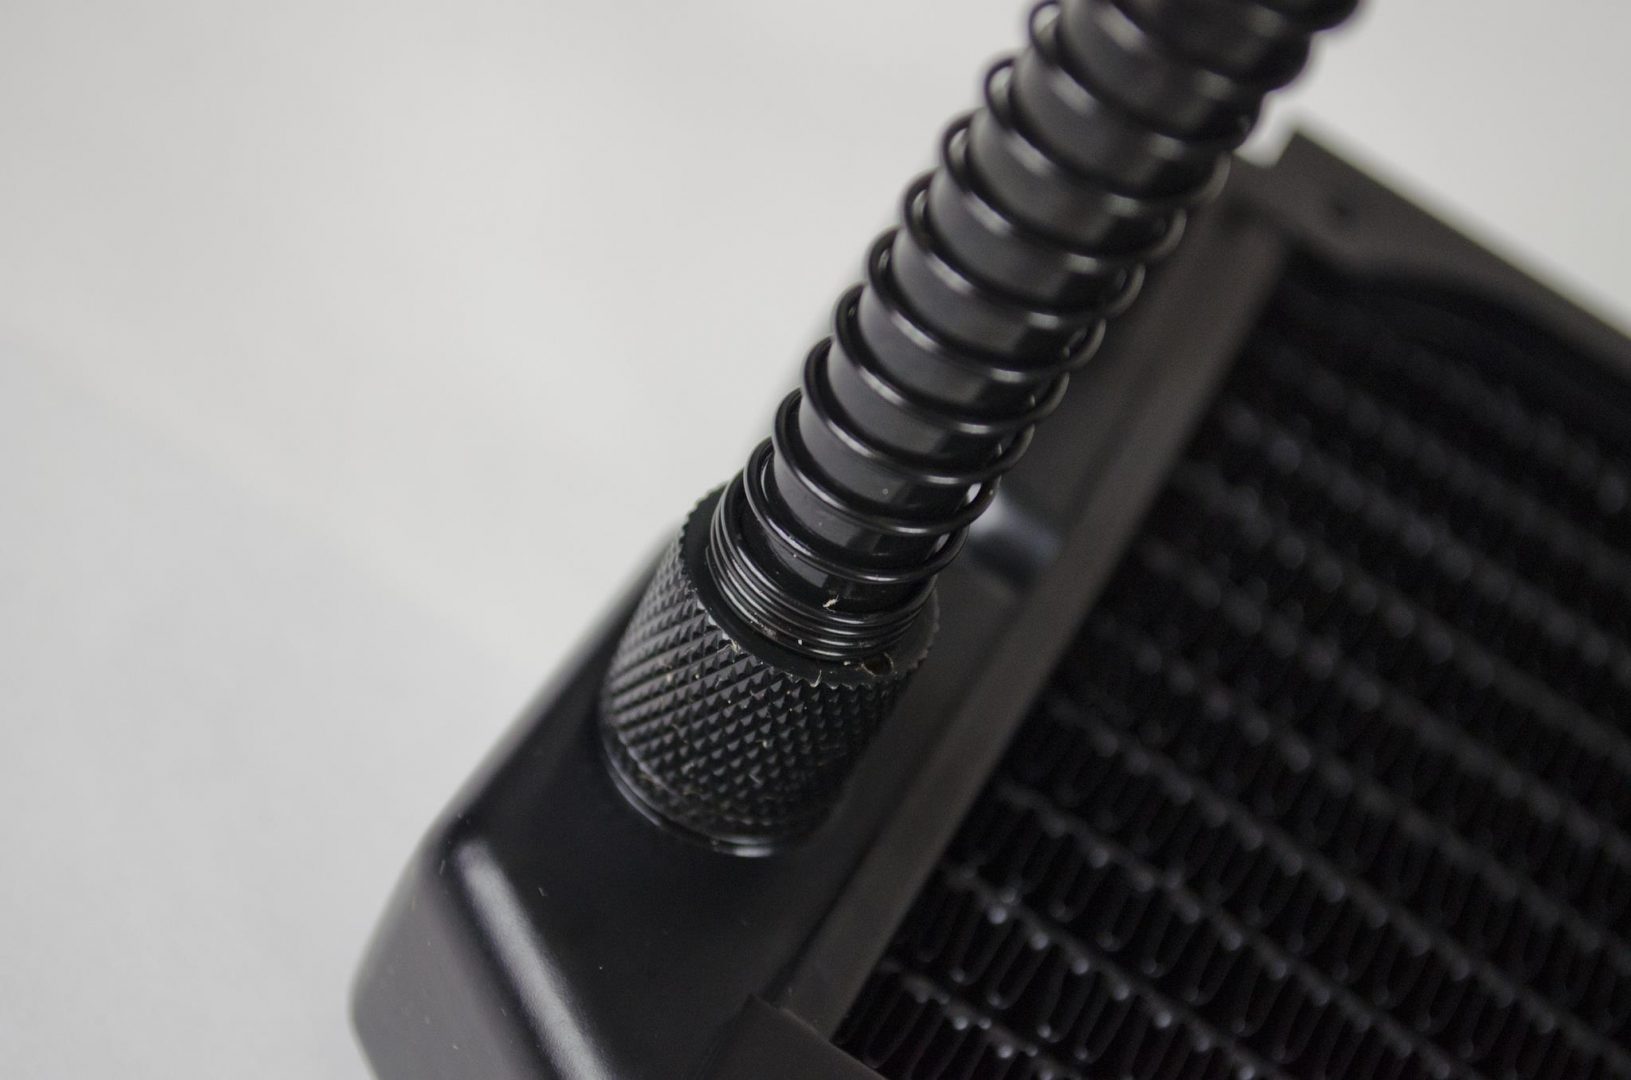
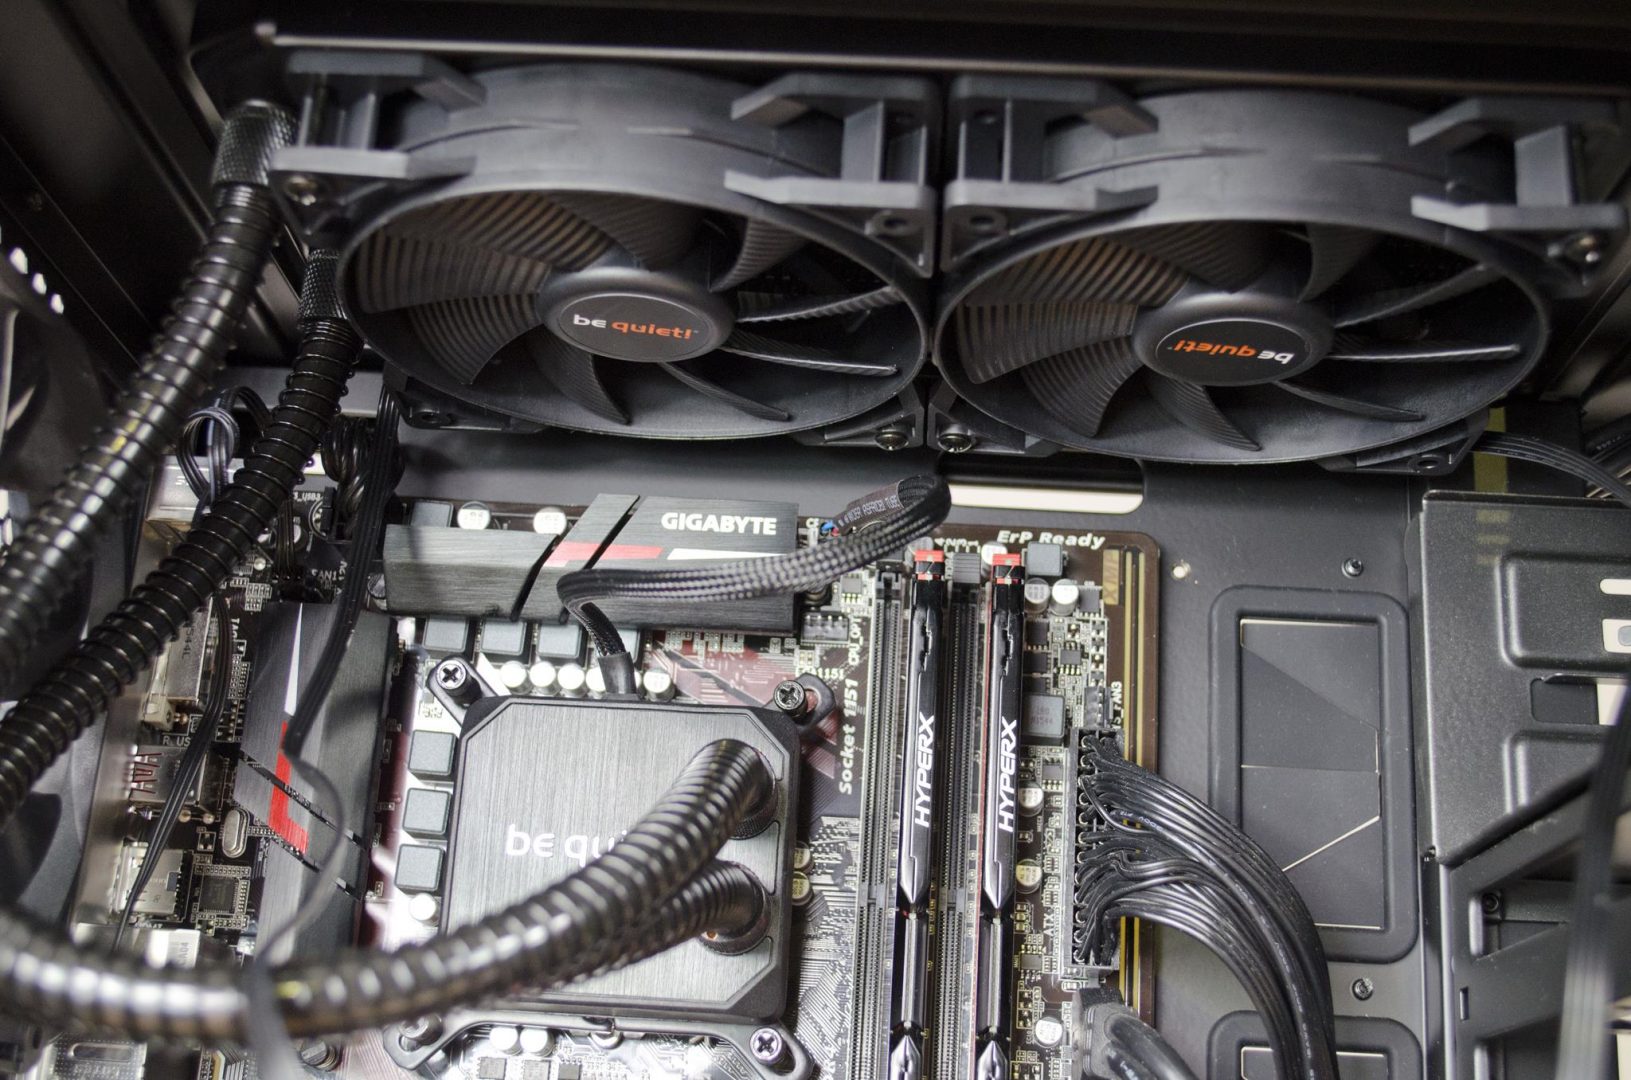
The hoses that connect the pump to the radiator or more of a proper water cooling house, rather than what we normally see on AIO coolers. The hoses also have springs wrapped around them which not only add an extra layer of protection and help them from kinking, they also help to improve the overall aesthetics of the cooler.
The Silent Loop really does take AIO coolers to the next level as it looks to be comprised of more custom water cooling components as opposed to your standard AIO coolers.
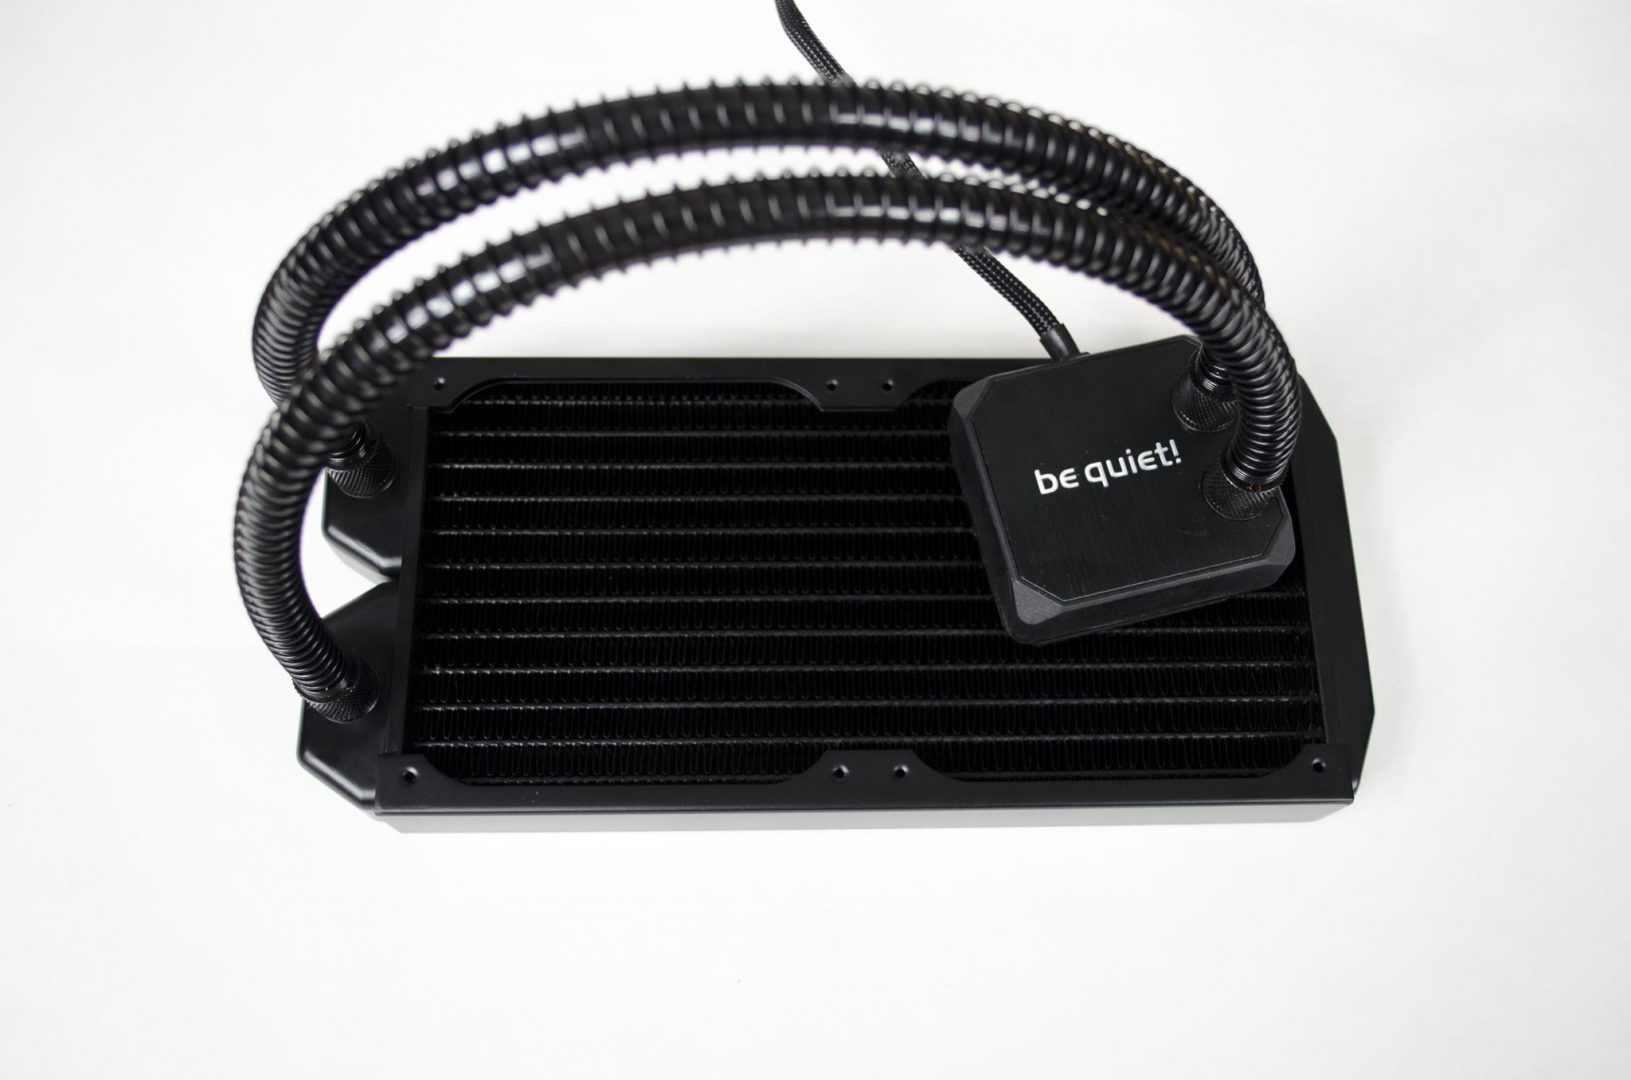
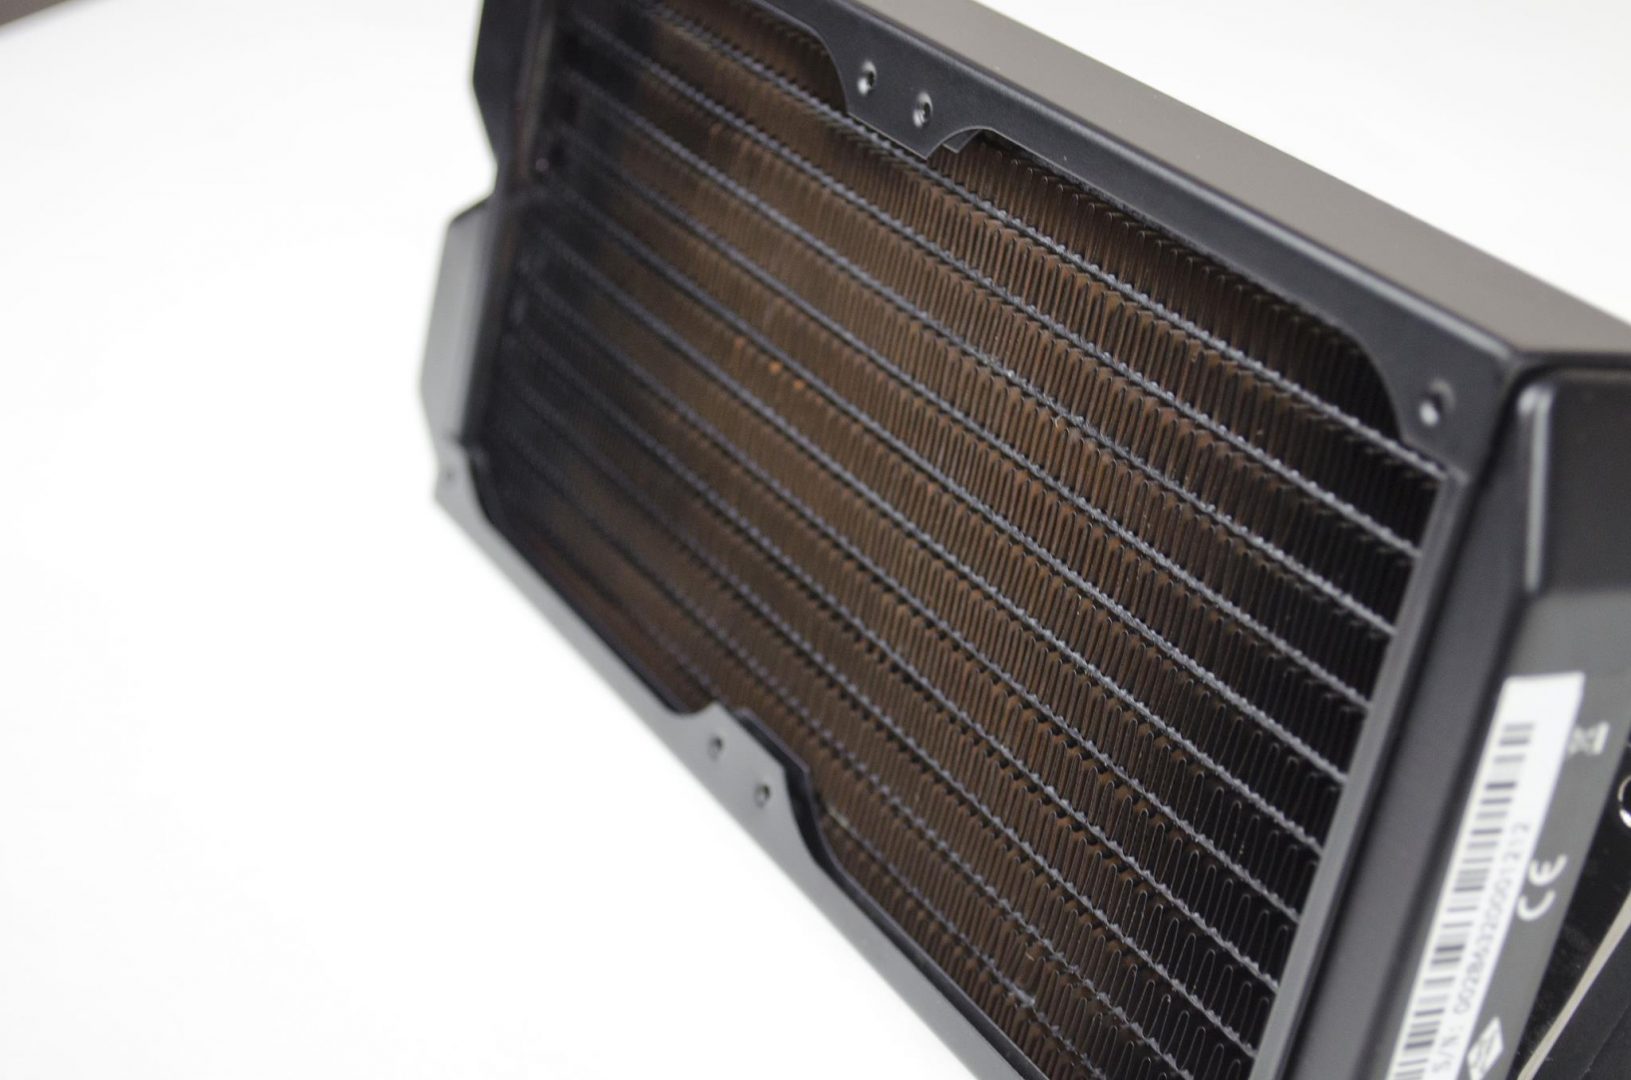
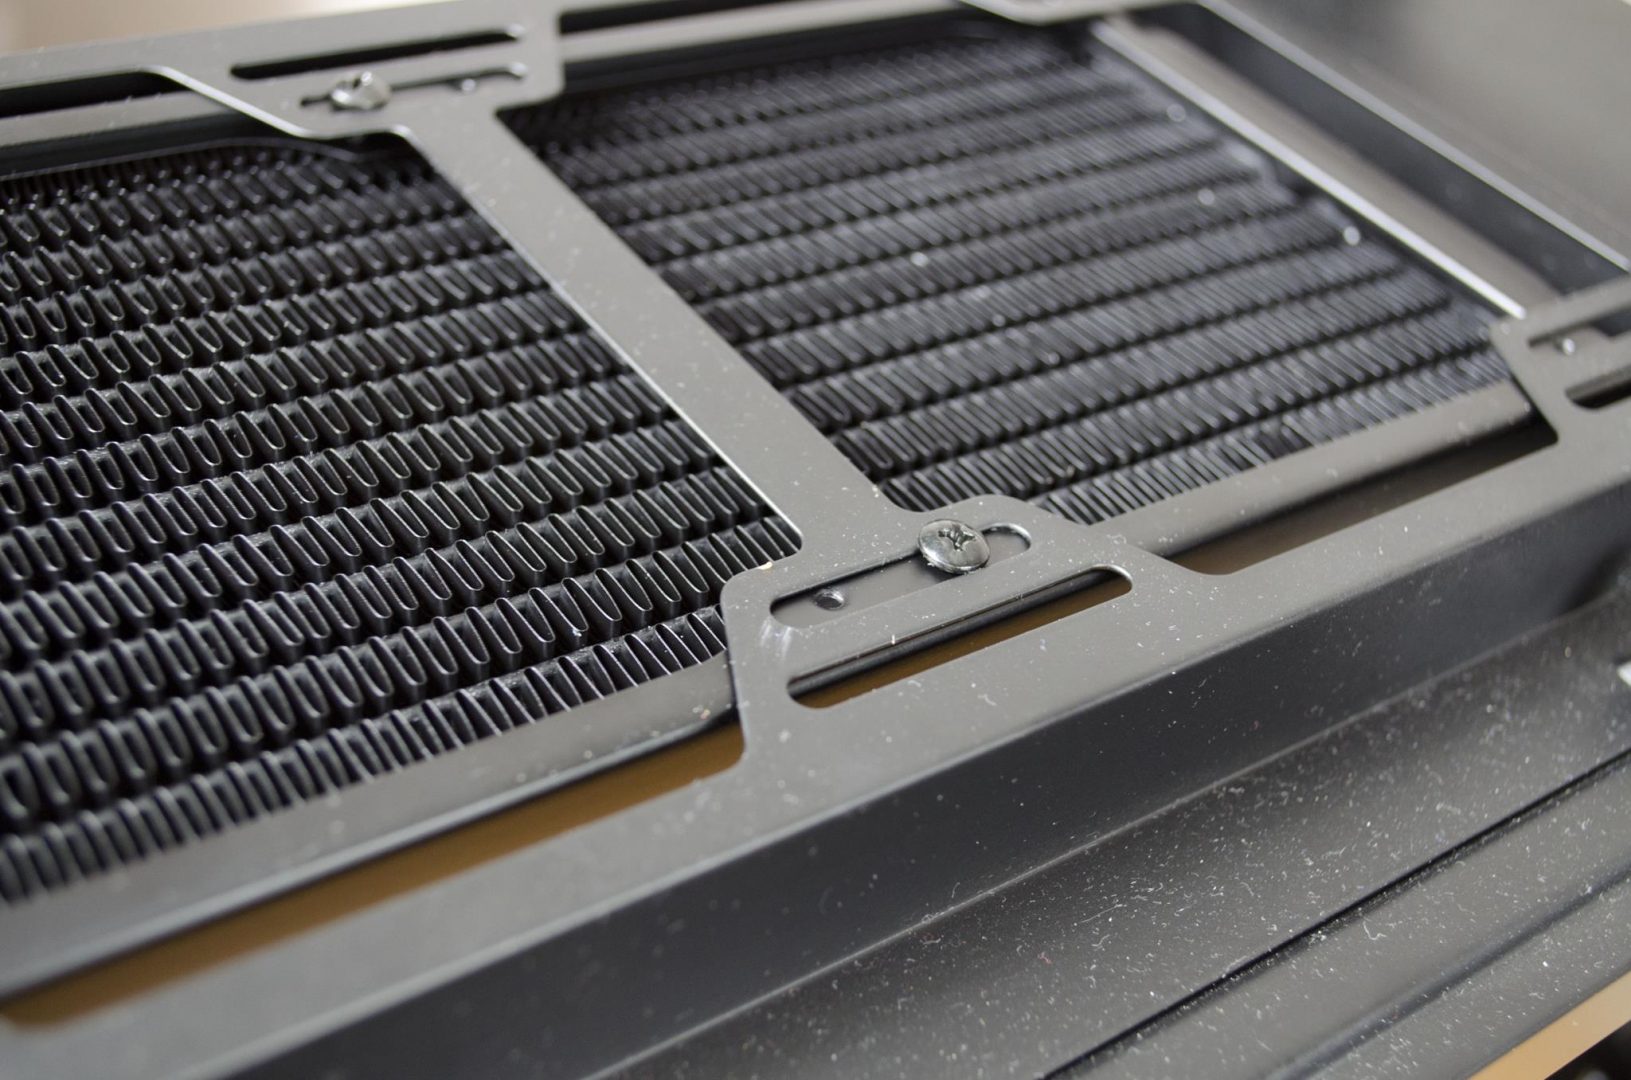
As mentioned, the Silent Loop does come in 120/240/280mm variants. However, the actual radiator will be a bit bigger than this so allow for some extra room in your case. For instance, the 240mm version, which we are reviewing here today is actually 277mm long when you account for the whole size of the radiator and not just the fans. The Radiator is also 30mm thick on its own, or 55mm with the fans attached so you will want to make sure you have enough room for this as well.
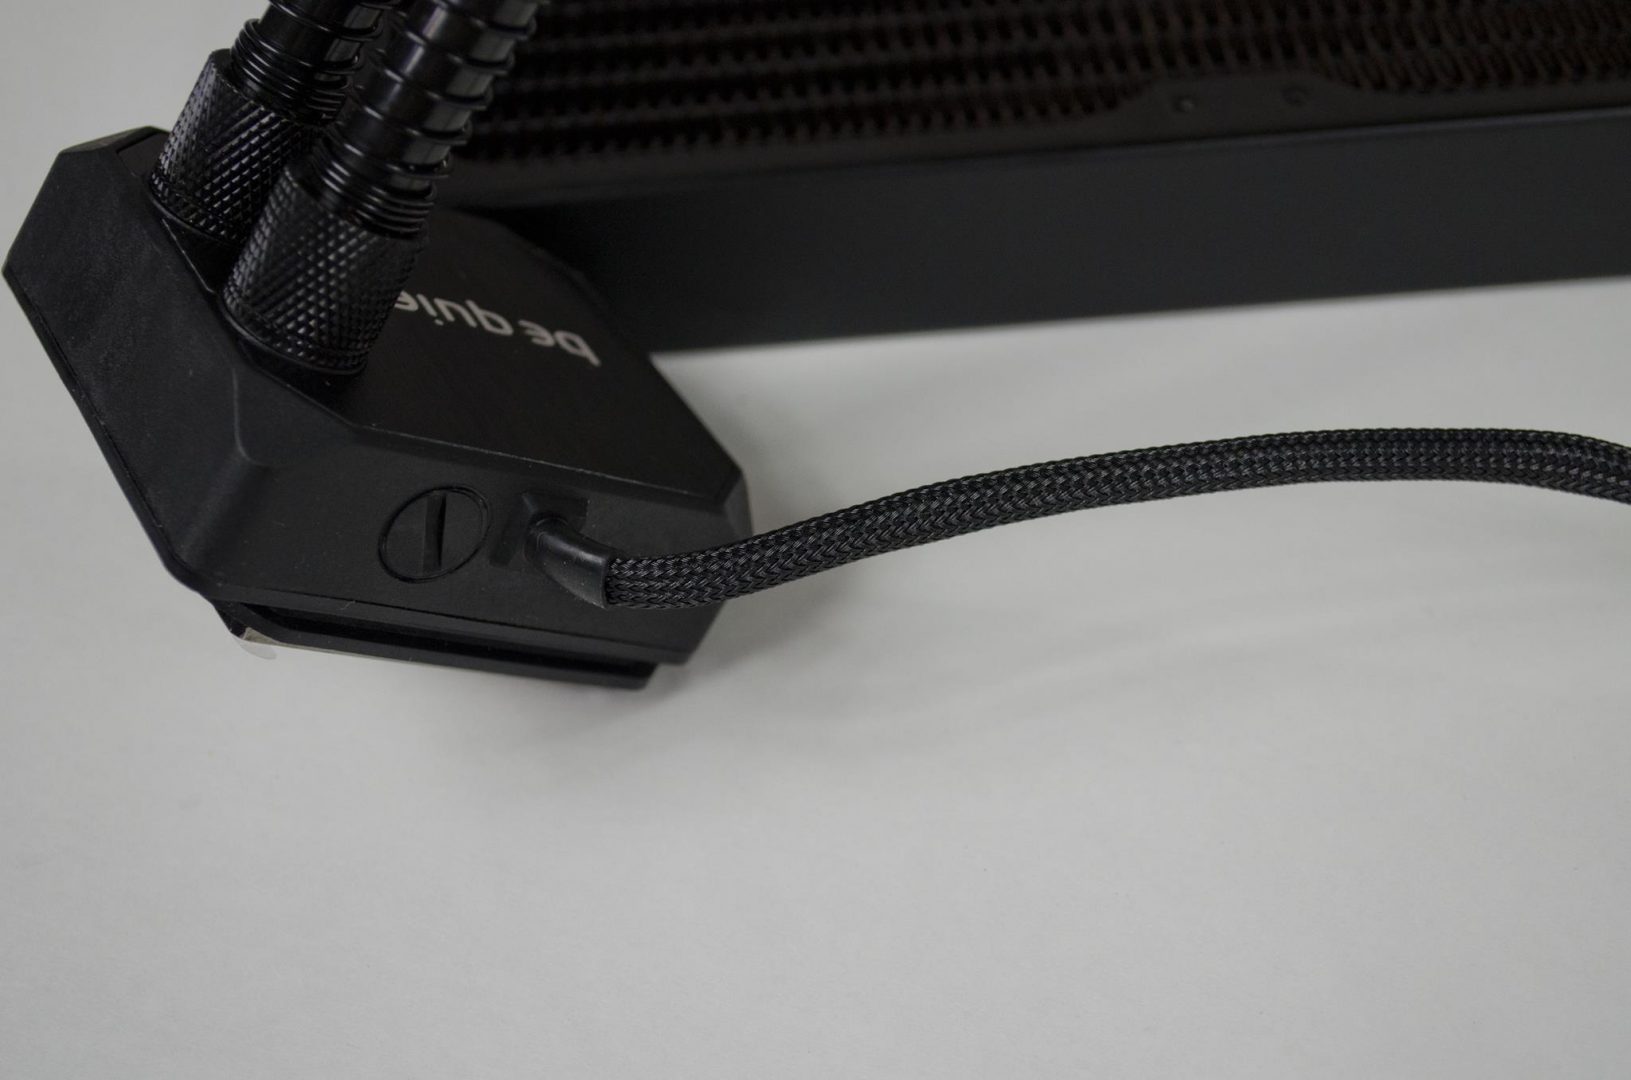
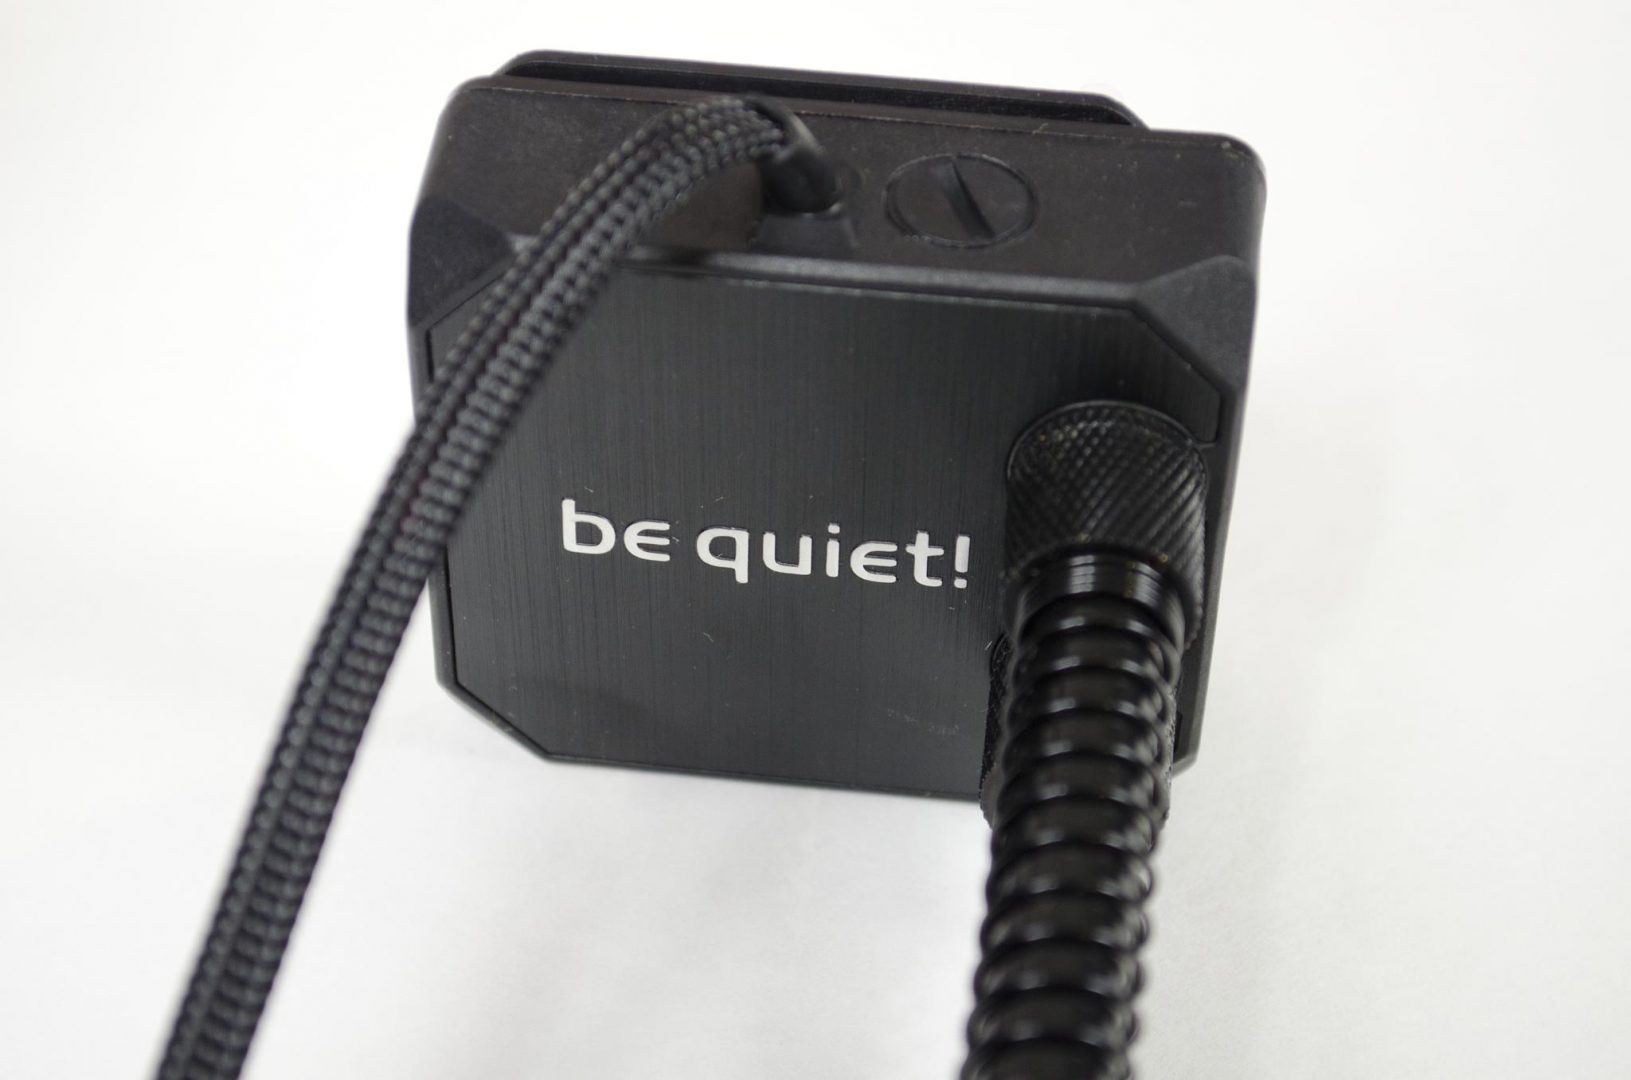
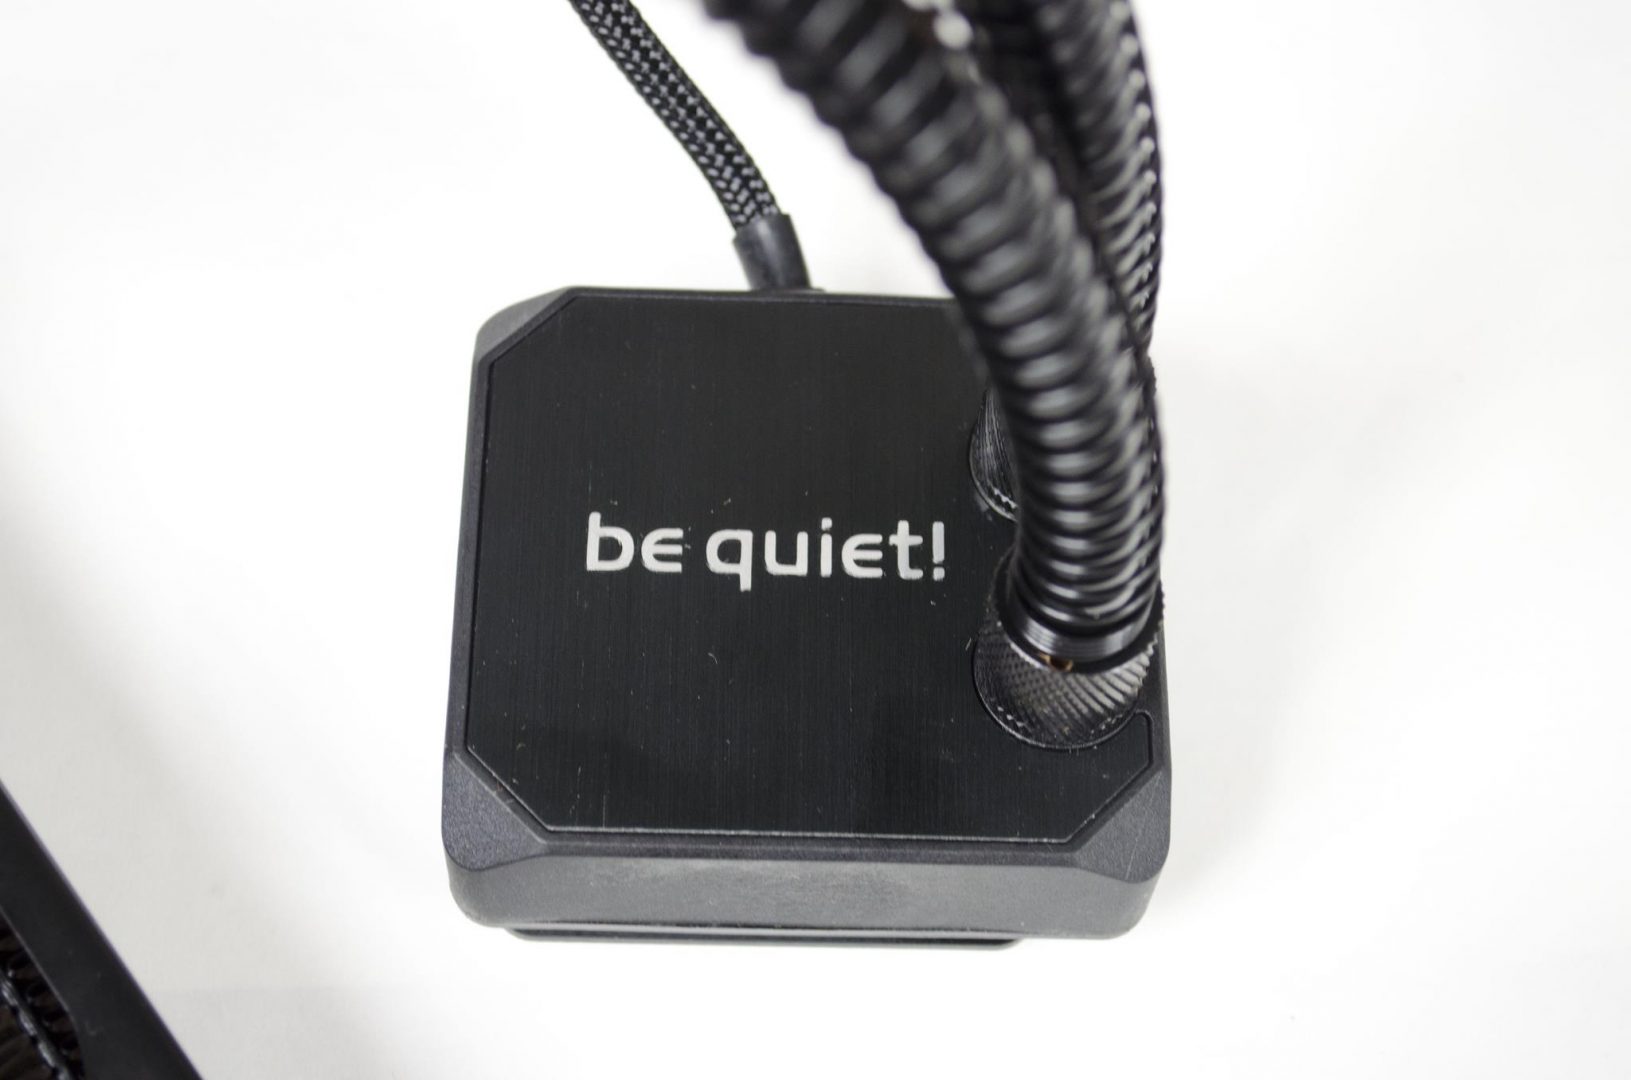
Making our way to the pump/block combo and I have to say, this is one of my favourites so far. A lot of AIO coolers tend to have a few cables and plugs coming off of the pump. However, be quiet! have chosen to only have the 3-pin pump power plug coming off of the pump and have included a fan splitter so you can power the fans from a motherboard fan header. This just allows users a better chance at having a cleaner build as there is only so many ways you can hide and route cables that are coming from the pump of an AIO.
be quiet! have also included a refill port here for the more advanced users out there. Allowing users easy access to changing the fluid also means we will likely see quite a few modded versions of this cooler soon. Being able to easily change the fluid inside will also allow users to be able to drain the unit so they can change the tubing and much more, should they want too.
The top of the pump has to be one of my favourites to date. It features a brushed aluminium look to it which is simple and elegant all at the same time.

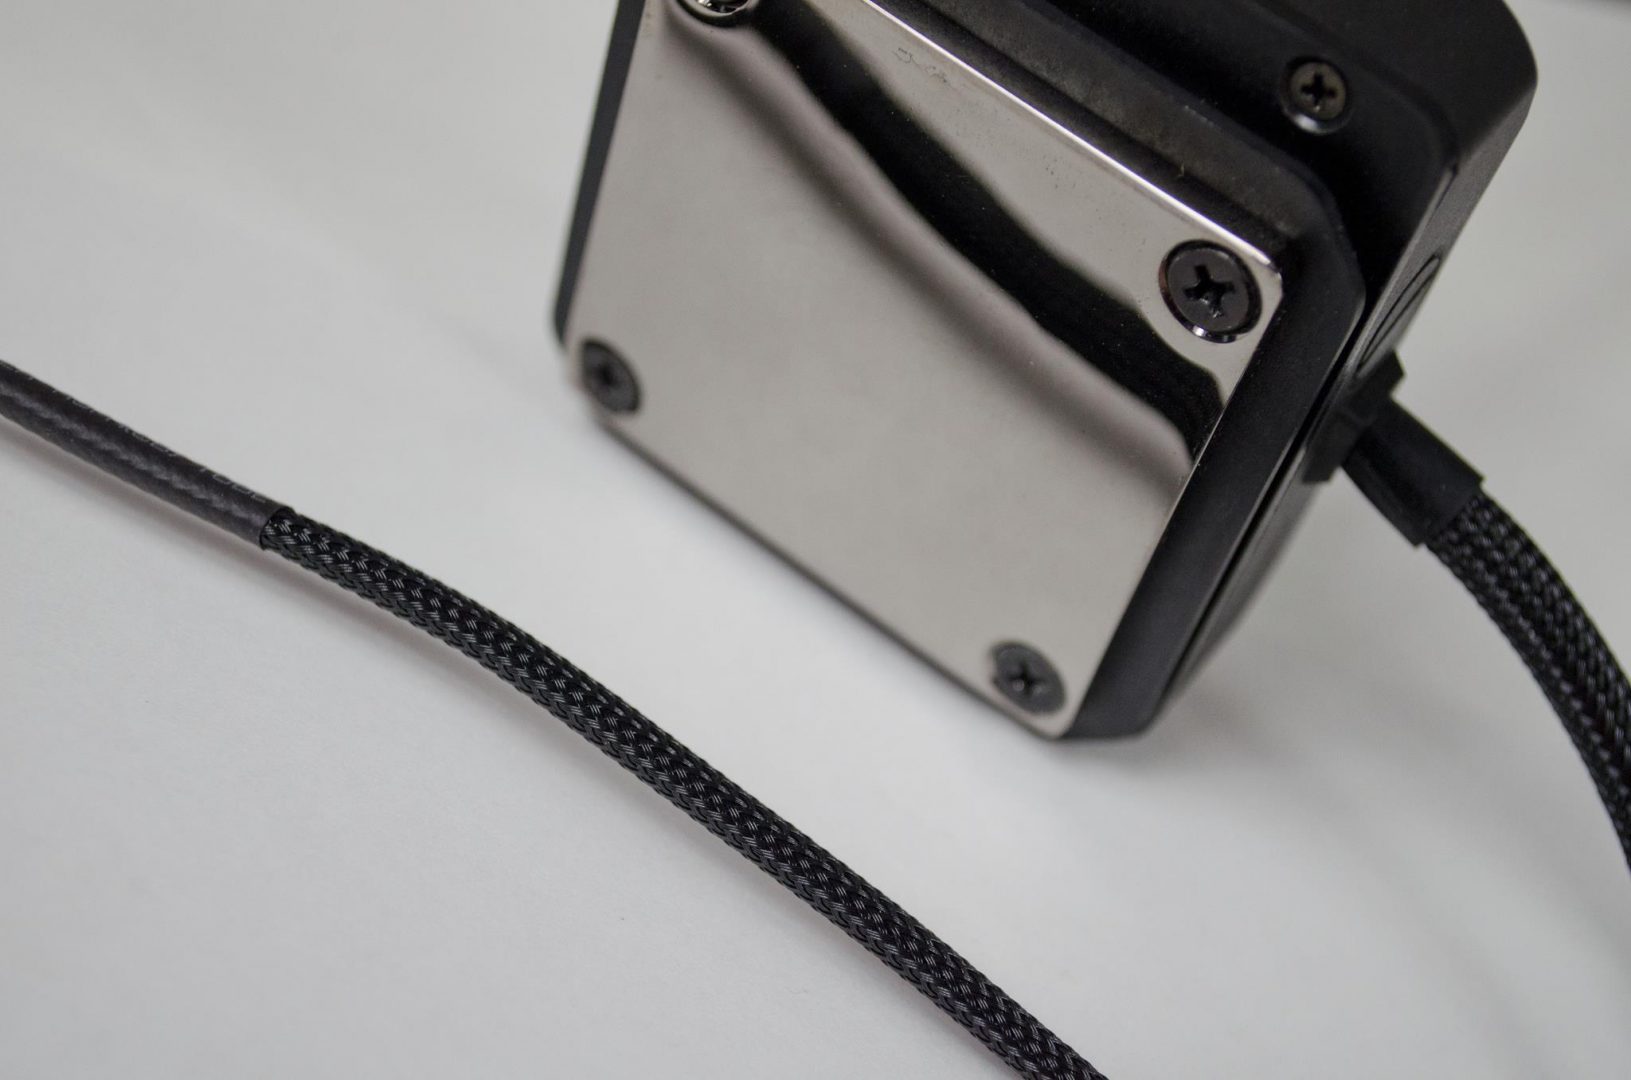
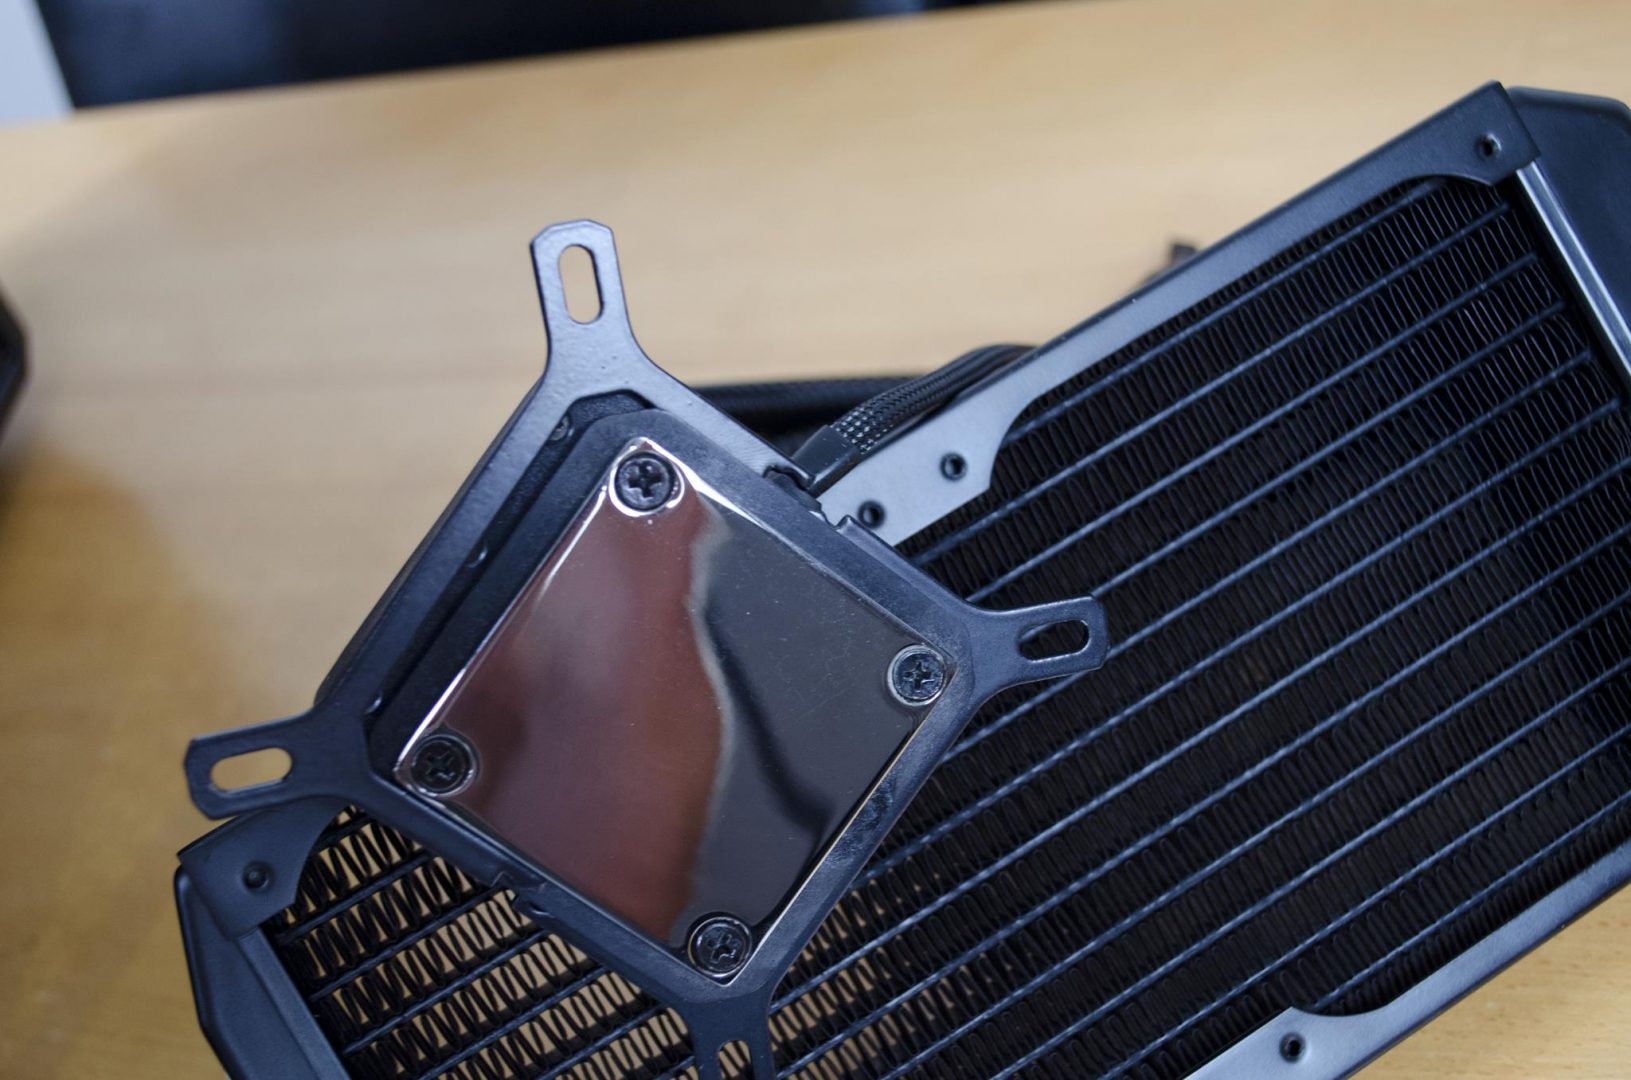
The base plated is made from dark nickel-plated copper. Nickel-plated copper is one of the more common materials used for base plates on coolers and can even be found on loads of air CPU coolers, including some of the ones be quiet! offer.
Installation
There was a bit of a learning curve for myself when it came to installing the Silent Loop on my 6700K. This was to be expected though as it is the first be quiet! AIO cooler. As always, I have installed this on Intel’s 1151 socket.
First, you will want to get the to retention brackets that will hold the screws in place so you can screw the pump down to the back plate. There are two pieces and they slot into on the side of the pump and then the clip together. While it does take a bit of force or did for me anyway, they do have grooves on them and fit together nicely.
This is where things get a bit subjective. With most AIO coolers, you can install the fans onto the radiator before installing the radiator in your case and this is exactly what I have done today. Depending on your needs and the case you are using, some may prefer to install the fans after the radiator is already in the case, which really is fine.
Next, I installed the radiator in the top of my Cooler Master Master Case Pro 5. This is done simply be using some of the smaller screws and screwing them into the top side of the radiator.
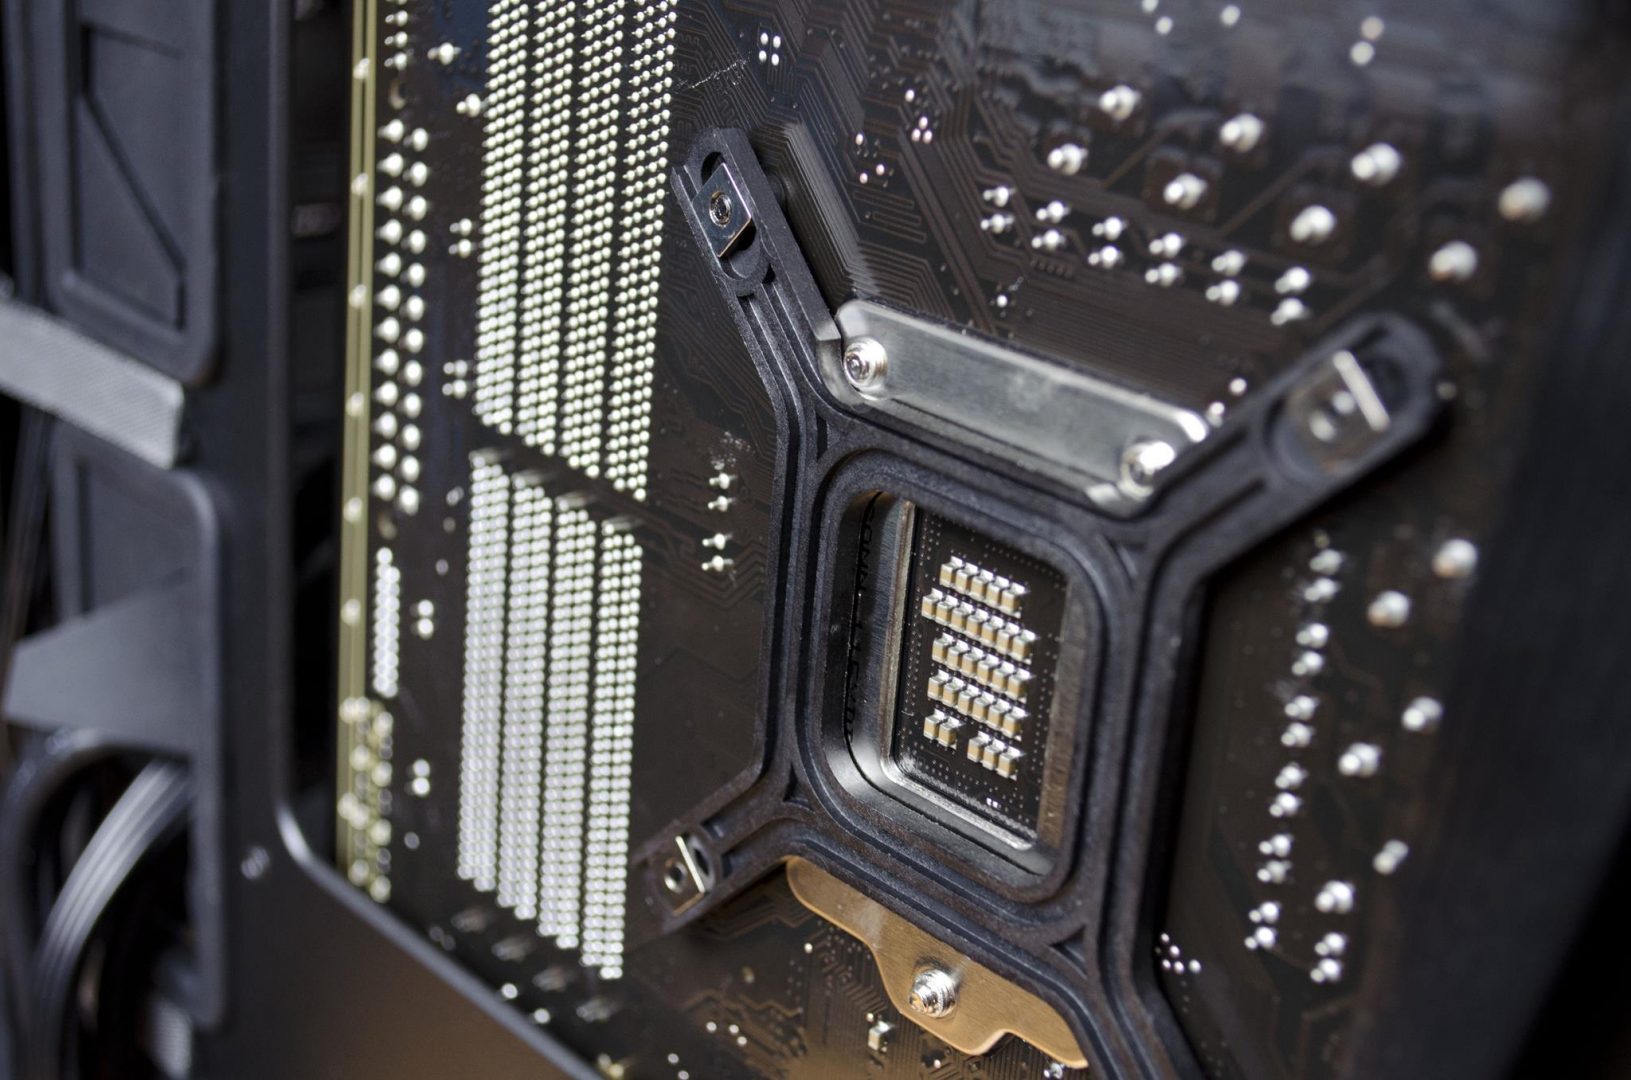
Now that the radiator is in place, we can get the backplate onto our motherboard. There are a couple of small white strips that can be removed and will reveal a bit of adhesive so the backplate will stay in place on the backside of the motherboard.
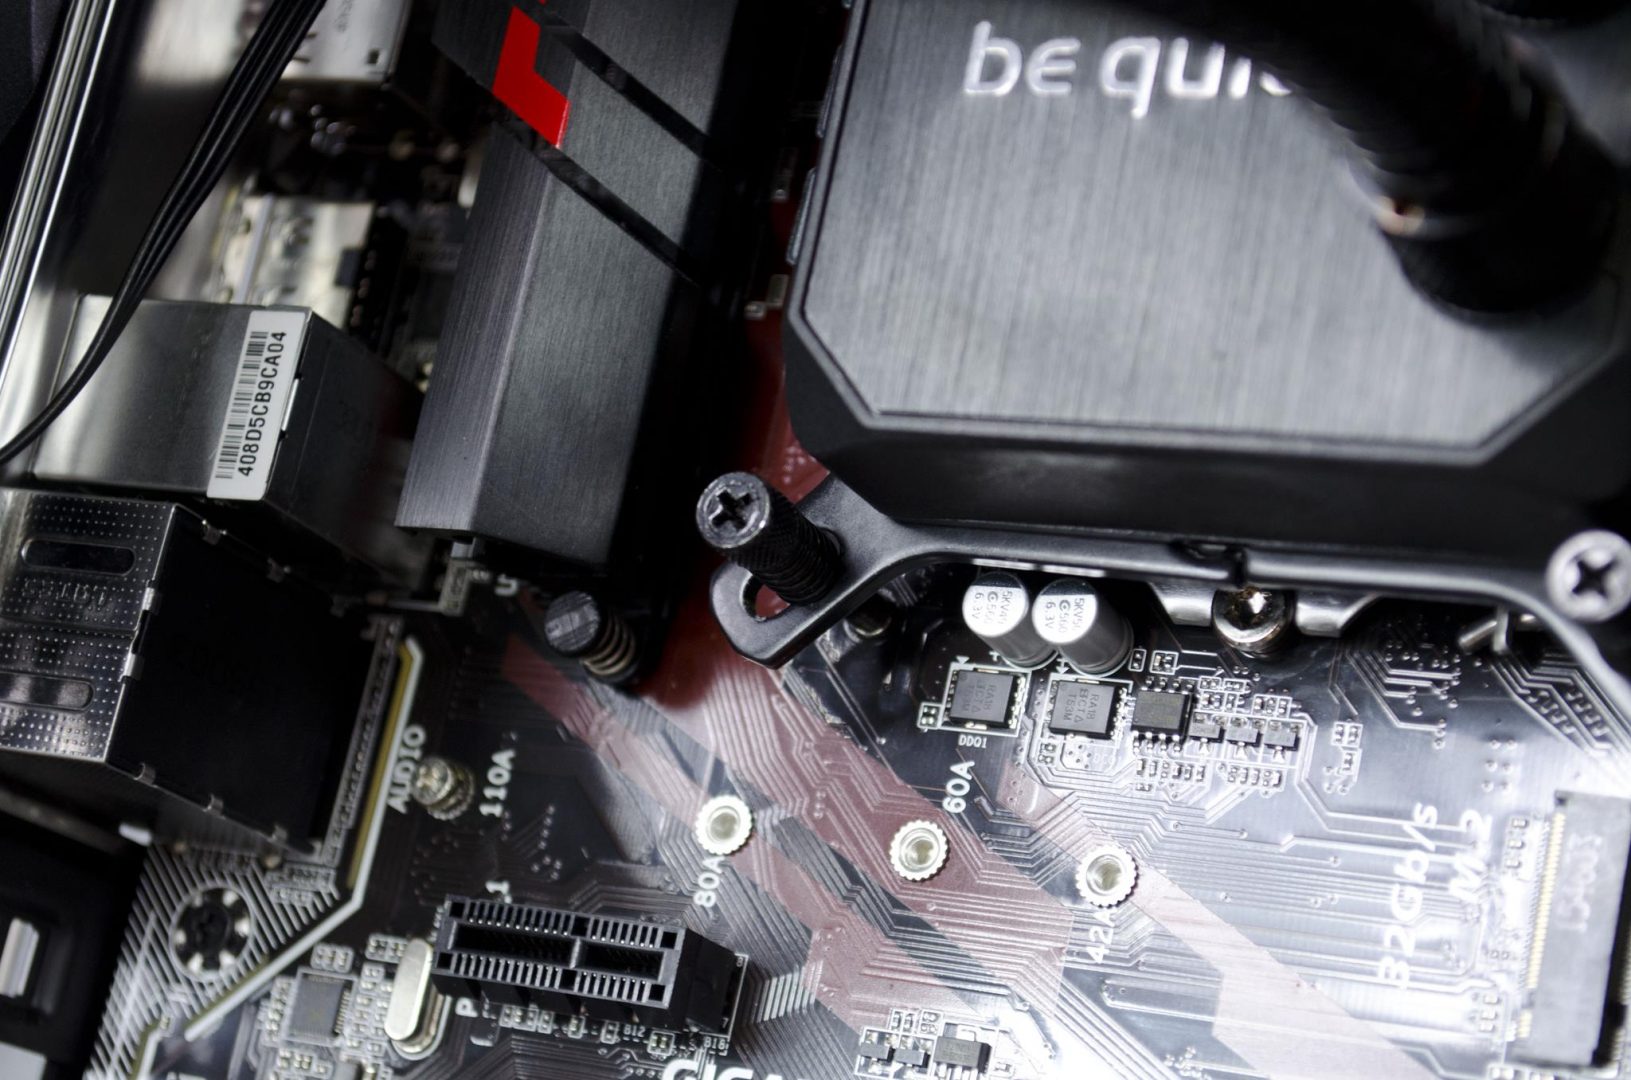
Now it is time to apply our thermal paste and get the pump/block combo installed. The easiest way I found to do this was to get the screws installed on the retention brackets. this is done by using the correct screws and adding a spring, washer and a nut to keep them in place on the bracket. Next, you can install your thermal paste and secure the screws into the backplate. Please note, when tightening the screws, you may want to add a bit of pressure on the backplate area where you are the screw is as the little metal pieces can fall out of the backplate. This is just to get the screw threaded a bit then you can go onto the next one. Personally, I got all 4 screws threaded a tiny bit then worked on further tightening the screws and finalizing the installation of the pump/block combo.
Once it installed, it is time to put it to good use. As you can see, when installed in the Master Case Pro 5, there is plenty of room and the fans are above the top of the motherboard. This would also mean that there is plenty of room for me to add two more fans on the top should I want to go for a push/pull configuration on the Silent Loop. Though that won’t be the case for all and will be dependent on the chassis you are installing the cooler in.
Performance and Testing
For our testing, we use the Prime 95 stress testing program to make all the cores on our CPU run at 100% then we monitor them with CoreTemp and CPU-Z.
To have the best chance of having like for like results, all testing is done in an open air environment.
Test System
Programs
Temperature
Noise
Final Thoughts
Well, the results are in and things are looking quite good for the Silent Loop from be quiet!. For their first offering into the world of AIO coolers, they have done an exceptional job and have kept true to their roots. The Silent loop does a great job at offering some impressive cooling performance while remaining rather quiet, With that being said, let’s go ahead and finish up this review and hear my final thoughts!
Performance
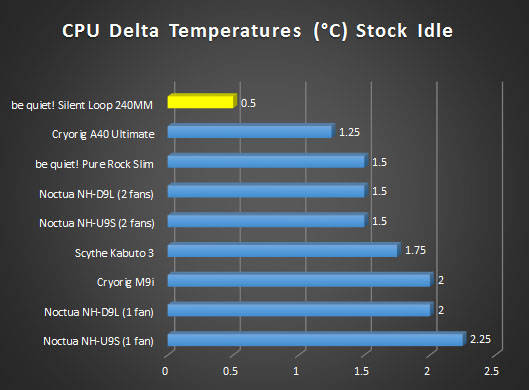
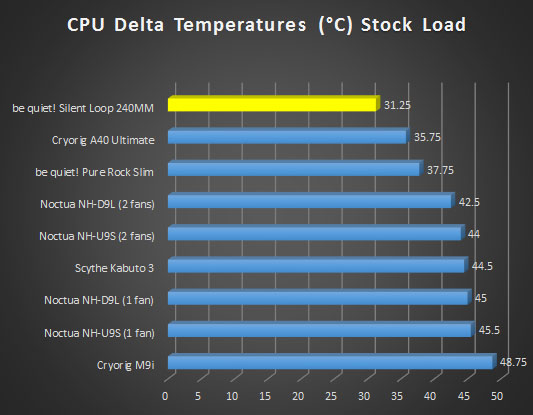
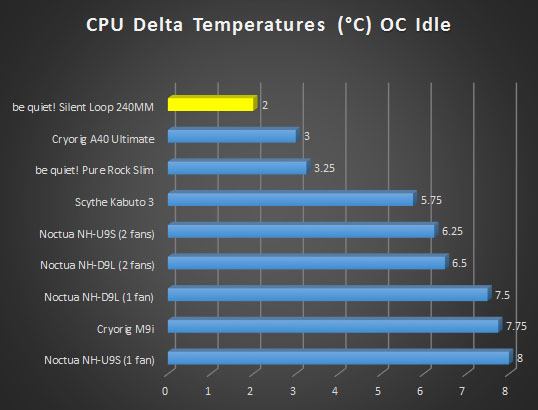
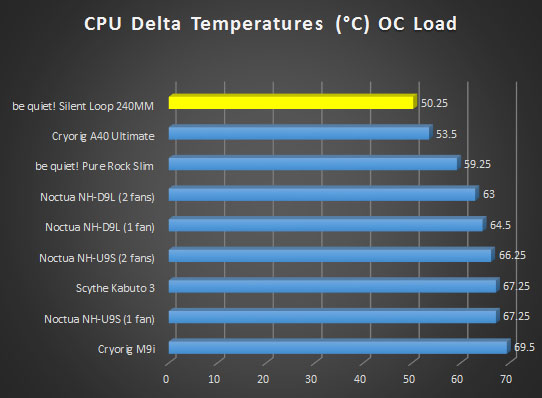
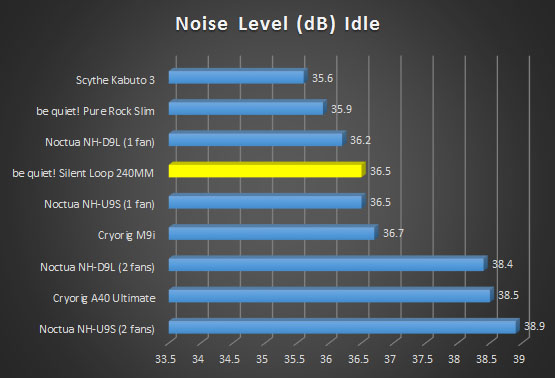
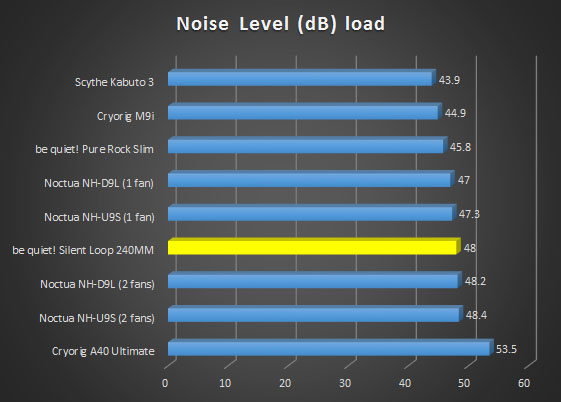
When it comes to the raw performance the Silent Loop has to offer, the 240mm variant is topping our charts. Currently, this is the best performing cooler of any type we have tested here at Enos Tech. Topping all of our charts, it seems that reverse-flow function not only helps to keep things quiet, it also offers some great cooling performance. Keeping an overclocked 6700K with 1.4V running through it cool is far from the easiest task and means there is plenty of room for overclocking most CPUs when using the Silent Loop 240mm to cool them. The addition of the Silent Wing 2 fans has also worked out for be quiet! Not only are they quite quiet, they also do a great job at dissipating the heat from the radiator in an aid to help give users the best cooling performance possible.
Design
As much as I hate to say things like this, this is currently one of, if not my favourite AIO cooler from a purely aesthetical standpoint. be quiet! did a great job at making this look extremely sexy and the fact that it looks more like proper water cooling gear rather than an AIO surely has helped. From the proper tubing to the brushed aluminium pump top, the Silent Loop cooler looks amazing. The all black Silent Wings 2 fans also add to the overall look and performance of the Silent Loop. When it comes to the inner workings, be quiet! seem to have done that right as well. The reverse-flow and decoupled pump seem to work great together and, as we saw, allow for some pretty impressive cooling performance. For their first take on an AIO cooler, be quiet! have done a great job with the design from all aspects.
Value
Currently sporting a MSRP of €130, the Silent Loop is far from the cheapest AIO on the block and that’s OK. The Silent Loop offers a new take into the world of AIO cooling. From the reverse-flow and decoupled pump to the proper water cooling tubes, it is easy to see this is a high-end AIO cooler. When it comes to the overall value for money, the Silent Loop offers great performance and is comprised of quality parts and components so you are definitely getting your monies worth. Remember, you get what you pay for and that couldn’t be more true here. For the money, you are getting a top-end AIO cooler that comes backed with a 3-Year warranty from be quiet! who is known for offering products of great quality and performance!
“The be quiet! Silent Loop is a fresh take on AIO Coolers. It offers great performance and is comprised of quality components which allow it to be a top of the line AIO cooler.”
Many thanks to be quiet! For sending in their Silent Loop AIO CPU cooler for this review.
Want to discuss this review further, head on over to the Logitech be quiet! Silent Loop thread, in the Enos Tech Reviews Sub-category on the Gaming Exodus forums!

