Cryorig M9i CPU Cooler Review
Introduction
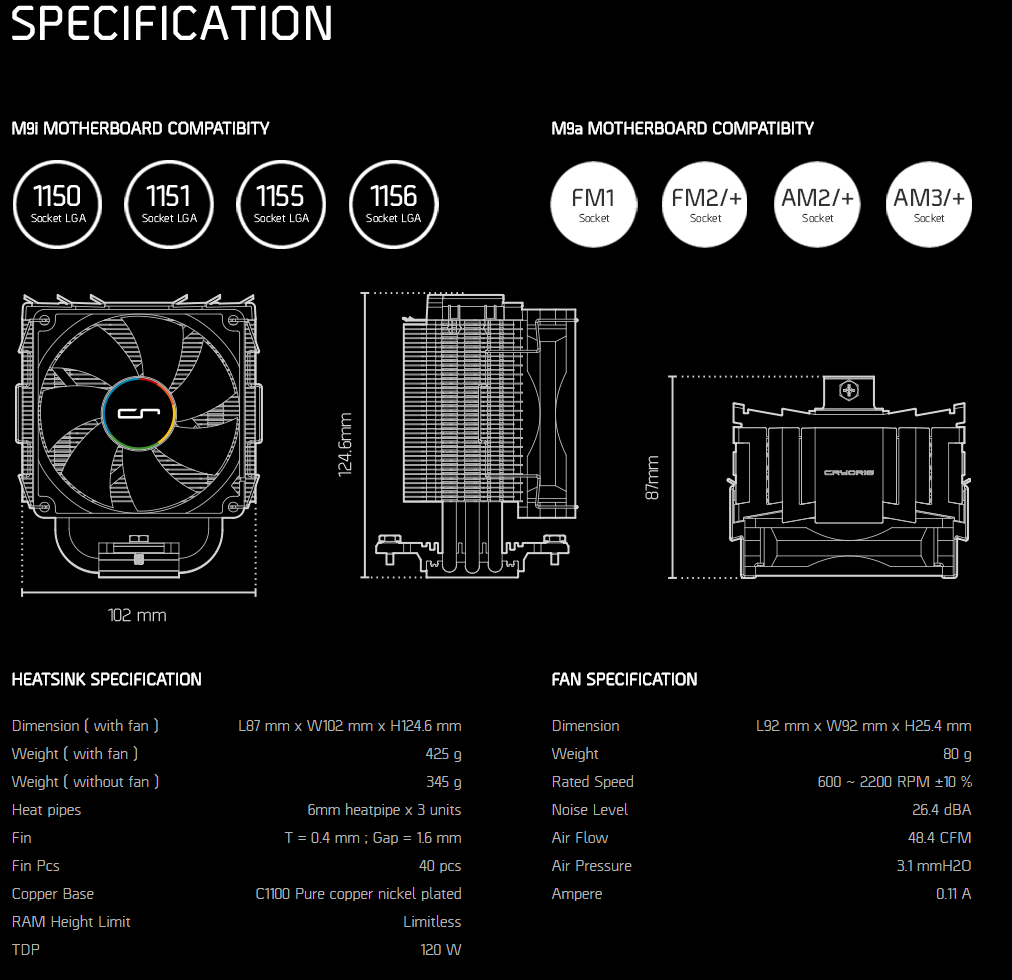
Today, we will be taking a look at the Cryorig M9i CPU cooler. Following on from our H5 Universal review, it will be interesting to see how this smaller cooler stacks up to some of the others on the market. For those who may not know, Cryorig offers some amazing coolers that not only look great, but they also perform equally as well. If you’ve ever seen a Cryorig cooler in person, you will be easily able to tell them apart from their competitors. Cryorig has taken the white and black theme to amazing lengths with their coolers and not only do they look great, they will be able to fit in with a number of colours schemes thanks to their more basic colourings.
The M9i is a smaller single tower cooler that comes equipped with one fan. It is also actually part of a set, where the i stands for INTEL, there is an M9a, where the a stands for AMD. While some may think this is an odd move to offer two almost identical coolers. just with different mounting hardware, it actually makes perfect sense. By alleviating the need to include both sets of mounting hardware, Cryorig is essentially able to keep their product prices down which means they can offer better prices to their customers. Saving money is great, especially when it comes from not having to purchases necessary items for your PC that will ultimately just sit in a box up in the loft somewhere until passed on to someone else.
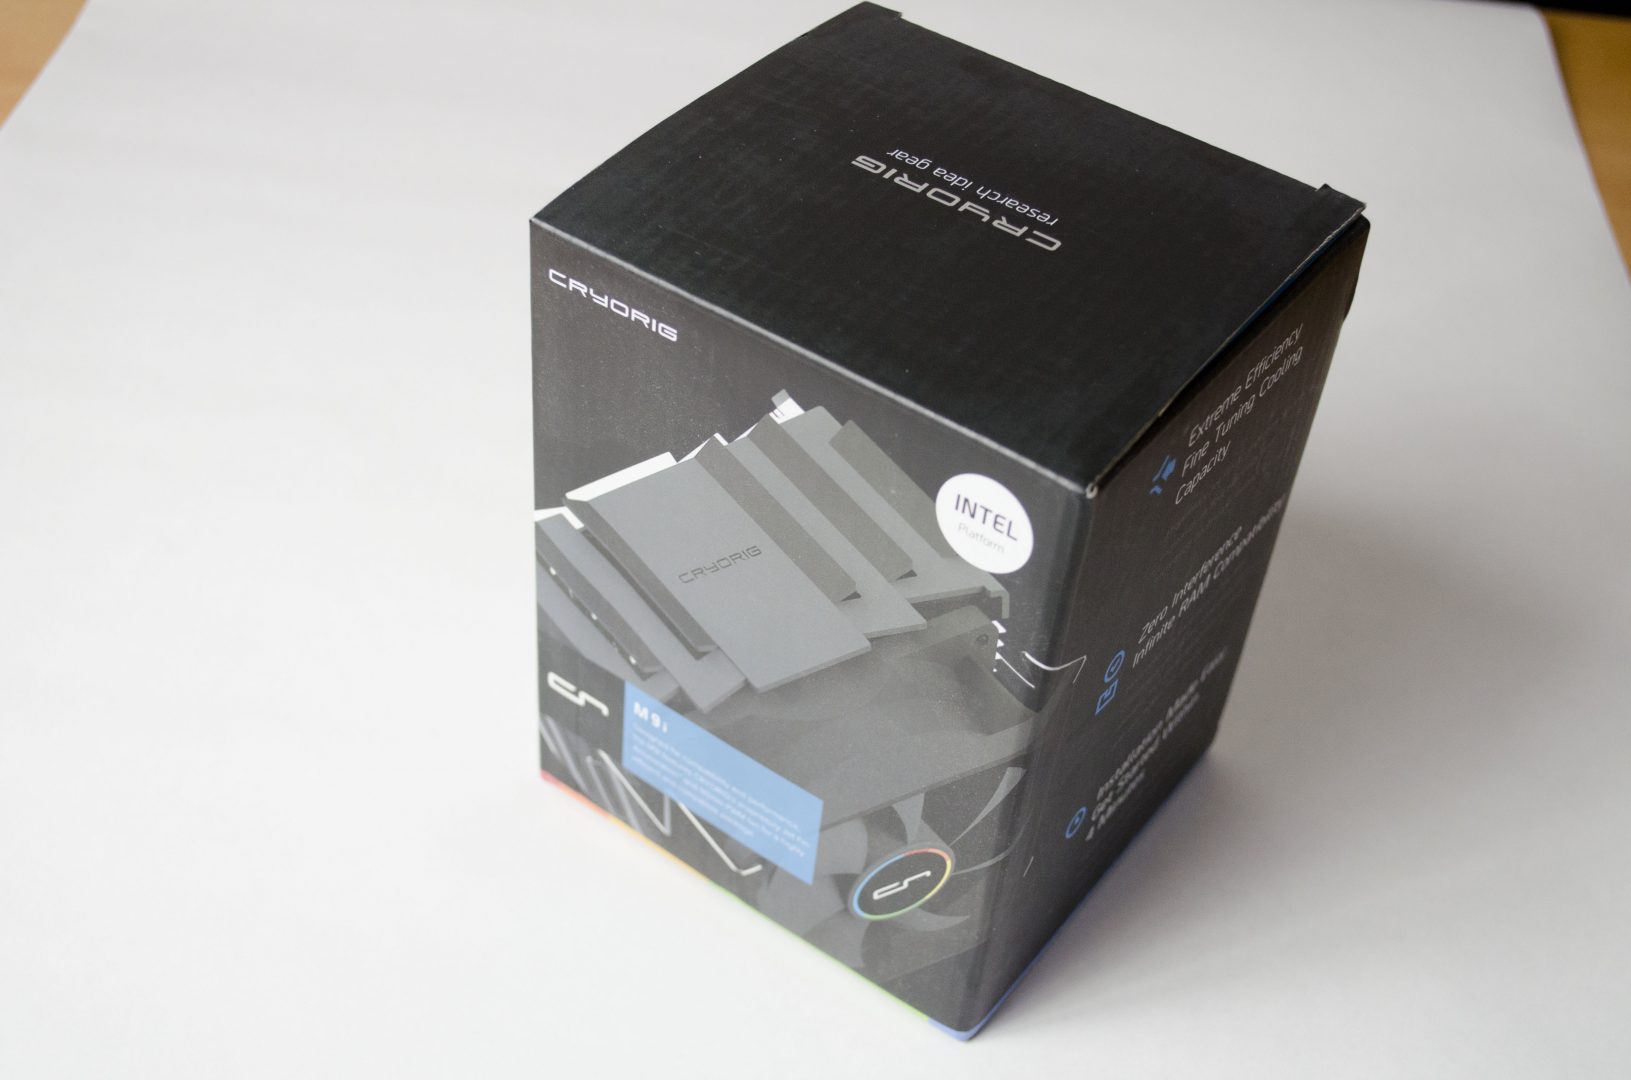
The box is quite small and looking around it, user’s should be able to find most of the information they would need to make sure this cooler with be suitable for their PC.
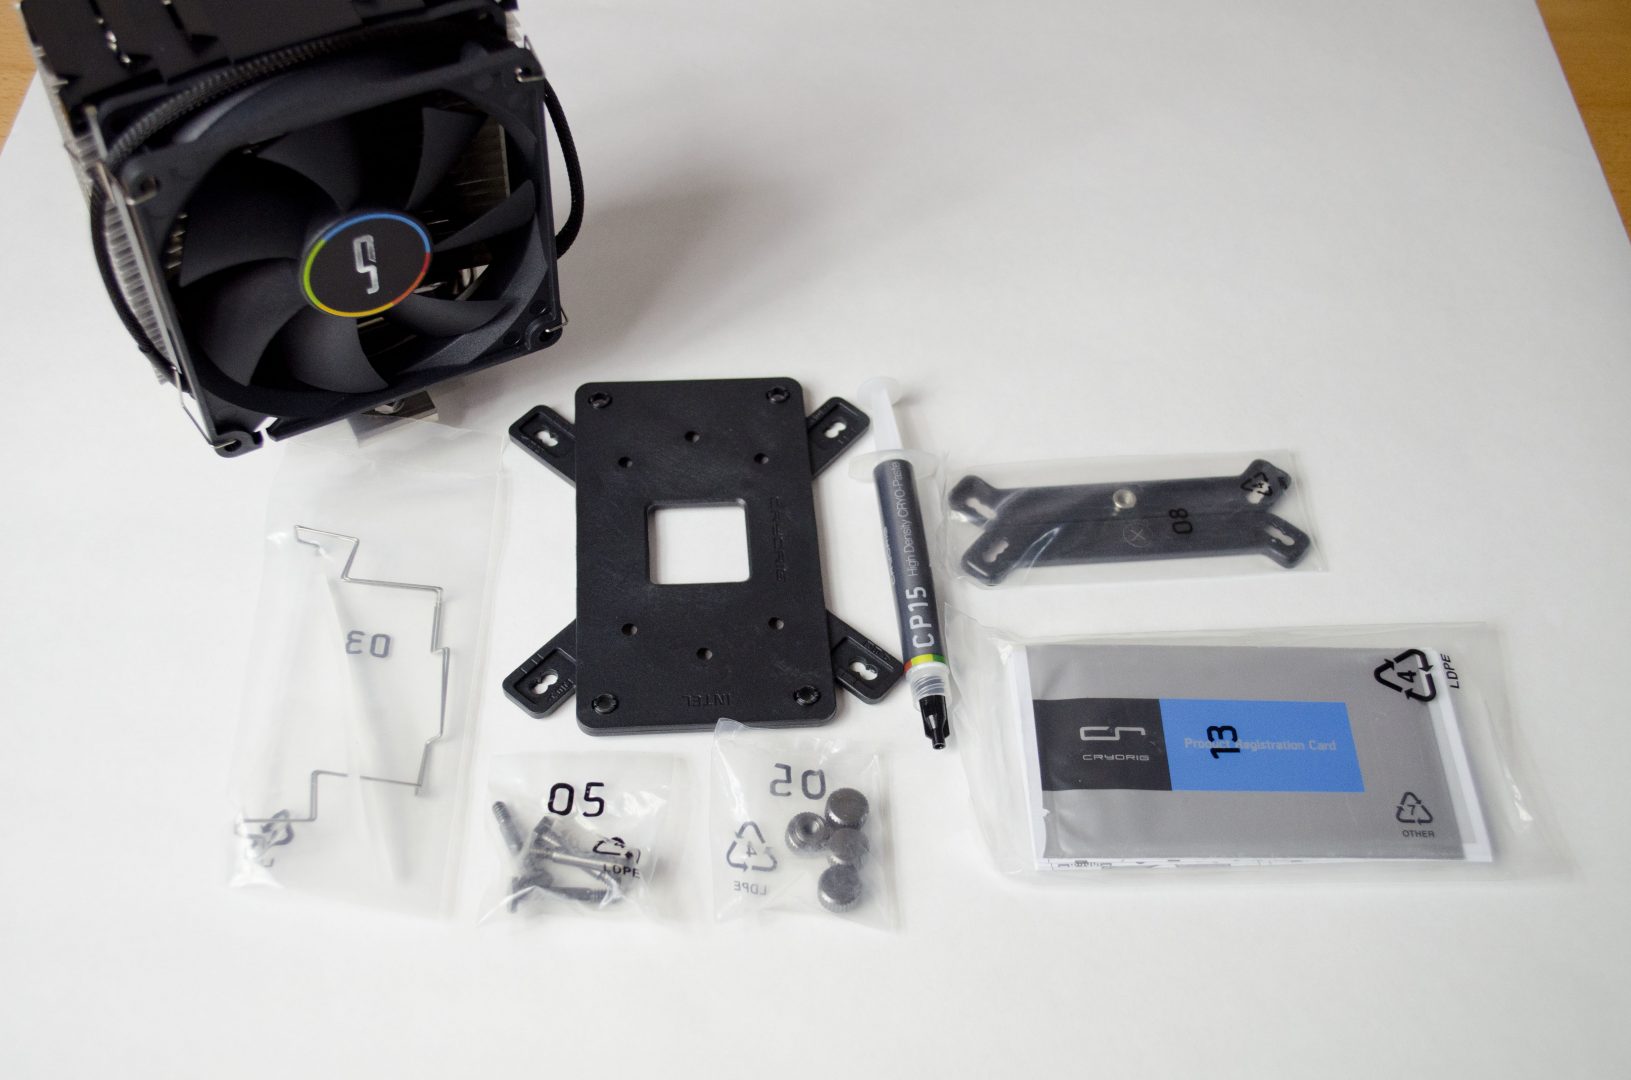
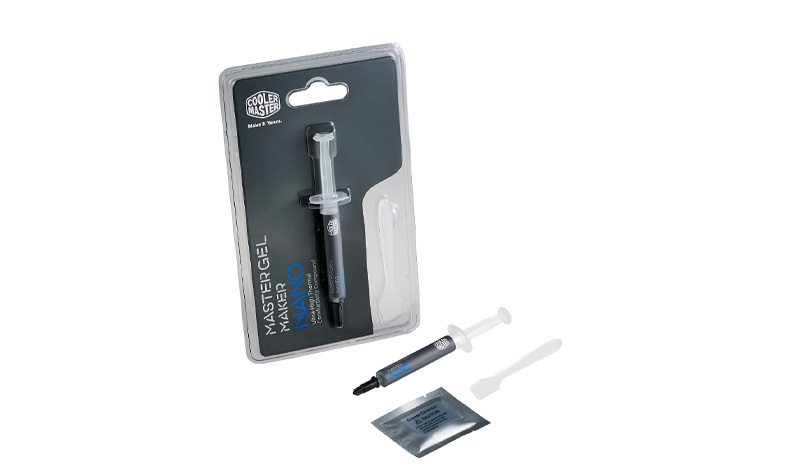
Inside the box, we have everything we need to get this bad boy mounted and started using it right away. There is a backplate and retention brackets as well as the 2nd pair of fan clips, so you can add a 2nd fan on. Cryorig has even included a nice product registration card, instructions and a tube of their CP15 thermal paste!
Closer Look
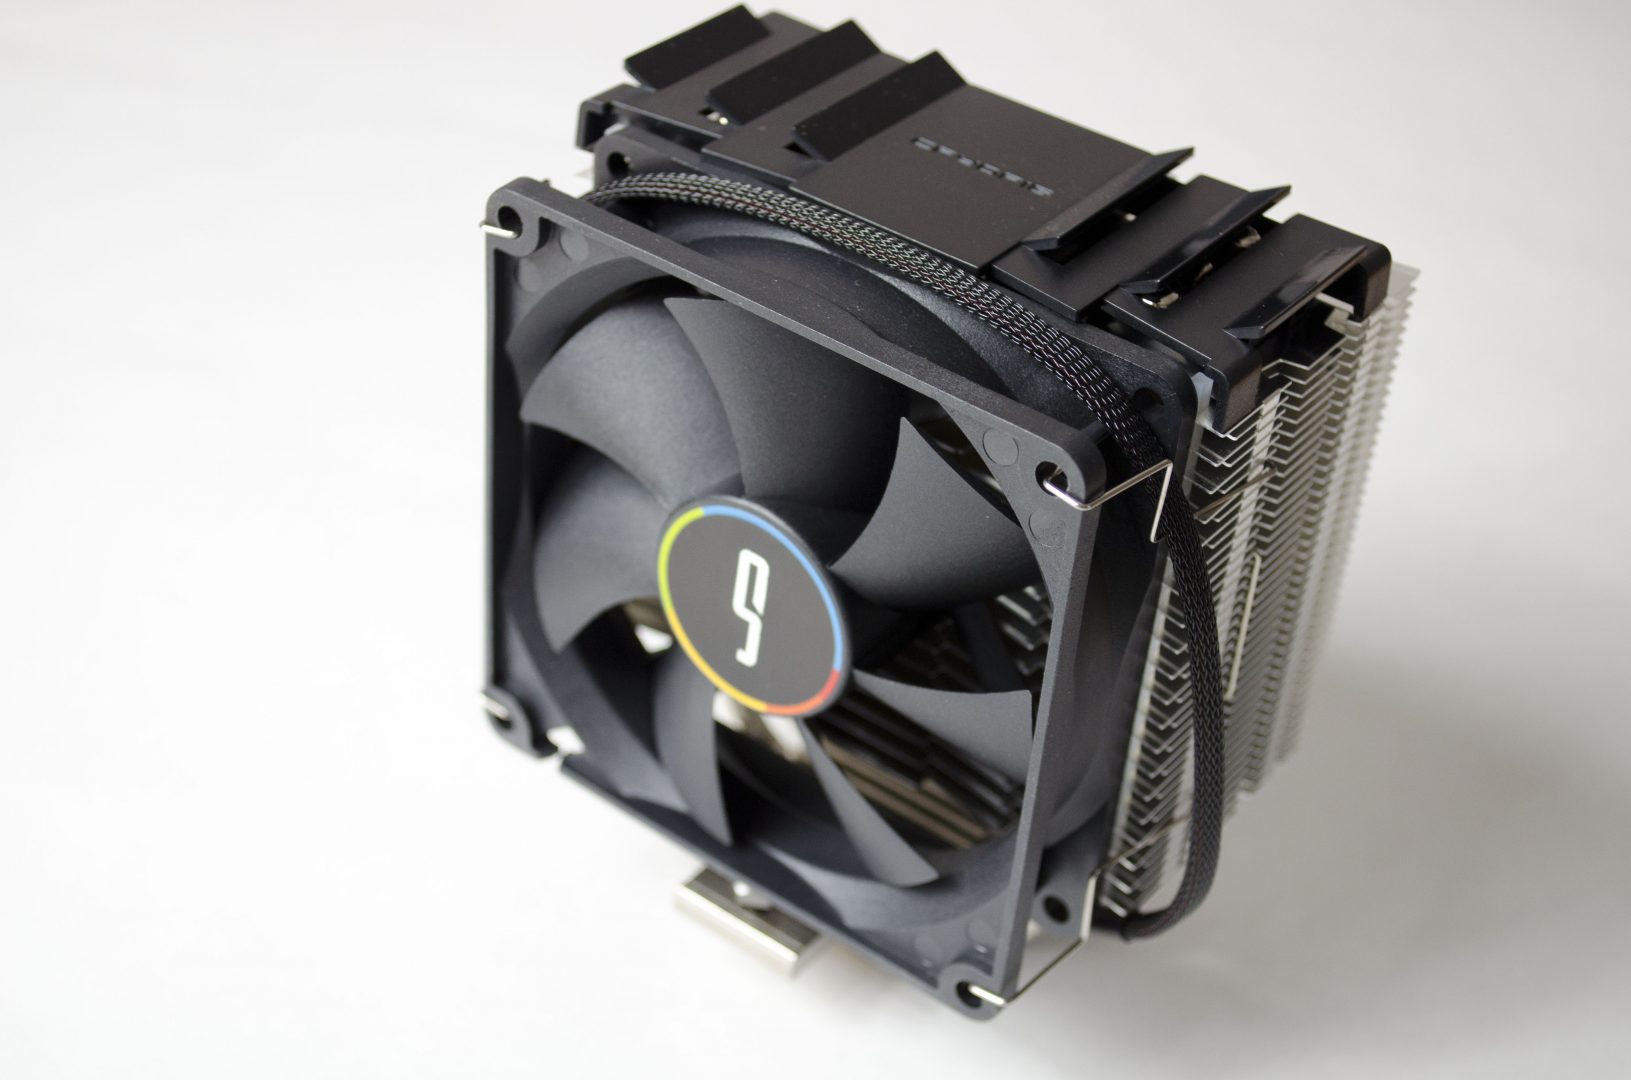
The fan on the M9i is 92mm and rated for 2,200 RPM which should do a good job at dissipating the heat from the fin array. In true Cryorig Fashion, the center of the fan has a sticker which features a multi-coloured ring outline, while the rest of the fan is all black. The fan also comes with a loosely braided black cable so hopefully, it can be tucked out of the way and won’t be an eyesore.
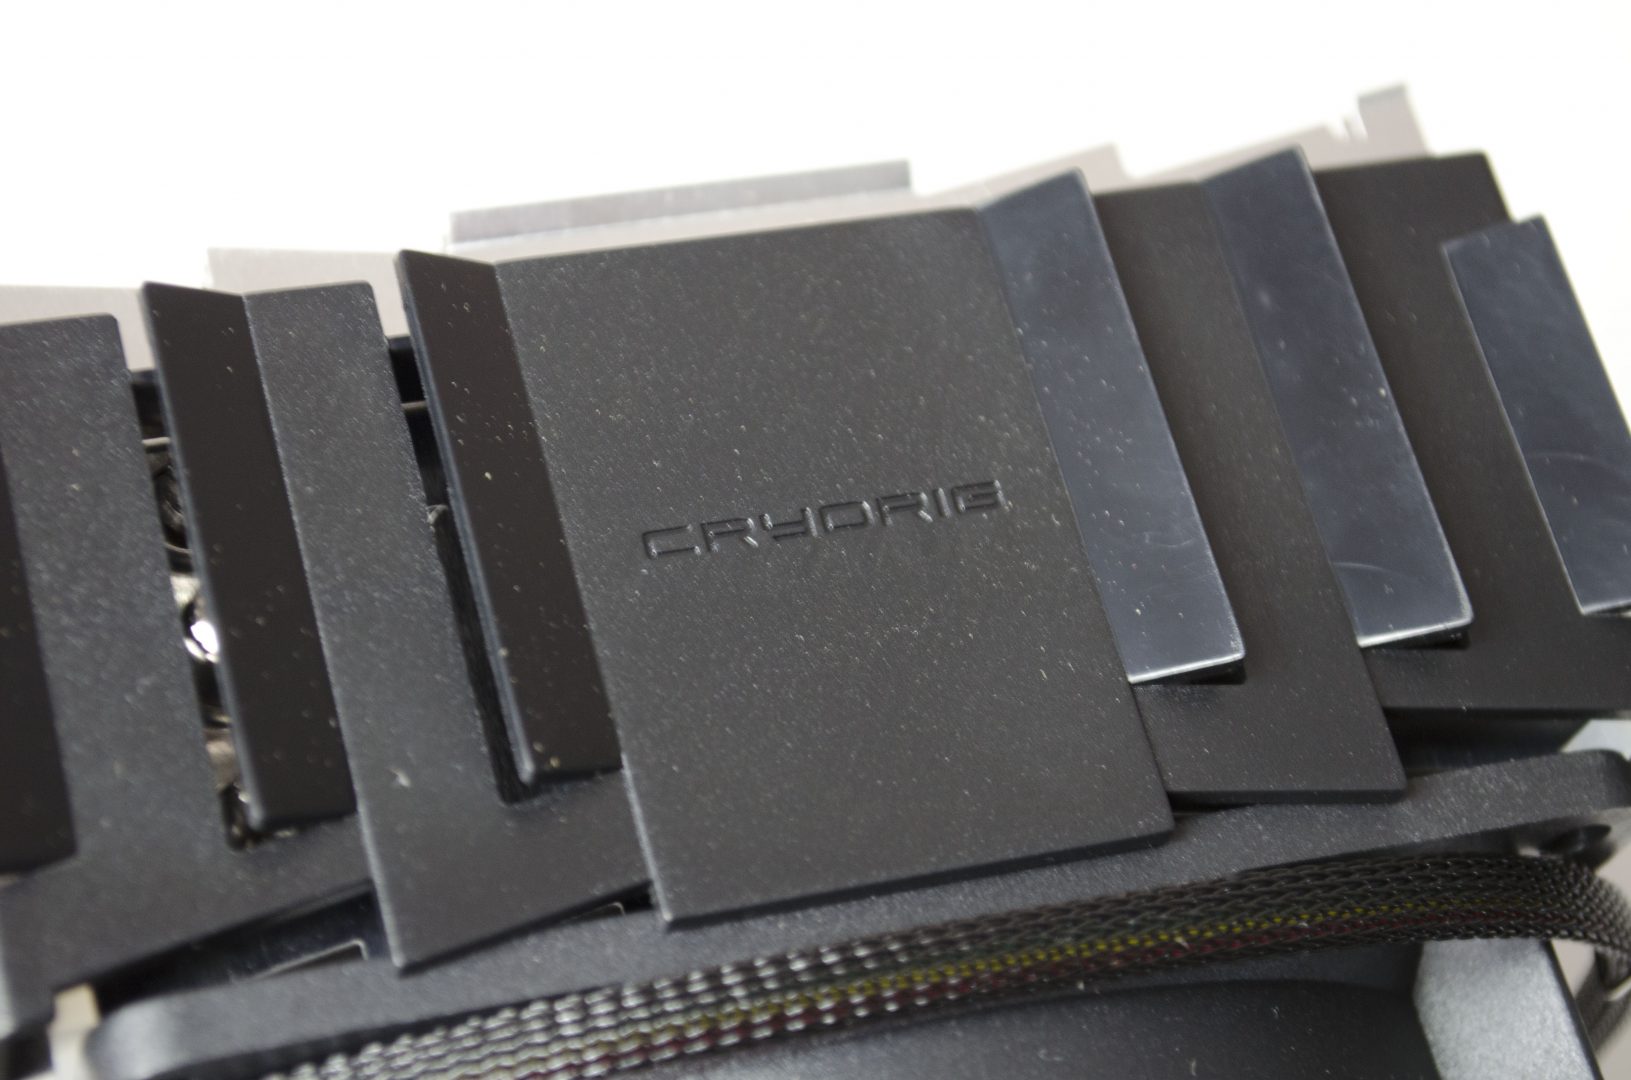
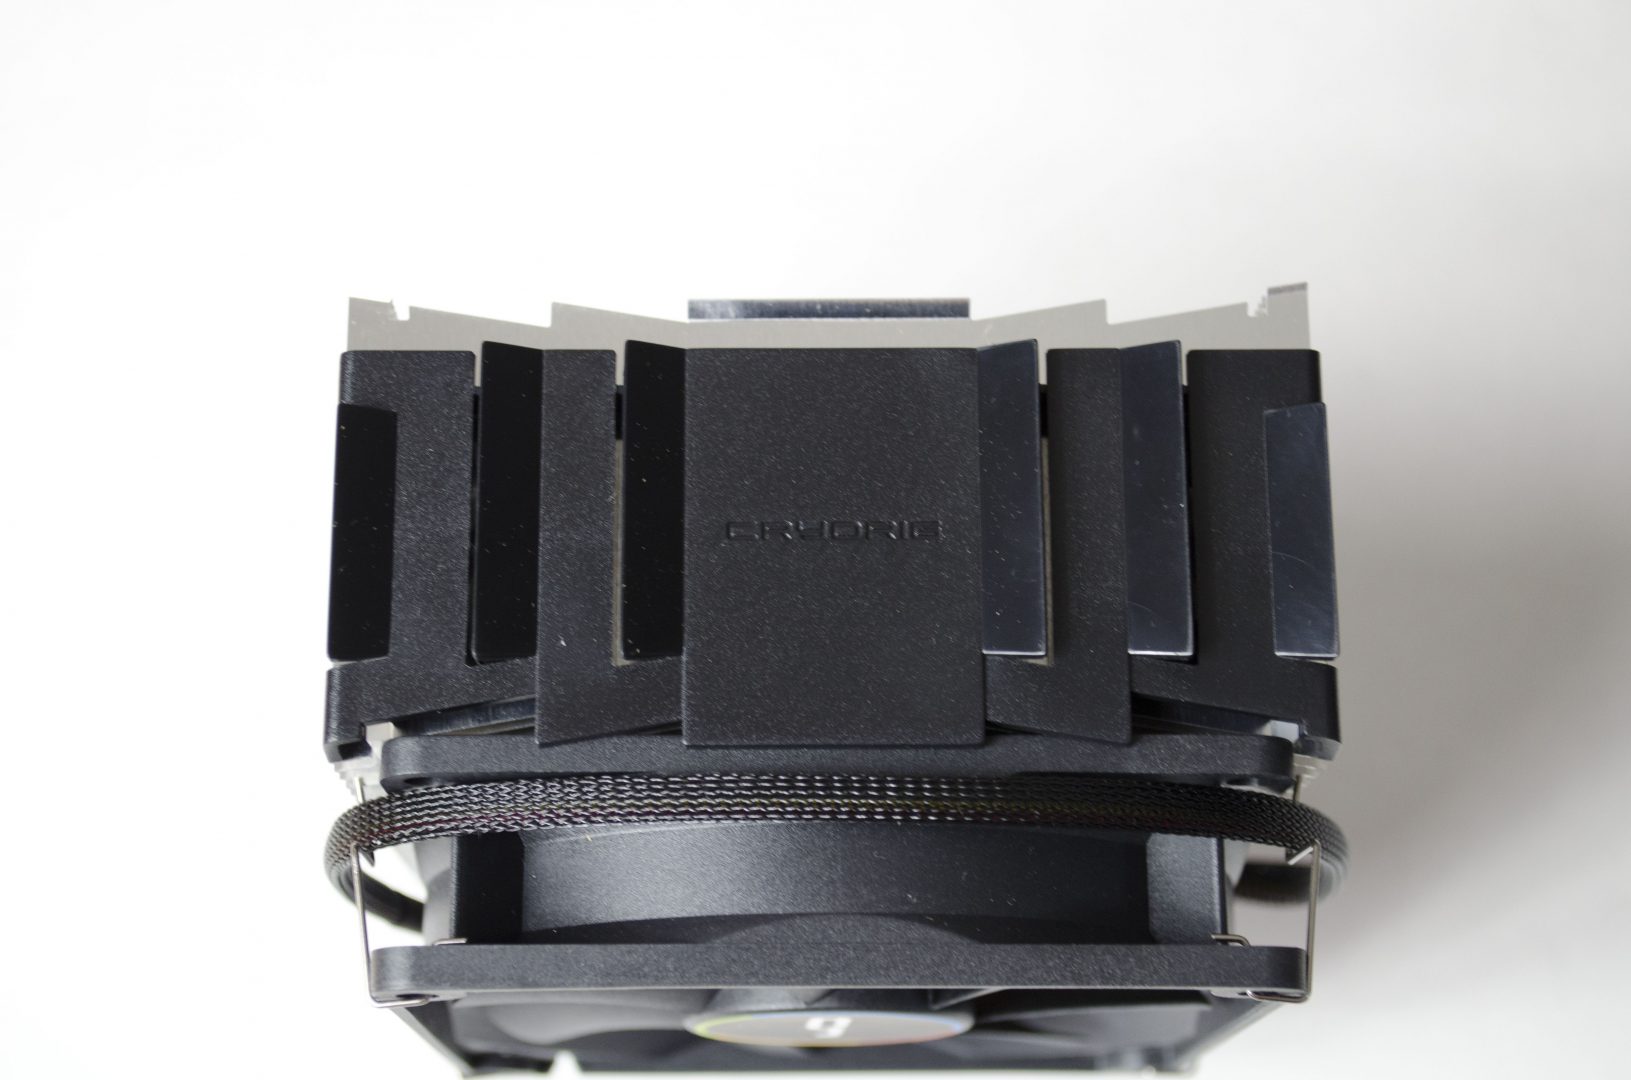
On the top of the fin array is a nice black shroud that features the Cryorig logo directly in the middle and has some nice raised fins on it to get it a more edgy and appealing look.
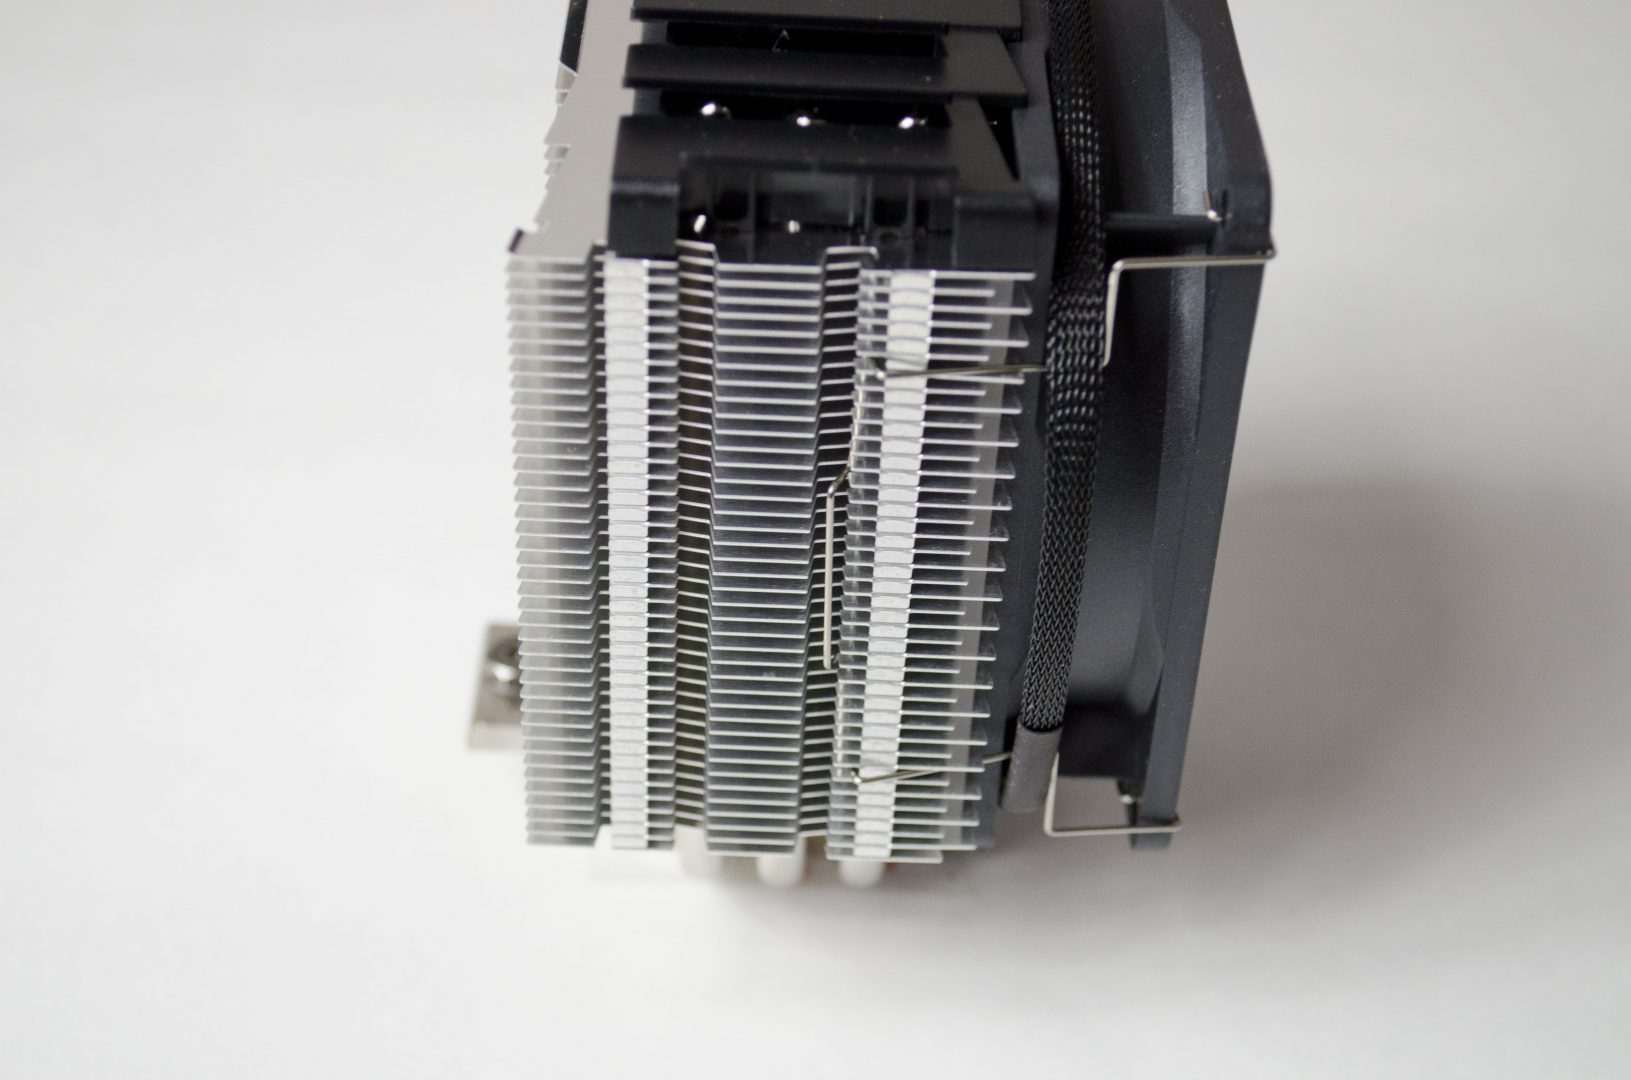
The sides of the cooler are fairly standard and are mostly designed to be a place to retain the fan brackets. As mentioned, there is a 2nd pair of fan retention clips in the box so if you’re looking to put a 2nd fan on the M9i, you need only purchase the fan itself.
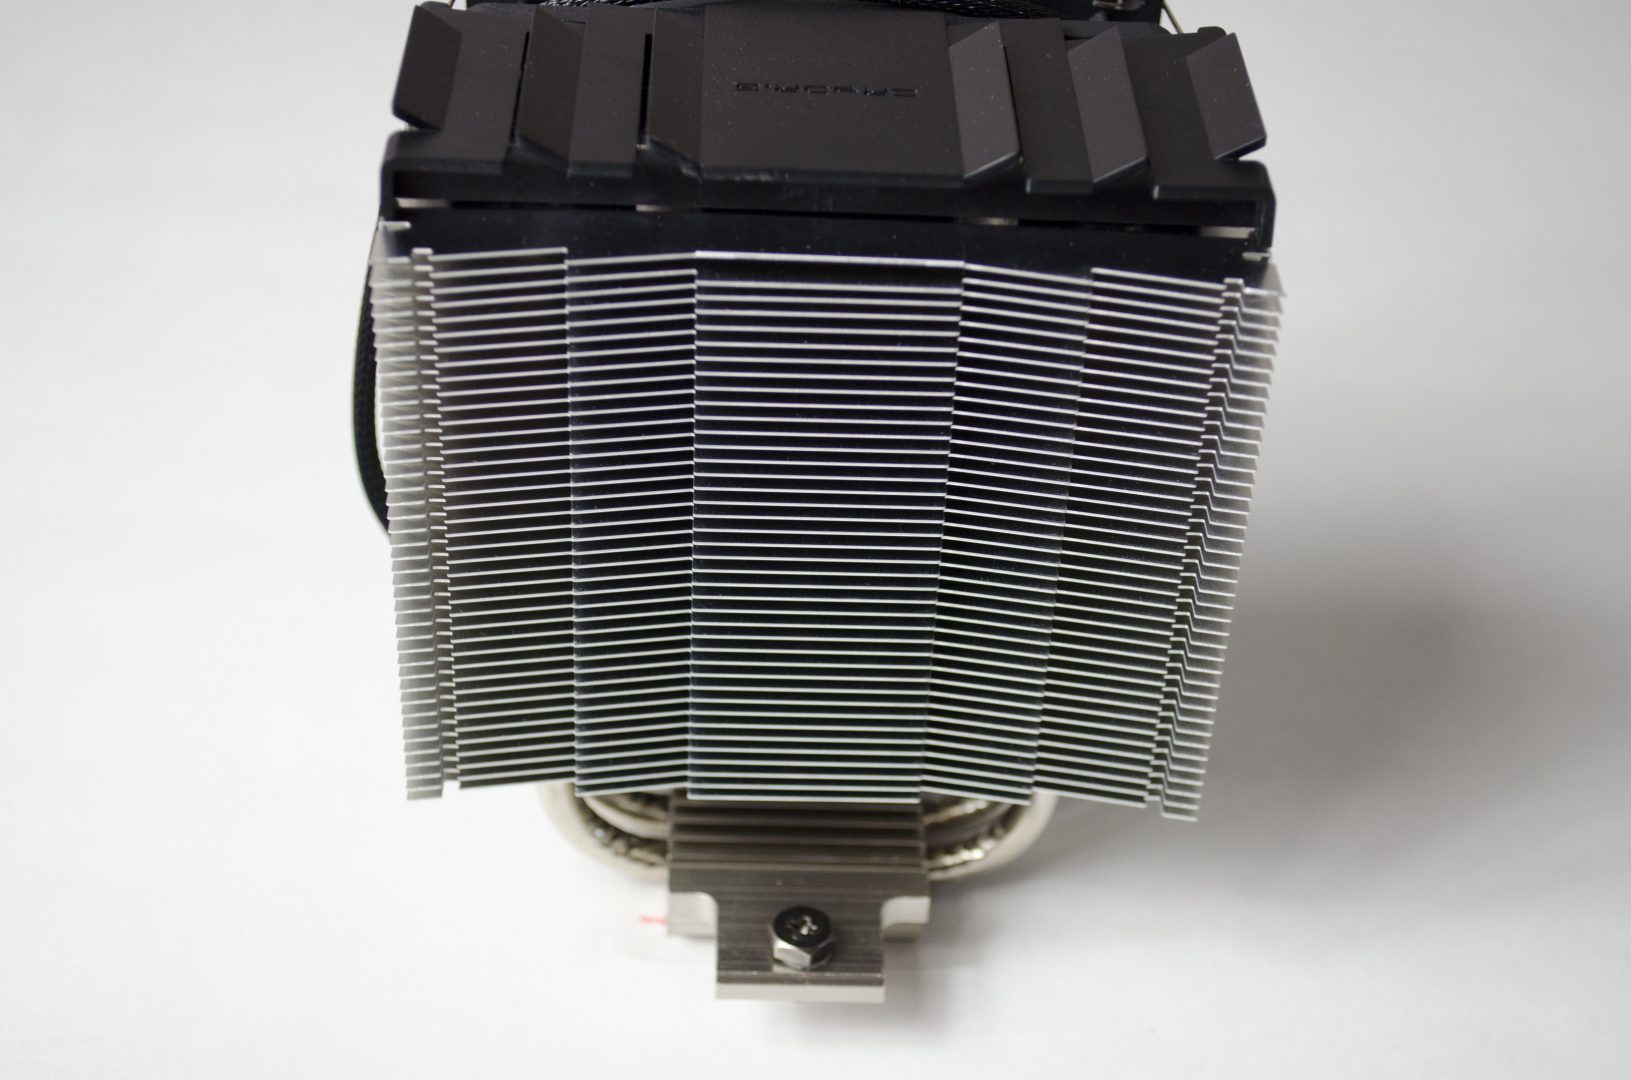
The backside of the cooler is all bare and just asking for a 2nd fan to be installed. We can also see how Cryorig have curved the fin array and added some more edges so it’s not just flat and straight.
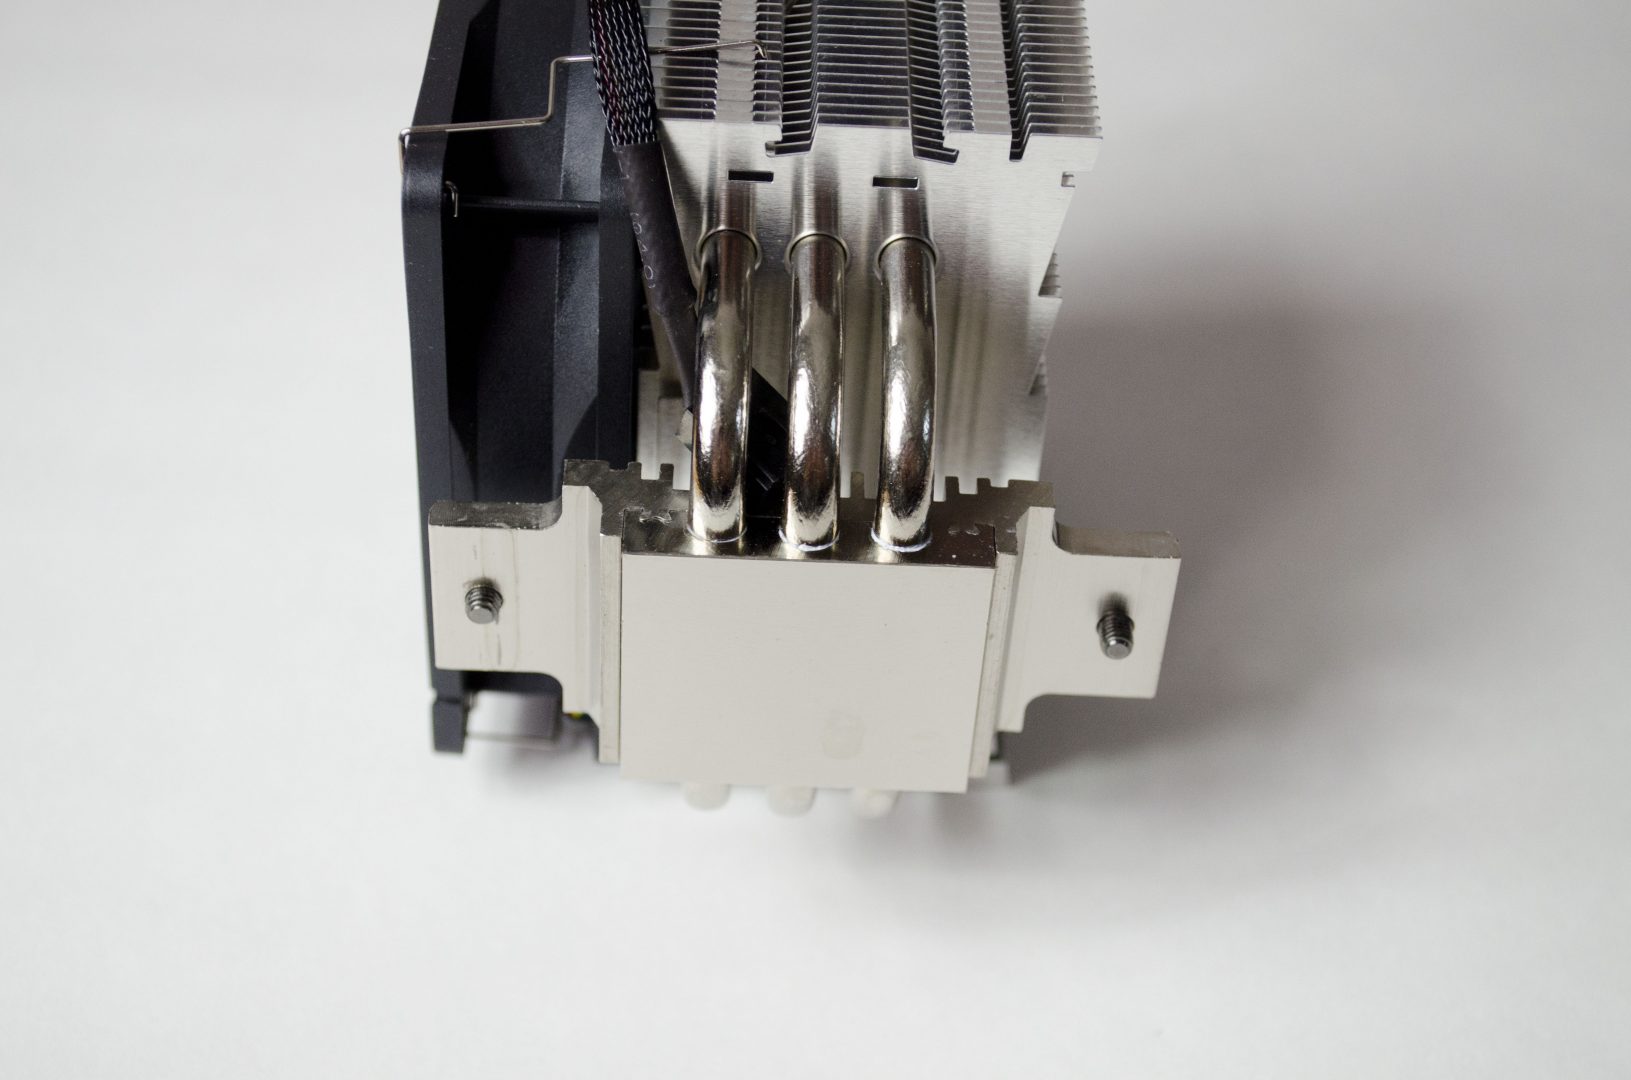
The M9i features 3x nickel plated copper heatpipes and a nickel plated copper base. It is also worth noting that the mounting for the cooler itself is already attached to the heatsink, meaning you will only need to install the retention brackets onto the motherboard before mounting the heatsink itself.
Installation
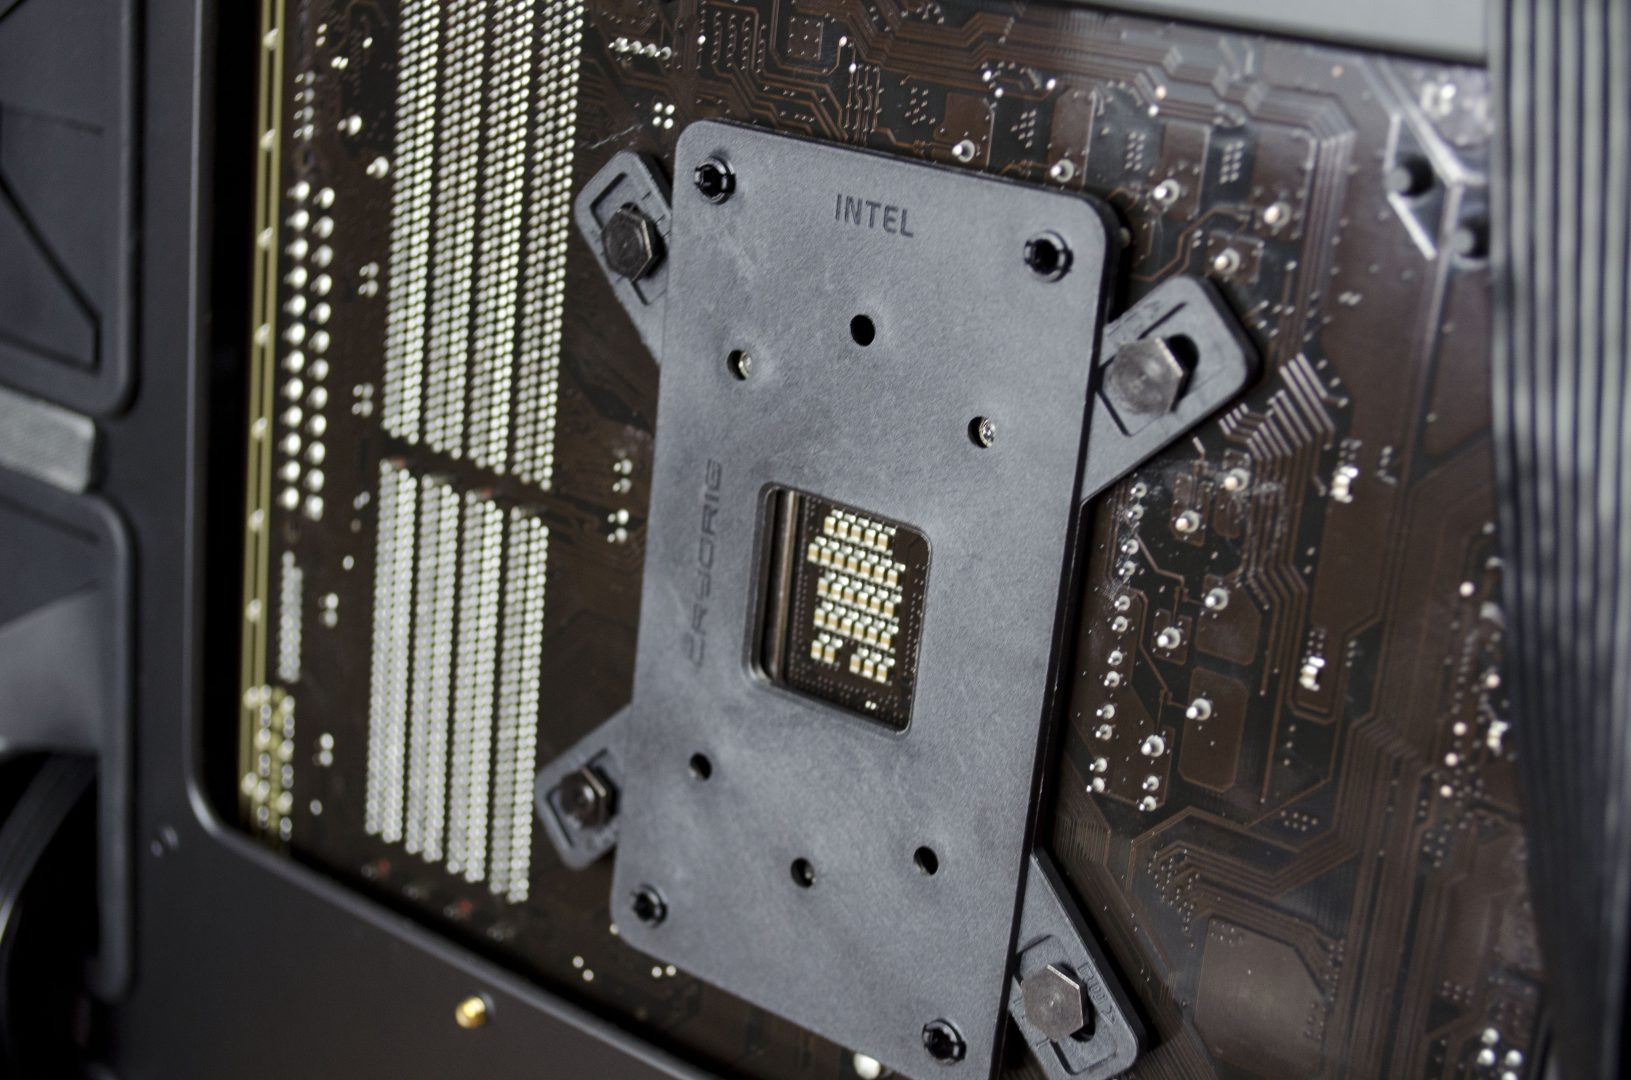
As we are starting to see with a lot of coolers these days, mounting is very simple. First, you will put the backplate onto the backside of the motherboard and then you will push the screws through the corresponding holes.
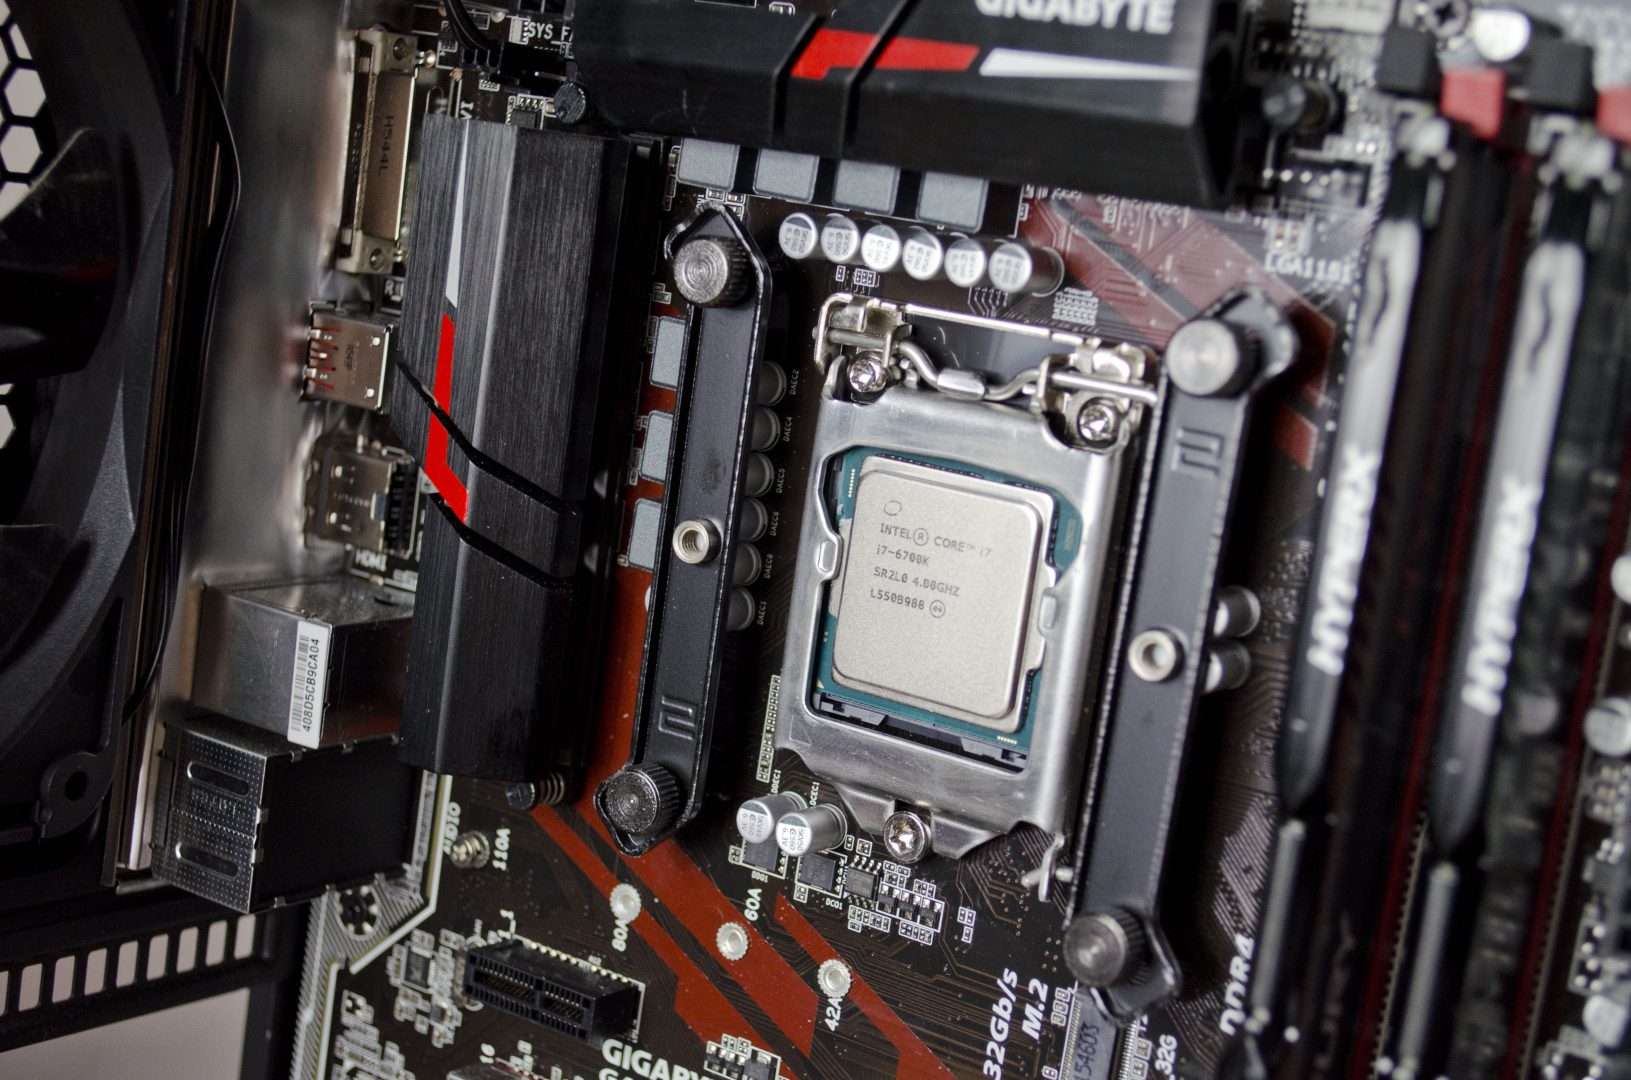
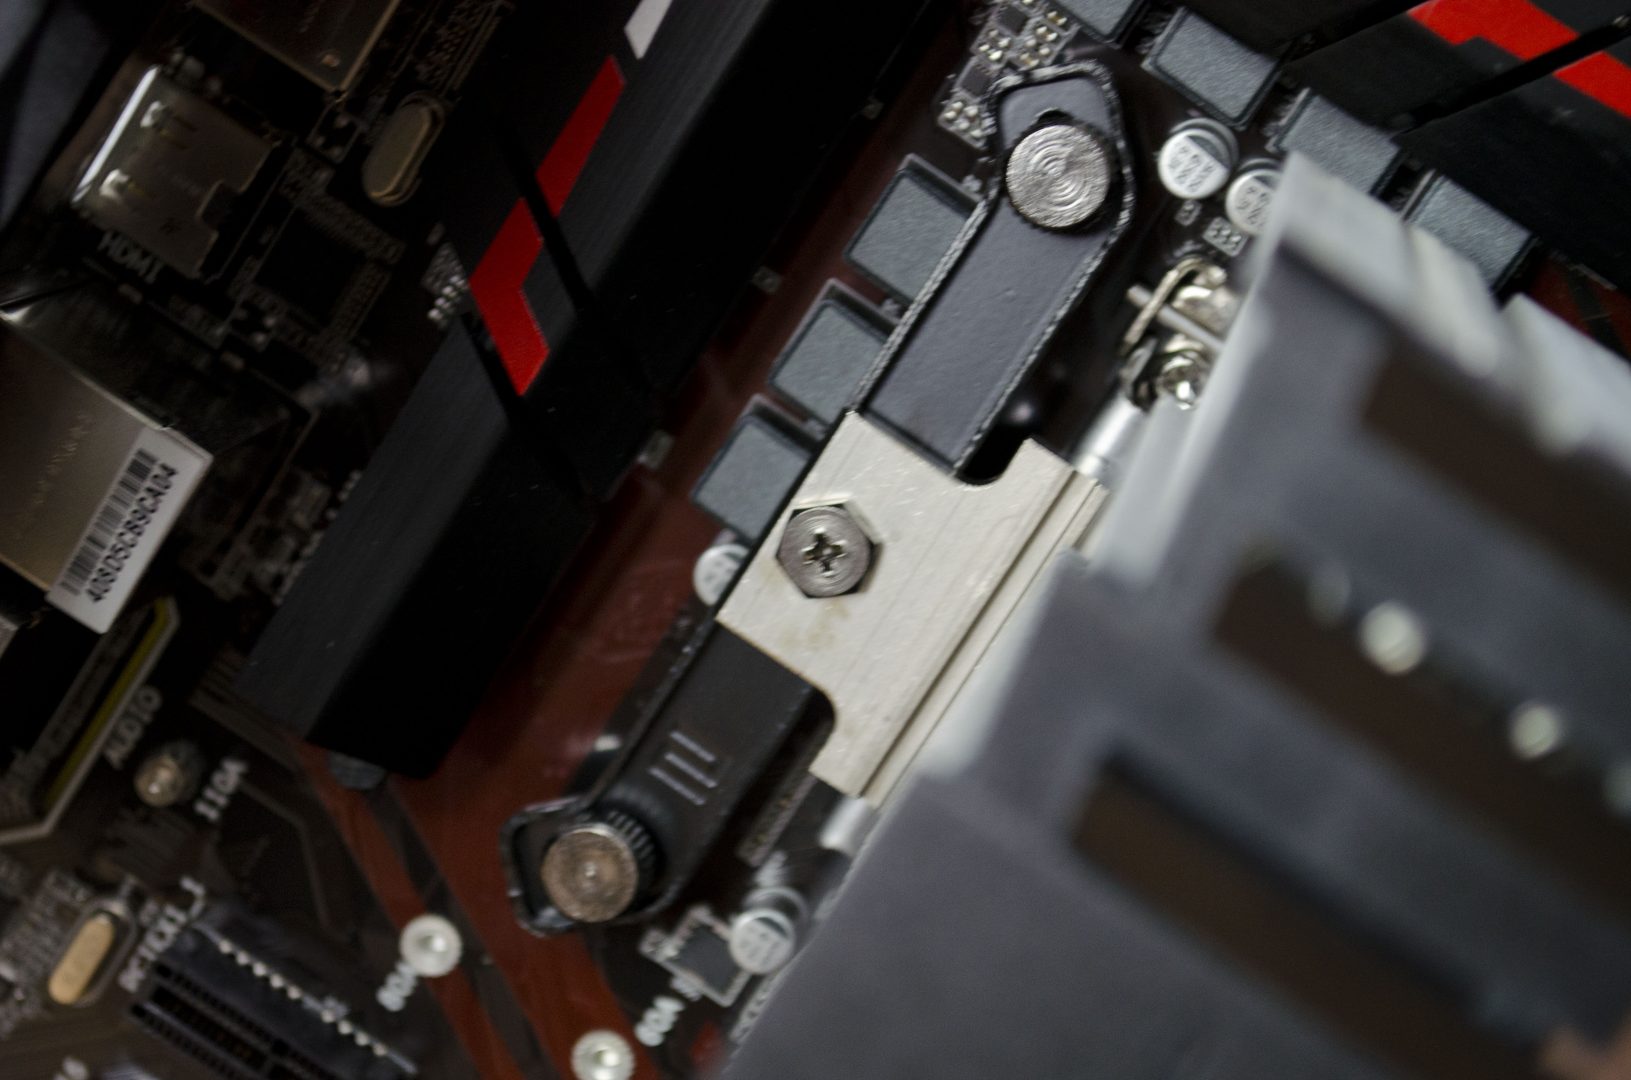
Next, you will add the retention bars on either side, it will be worth looking at the directions to make sure you get them installed facing the correct way. Once facing the right way and placed on the screws, you can now secure them in place with the thumb screws.
And that is pretty much it, not you just need to apply your thermal paste, set the heatsink on top and screw it into the retention brackets you just installed on the motherboard and job done. It is also worth noting you will need to take off the fan to screw the heatsink in on the one side, but this is as easy as unclipping it.
Test System and Methodology
Test System
- Windows 10 with all the latest updates
- Intel i7 6700K CPU Stock / 4.5GHz @1.400V OC
- Gigabyte Gaming K3 Z170 Motherboard
- 16GB HyperX Fury 2x8GB @ 2666Mhz RAM
- 2x HyperX Fury 120GB SSD
- Coolermaster V650 PSU
Methodology
For our testing, we use the Prime 95 stress testing program to make all the cores on our CPU run at 100% for 10minutes then we monitor them with CoreTemp and CPU-Z. We then take all the individual core temperature readings and add them up, then we divide that total by the number of cores and finally, we subtract the ambient room temperature to achieve our final result. We run four tests to completely test the cooler, we run both Stock and Load tests at stock CPU settings and then again at 1.40V for the OC settings.
To have the best chance of having like for like results, all testing is done in a Cooler Master Master Case Pro 5 with both side panels off.
Programs
Performance and Testing
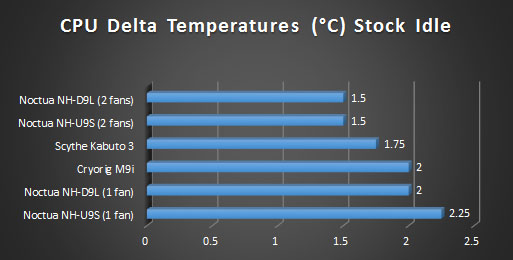
Temperatures
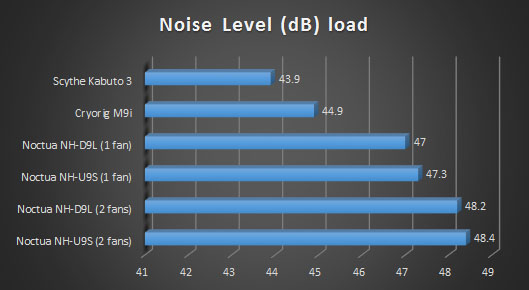
Noise Level
Final Thoughts
The only thing more impressive than its compact and small size is the M9i’s price tag of just $20! For this price, you certainly don’t expect sub-zero temps, but what you do get is enough cooling performance to keep your CPU from thermal throttling, which is all you can really ask for. The M9i is a great budget cooler that will definitely do the job, so let’s go ahead and recap and see just what I thought about it.
Performance
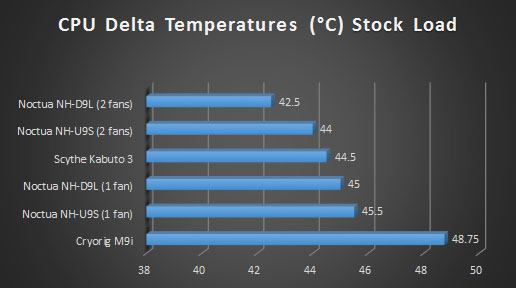
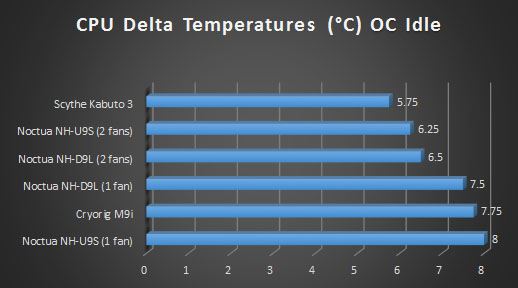
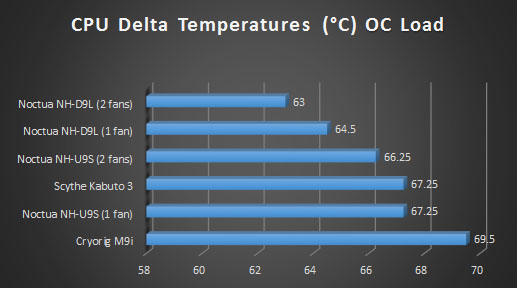
Comparing it directly to the NH-U9S we reviewed from Noctua and it’s a very close race. When looking at the Load temperatures on the overclocked benchmarks, the U9S does beat the M9i but 2c. However, at the time of review, the U9s costs almost twice as much as the M9i does, so is it really worth it? I’ll leave that up to you to decide. What I can say is for its size and price tag, the Cryorig M9i is nothing to bat an eye at as it had no issues at all while taming an overclocked i7-6700K running at 1.4V. It is also worth noting, those looking for a bit better performance can purchase a 2nd fan which can be easily attached to this cooler that will definitely knock a few more degrees off the temperatures seen here today.
Design
The design is quite simple and small, but it still does a great job at representing the Cryorig brand. While this may be one of the smallest and cheapest coolers Cryorig has to offer, the M9i is still designed with performance in mind. The nickel plated copper heatpipes and baseplate does a great job at helping to spread the heat through to the fin array where that 2,200RPM 92mm fan blows it right off. Cryorig has also not shied from adding an extra plastic shroud to the top fo the heatsink, something you will find somewhere on most Cryorig CPU coolers. While it is definitely smaller than most coolers these days, it has some great performance to offer thanks to its solid design.
Value
$20! I mean, come one! $20, really?!?! Yes, the M9i comes in at a ridiculous price of $20 from Newegg in the US. For this price, the M9i offers undoubtedly some of the best performance per price ratio I have ever seen in a CPU cooler. Whether you are looking to use the M9i as a stop-gap, or a permanent piece of your build, you really can’t go wrong, especially at just $20. For the money, it will be almost impossible to find something this small that offers like for like performance.
When it’s all said and done, Cryorig has offered us an amazing cooler in their M9i. Not only is it small, compact and offers great compatibility with RAM and other hardware, it has some great performance at an incredibly low price that is not to be missed.
Many thanks to Cryorig for supplying a same of their M9i cooler for this review.
Want to discuss this review further, head on over to the Logitech Cryorig M9i thread, in the Enos Tech Reviews Sub-category on the Gaming Exodus forums!

