Raijintek Pallas Low Profile CPU Cooler Review
Raijintek was established in 2013 and within this short time, the company has made its way to earn themselves a good reputation in the market. Their aim is to design high-end products for lifestyle, computer, and day-to-day usage. Their products are designed in Germany and manufactured in China. Their products range include Power Supplies for the PC, Cooling solutions in both categories of air and water, custom loop components, PC Chassis, fans, and accessories. Their lifestyle product line is intended for the smartphone and tablet users in the form of accessories.
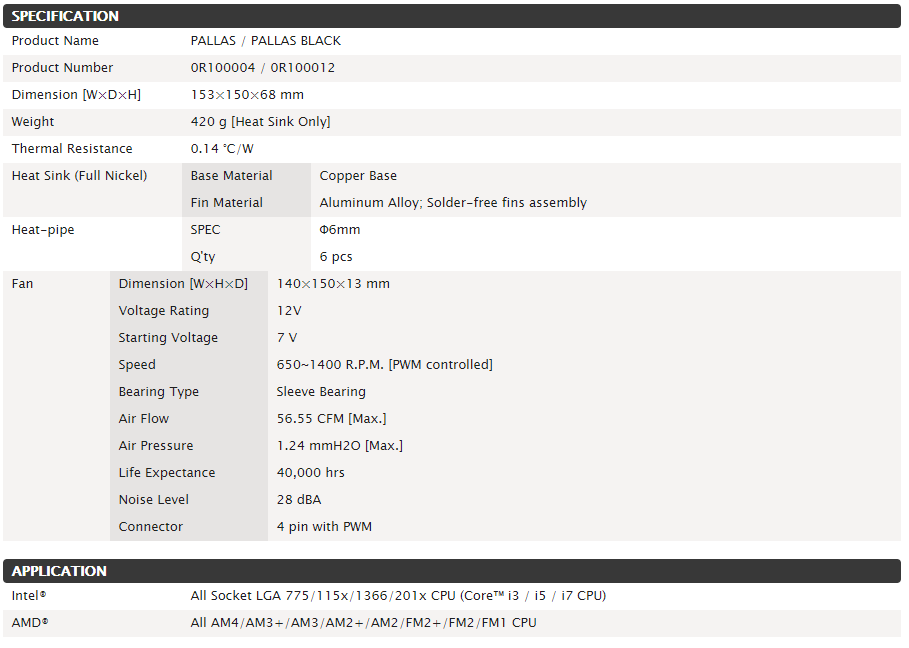
The battle of low profile air coolers on our test bench is going on and today, we will be taking a look at the Raijintek high-end solution in this category. We have categorized the low profile air coolers in two broader categories of Compact Low Profile and Regular or Non-Compact Low Profile coolers. This helps in better understanding of the performance given the size of the cooler. The Pallas from Raijintek falls under the Non-Compact Low Profile air cooler with 68mm height inclusive of the fan. The cooler comes in two colors one in the black and the other in the red with later being termed simply as Pallas while the former is termed as Pallas Black. The fan provided with the cooler has 13mm of height and is quite slim profile while maintaining the larger surface of 140x150mm. The cooler is designed for use in HTPC or SFF builds with an emphasis on the form and the functionality.
Product: Pallas
Manufacturer: Raijintek
Price: $35 [at the time of the review]
Specifications
Packaging and Unboxing
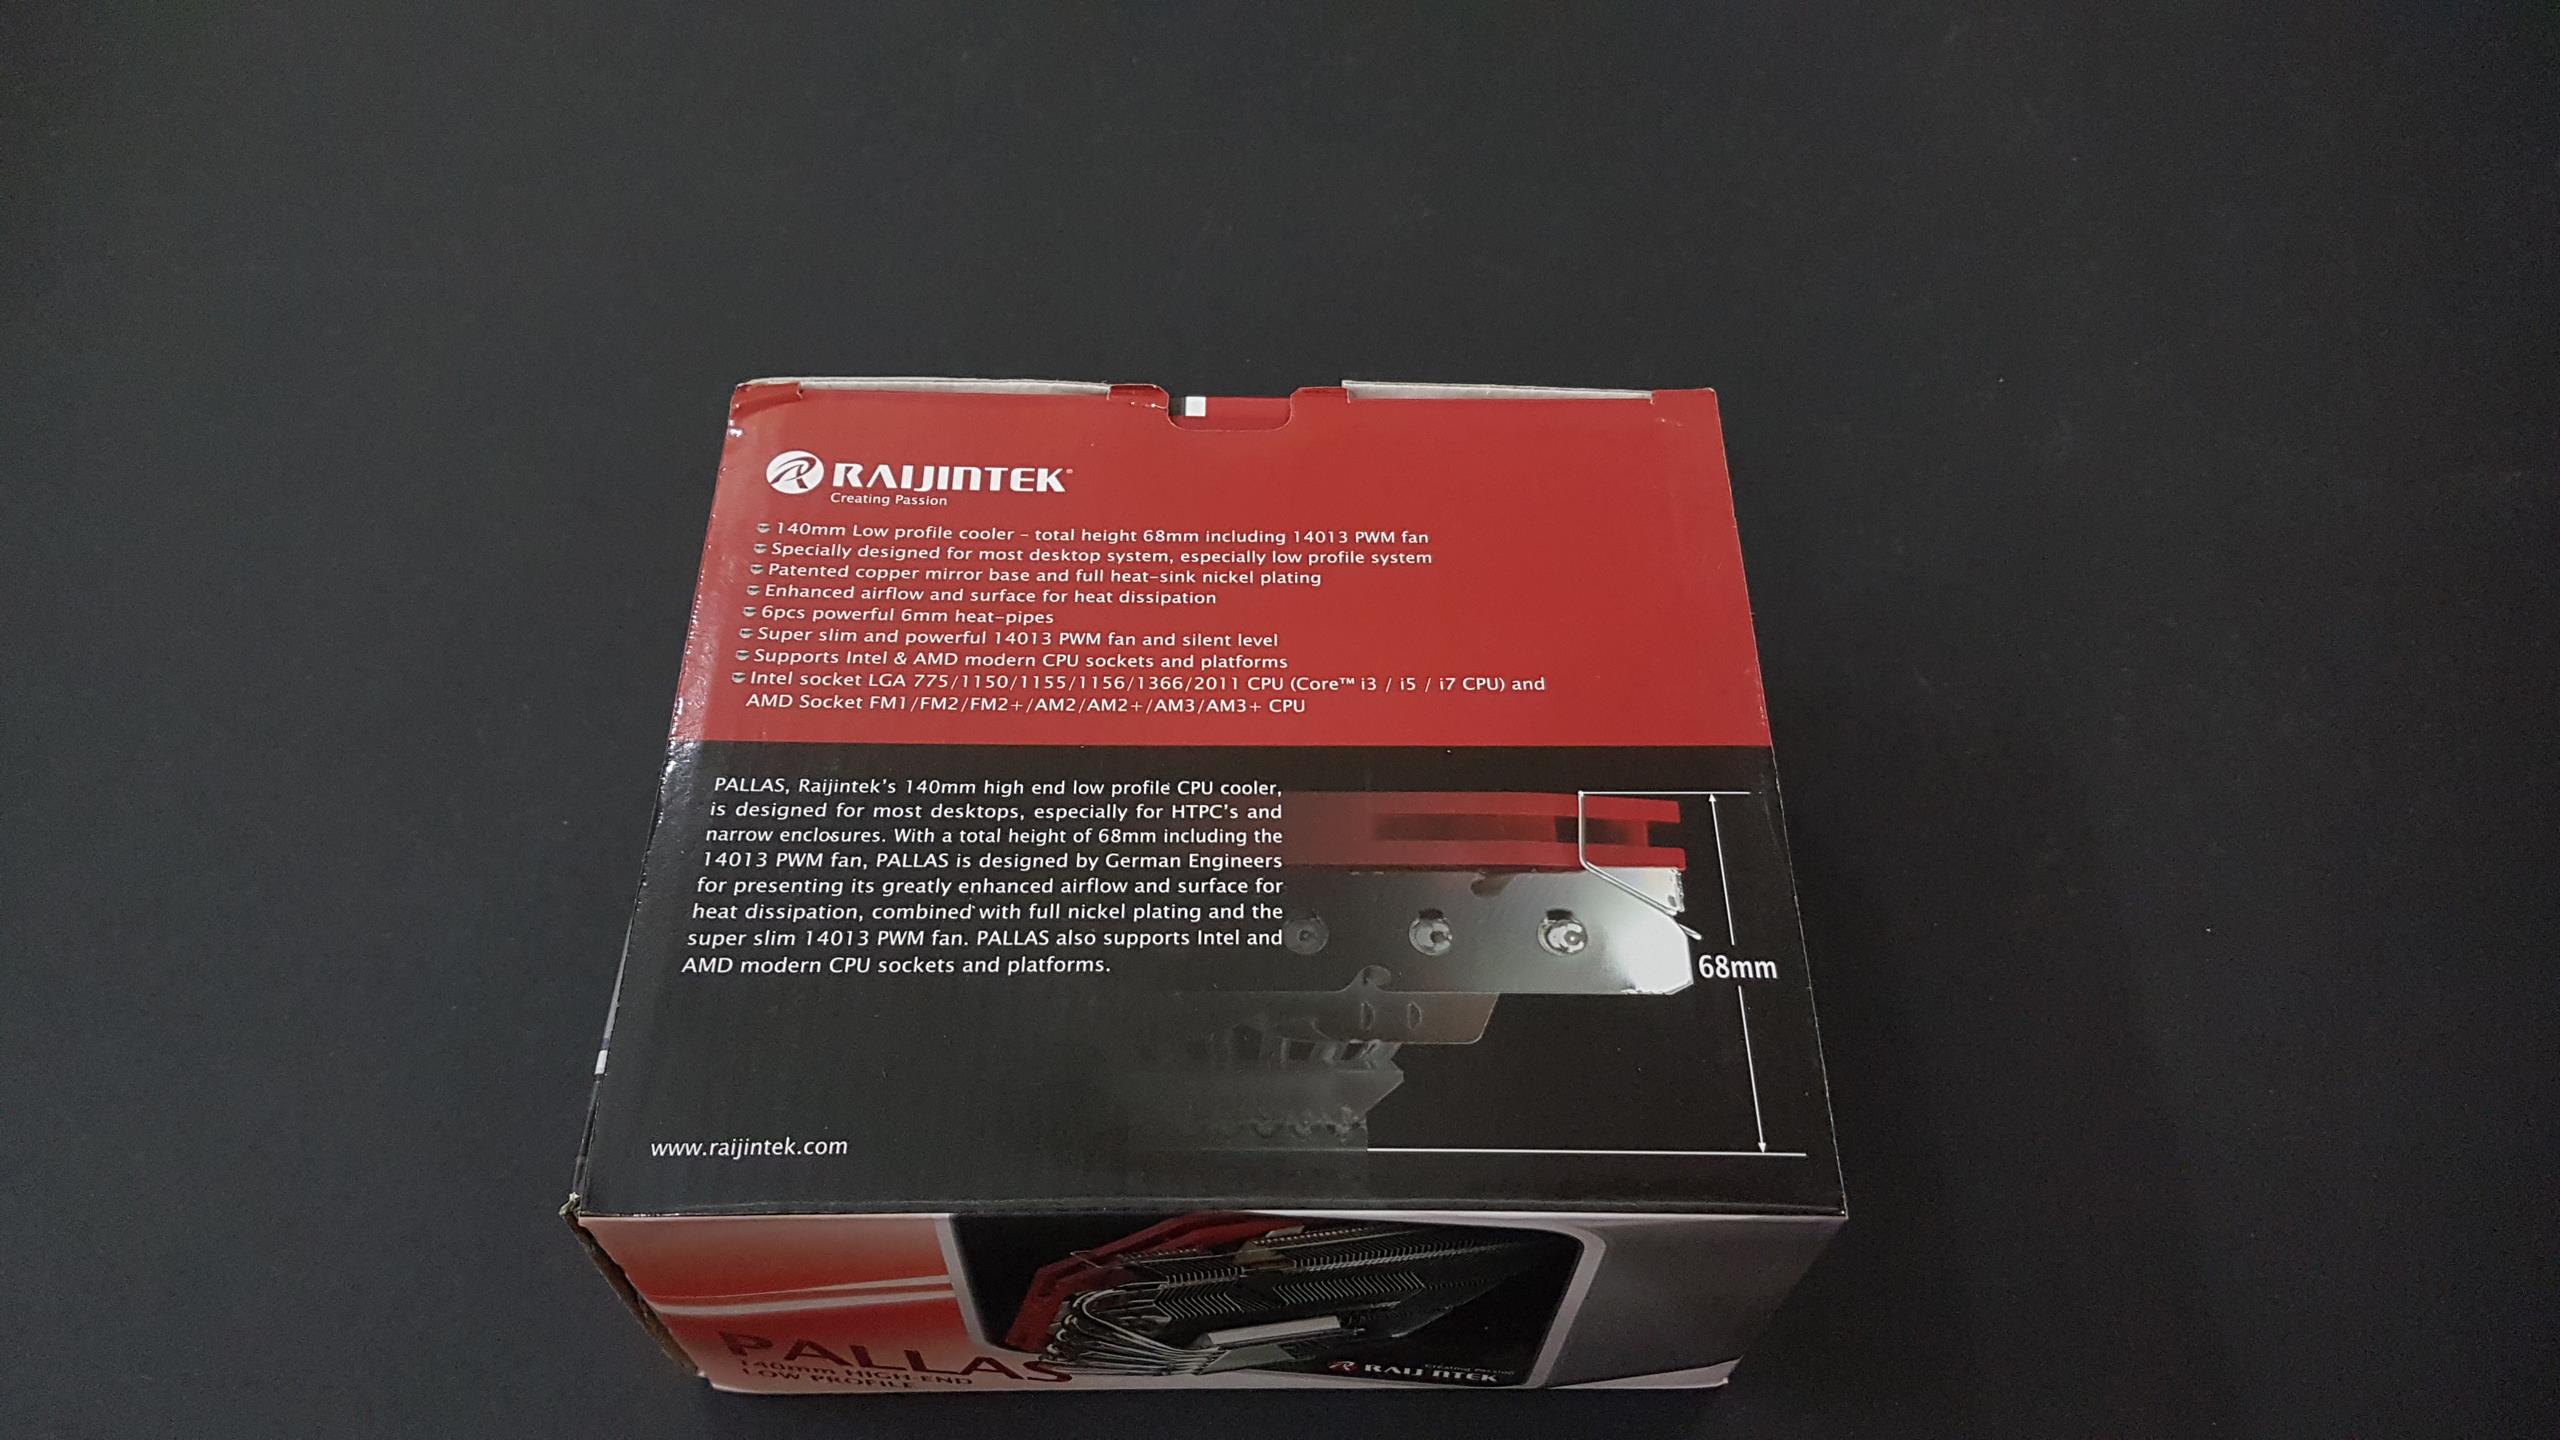
The cooler comes in a colorful packing made of a cardboard box. There are two colors used on the packaging. These are Red and Black to signify the red color version of the Pallas. Please note that the heatsink is not colored but the fan. On the top cover, there is a Raijintek brand name and logo printed on the top left side. The top side has the red color background and salient features of the cooler are printed on it. The bottom side as black color background with the text of what the Raijintek has to say about the cooler. Company’s website address is printed at the bottom.
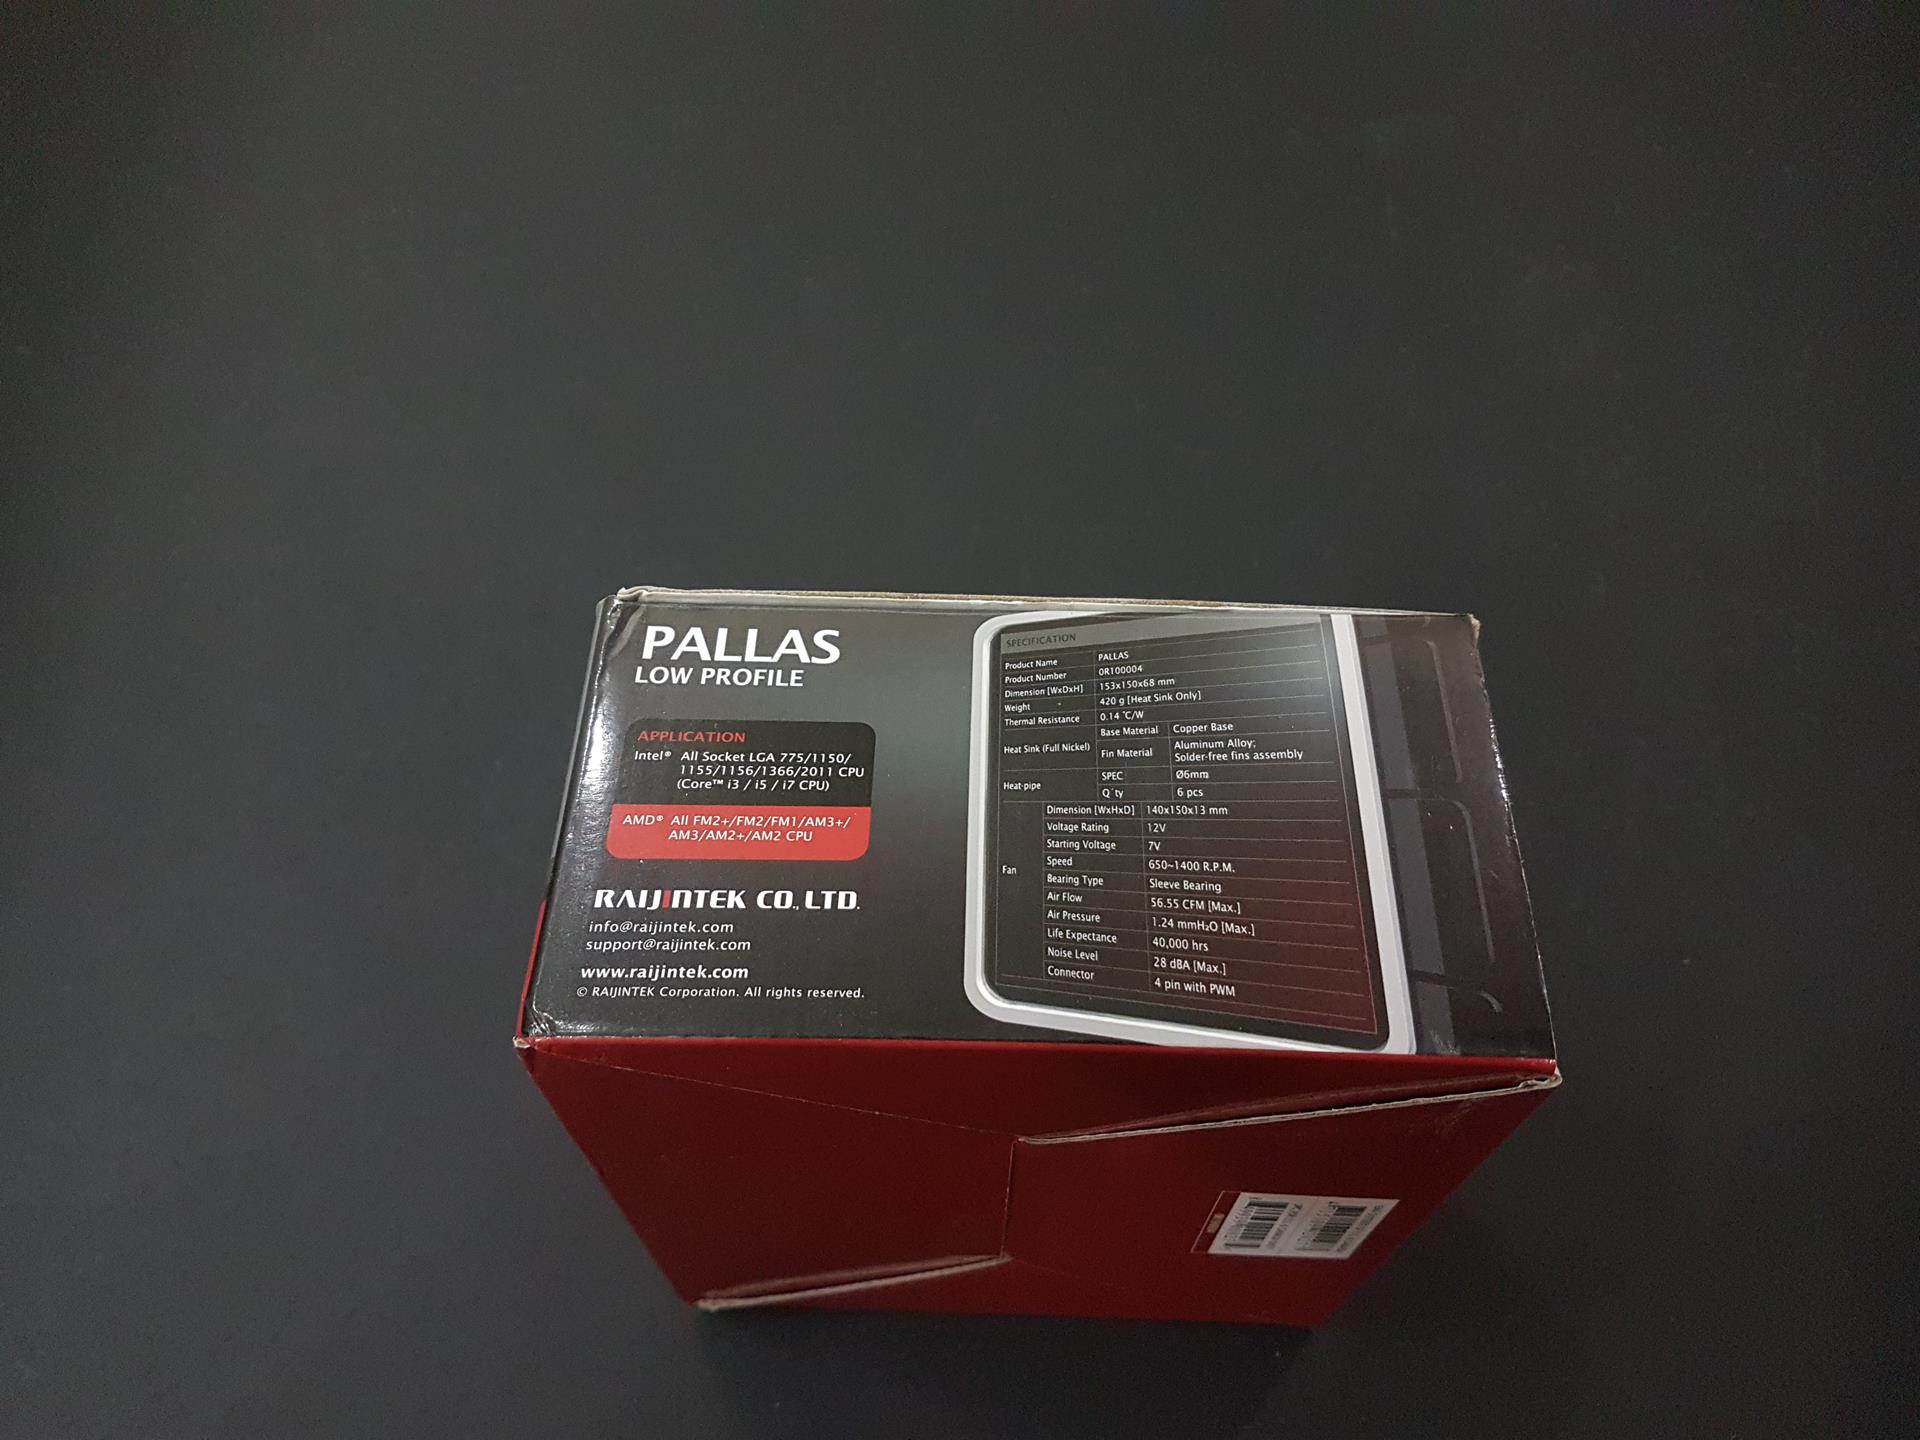
This side of the packing box has the specifications of the cooler printed in the tabular format on the right side. Pallas Low Profile is printed on the top left side. Socket compatibility is printed under it. The cooler is compatible with most of the sockets. It is AM4 ready for which the supporting bracket would need to be bought from the manufacturer separately. Company’s contact address is printed at the bottom.
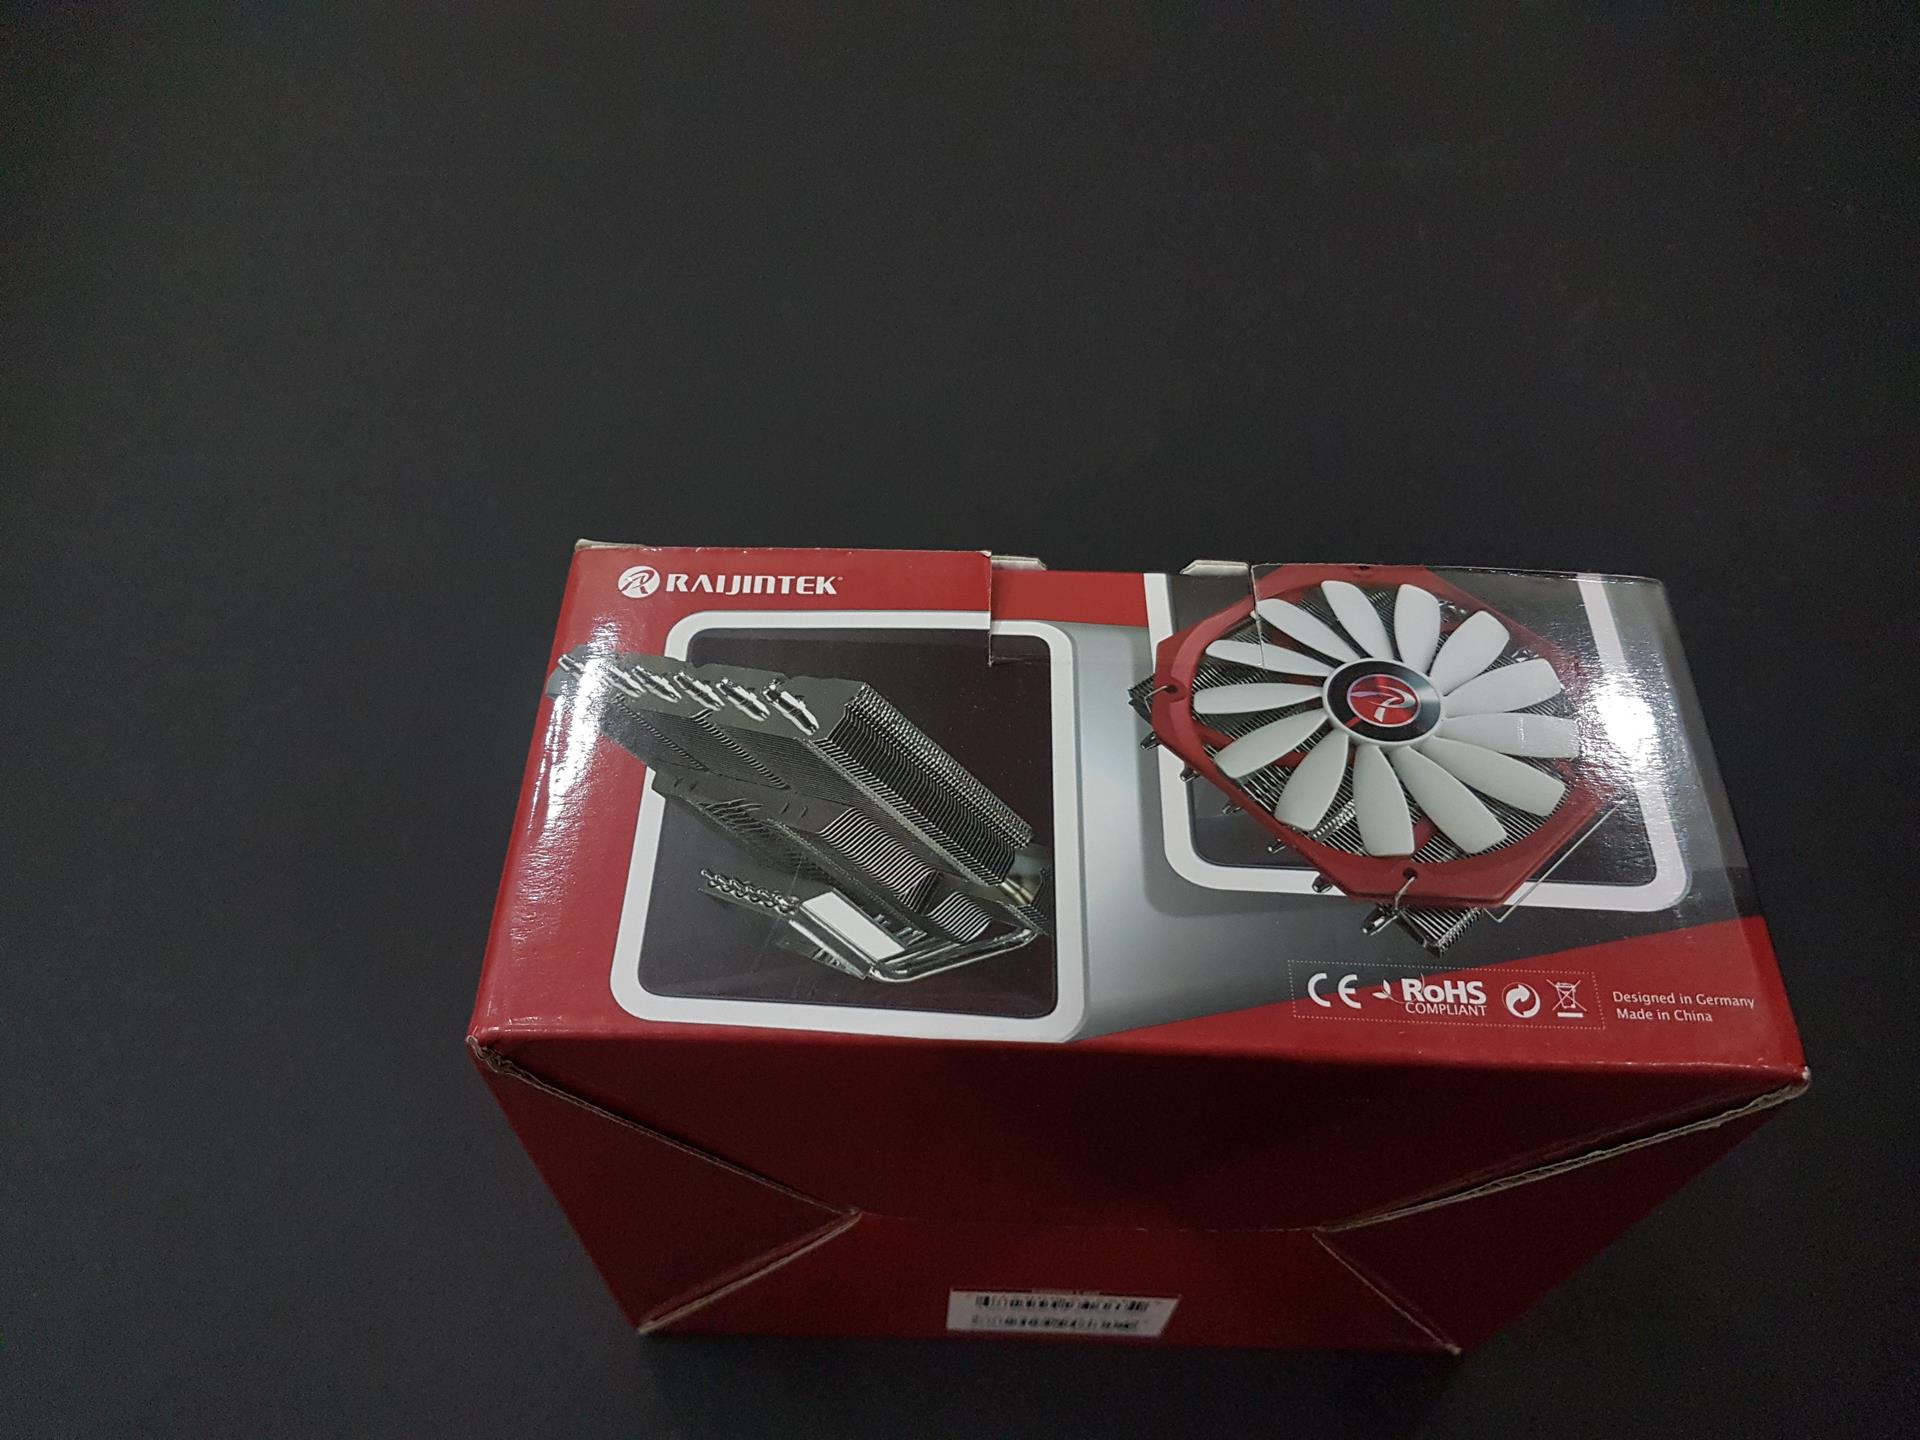
The front side of the packing box has the picture of the heatsink printed on the left side. The Raijintek brand name and logo are printed on the top left side. The picture of the complete cooler is printed on the right side with the focus on the fan. The cooler is designed in Germany and made in China.
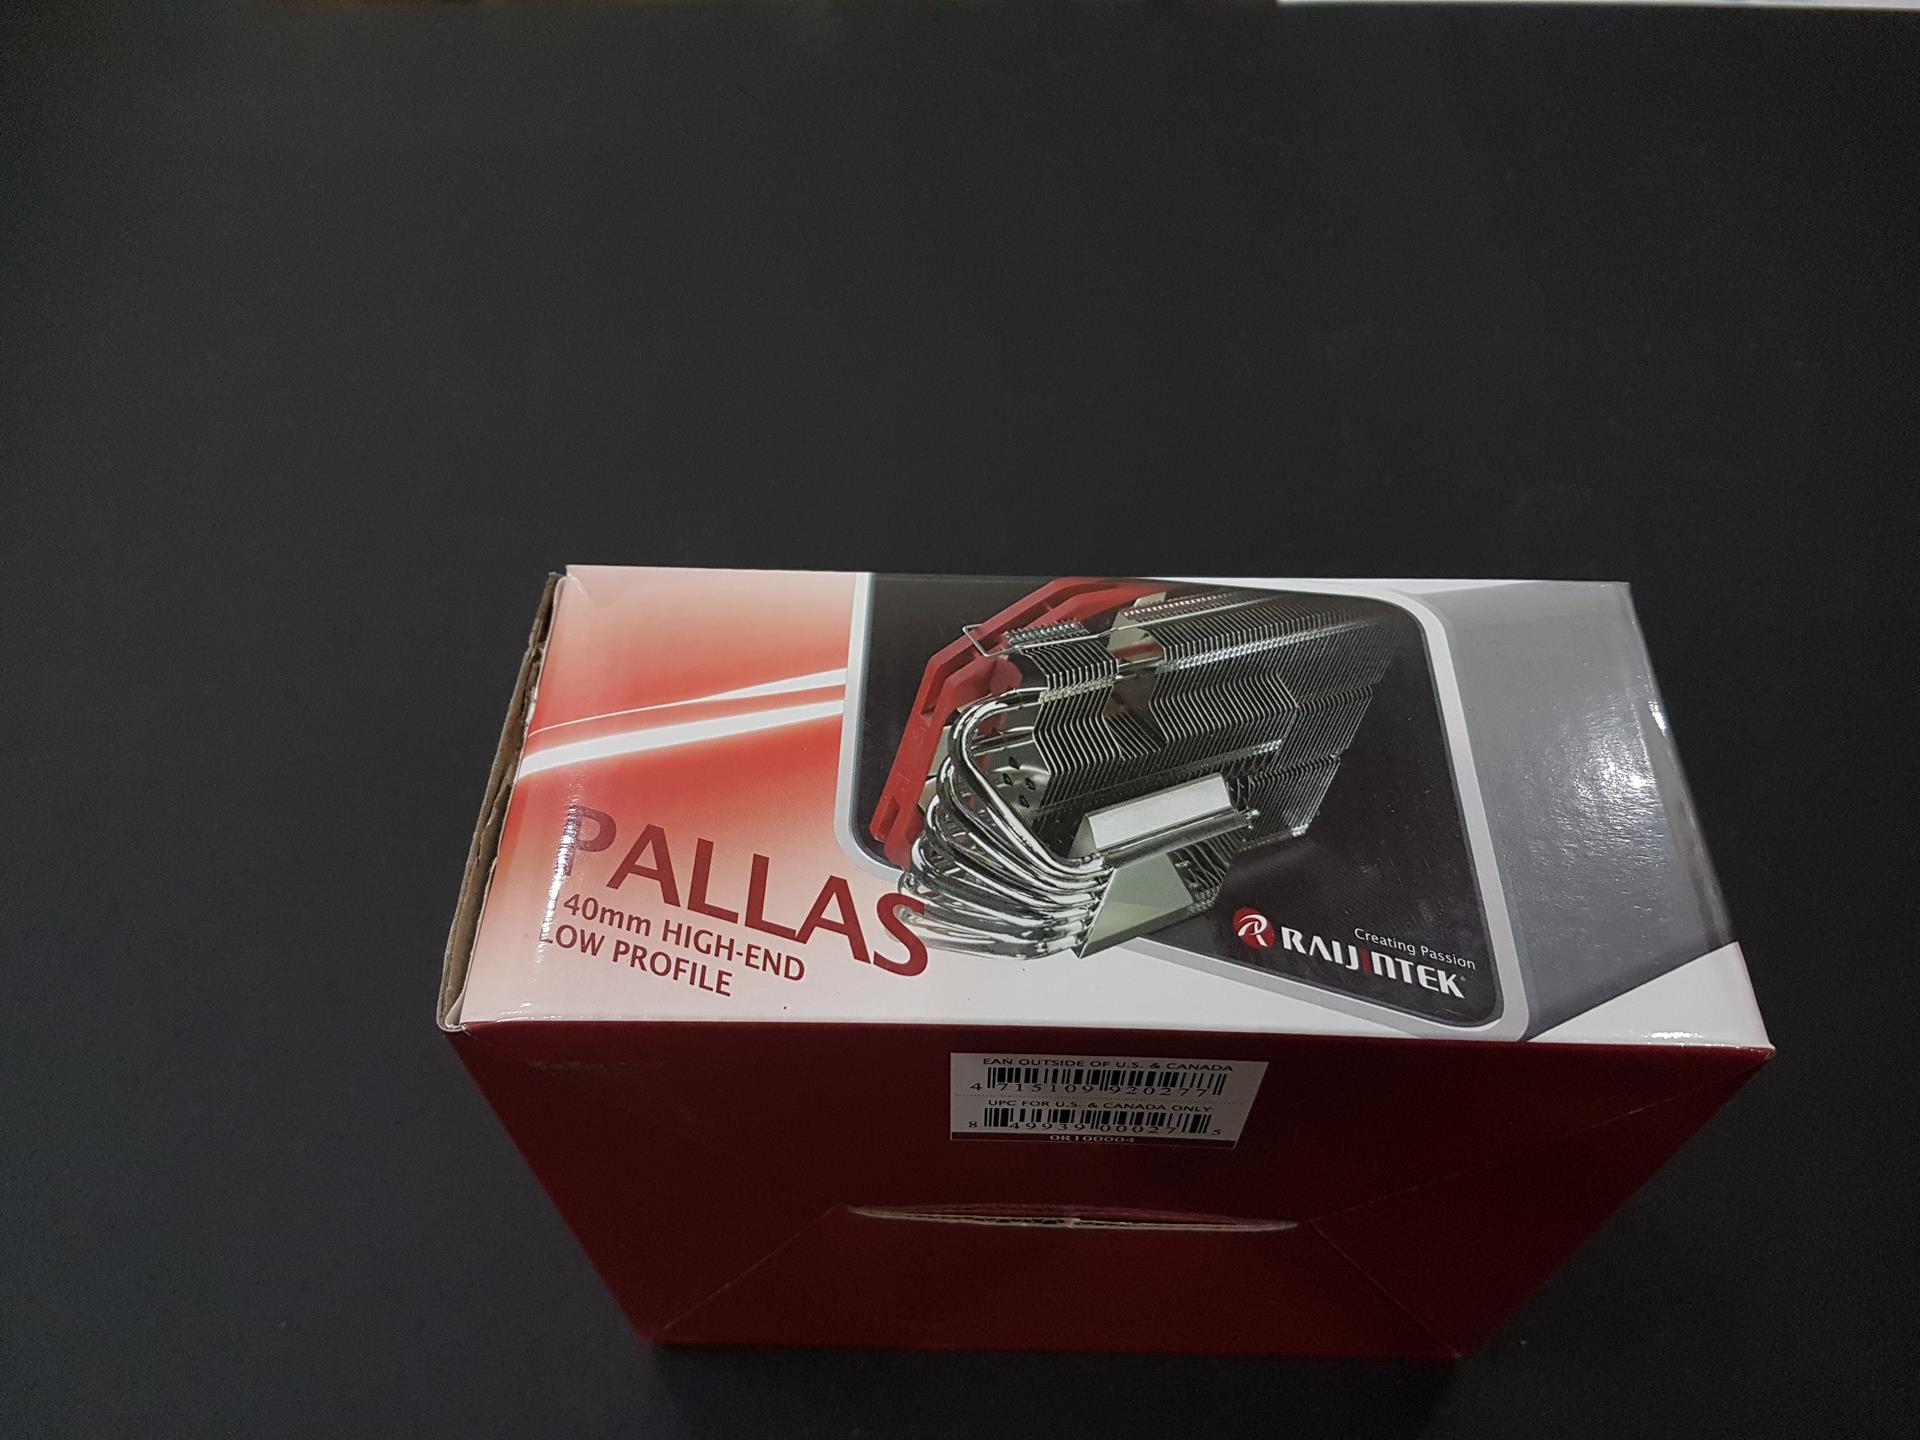
This side of the packing box has the picture of the cooler printed on the right side with the focus on its bottom and backside. Pallas 140mm High-End Low Profile is printed in the red color at the bottom left side.
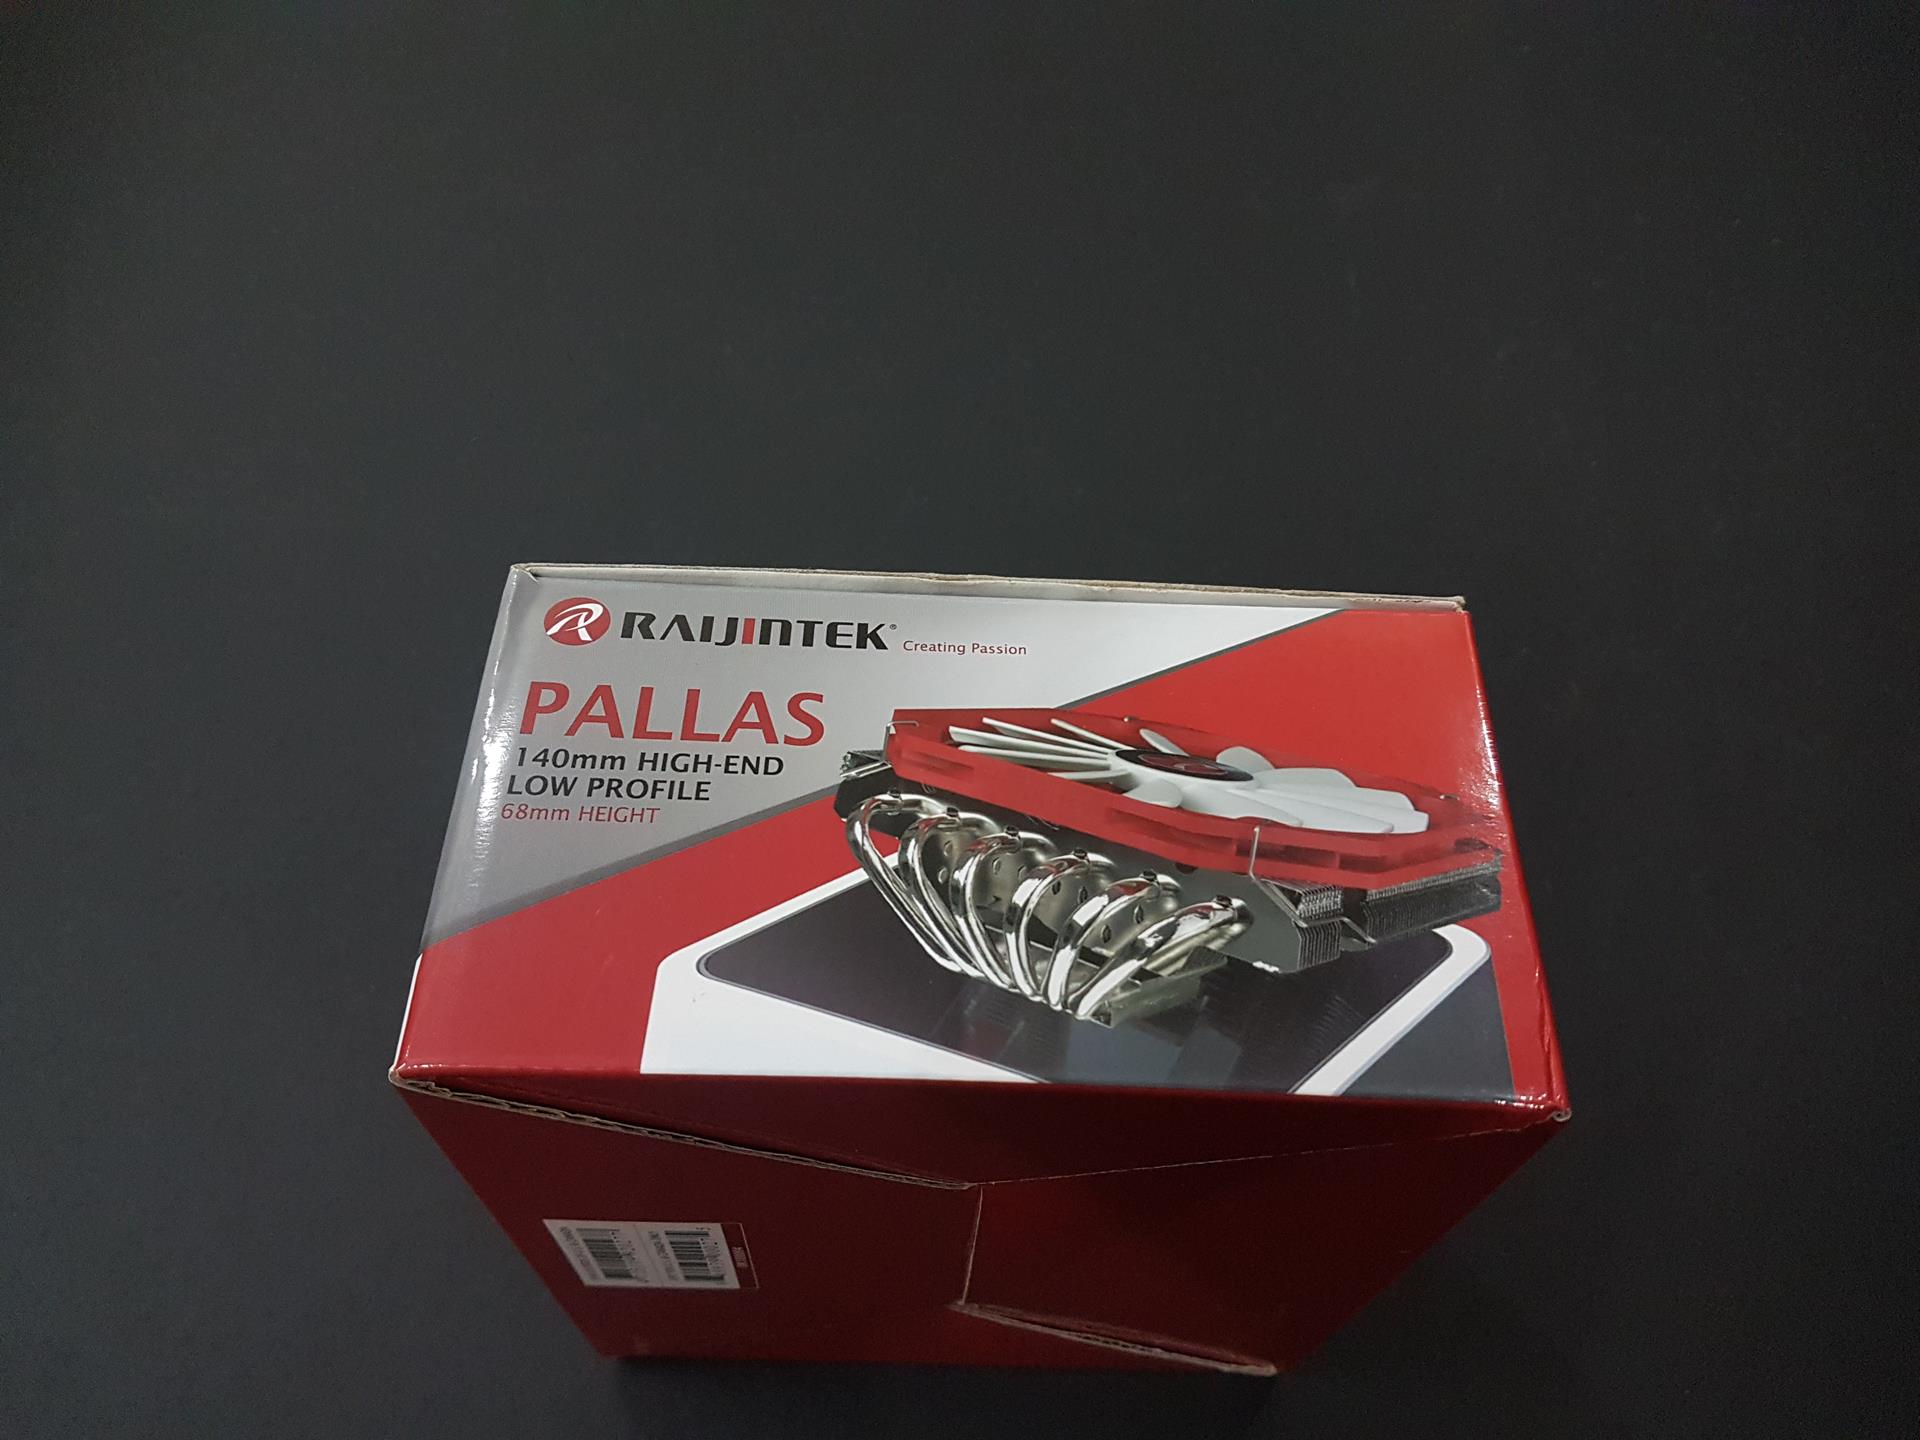
This side has the Raijintek brand name and logo printed on the top left side. The picture of the cooler is printed on the right side. Pallas High-End Low Profile is printed on the left side. The height of the cooler is highlighted as well which is 68mm.
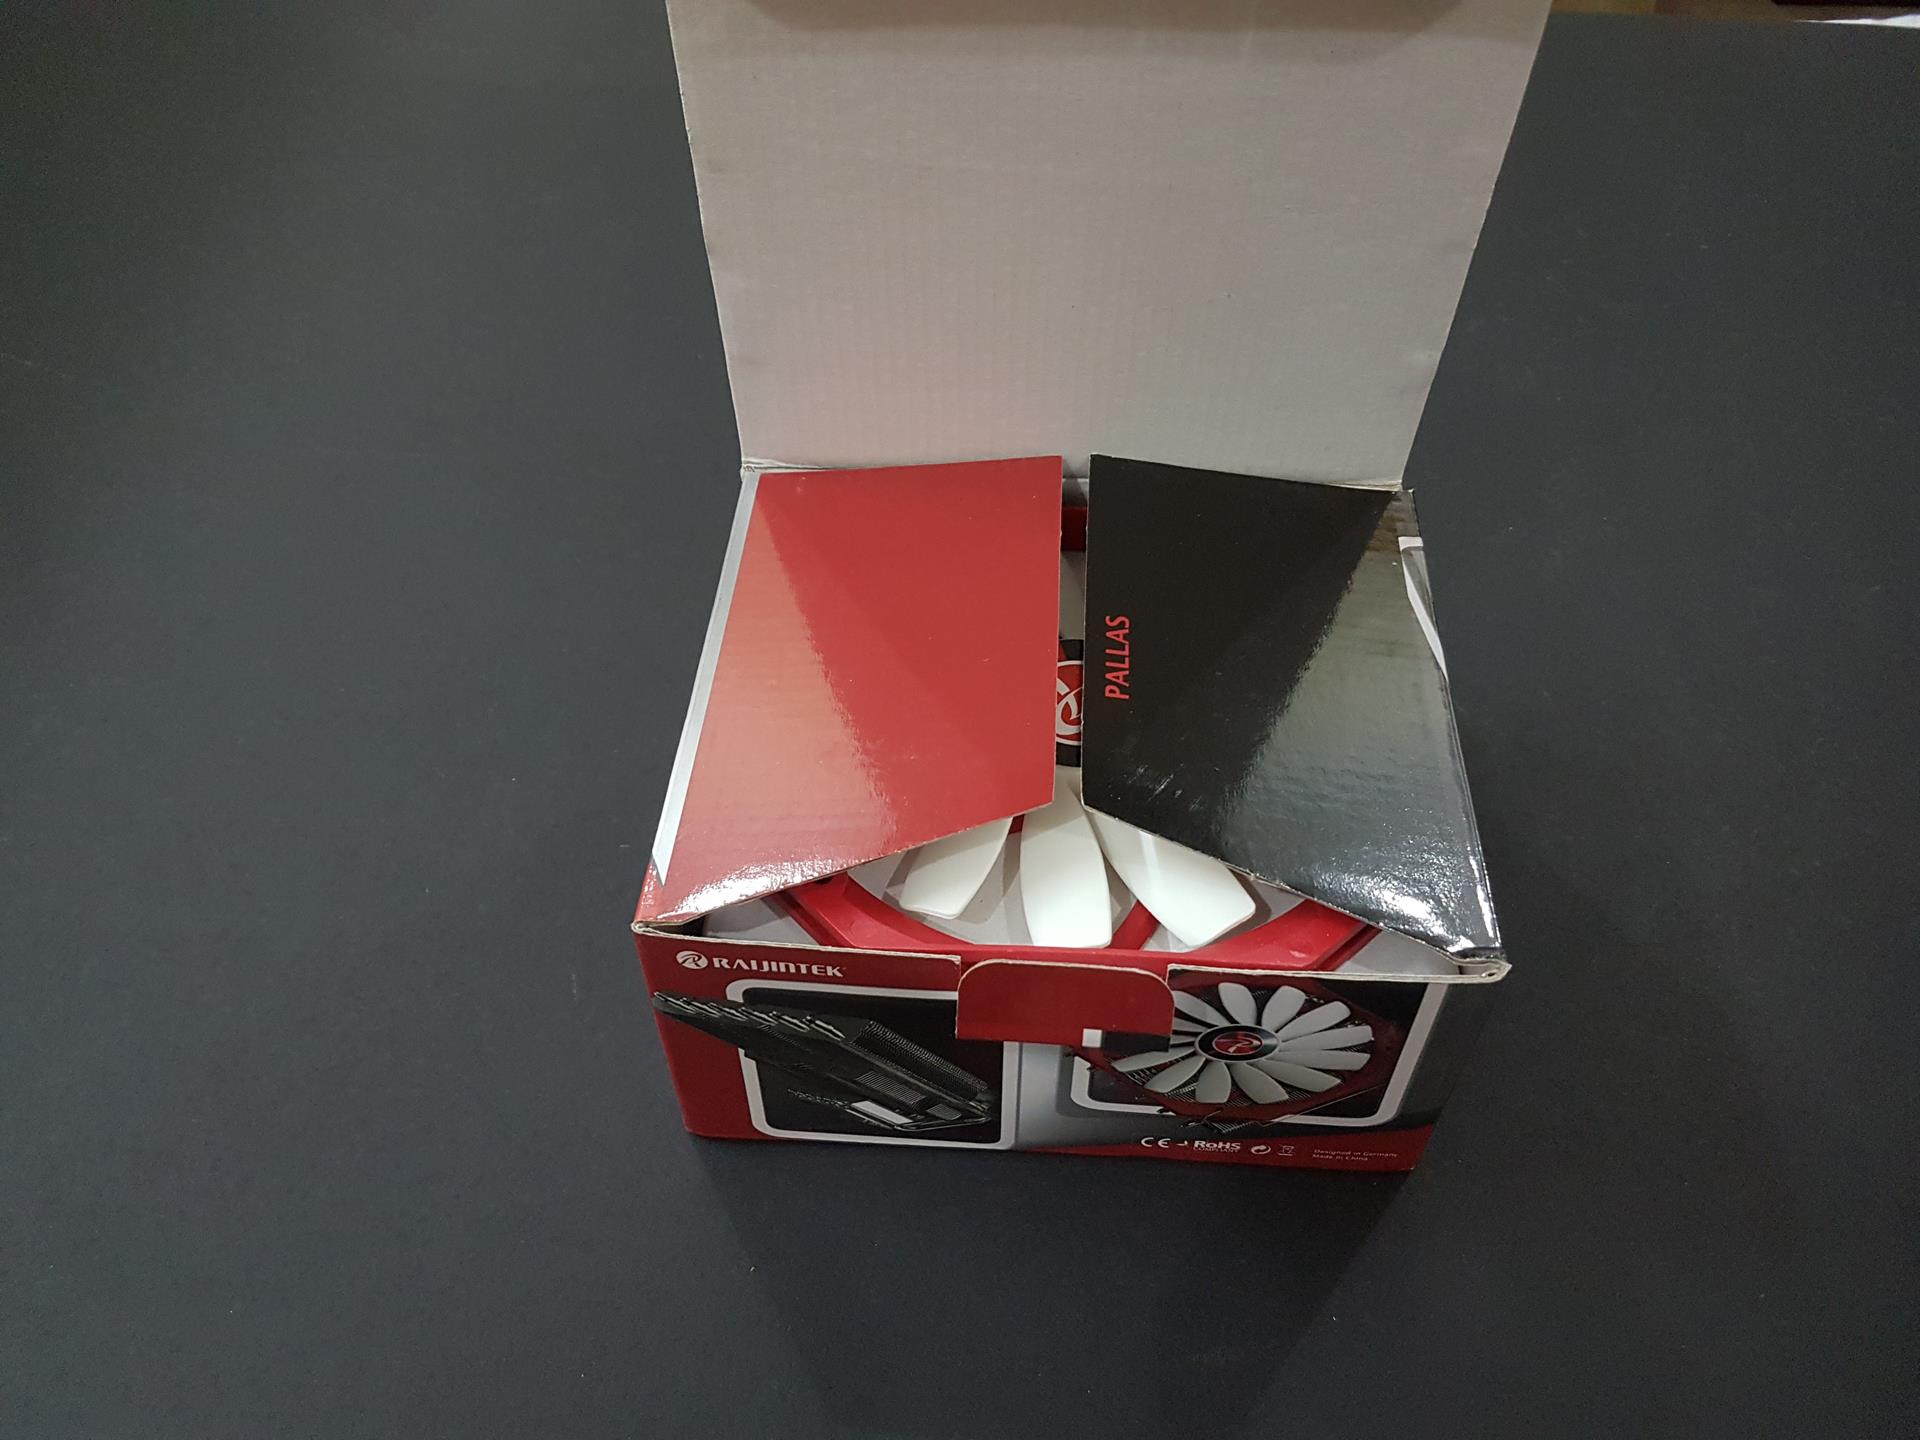
The inside flap covers are in two colors. The right-hand one is in black color while the left-hand one is in the red color. PALLAS in red color is printed on the black background.
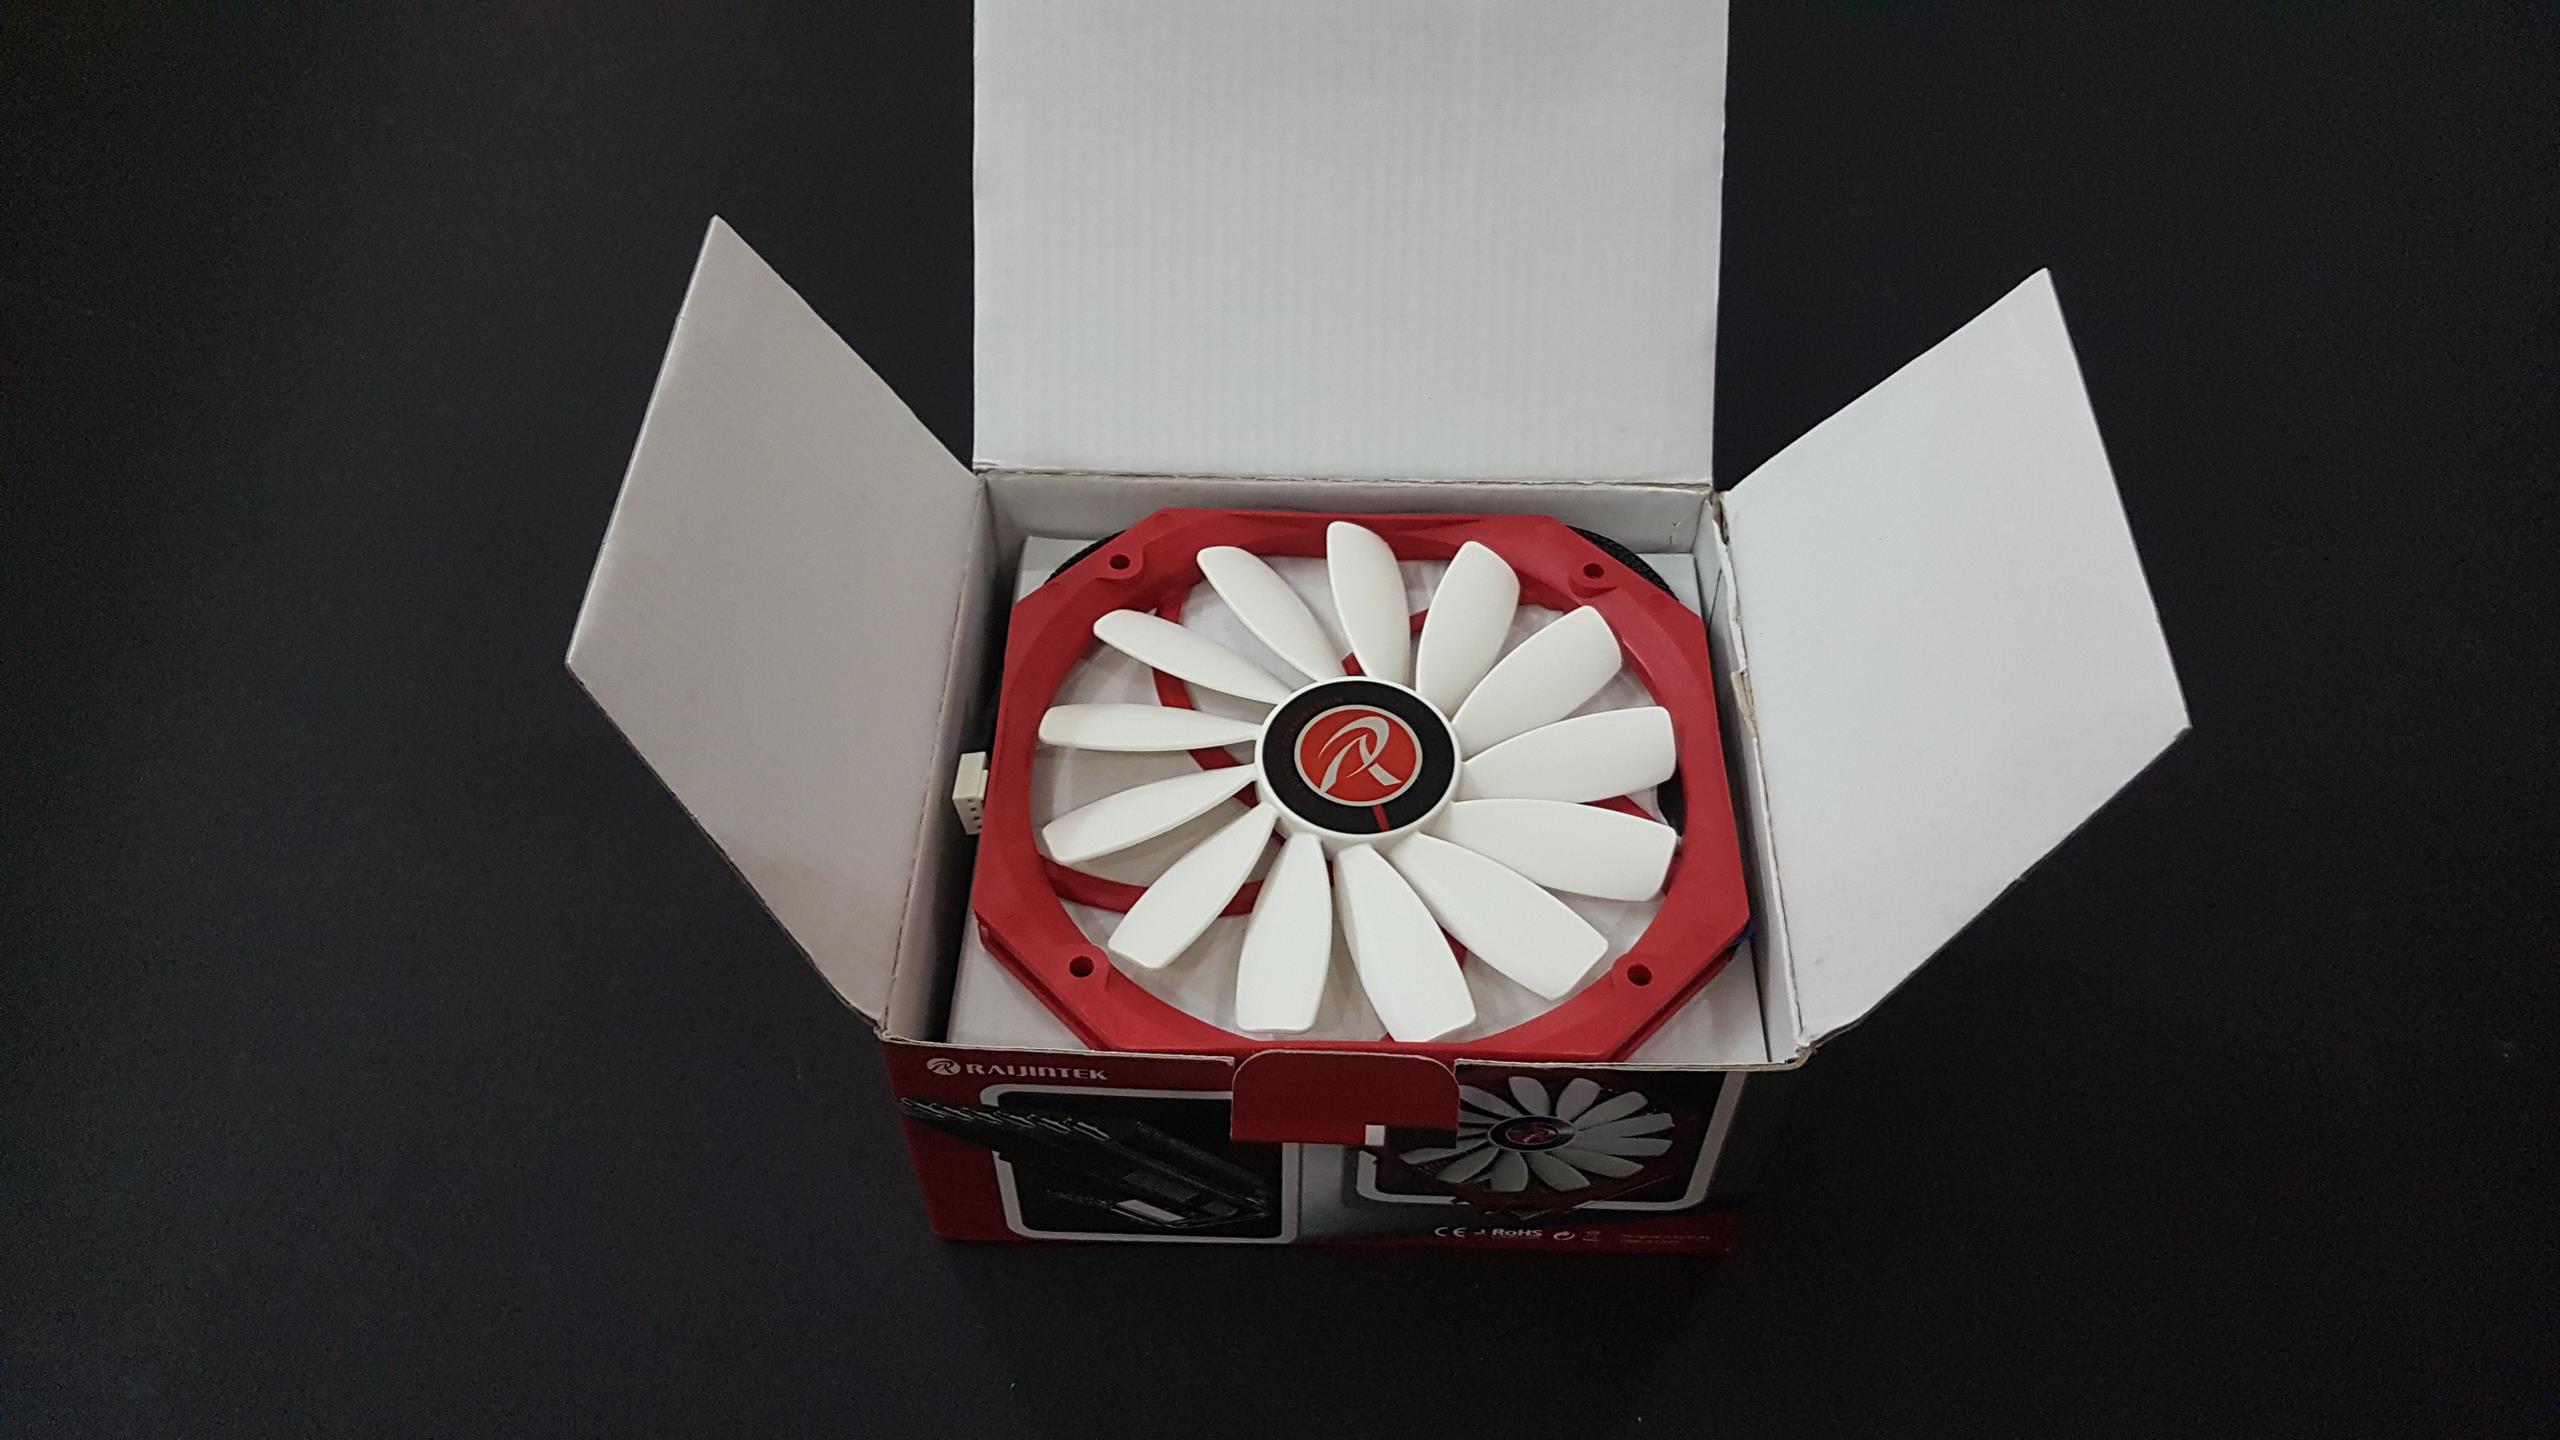
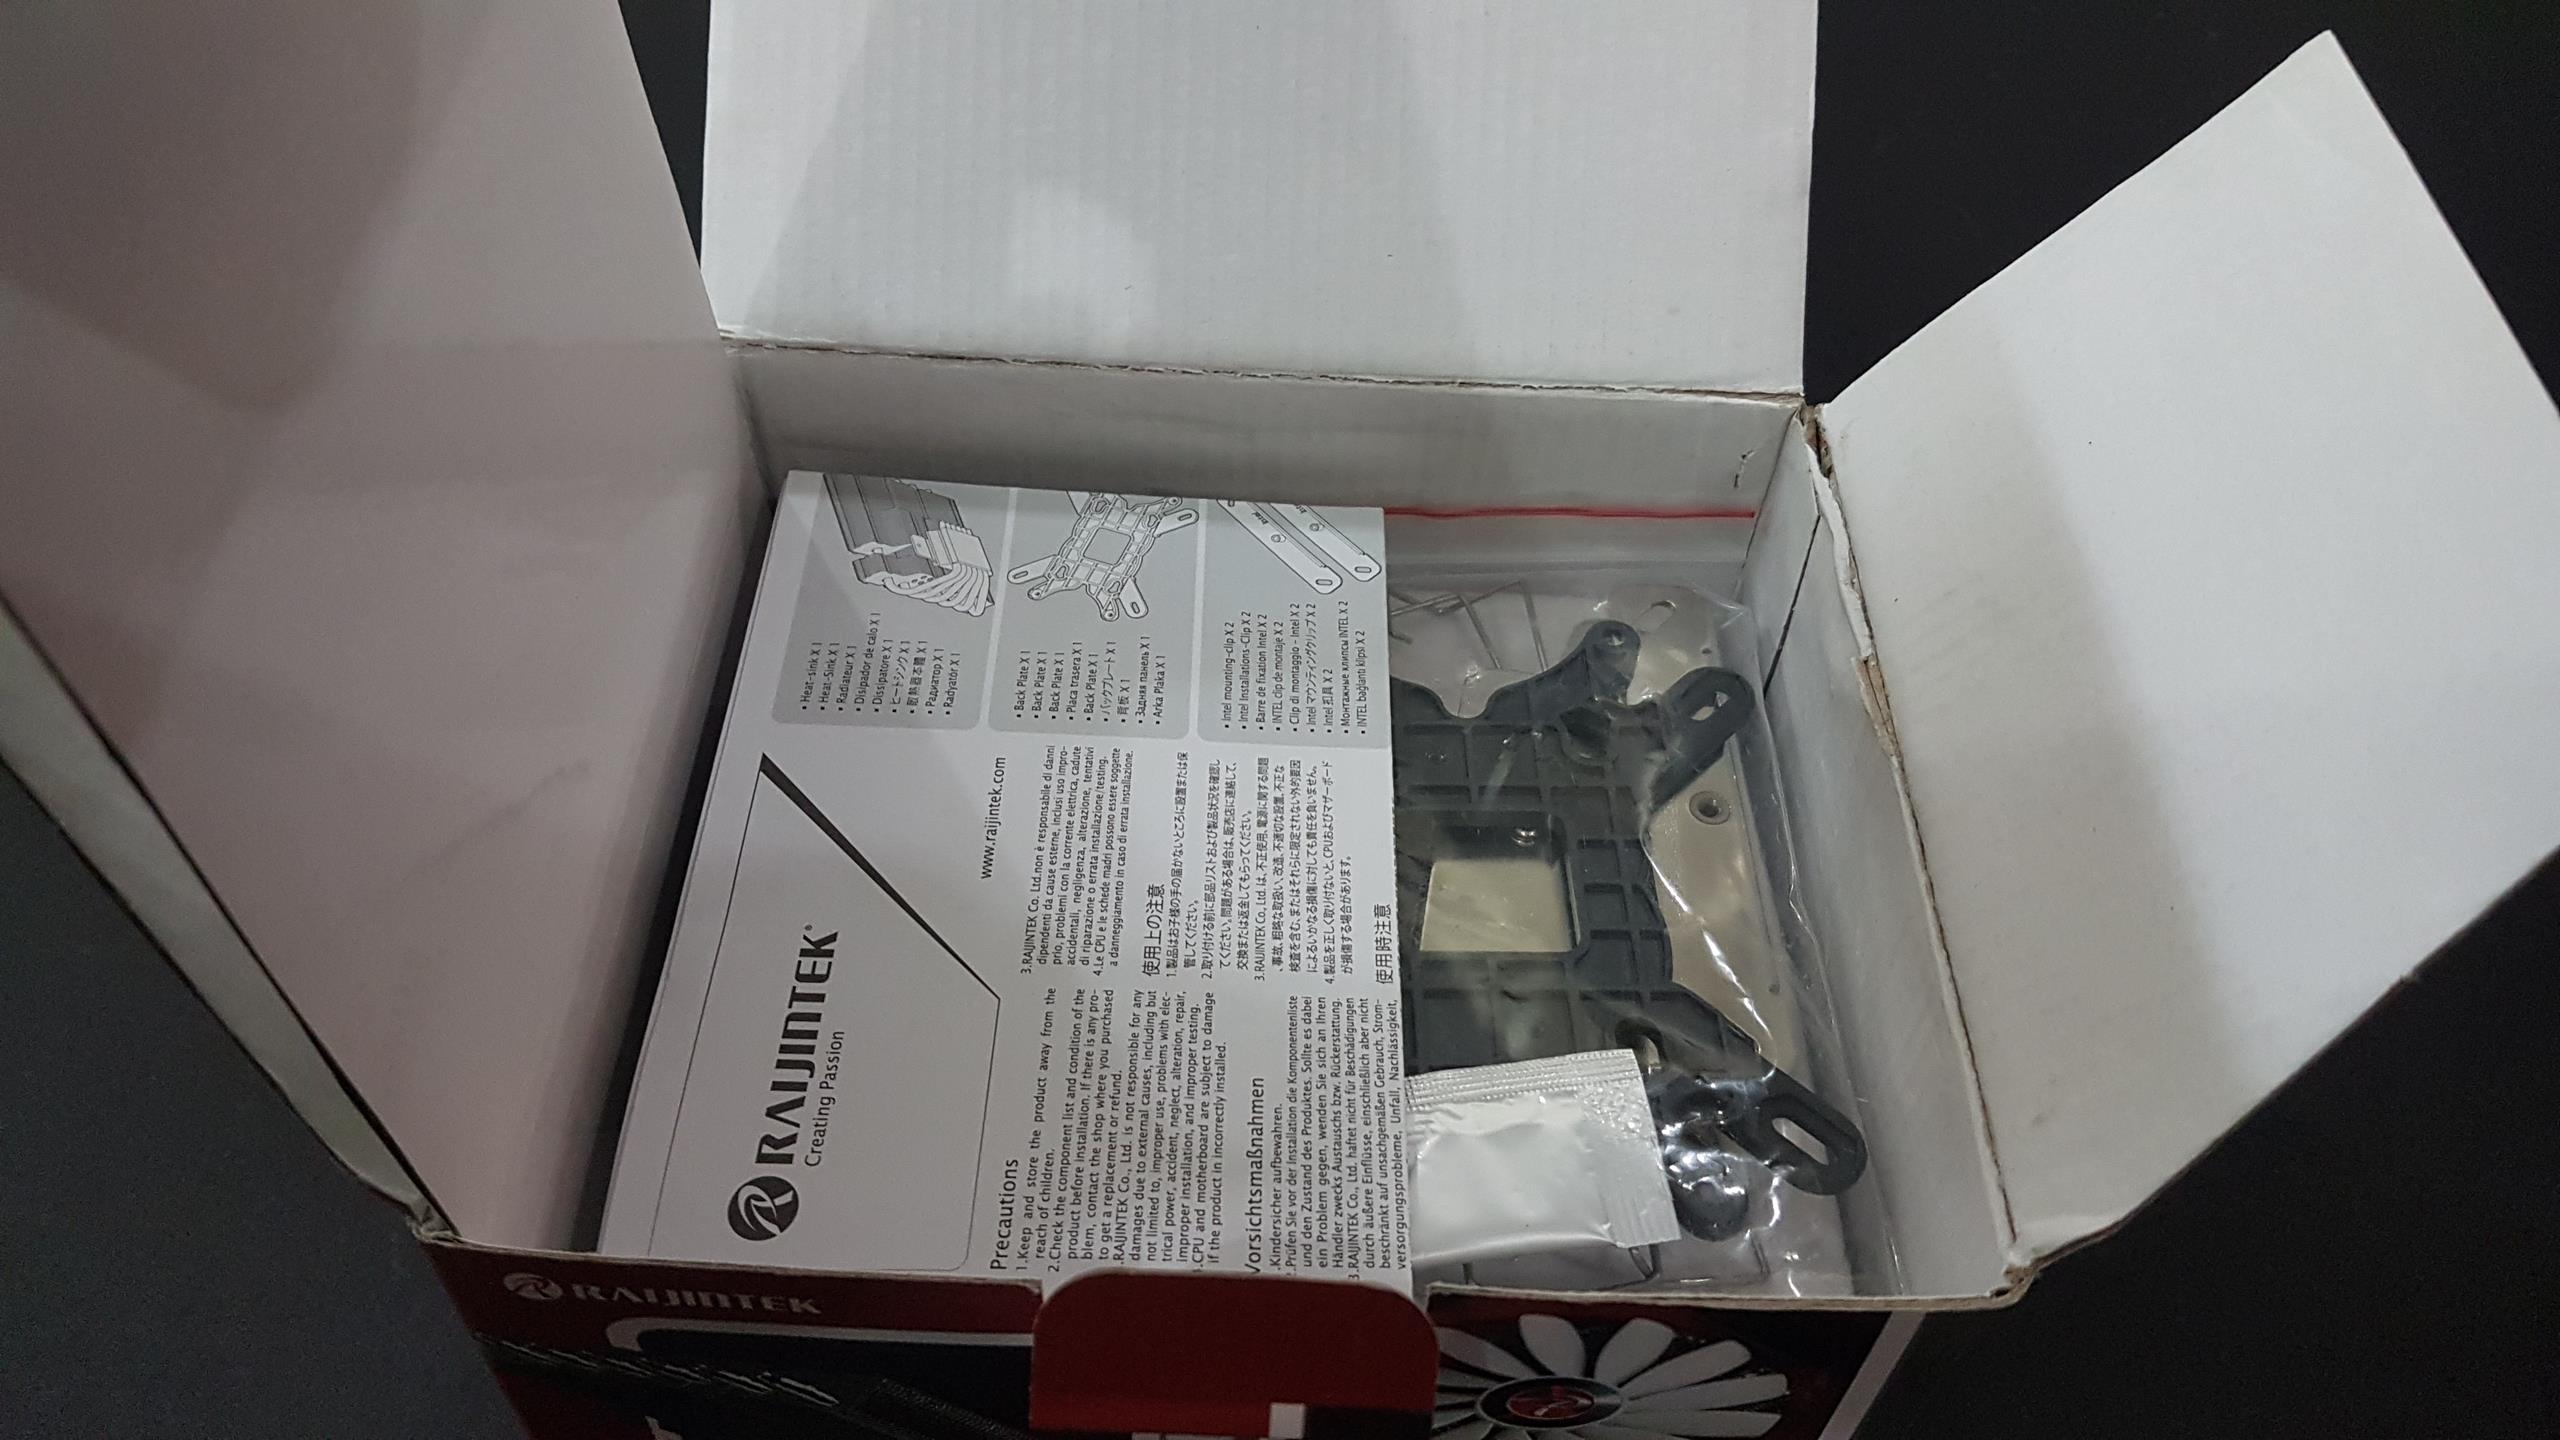
Once the box is opened, it shows that the fan is placed on the top of the contents. The cable is wrapped along the boundary of the fan and fan is not installed. Removing the fan would reveal the rest of the contents. The installation guide is placed on the top with the accessories nicely tucked inside the transparent containers. The cooler is placed inside the white color recycled cardboard box. For further safety particularly during the shipping.
Accessories
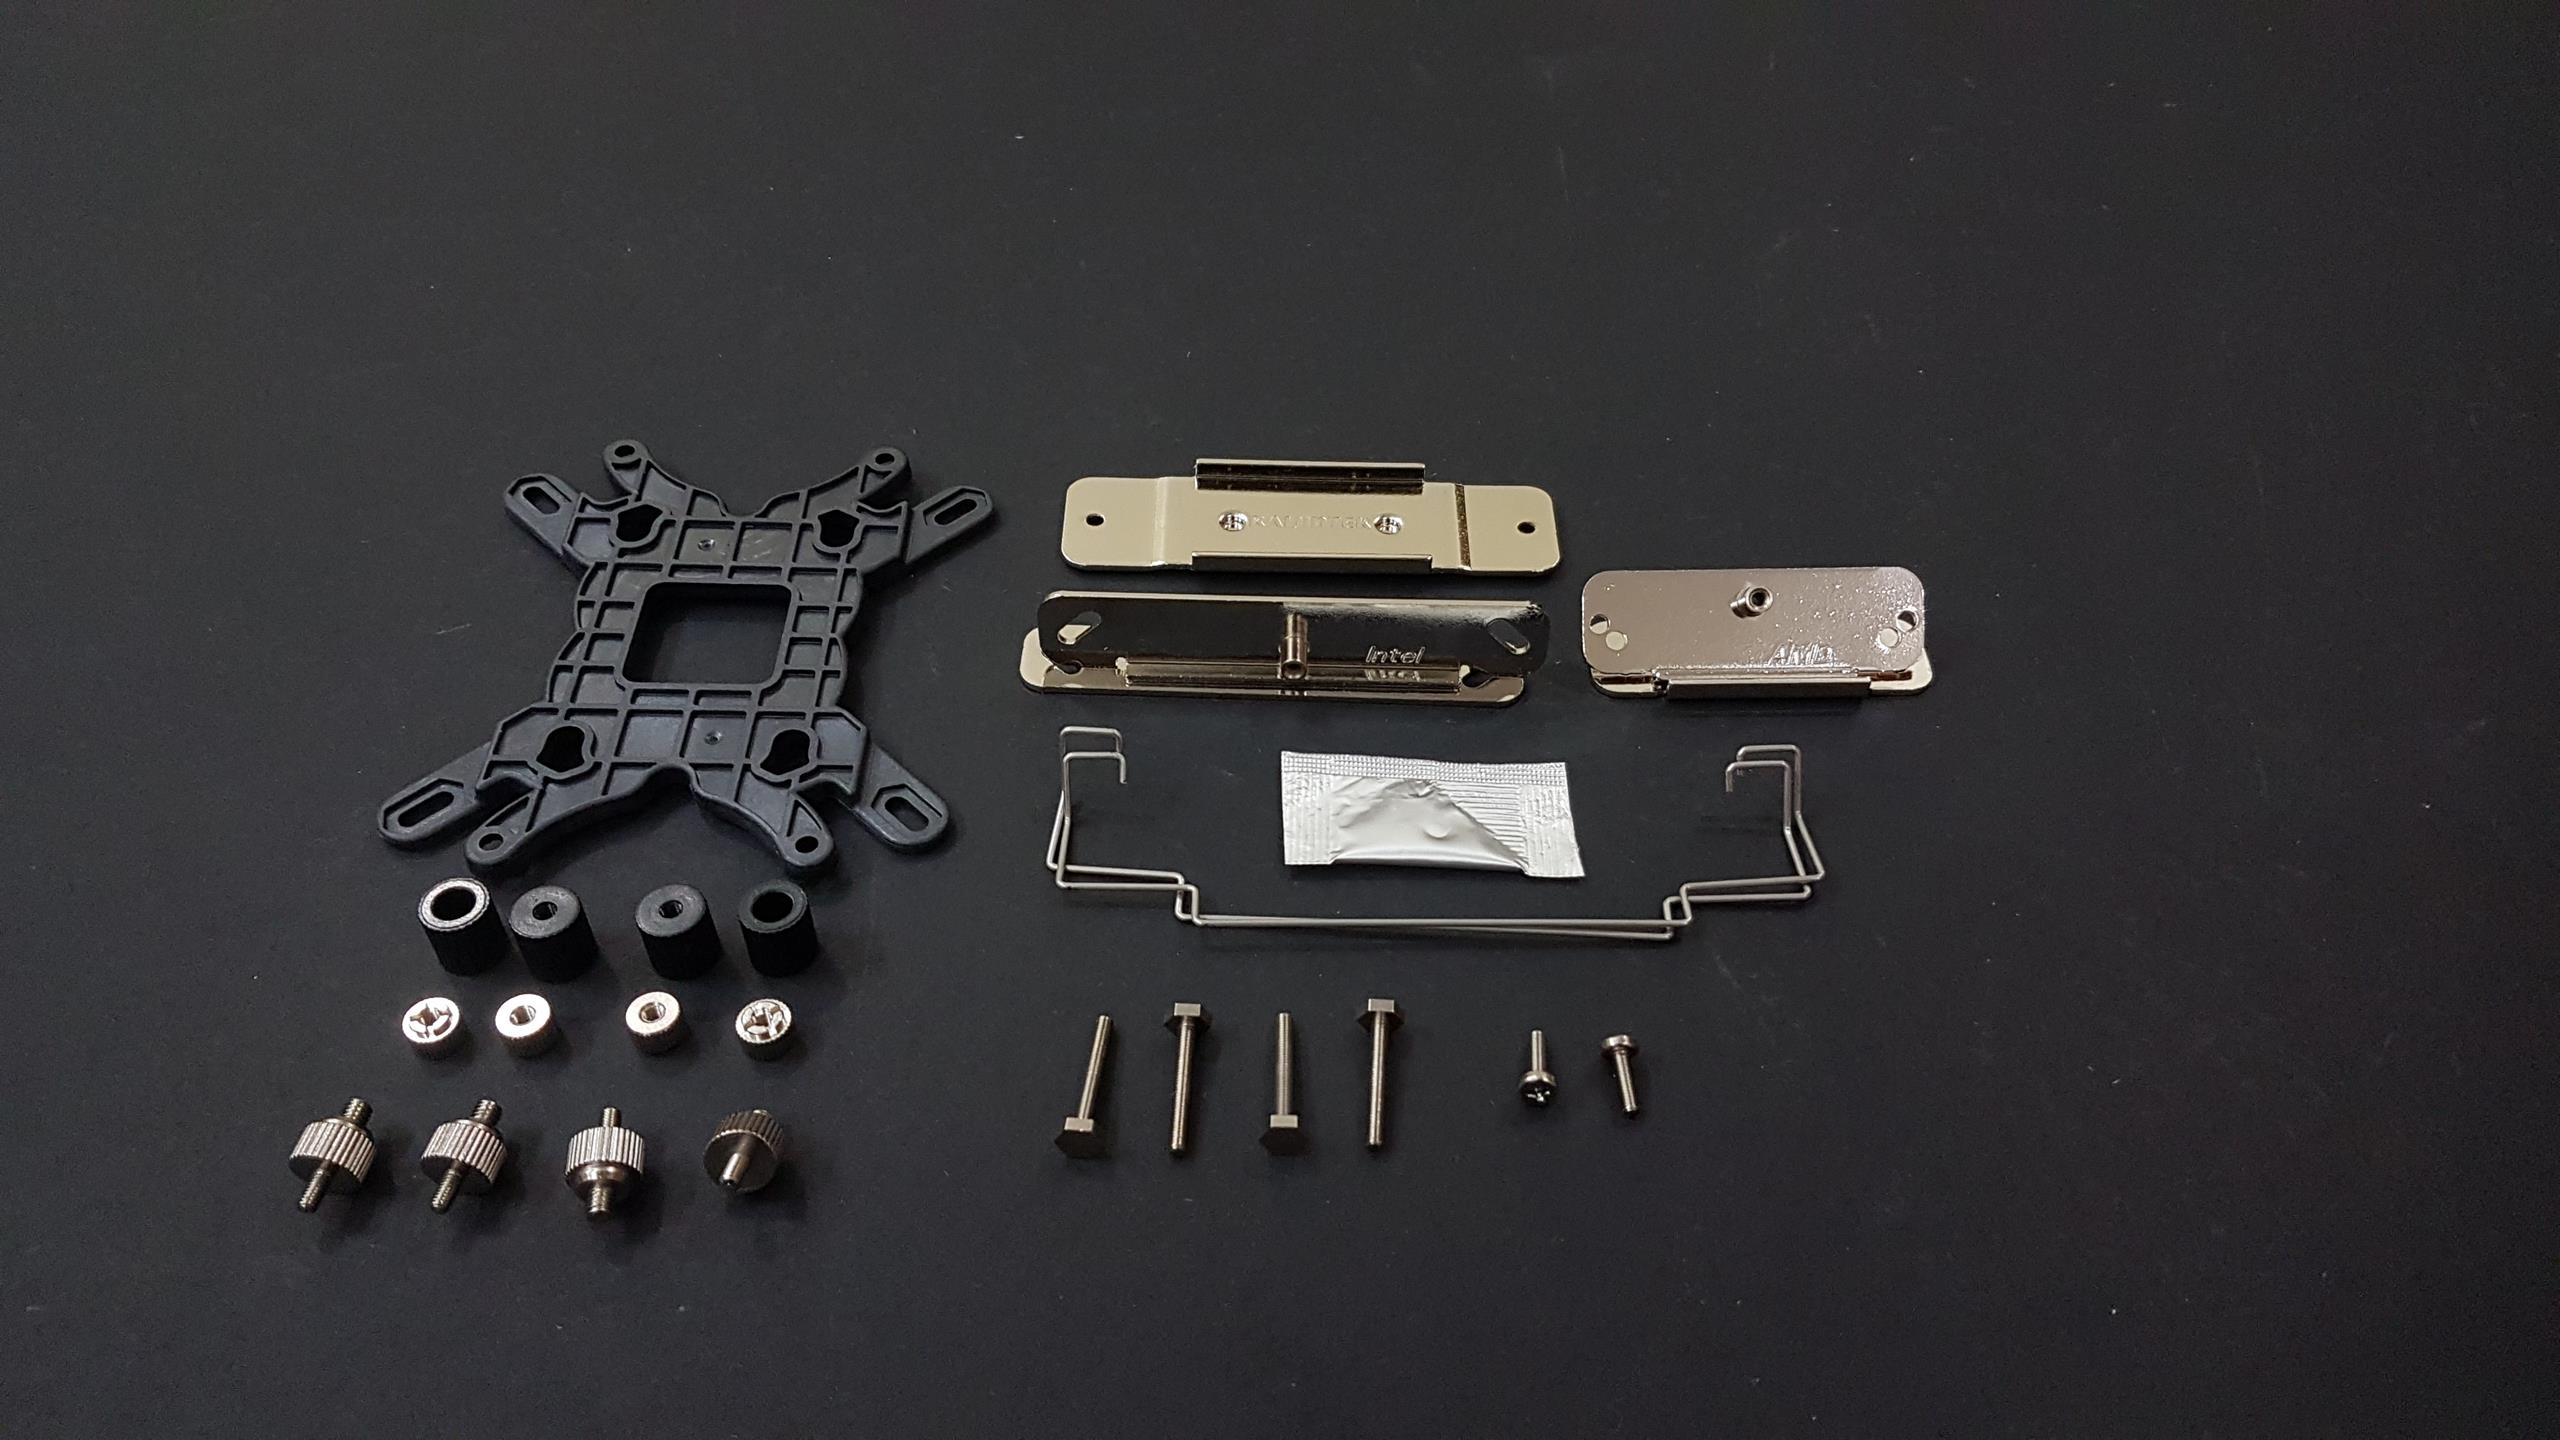
The Raijintek has provided following contents:
- 1x Heatsink
- 1x Fan
- 1x Backplate for Intel/AMD
- 2x Intel mounting clips
- 2x AMD mounting clips
- 2x Fan clips
- 1x crossbar
- 4x Knurled threaded screws
- 2x M3 screws
- 4x LGA2011 screws
- 4x Metal Nuts
- 4x Plastic nuts/spacers
- 1x Thermal Paste
Closer Look
The Pallas is a 140mm High-End, Low Profile CPU Cooler with a height of the 68mm including the fan. Here is what the manufacturer has to say about it. “PALLAS, Raijintek’s 140mm high-end low profile CPU cooler, is designed for most desktops, especially for HTPC’s and narrow enclosures. With a total height of 68mm including the 14013 PWM fan. PALLAS is designed by German Engineers for presenting its greatly enhanced airflow and surface for heat dissipation, combined with full nickel plating and the super slim 14013 PWM fan. PALLAS also supports Intel and AMD modern CPU sockets and platforms.” Let’s take a closer look at the cooler and discuss its features.
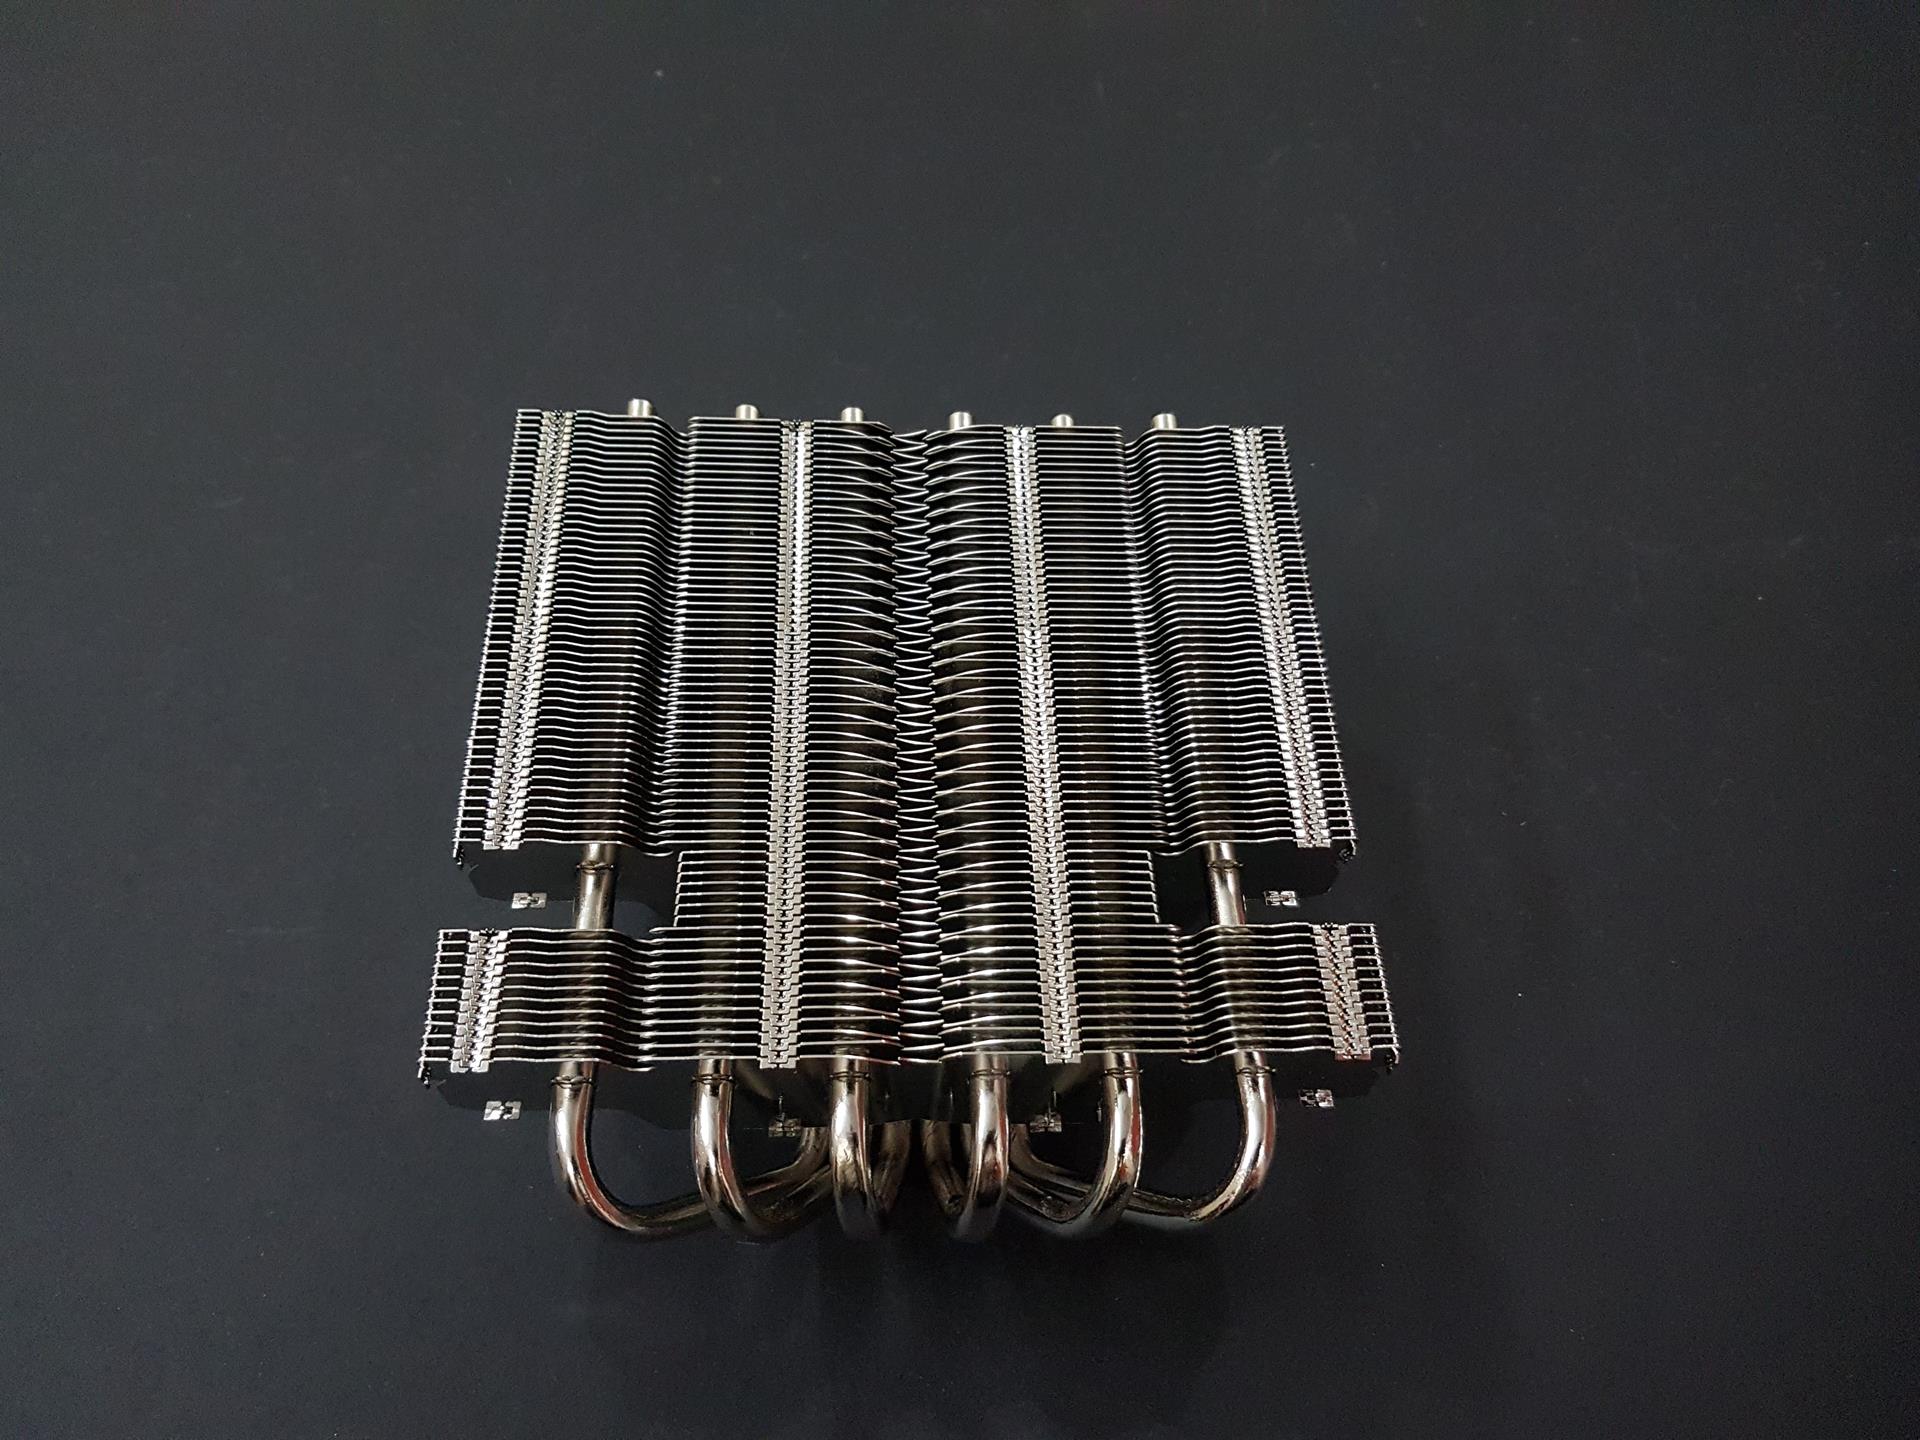
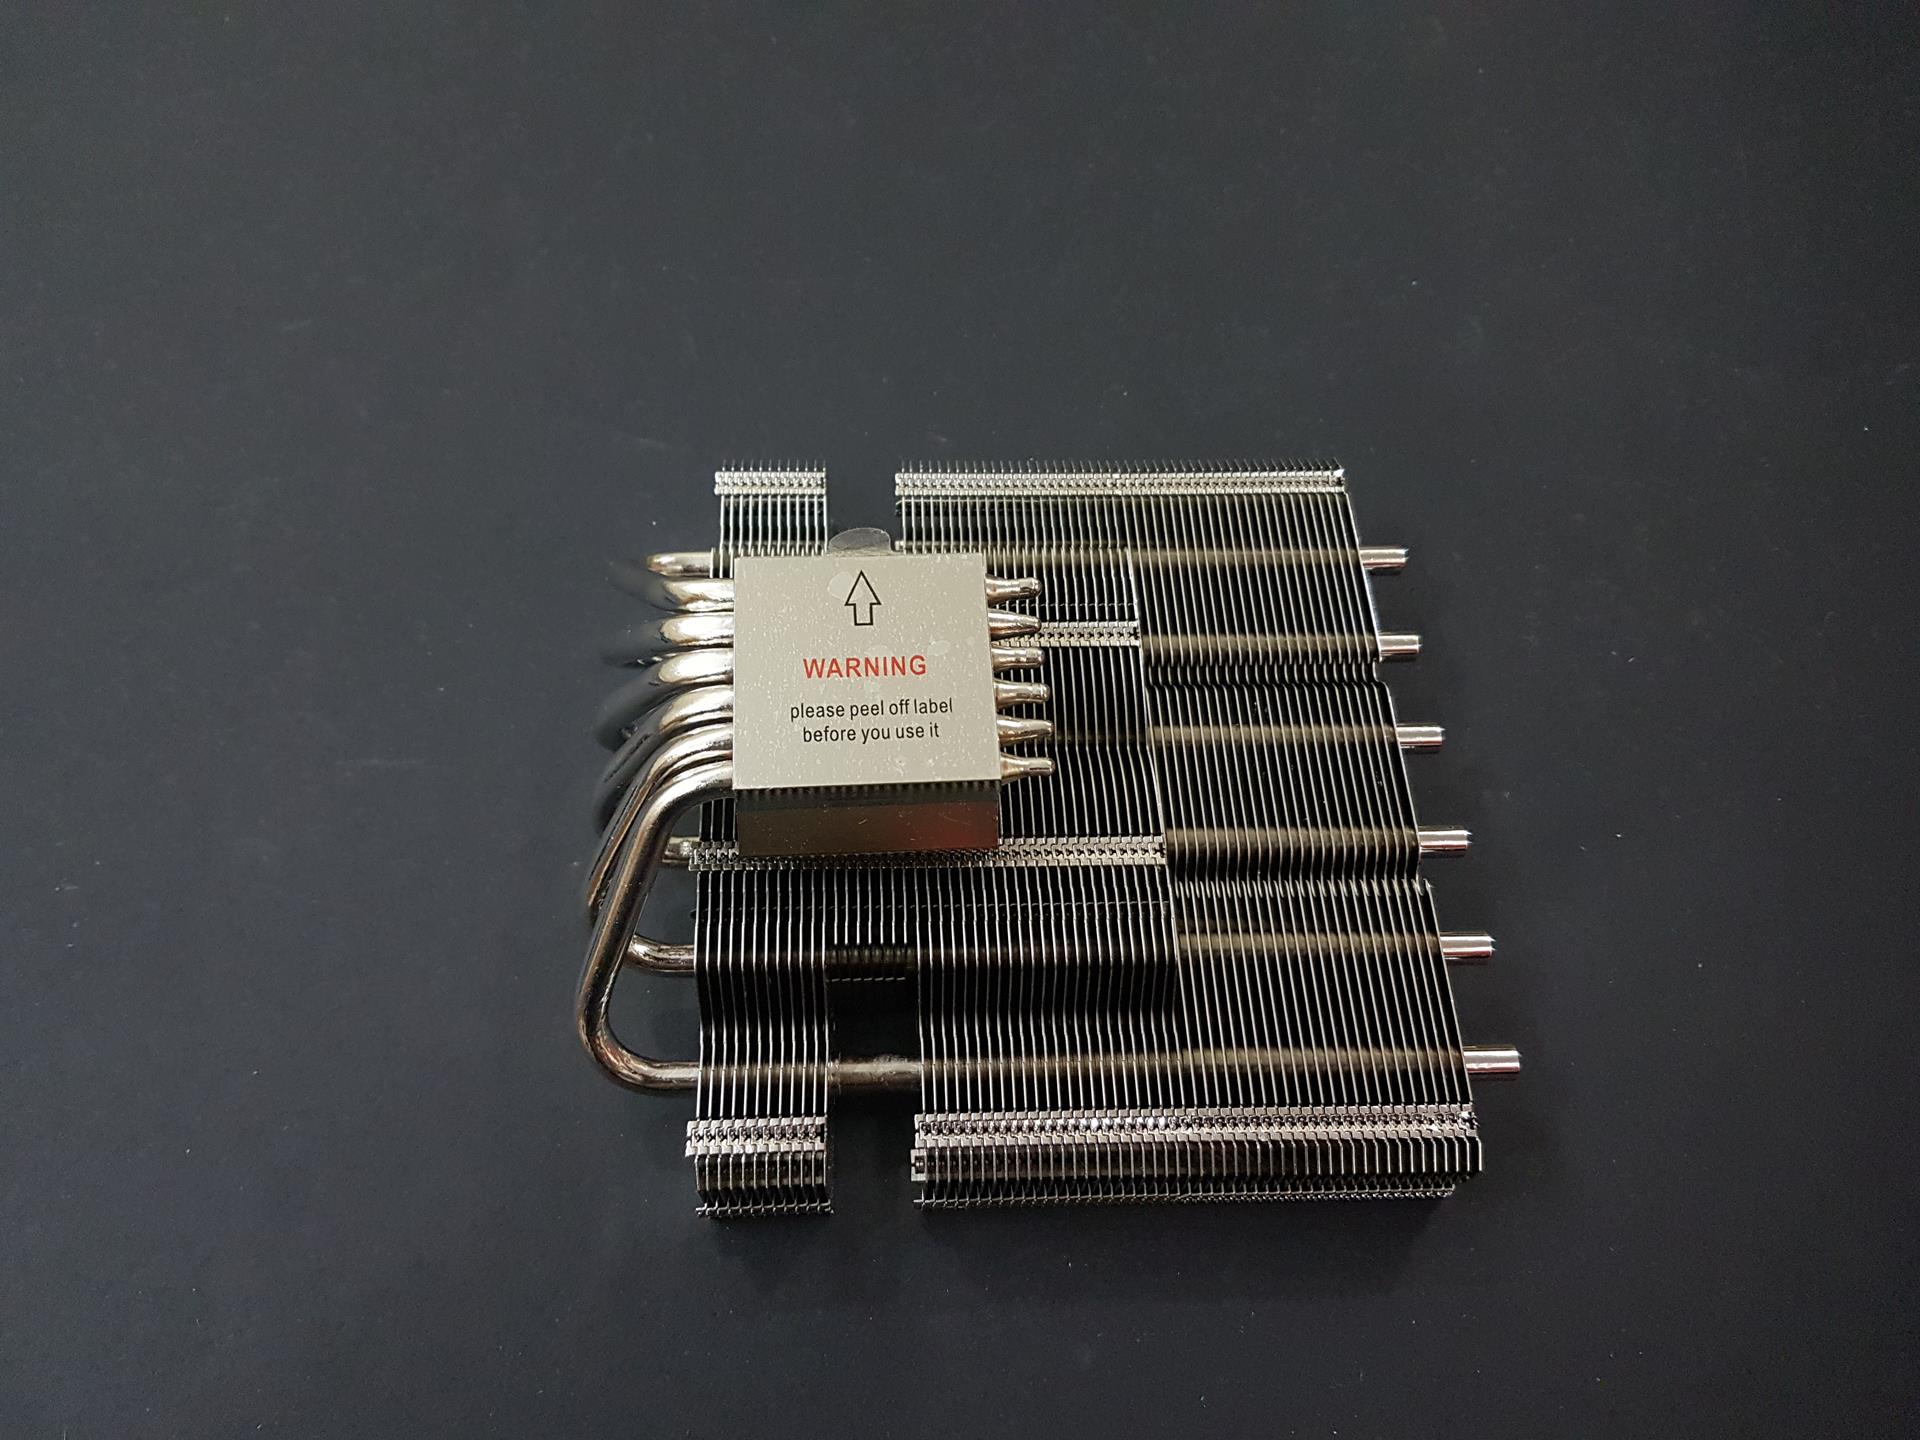
Above is a picture of the heatsink from the top side. The weight of the heatsink is 420g. The heatsink packs 6 heatpipes with a dense fin stack. This side has the dimension of 140x120x22mm. Please note that this is strictly a dimension of the heatsink without taking into consideration the protruding heatpipes from both sides. There are total 69 nickel plated aluminum fins which are placed narrow to each other. This design warrants two requirements: a fan with better static pressure and better airflow as well. This is important. If the fins were wider the fan can push more air at reduced speed because the resistance from the surface would be less but in this case, there is more resistance hence we need a fan with better static pressure and airflow. The fins are interlaced in the middle of the heatsink. There are 4 fins jointing assembly points. There are two large size cutouts on both ends of the heatsink. Approximately 9 fins are dropped to make these cutouts. This is the area from where the 2x M3 screws will be threaded on the mounting plates. The cutouts are designed in such a manner to give enough clearance for the user to install the heatsink conveniently. There are 49 fins above the cutouts and 12 fins below them.
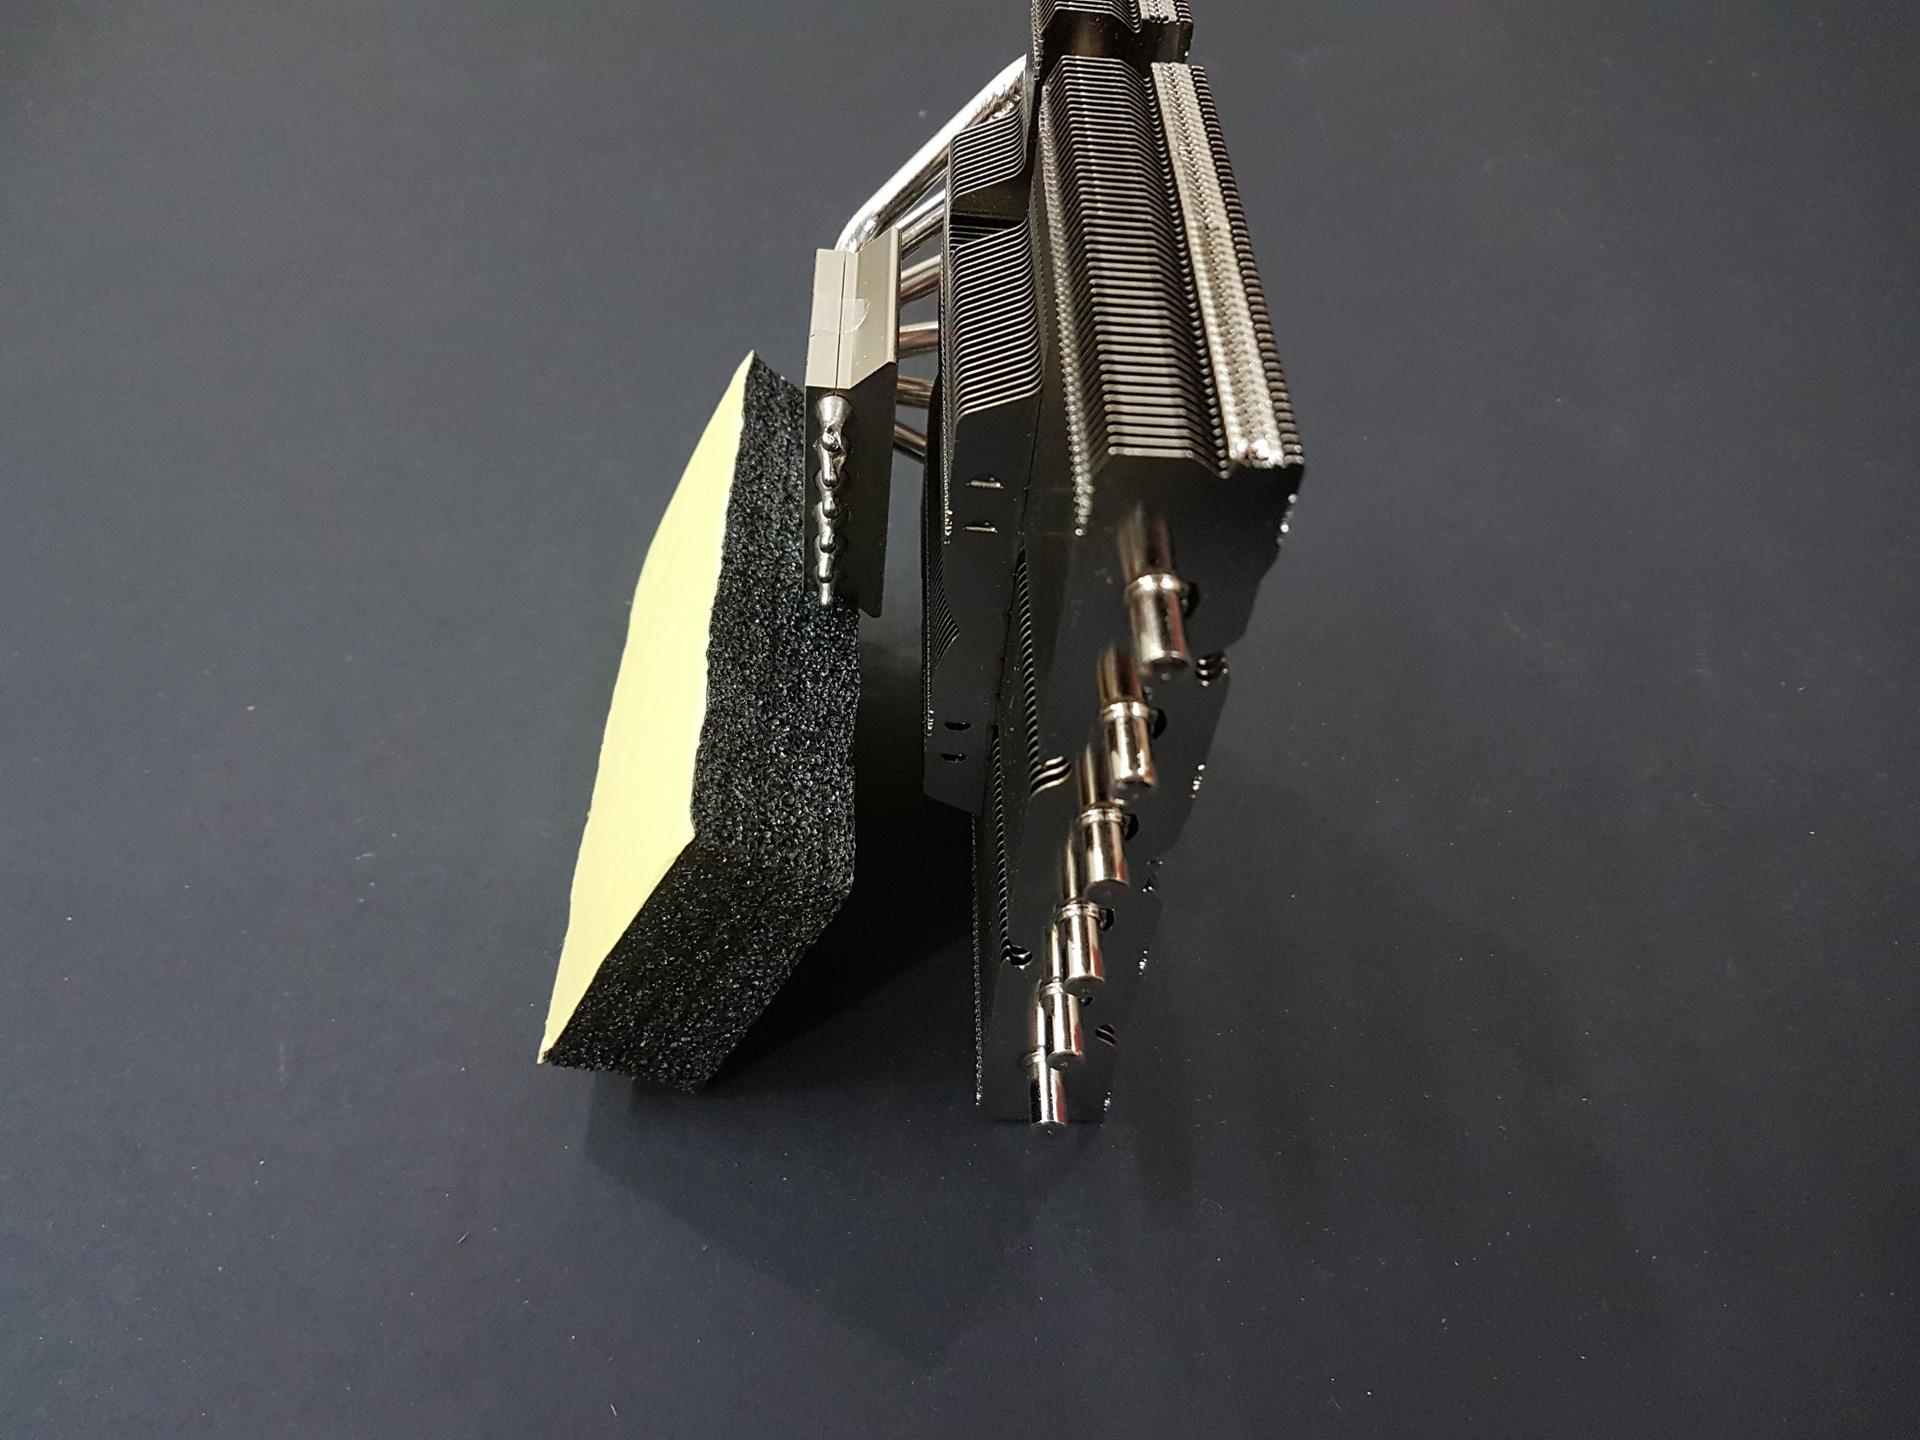
The left and right sides of the heatsink are identical. The dimension of the heatsink from these sides only is 120x22mm. There is a notch on each side right above the fins jointing assembly. This is where the fan clips are placed or mounted to install the fan on to the heatsink.
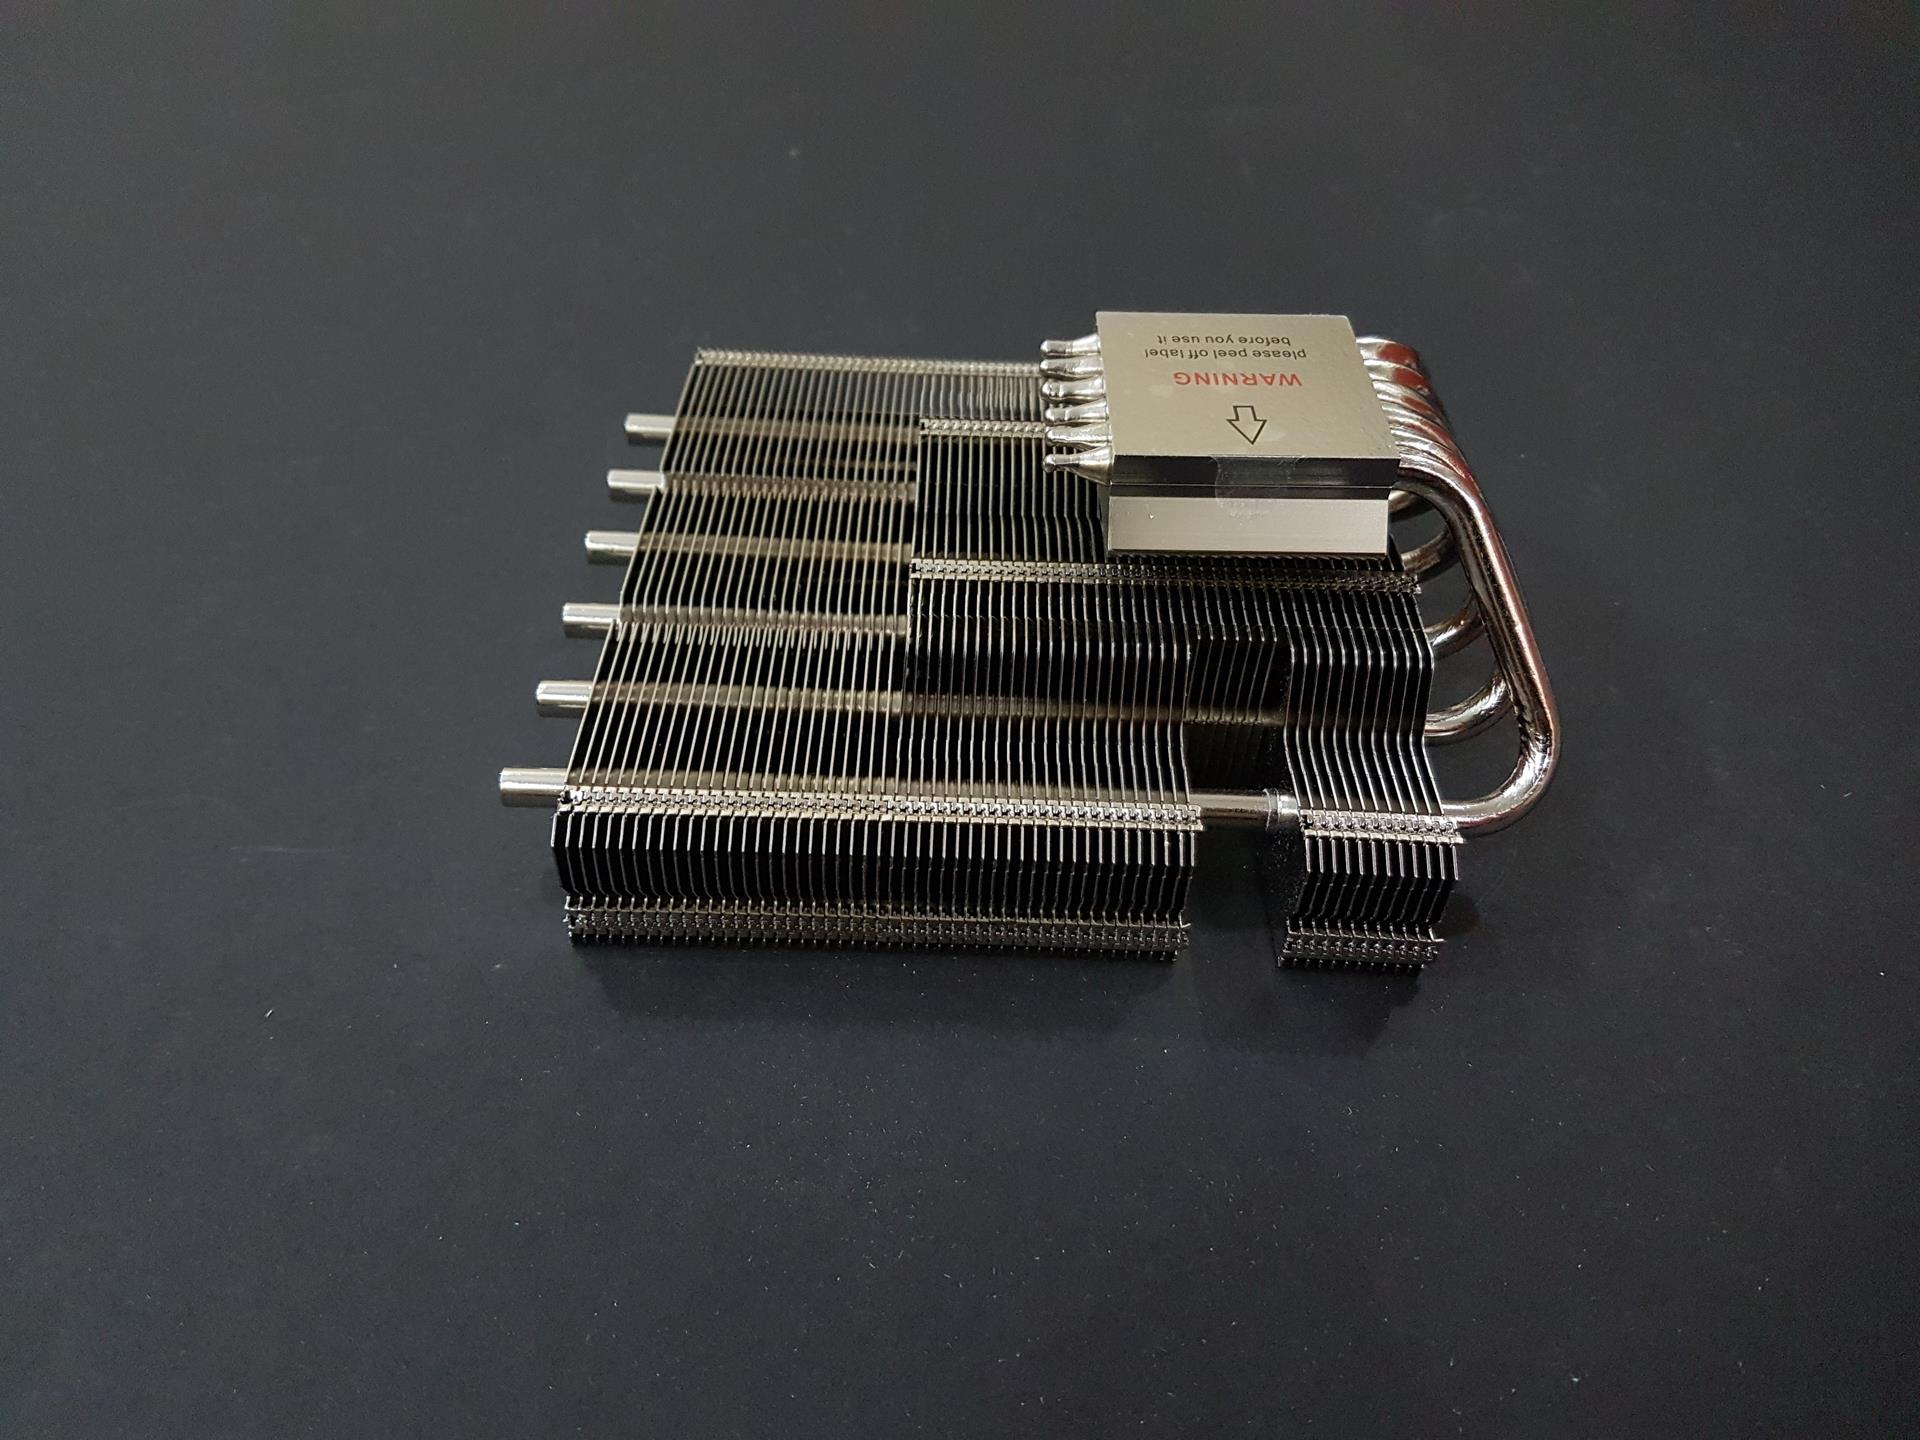
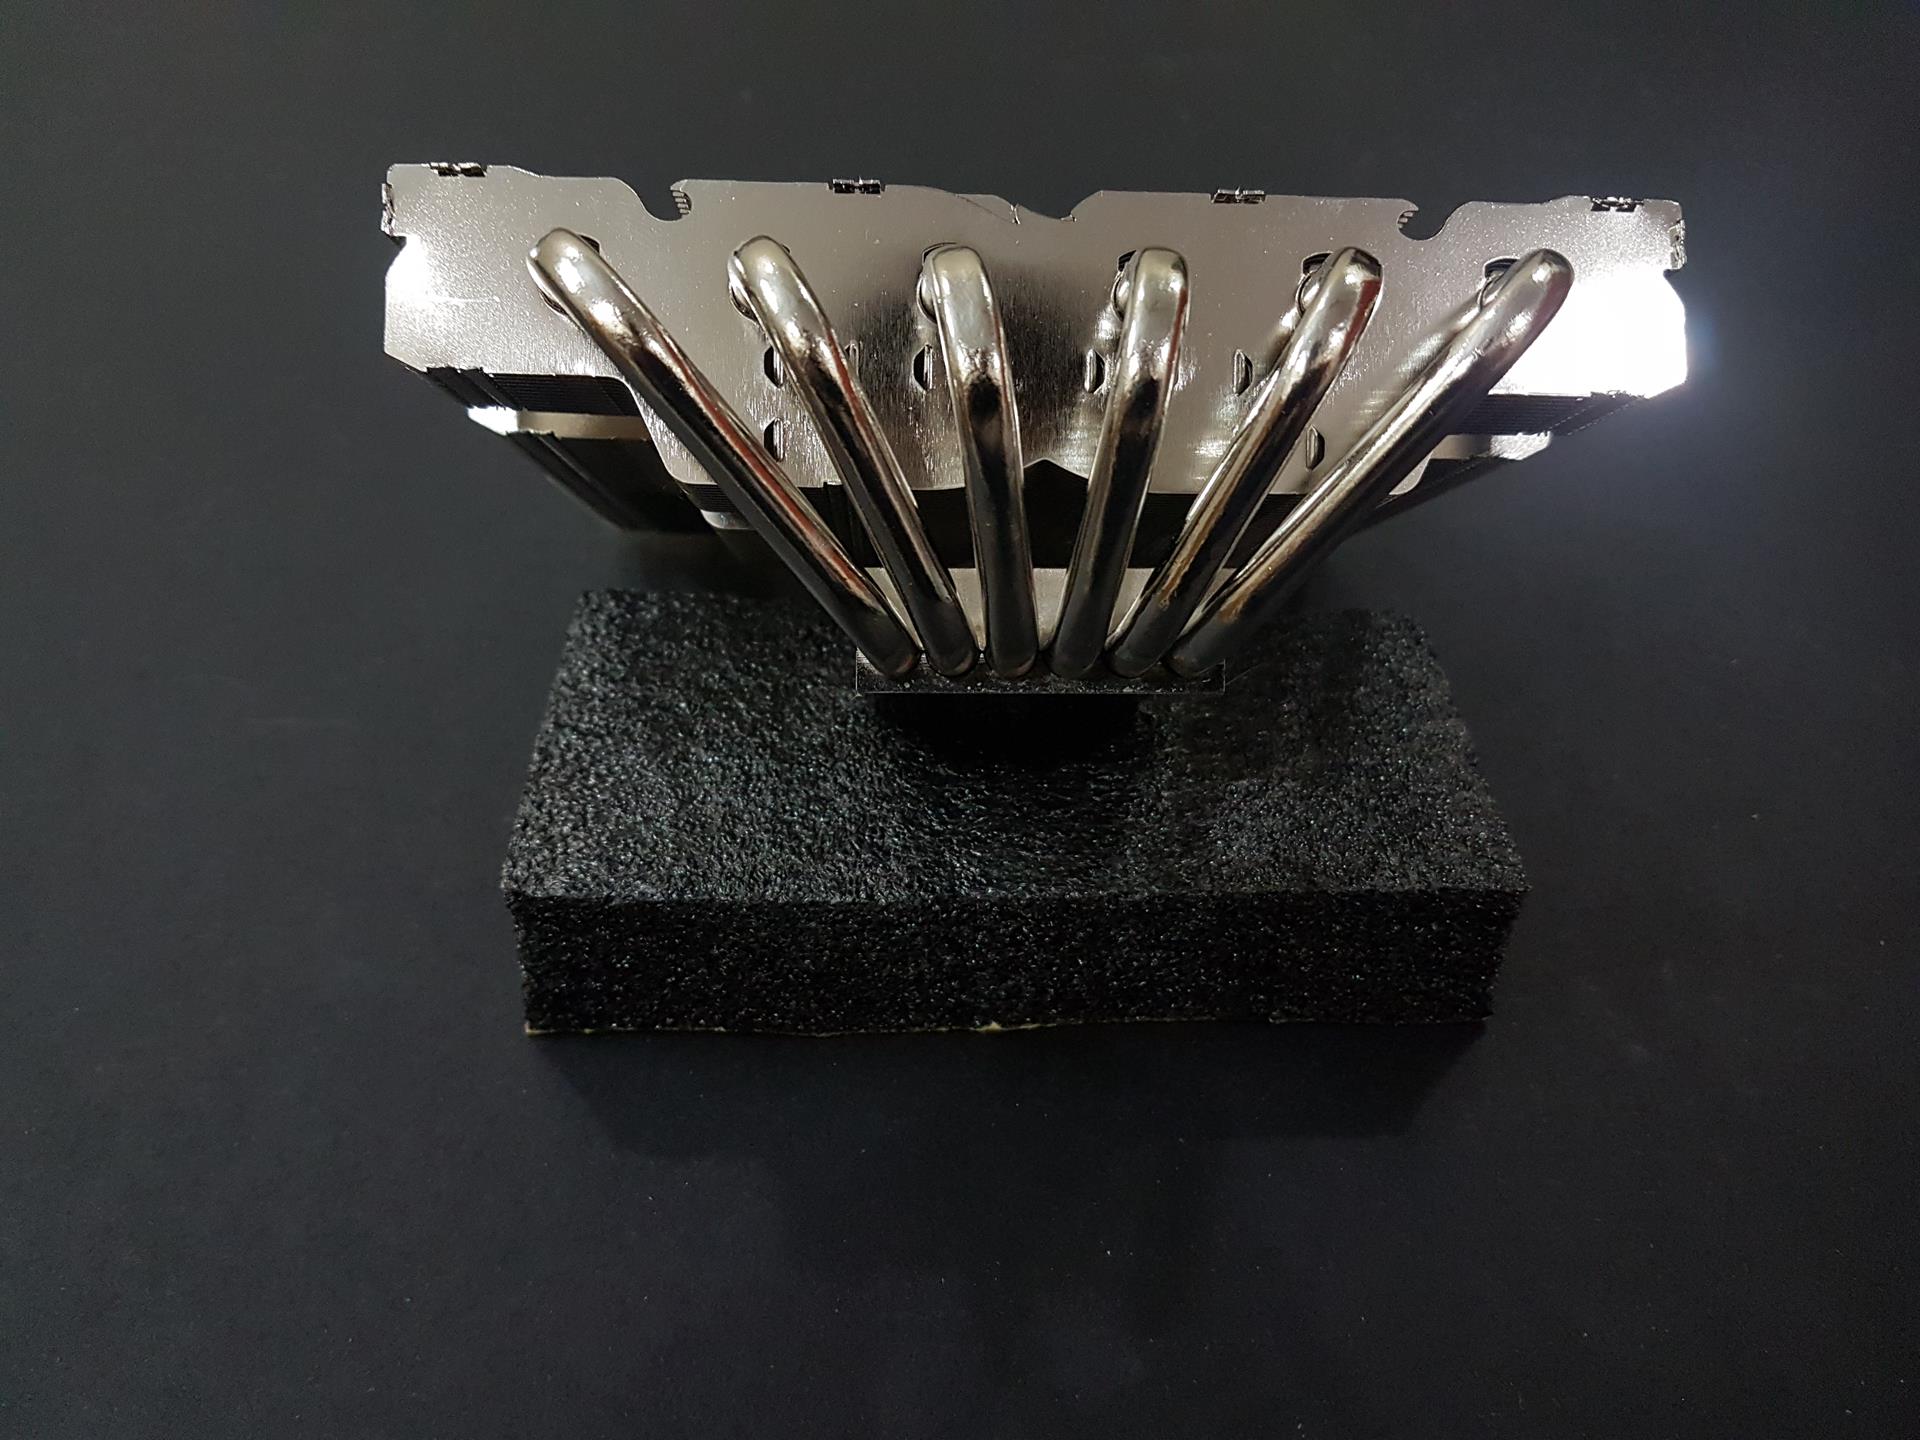
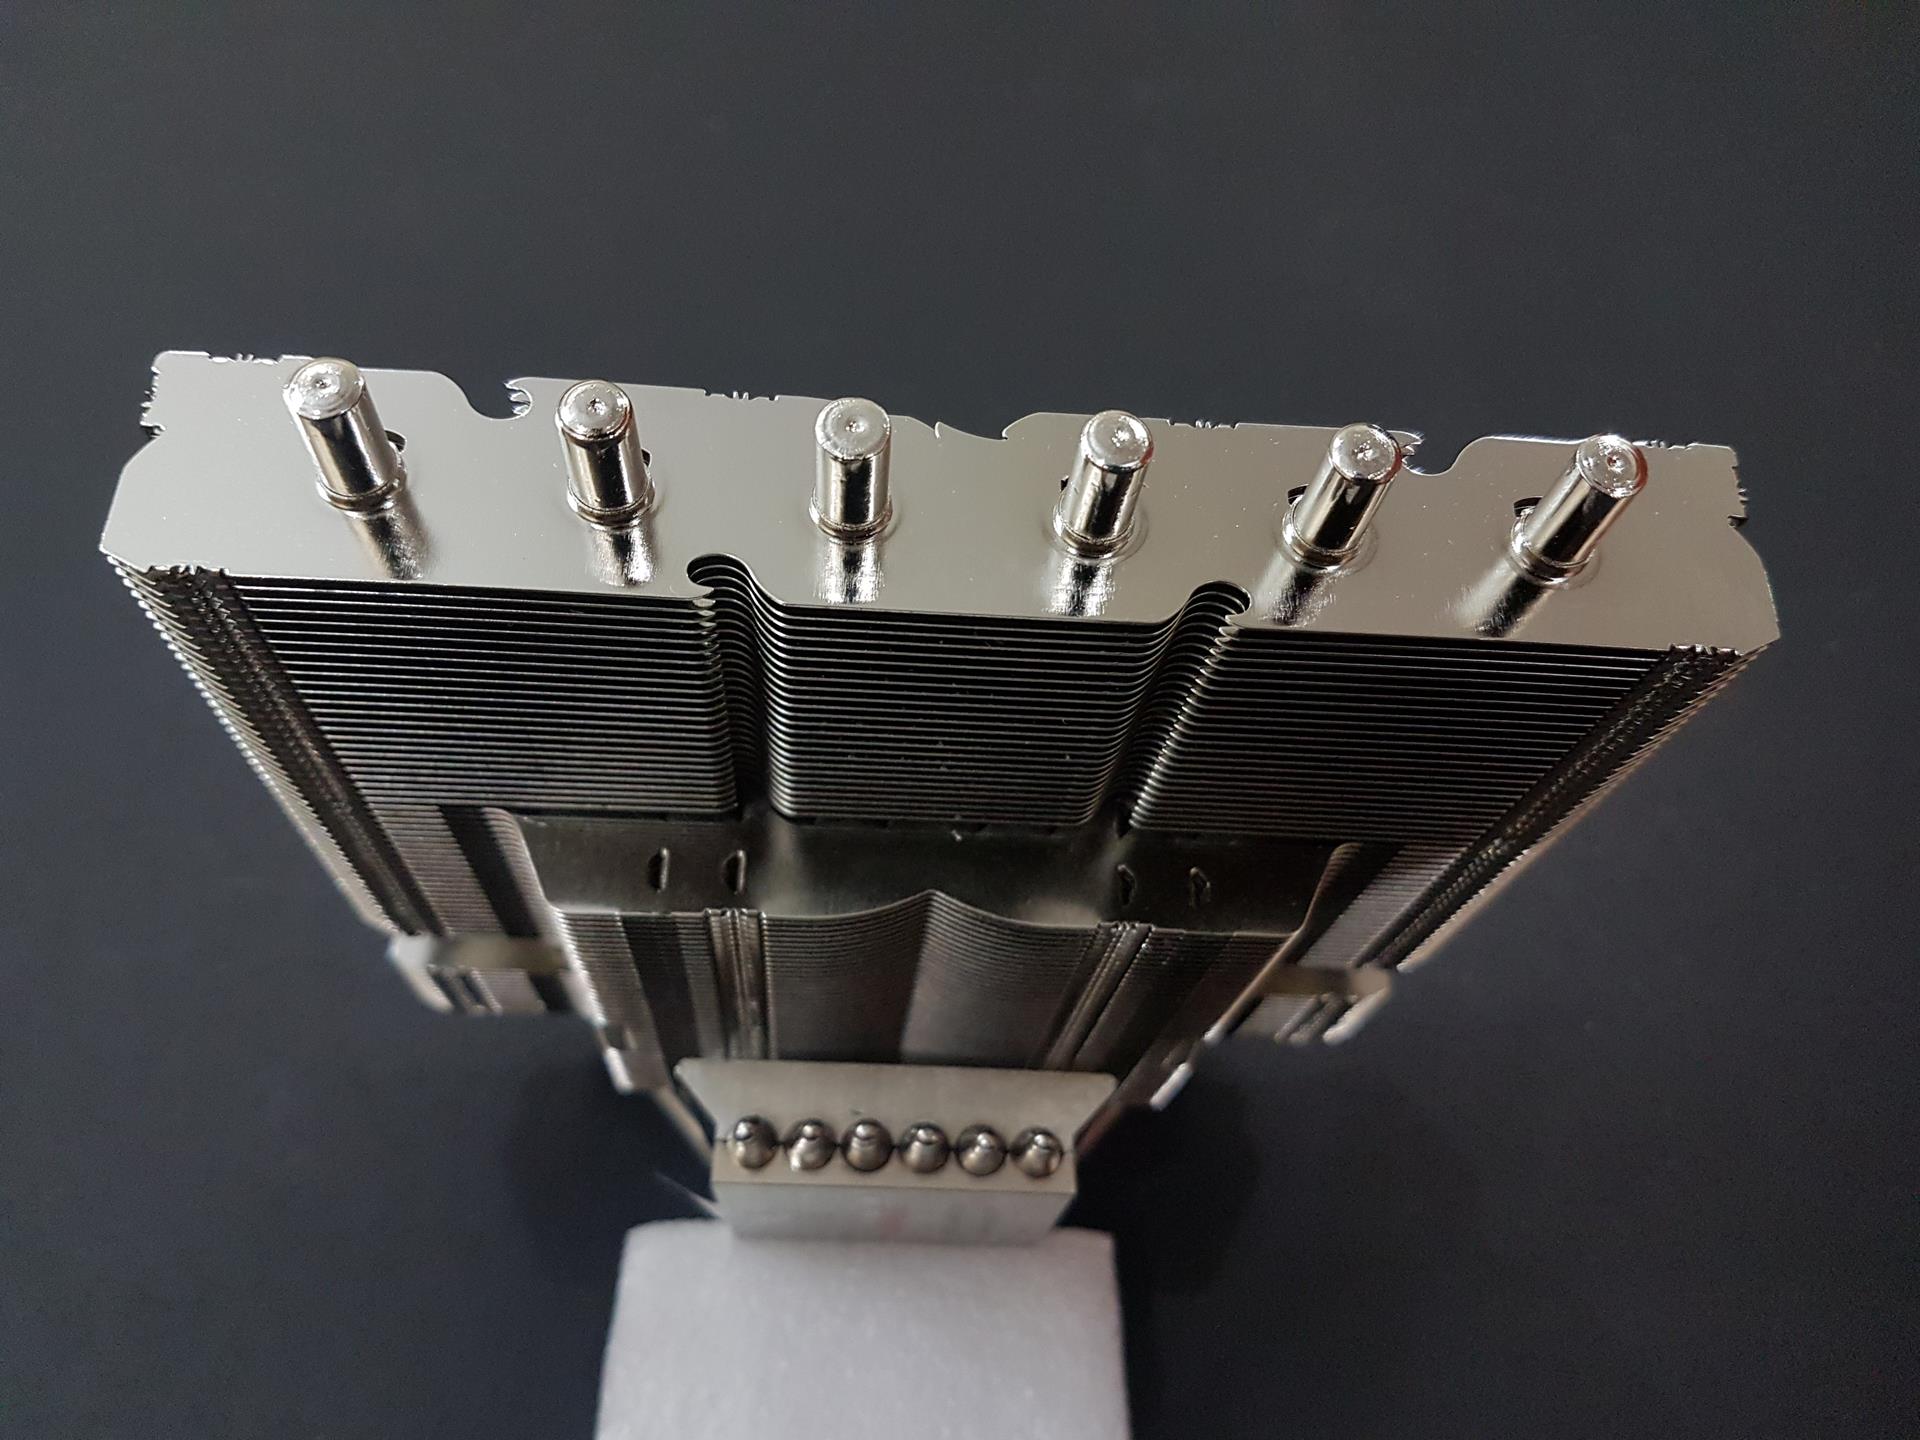
Let’s take a look at the backside or rear side of the heatsink. We can see 6 heat pipes coming out of the heatsink and going in the copper base. If you would notice there are holes or cutouts on top of each of the heatpipe. This is another airflow channel through the heatsink as the same design can be seen from the front side. There are also cutouts under the heatpipes. The heatsink is designed in a stepped manner. The heatpipes are made of copper and are nickel plated. They are 6mm thick. The dimension of this side excluding the protruding heatpipes is 140x32mm.
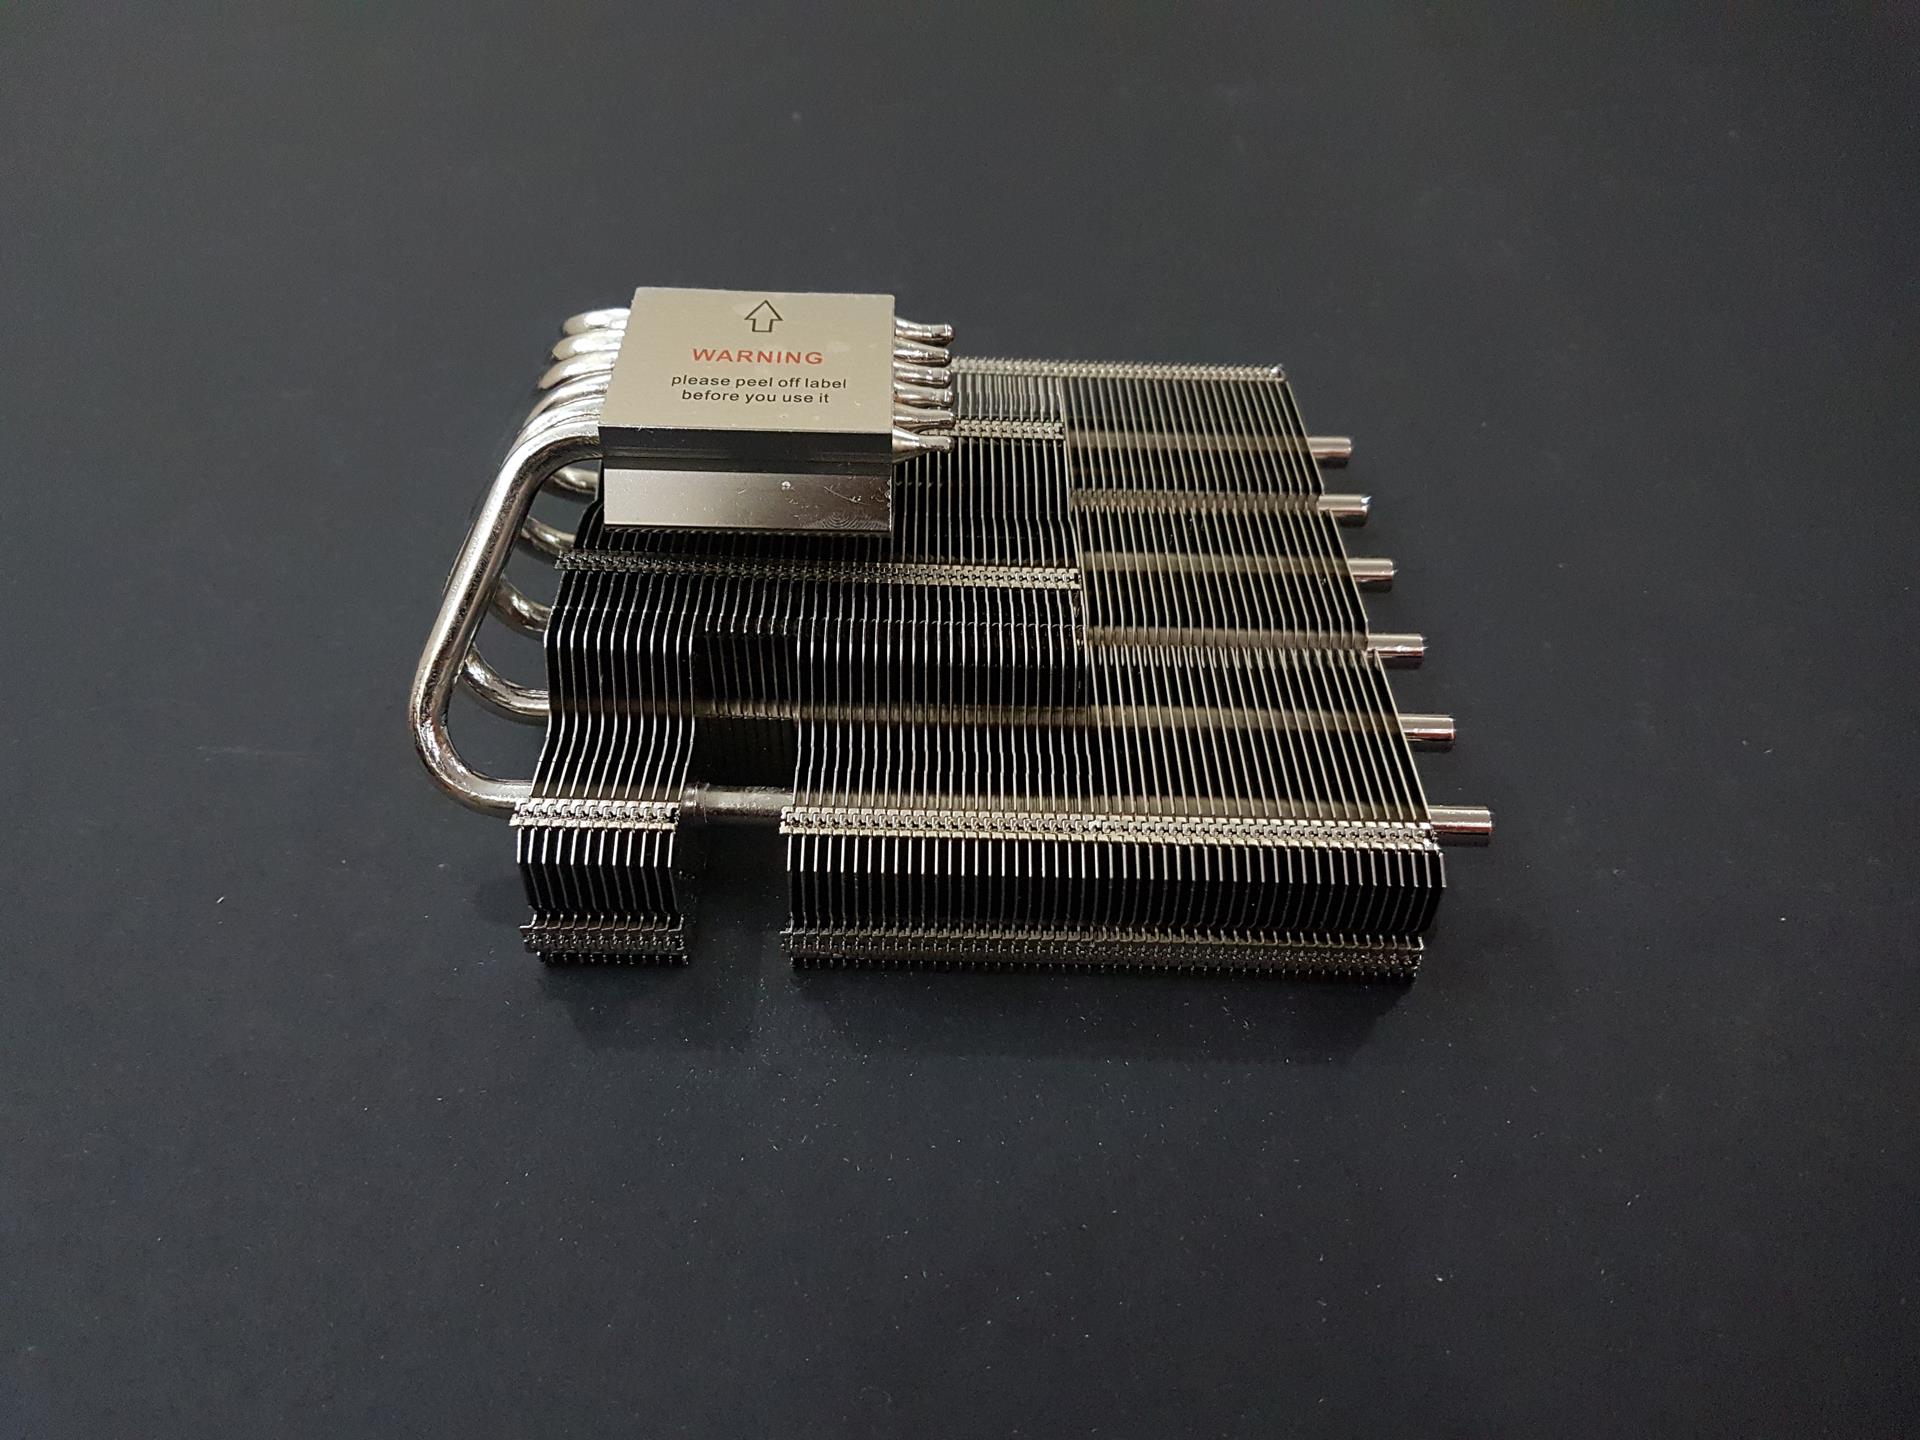
The front side of the heatsink has 6 heatpipes coming out of it and terminating. They are protruding quite a bit with approximately 14mm or so. The holes on top of each heatpipe can be seen. As mentioned above it is forming another airflow channel through the heatsink. The tips of the heatpipes are rounded unlike most of the coolers’ design. The dimension of this side only excluding the protruding heatpipes is 140x22mm.
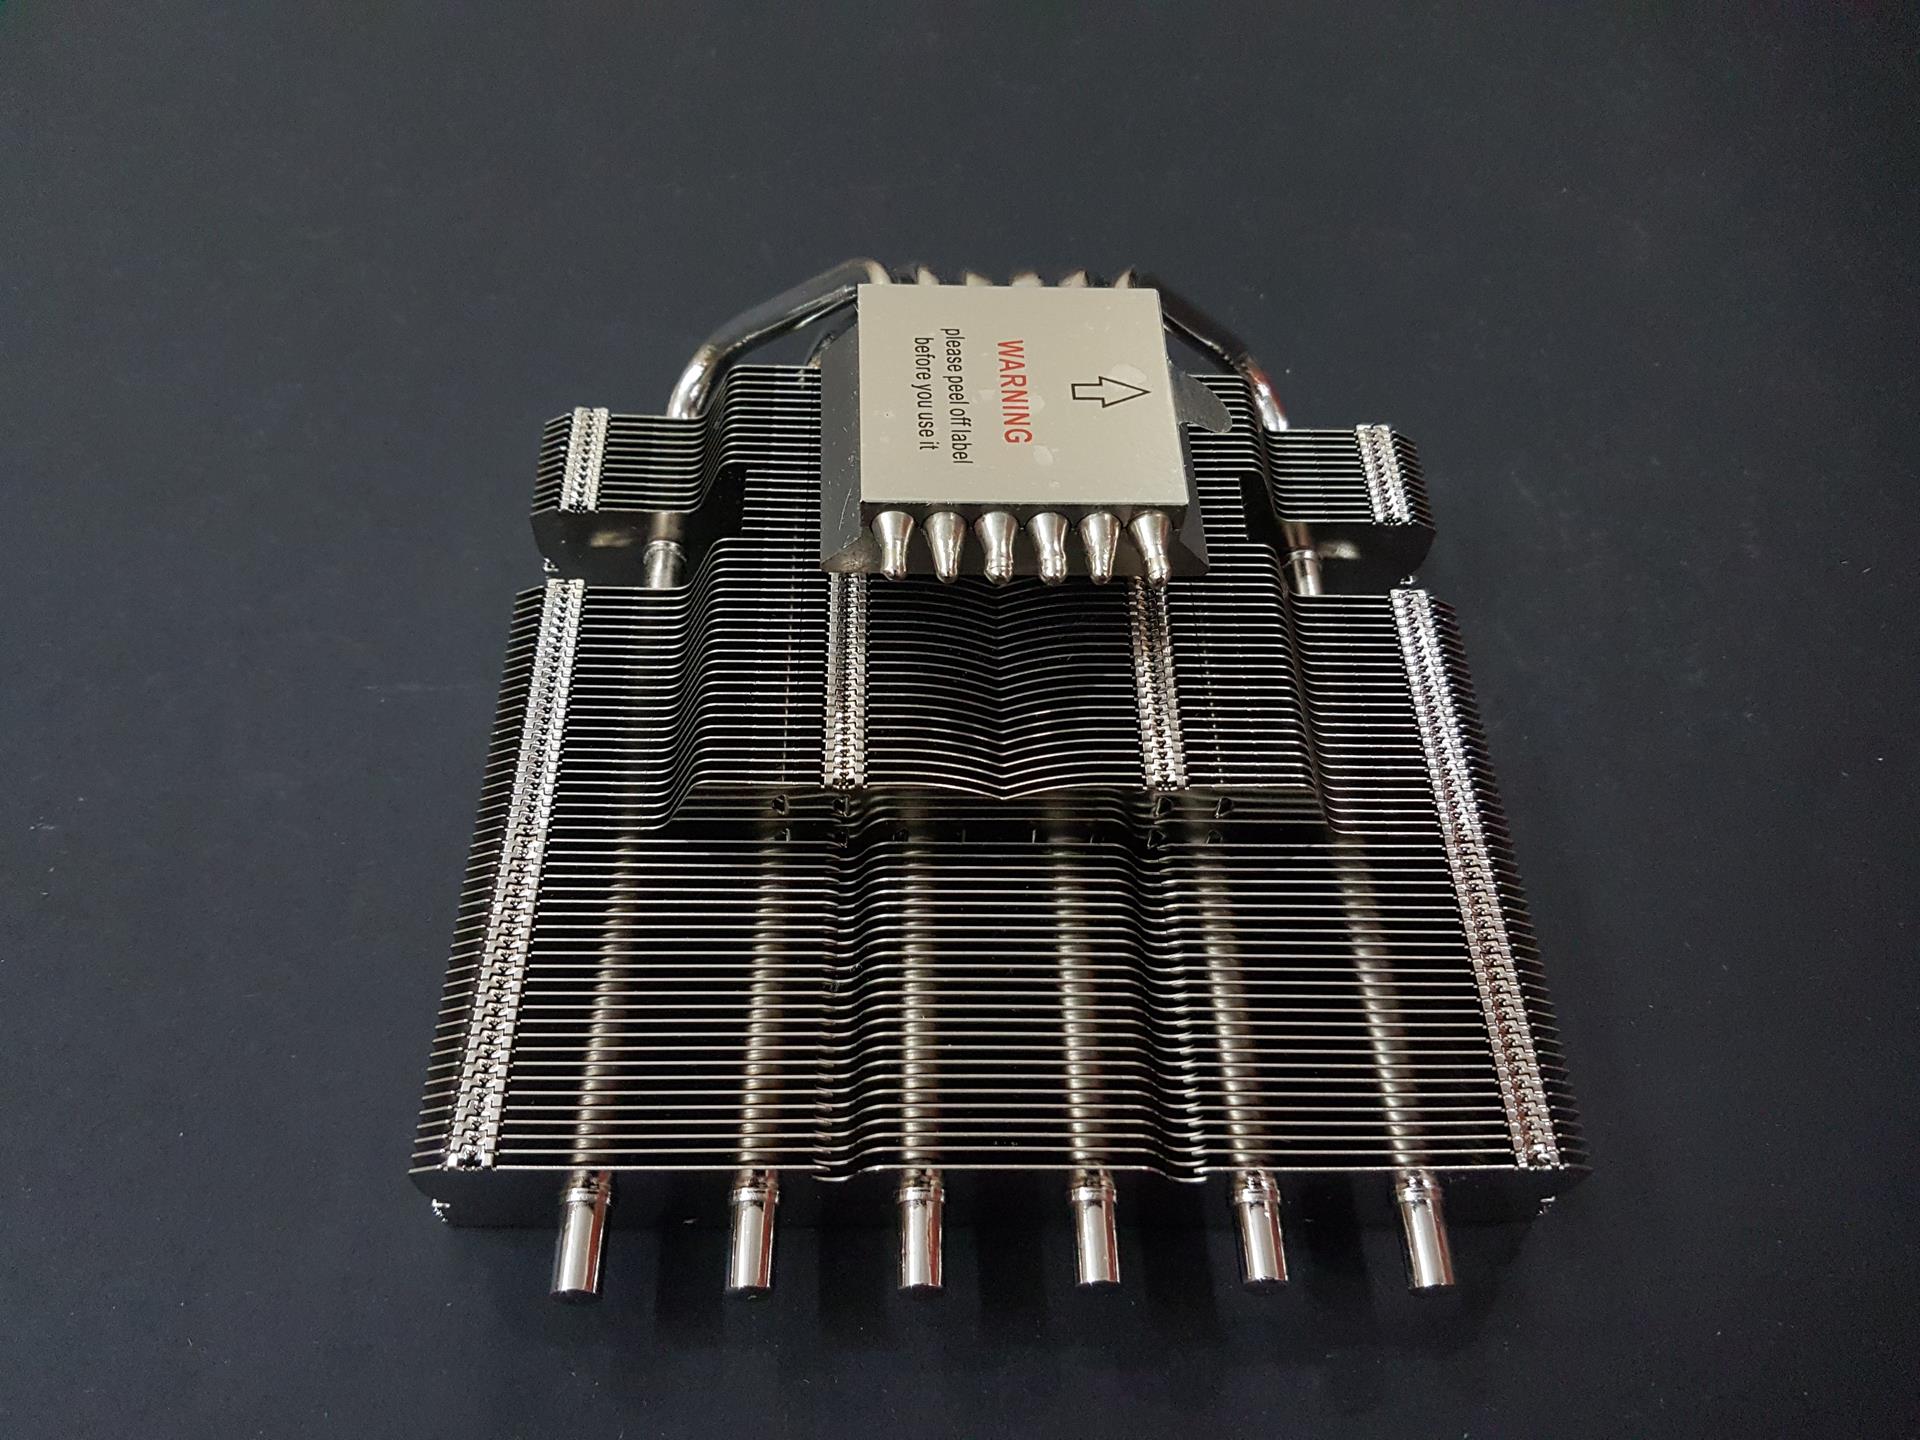
Let’s take a look at the base or bottom side of the heatsink. Here we can see the stepped design of the heatsink clearly. Approximately 40 fins from the copper base side have raised surface to them. The raised fin stack portion only has the dimension of 75x89x11mm. There are two fins joint assembly points on the raised surface portion of the fin stack.
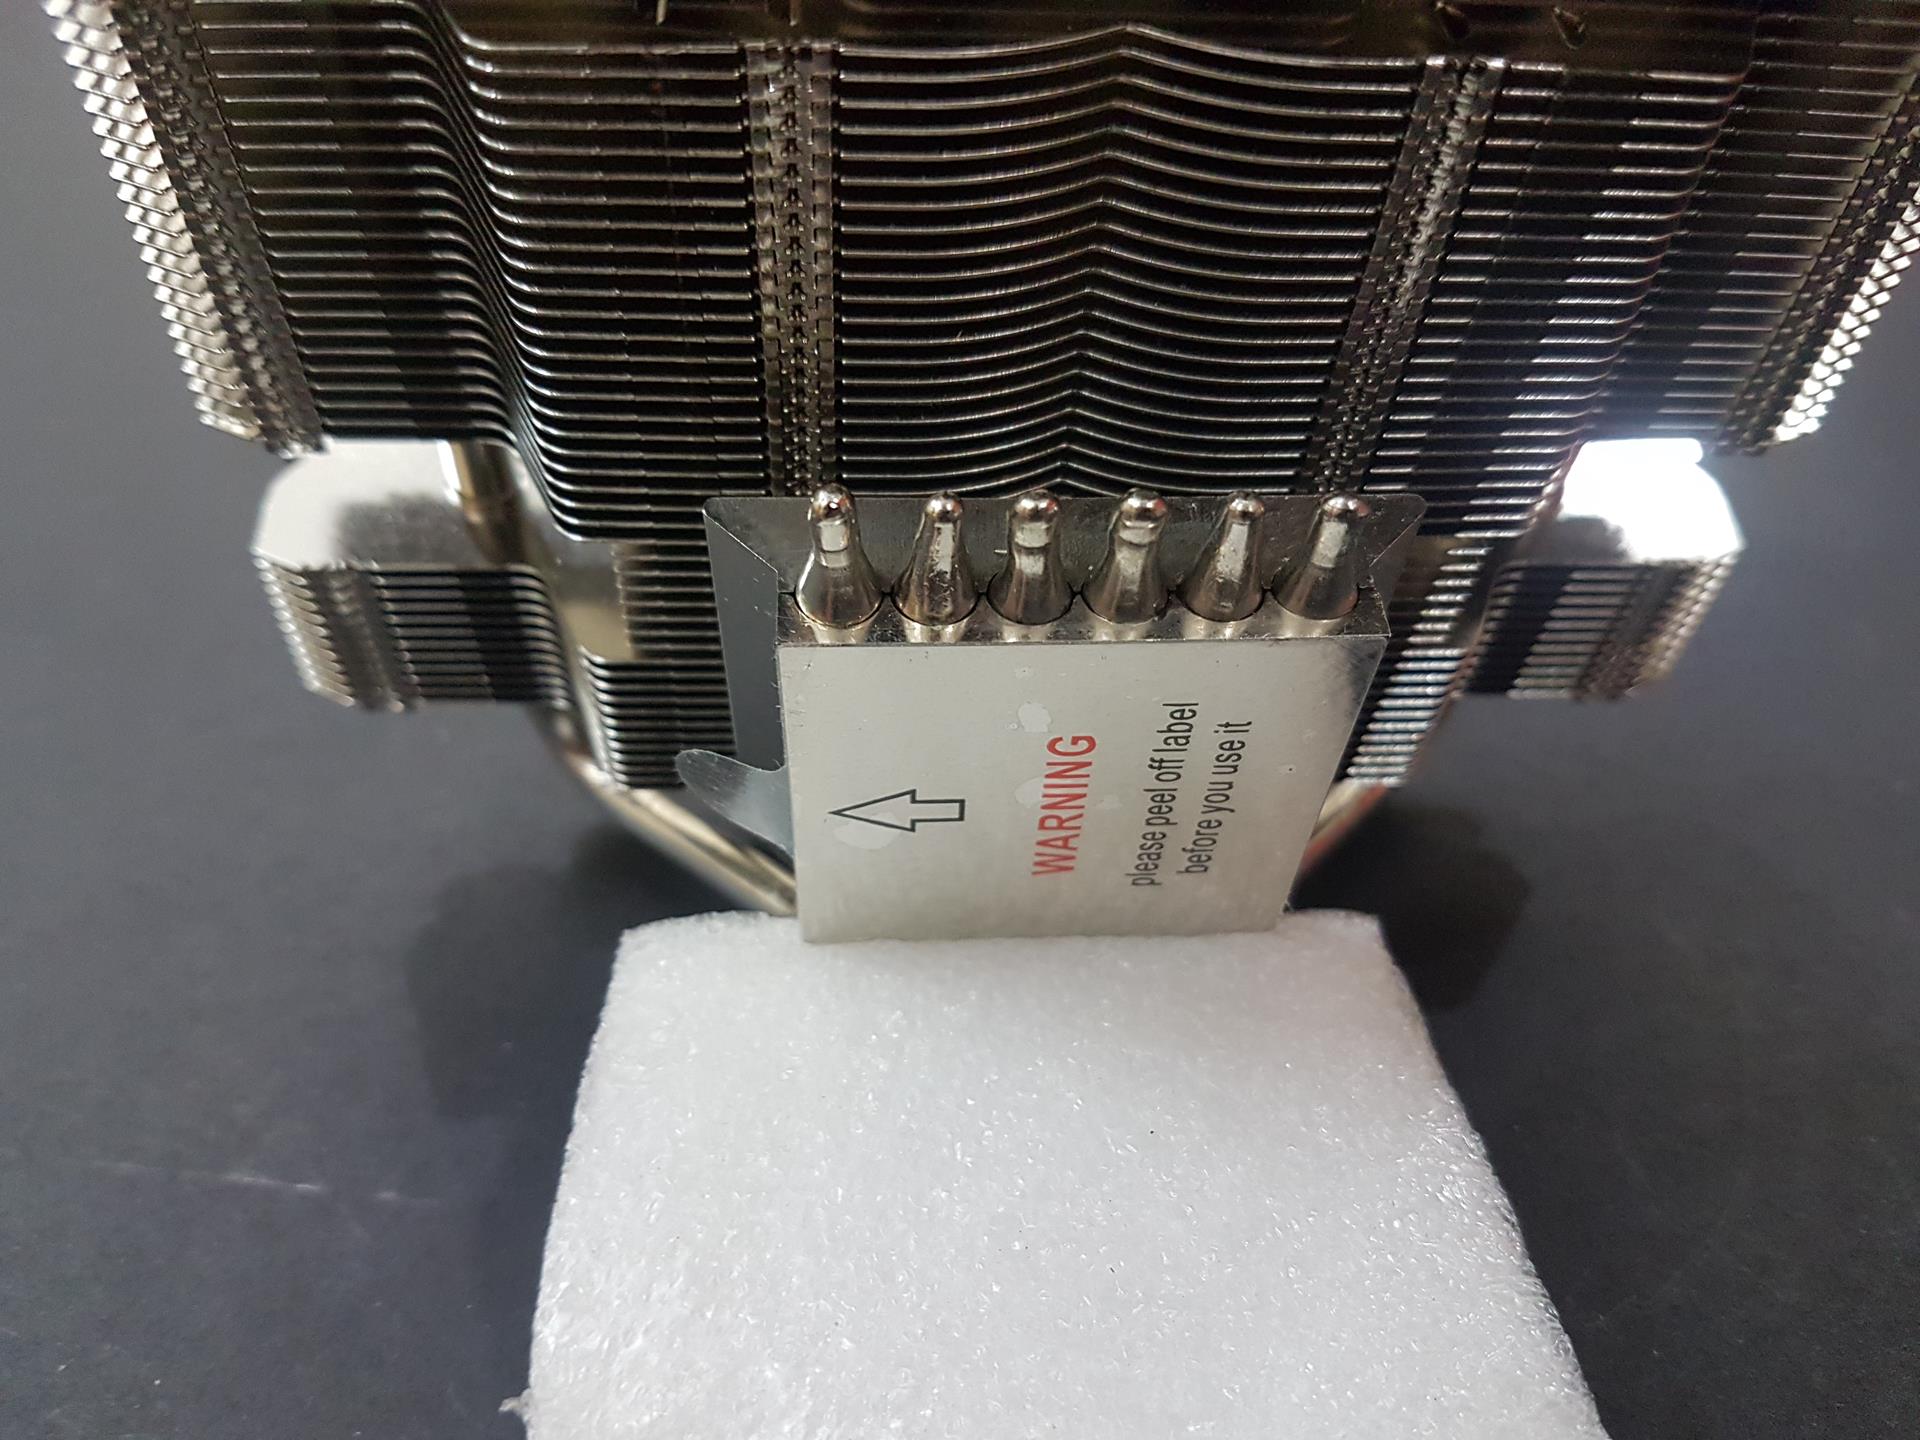
The cooler has copper mirror base in nickel plating. The dimension of the base is 42x39mm. The heatpipes are not making direct contact with the CPU IHS. They are soldered into the base making a contact with the base and mirror finish side of the base would contact the IHS of the CPU. There is a 4-5mm gap or spacing between the base and the heatsink. There is a safety sticker pasted on the base informing the user to peel it off before mounting the cooler. The tips or terminating ends of the heatpipes on the base are in pointing shape unlike the terminating ends on the front side of the heatsink.
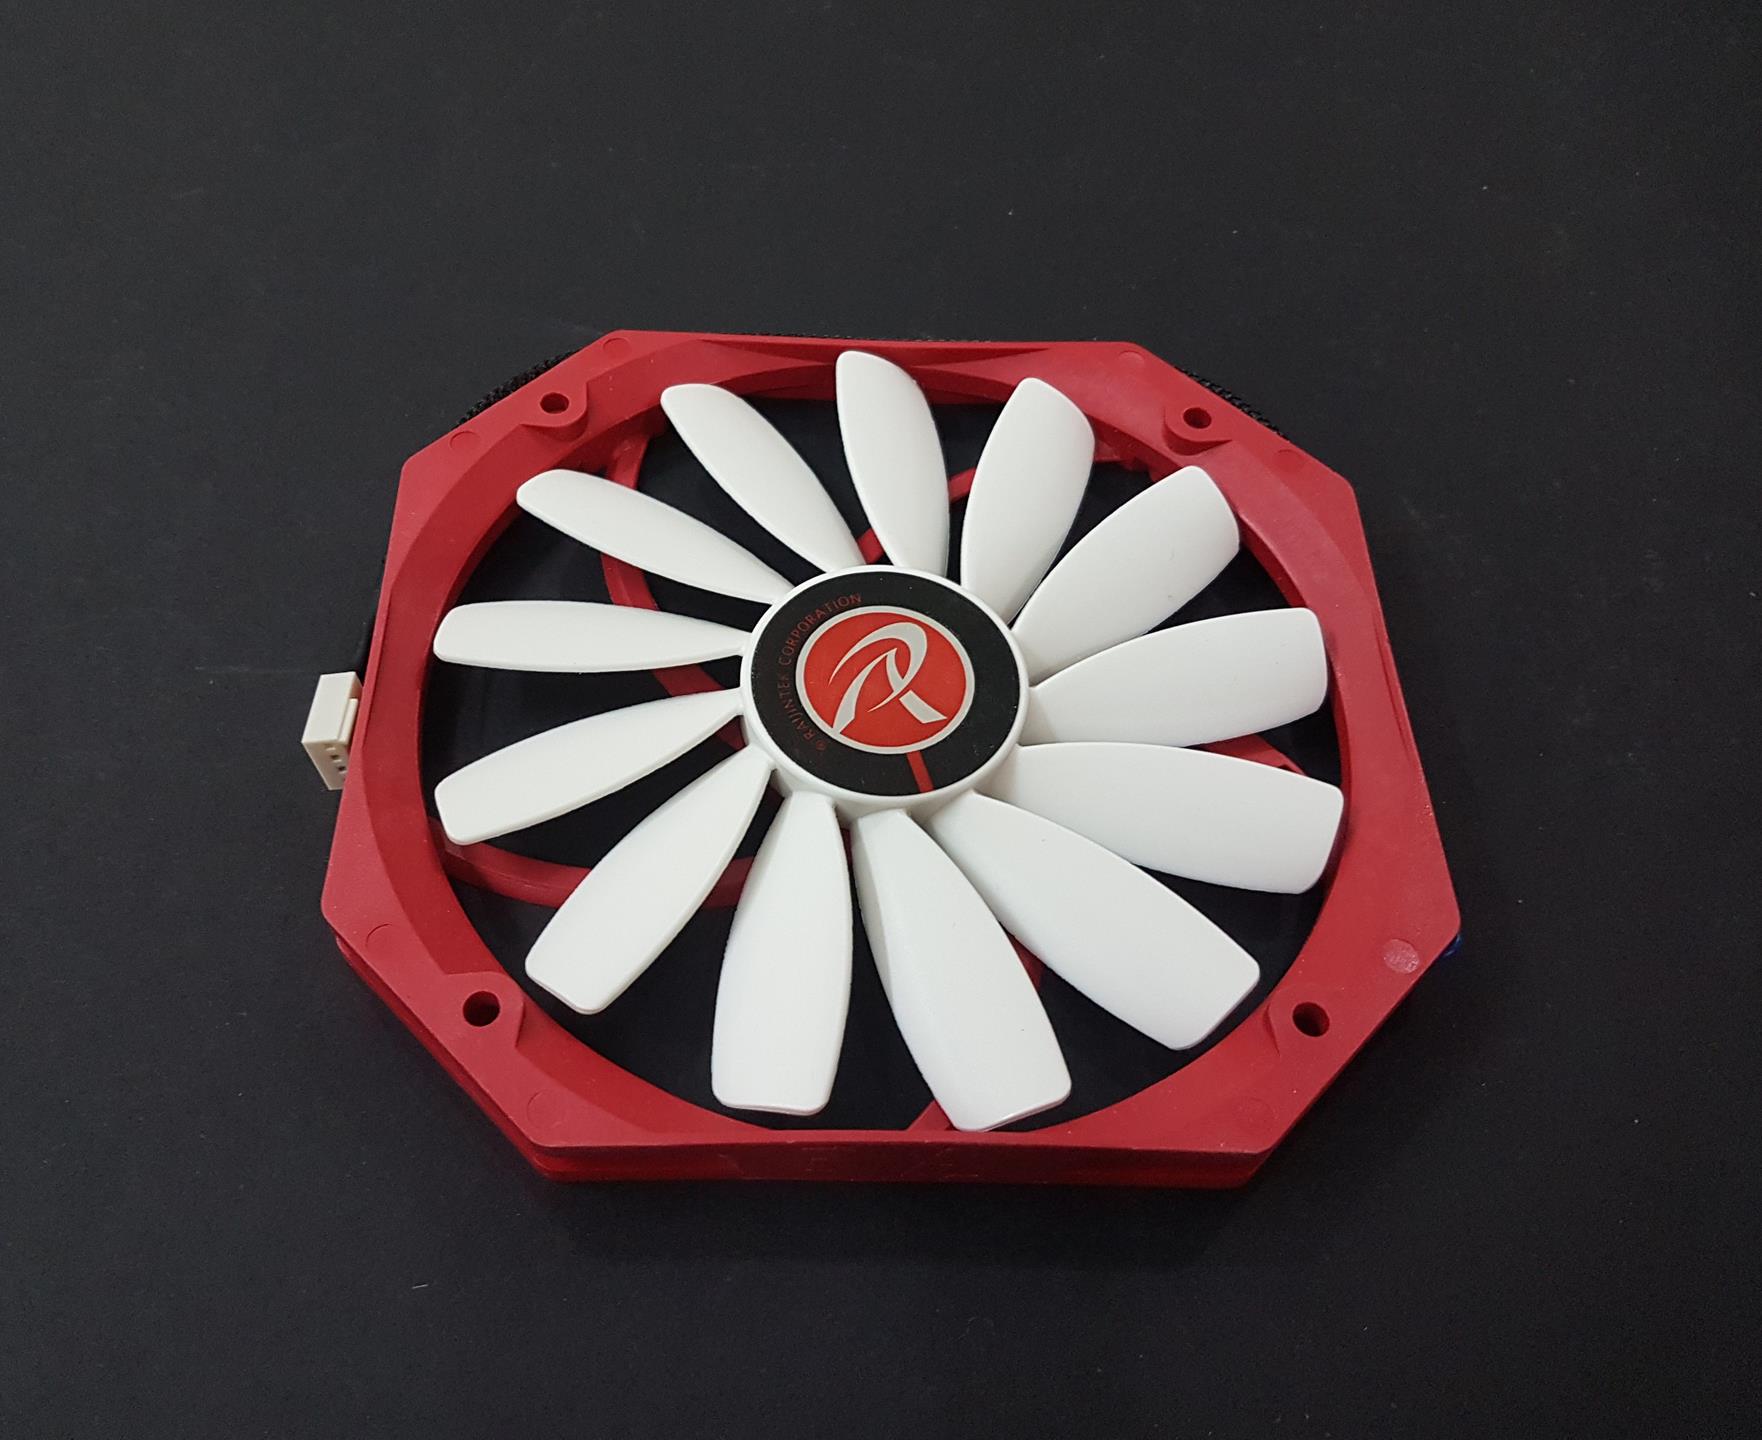
Raijintek has provided a 14013 slim profile fan with 140mm mounting with the cooler. The fan has a slim profile with just 13mm of the height. The dimension of the fan is 140x150x13mm. This shows the sheer size of the fan yet with a slim profile. It is understandable as the fan is supposed to cover the 140mm heatsink. The frame of the fan is in red color. There are 13 blades of this fan. These are in white color and they carry a propeller-like design. Their tips are bit high than the fan’s frame. There is a sticker covering the fan motor hub. Brand logo of the Raijintek is printed in the center with the name of the company printed around it.
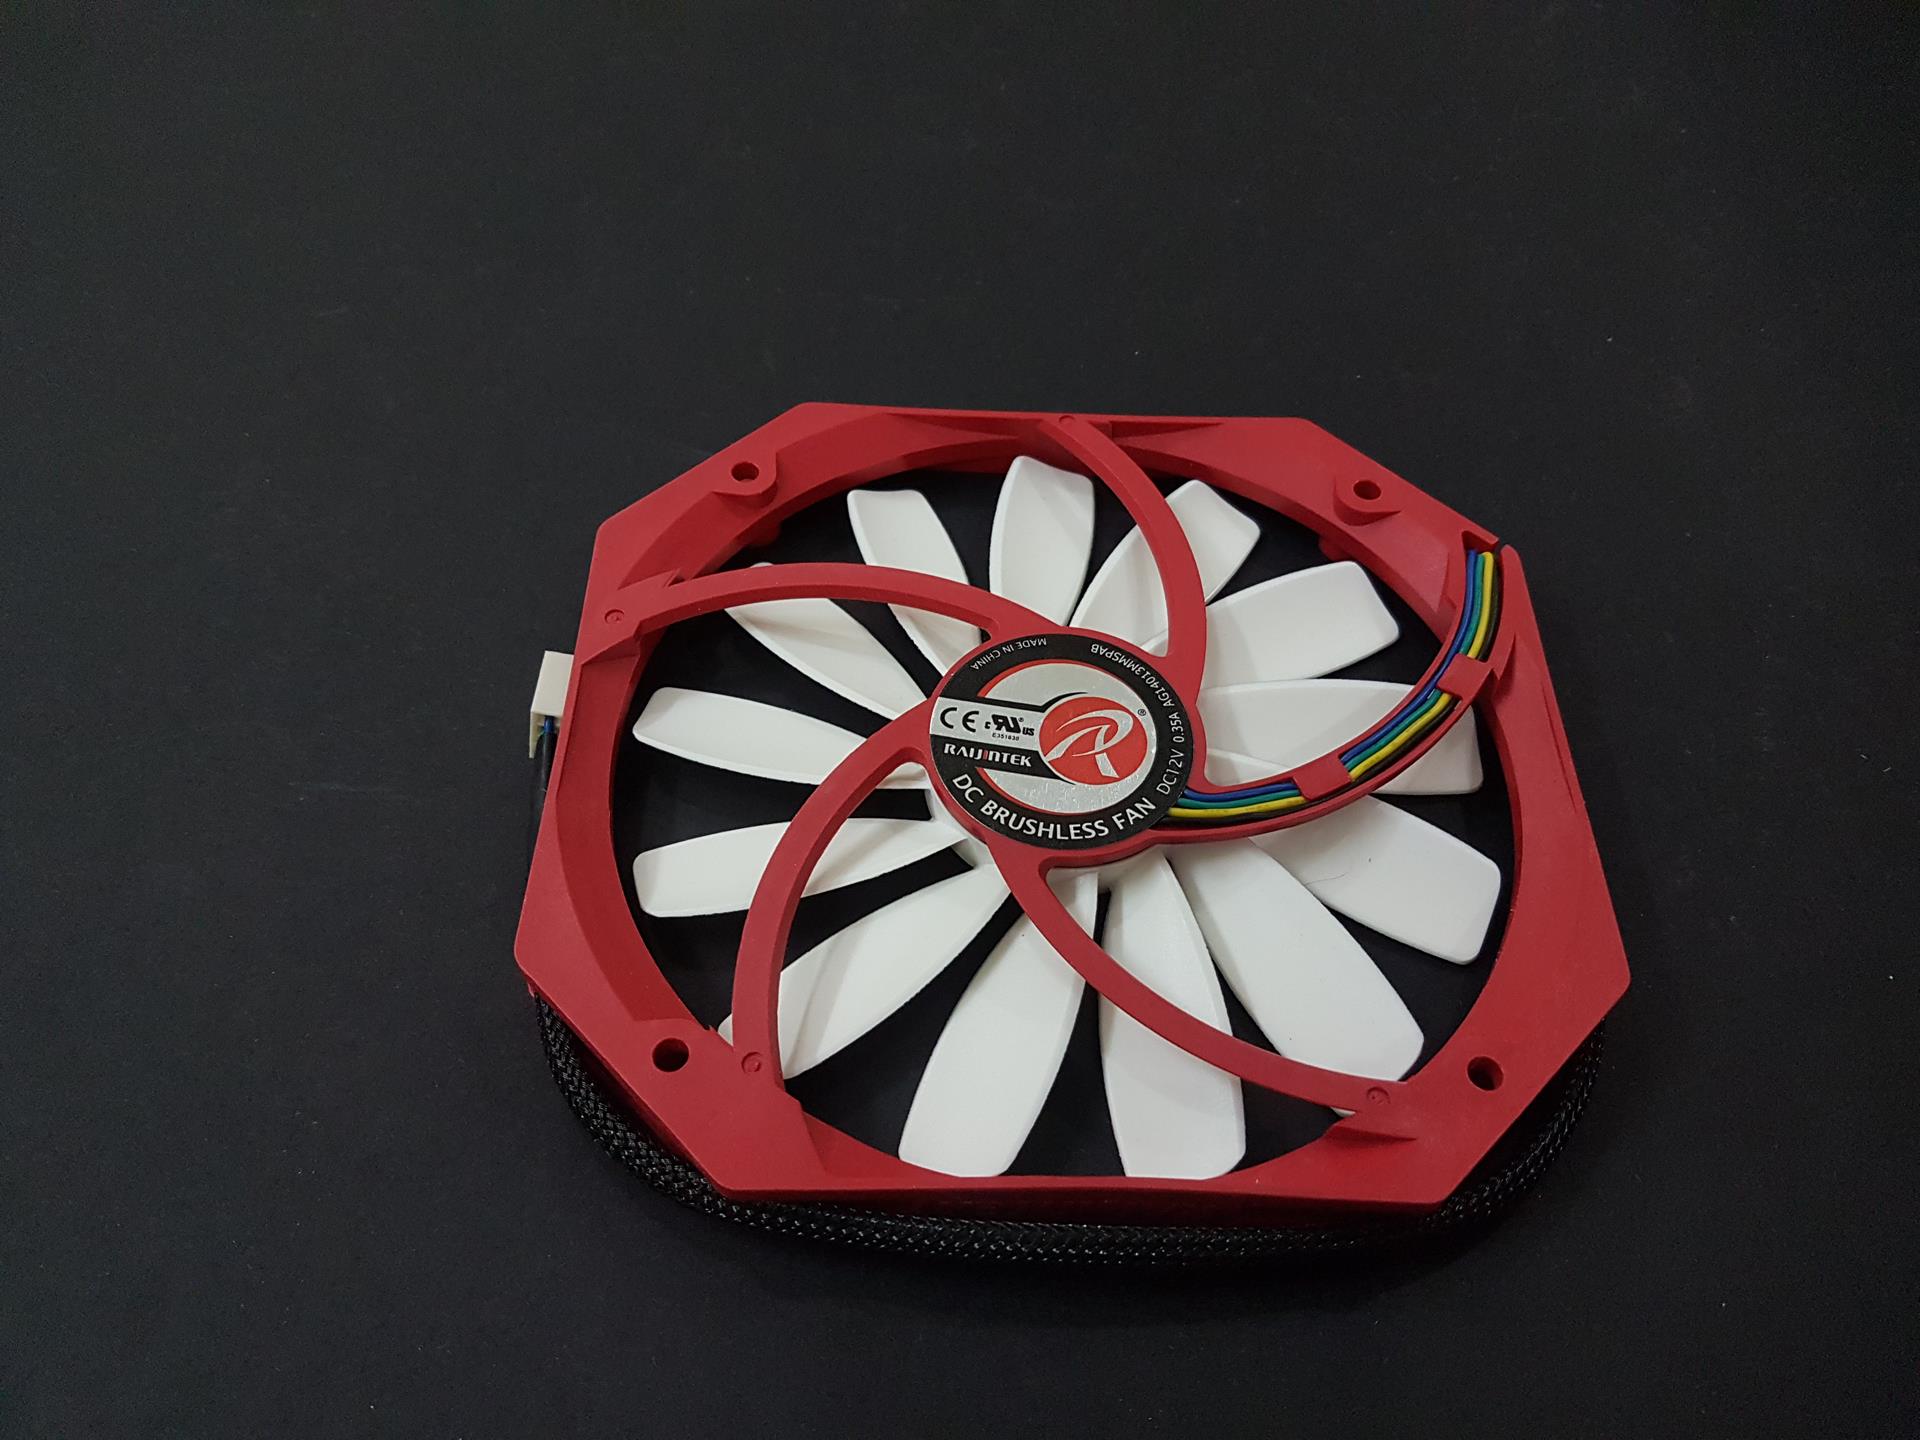
There is a five-arm assembly holding and connecting the fan motor with the frame. The fifth arm has an inset on which the 4 wires of the power connector are routed. The fan power cable is sleeved and has a white color 4-pin PWM connector. There is a sticker pasted on the motor hub. Raijintek brand name and logo are printed in the center. The motor is DC Brushless. The fan draws 12V DC power with 0.35A and 4.2W. Starting voltage of the fan is 7V. Rated speed of the fan is 650 ~ 1400 RPM. The fan has sleeve bearings with the maximum airflow of 56.55 CFM. Rated static pressure is 1.24 mmH₂O. MTBF is 40000 hours. Rated sound level is 28dBA.
Installation
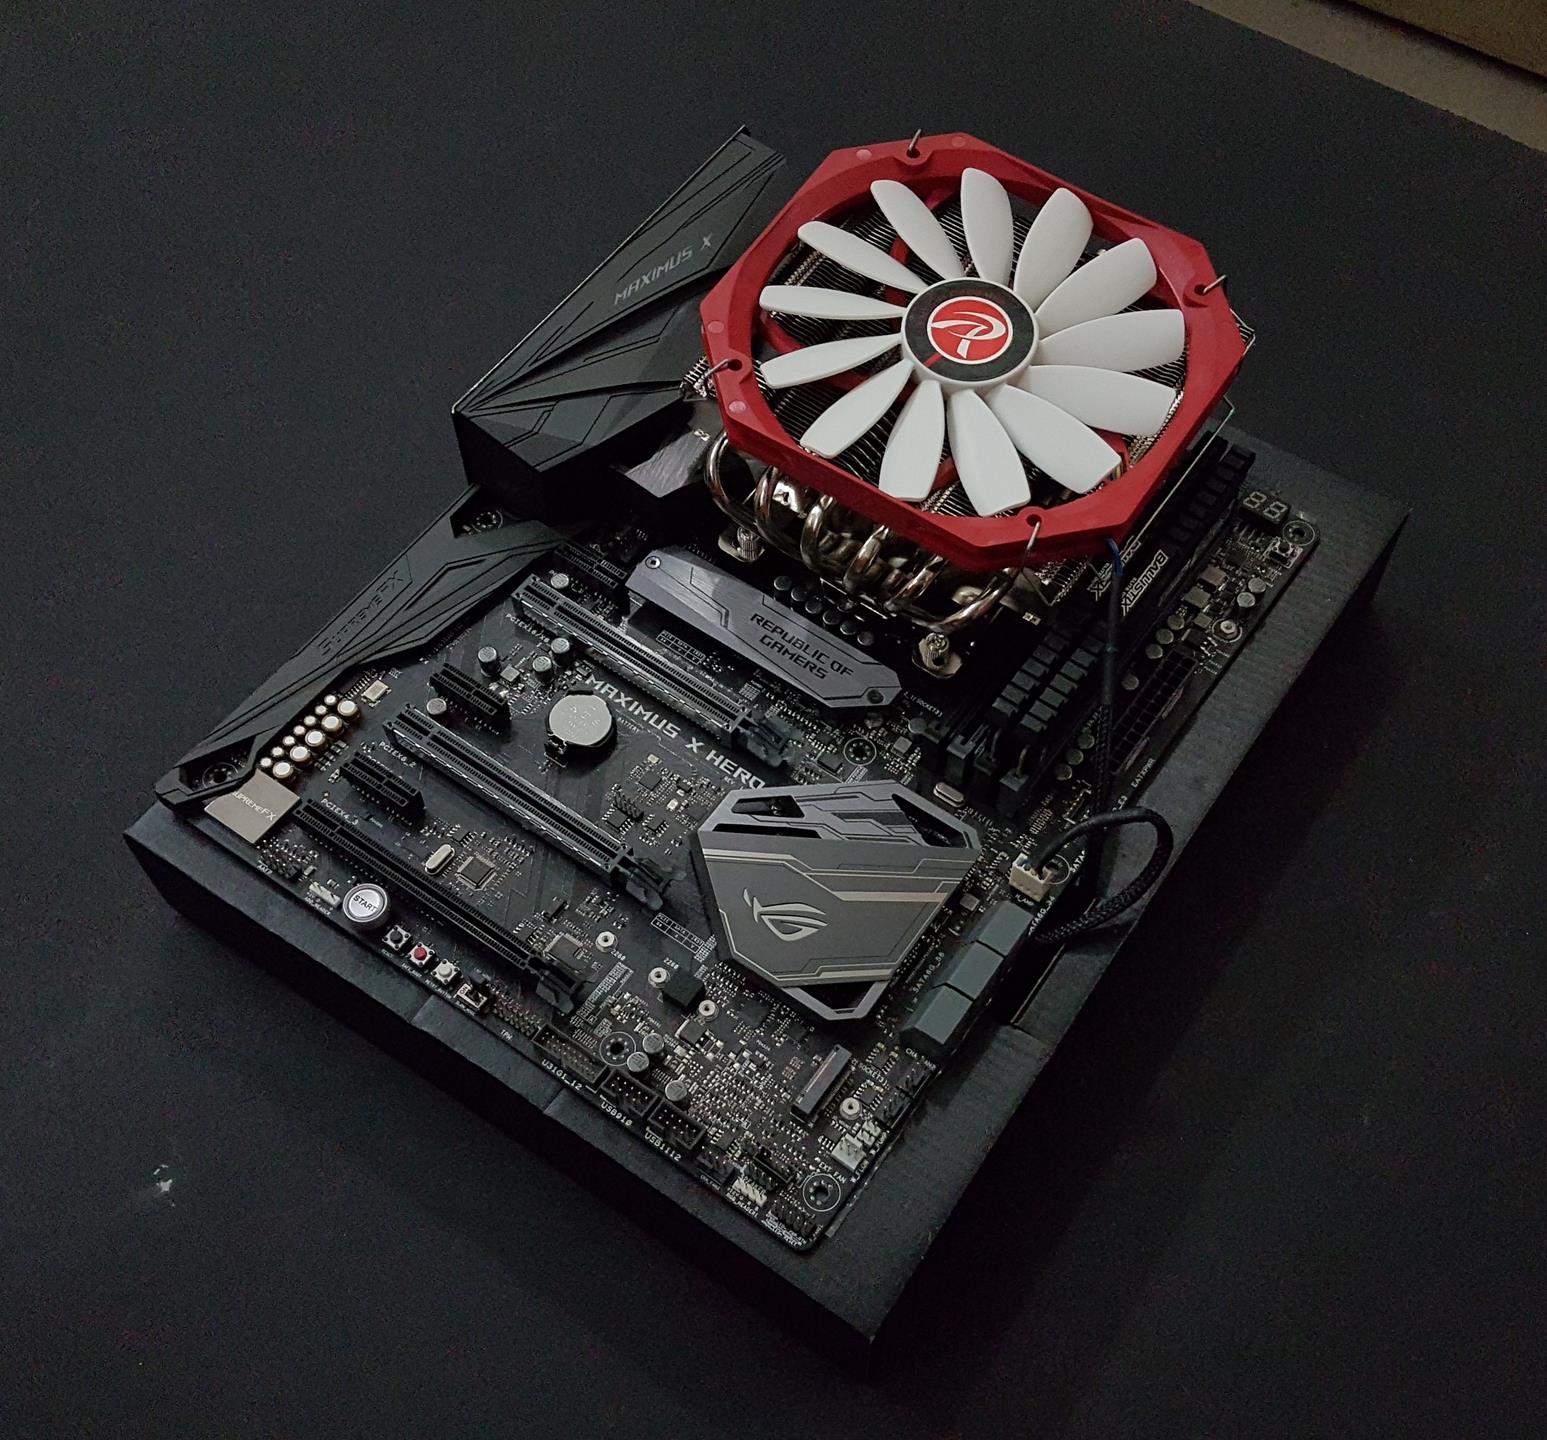
The cooler was installed on the Asus ROG Maximus X Hero as we don’t have mini-ITX size motherboard which would have been ideal for these coolers. Let’s take a look at the installation procedure of this cooler.
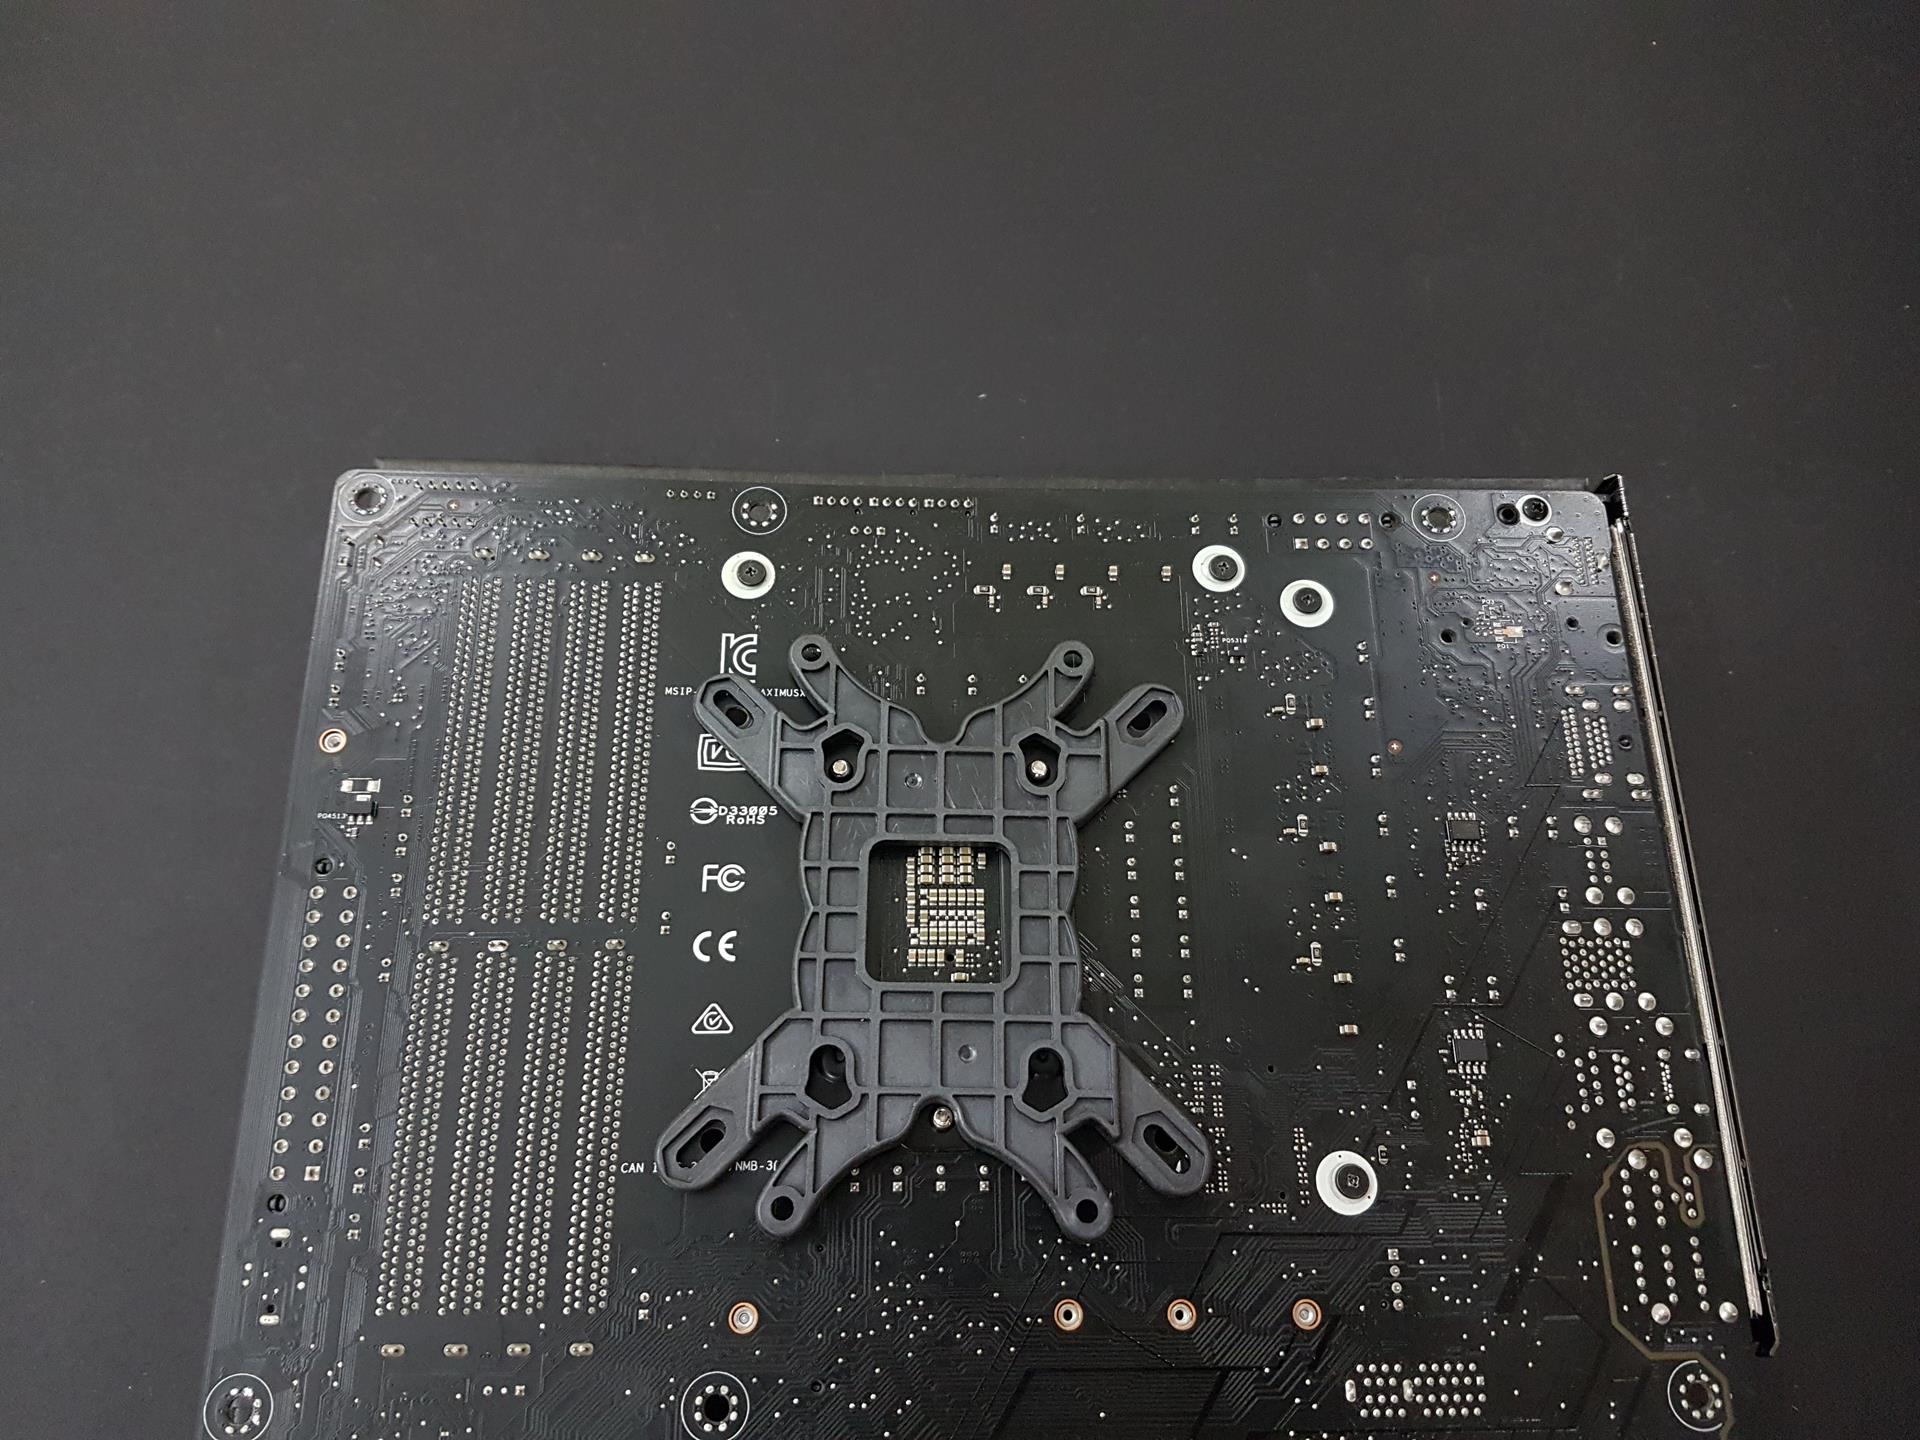
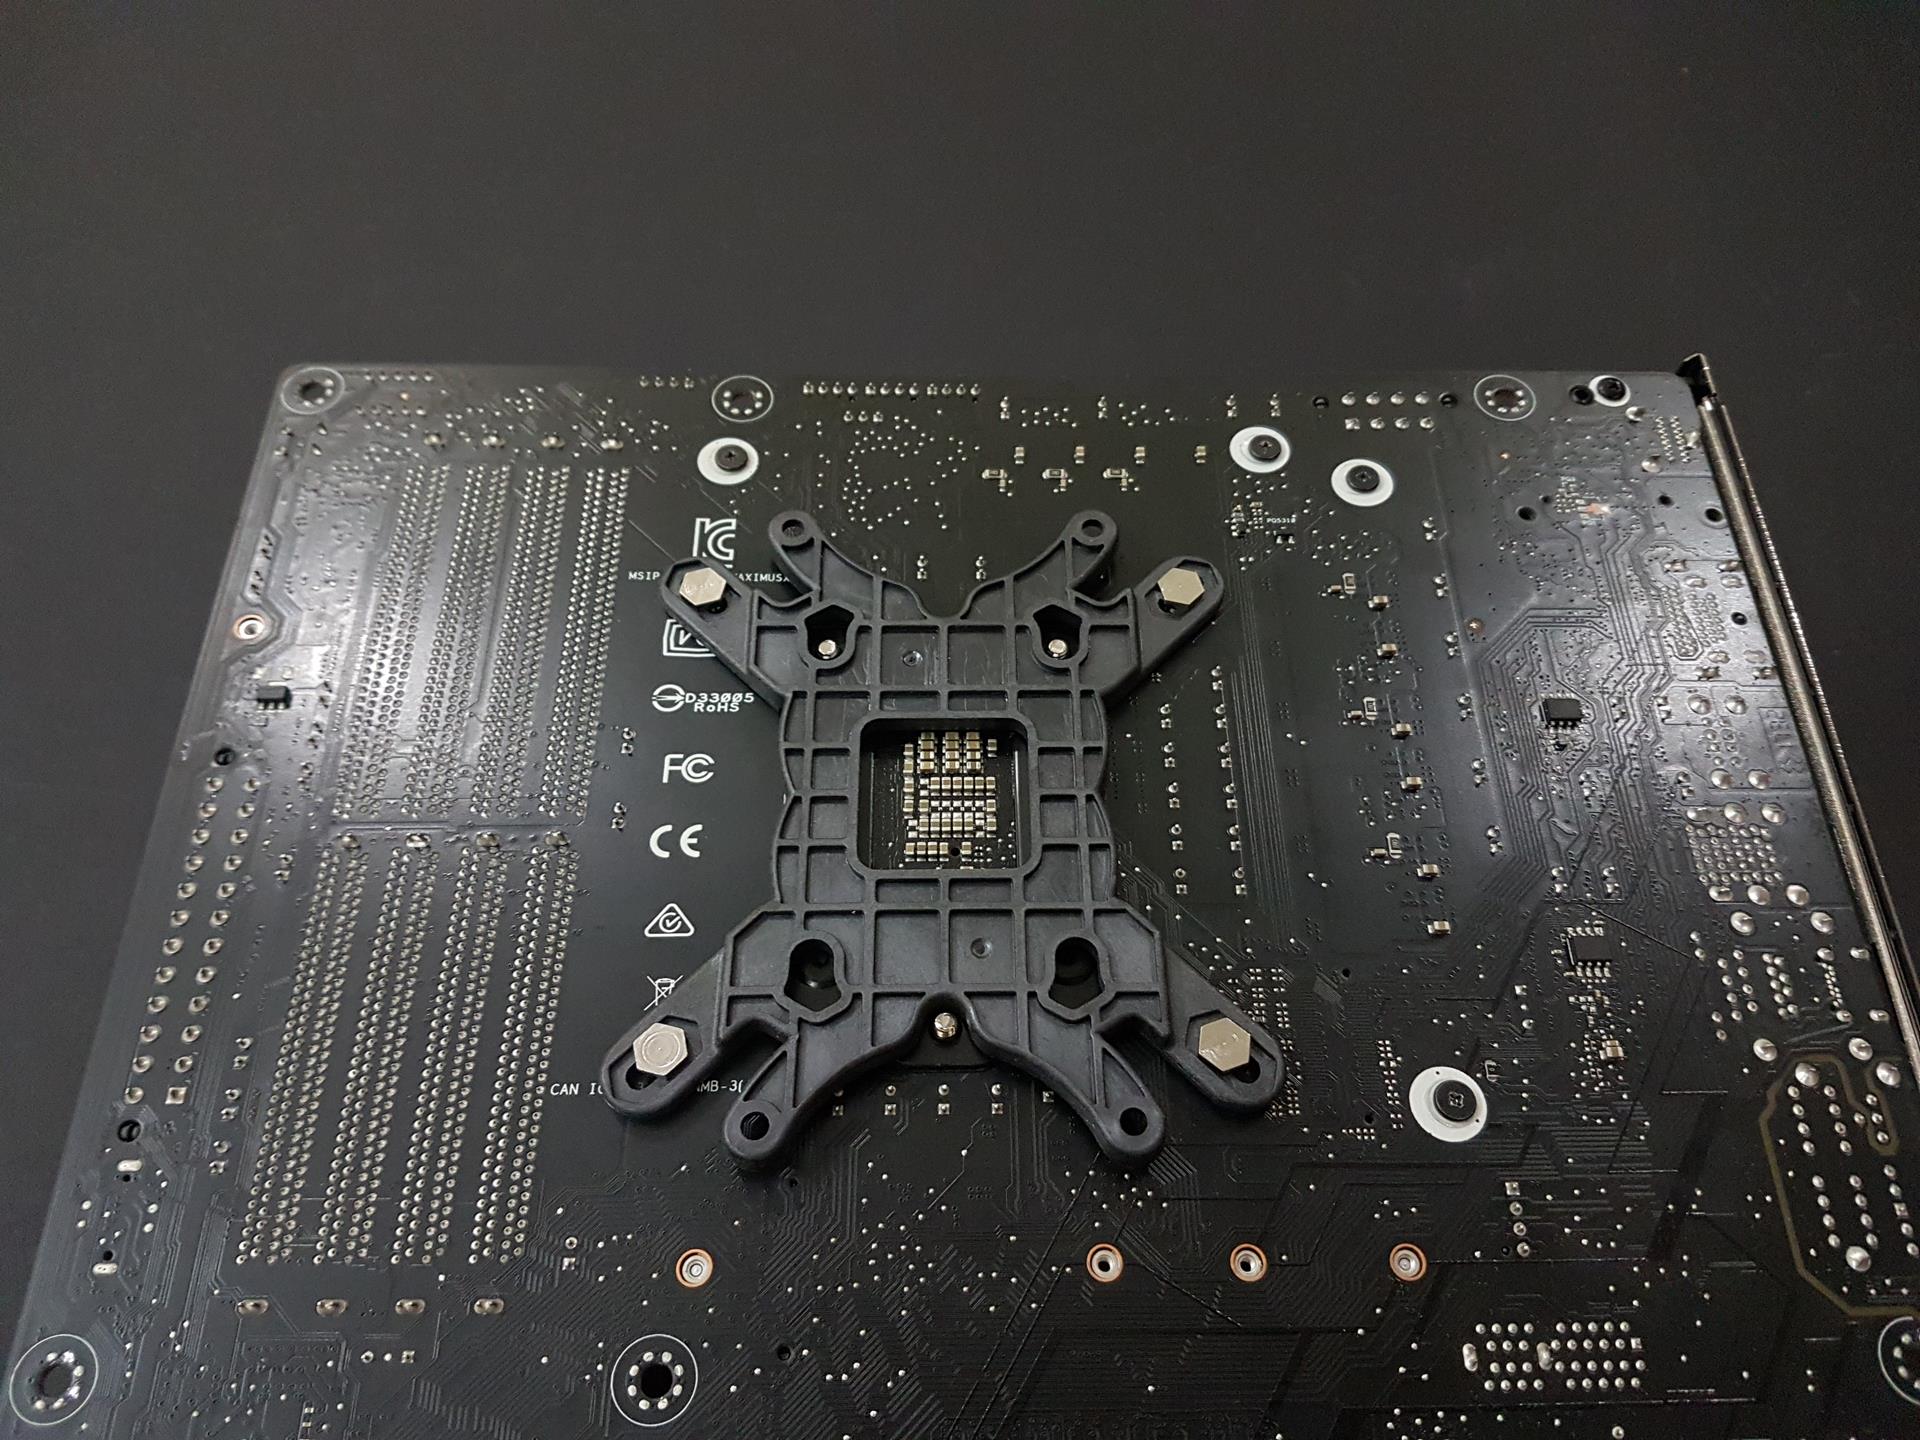
Place the backplate on the backside of the motherboard in such a way that the raised tabs portion is facing the user side. The raised tabs are for the AMD mounting. Installation manual was helpful. One note before moving on. The provided backplate is hard plastic without any protective padding on the mounting side. On a regular ATX size PCB this won’t create any issue but on mini-ITX PCBs we are space constrained and resultantly the sub-components on the backside of the motherboard near CPU socket are tightened placed. This bracket could damage those components.
Route the 4x knurled headed screws from the 4 holes on the CPU socket. They should sit inside the mounting tabs of the backplate.
Secure the backplate by placing the 4x black color plastic nuts/spacers on the front side of the motherboard. These nuts/spacers are designed in a manner that they will snuggle on to the screws and will hold the backplate intact. This was the tricky part as the screws were slippery and it was difficult holding the screws at the same time. It is suggested to use the screws in a diagonal manner with two screws at a time.
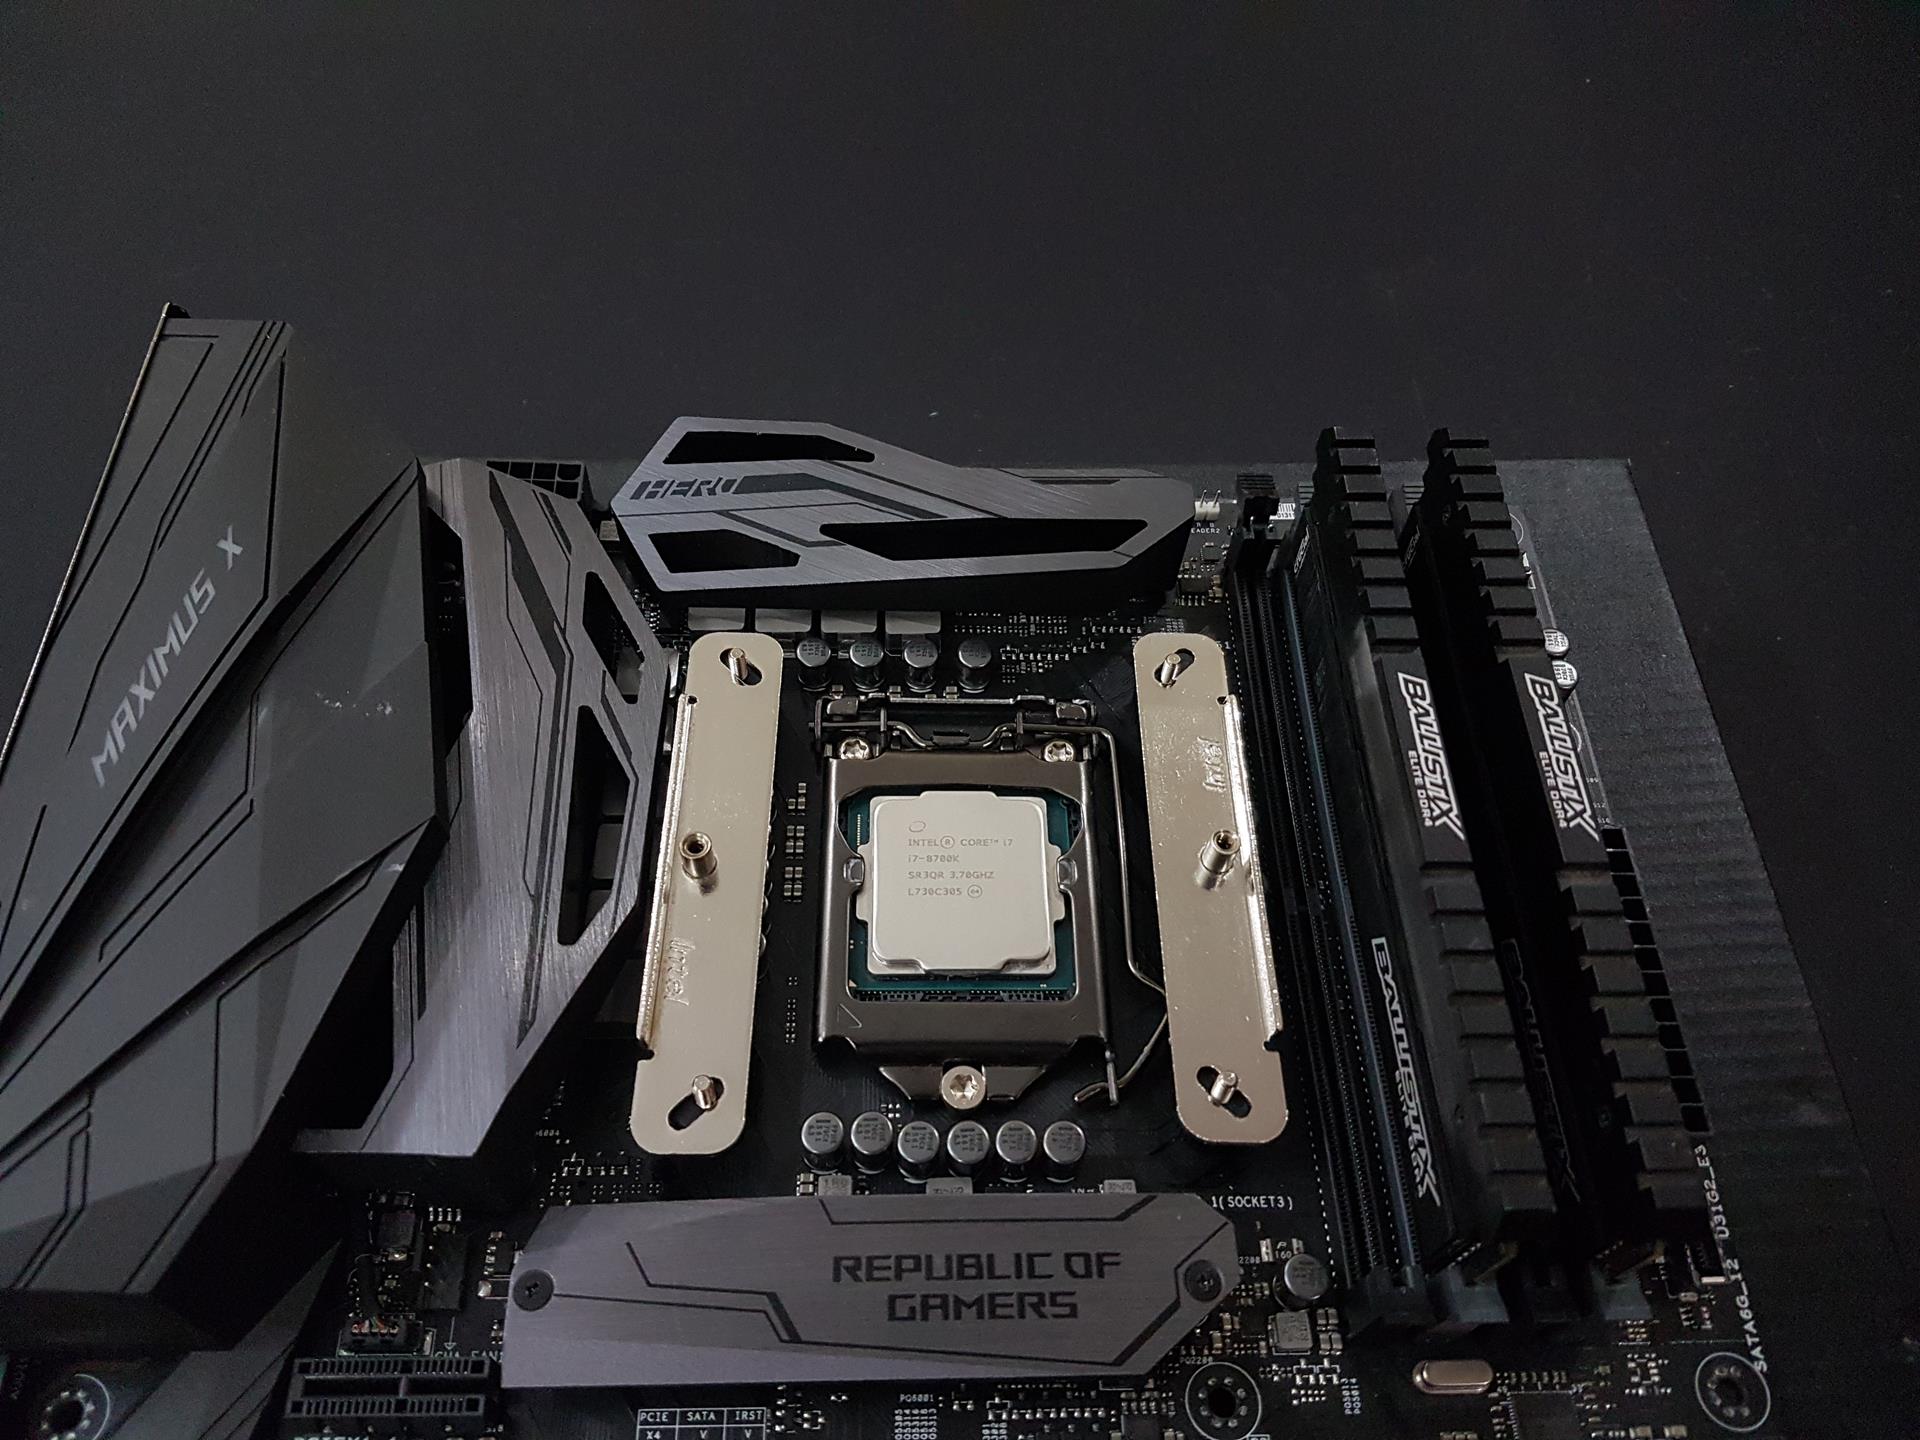
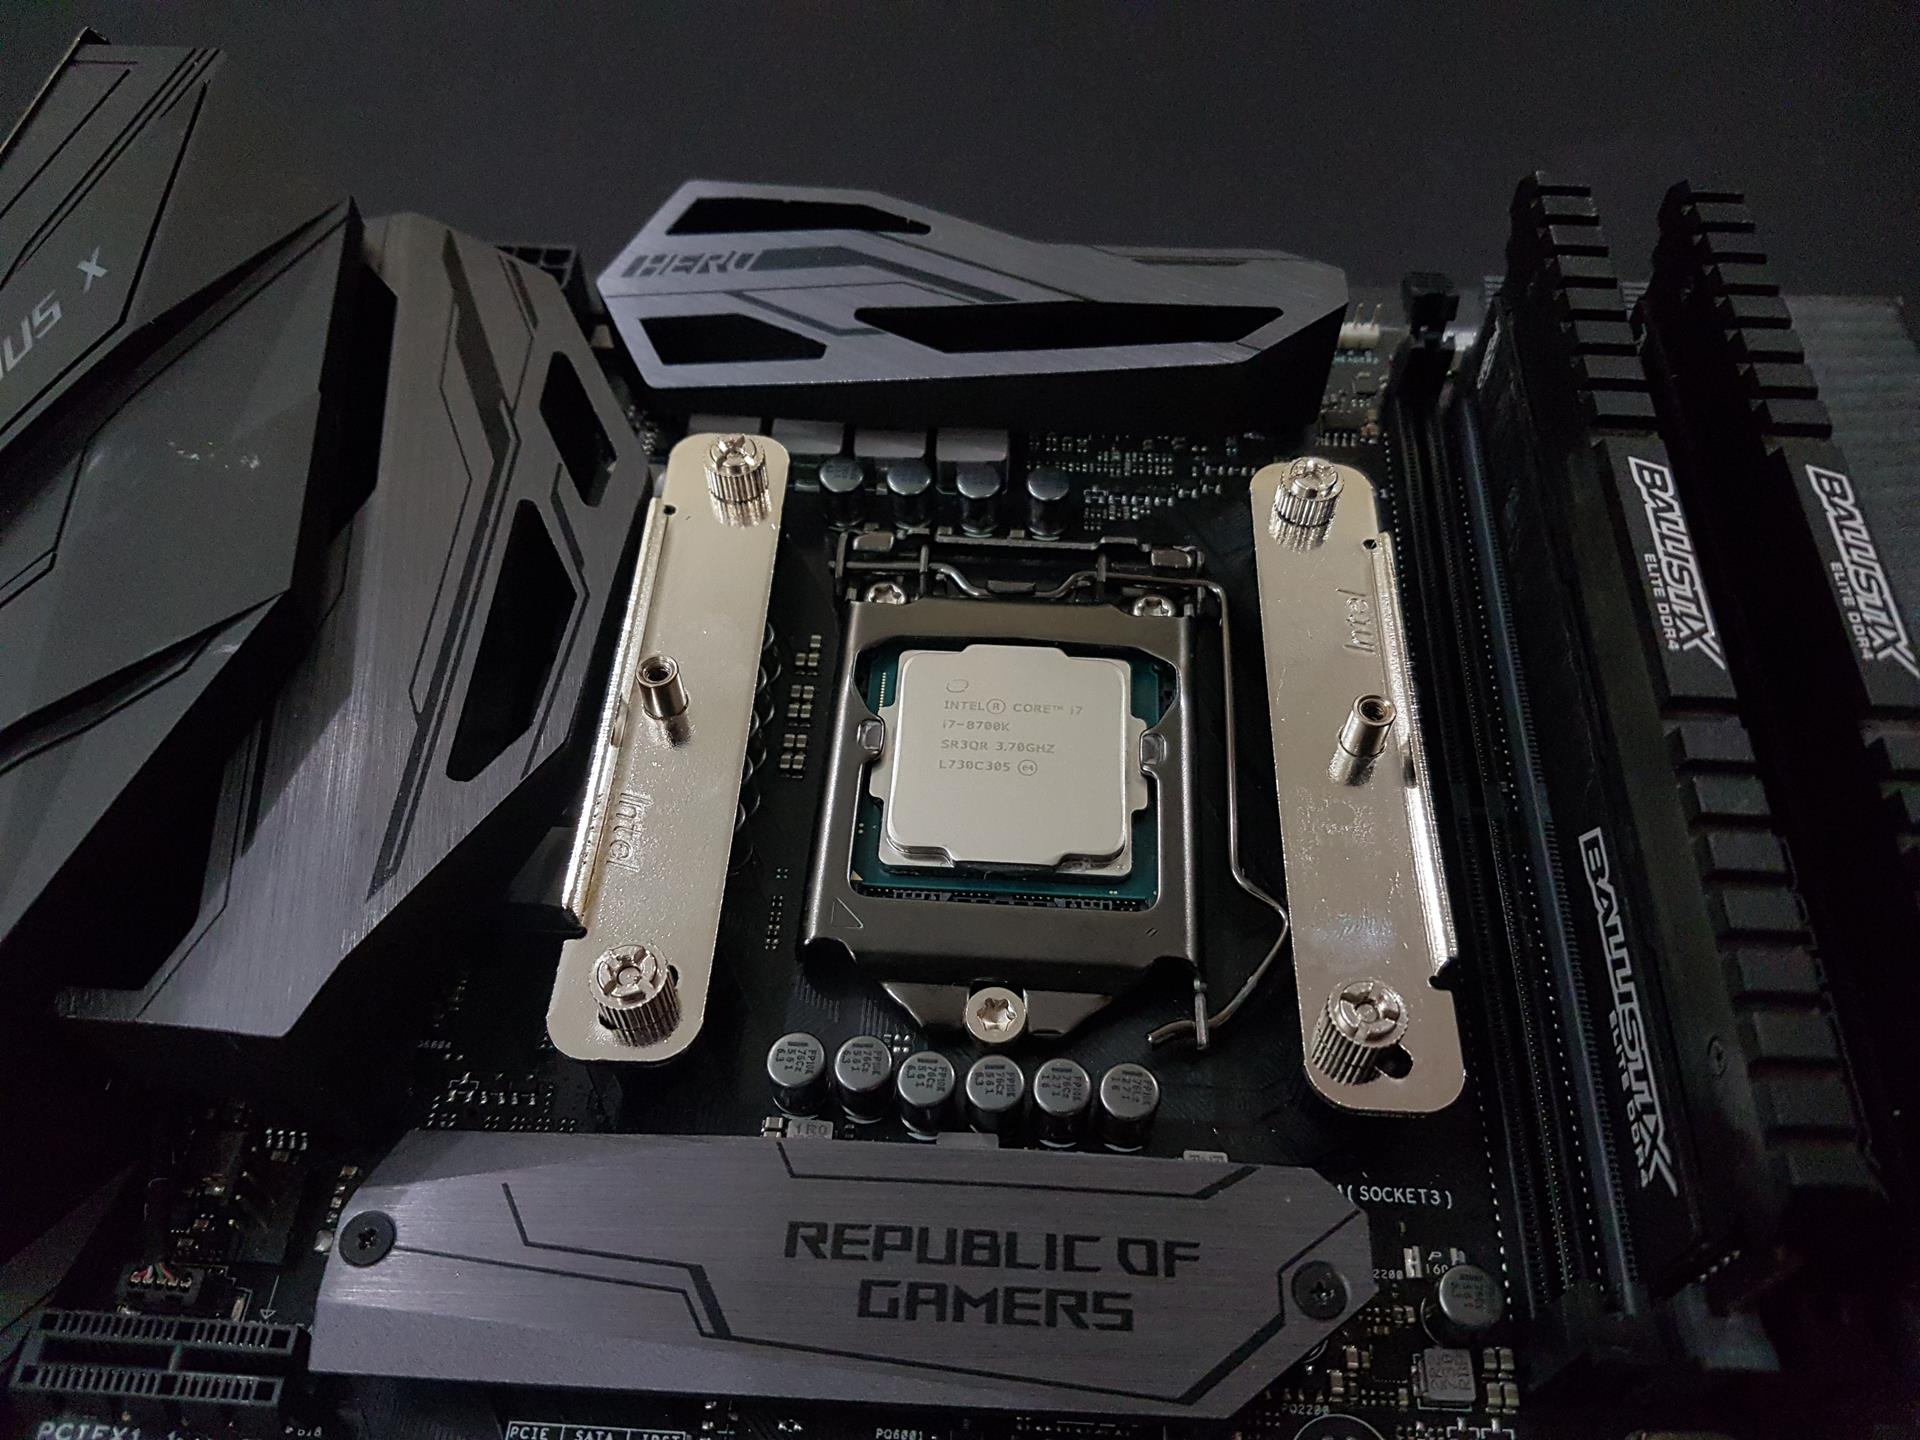
There is a pre-requisite to the next step. You should decide the orientation of the heatsink before placing the Intel mounting clips and place the clips accordingly. Place the clips as shown in the below picture. The raised sides should face the exterior.
Once the mounting plates are placed, secure them using the 4x metal nuts. Don’t overtighten them.
Apply the thermal paste on the IHS of the CPU. Insert the crossbar on top of the cooler’s base. There are two holes on top where the crossbar is tucked on it. Place the heatsink in the decided manner by aligning the holes on the crossbar with the standoff on the mounting clips. Use the two M3 screws to secure the heatsink with the mounting bracket. Here we saw another difficulty. While placing the heatsink on the CPU the crossbar can easily slip. So, it would be better if you use your fingers to hold it tight on the heatsink. Place the fan on the top in the direction that it pushes the fresh air through the heatsink. Use the metal fan clips to secure it with the heatsink. Connect the 4-pin PWM connector on your desired fan header of the motherboard preferably CPU fan header. This would complete the installation of the cooler.
Compatibility and Clearance
Before discussing the performance of the cooler, let’s take a peak on the compatibility and clearance of this cooler with respect to the PCIe slot, RAMs’ height Motherboard’s I/O cover.
PCIe Slot Clearance
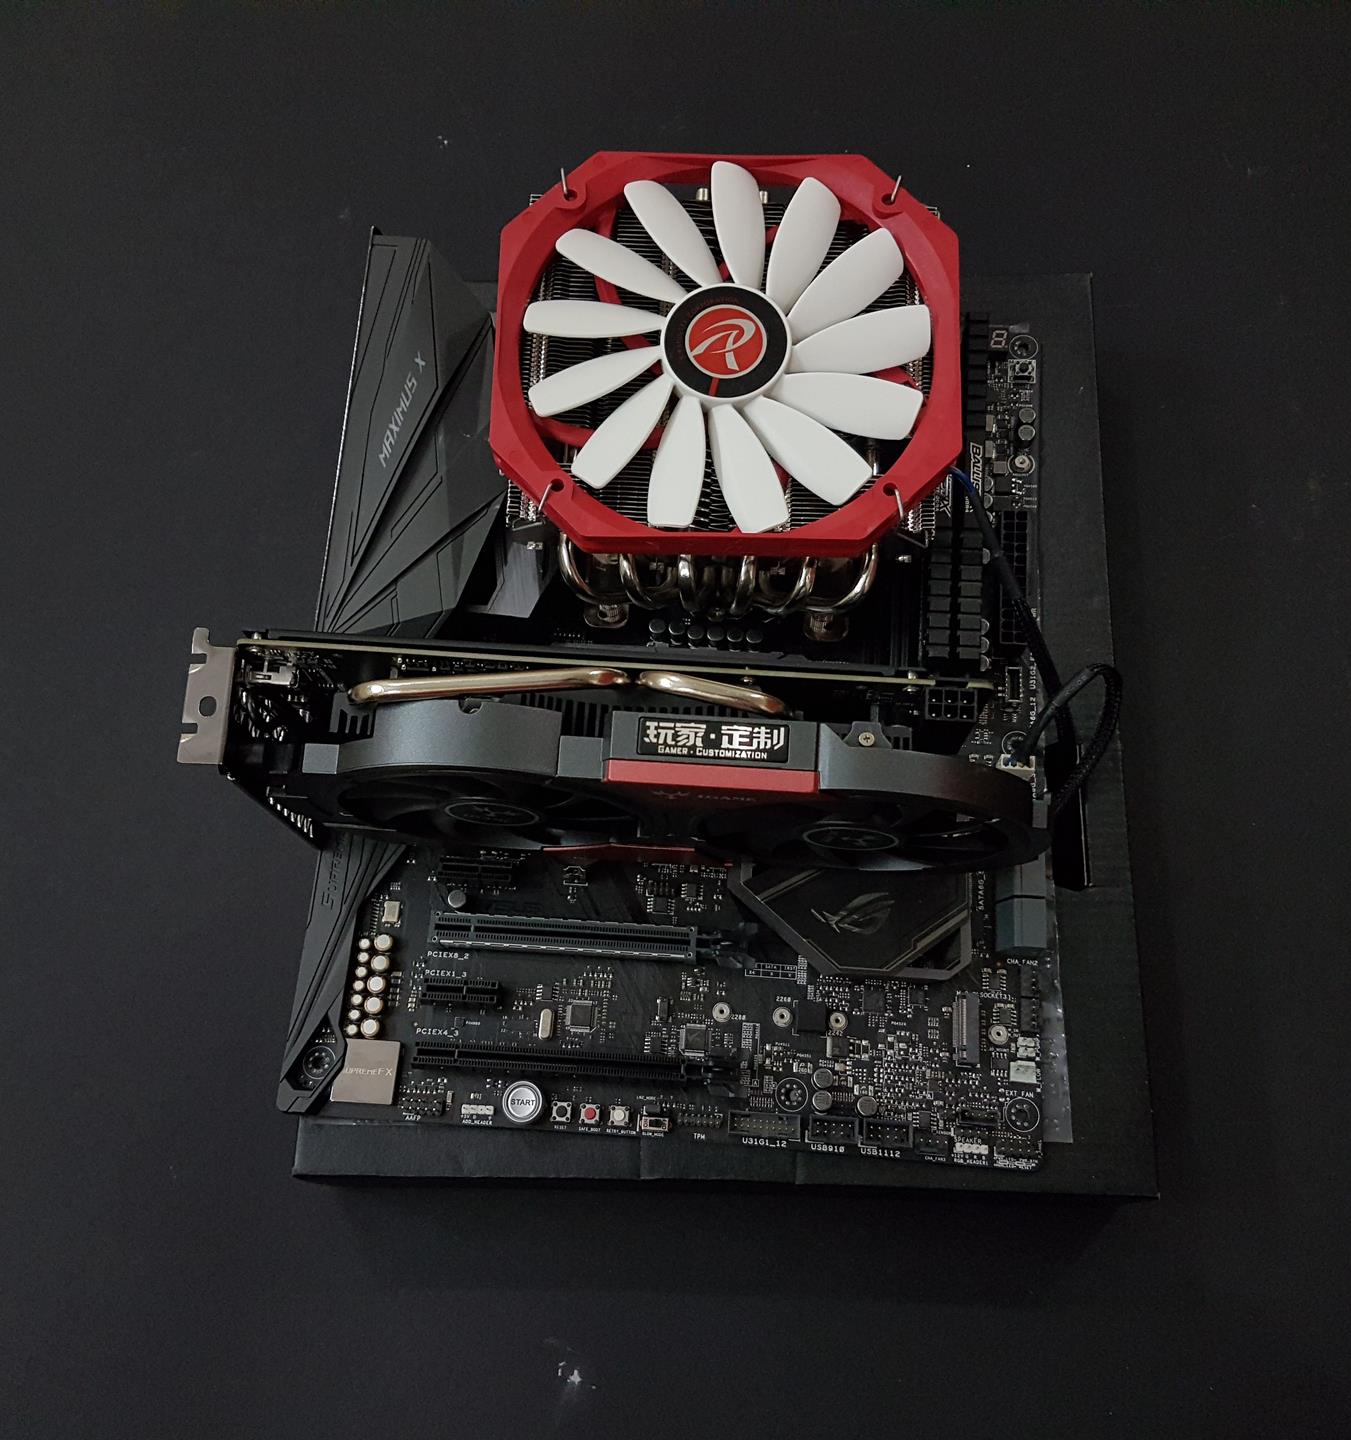
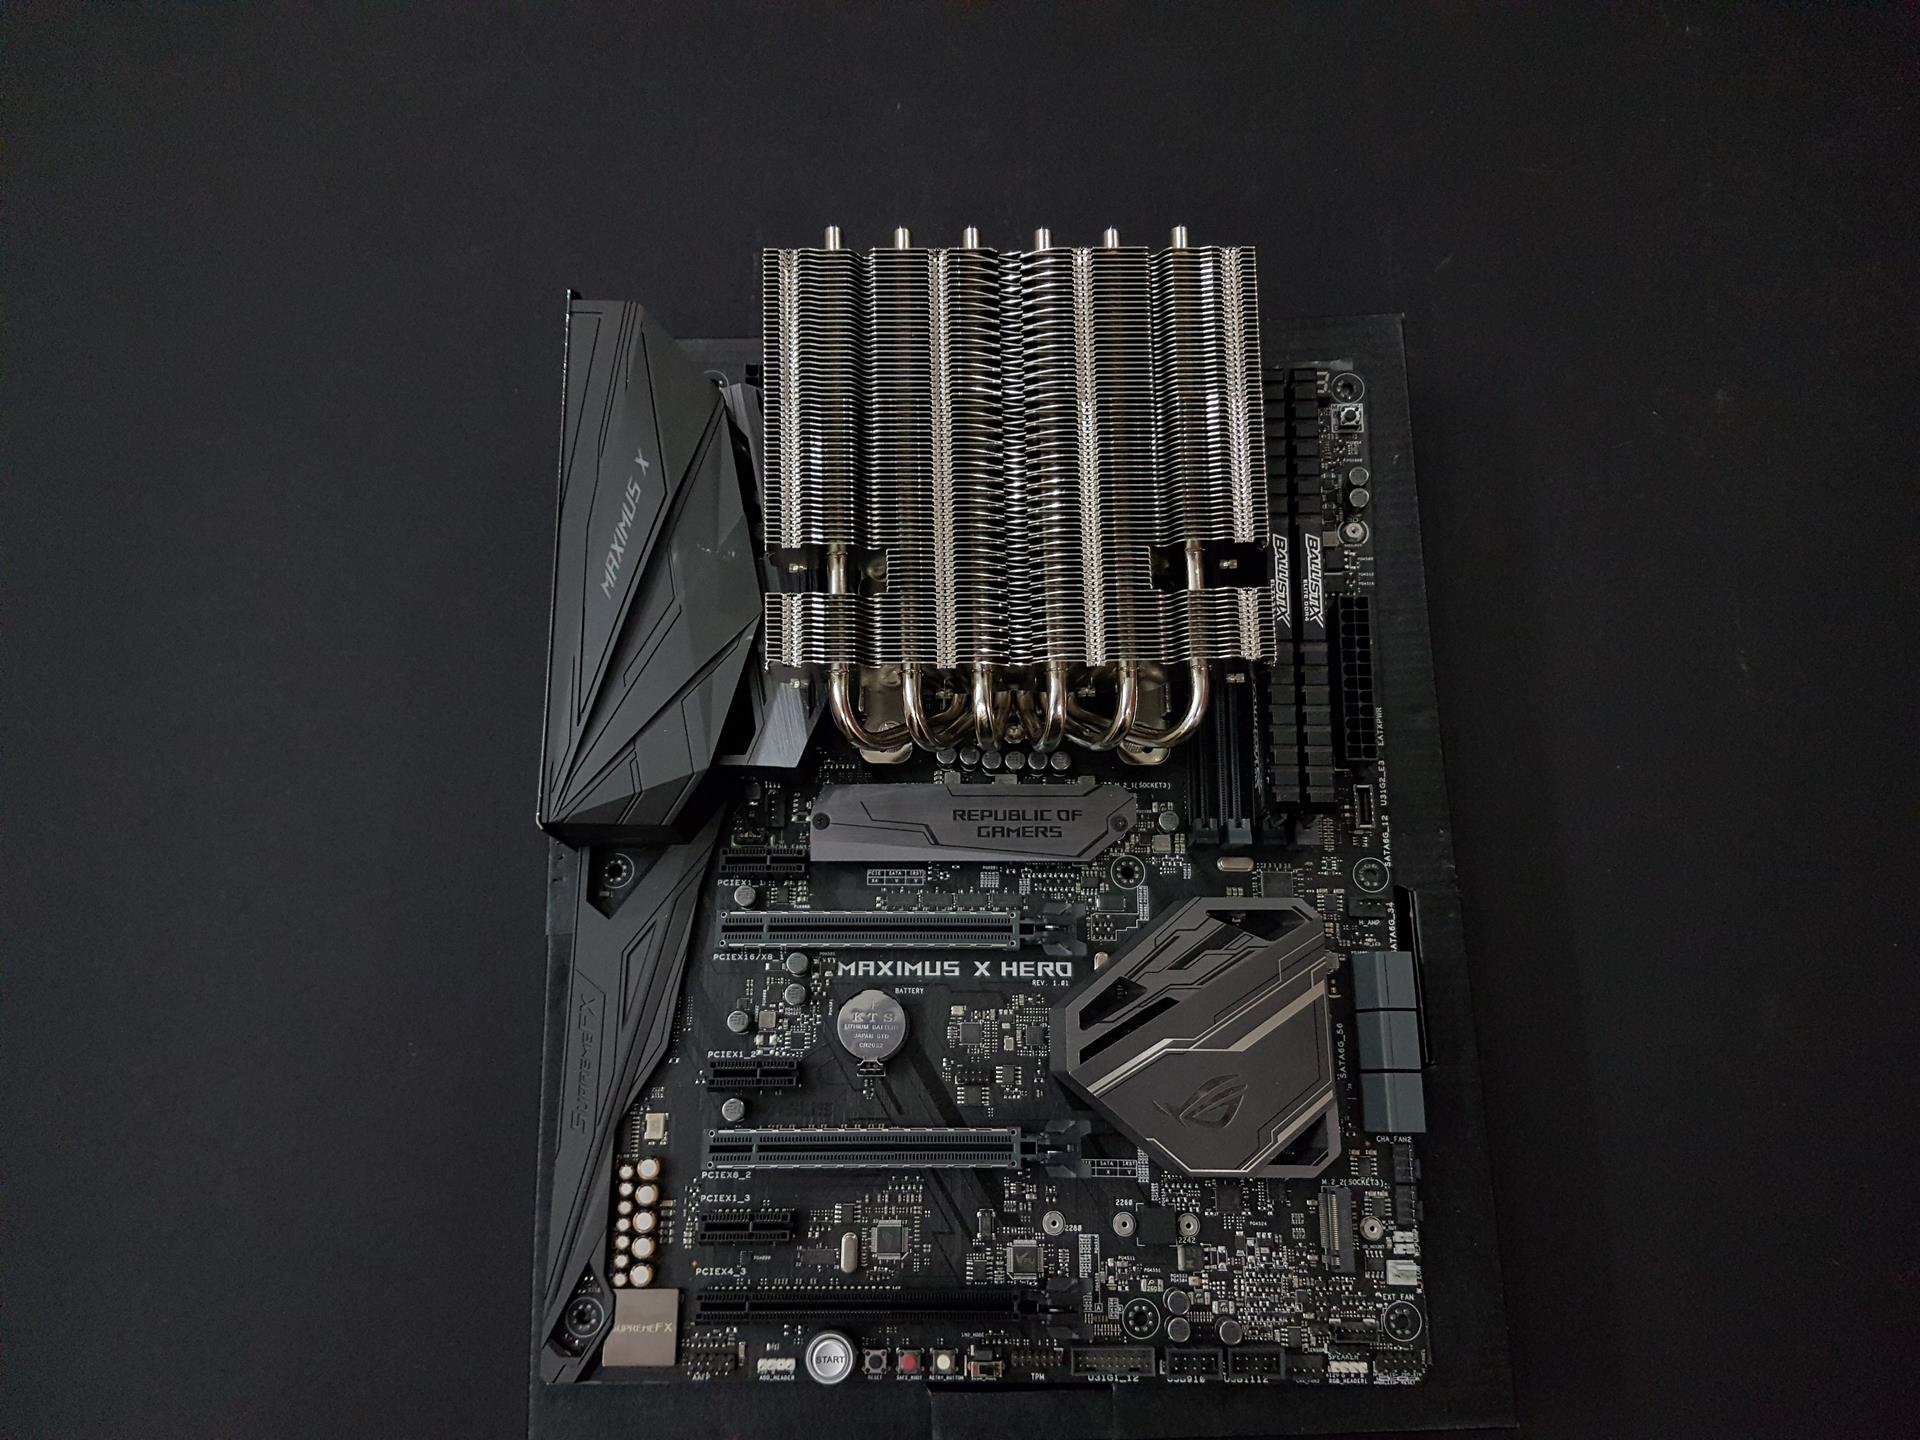
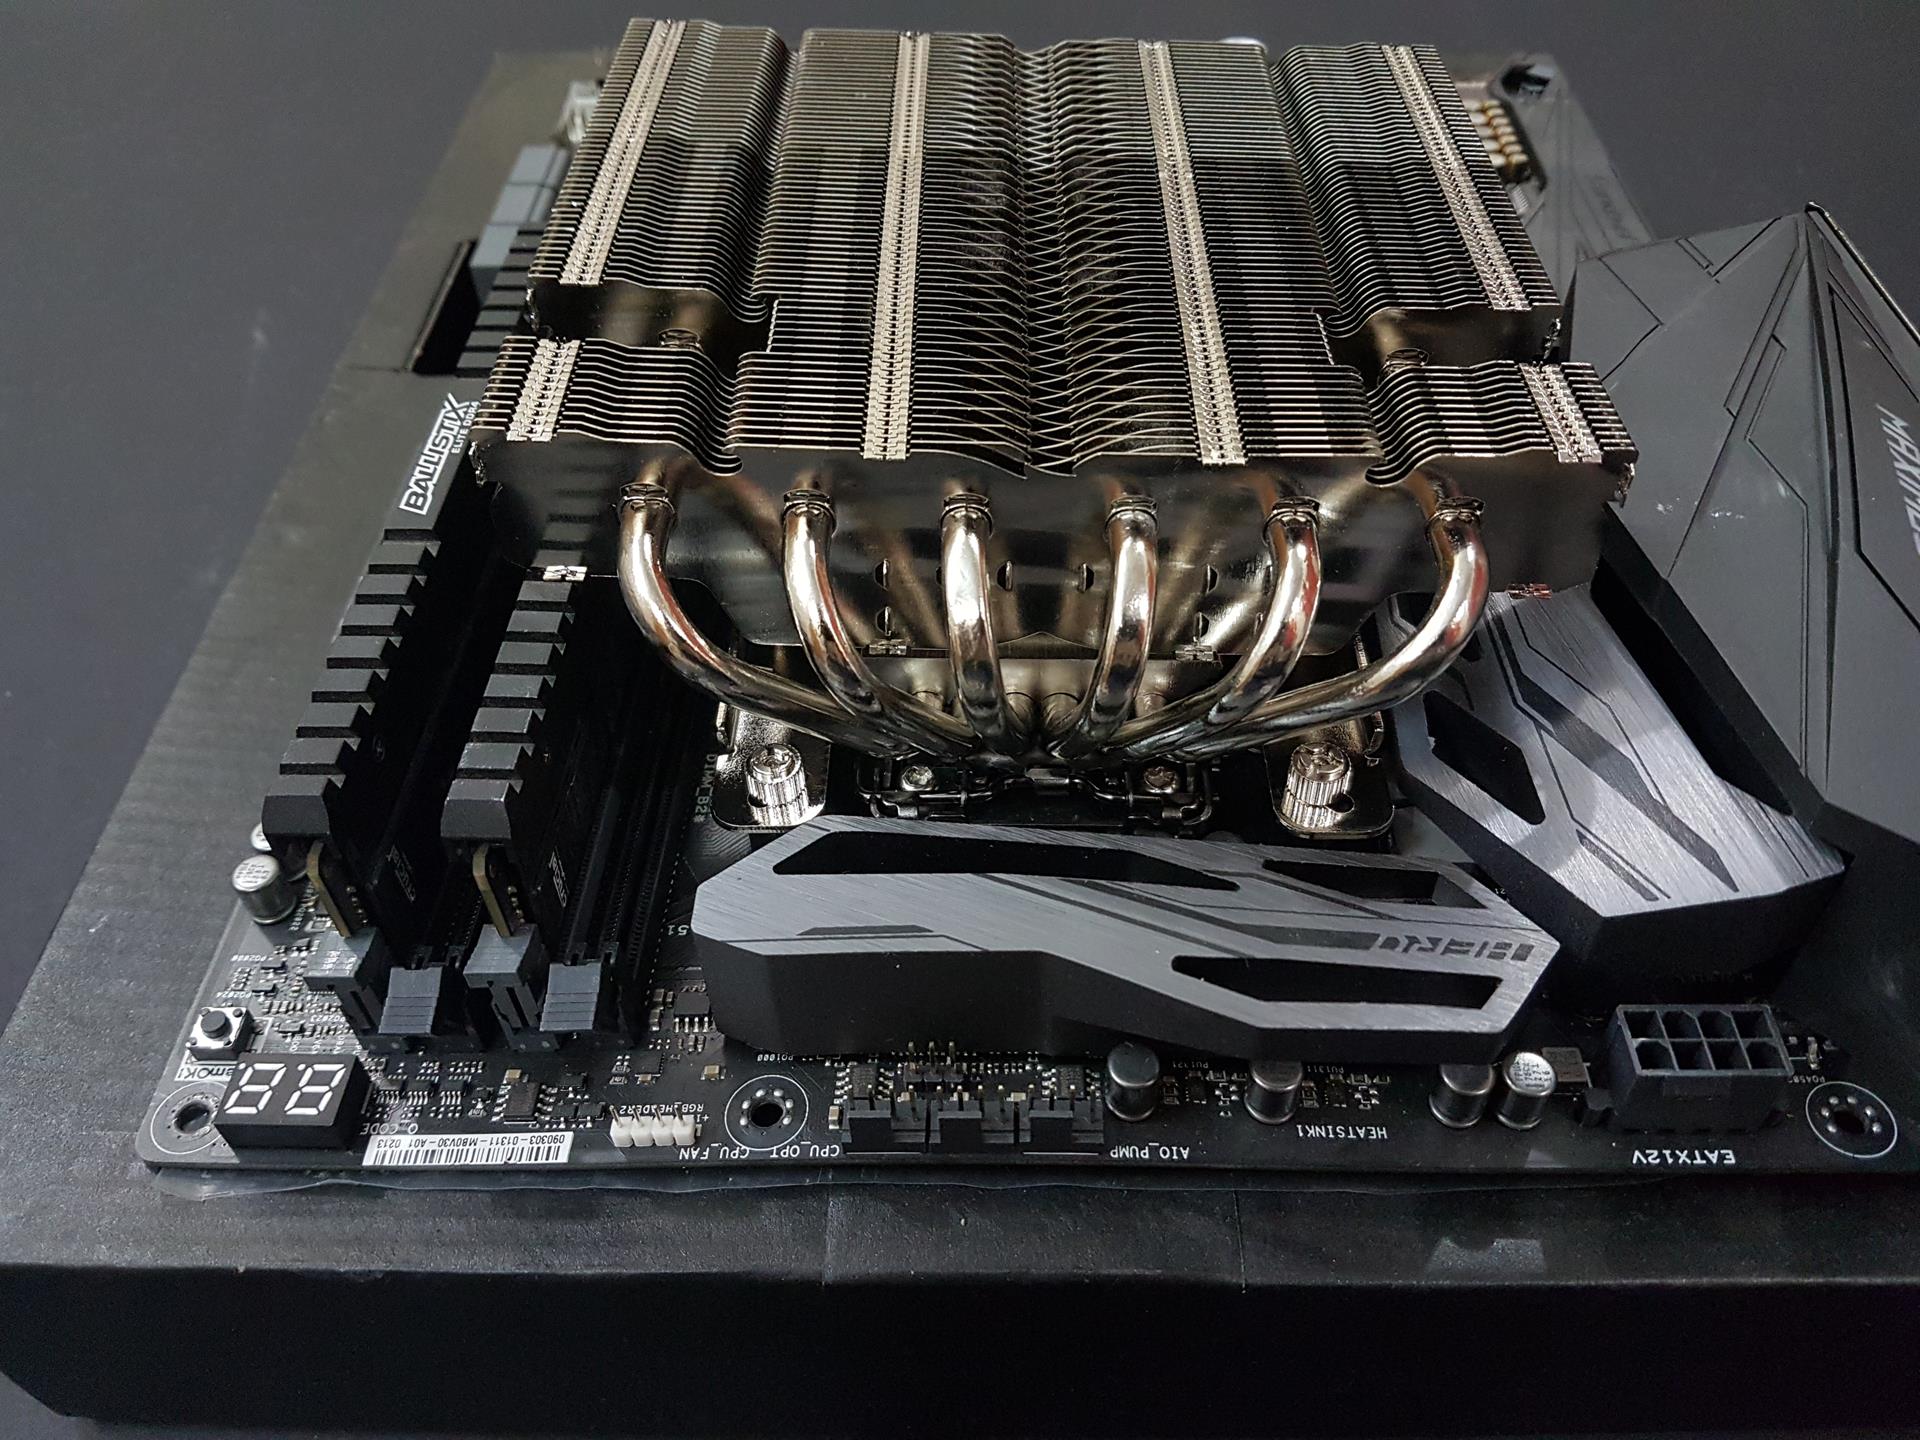
The dimension of the cooler is 153x150x68mm [WxDxH]. This is a larger surface area than usual. Mounting the cooler upside down would cover the top PCIe slots and the user won’t be able to install the graphics card on the PCIe 3.0 x16 PCIe slot subject to the motherboard. This is shown in the picture below.
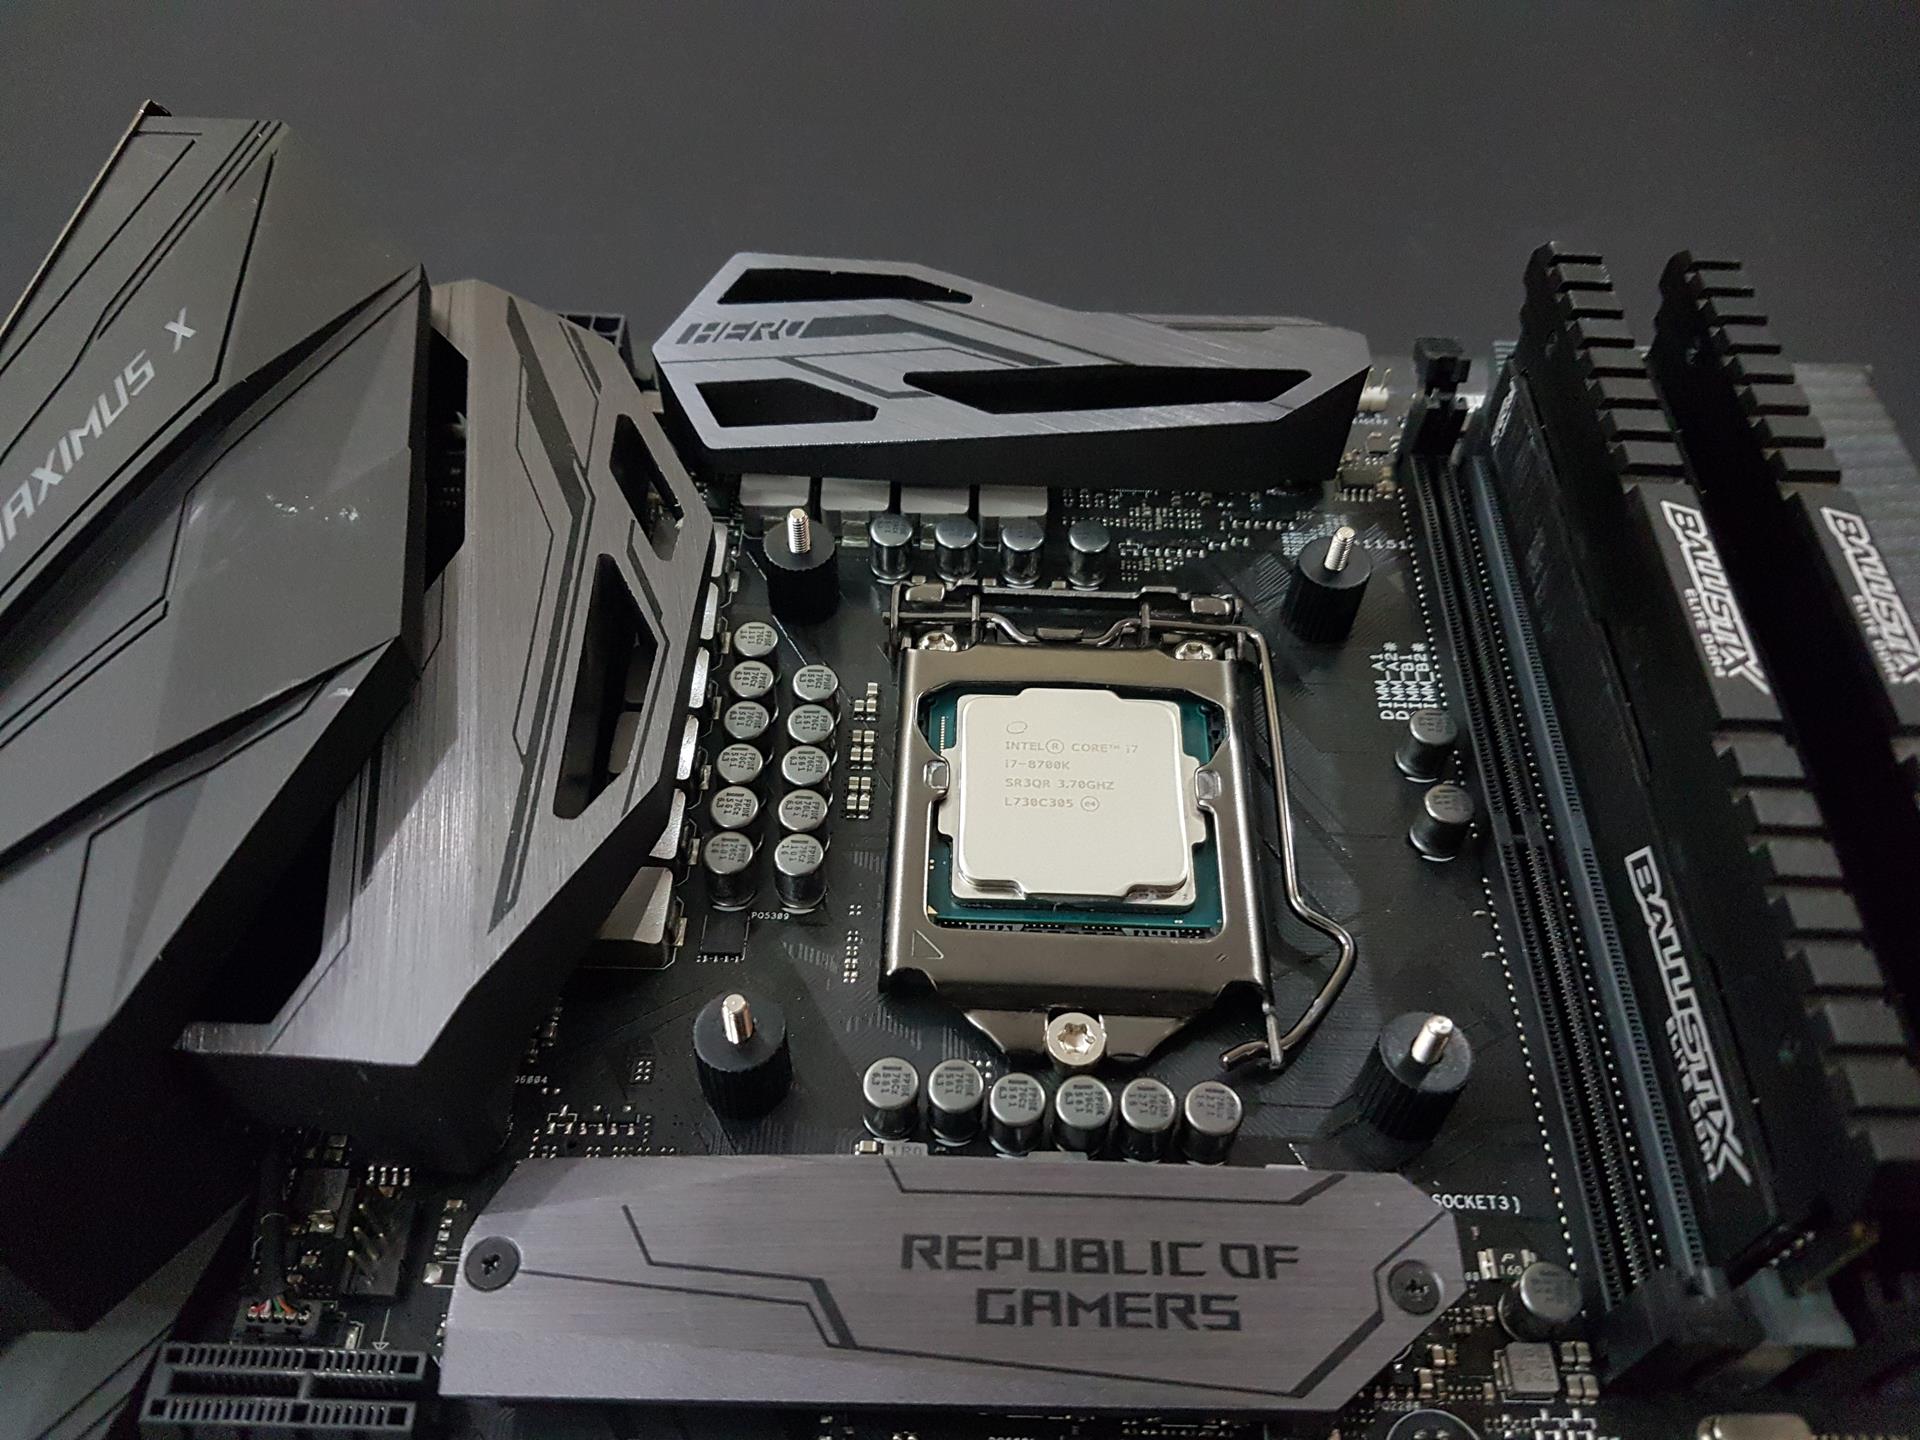
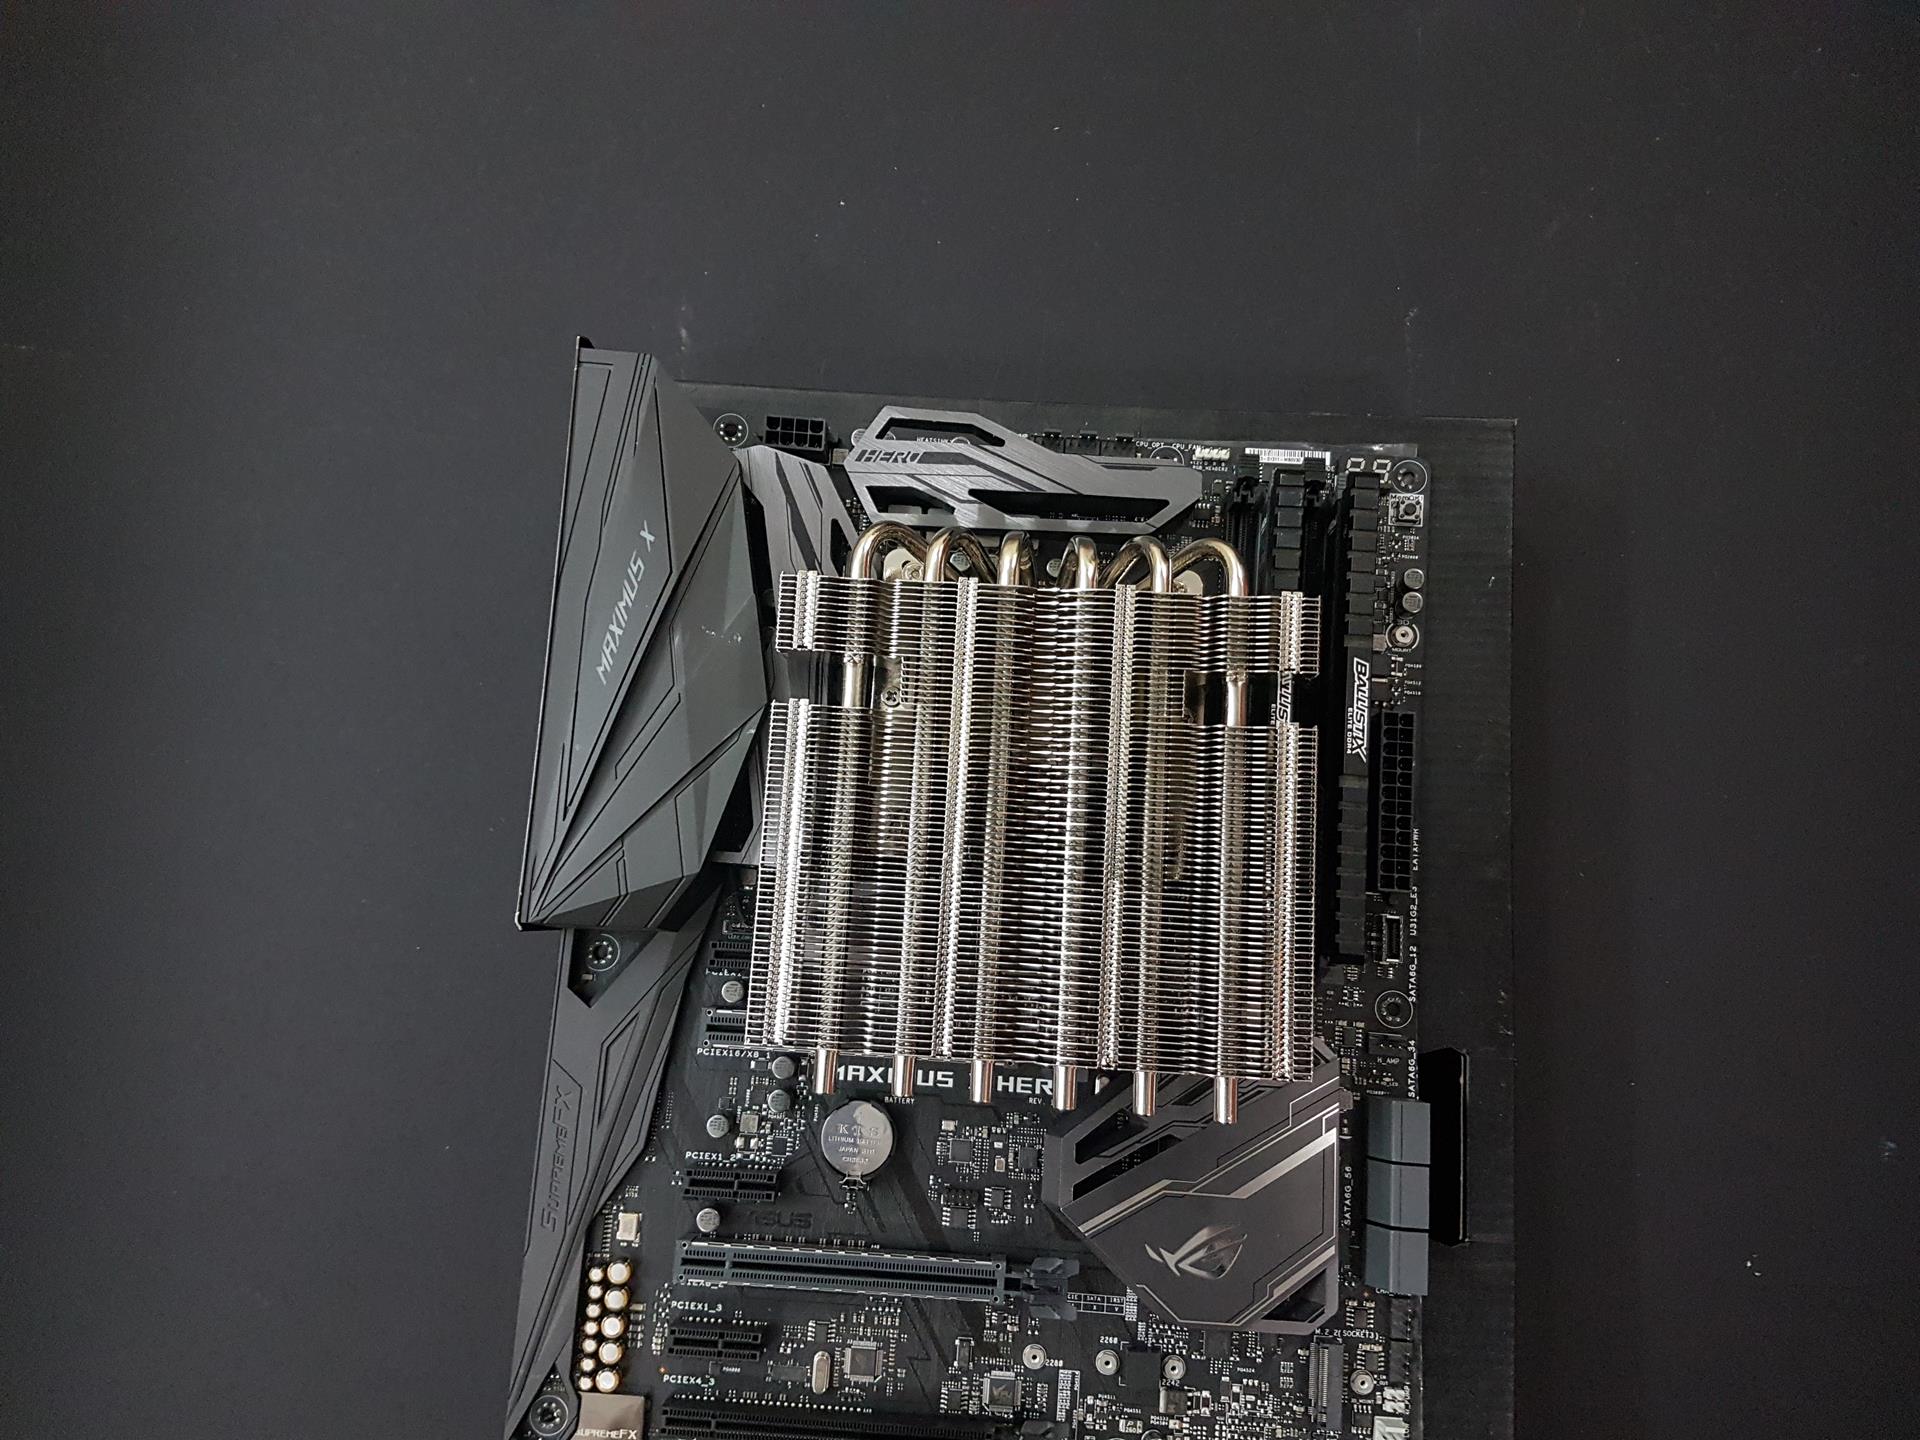
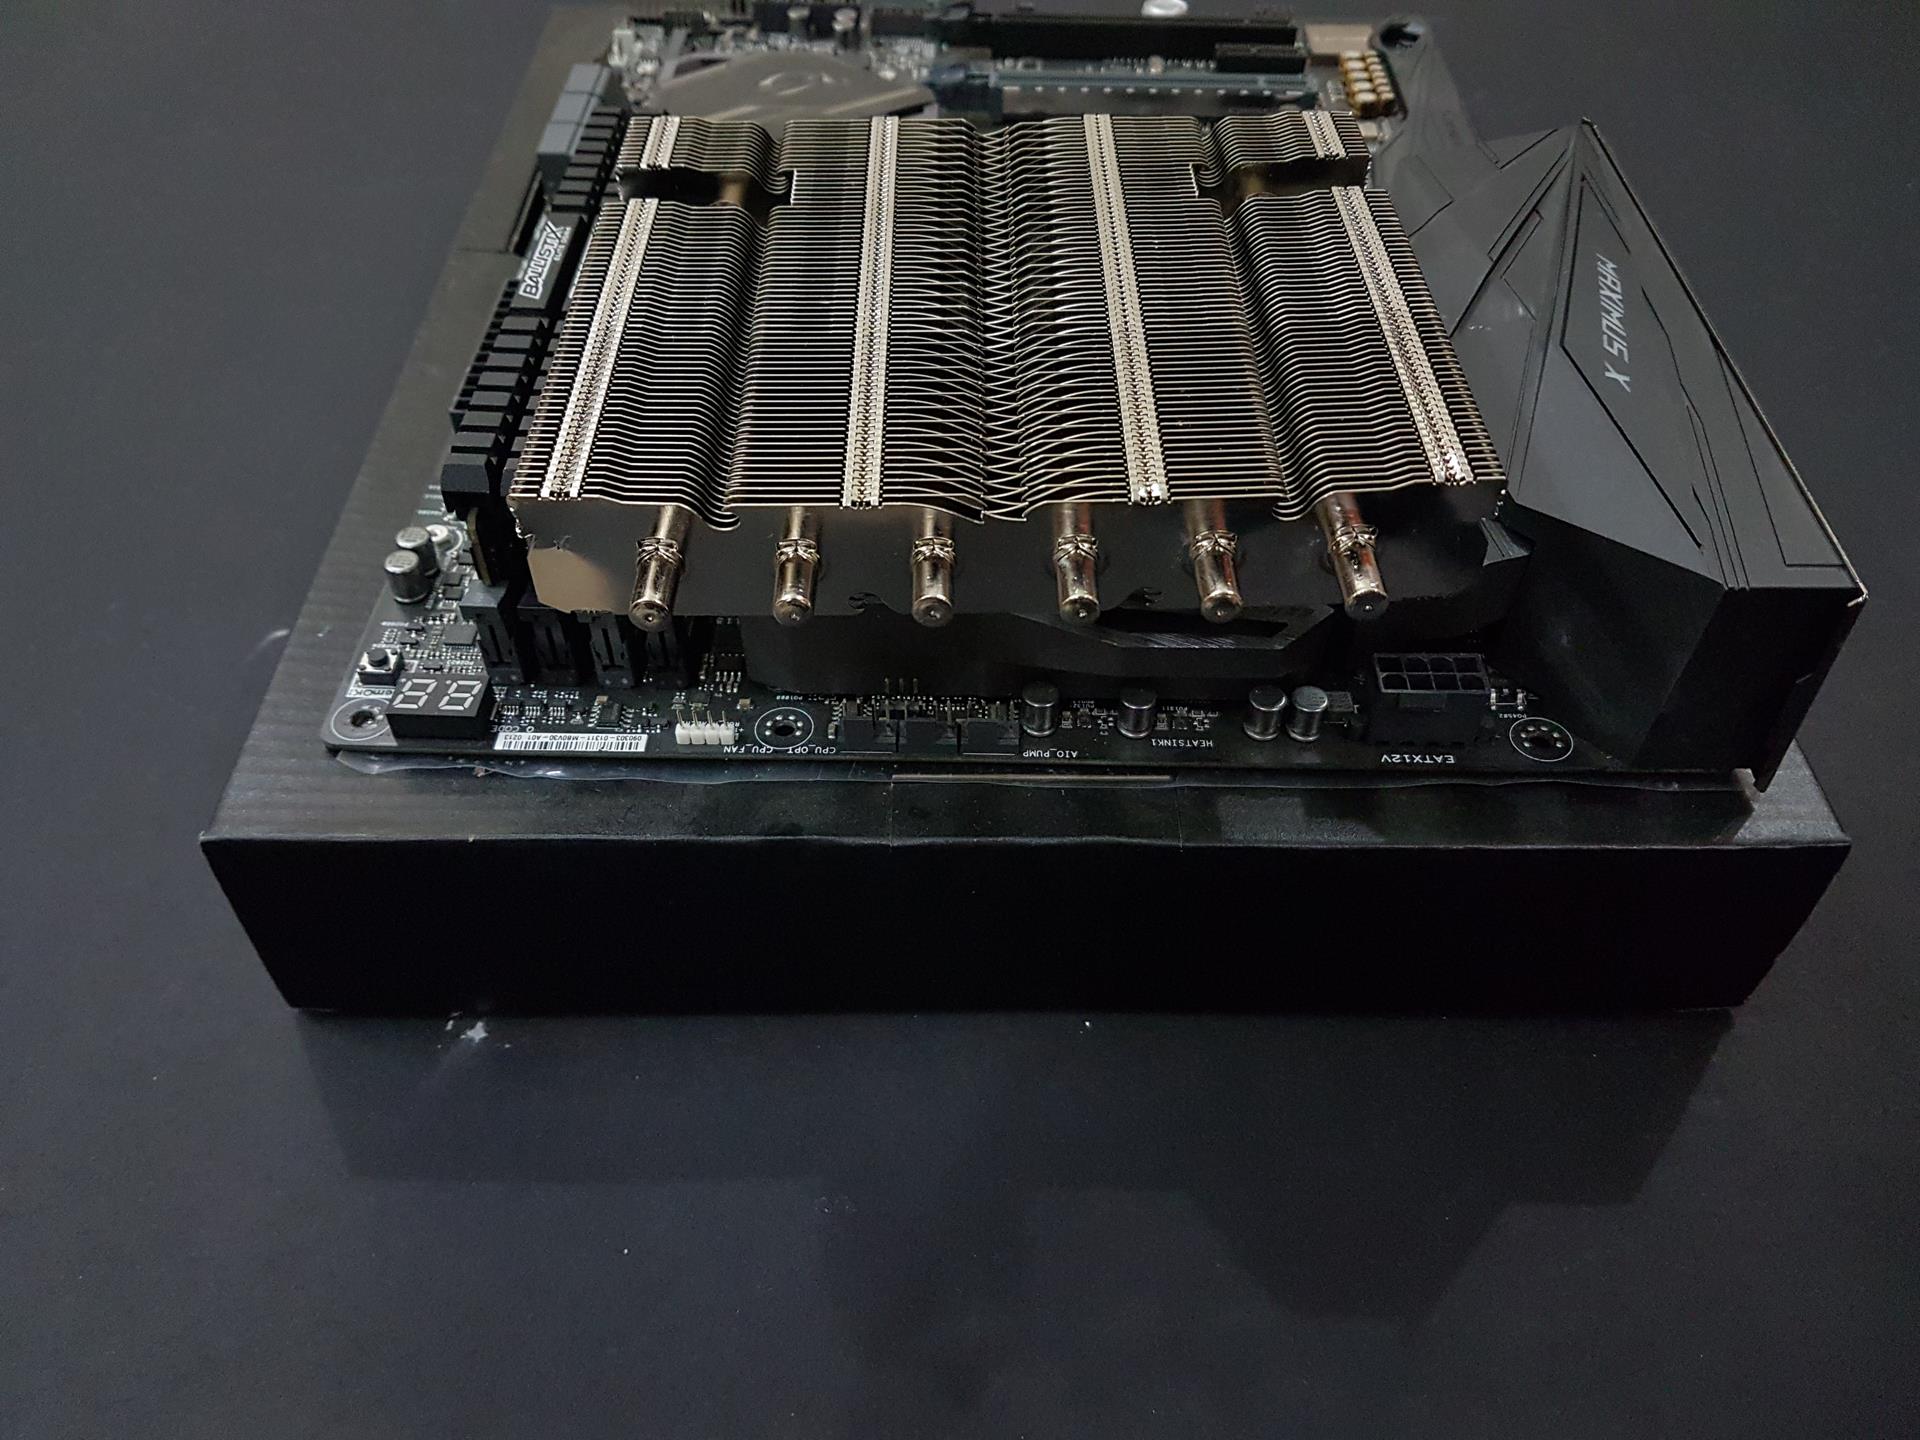
The way around is to mount the cooler in 90° clockwise or counter-clockwise. But that manner of mounting has other considerations which we will discuss below. By mounting the cooler in reverse direction the hindrance over the top PCIe slot was eliminated as shown in the below picture.
RAM Height Clearance
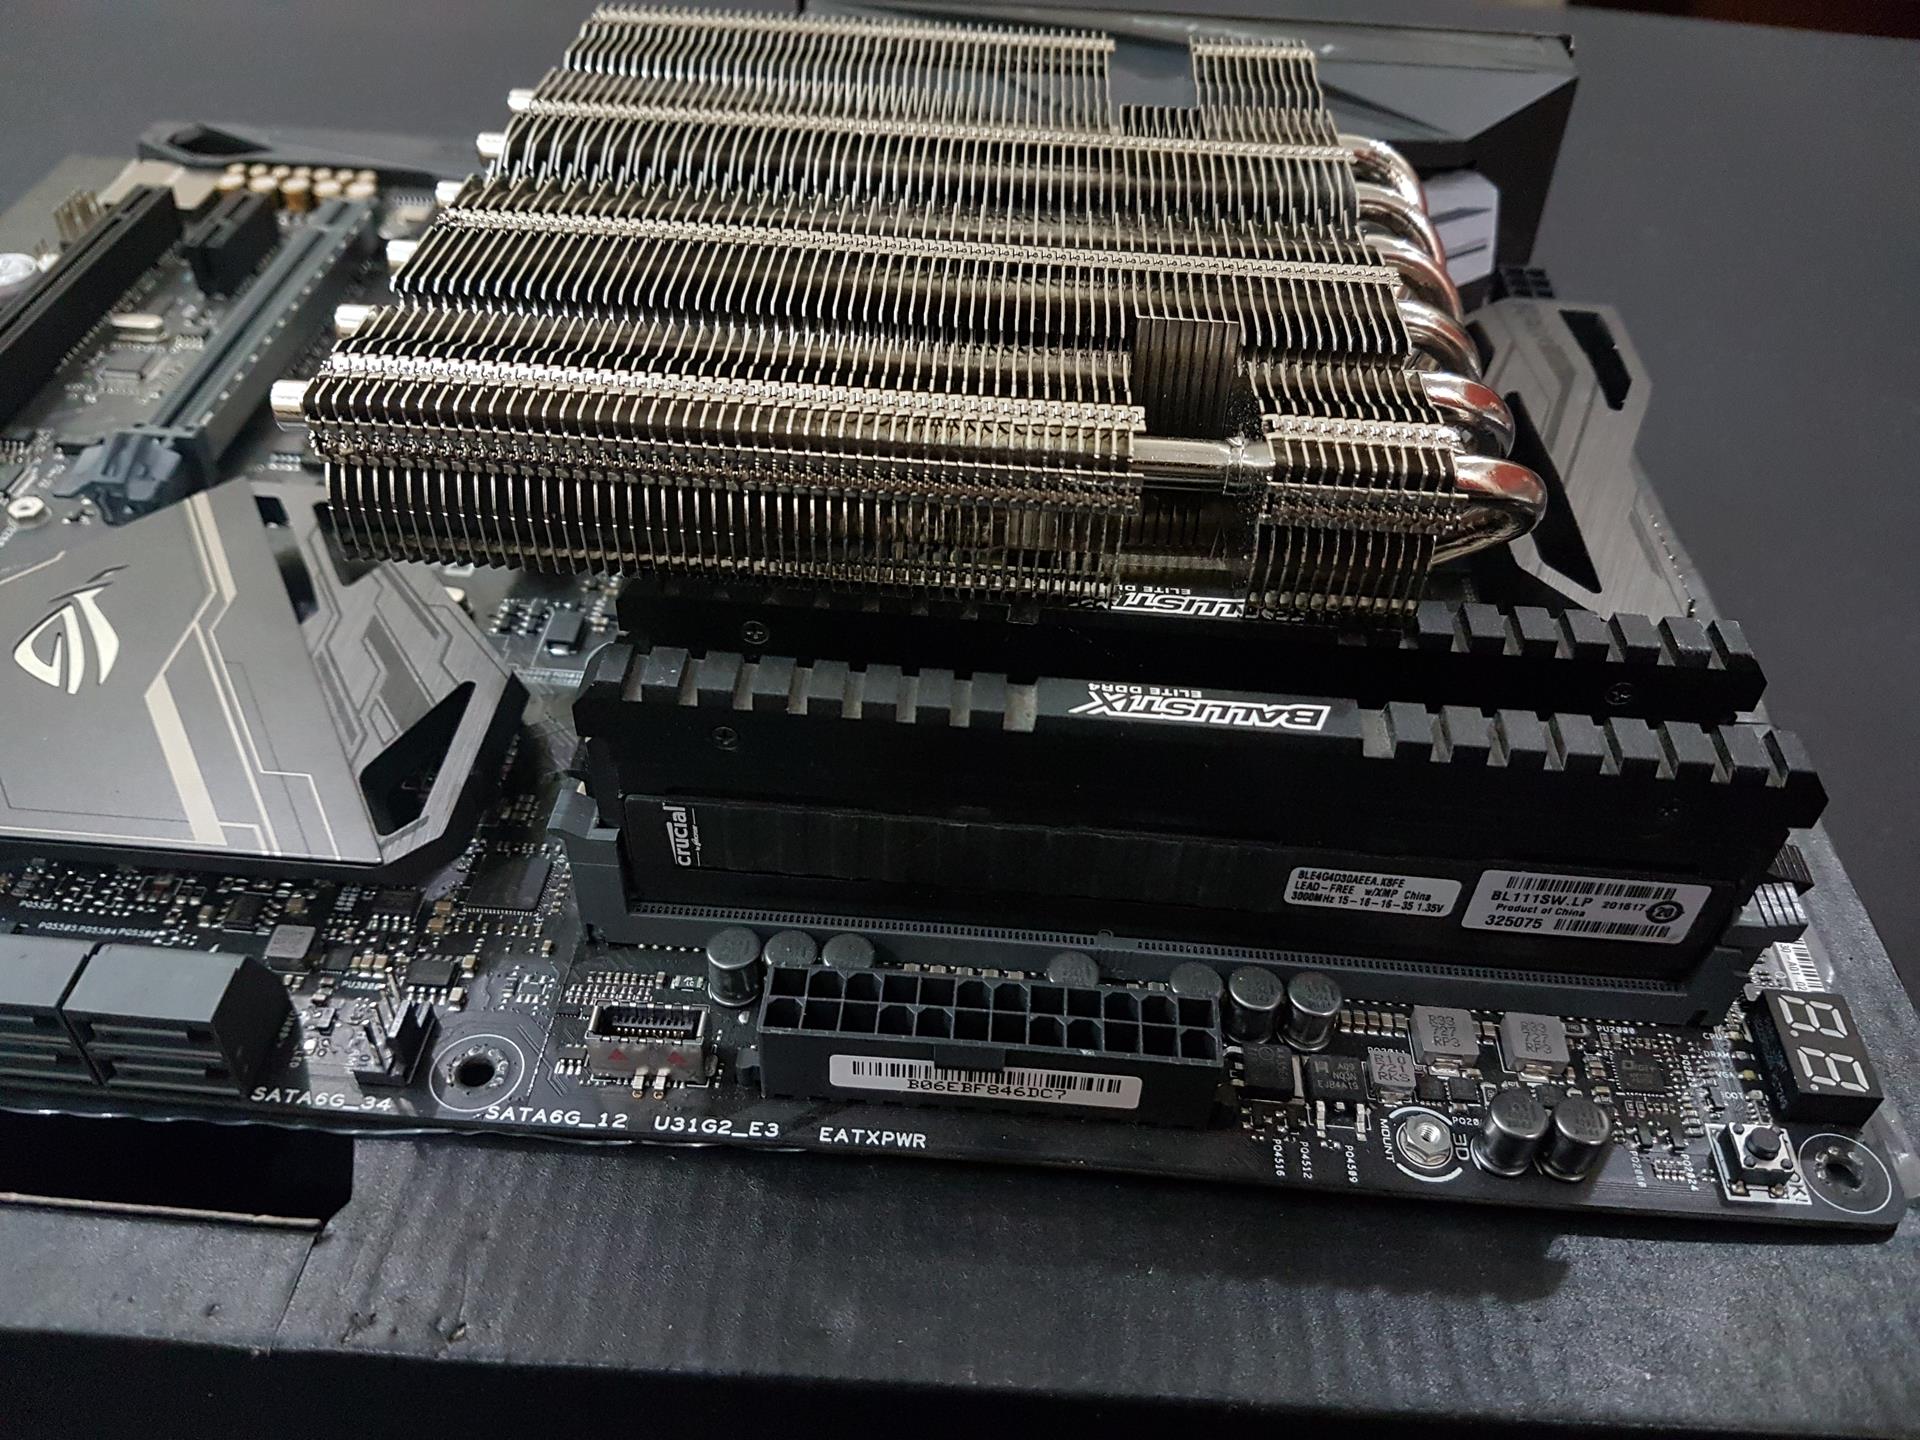
We have used the Ballistix Elite DDR4 RAM on the test bench. These have a height of 40.75mm. The cooler has a limitation with this height of the RAM subject to the orientation. We had to move the RAM further away from the CPU socket for the height clearance while clearing the first PCIe slot. For 90° mounting, the bulk of the heatsink would cover the RAM. So, it is suggested to use low profile RAMs with this cooler preferably of 39mm and below.
Motherboard’s I/O Cover Clearance
The Asus ROG Maximus X Hero has raised I/O cover which added more difficulty in mounting the cooler under 90° orientation as the cover was obstructing the cooler’s heatpipes. Majority of the mini-ITX motherboards either have no I/O Cover or low profile covers hence mounting in the 90° on those boards may not be difficult. There was no obstruction from the top side in either orientation through our settled orientation made it difficult to plug in the CPU power cable and the fan power cable.
Testing
We have recently upgraded our second test bench to the Coffee Lake platform. We could not yet complete the testing of all the coolers on this platform. Here is the test build configuration:
- Intel i7 8700k
- Asus ROG Maximus X Hero
- Ballistix Elite 2x4GB @ 3000MHz DDR4
- HyperX 120GB SSD
- Thermaltake TP DPS-G 750W PSU
- Colorful GTX 1050Ti Vulcan U 4G EC
Each cooler was tested on stock clocks at 1.140V with turbo boost. Asus Real Bench 2.4 was used to stress the CPU. RealTemp was used to monitor the temperatures during the testing. A single run of RealBench was run on stock clocks and an average of max temperatures on all cores was recorded. We are using delta temperature to counter the un-controlled environment. The average figure is subtracted from the recorded ambient temperature to obtain the delta temperature.
CPU was overclocked to 4.8GHz at 1.28V. This i7 8700k runs way hotter and due to the warranty concern, we have not yet delided the chip. 3 runs of RealBench were made with overclocked chip each with the interval of minimum 30 minutes to let the CPU cool down before the next run. The average of each run is obtained and the maximum value is mentioned on the graph as the worst case possible scenario. Fans were made to run at 100% of their rated speeds across all tests. Each run was of 60 minutes.
We are using Noctua NT-H1 to test all coolers. This helps to ensure the standardization of the testing by mitigating any possible performance effect that can be had with the bundled thermal paste with the cooler. Microsoft Windows 10 x64 is used.
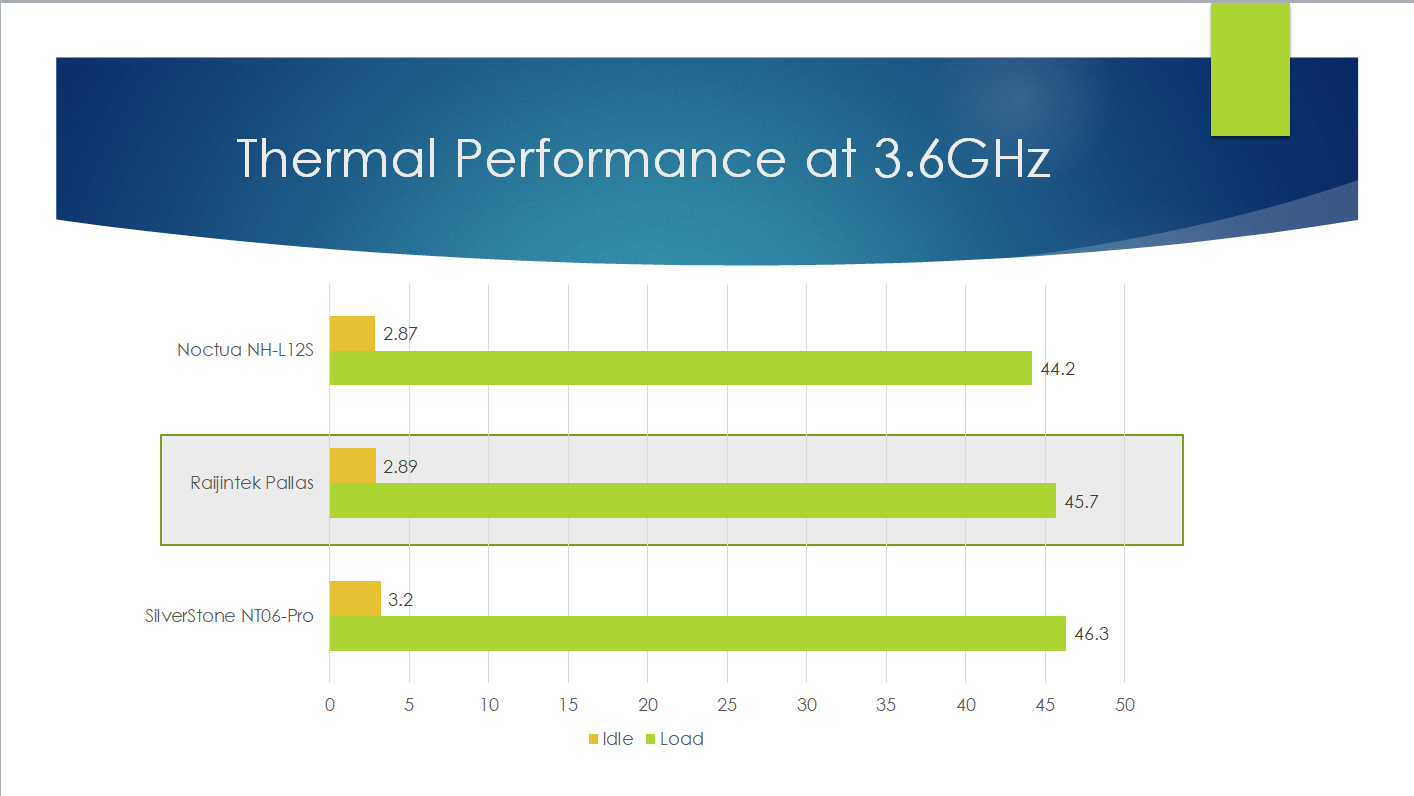
Let’s take a look at the performance graphs.
The Raijintek Pallas did a maximum of 45.7°C under load on the stock clocks which is 1.5°C behind the Noctua NH-L12S. All the three coolers were almost in same performance margin.
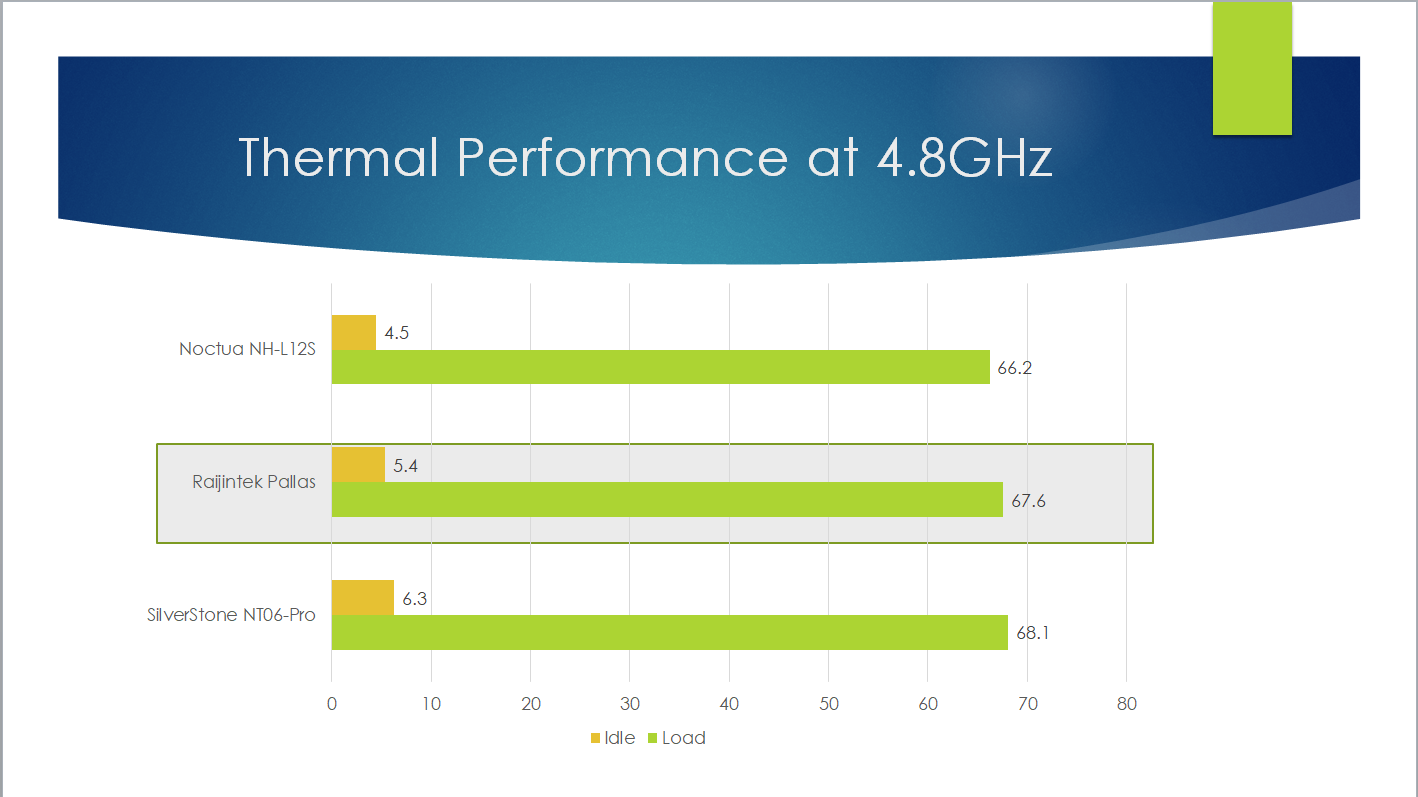
Again, the Raijintek Pallas did a marvelous job with overclocked chip and it did a maximum of 67.6°C which is still behind the Noctua NH-L12S by 1.4°C margin. All coolers were performing in same performance margin.
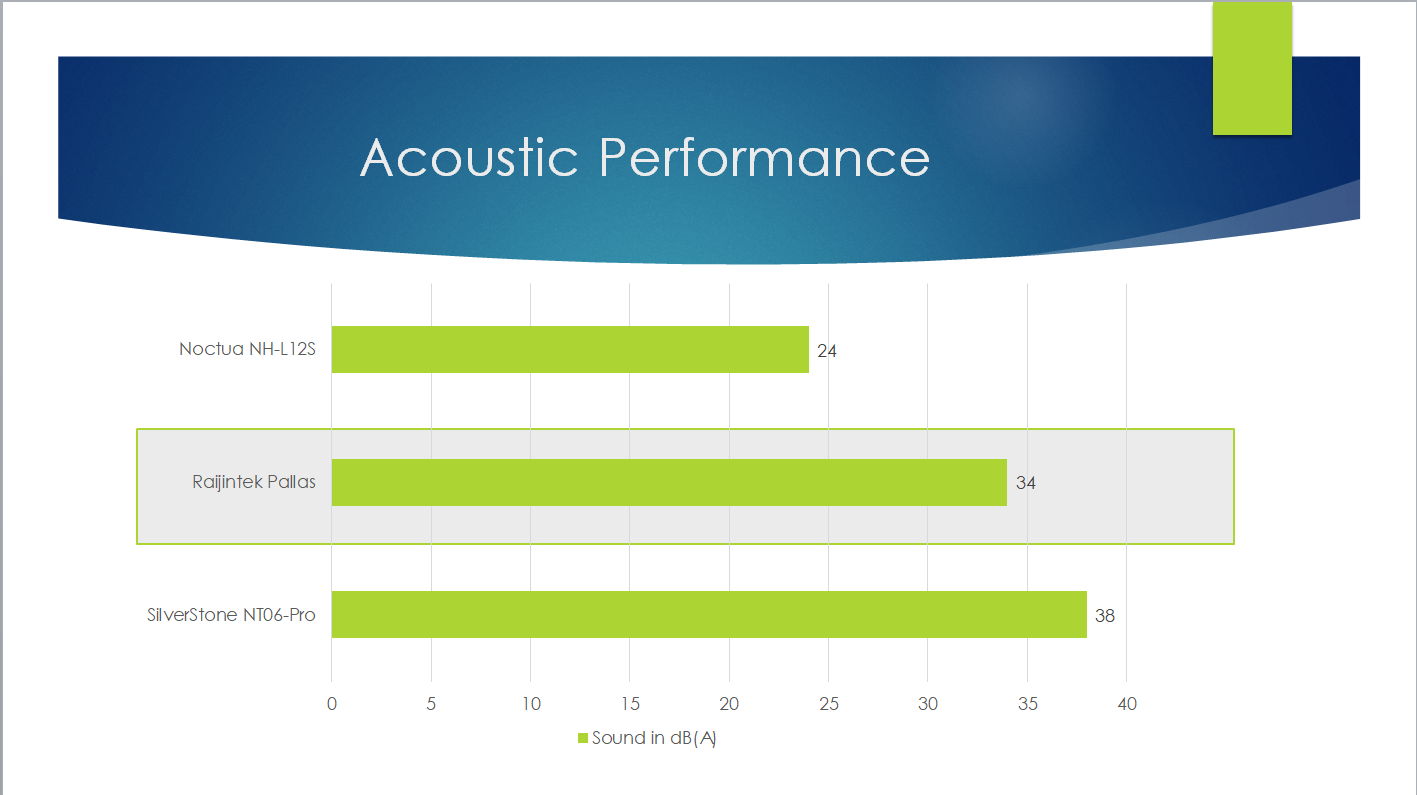
34dB(A) was the maximum recorded sound on the Raijintek Pallas. It is still in acceptable range.
Conclusion
Raijintek Pallas is a high-end, low profile CPU cooler with a maximum height of 68mm including the fan. The cooler is designed for use the tightened enclosures, particularly for the HTPC and SFF, builds. The dimension of the cooler is 153x150x68mm including the fan. This is a 140mm CPU cooler and comes under our Non-Compact Low Profile coolers category.
The heatsink is made of 69 dense aluminum fins. The cooler has 6 copper heatpipes which are nickel plated. They have 6mm of thickness to them. The cooler follows the non DCU design as the heatpipes are not making direct contact with the CPU but through the copper mirror-finished base measuring 39x42mm. There are two cut-outs in the heatsink to make enough room for the user to mount the cooler conveniently on to the mounting bracket. Fins are interlaced on the center of the heatsink.
There are cut-outs or holes on top of each heatpipe forming another airflow channel for maximum heat dissipation. The fin stack is dense which would require a fan with better static pressure and airflow. Running the fan at higher speeds would yield better results but that could be at a cost of bit more noise level. The fins are designed in a stepped manner which gives more surface area for effective heat dissipation. The cooler is compatible with most of the sockets and it is AM4 ready as well but the user will have to buy a separate mounting bracket for that purpose.
Raijintek has provided a 14013 slim profile fan with 140mm mounting with the cooler. The fan has a slim profile with just 13mm of the height. The dimension of the fan is 140x150x13mm. This shows the sheer size of the fan yet with a slim profile. The frame of the fan is in red color. There are 13 blades of this fan. There is a five-arm assembly holding and connecting the fan motor with the frame. The motor is DC Brushless. The fan draws 12V DC power with 0.35A and 4.2W. Starting voltage of the fan is 7V. Rated speed of the fan is 650 ~ 1400 RPM. The fan has sleeve bearings with a maximum airflow of 56.55 CFM. Rated static pressure is 1.24 mmH₂O. MTBF is 40000 hours. Rated sound level is 28dBA.
The installation of the cooler is easy though can be further enhanced. Installation guide is well laid out and useful. But the cooler of this sheer size has clearance issues as mentioned in detail above. Mounting the cooler with the curved section of the heatpipes on the top would block the top PCIe slots. Reversing the direction would clear the PCIe slot but as the cooler’s heatsink crosses over the top side of the motherboard’s PCB, plugging the cables like CPU power cable and/or fan power cable could be challenging. 90° mounting on our motherboard with raised I/O cover saw another limitation though most of the mini-ITX motherboards don’t have I/O cover or low profile ones. RAMs of the height 39mm or less are preferable or simply putting the low profile RAMs are needed for this cooler. For more details, please check the Compatibility and Clearance Section of this content. Raijintek Pallas comes with the 5-year warranty on the heatsink only and 2 years of warranty on the fan only. I wish they had given 5 years of the warranty period for the complete cooler.
Value and Performance
This cooler is retailing at $35 at the time of the review. The SilverStone NT06-Pro is retailing at $59.99 whereas the Noctua NH-L12S is retailing at $49.90. This scenario clearly favors the Raijintek Pallas for price over thermal performance. From the acoustic performance perspective, the Noctua NH-L12S is a clear winner making all-around winner leaving the price out of it. The fan of the Pallas was bit wobbling and there was a hint of whine from the fan.
When it comes to the performance, the Raijintek Pallas has surprised us for sure. Given the size of the cooler, one would generally expect this cooler to perform well but given the price category of this cooler, it has exceeded that expectation. The graphs are self-explanatory. All the tested coolers were almost in the same performance delta of 2°C variance. The Raijintek Pallas was leading the competition over the SilverStone NT06-Pro but a bit behind the Noctua NH-L12S.
The Raijintek Pallas has performed exceptionally well on our test bench. In this price bracket with 5 years of Raijintek warranty (on heatsink only) and performance being right on the money, this is too good a deal to overlook. The Raijintek Pallas has rightfully won our Performance Award.
We are thankful to the Raijintek for sending us their Pallas Low Profile CPU cooler for the review.

