SilverStone Tek Lucid Series LD01 microATX chassis review
Introduction
SilverStone Technology was founded in 2003 on the principle of recognition that merely having innovative expertise within the industry is not enough. Their objective is to ensure that their expertise is delivered to all products with consistency, in response to user’s needs, and with maximum user satisfaction. SilverStone Technology thrives on challenges of rapid technological advancements and creating an aesthetic standard for the industry. Their products are of high quality. Product lines include PC Chassis, PSU, Cooling Solution, Storage devices, etc.
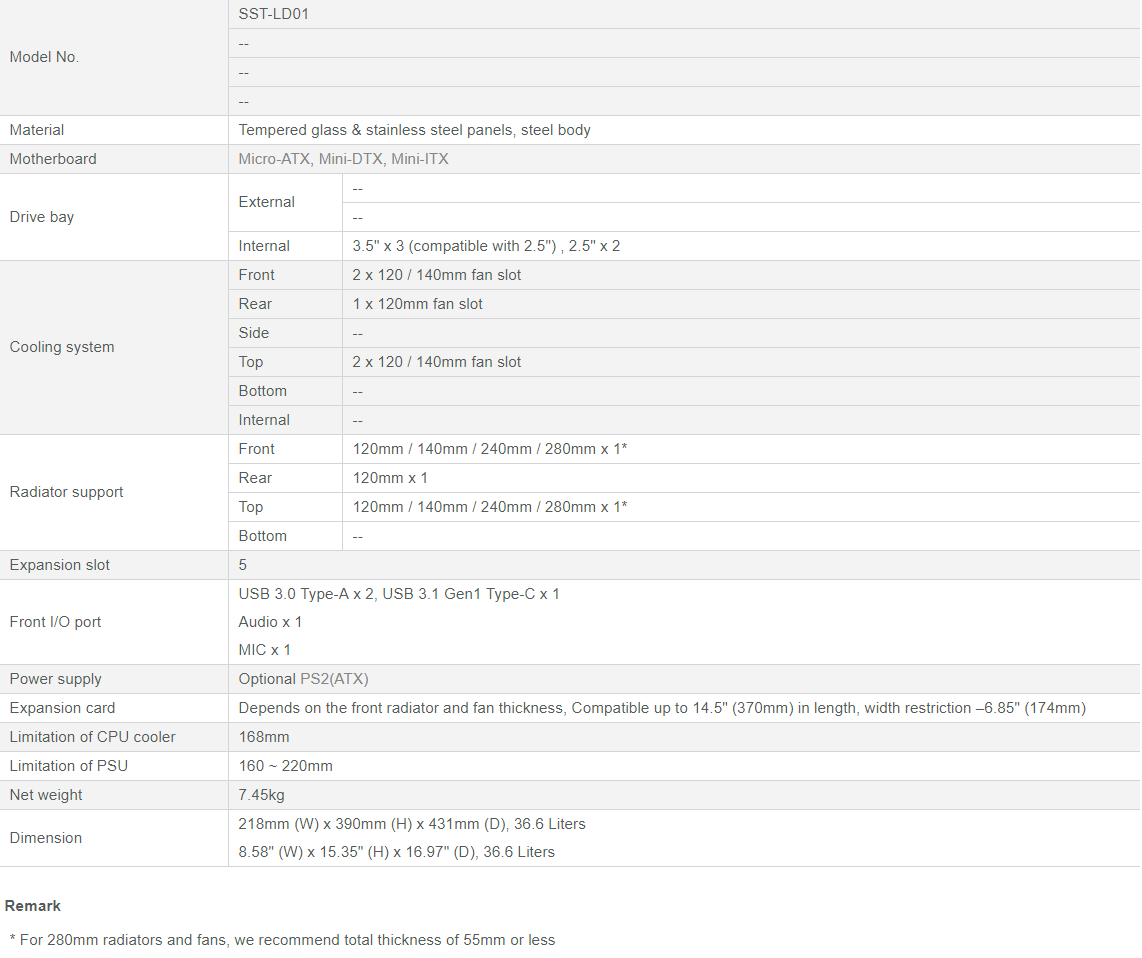
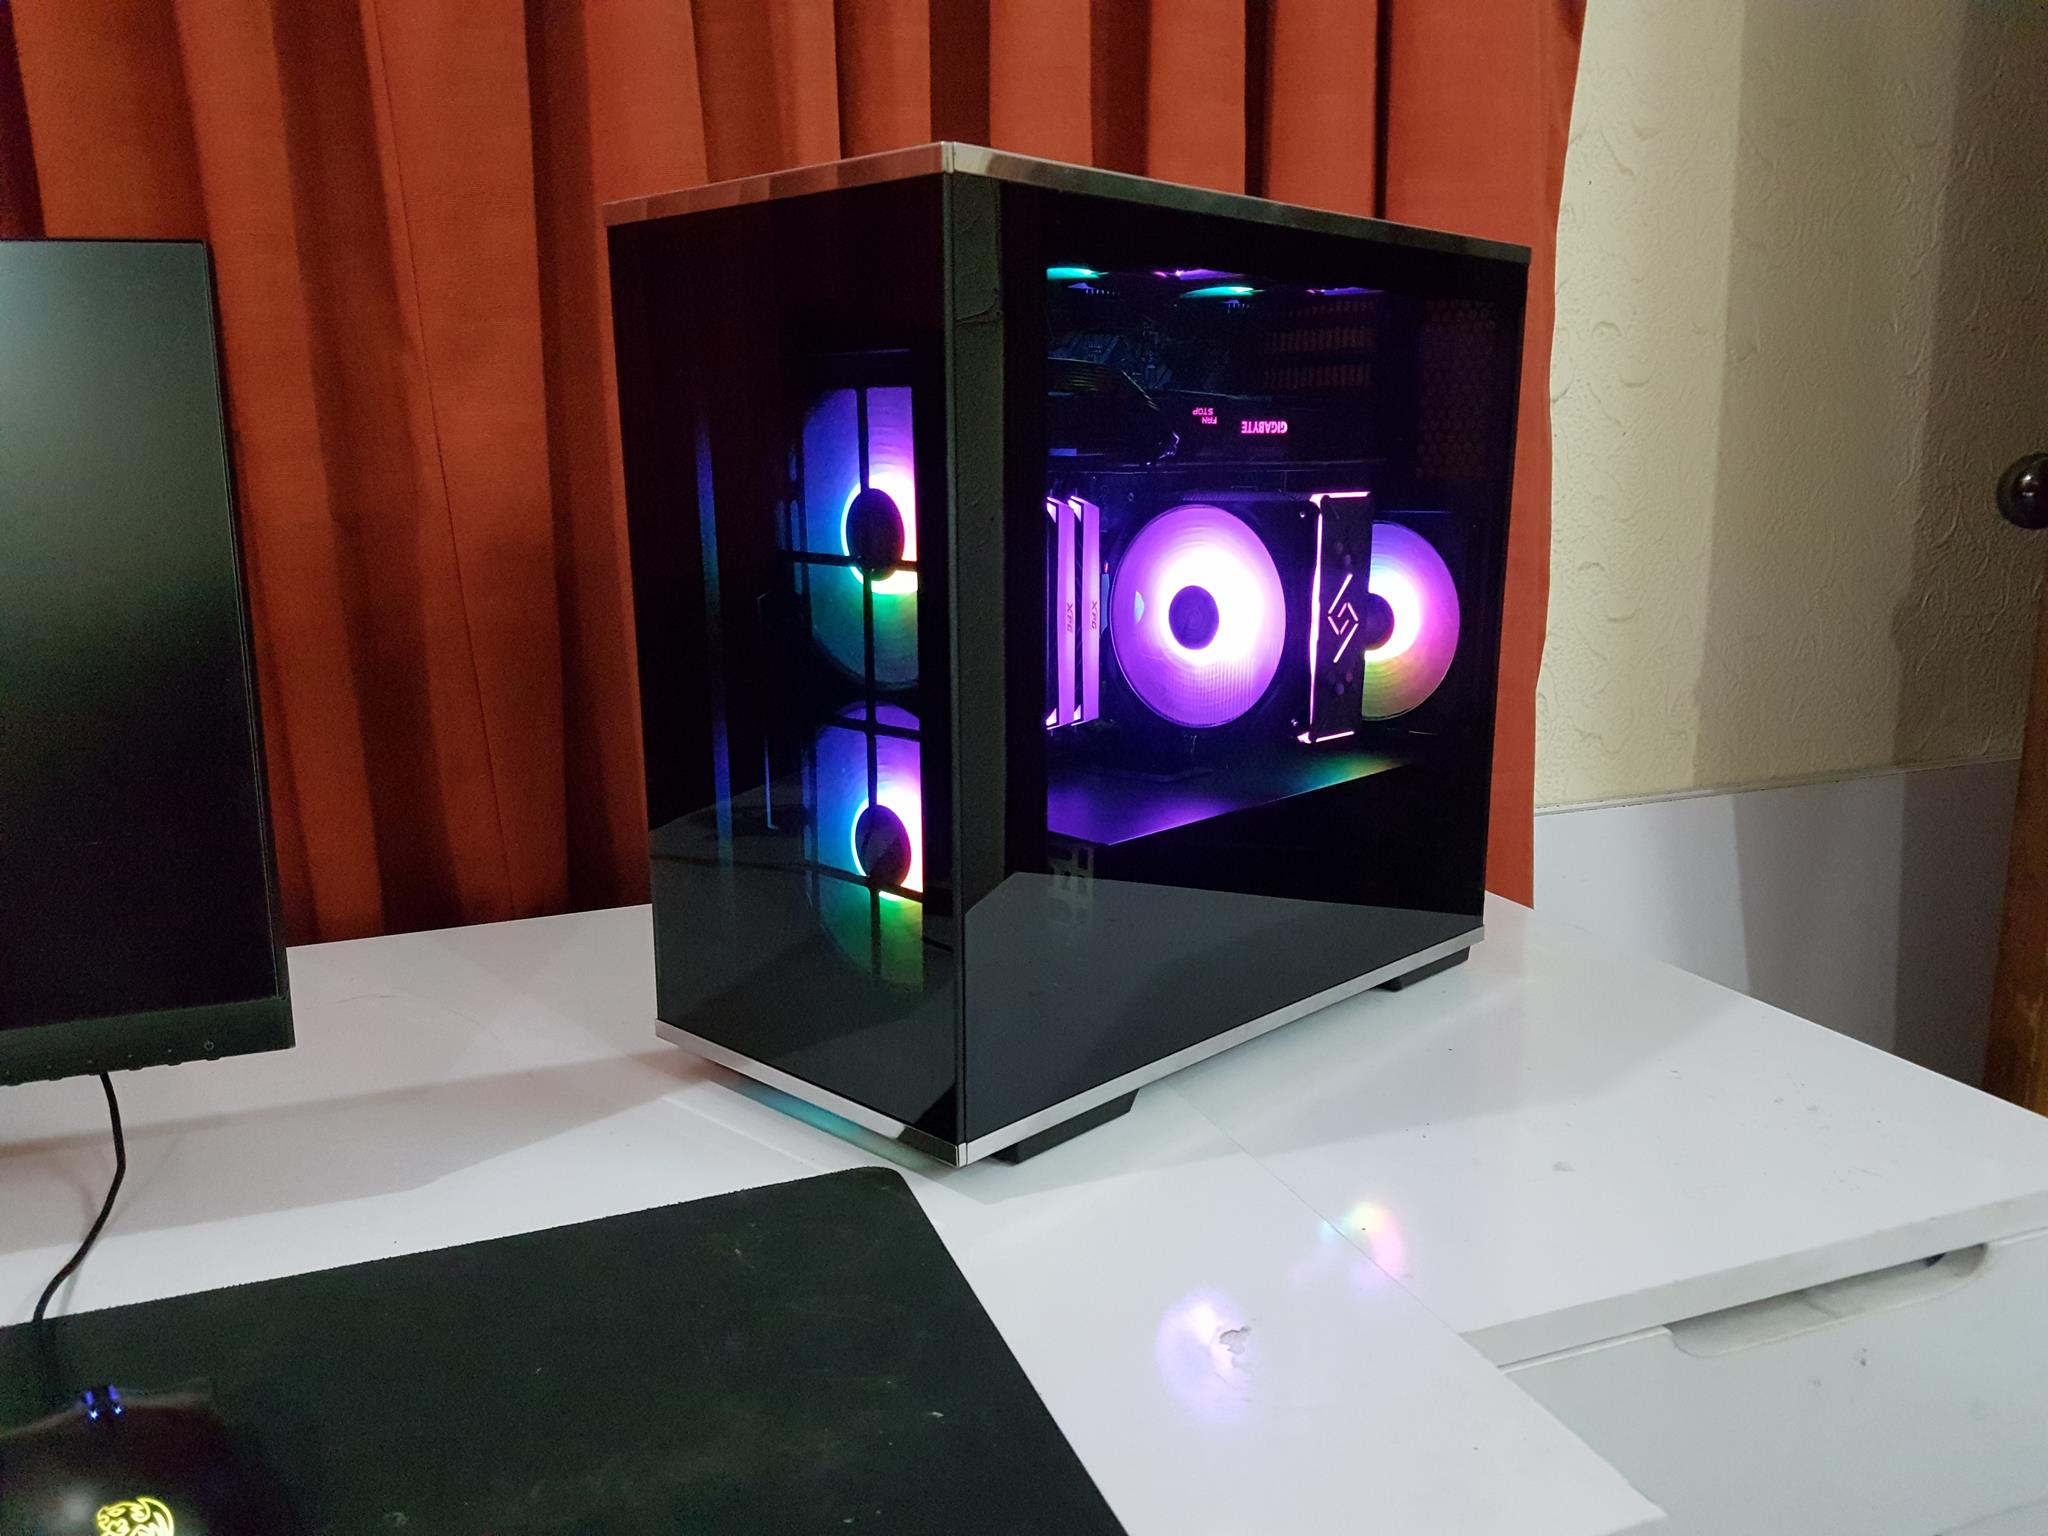
We are seeing yet another change in the trend where the small form factor Chassis are getting popular and gaining the attention of the customers. SilverStoneTek demonstrated their new line up of the Chassis called Lucid during the Computex 2018 and LD01 was on the show. Looking at the design, we were thrilled and reached out to the SilverStoneTek for review possibility. Finally, we got our sample and this content is all about this beautiful, well thought out designed enclosure for microATX sizing. LD01 is based on their ever popular Temjin TJ08-E mATX chassis but has revolutionized the design with inverted layout and Steel reinforced TG panels to add more stunning looks to it than any mATX enclosure has. This chassis has support for microATX, mini-DTX, and mini-ITX form factor motherboards. It has tremendous support for the cooling gear as there is a provision of up to two 120/140mm fans on the front and on the top with one 120 fans at the rear. Similarly, there is a provision of up to 280mm radiator support on the front and on the top with some limitations that we will discuss later in the content. A 120mm radiator can be mounted on the rear as well. Normally, we would not expect such leisure in the mATX chassis. CPU cooler of up to 168mm height can be installed in this chassis and graphics card up to 370mm (depending upon the front mounted radiator/fans) can be installed. ATX PSU of length ranging from 160 to 220mm can be installed which is too good a deal to break. There is a provision of a USB 3.1 Type-C Gen 1 port on the I/O panel. This chassis has plenty of cable management space on the backside. There are two Velcro strips pre-installed for better cable management. There are 5 PCIe slots though the last one almost touches the top side of the chassis and has considerations with respect to the top mounted fans/radiator. Overall, this is almost a perfect chassis that one could have dreamt of with some minor caveats. It is time to start our content.
Product: Lucid LD01
Manufacturer: SilverStone Technology
Price: $114.99 at the time of the review
Specifications
Packaging and Contents
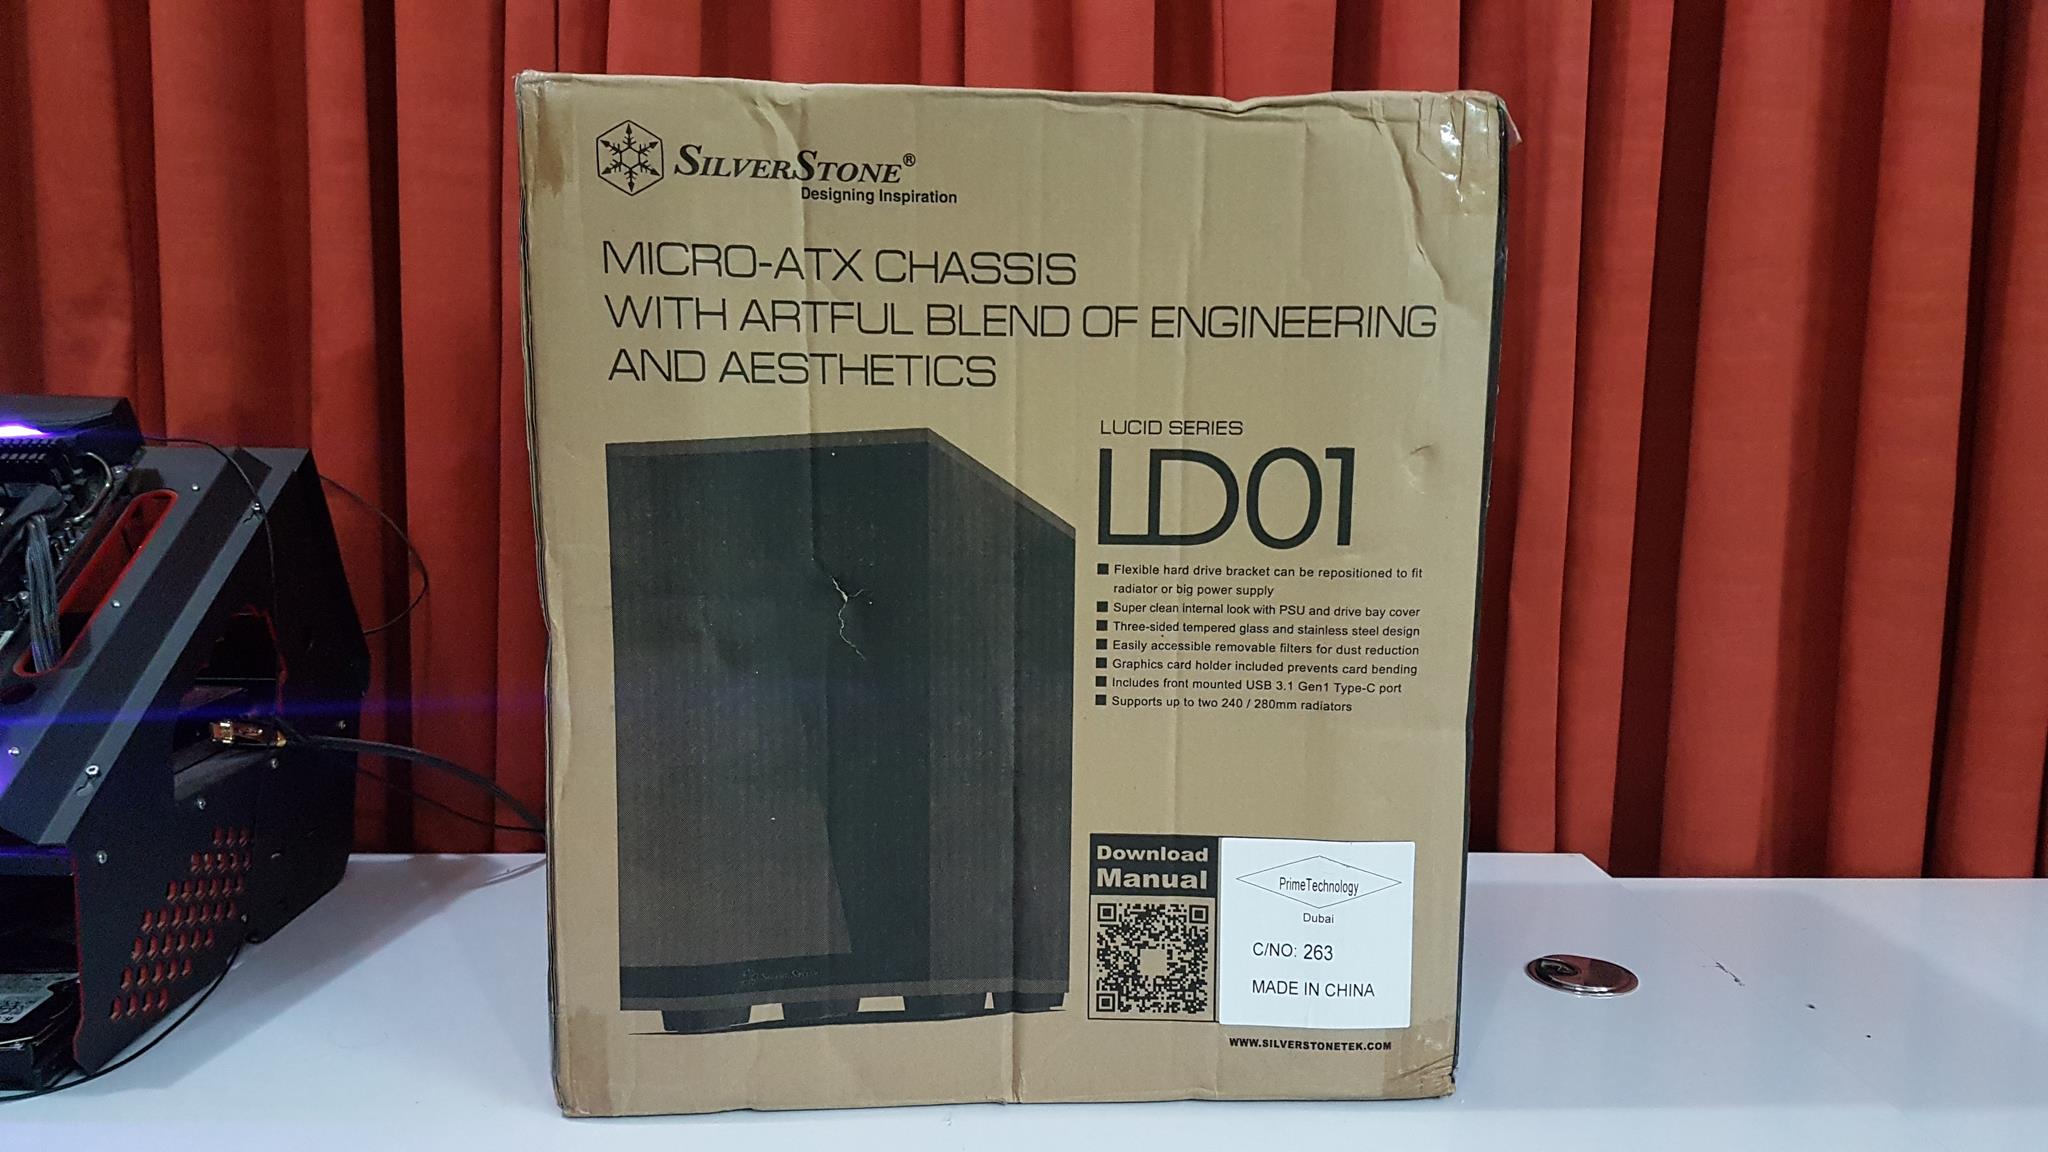
The chassis is shipped inside a standard brown color cardboard box. The front side of the box has SilverStone brand logo and name printed on the top left. There is a picture of the chassis on the main section followed by the name of the chassis and its salient features.
The backside of the box has SilverStone brand name and logo printed on the top left side. There is a block diagram of the chassis printed all over with labels highlighting the corresponding feature of the chassis.
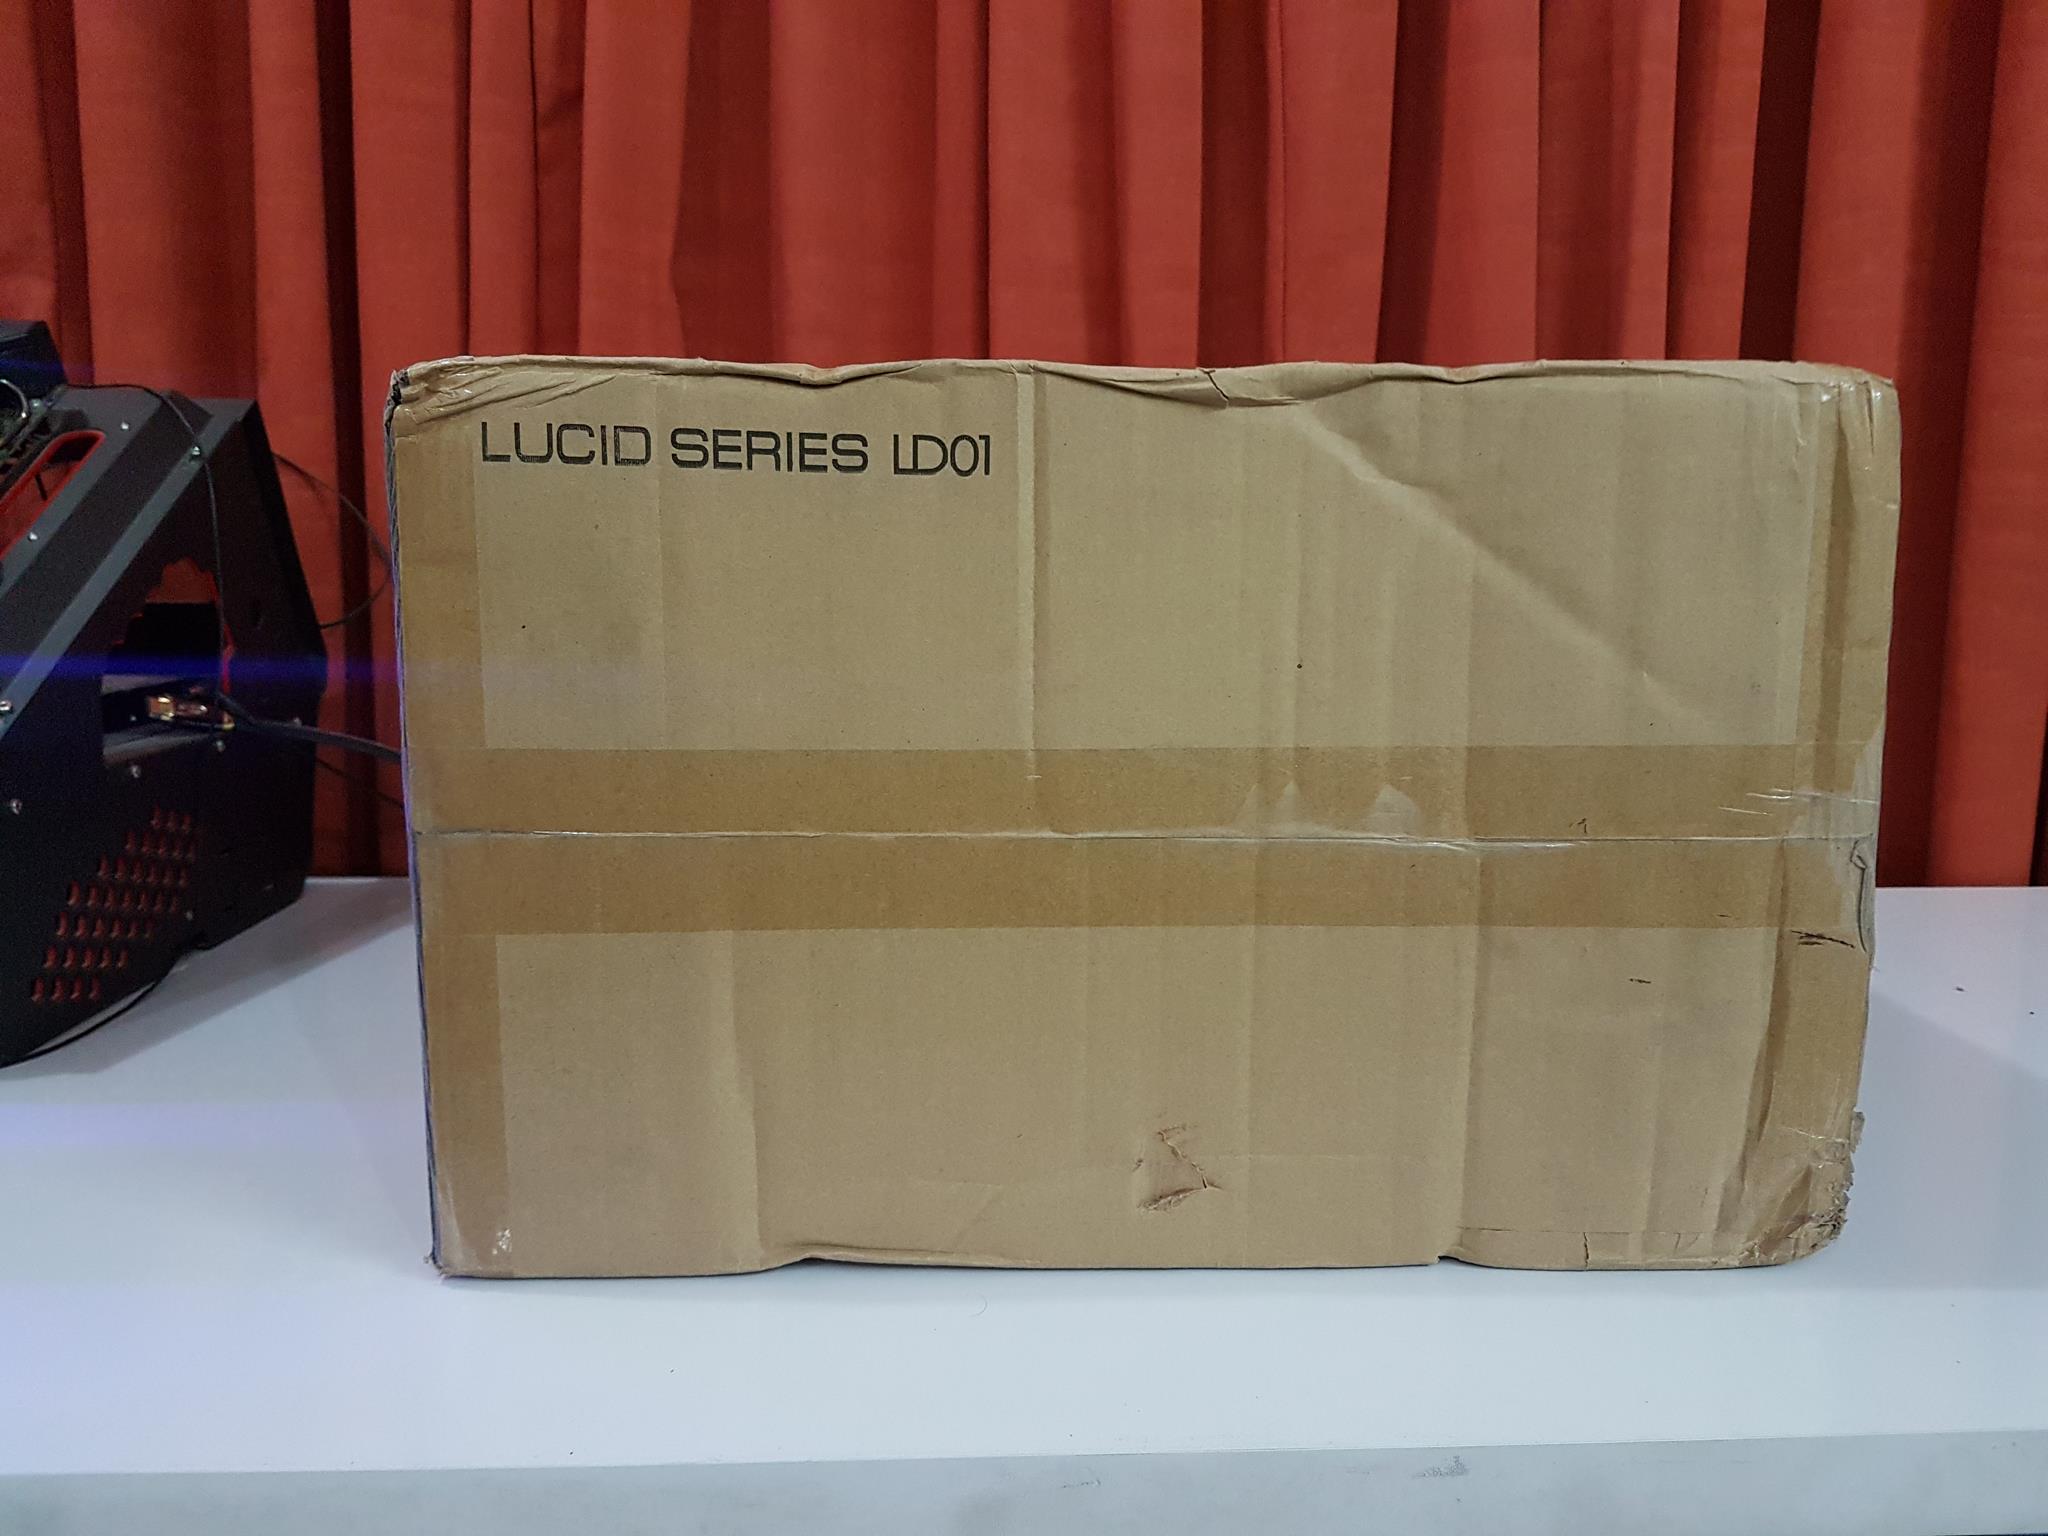
The top cover has LUCID SERIES LD01 printed on it.
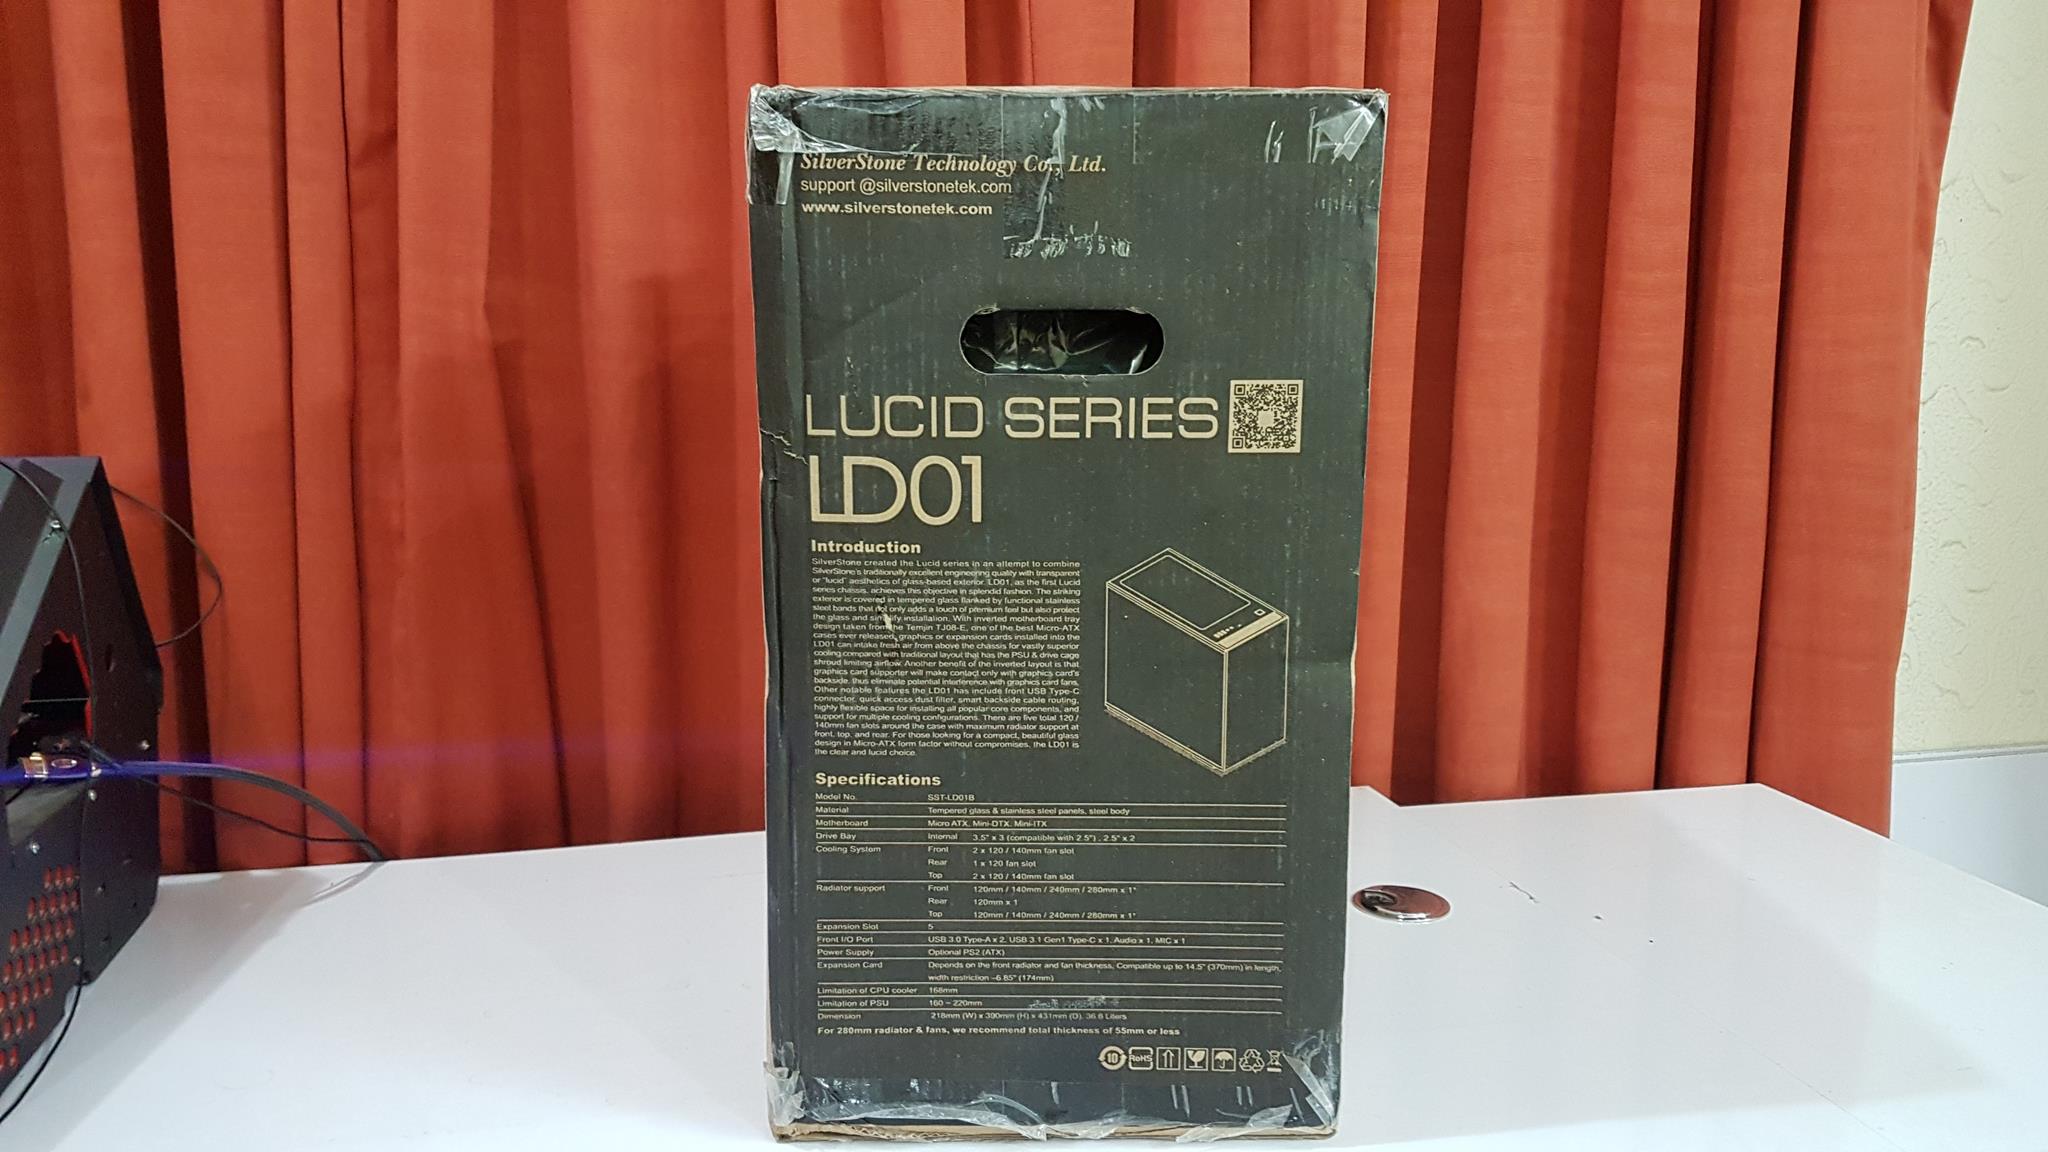
The left side of the box has the company’s contact information printed on the top left. Introduction to the chassis and the series is printed in the middle and there is a tabular formatted printout of the specifications at the bottom.
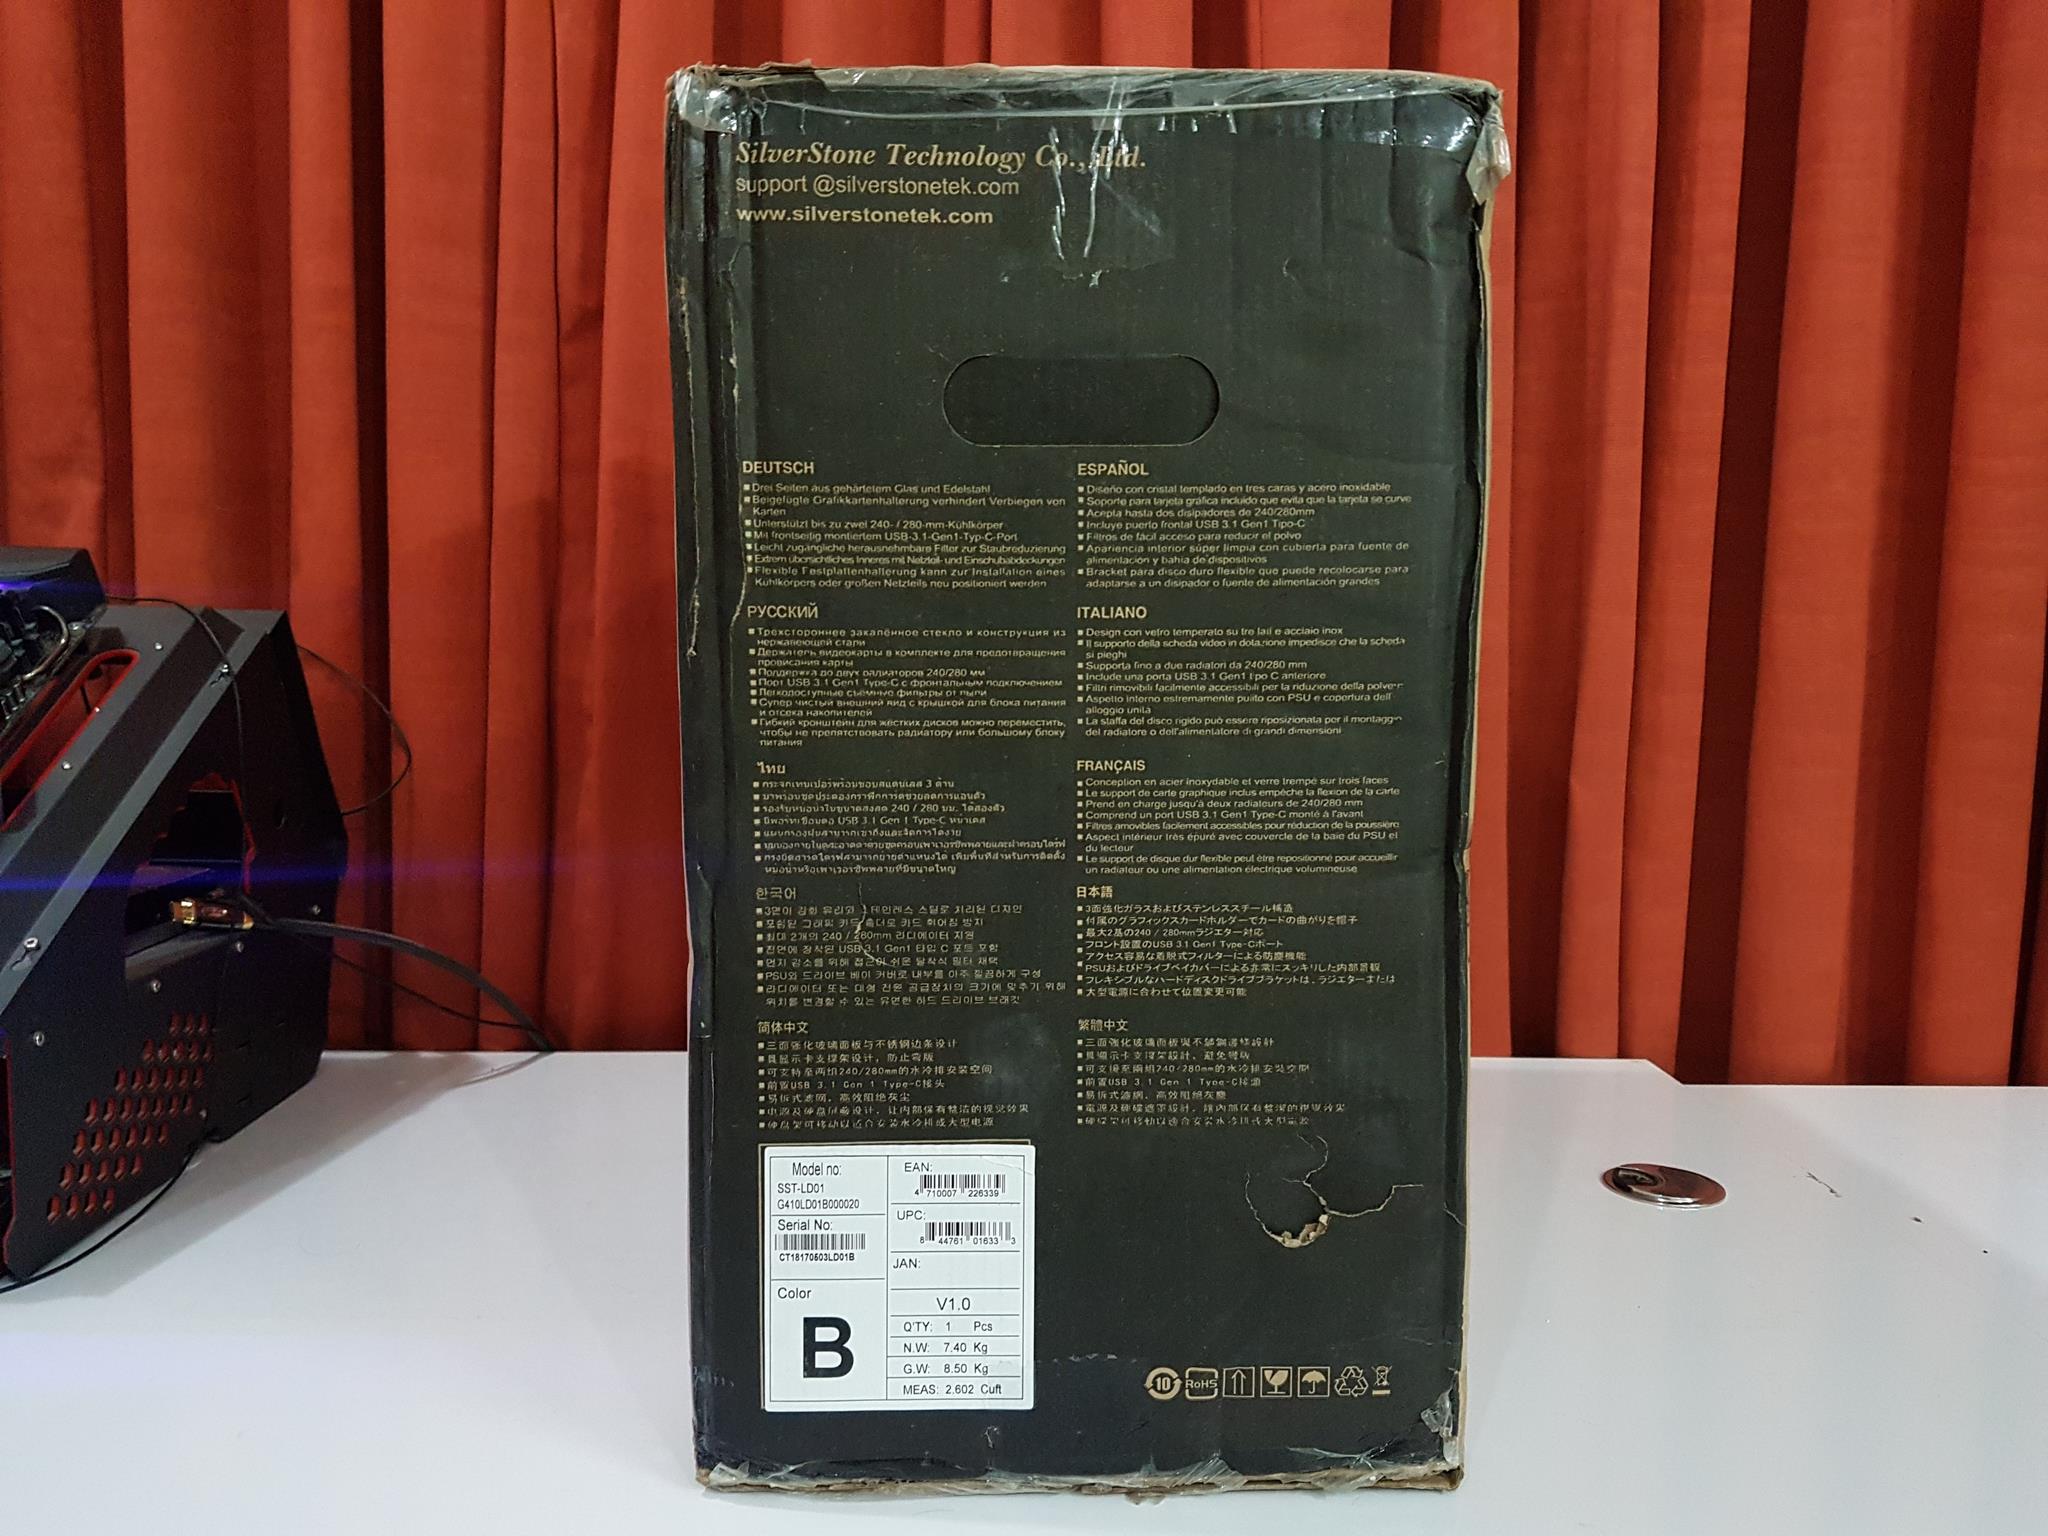
The right side has an almost identical layout as is on the left side except for that feature highlights of the chassis are printed in two columns in 10 different languages. There is a white color sticker on the bottom showing the EAN/UPC/Serial No and weight information of the chassis. Compliance information to various regulations is printed on the bottom right.
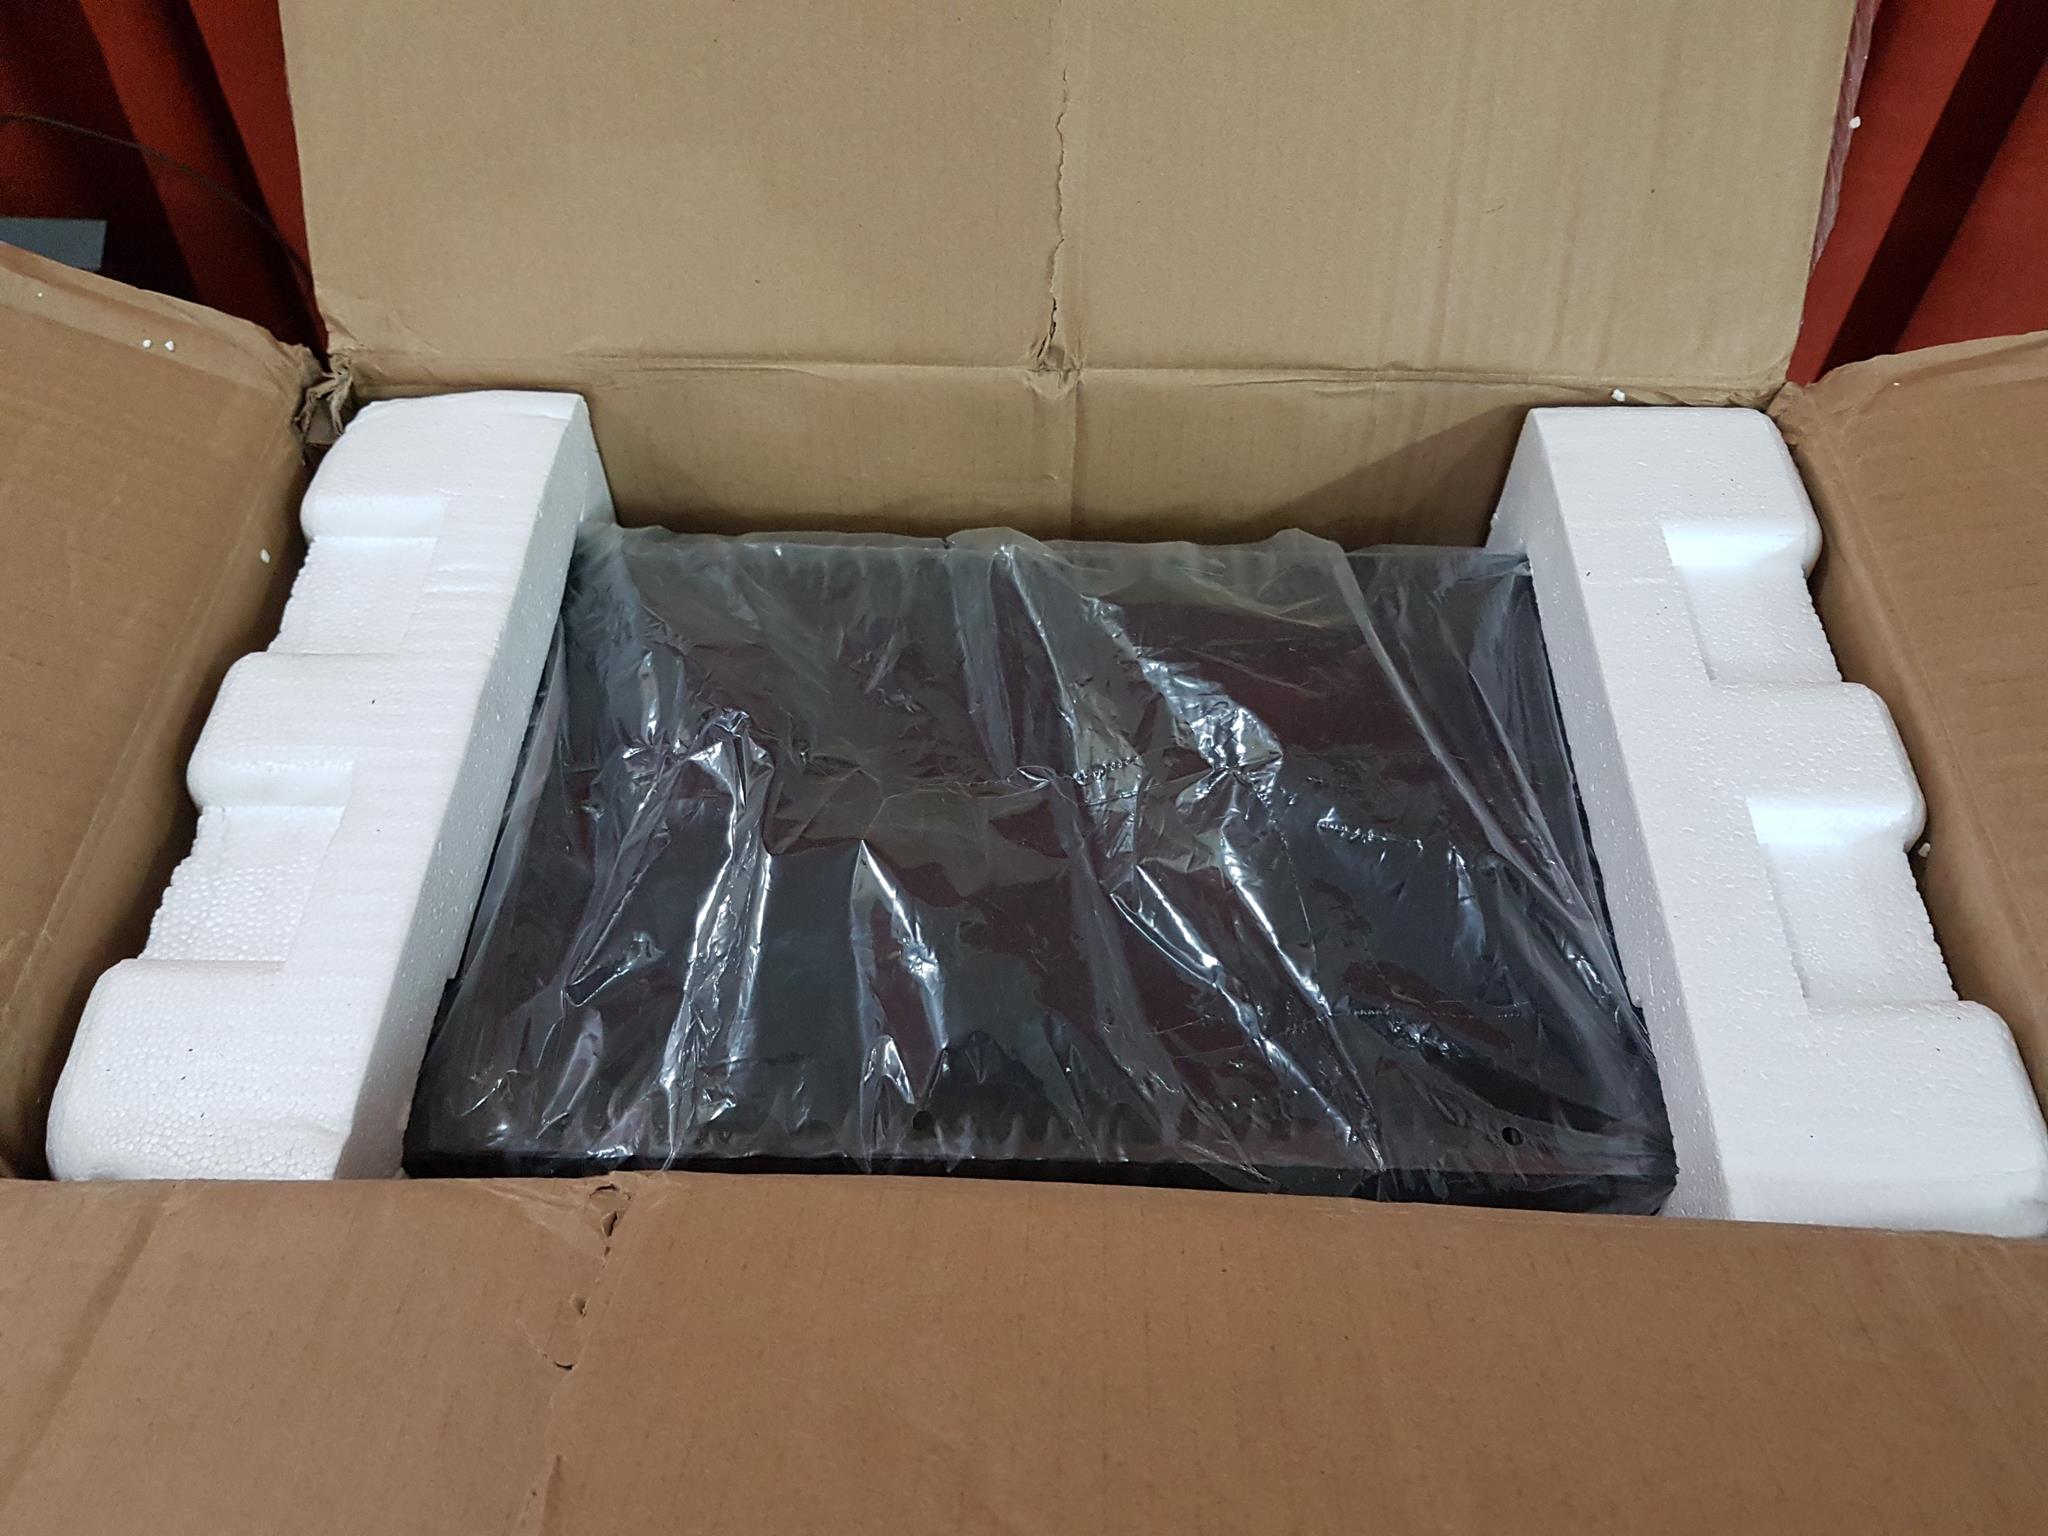
Opening the box will show the chassis tucked inside two thick white colors Styrofoam pads. This is a version 1.0 which indicates more are planned in the future. From Computex, I could remember there was a meshed front version as well.
Accessories
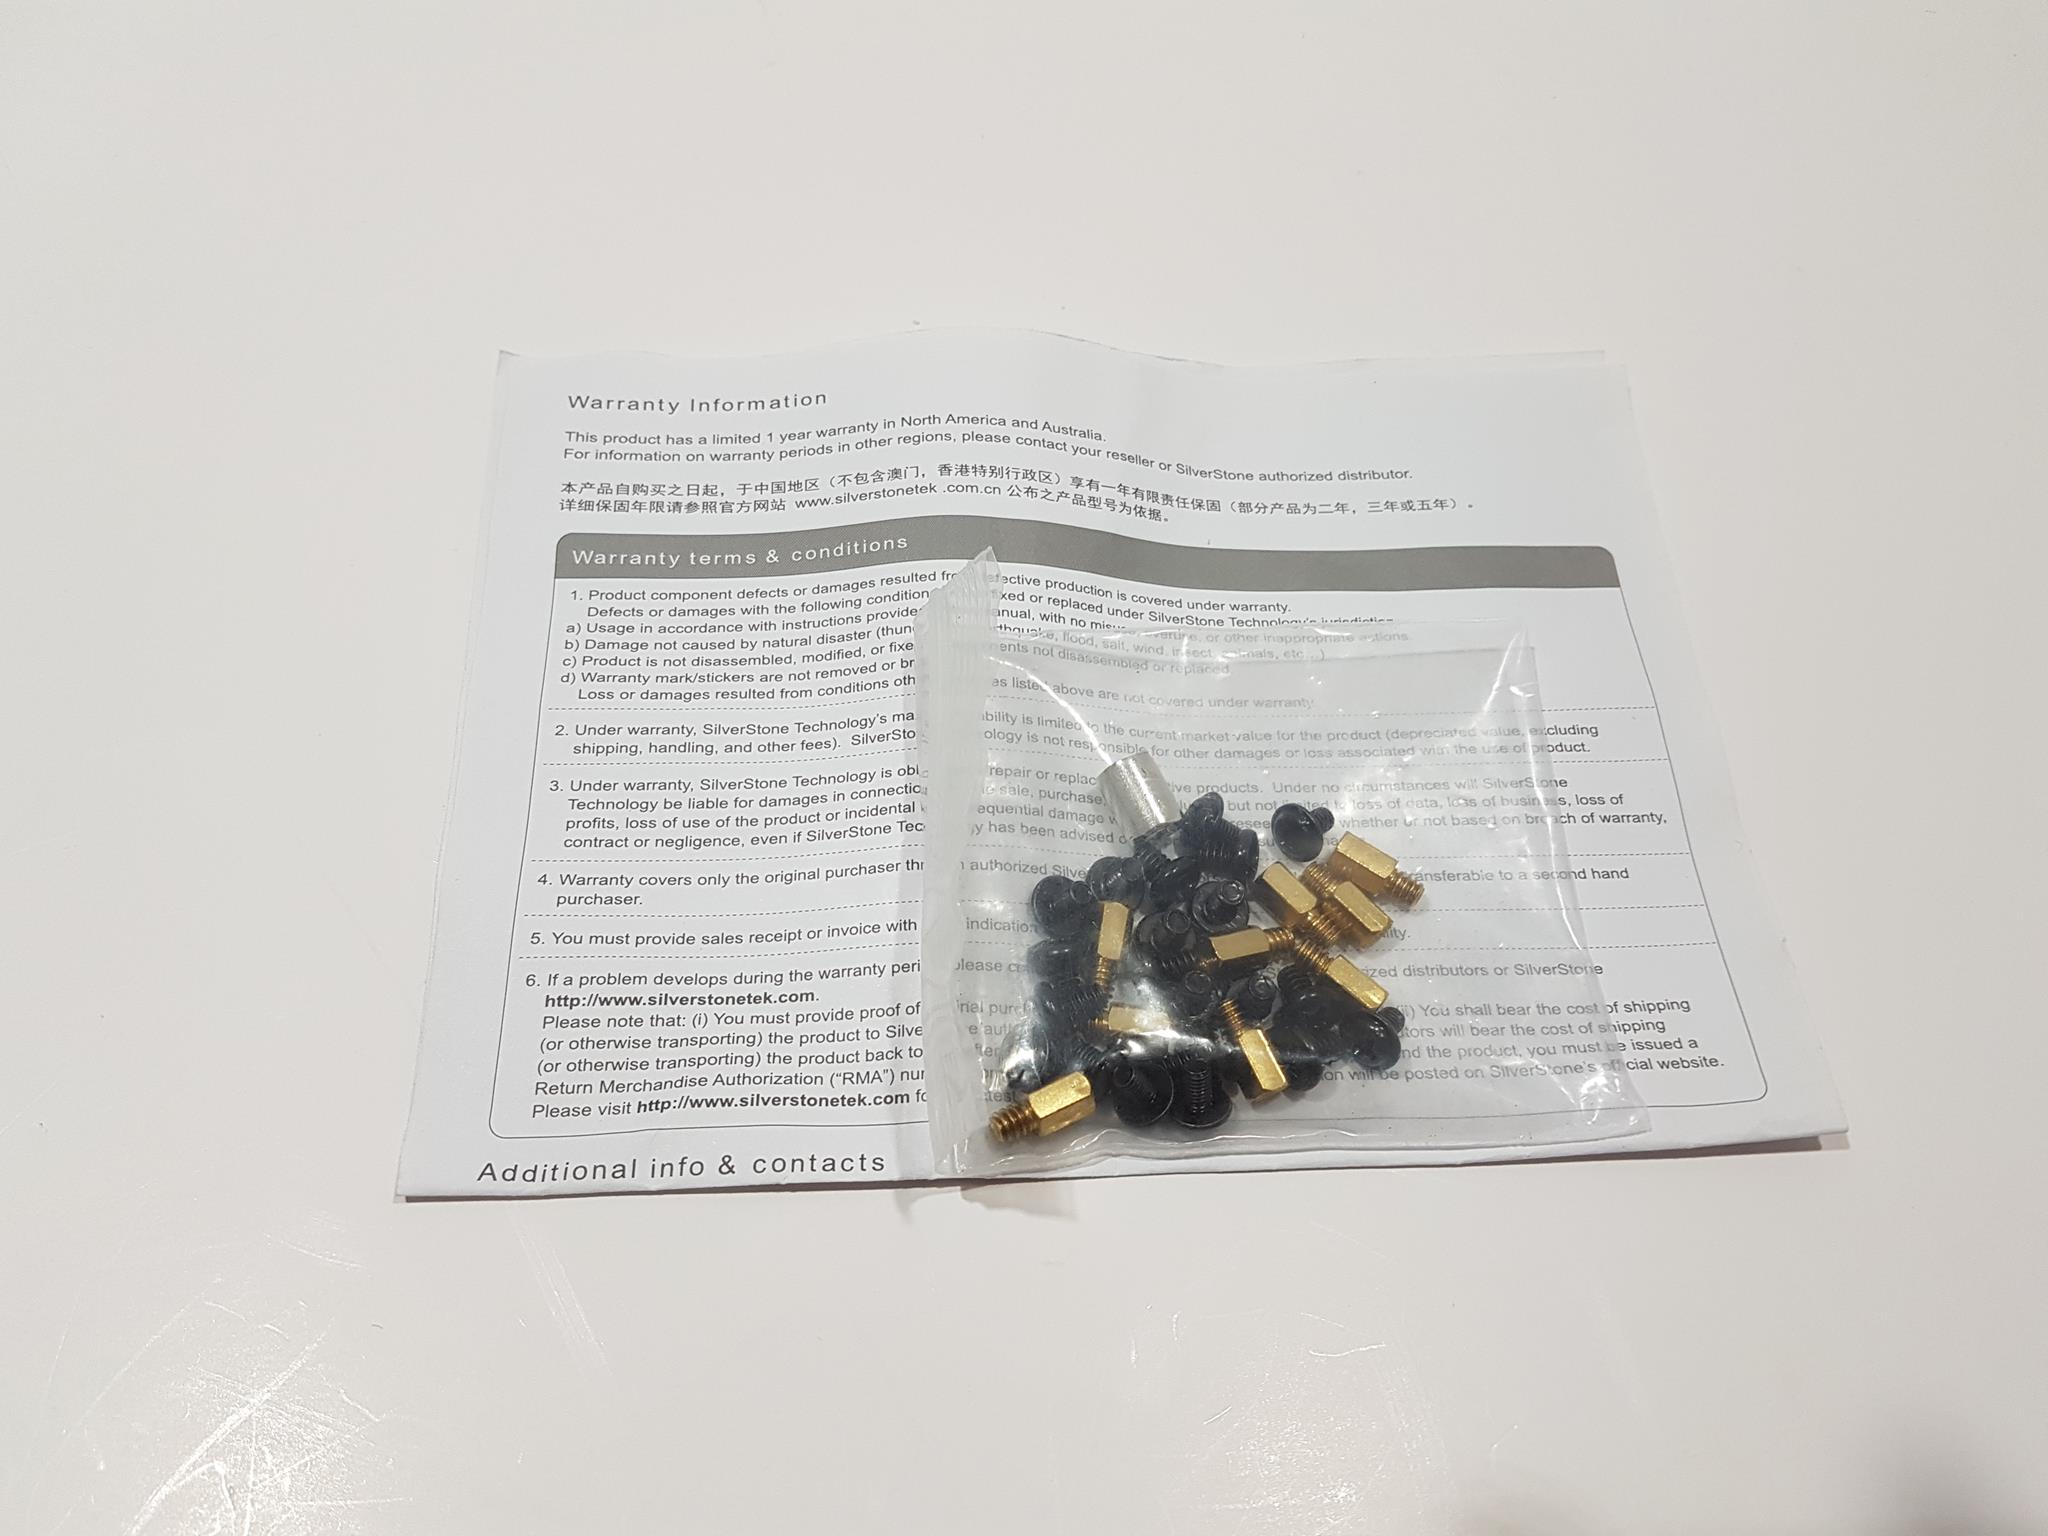
The SilverStone has provided:
- Gold Color Standoffs
- Various Screws
- 1x Warranty Guide
There is no user manual included in the chassis which in my opinion should have been provided. The user can download the manual from their website. The downloaded manual has 20 pages and is quite elaborative taking the user step by step towards building inside the chassis and showing compatibility/clearance aspects symbolically. Their attention to detail is remarkable.
Closer Look
It is time to take a closer look into the design element of this chassis and see what it offers to the builder and the user. Here is what SilverStone is saying about it, “SilverStone created the Lucid series in an attempt to combine SilverStone’s traditionally excellent engineering quality with transparent or “lucid” aesthetics of glass-based exterior. LD01, as the first Lucid series chassis, achieves this objective in splendid fashion. The striking exterior is covered in tempered glass flanked by functional stainless steel bands that not only adds a touch of premium feel but also protect the glass and simplify installation. With inverted motherboard tray design taken from the Temjin TJ08-E, one of the best Micro-ATX cases ever released, graphics or expansion cards installed into the LD01 can intake fresh air from above the chassis for vastly superior cooling compared with a traditional layout that has the PSU & drives cage shroud limiting airflow. Another benefit of the inverted layout is that graphics card supporter will make contact only with graphics card’s backside, thus eliminate potential interference with graphics card fans. Other notable features the LD01 has included front USB Type-C connector, quick access dust filter, smart backside cable routing, highly flexible space for installing all popular core components, and support for multiple cooling configurations. There are five total 120 / 140mm fan slots around the case with maximum radiator support at the front, top, and rear. For those looking for a compact, beautiful glass design in Micro-ATX form factor without compromises, the LD01 is the clear and lucid choice.”
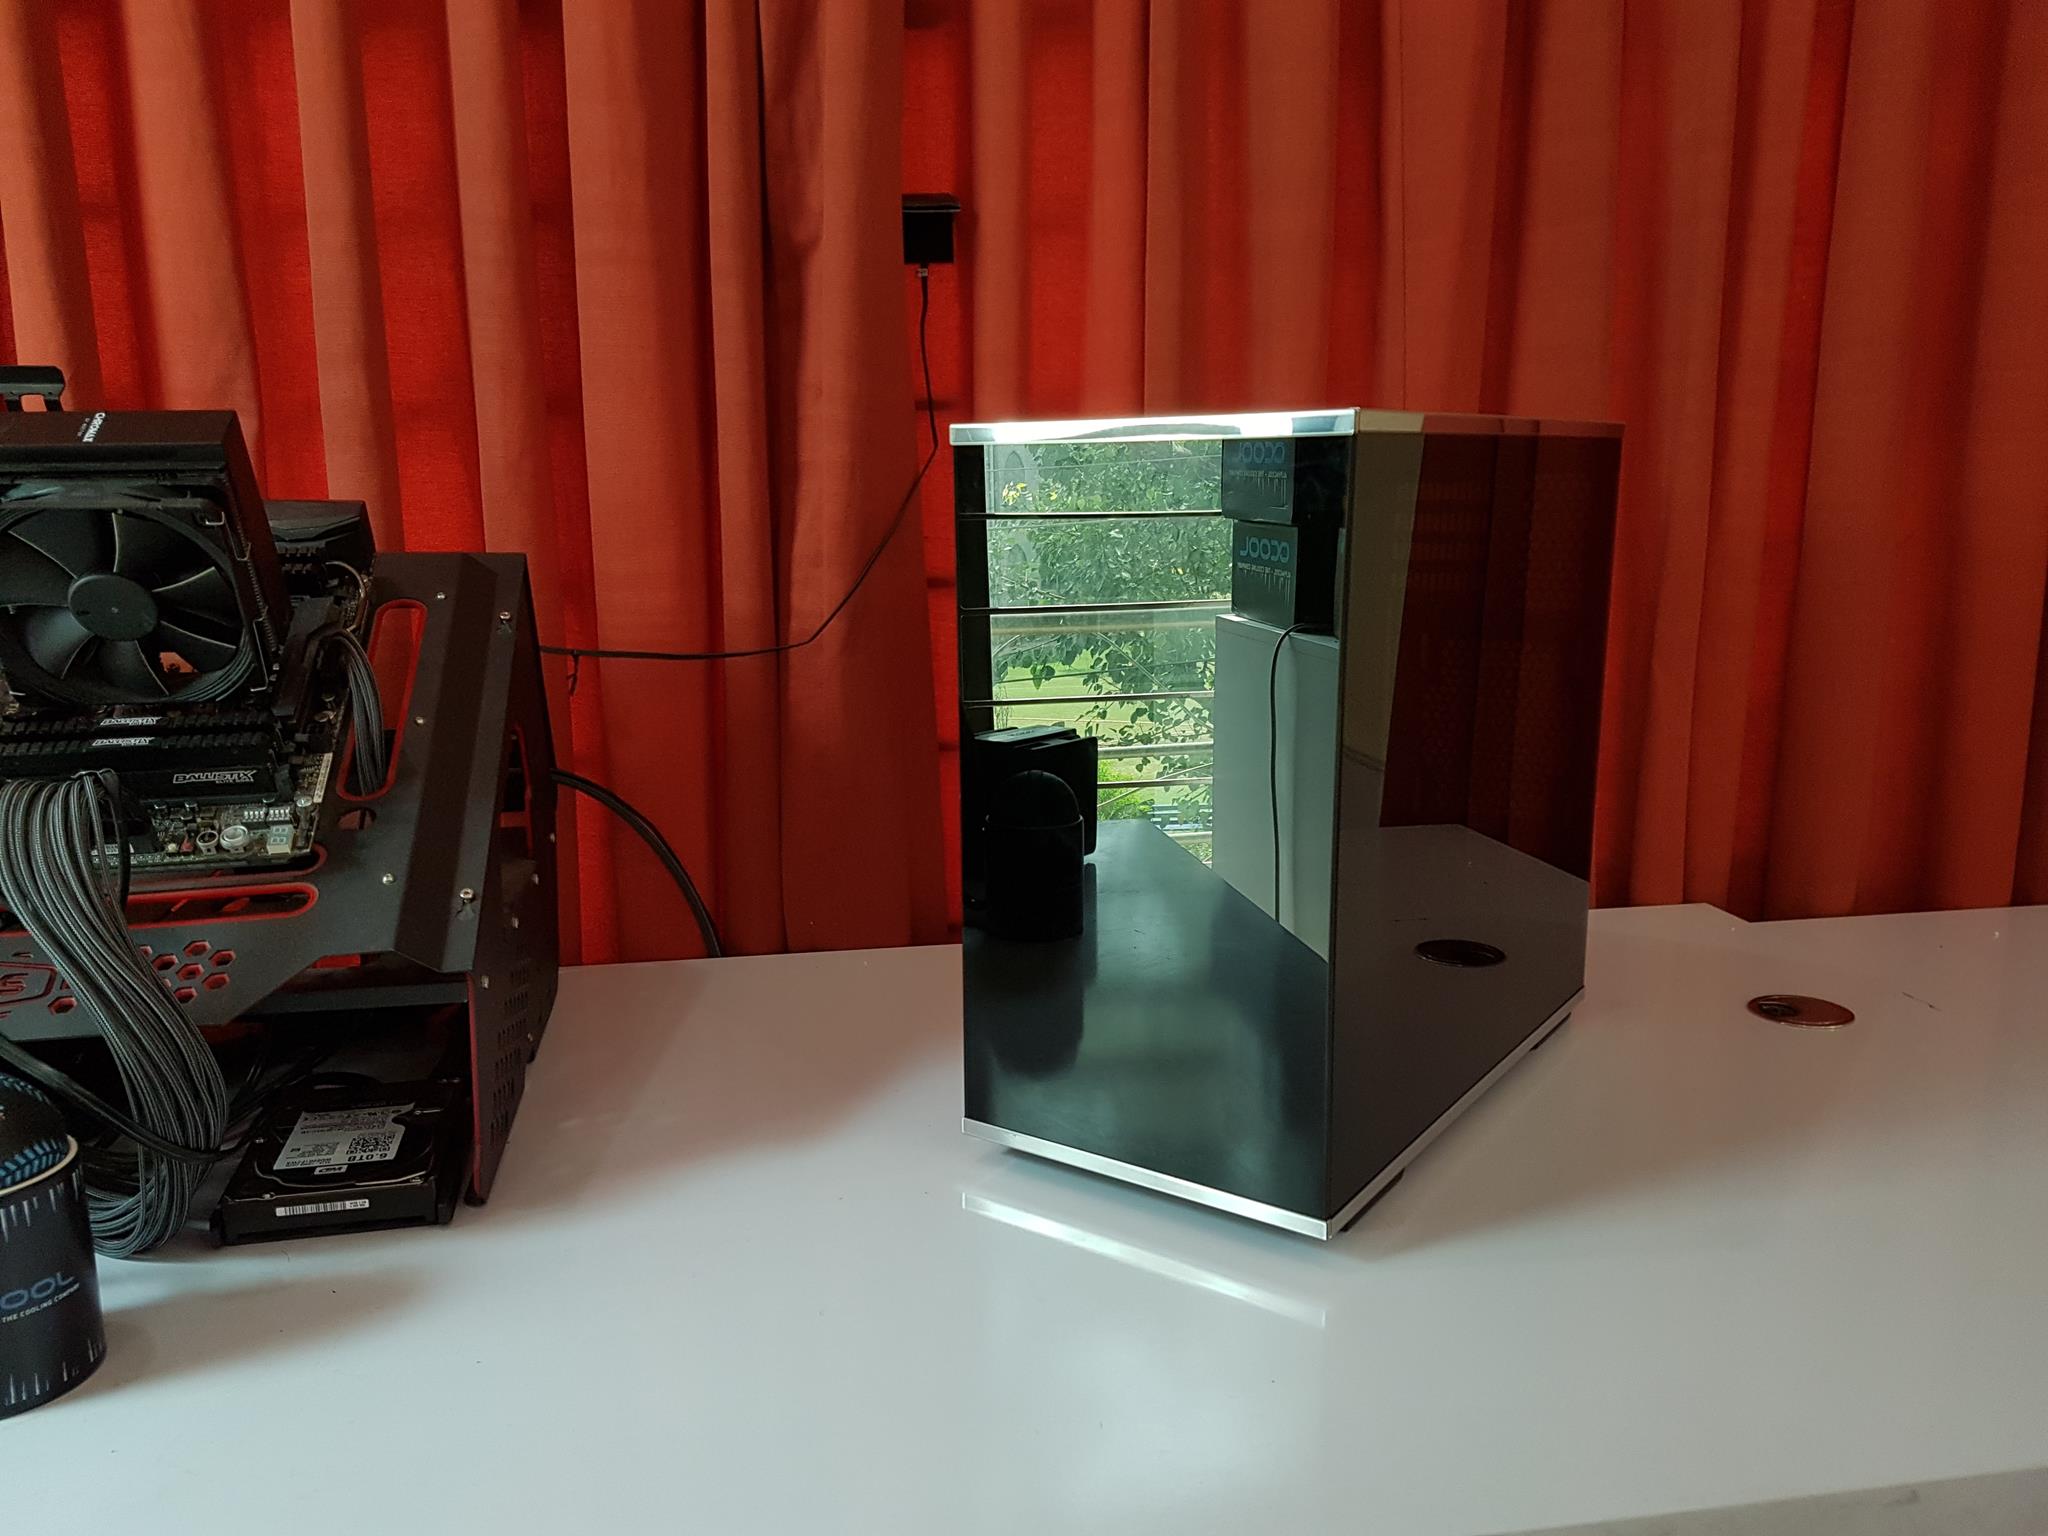
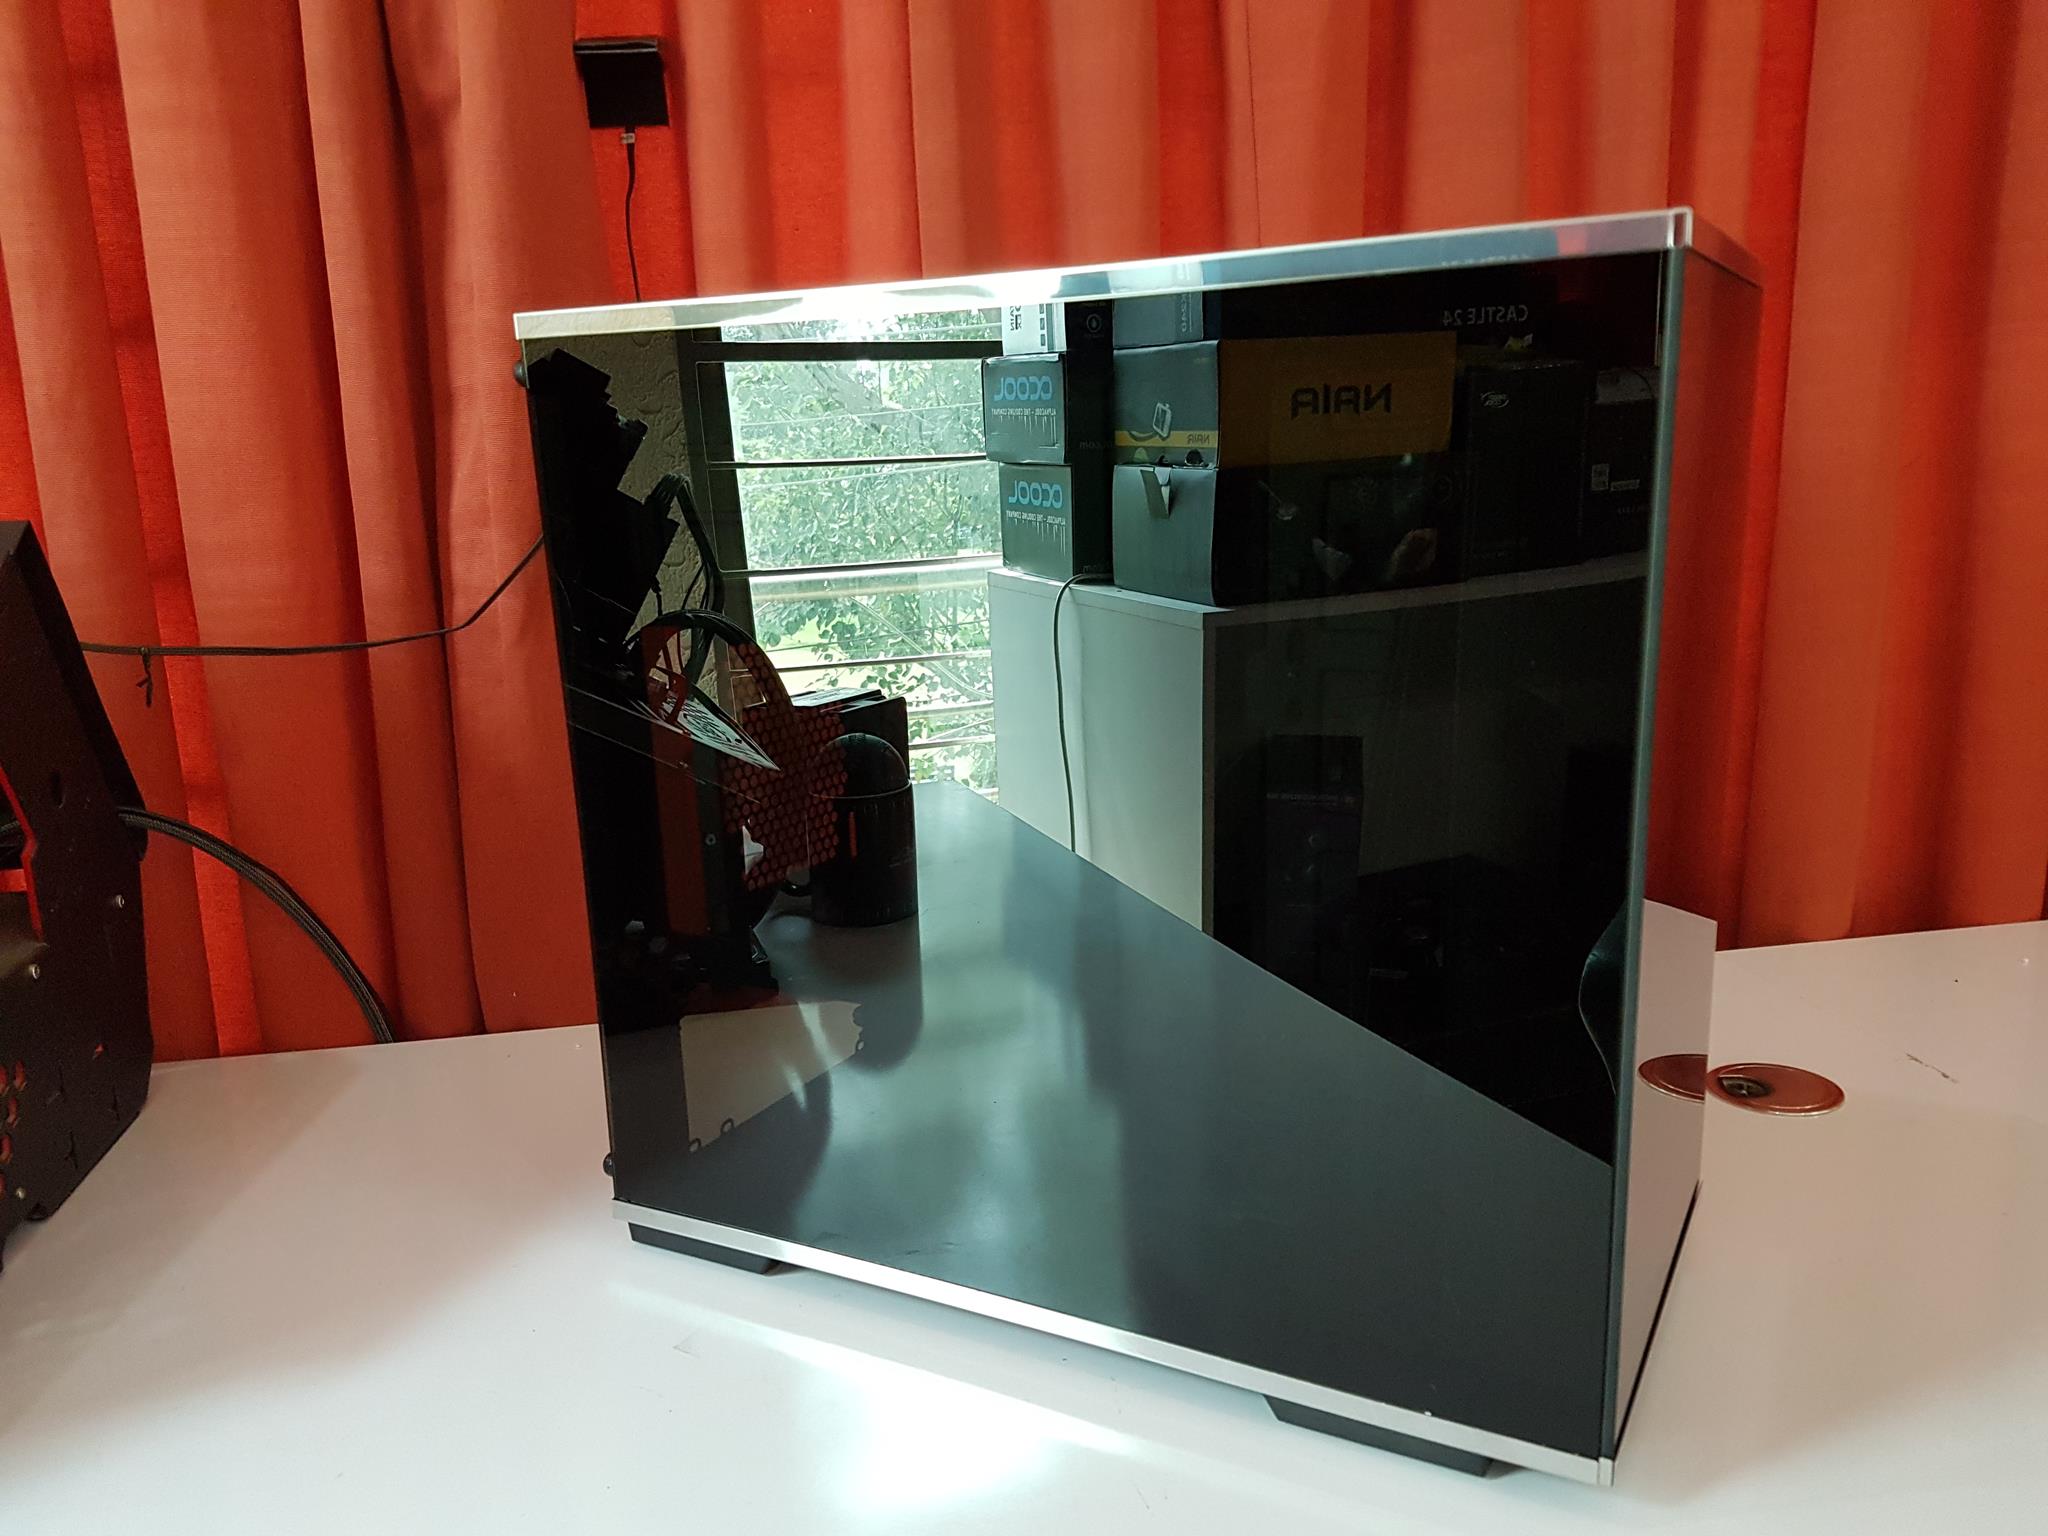
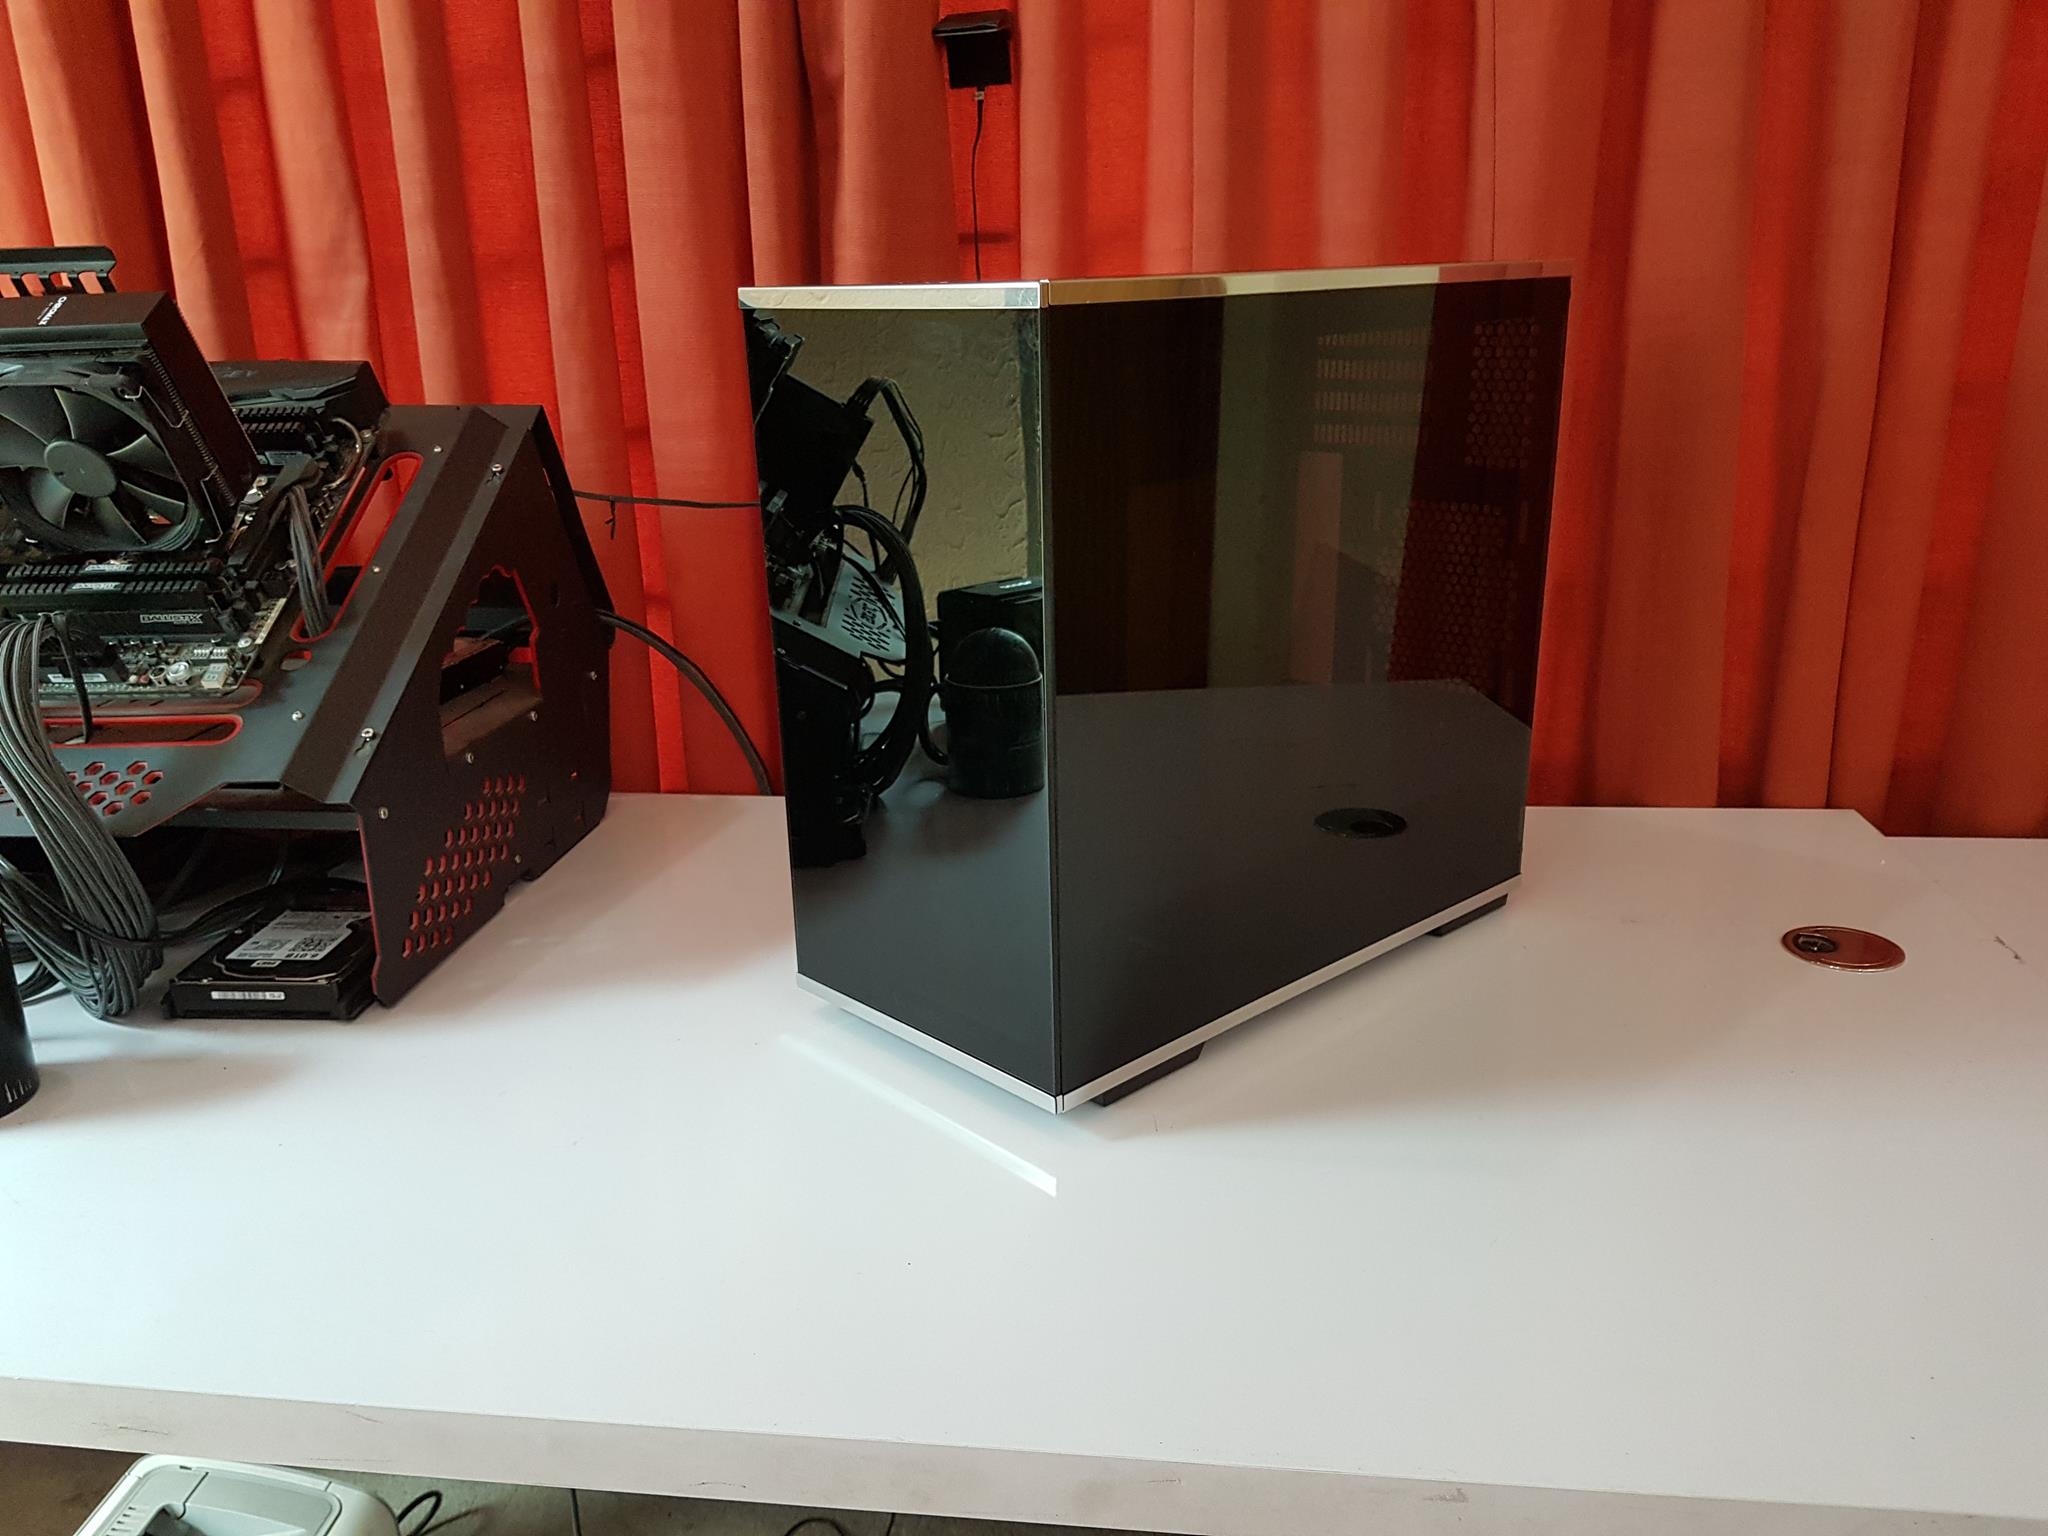
The dimension of the chassis is 218x390x431mm (WxHxD). Chassis is made of steel with steel reinforced tempered glass panels. Net weight of the chassis is 7.4KG. In terms of volume, this chassis has 36.6 Litres of space. Let’s start from the front side. There is a 3mm tinted TG panel installed on the front cover. The cover itself is made of plastic and there is a stainless steel band on the top and at the bottom encapsulating the TG panel for utmost protection and that damn good look and cohesiveness with the overall design. There are SilverStone brand logo and name ion white color at the bottom of the front panel. The complete panel is removable without needing to remove the side panels. The dimension of this panel is 388x218mm (HxL). The complete front is glass covered to create one heck of a look. One can see the fan mounting bracket on the front side of the chassis’s frame through it.
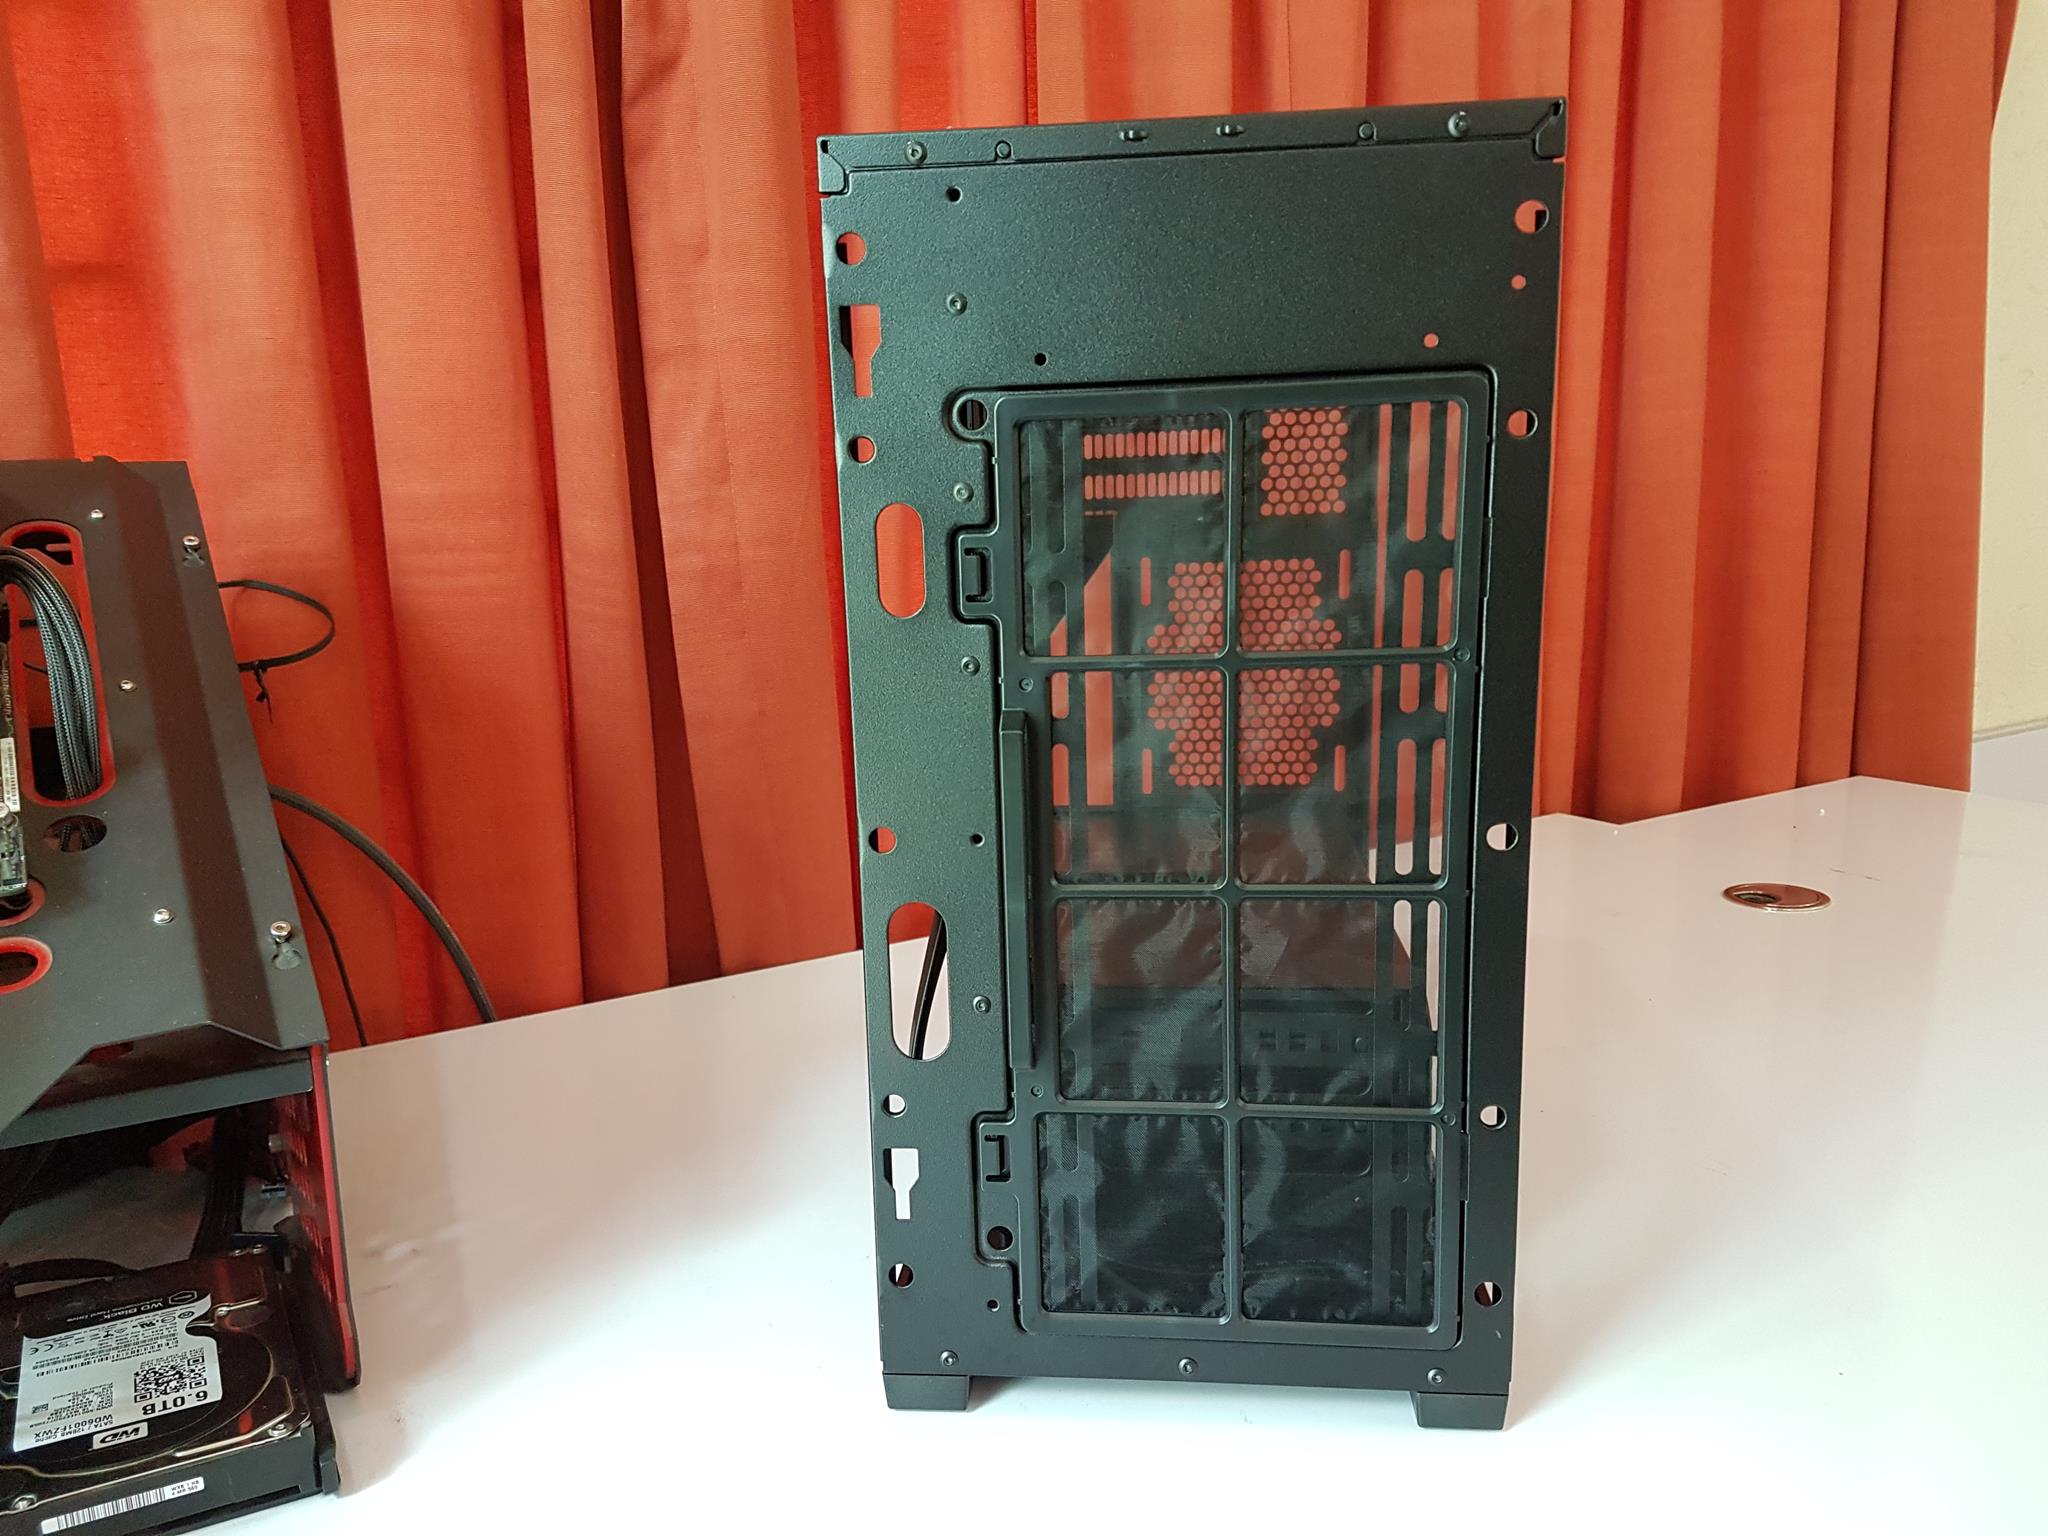
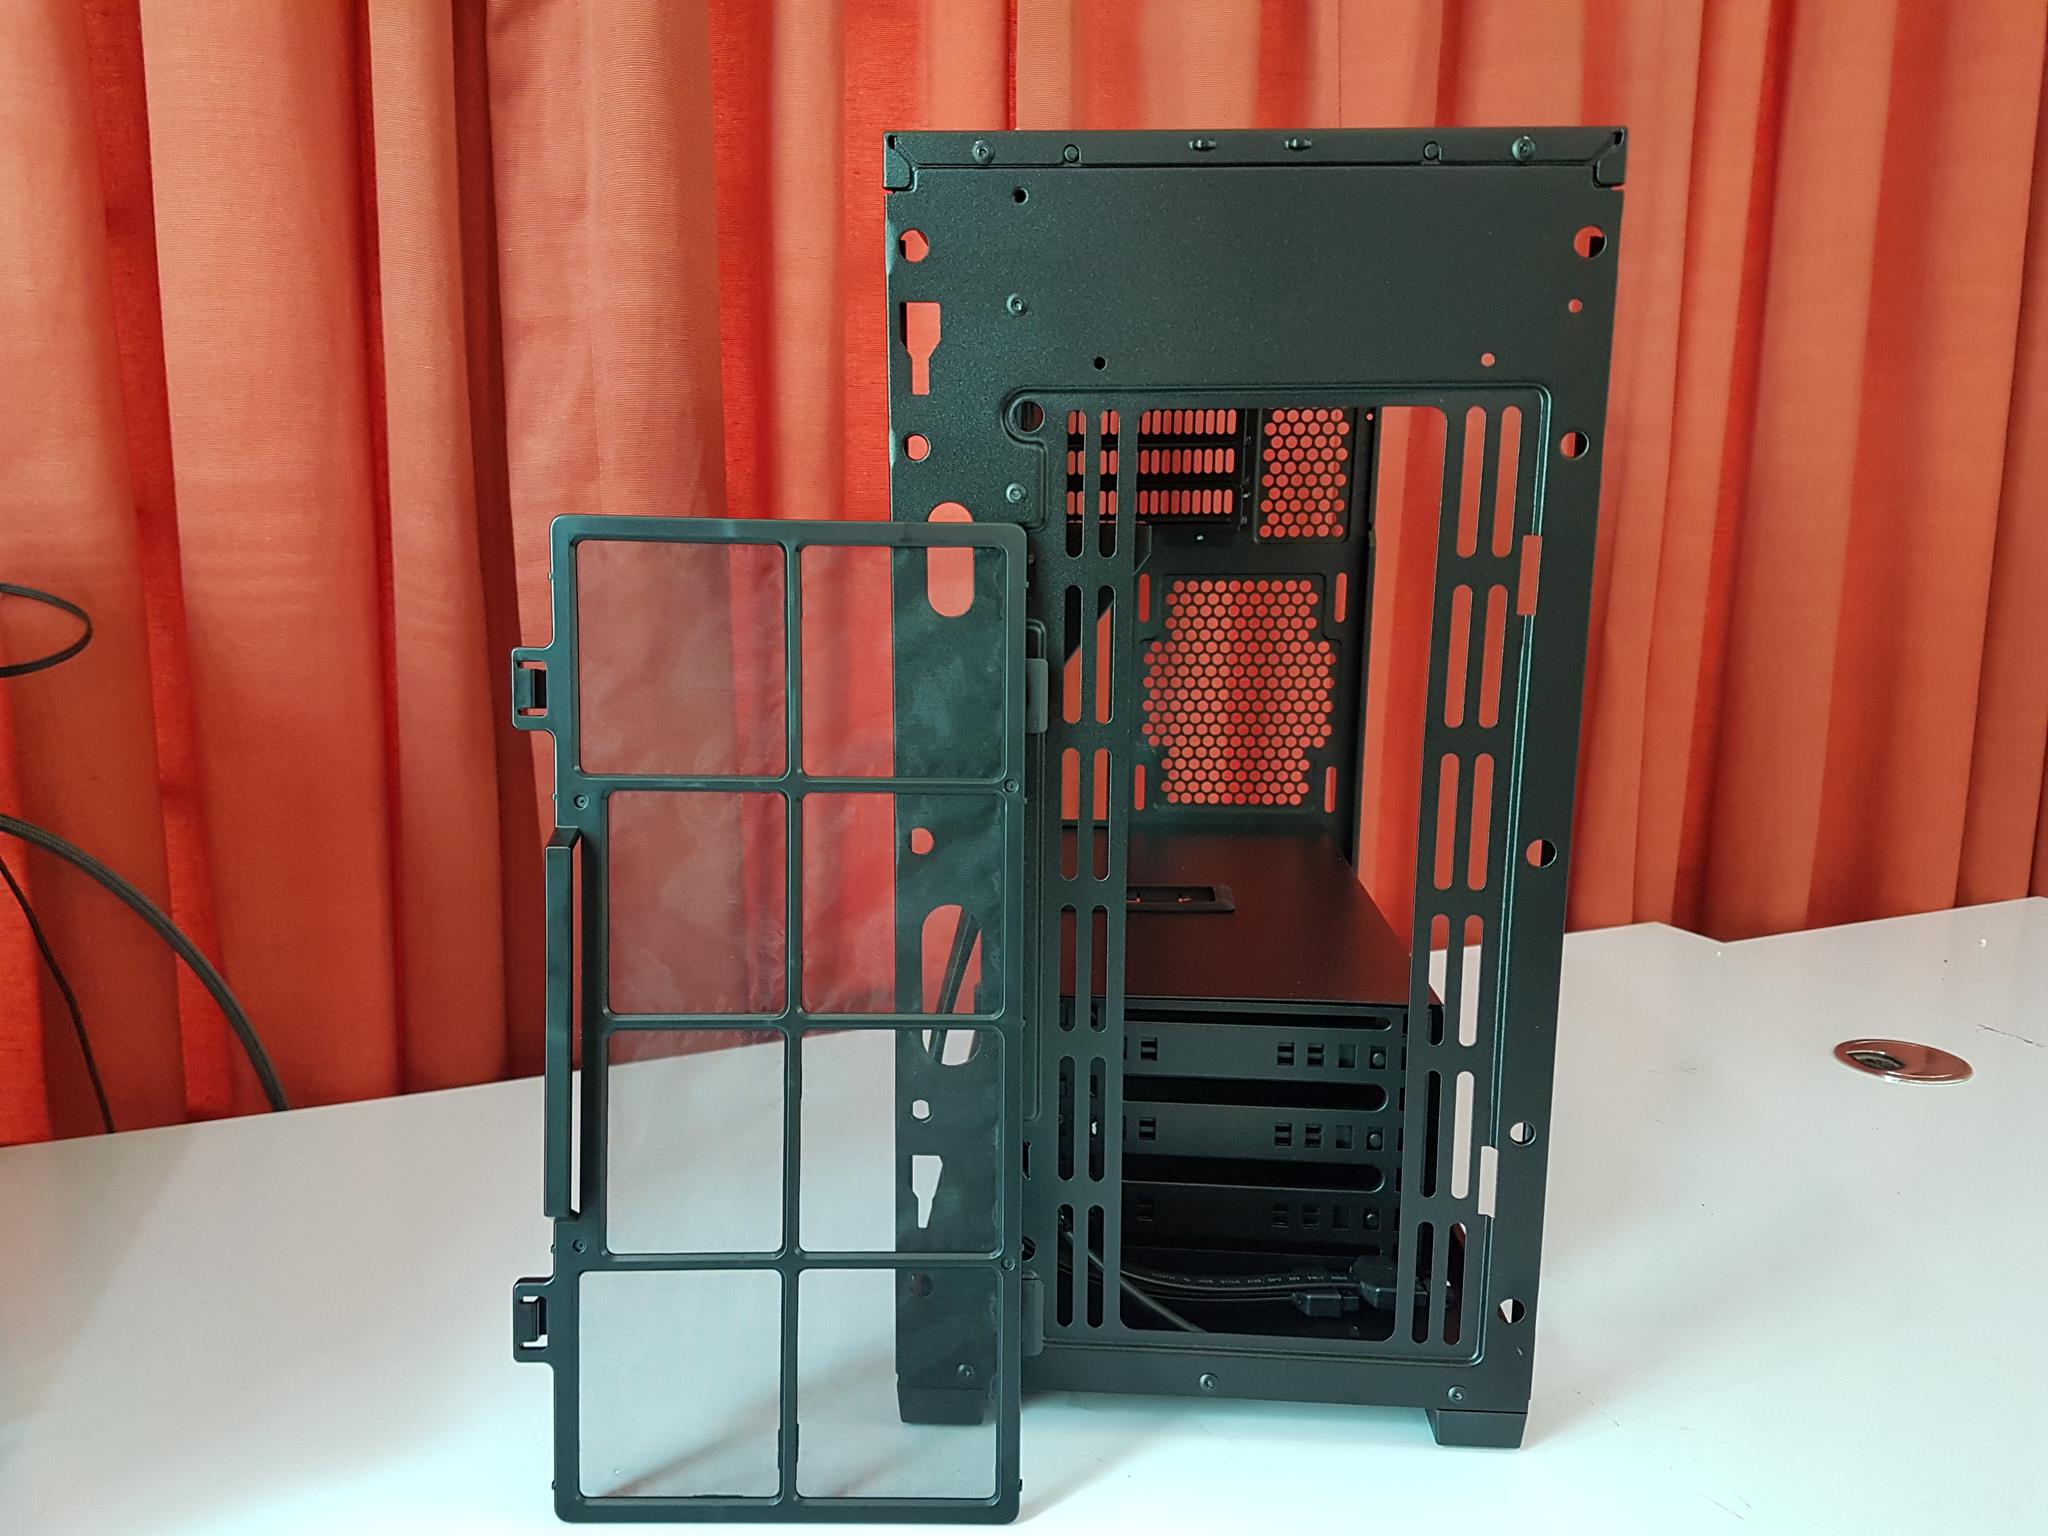
There is an opening at the bottom of the front cover having a size of 128x20mm and there is a meshed filtered perforation at the top. These two are the main areas of the air inflow. I was skeptical at this point that this chassis would suffer from a lack of airflow and/or front fans may choke due to this particular design. But, I was wrong. More on it in the testing section. To take the front panel off, grab it from the bottom opening side and gently pull it. The panel will pop out easily. A single look is enough to tell that almost 50mm of the left side area is fully covered and has two cutouts to pass the cables through. Also, the top side above the fan slots is also solid (approximately 66mm). There is a single dust filter covering the fan mounting slots. The user can install two 120mm or 140mm fans here. A 240mm radiator or a 280mm radiator is also possible. Please, note that in standard layout user has to install the fan on the behind these slots as indicative by the front mounted dust filter which sits in completely using two latches. However, the user can mount the fan(s) on the front side of the slots but going that route they will lose the front dust filter and possibly higher chances of the fans being choked as there is a provision of approximately 35mm only inside the front panel for the fans. Slim fans, on the other hand, can definitely make their way in this particular scenario. Our testing section has more details on it. Make sure to check that out. As there are no mounting holes but slots so the user has the option to adjust the height of the fans as per the requirement and limitation of the chassis. There is one intrigued design approach by the SilverStone. The tempered glass is only on the front side of the panel. The panel has a depth of approximately 215mm. The side panels are extended to align with the tempered glass on the front panel to create one cohesive look and feel to the overall design.
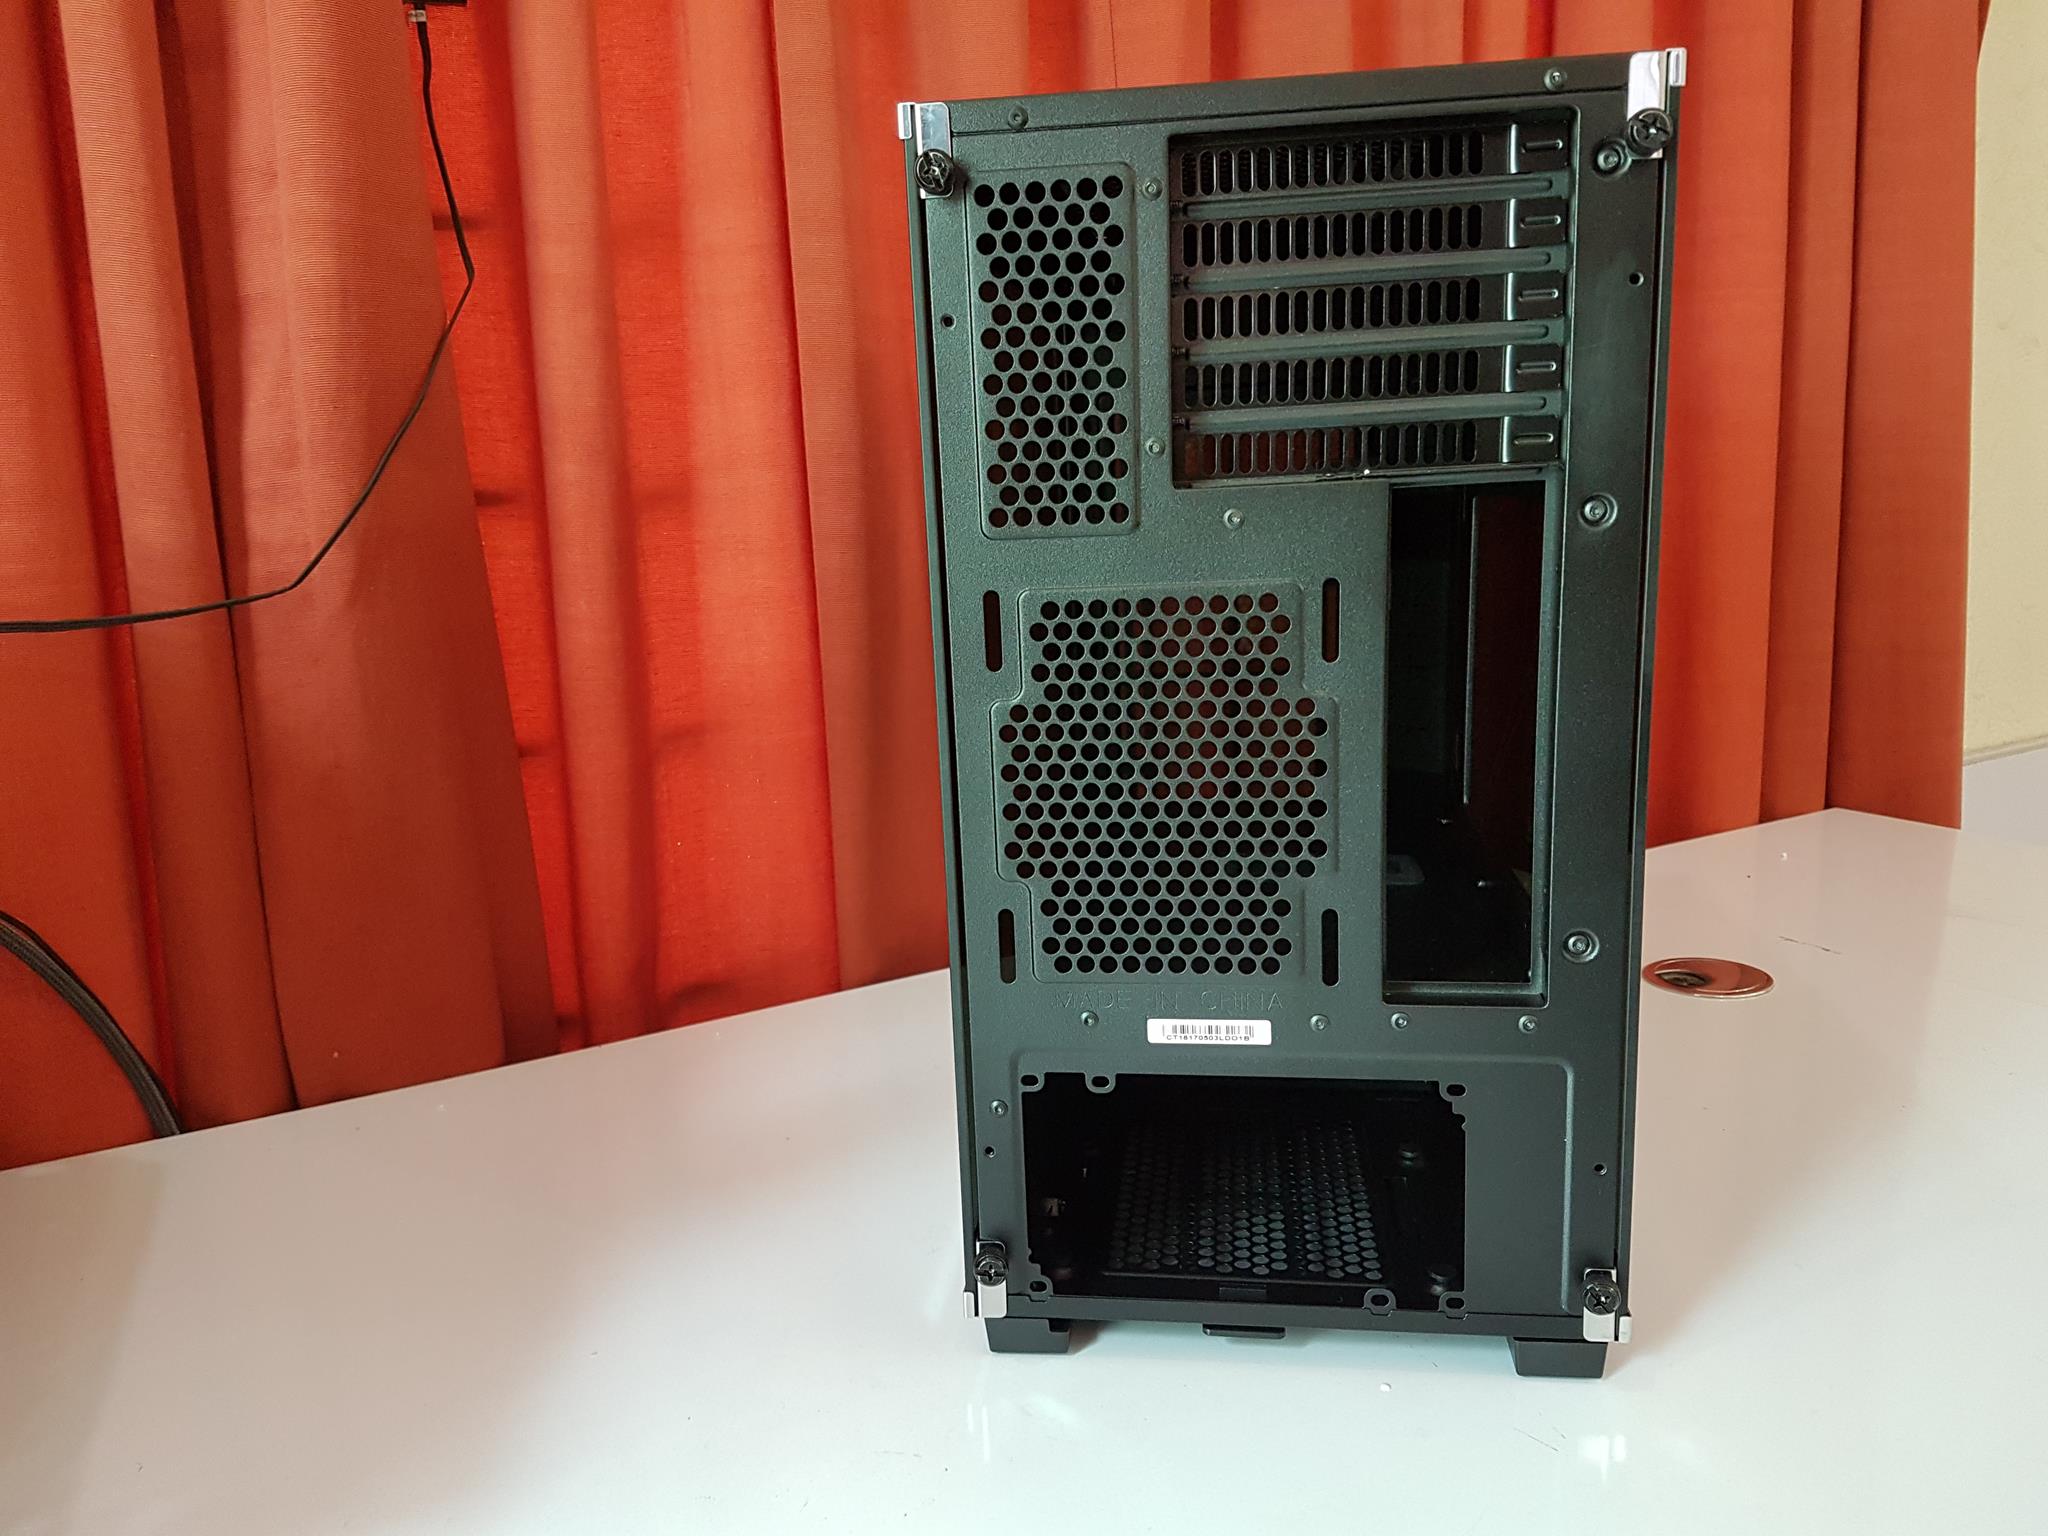
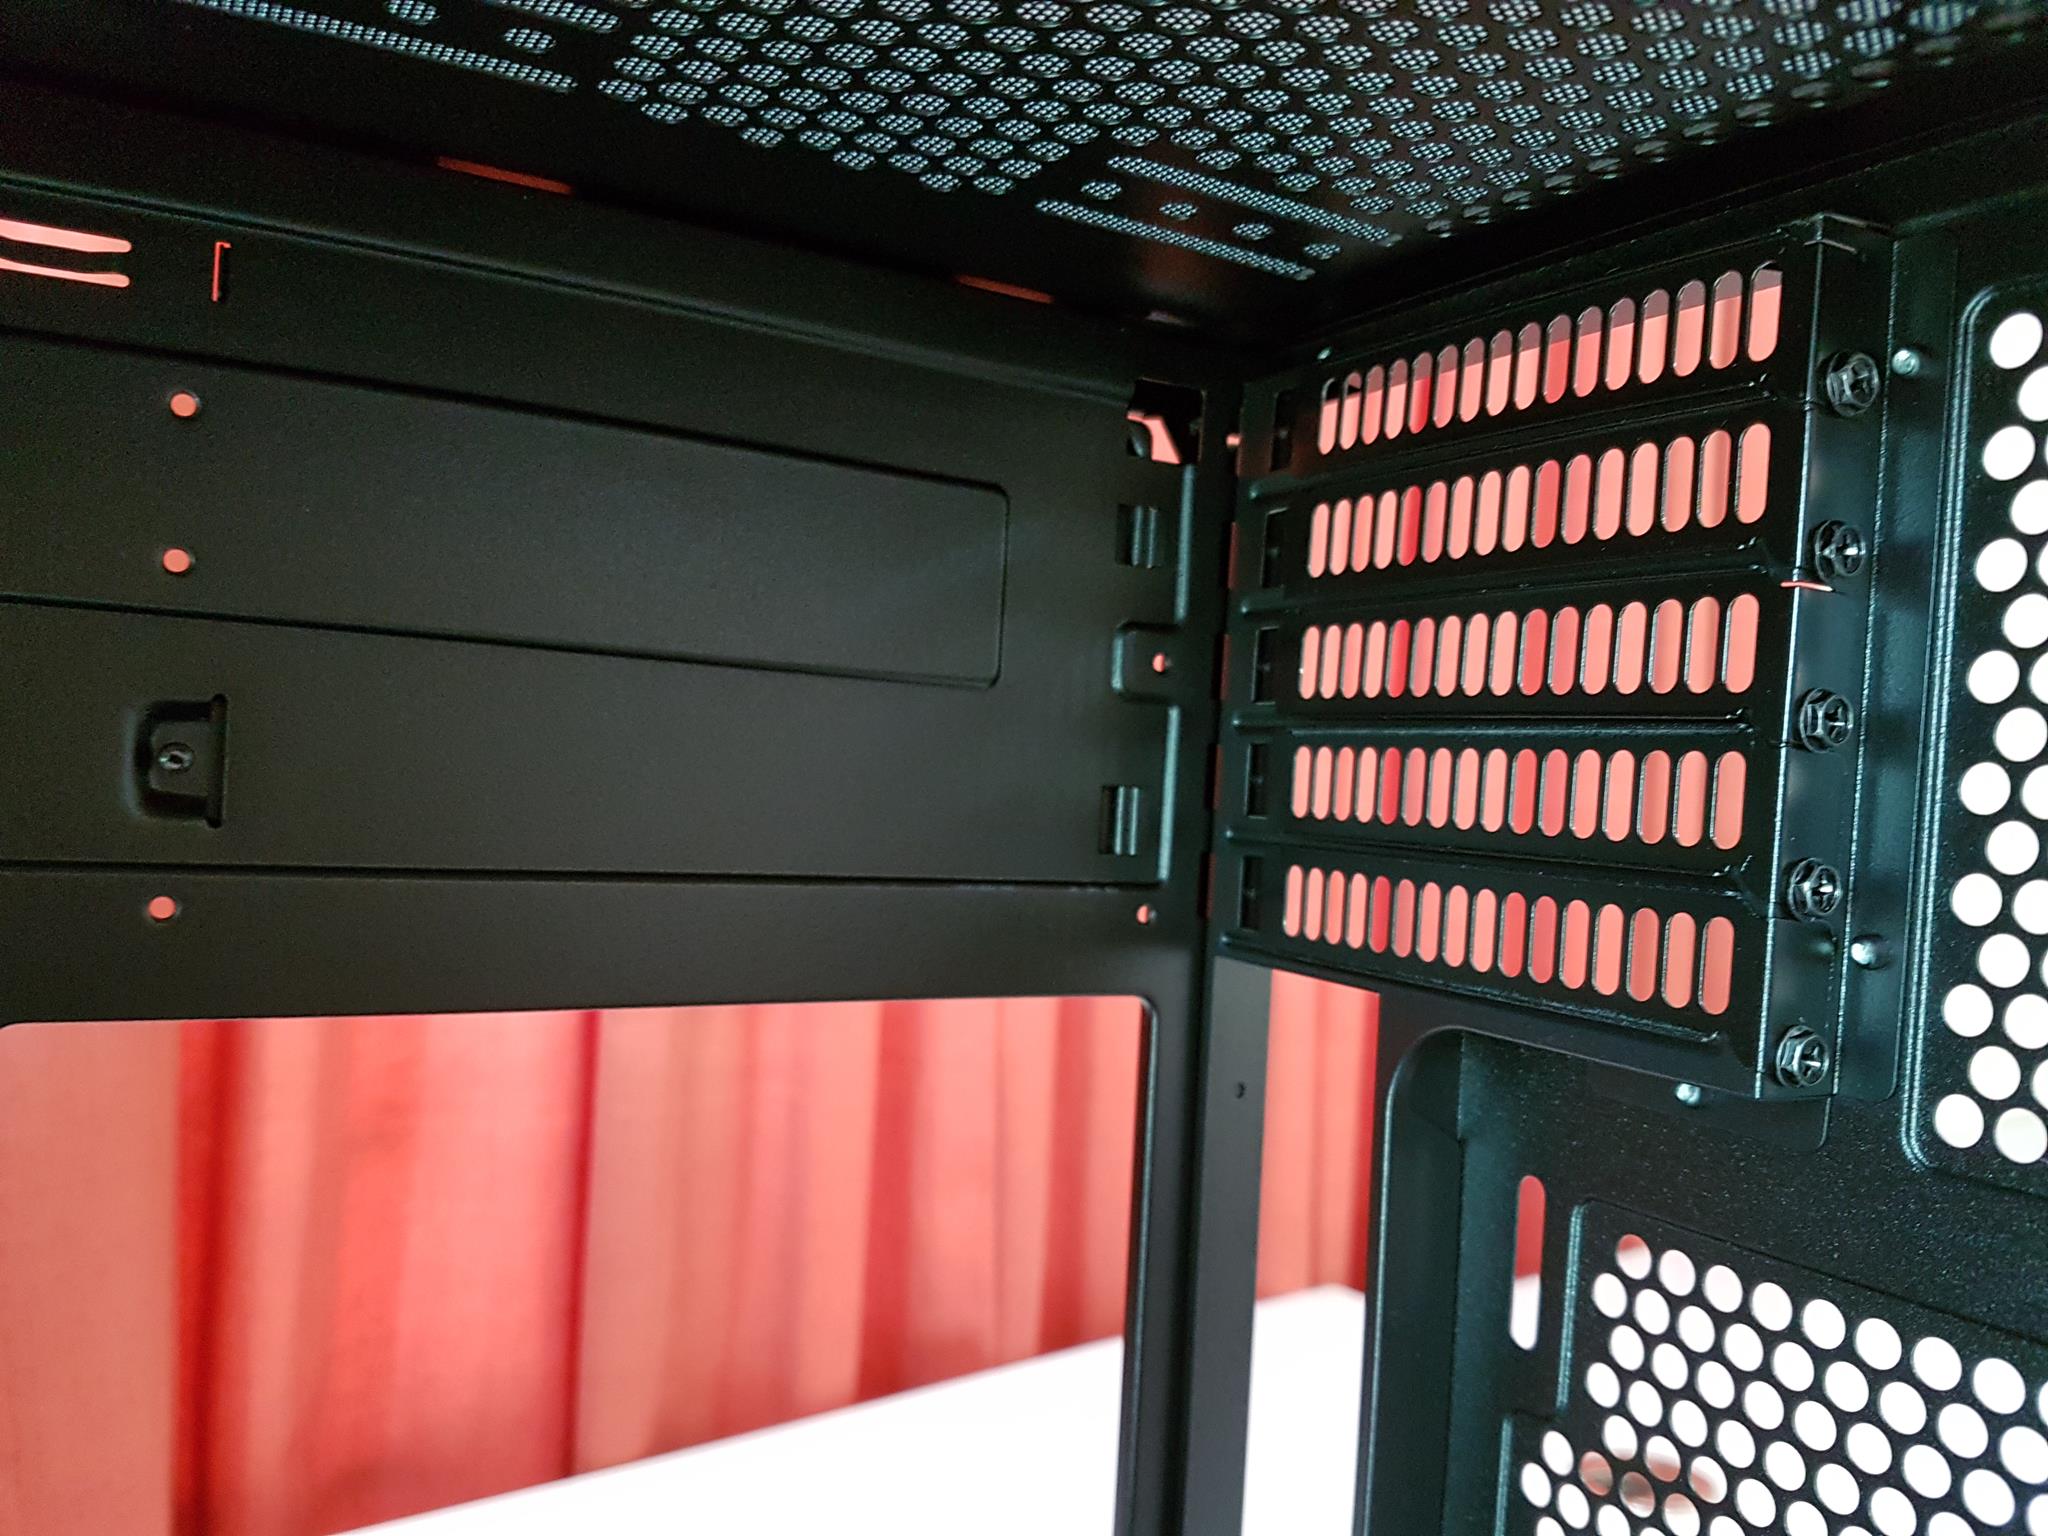
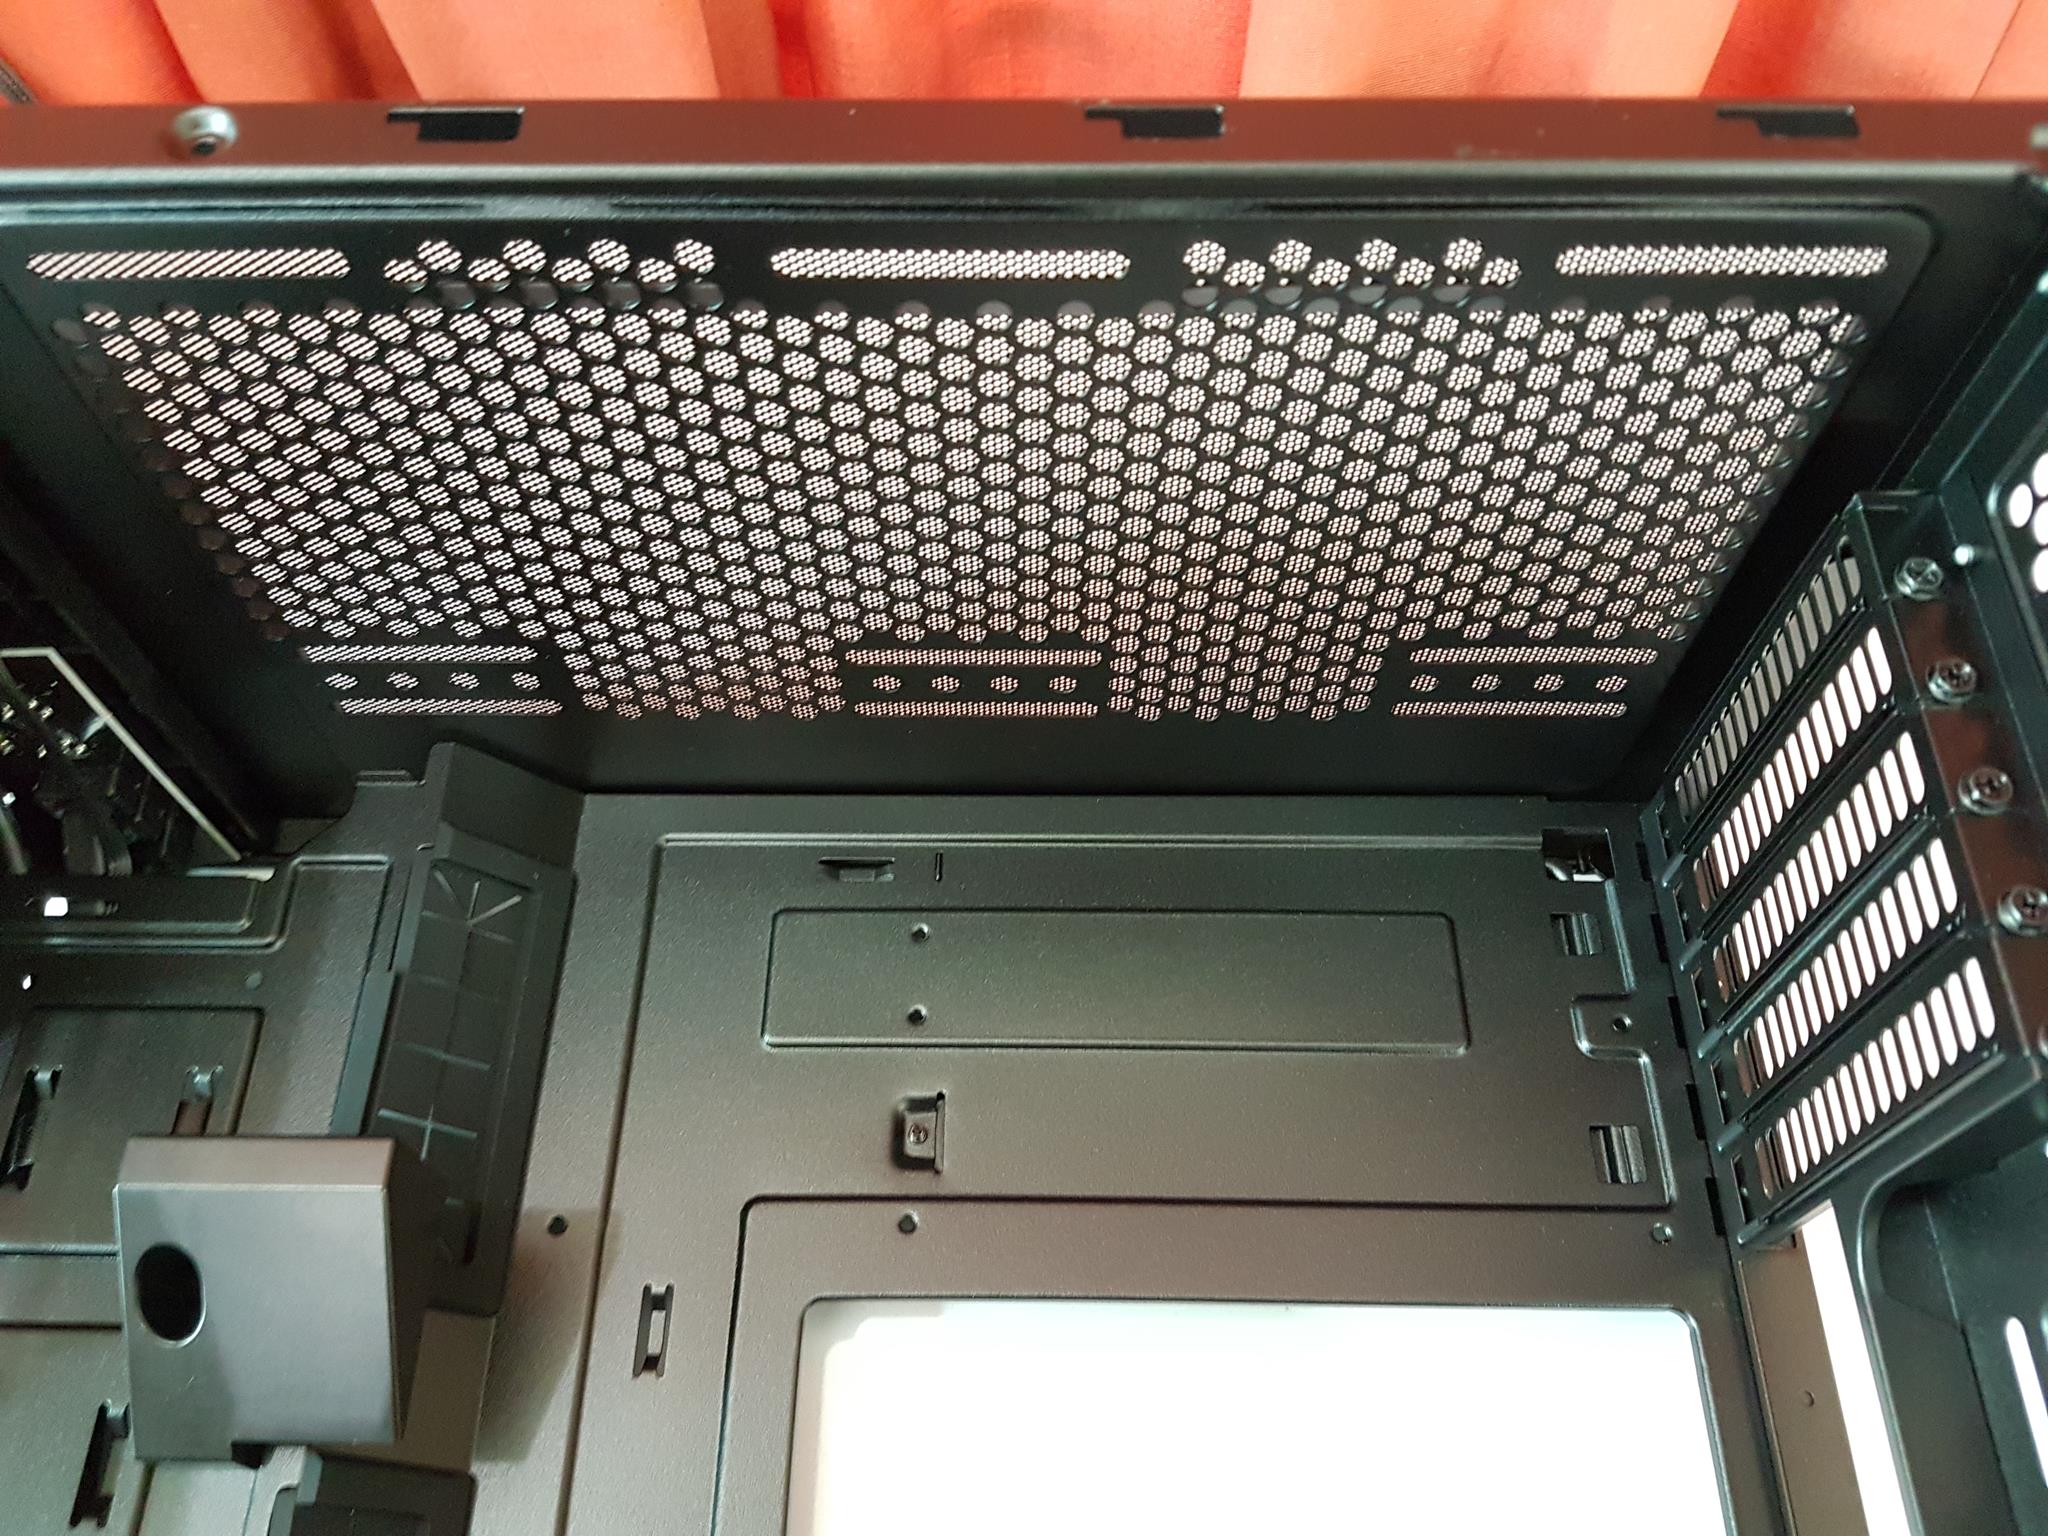
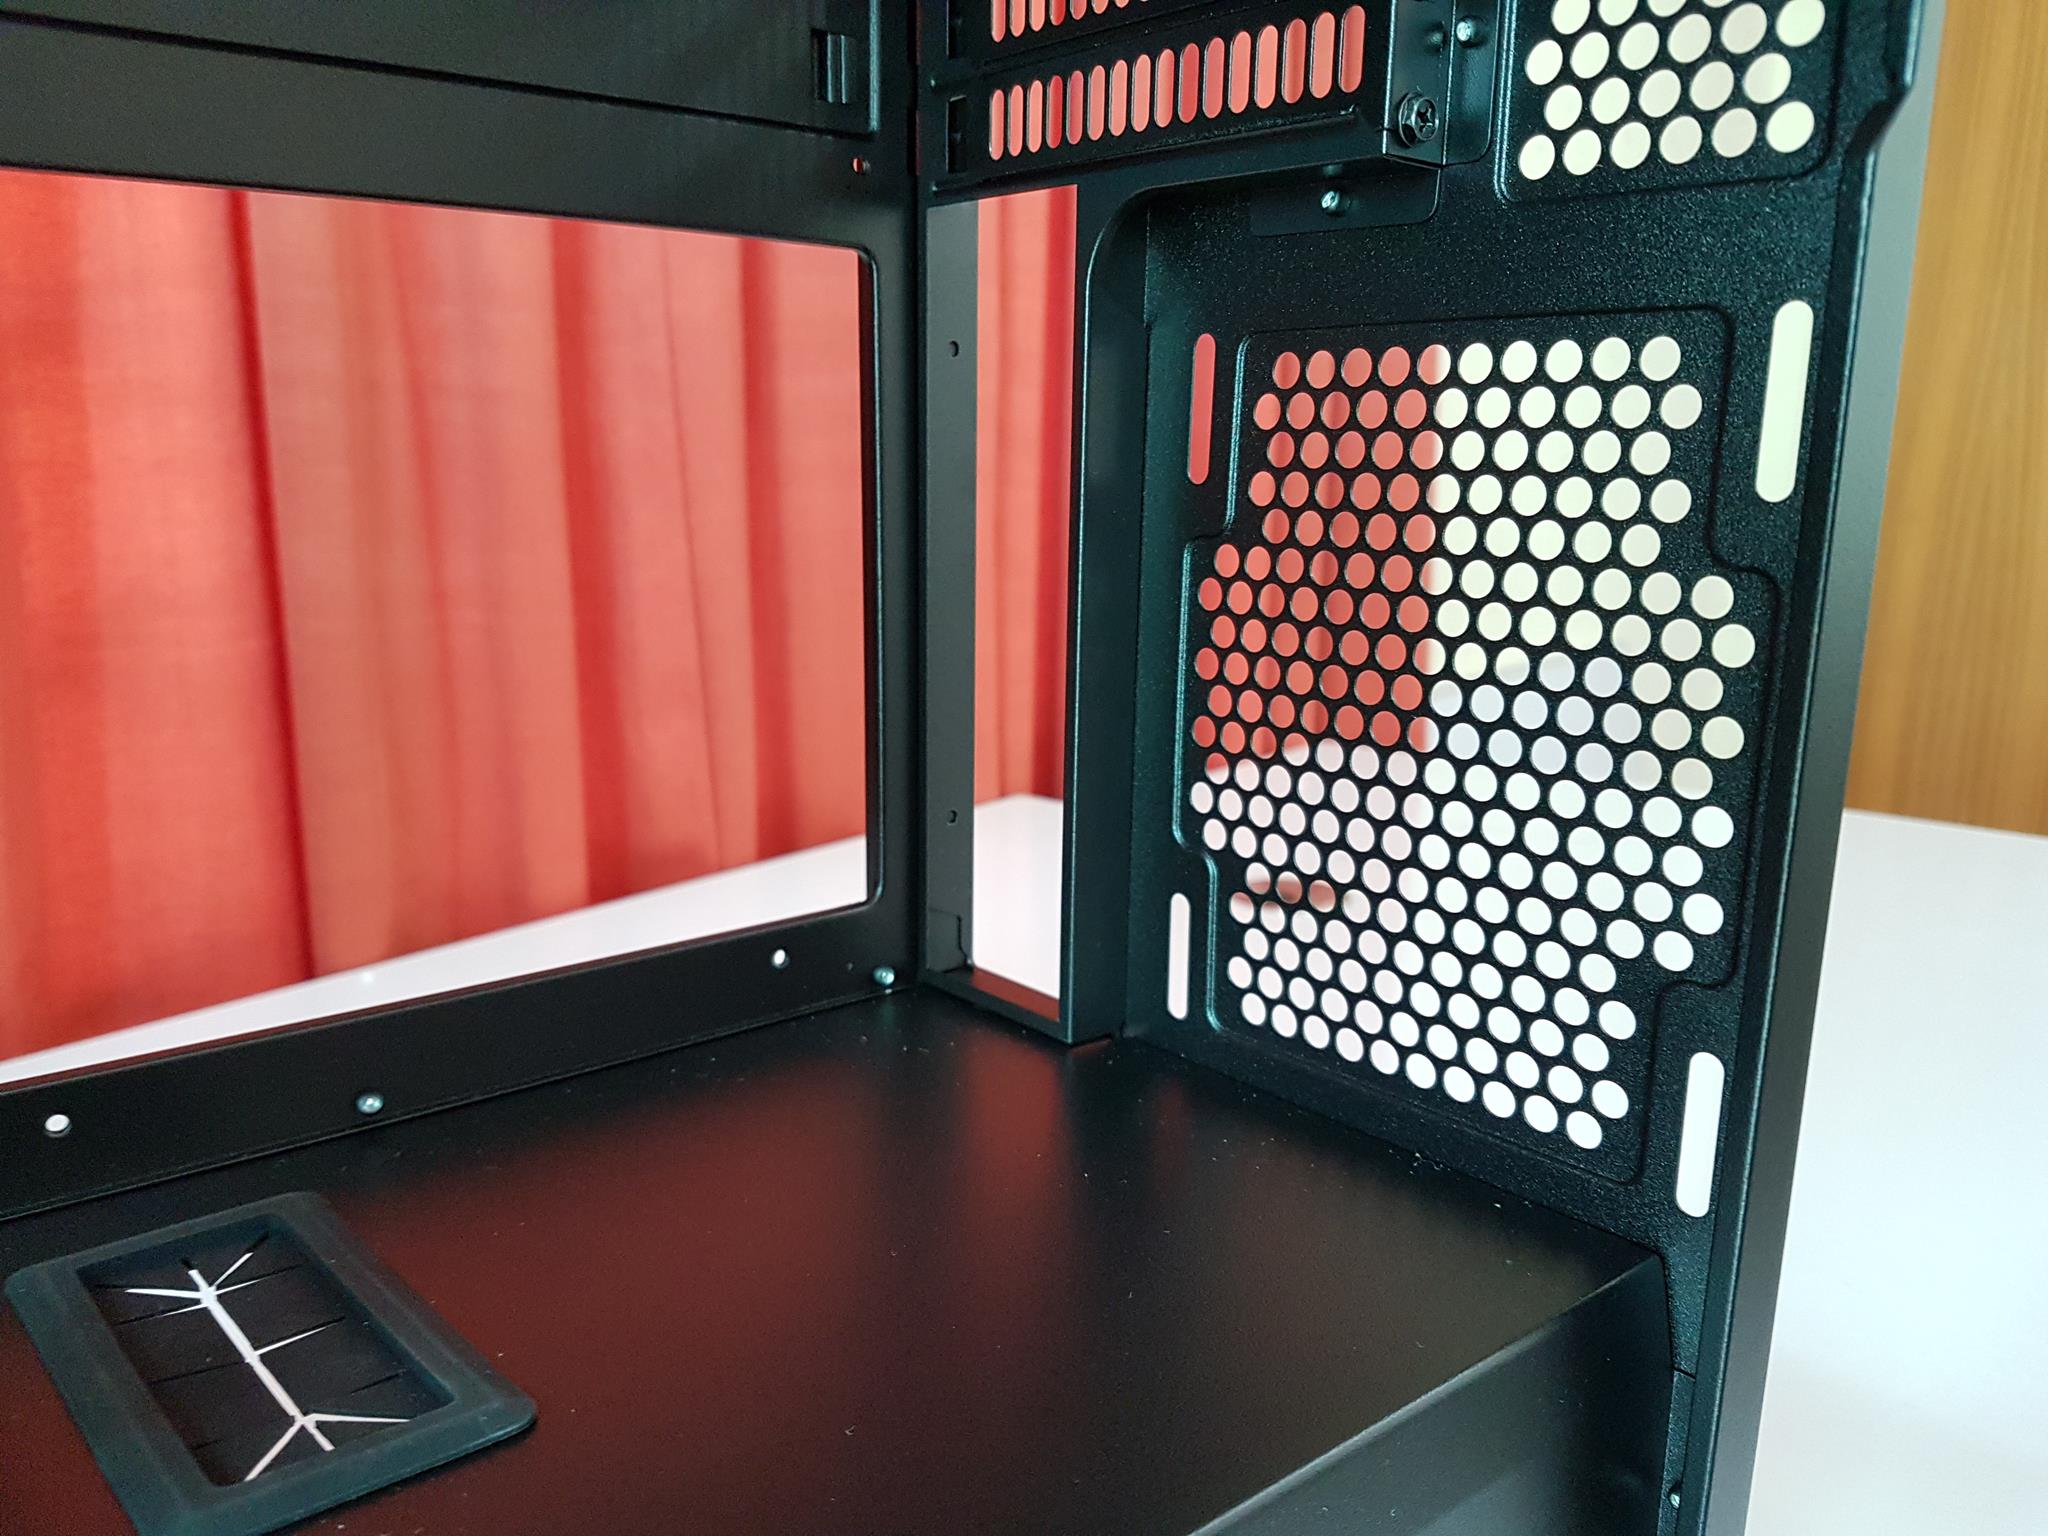
Taking a peek at the rear we could see 5 PCIe slot covers on the top right side. Keep in mind that it is an inverted layout. The left portion facing these slot covers is perforated to exhaust the hot air inside the chassis. There is a 120mm fan mount perforated area in the middle on the left side with 4 mounting slots. These slots would allow the user to adjust the height of the fan. The right side has a large cutout which is recessed. This is where the I/O shield of the motherboard is installed. The bottom has standard PS2 (ATX) PSU installation mounts. PSU is not included in the chassis.
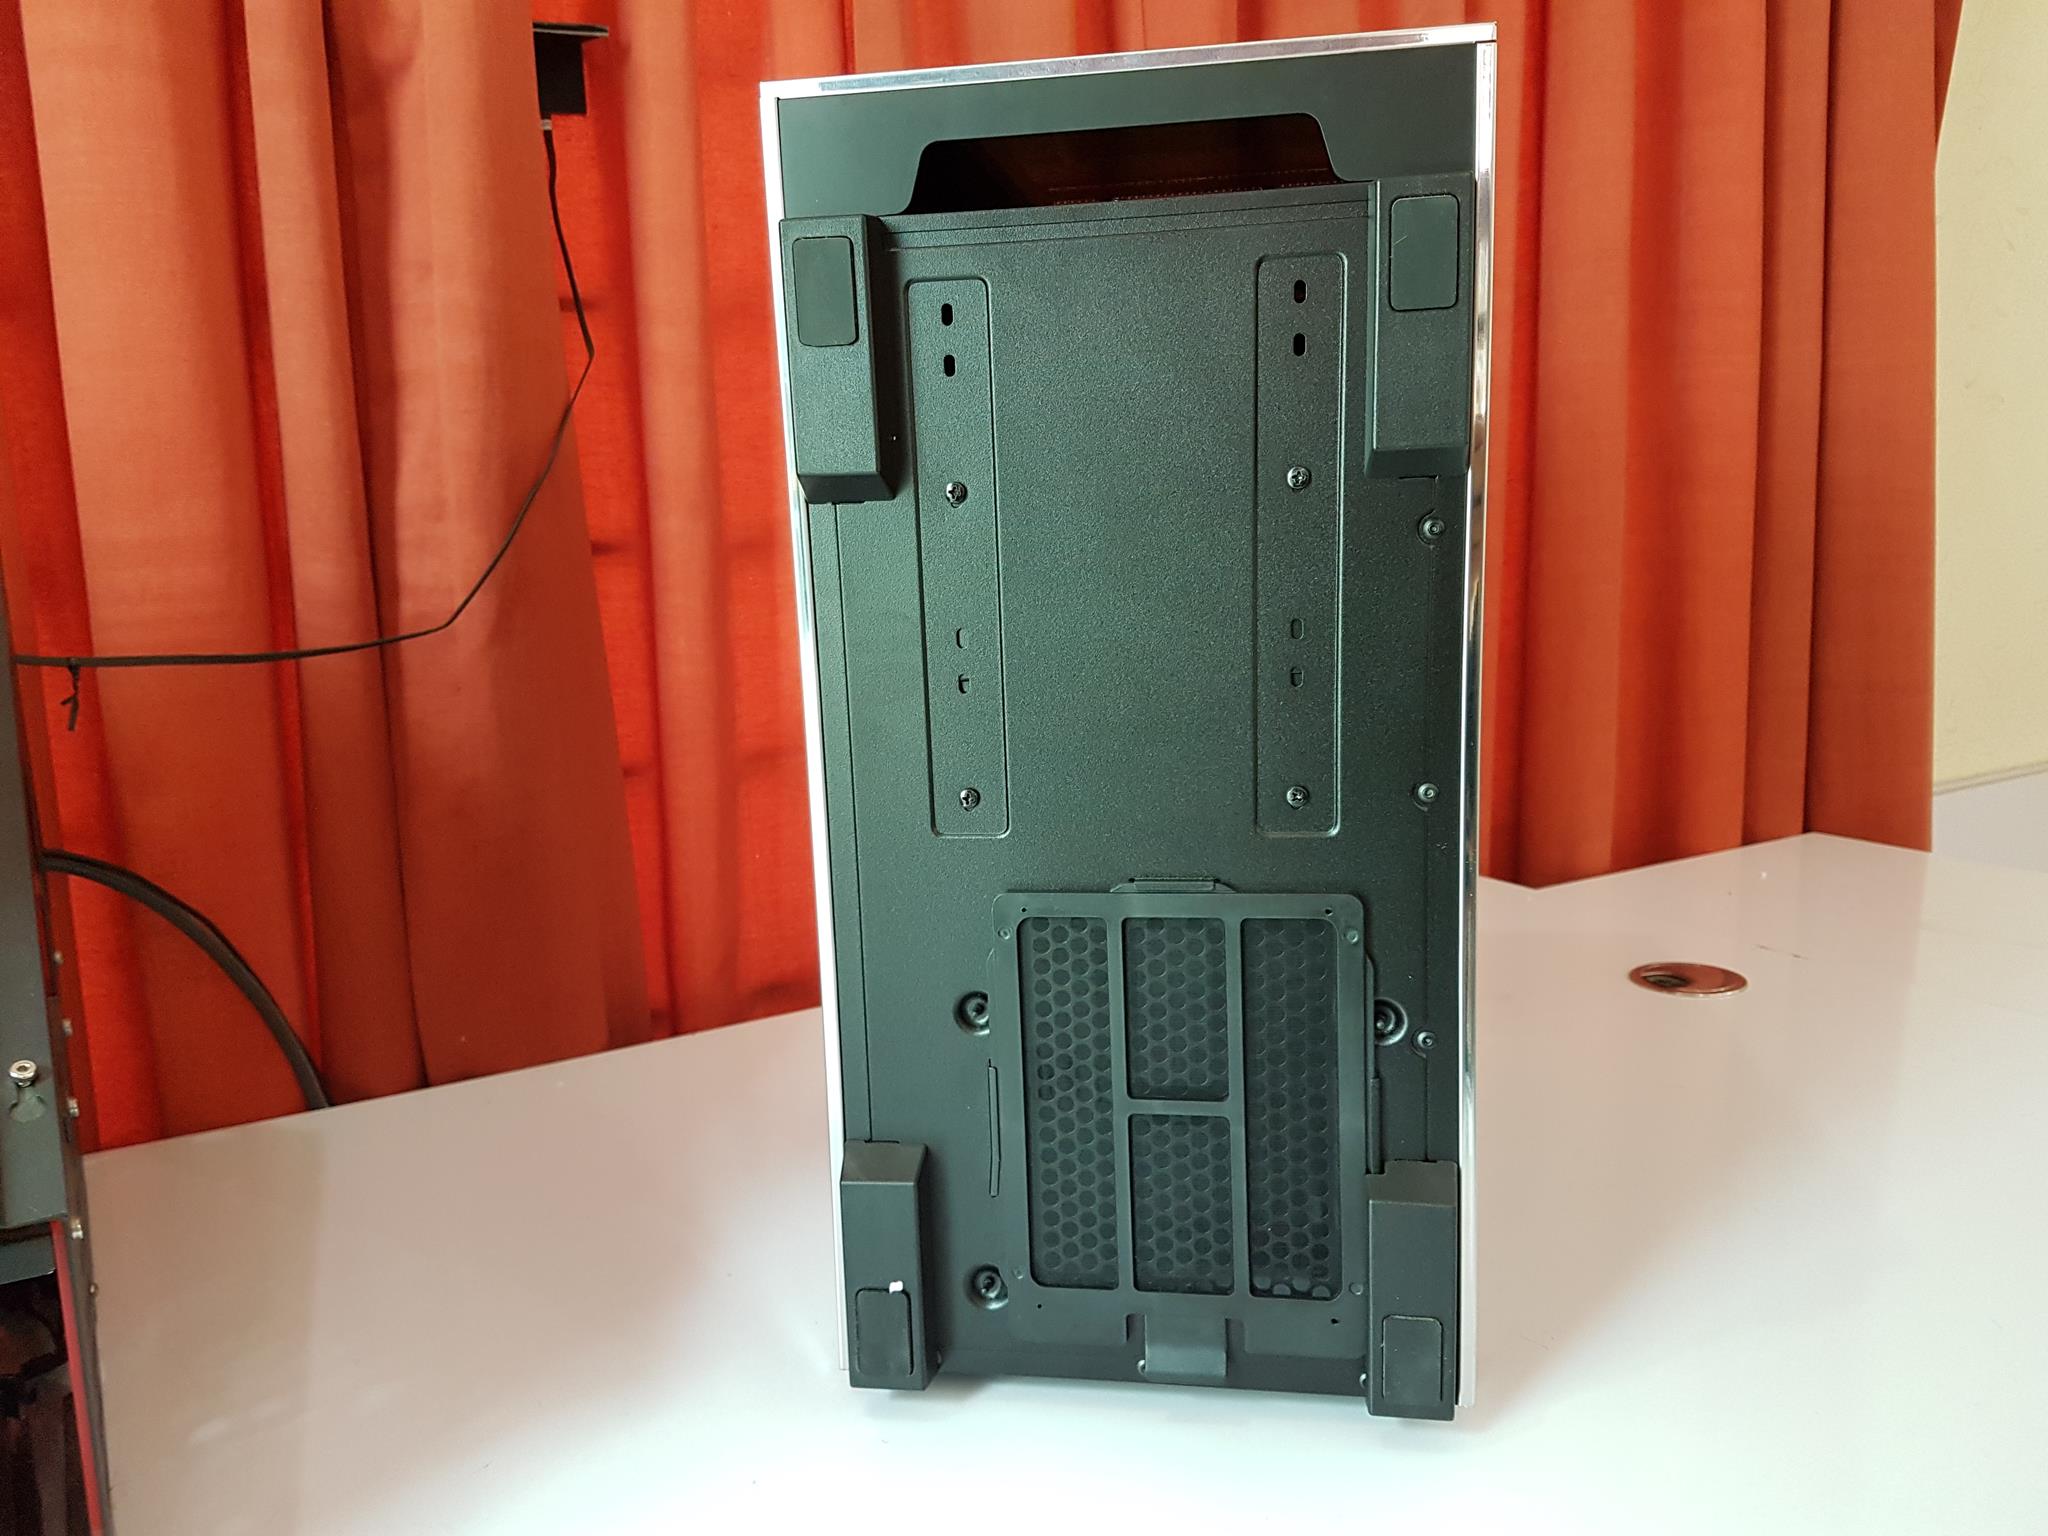
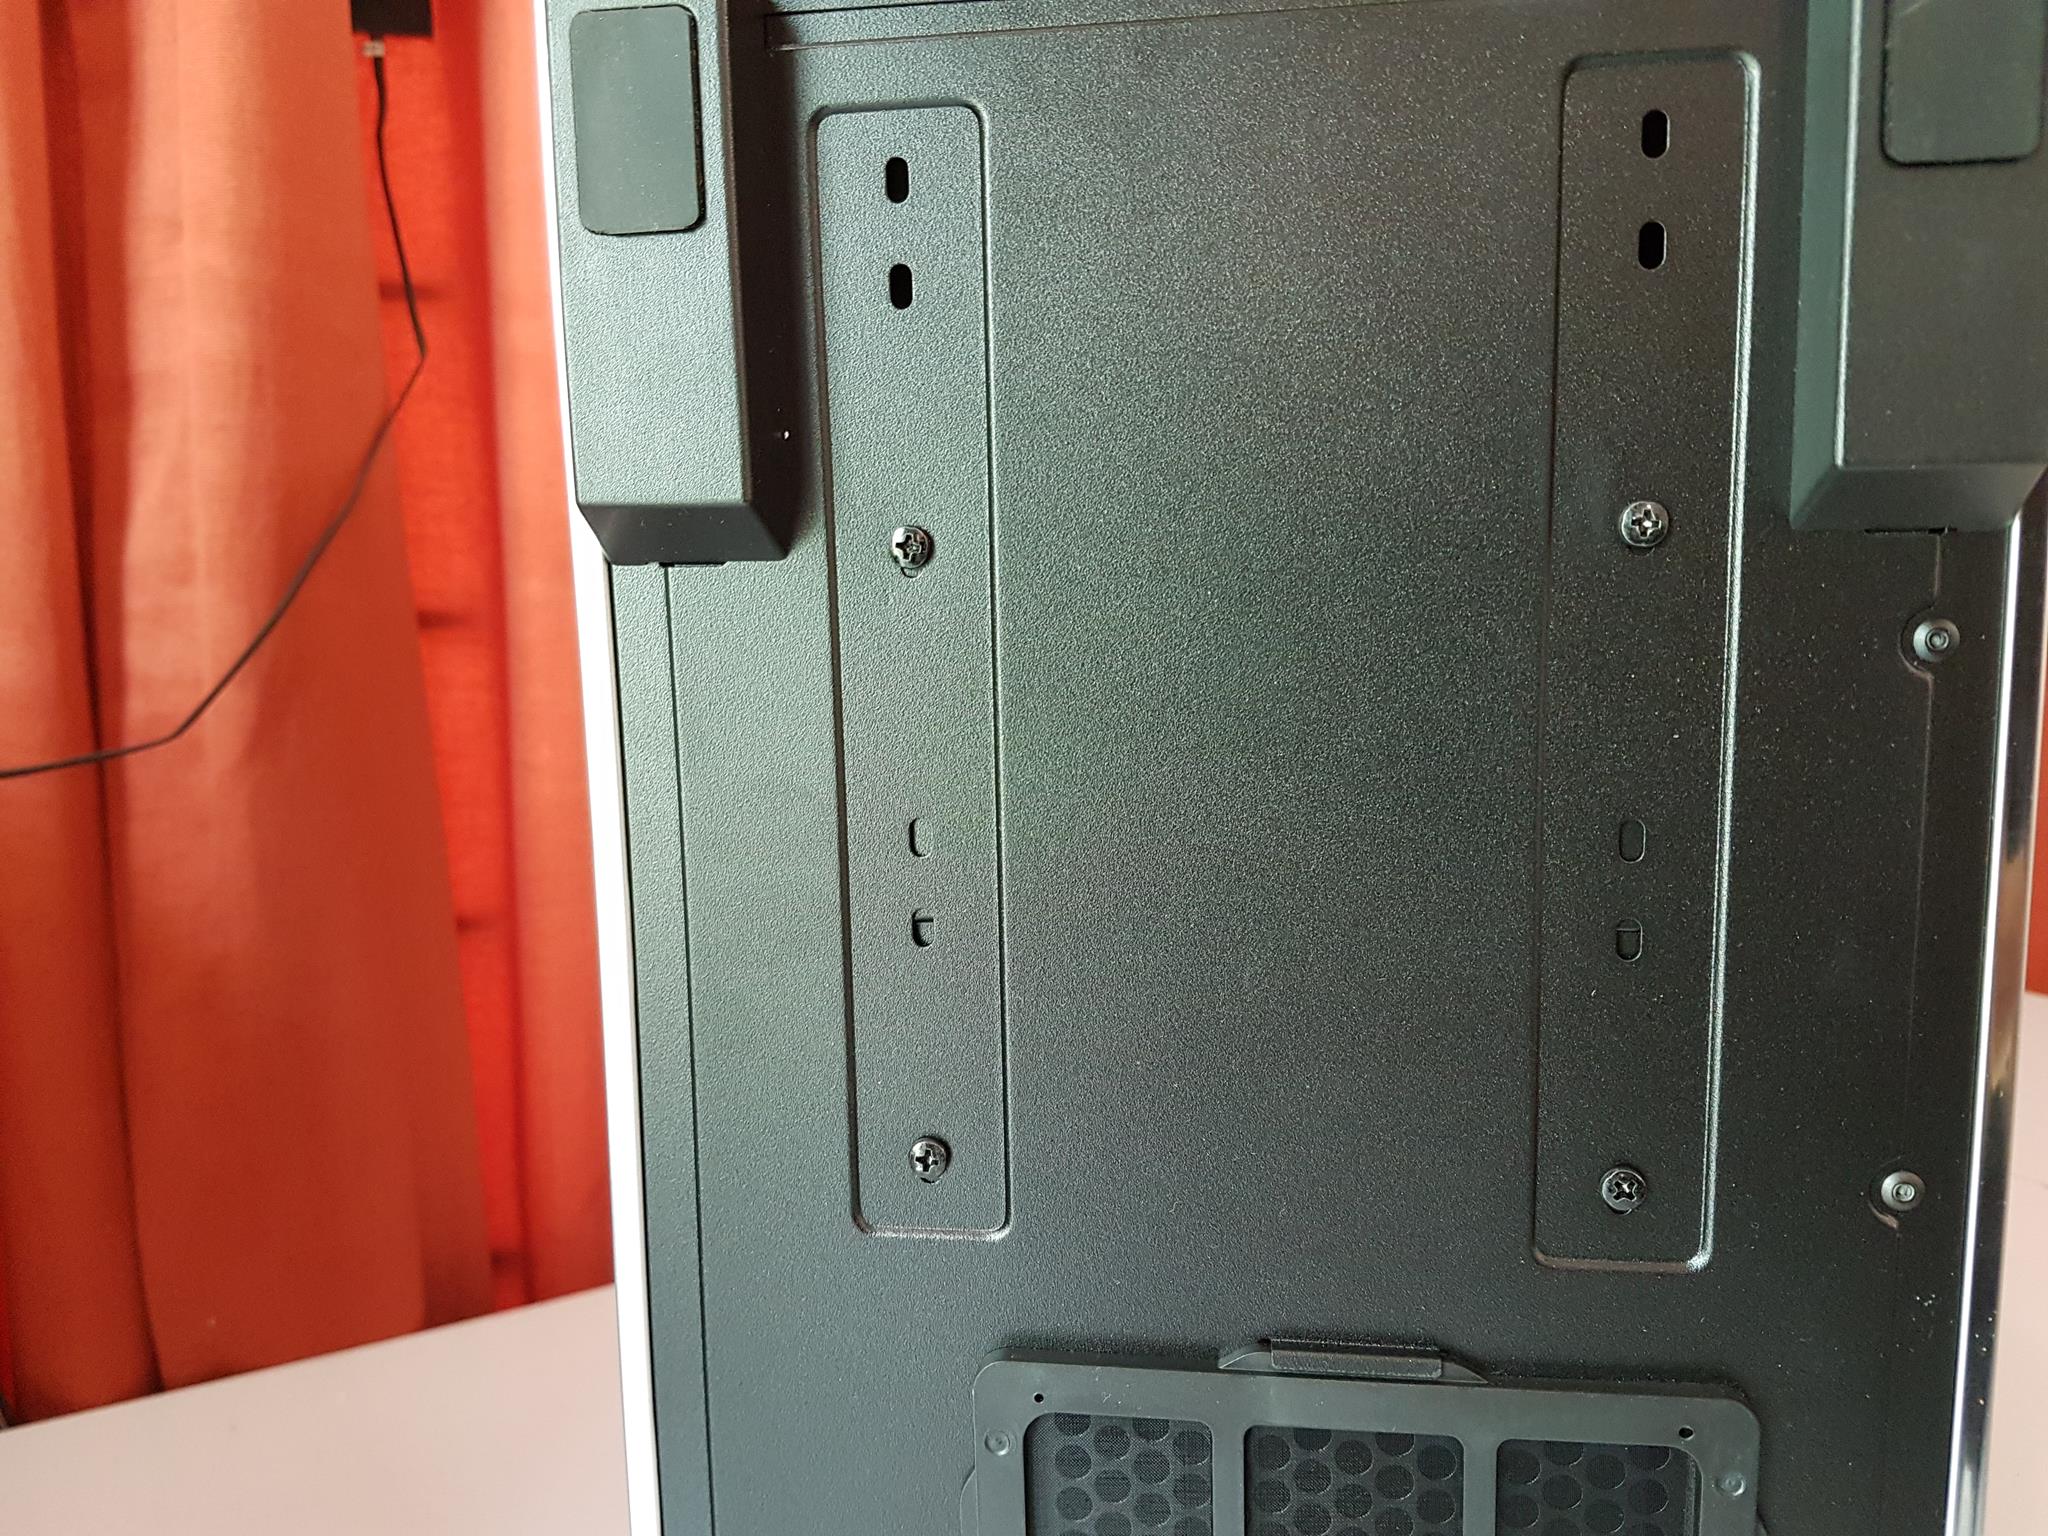
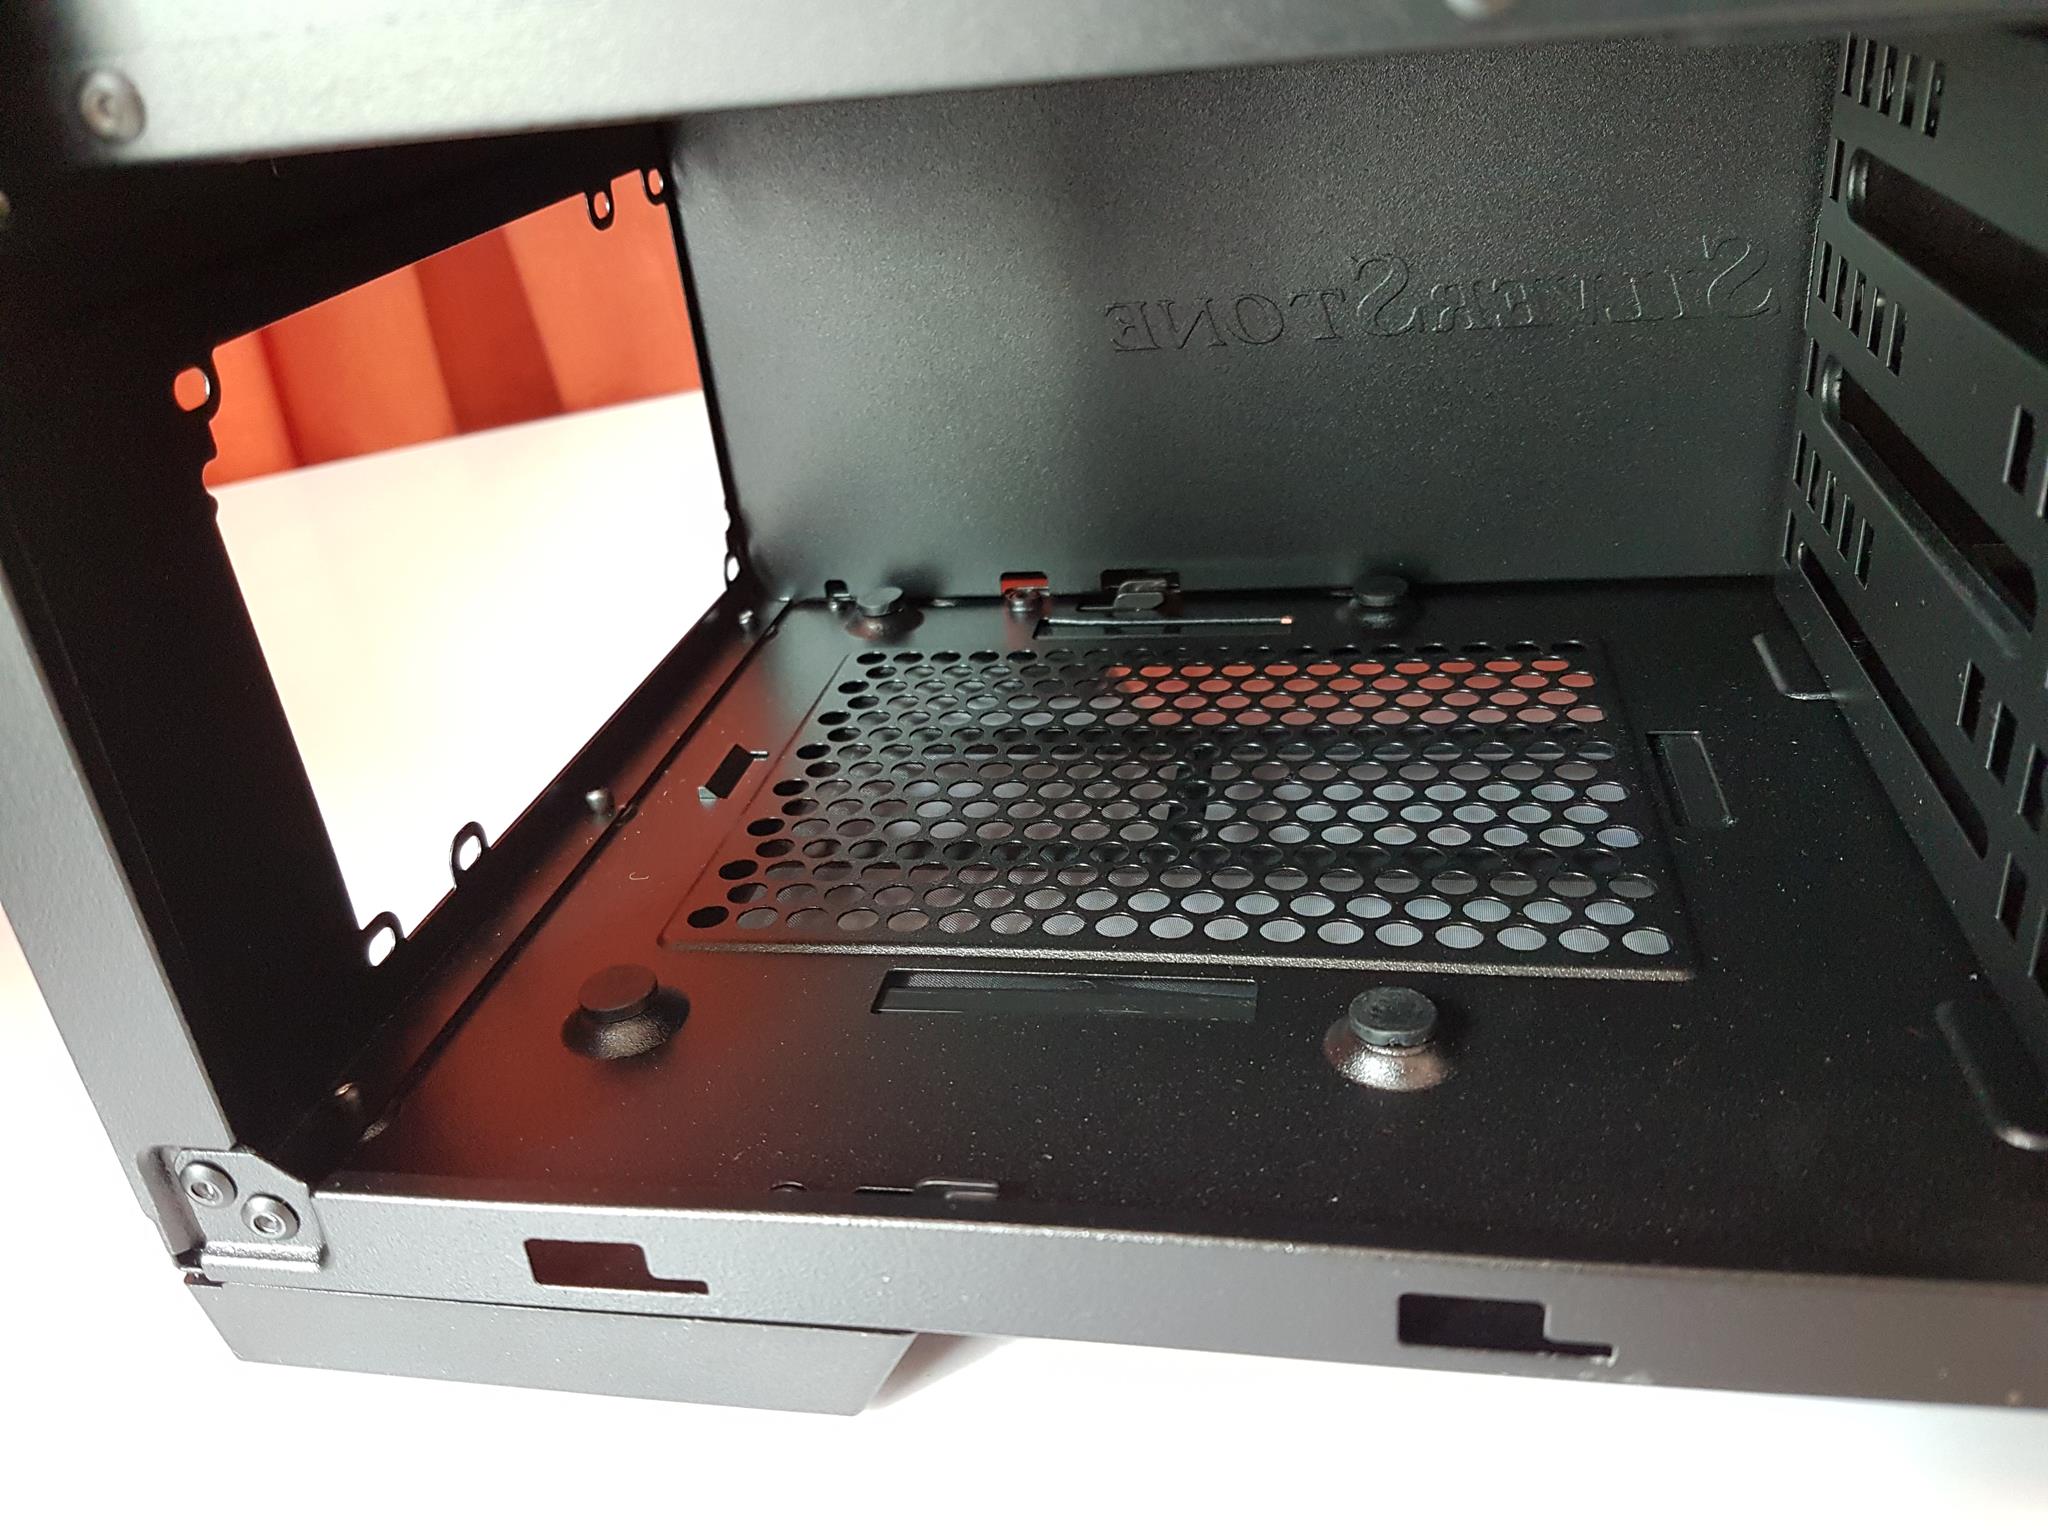
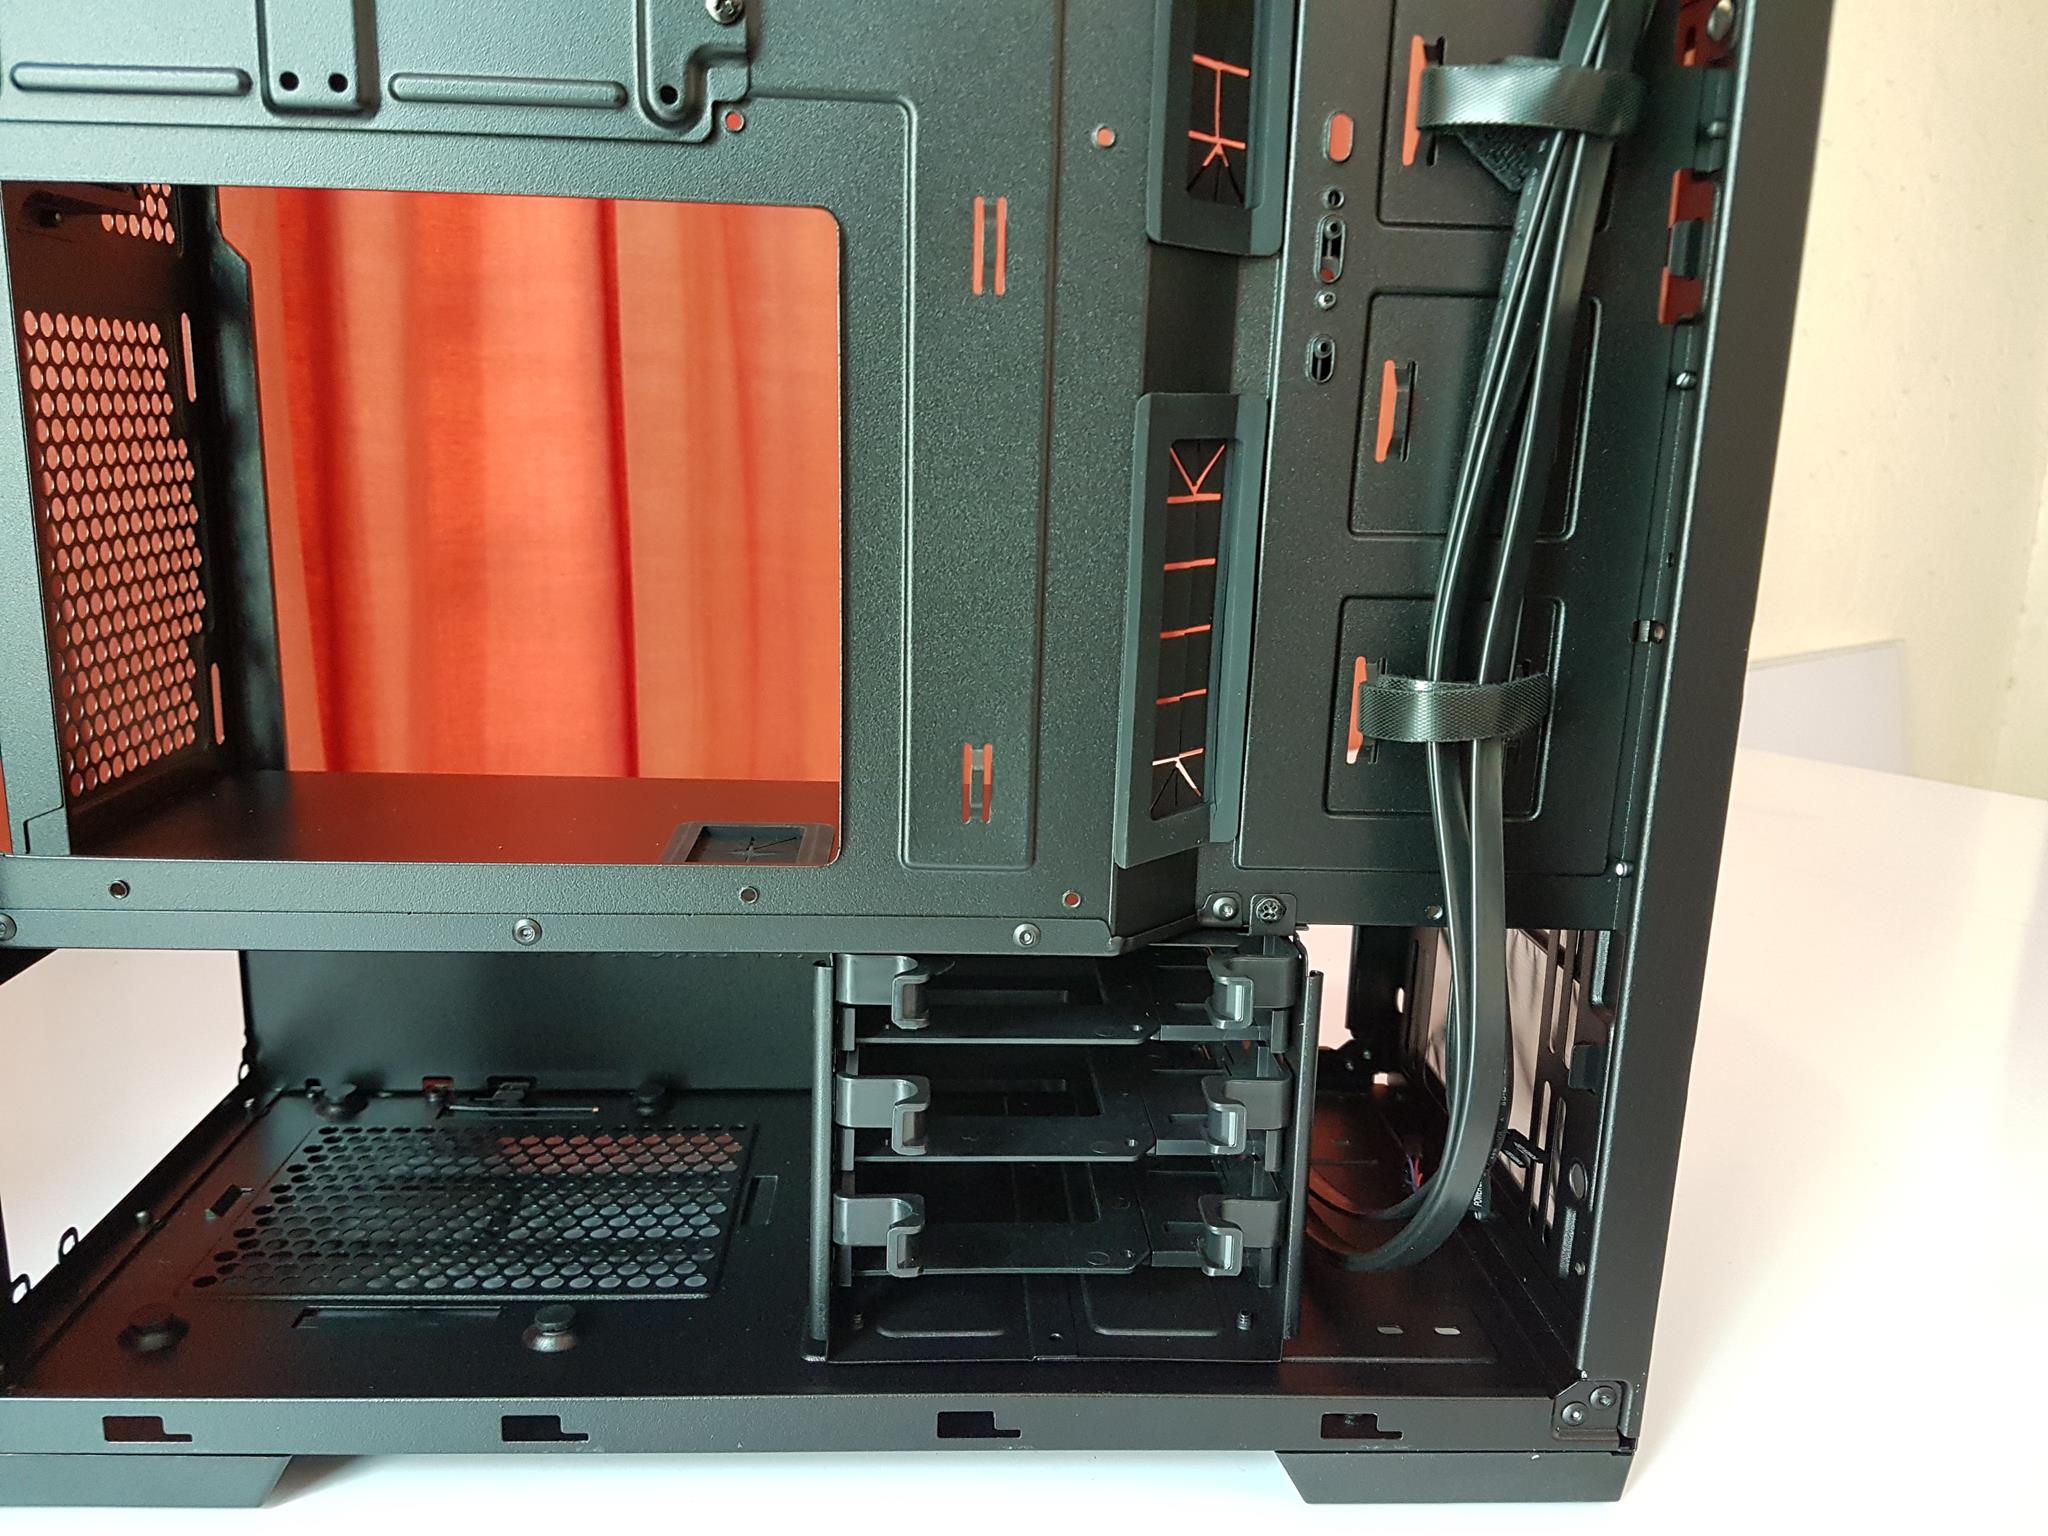
Let’s take a look at the bottom of the chassis. There are four feet with rubber pads to raise the height of the chassis from the surface by 16mm. The right side of the bottom shows a removable dust filter. It has a sliding design and there is a latch that is used to lock/unlock it on the mount. Taking it off will show the perforated area for ventilation. The left side is showing 4 screws and four more mounting holes. These screws are securing the HDD cage to the frame of the chassis. The cage can be adjusted in three pre-defined positions to accommodate more PSU of more length than 160mm. To do so, the user is required to remove these screws, adjust the position of the cage with respect to the PSU and the front mounted fans/bracket and install the cage on the drilled positions. Other than these drilled mounts there is no other way around to adjust the cage. The mounting slots would have been nice instead of the mounting holes for a more convenient application. The far left side is showing a large cutout. This is the bottom section from where the air intake is ensured.
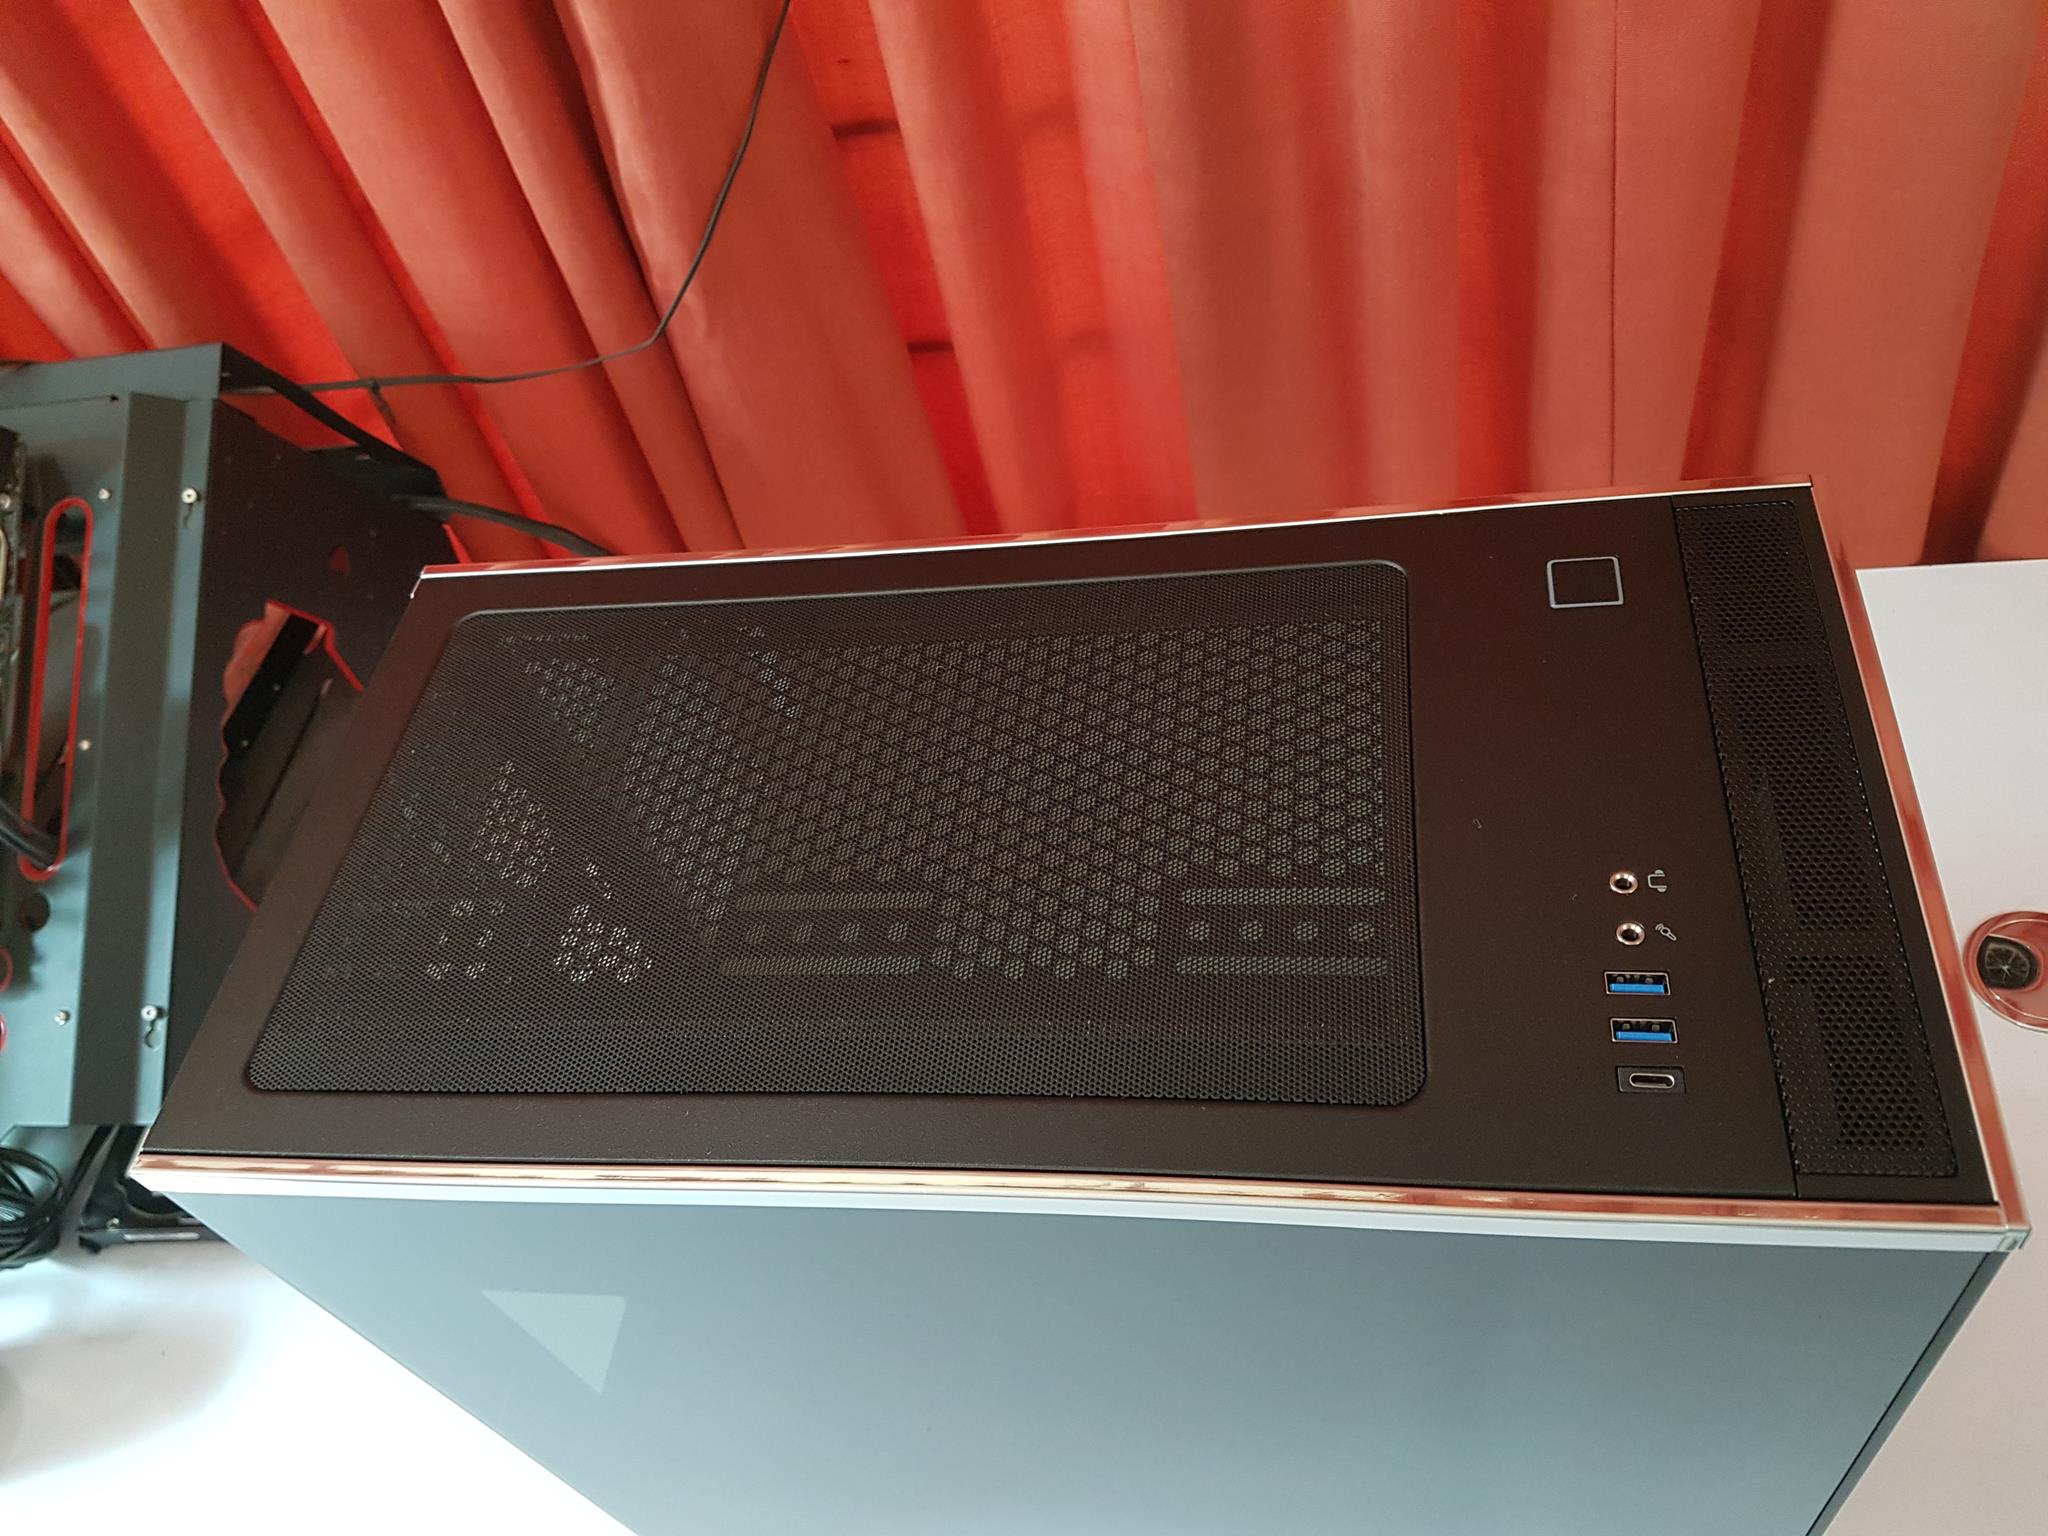
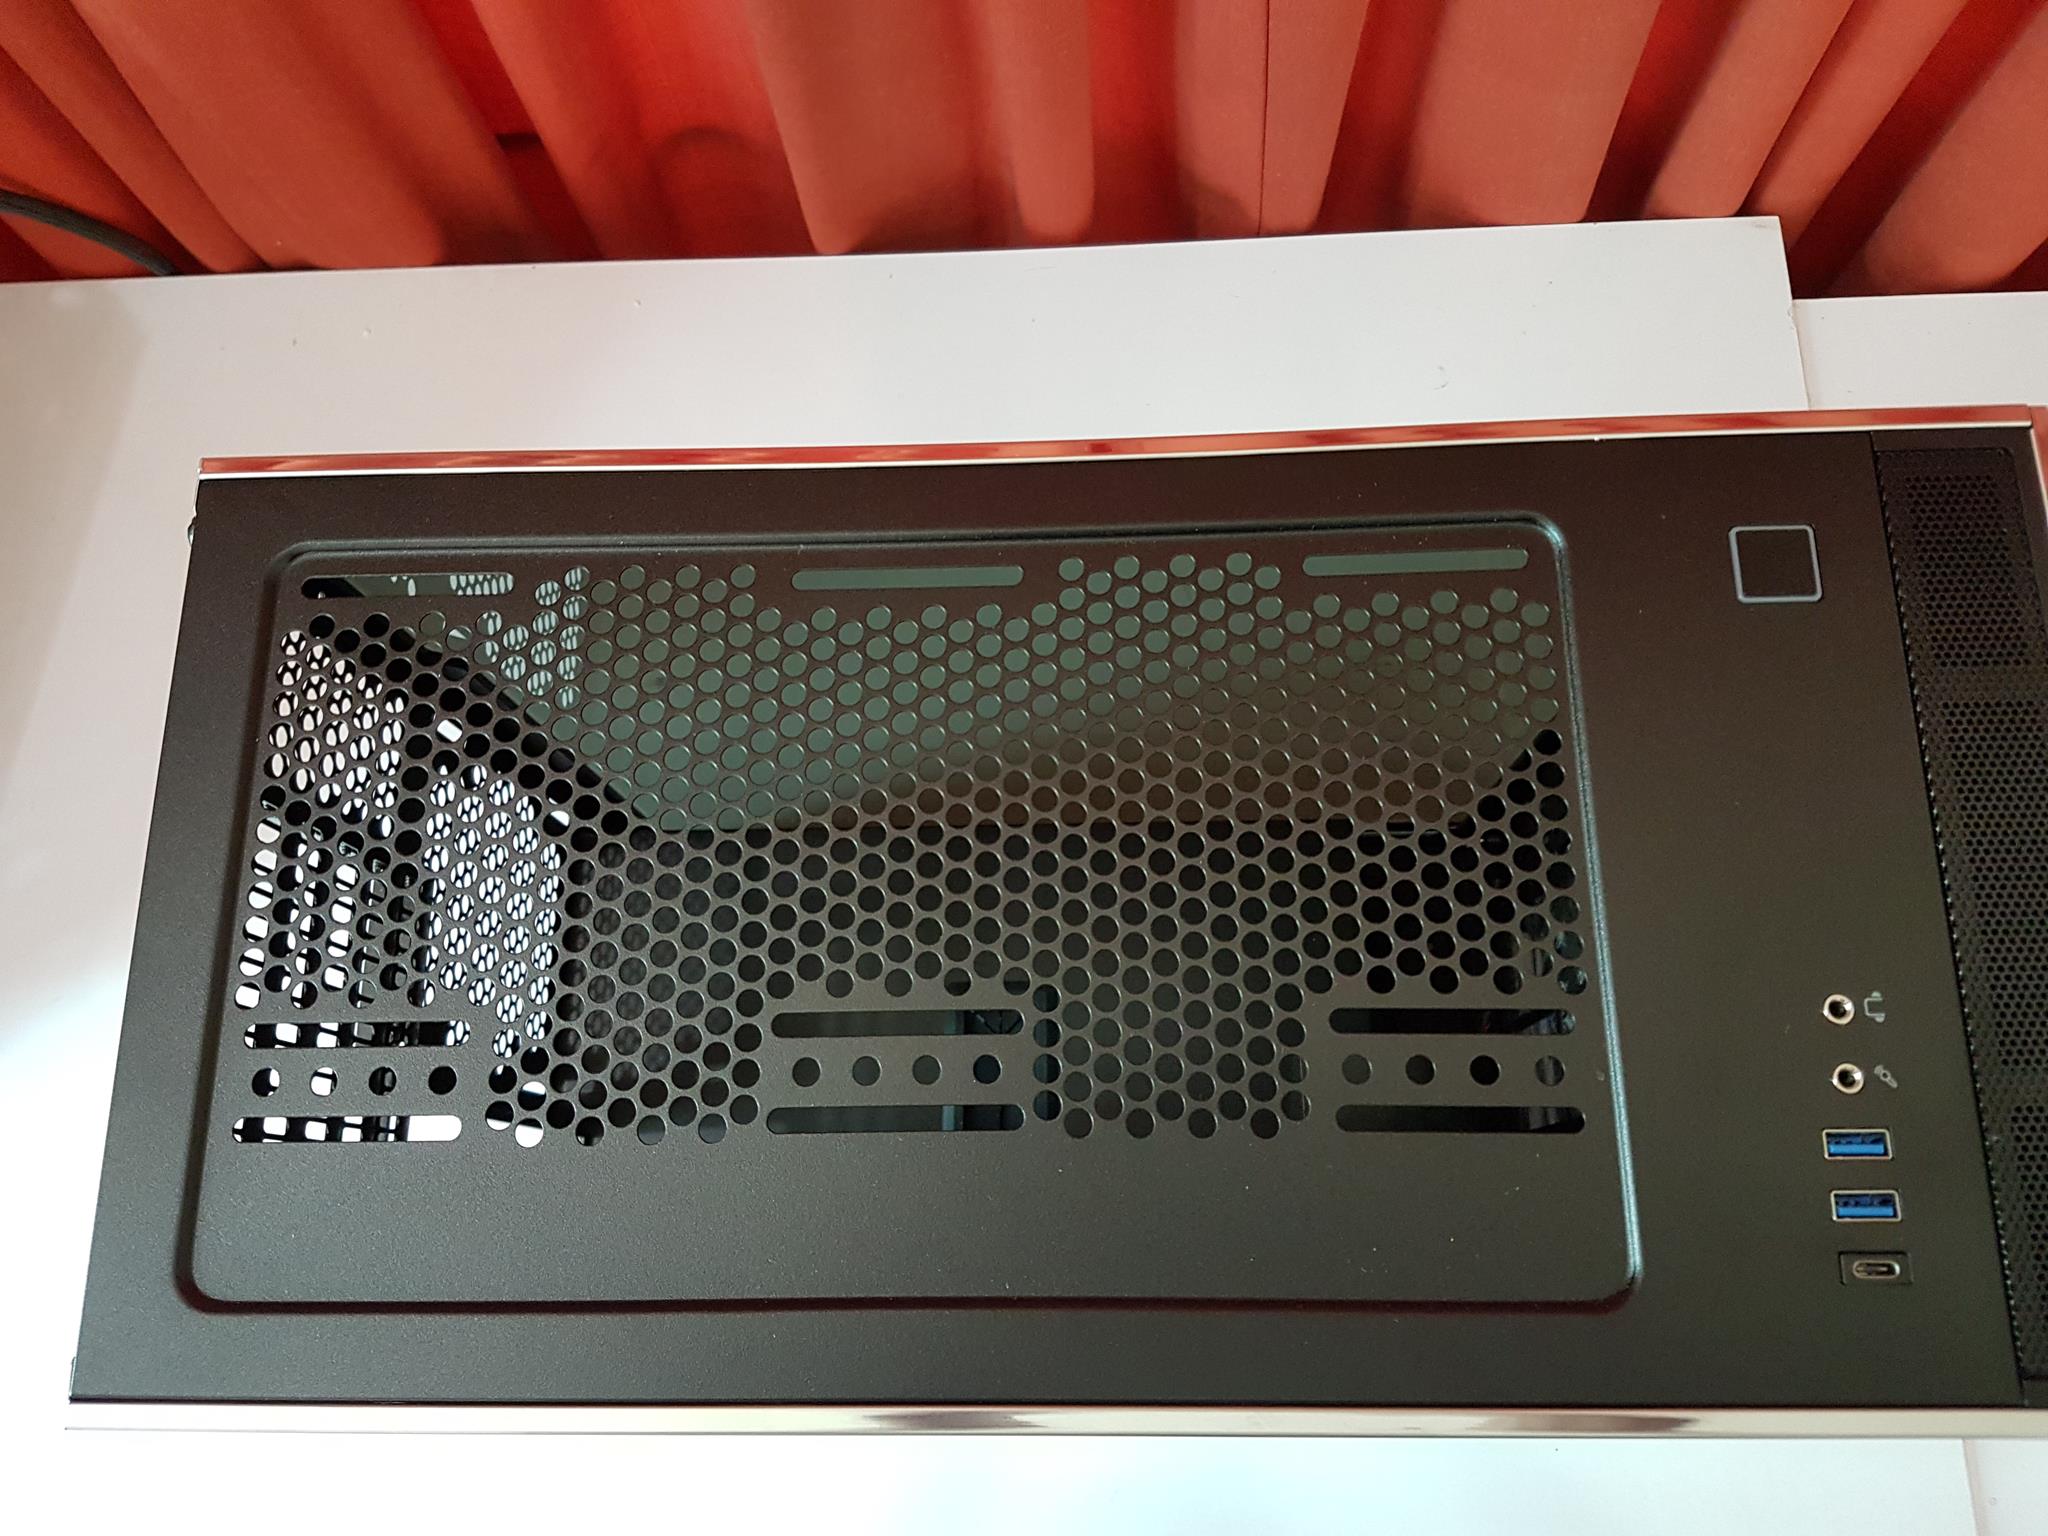
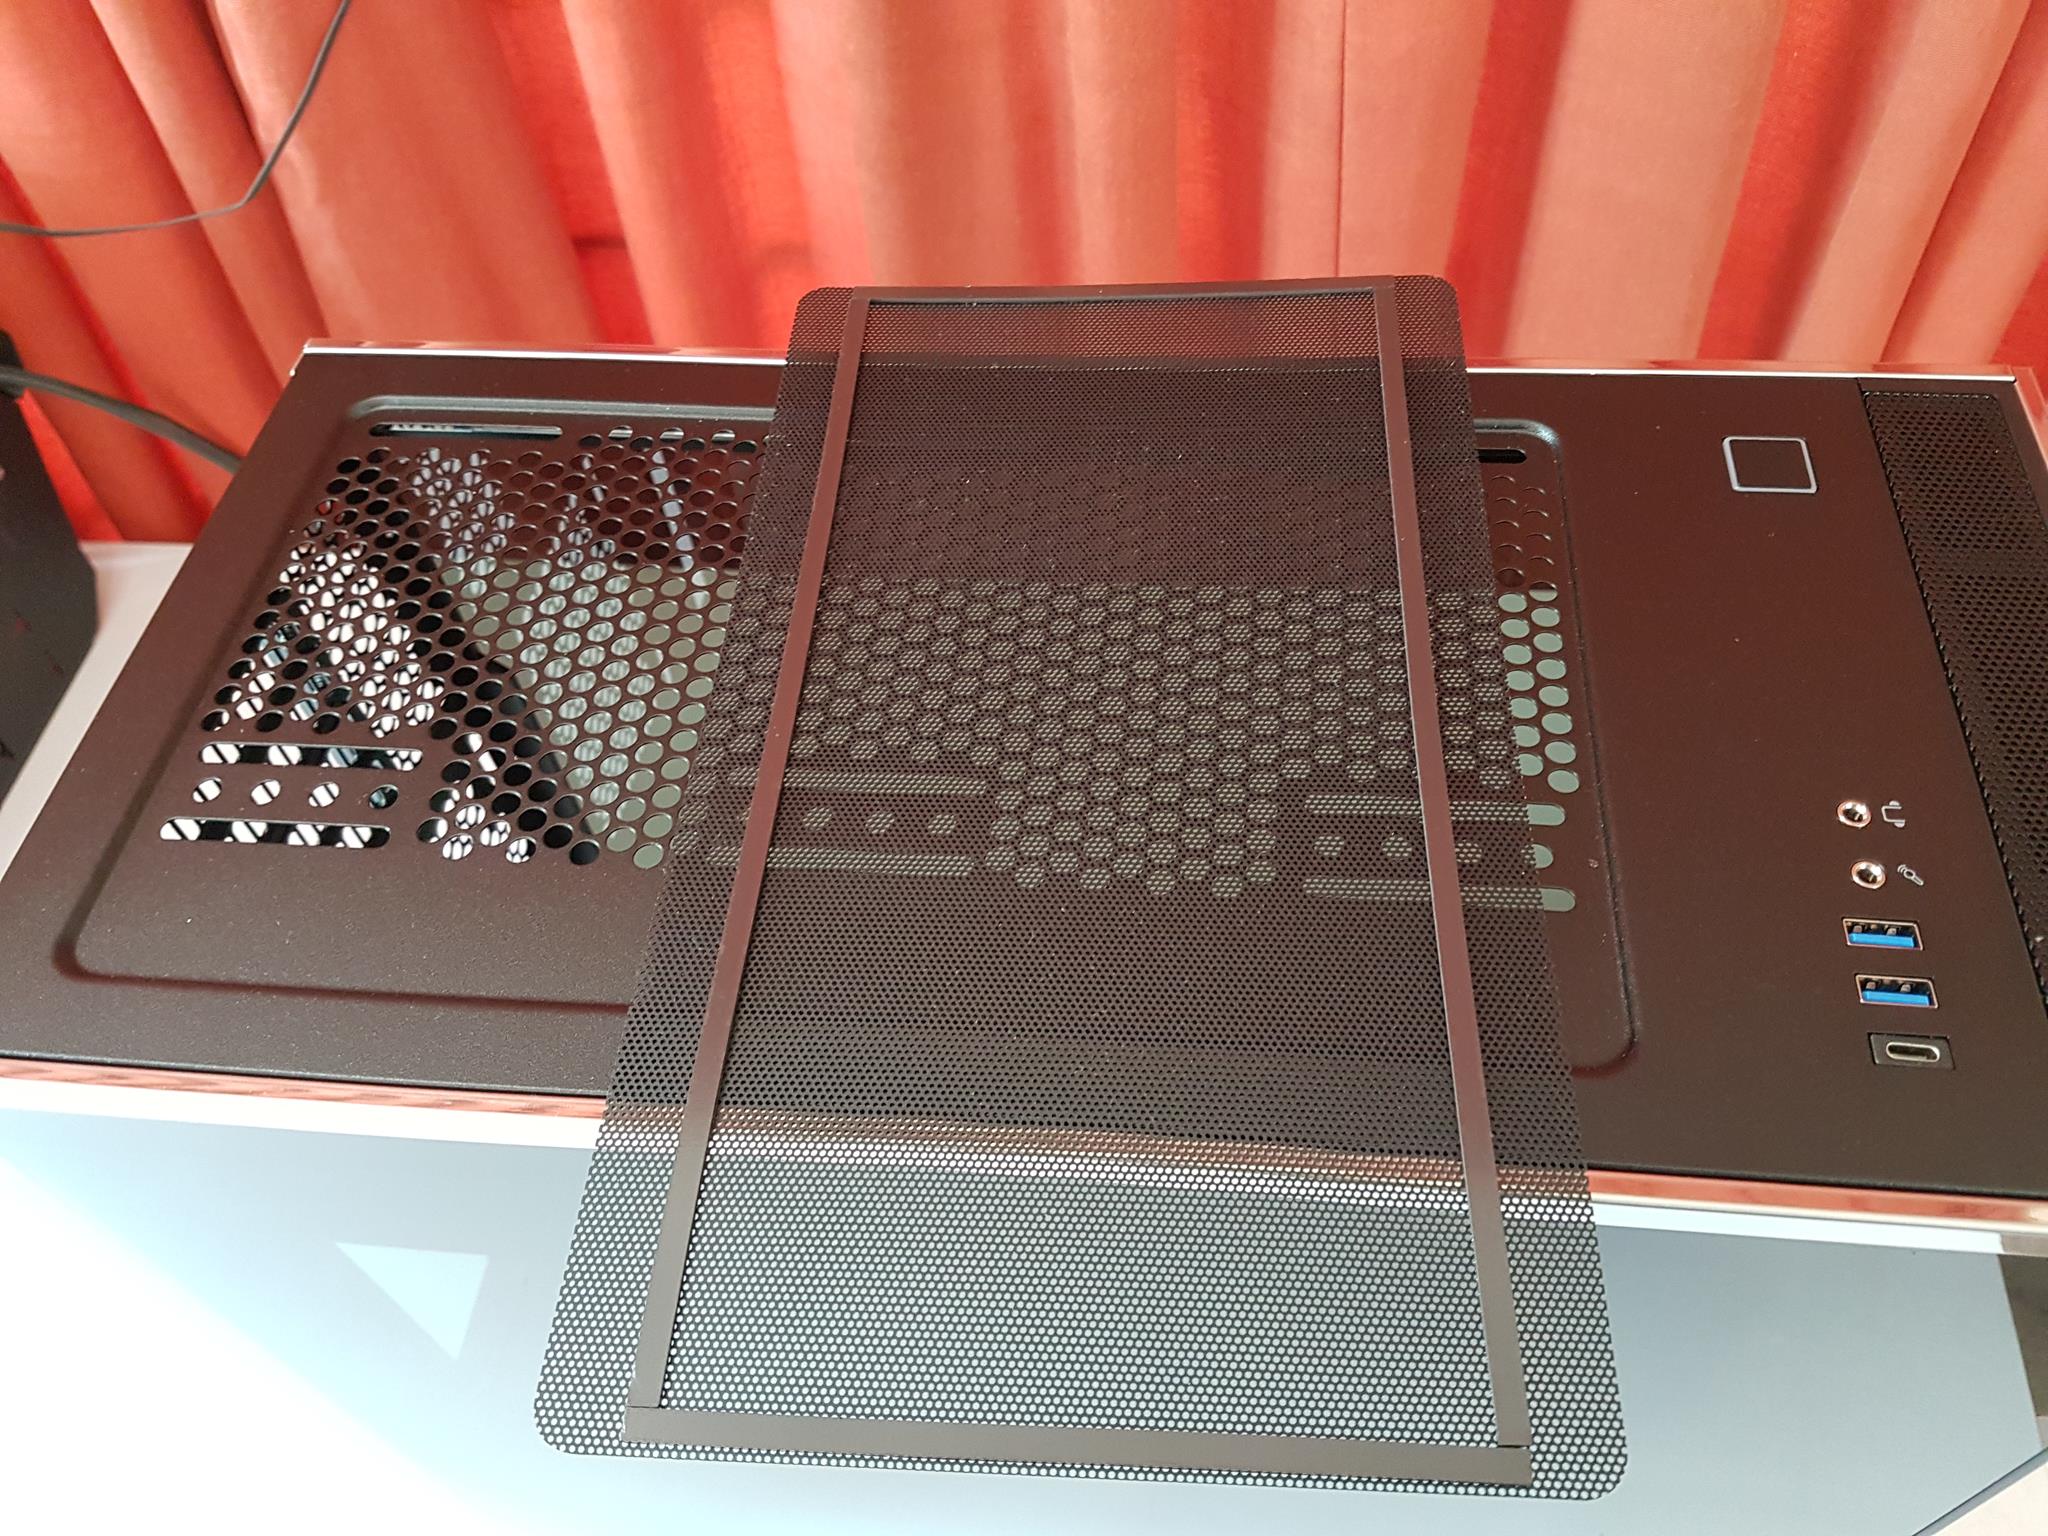
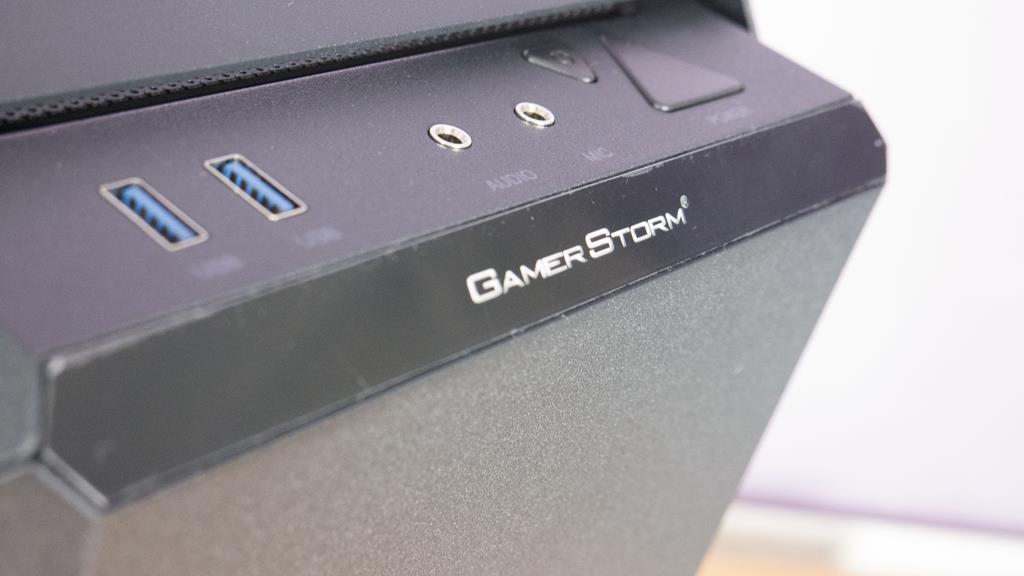
Now, it is time to take a look at the top side of the chassis. Starting from the front side, there is a large size cutout with mesh cover for air intake. It is a part of the front cover and not of the chassis frame. It is followed by the I/O ports on the left side and the beautifully designed power button on the right side. I/O panel has Audio jacks, two USB 3.0 ports, and a USB 3.1 Gen 1 Type-C port. It is nice to see a USB 3.1 port though a Gen 2 port should have been nice. There is a large size magnetic dust filter covering the top of the fan mounting slots.
The user can mount up to two 120mm or 140mm fans and 240mm radiator or 280mm radiator up top in this chassis. Provision of a magnetic dust filter is a plus. So far, SilverStone has left no corner uncovered. The use of slot approach overall speaks for itself as the user is not limited that would have come by the pre-drilled mounting holes. The only observation that I made during my time with this chassis from the top side is that it can become tedious sitting the magnetic dust filter with proper alignment. By my count, this aid in alignment should have come by the chassis design itself but the user has to move the filter around to make it sit in proper alignment.
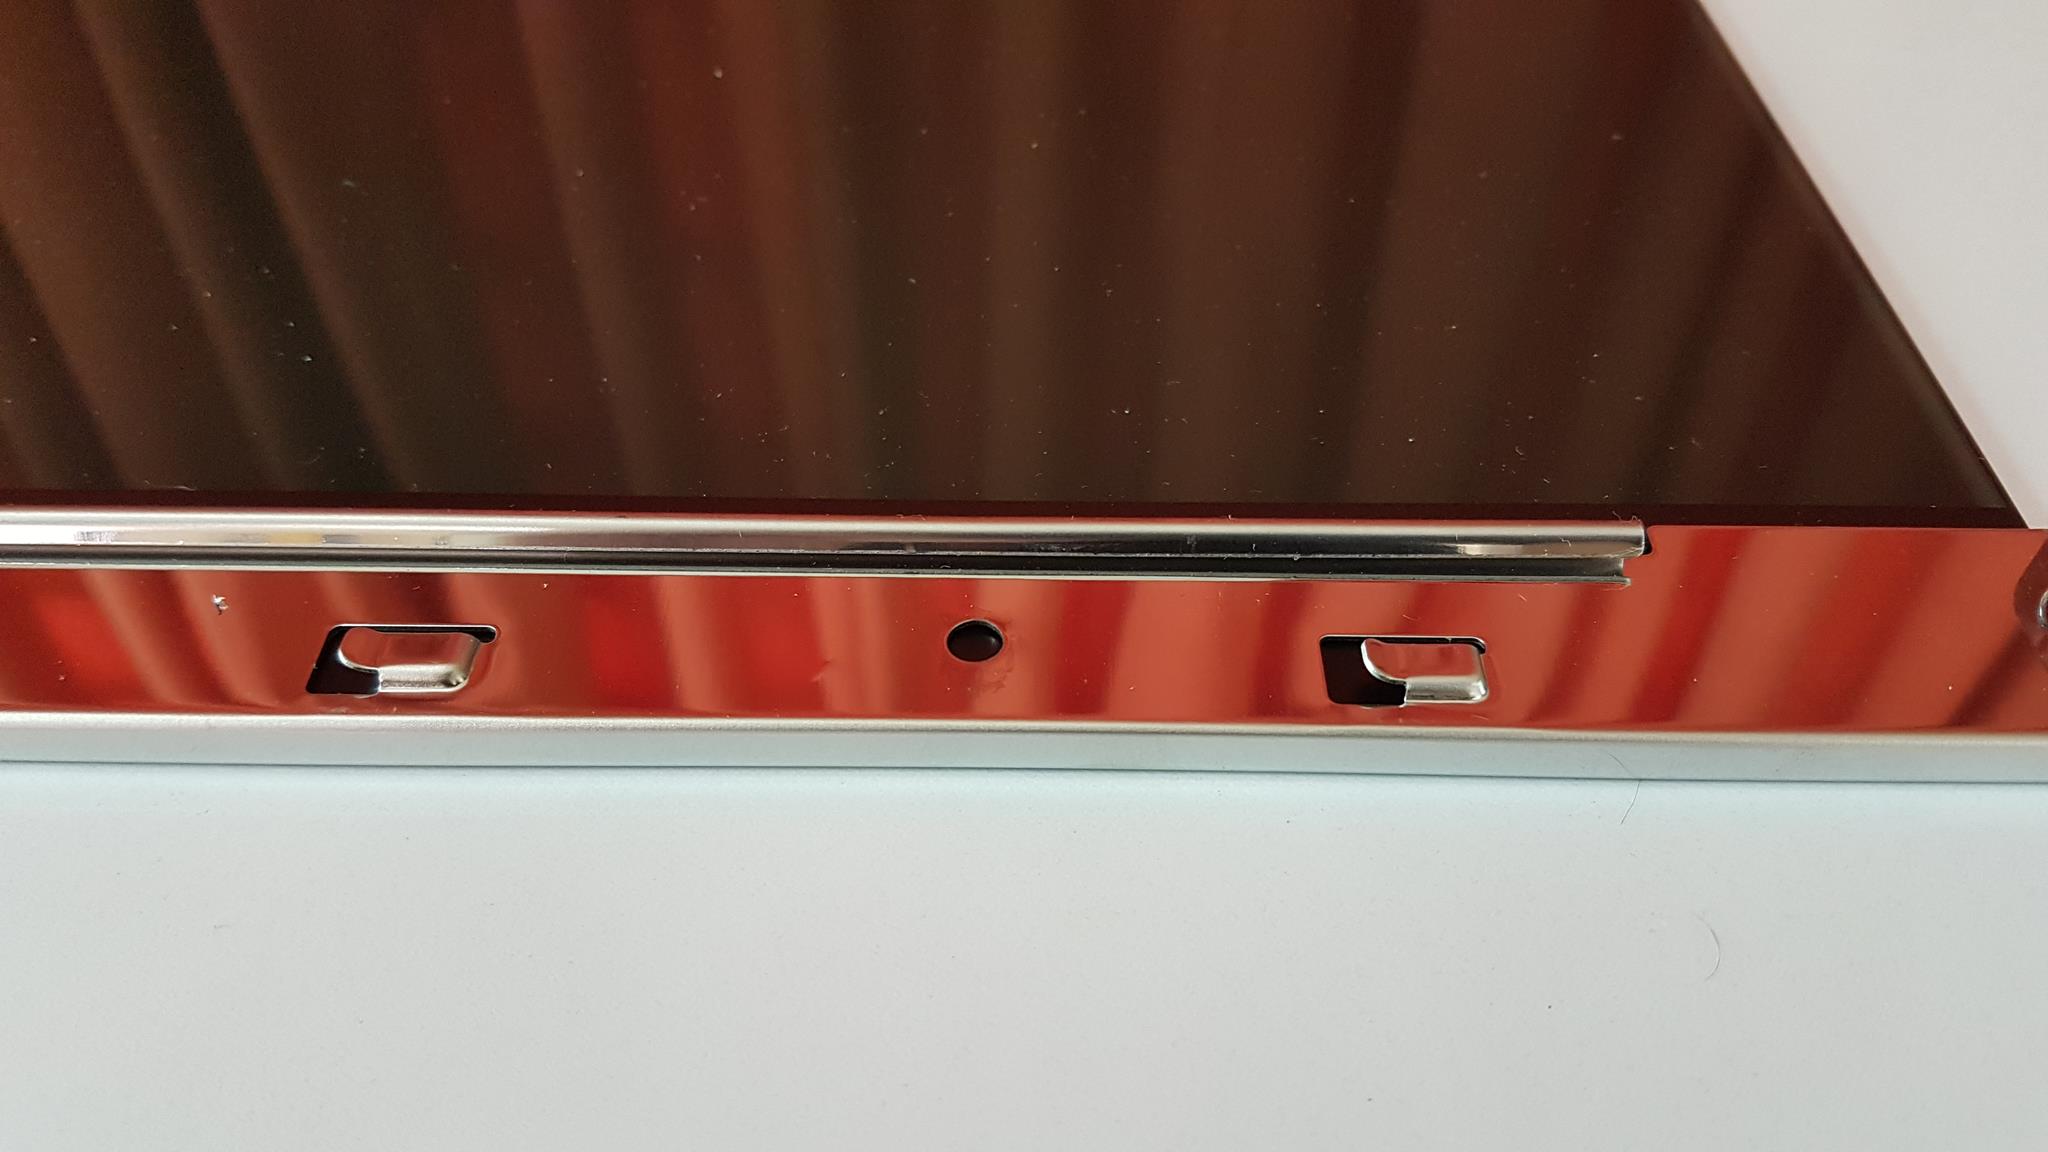
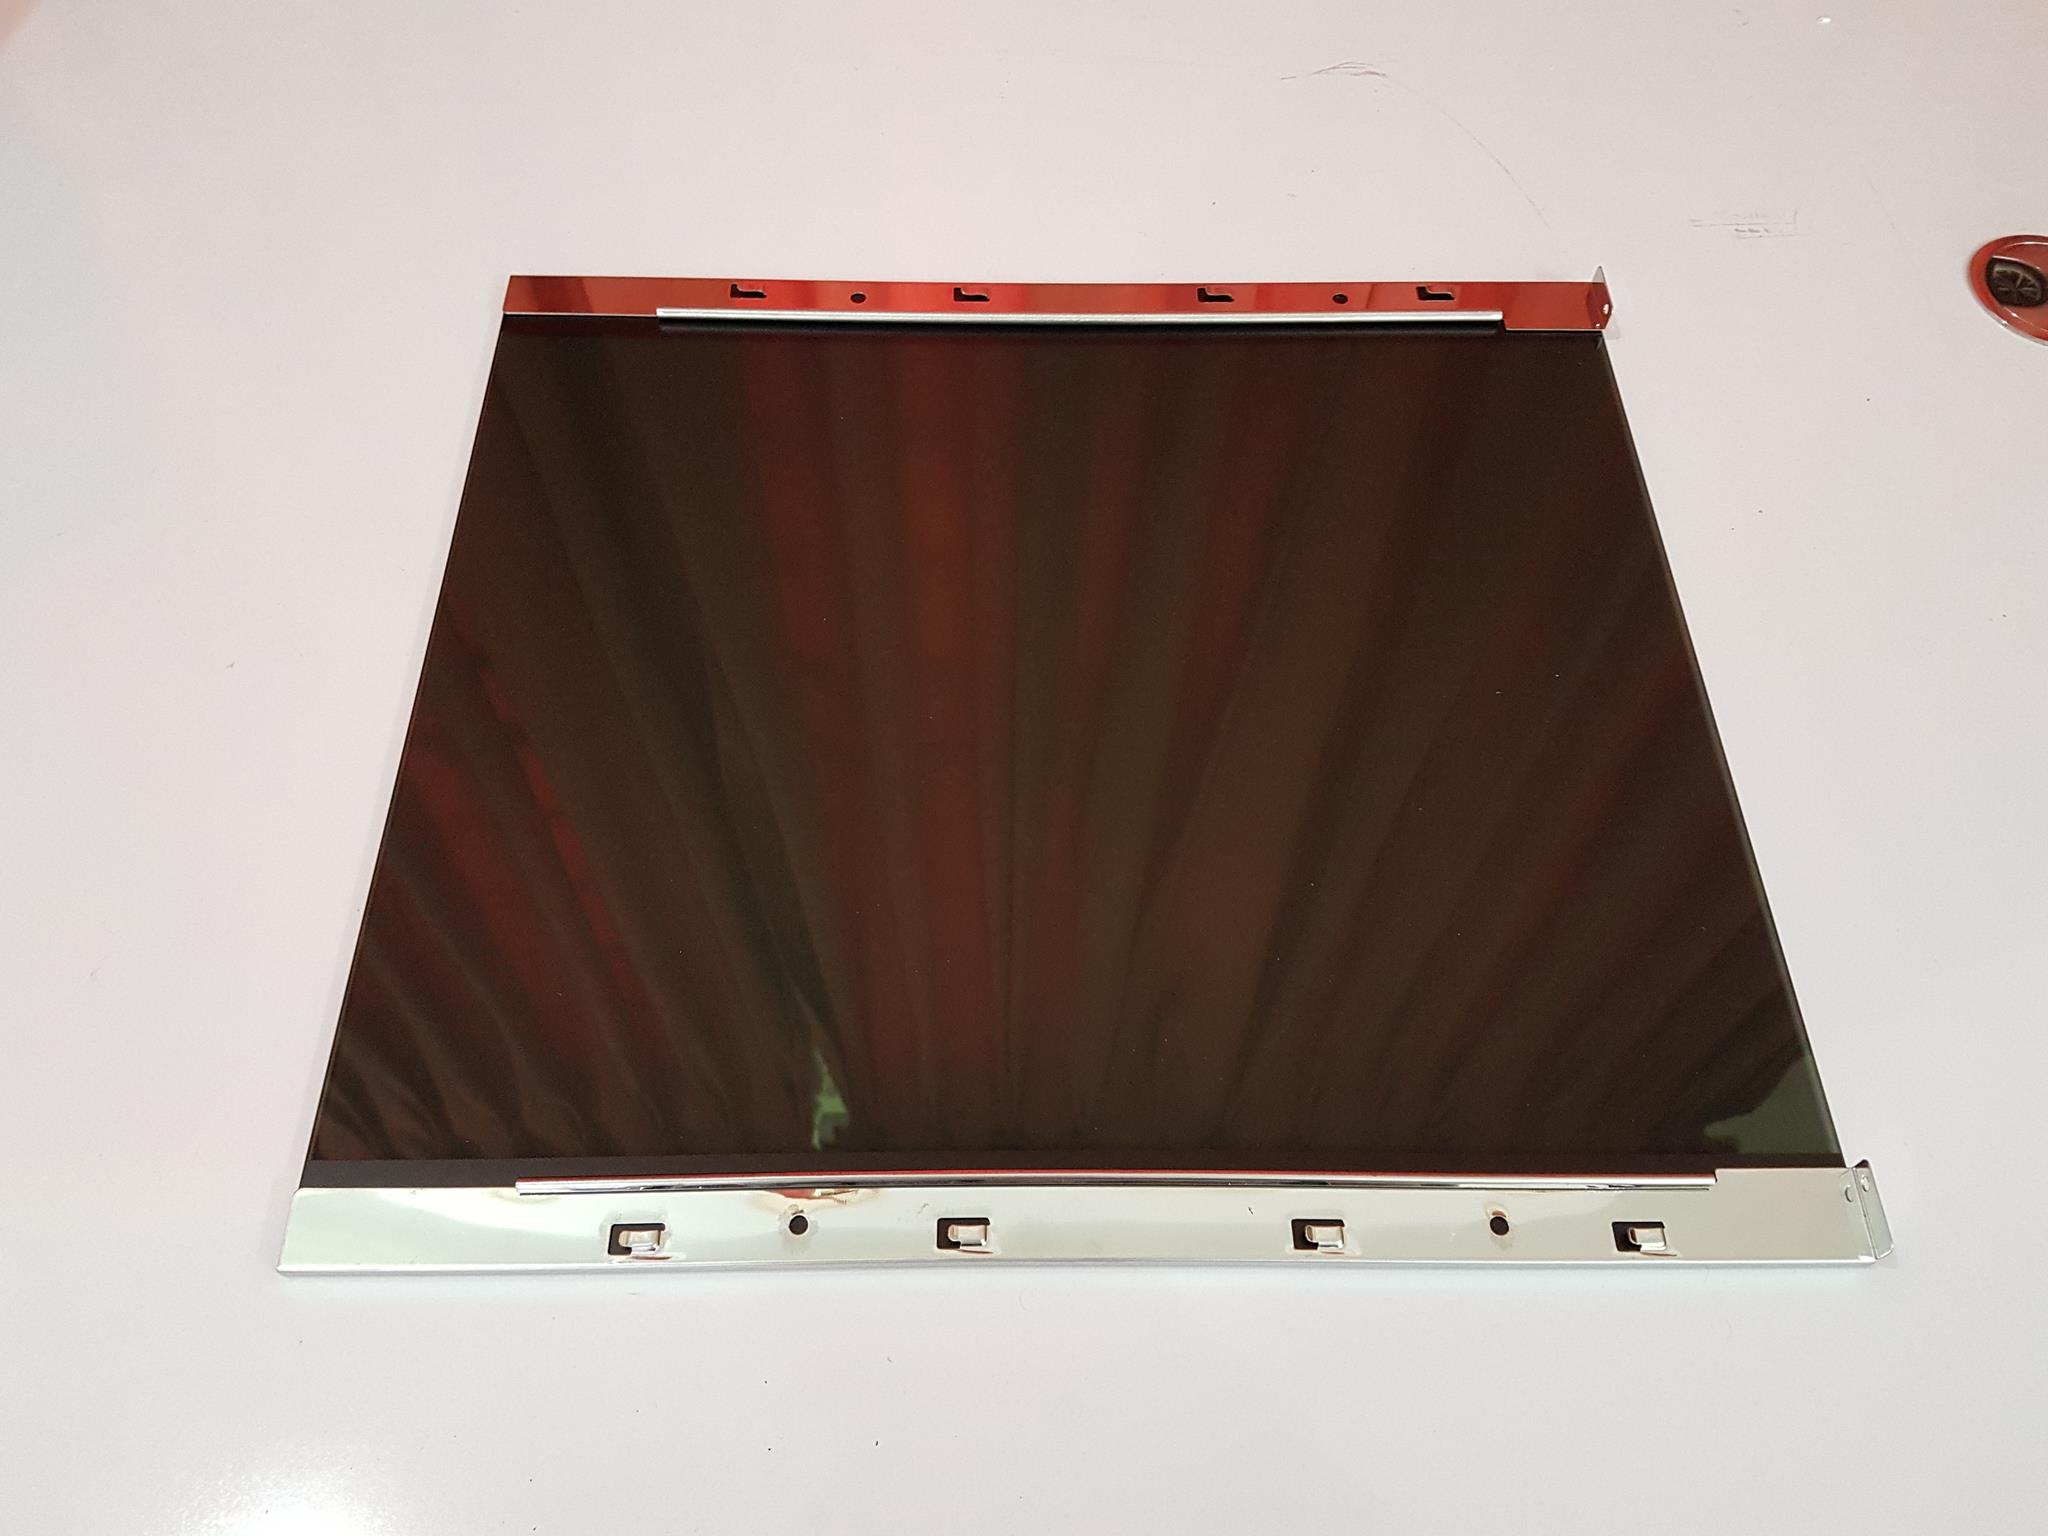
Now, it is time to look at inside the chassis and see what buzz is all about. Before that, let’s take a peek at those gorgeous side panels which are a show winner here. Each side panel measures 388x431mm (HxL). They are dark tinted Tempered Glass panels with 3mm thickness. What is more intriguing part of them is the use of the Stainless Steel bands on the top and at the bottom. These bands encapsulate the side panels from their respective sides. The chrome finish on the bands is top notch and adds to the stunning looks of the black glass.
The bands have four raised hooks on each side. These hooks are slided in the catchers on the chassis frame to secure the panels with the frame. This design approach has seamlessly makes taking these panels on/off safe and sound. Each panel is secured using two thumb screws at the rear side of the chassis. Removing these screws will not make the panels to fall. This is too good an attention to details. Stainless Steel hooks with mounting holes on the rear are a part of the steel frame and overall frame is rugged as it should be.
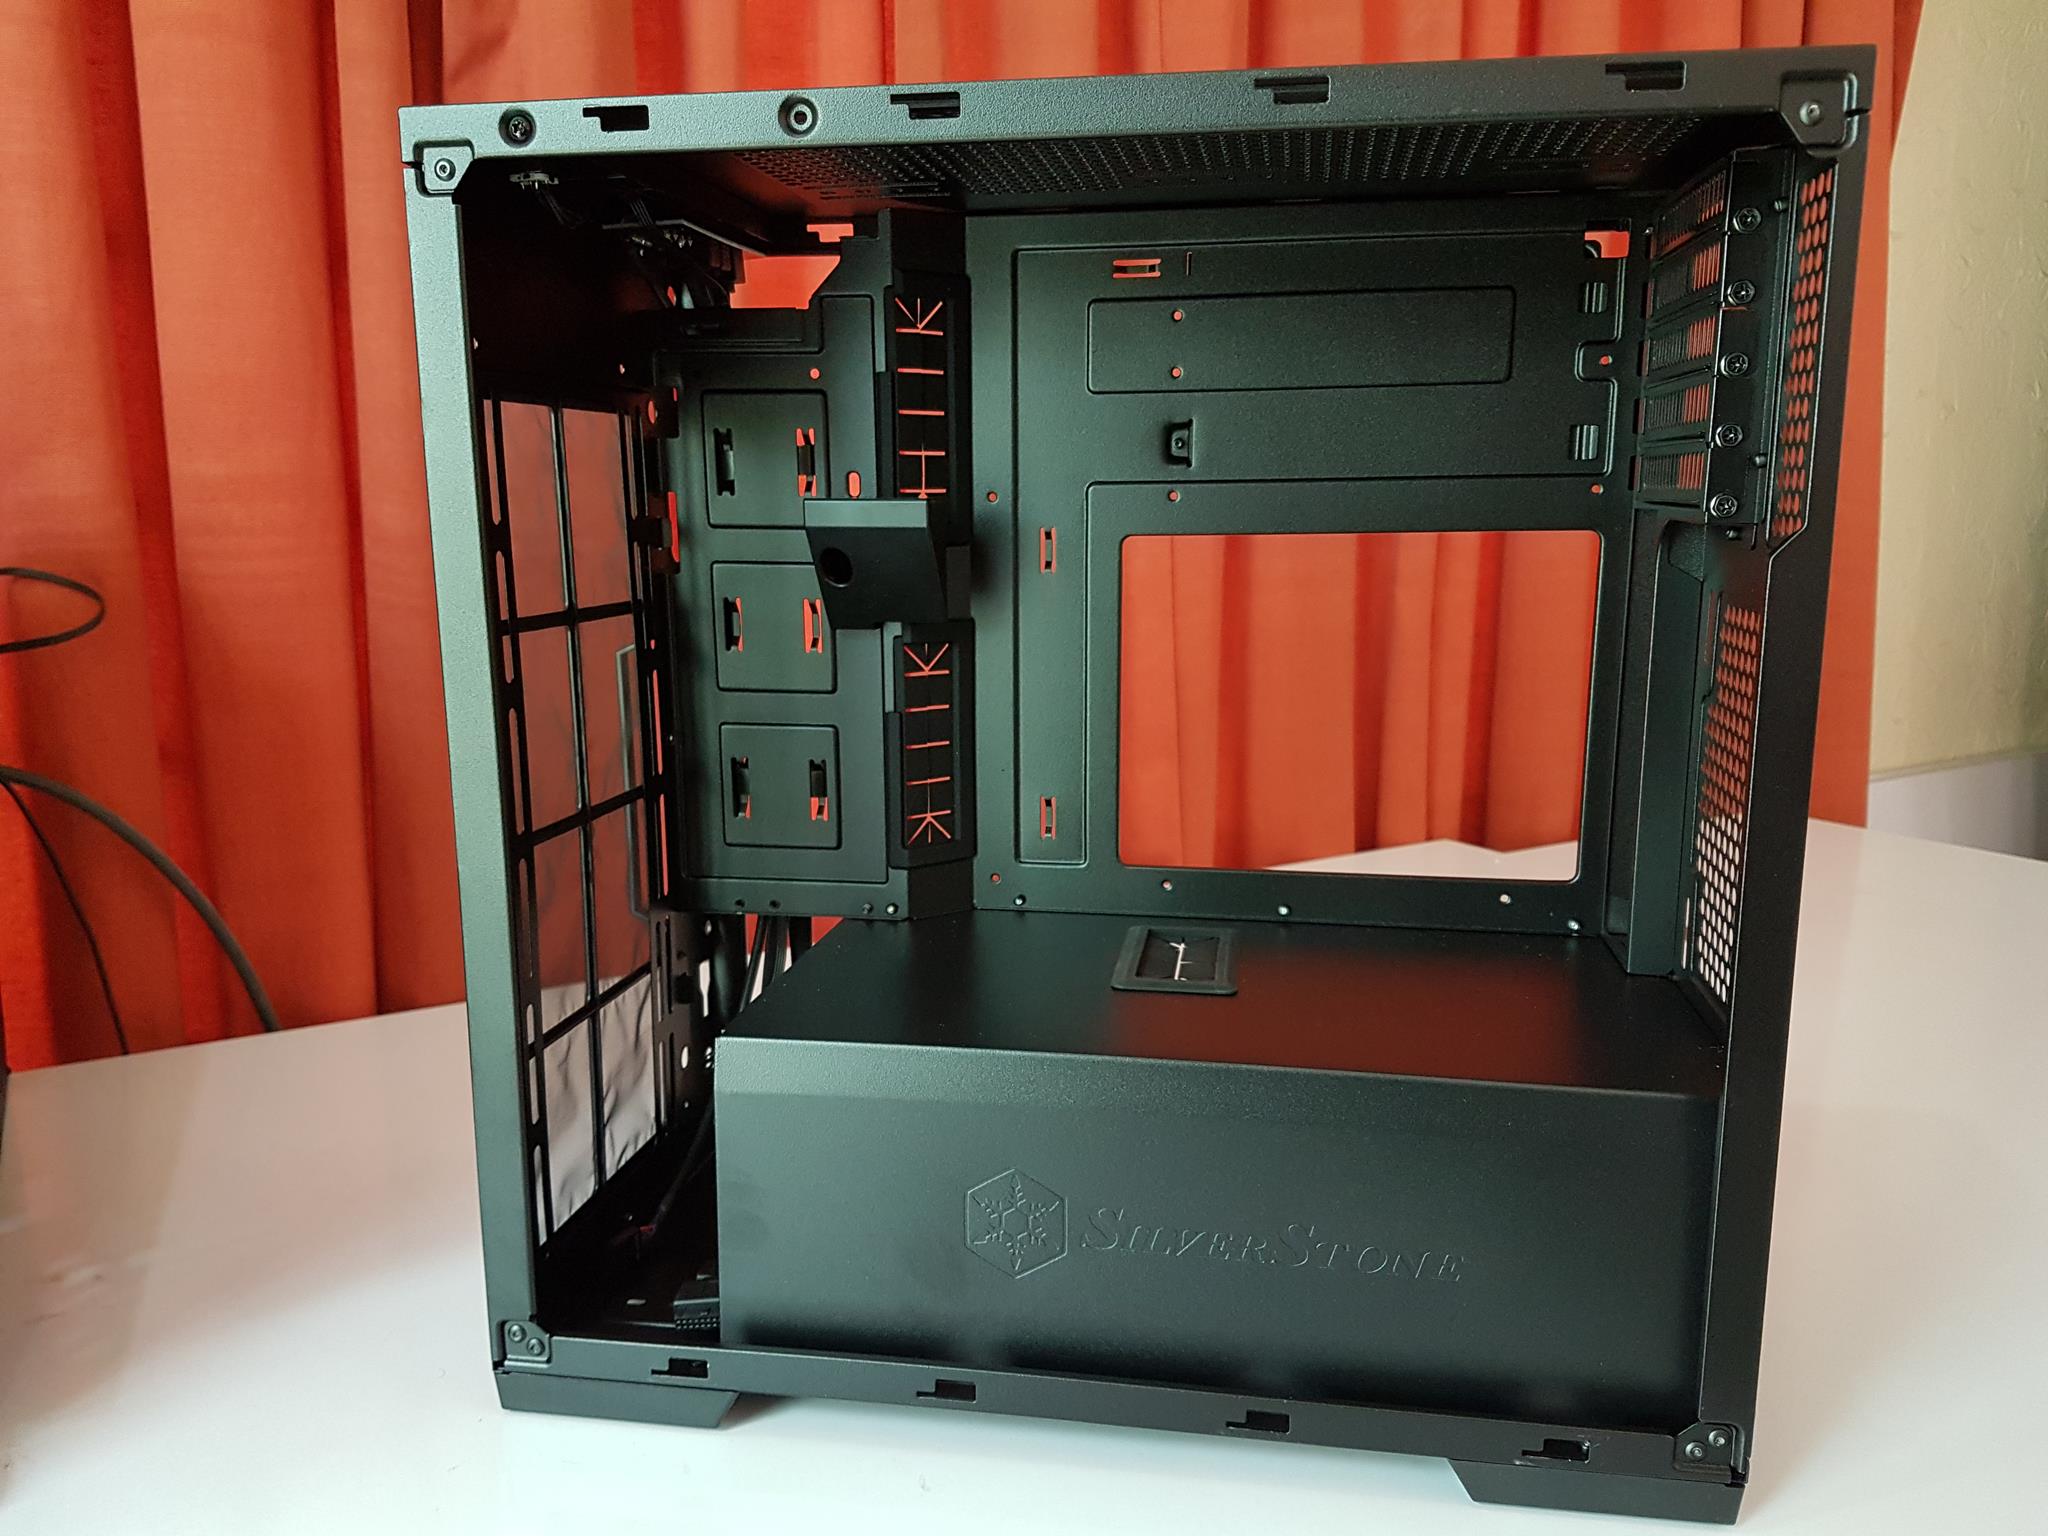
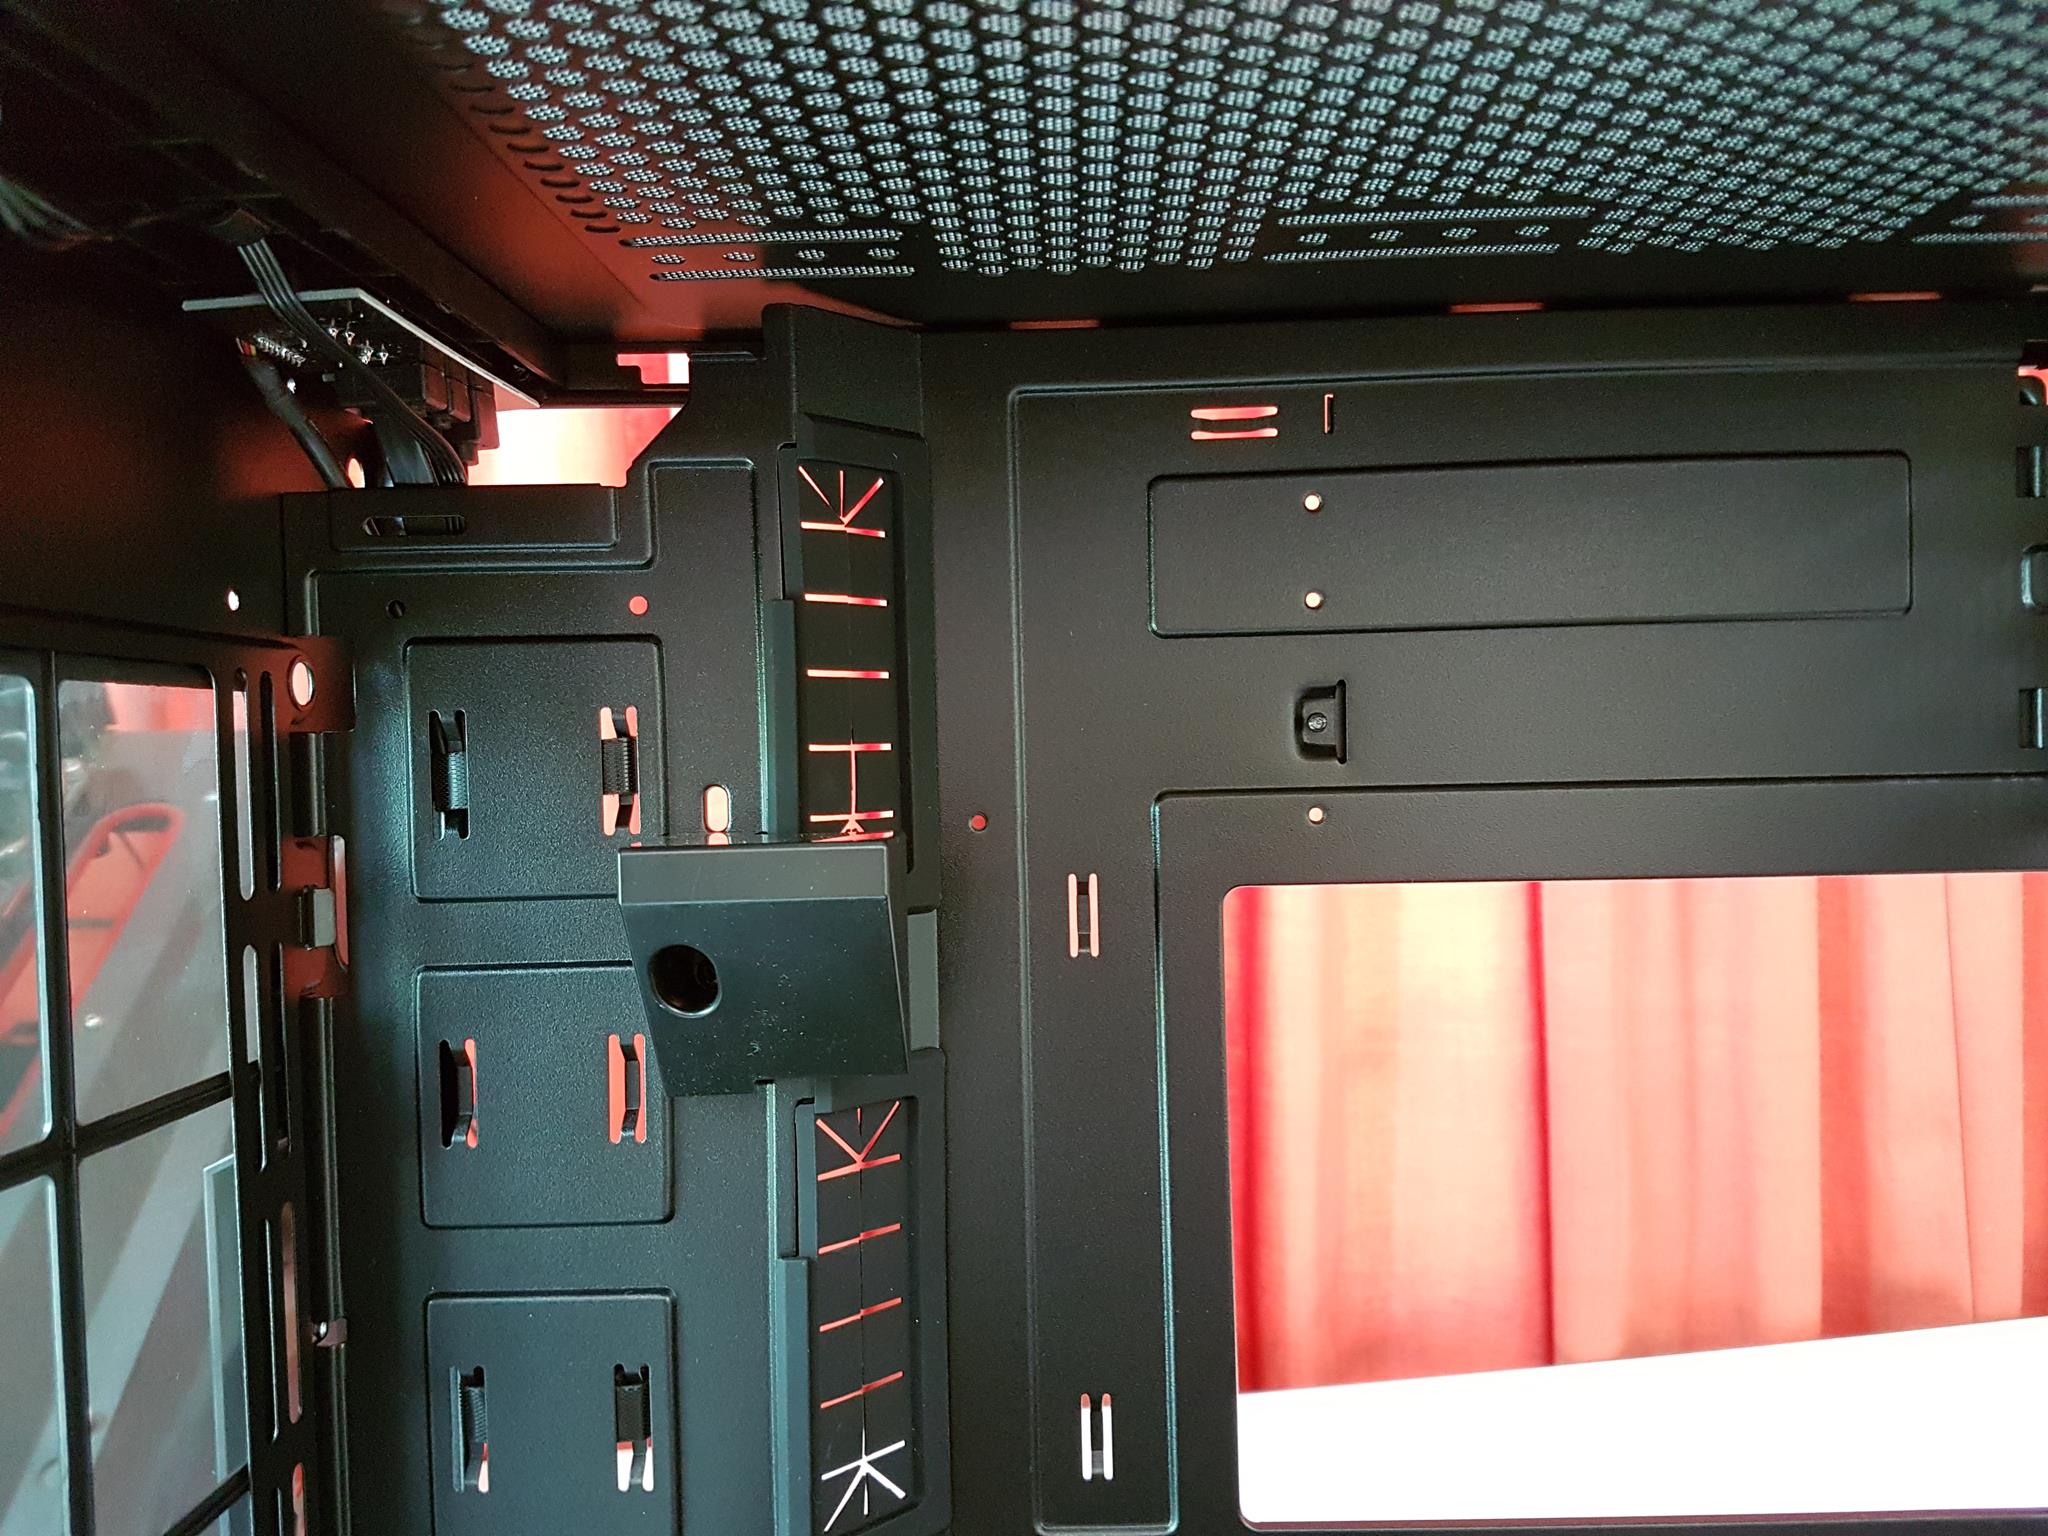
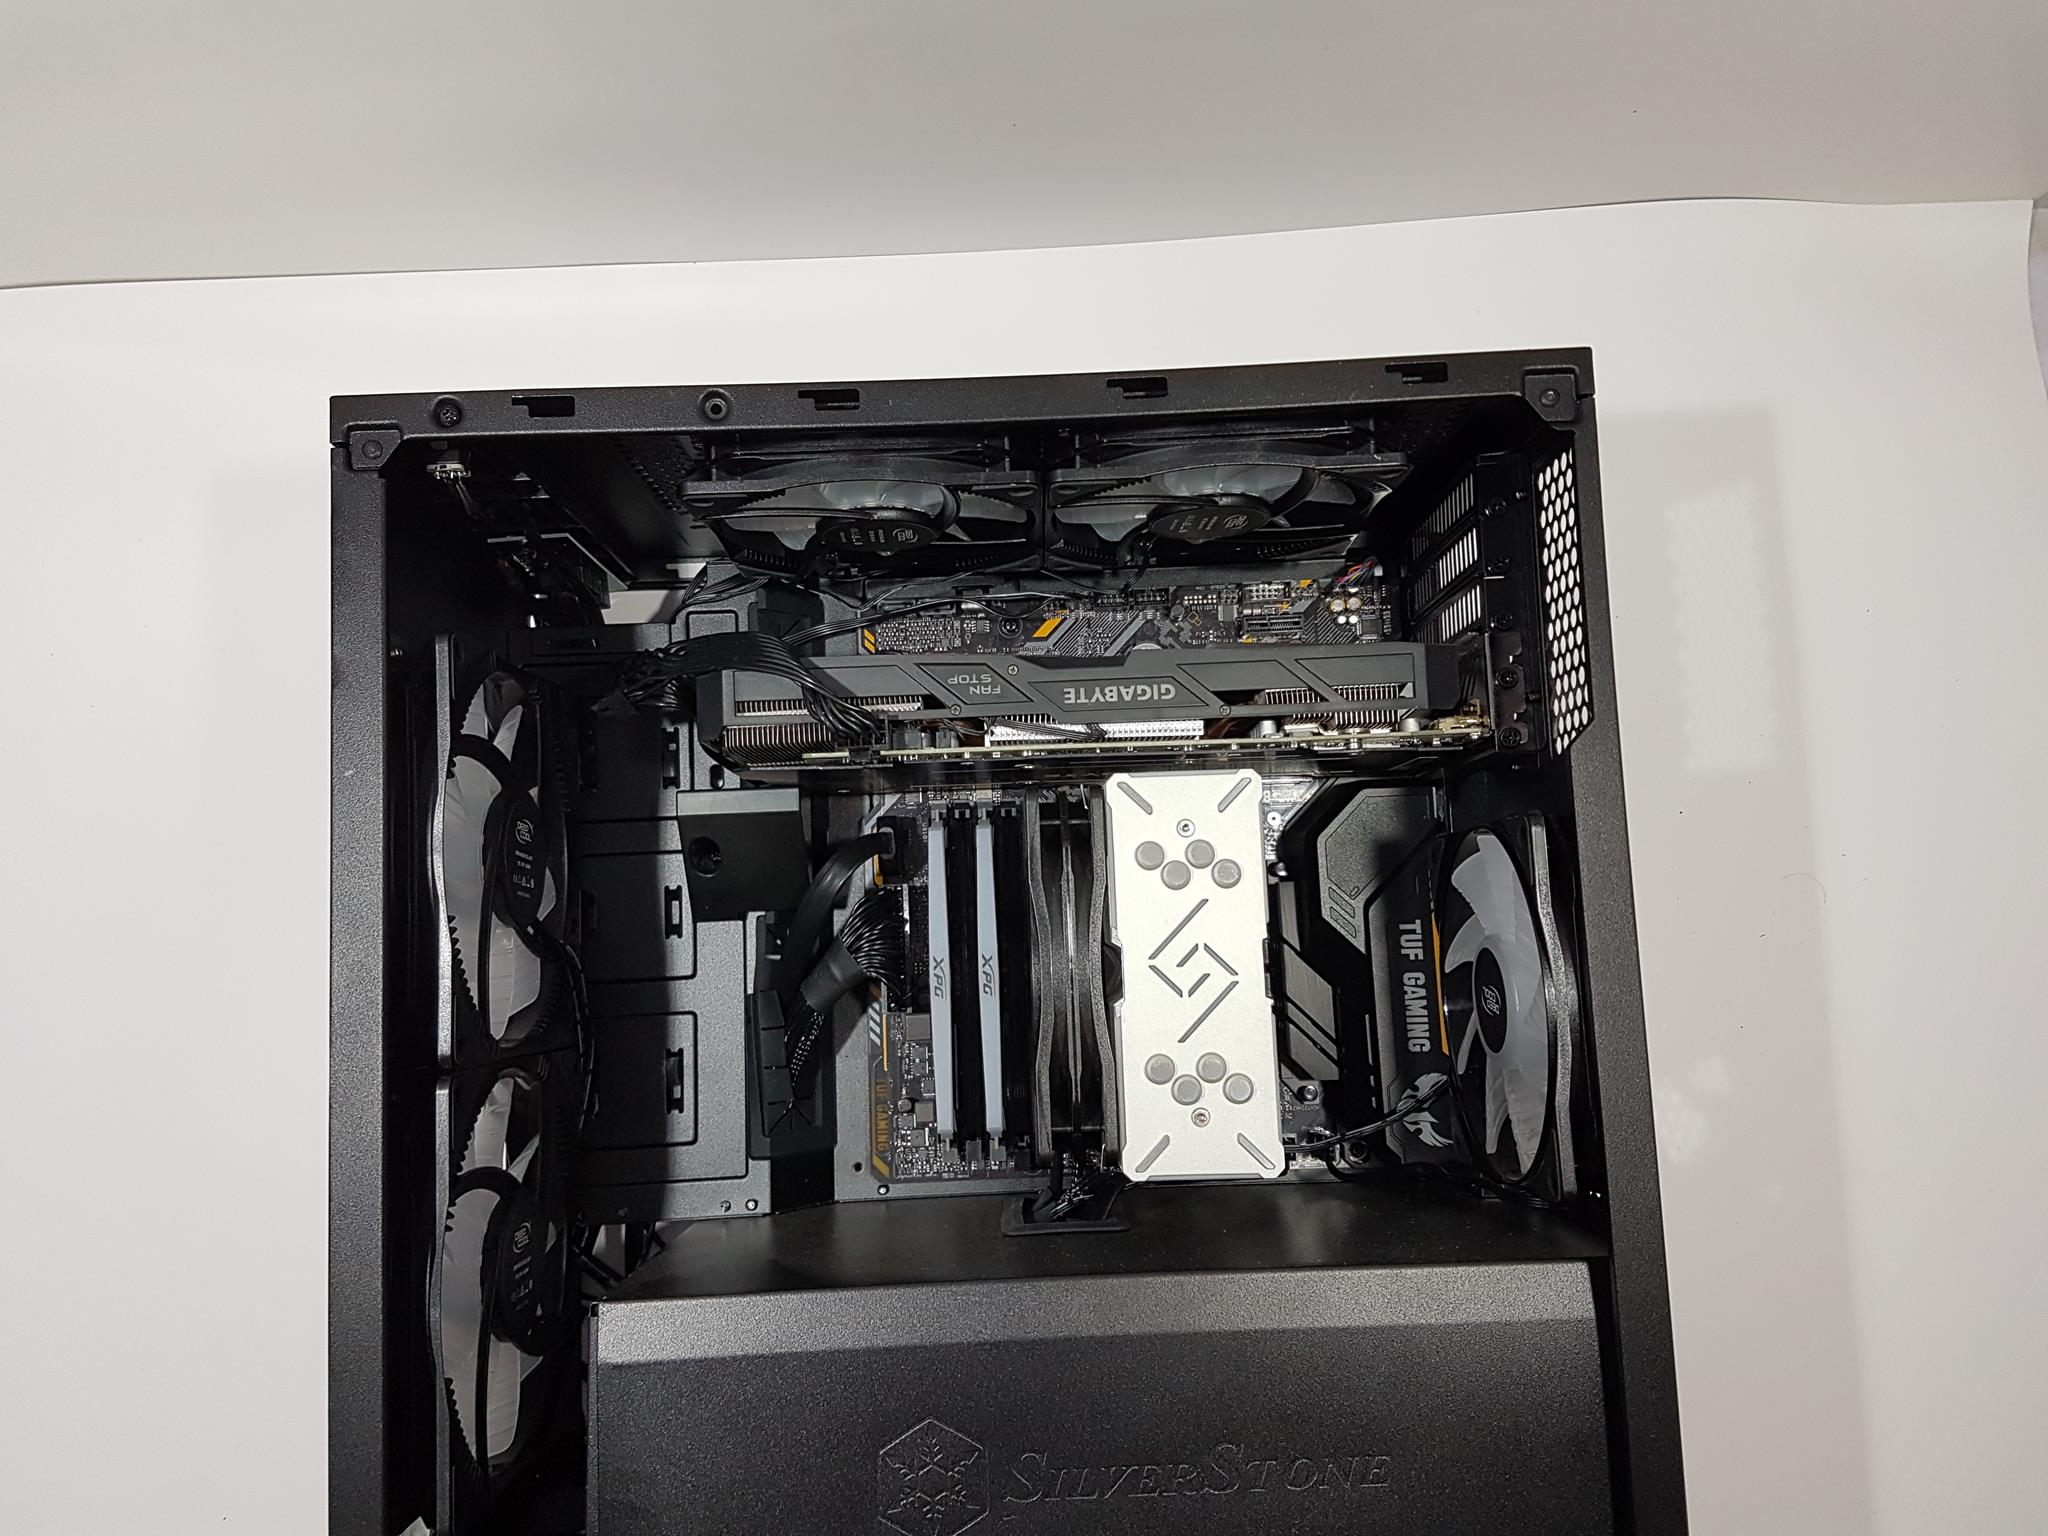
Let’s take a look at the main inside of the chassis; the one which houses all the components. At the bottom, we have a PSU shroud with SilverStone brand logo and name embossed onto it. The length of this shroud is approximately 299mm. It is not covering the entire length of the chassis which is understandable as there is 71mm of gap or spacing between the front side and the shroud for installation of fan and radiator. There is a cutout on top of the shroud which almost nears to the DIMM slots of the motherboard. It has a rubber grommet on it which is a plus. The user can route CPU Cooler’s fan cable and rear side fan’s LED/power cable through it for a clean look. Once again, the SilverStone design team was up to the task. We have a large size CPU cutout in the motherboard tray above the PSU shroud to easily install the CPU cooler. Overall build quality is top notch and speaks for itself. There is no flex in the motherboard tray. As this is an inverted layout, the top side of the motherboard will be facing the PSU shroud and the bottom side of the motherboard will be facing the top side of the chassis. The standoffs are not pre-installed and thankfully, SilverStone has provided a standoff socket wrench to easily install the standoffs on the motherboard tray. This PSU can accommodate motherboard of size microATX, mini-DTX, and mini-ITX.
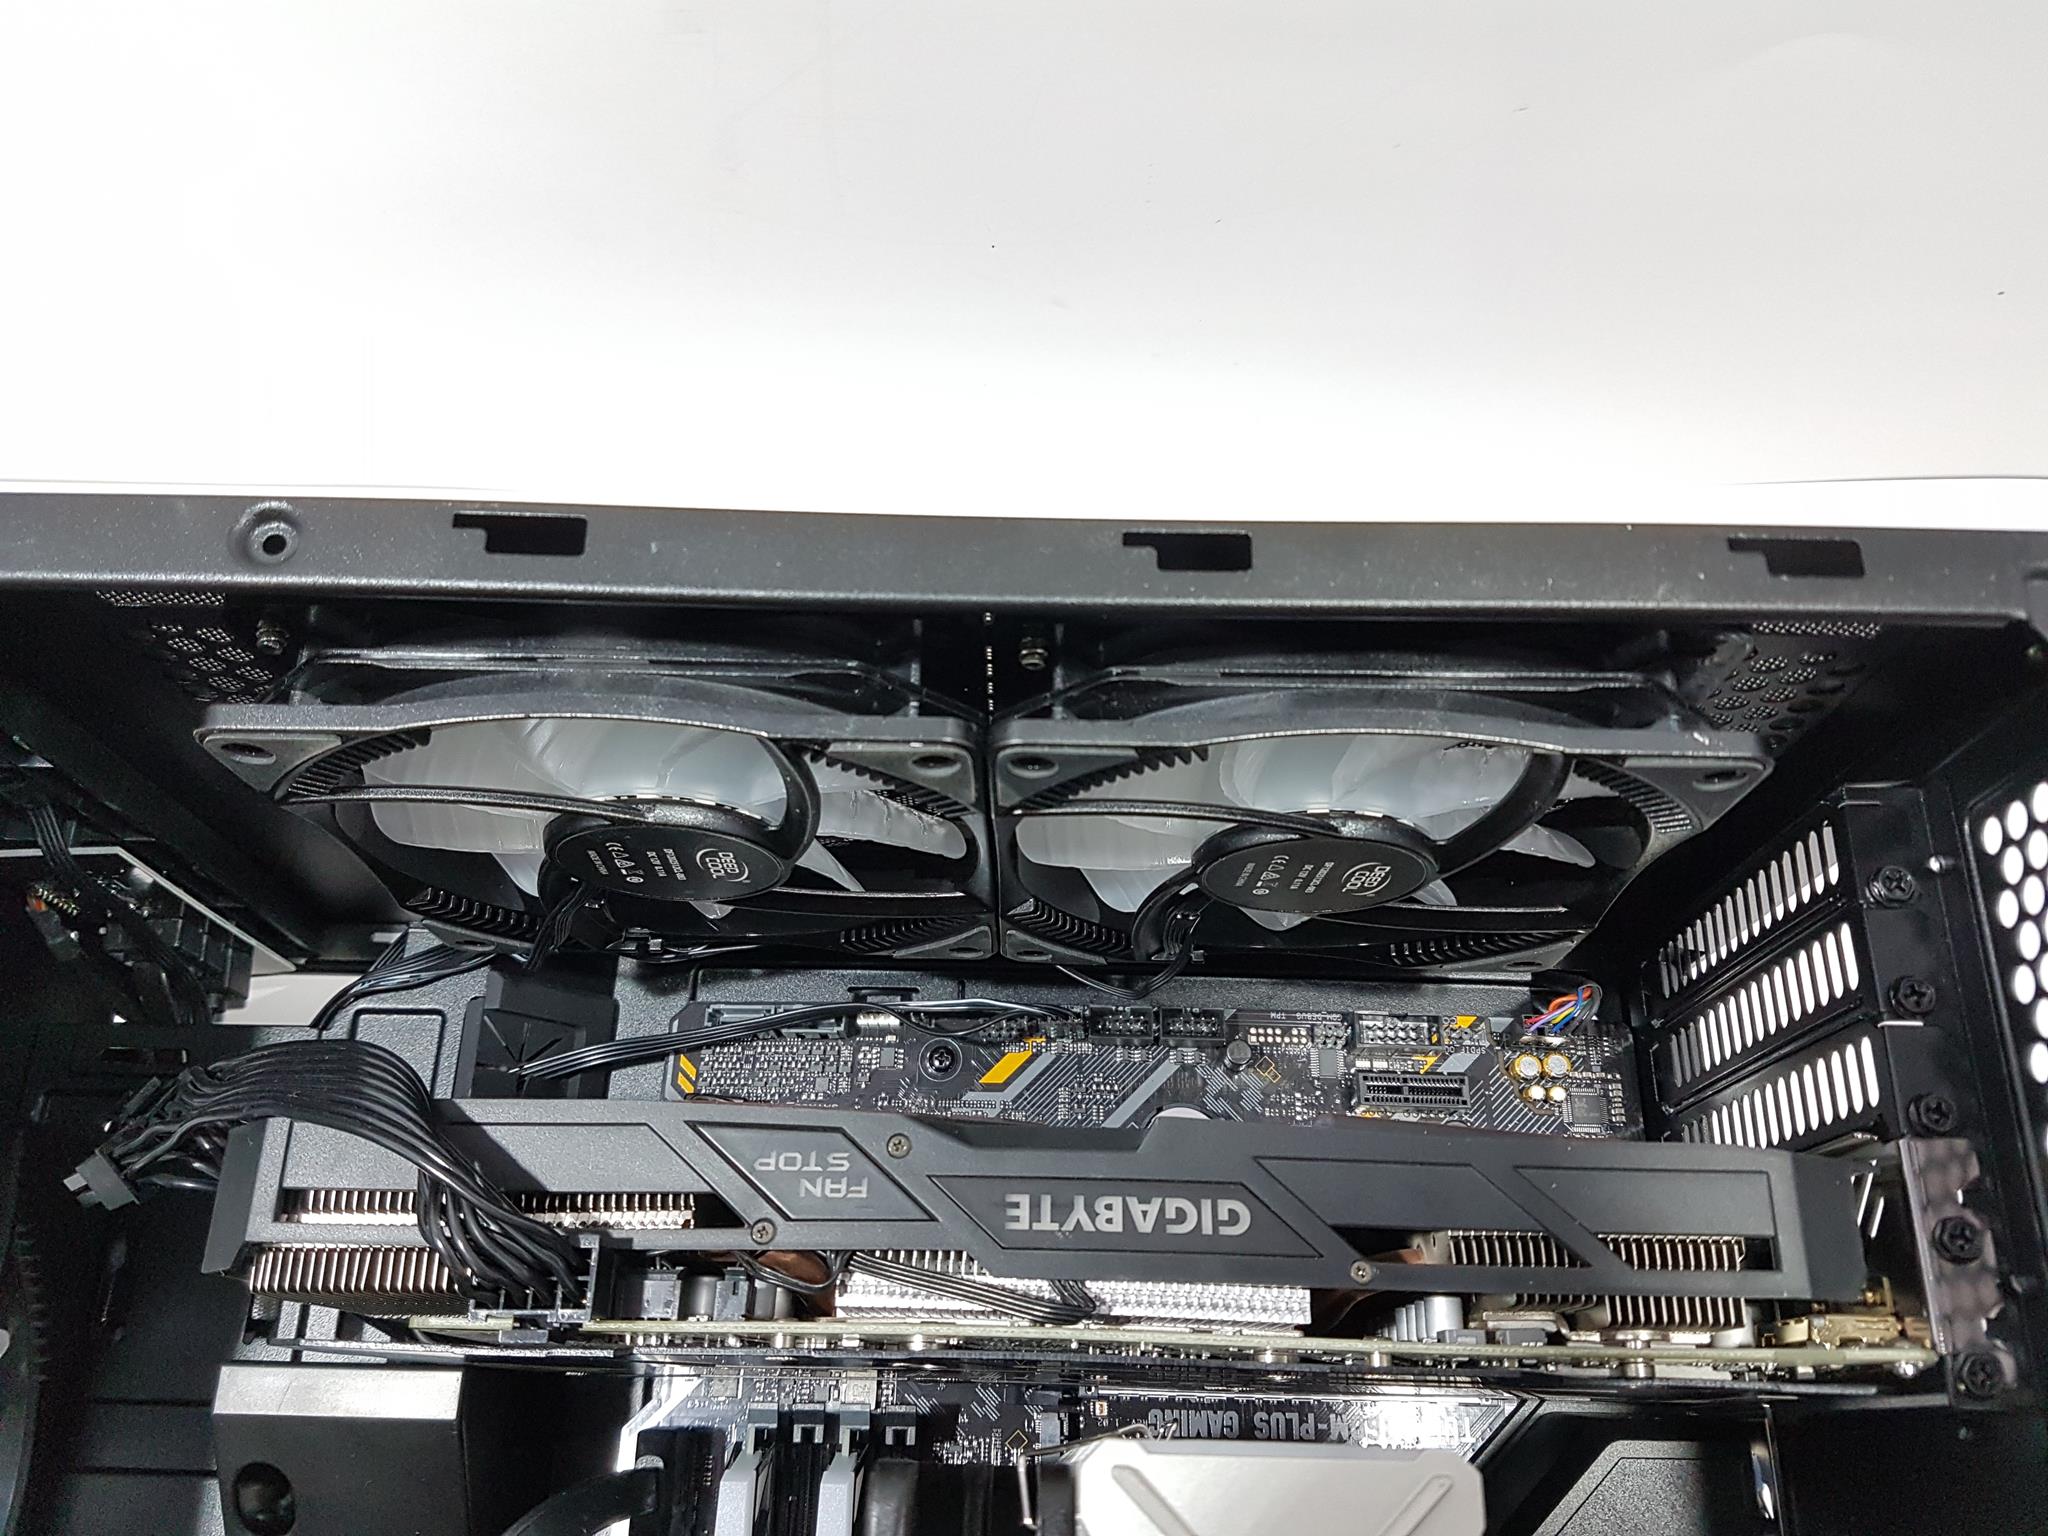
There are five PCIe slots whereas the micro-ATX board has a maximum of 4 slots. This makes it convenient for 25mm thick fans up top or graphics card with 2.5 to 3 slot design. The maximum height of the graphics card that can be installed is 178mm. The motherboard tray is recessed at the point where the cutouts with rubber grommets are located on the left side. That left side is raised and this has achieved multiple objectives; enough room for cable management near the front side on the backside of the chassis, connecting SATA cables to the motherboard without removing the graphics card, making cable routing more convenient for cables like 24-pin ATX cable, USB 3.0/3.1 cable etc.
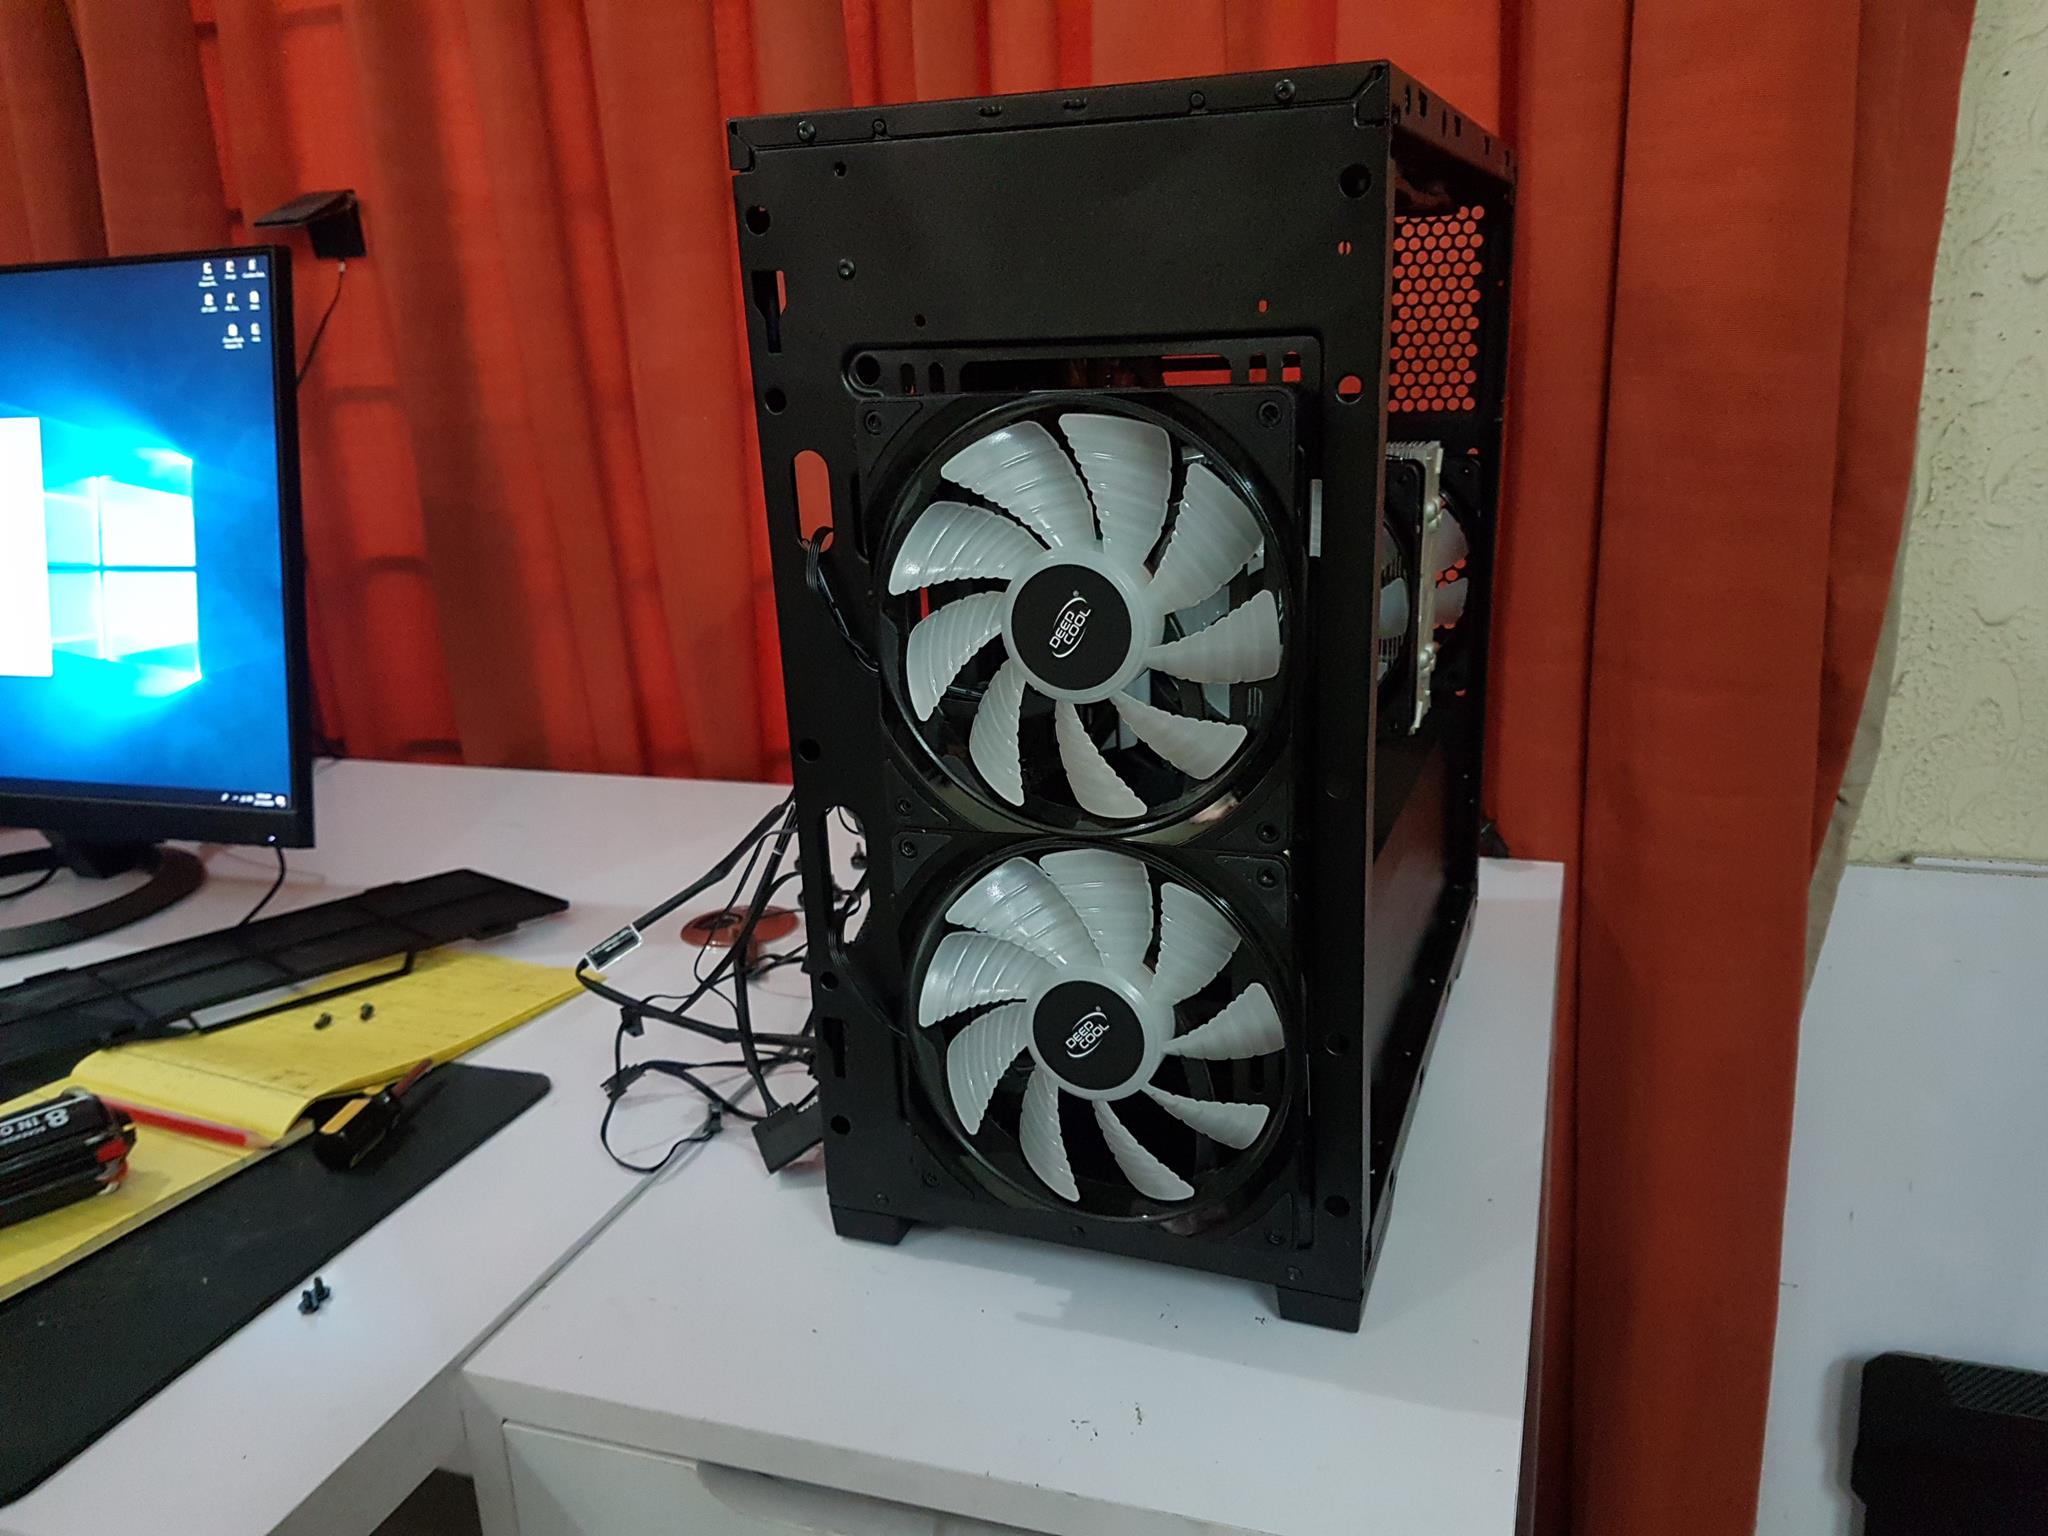
The front side can house up to two 120mm or two 140mm fans and a 240mm/280mm radiator. Please, note that in case of a 280mm radiator the SilverStone is recommending the total thickness of 55mm or less. This could have been relaxed by installing the fans on the front side of the mounting slot and the radiator behind the slots but this would restrict the airflow but not by much as can be seen in our testing section. Also, keep in mind that you can’t install the AIO with hose side down as there is simply not enough room to route the tubes (which need to be very flexible) above the PSU shroud. There is an opening at the bottom towards the motherboard tray area on the left side. This is to route cables through it. Similarly, there is a comparatively small cutout at the top for the cable routing. The I/O Panel cables are routed through the top cutout. The I/O panel is secured inside a plastic bracket which is mounted using two screws with one screw on each side of the chassis. There are two large size cutouts with rubber grommets on the inclining side of the motherboard tray. This is where the cables are routed to and from.
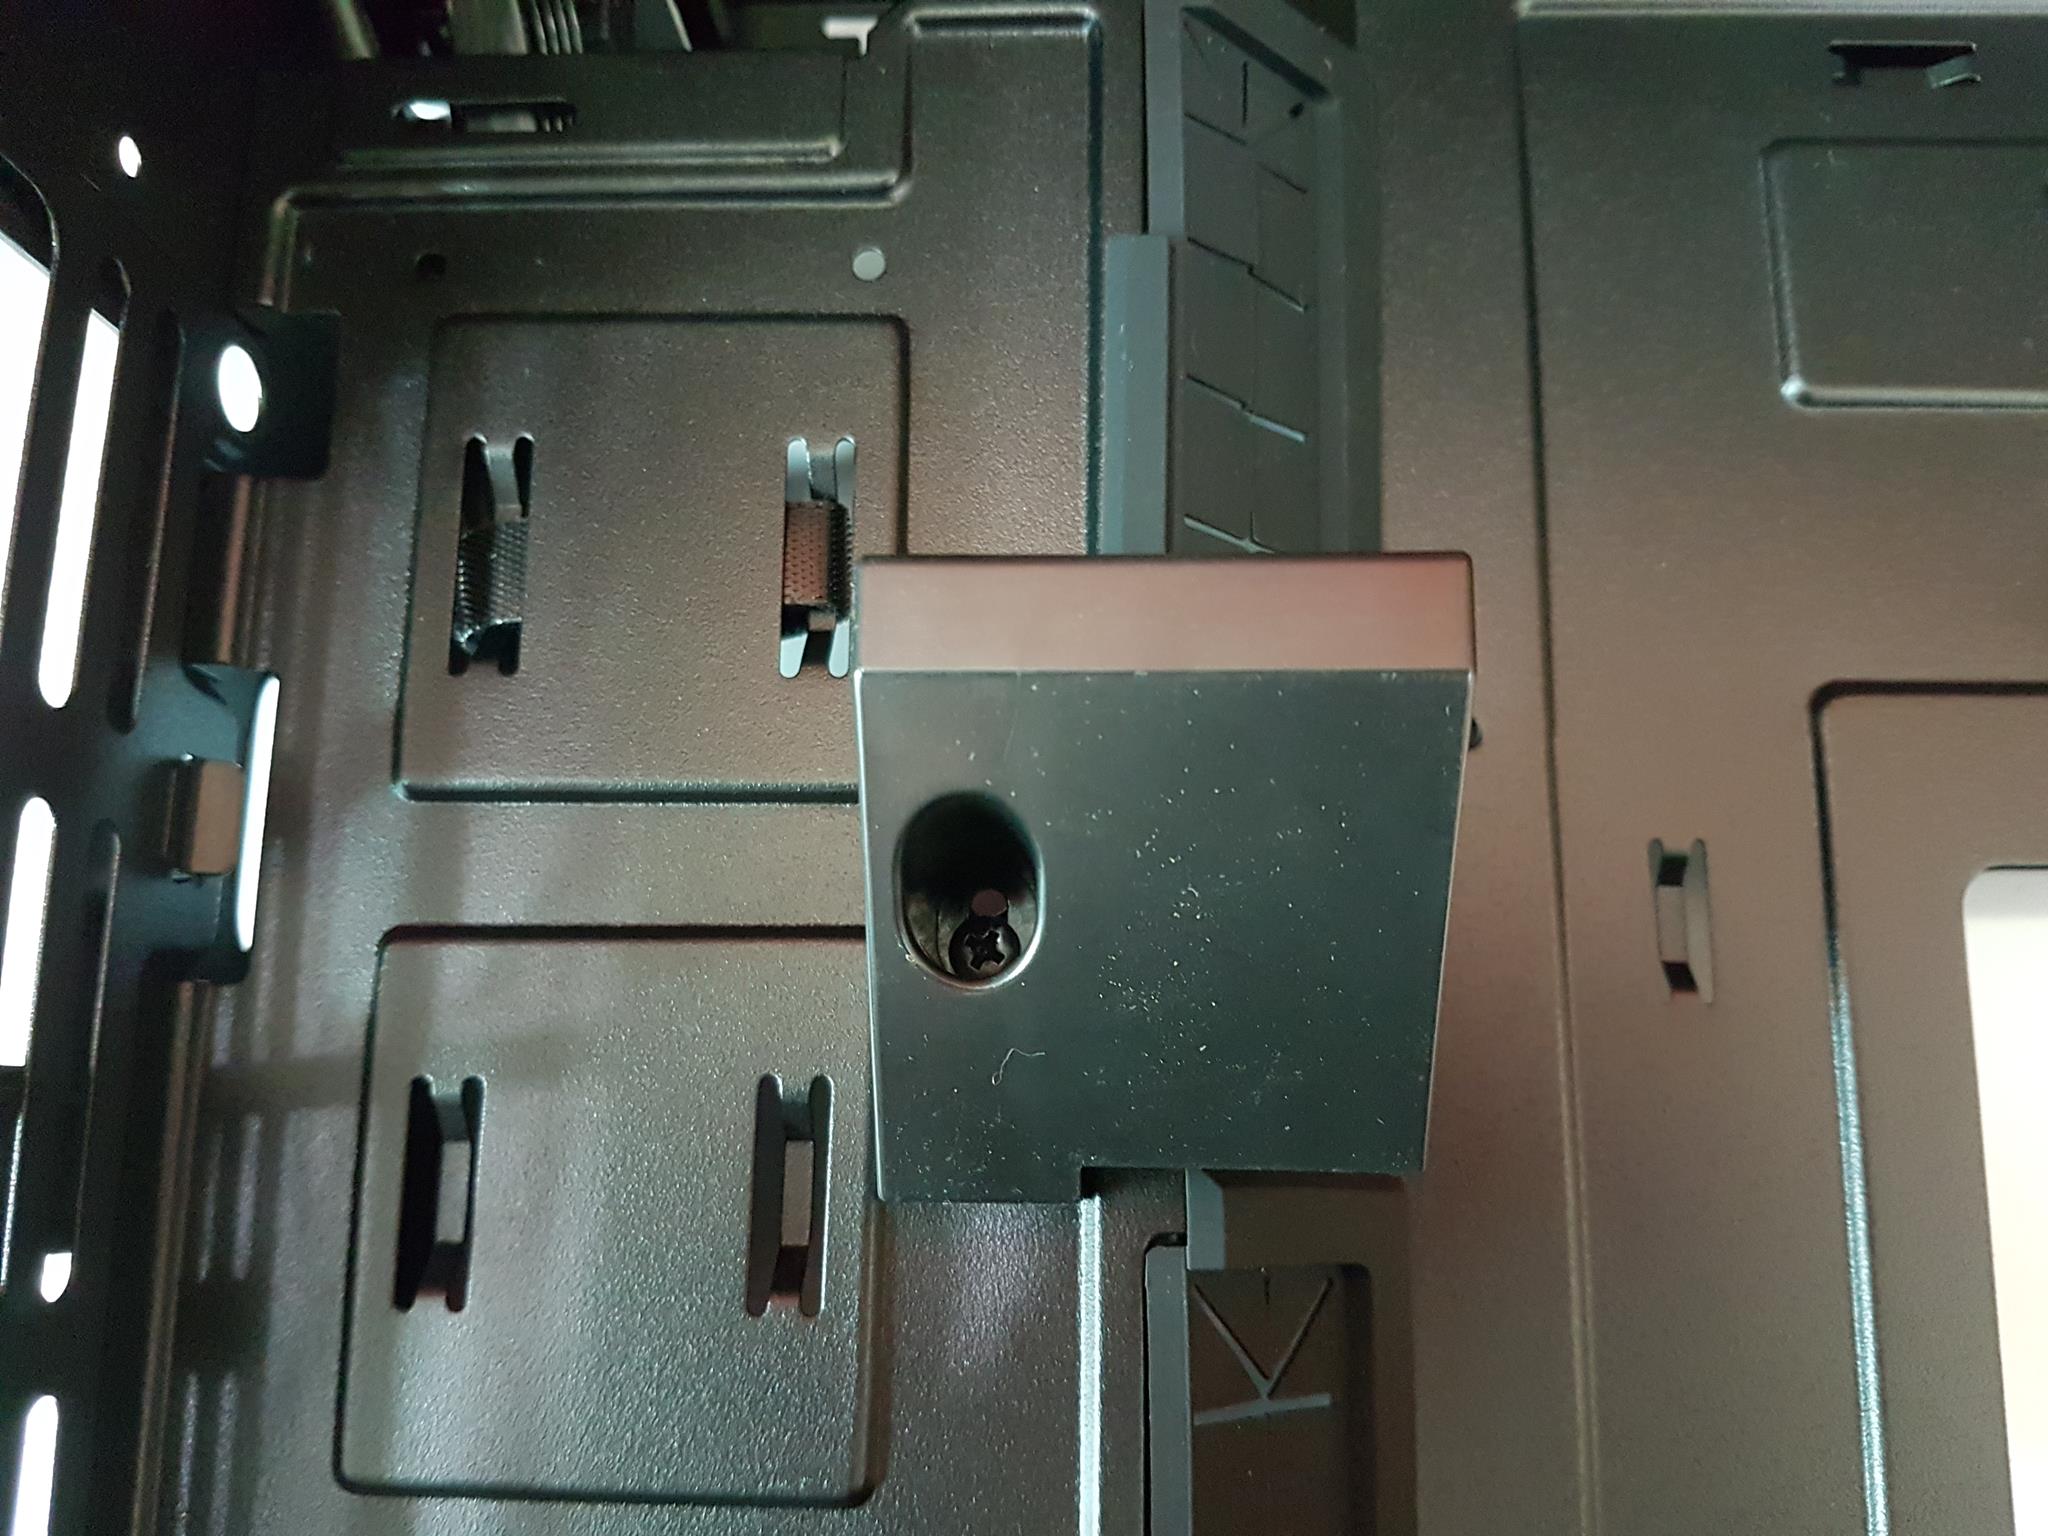
One last element to discuss here is the angular designed graphics card support bracket. It is mounted using a single screw on the front. Its height can be adjusted but it supports graphics card installed in the first or second PCIe slot only. There is a good reason why this bracket is there in the first place. In an inverted layout, the stress due to the weight of the graphics card’s bulky cooler comes on the PCB and resultantly on the PCIe slot. Many of the inverted layout chassis don’t have a supporting bracket to address this issue. The SilverStone seems to have taken every aspect into consideration and has come up with this smart solution as the support bracket is not taking much of the space and is designed in an inward slope which not only adds to the overall aesthetics but also serves to reduce the limitation on the tubes routing from the front mounted AIO. This bracket can be taken off in case small size graphics card is to be used. As the backplate or PCB side of the graphics card is facing the support bracket there is no hindrance to the cooler side of the graphics card that is coming naturally from this design aspect. As the graphics card is installed with cooler side facing the top of the chassis, the graphics card can potentially be benefited from the fresh air being thrown at it from the top mounted fans. This is obviously possible with fans made to intake the fresh air.
The user can install a 120mm fan and/or radiator on the rear and as long as there is a clearance of upto 50mm from the motherboard’s heatsink components, radiator thcikness has no limitation.
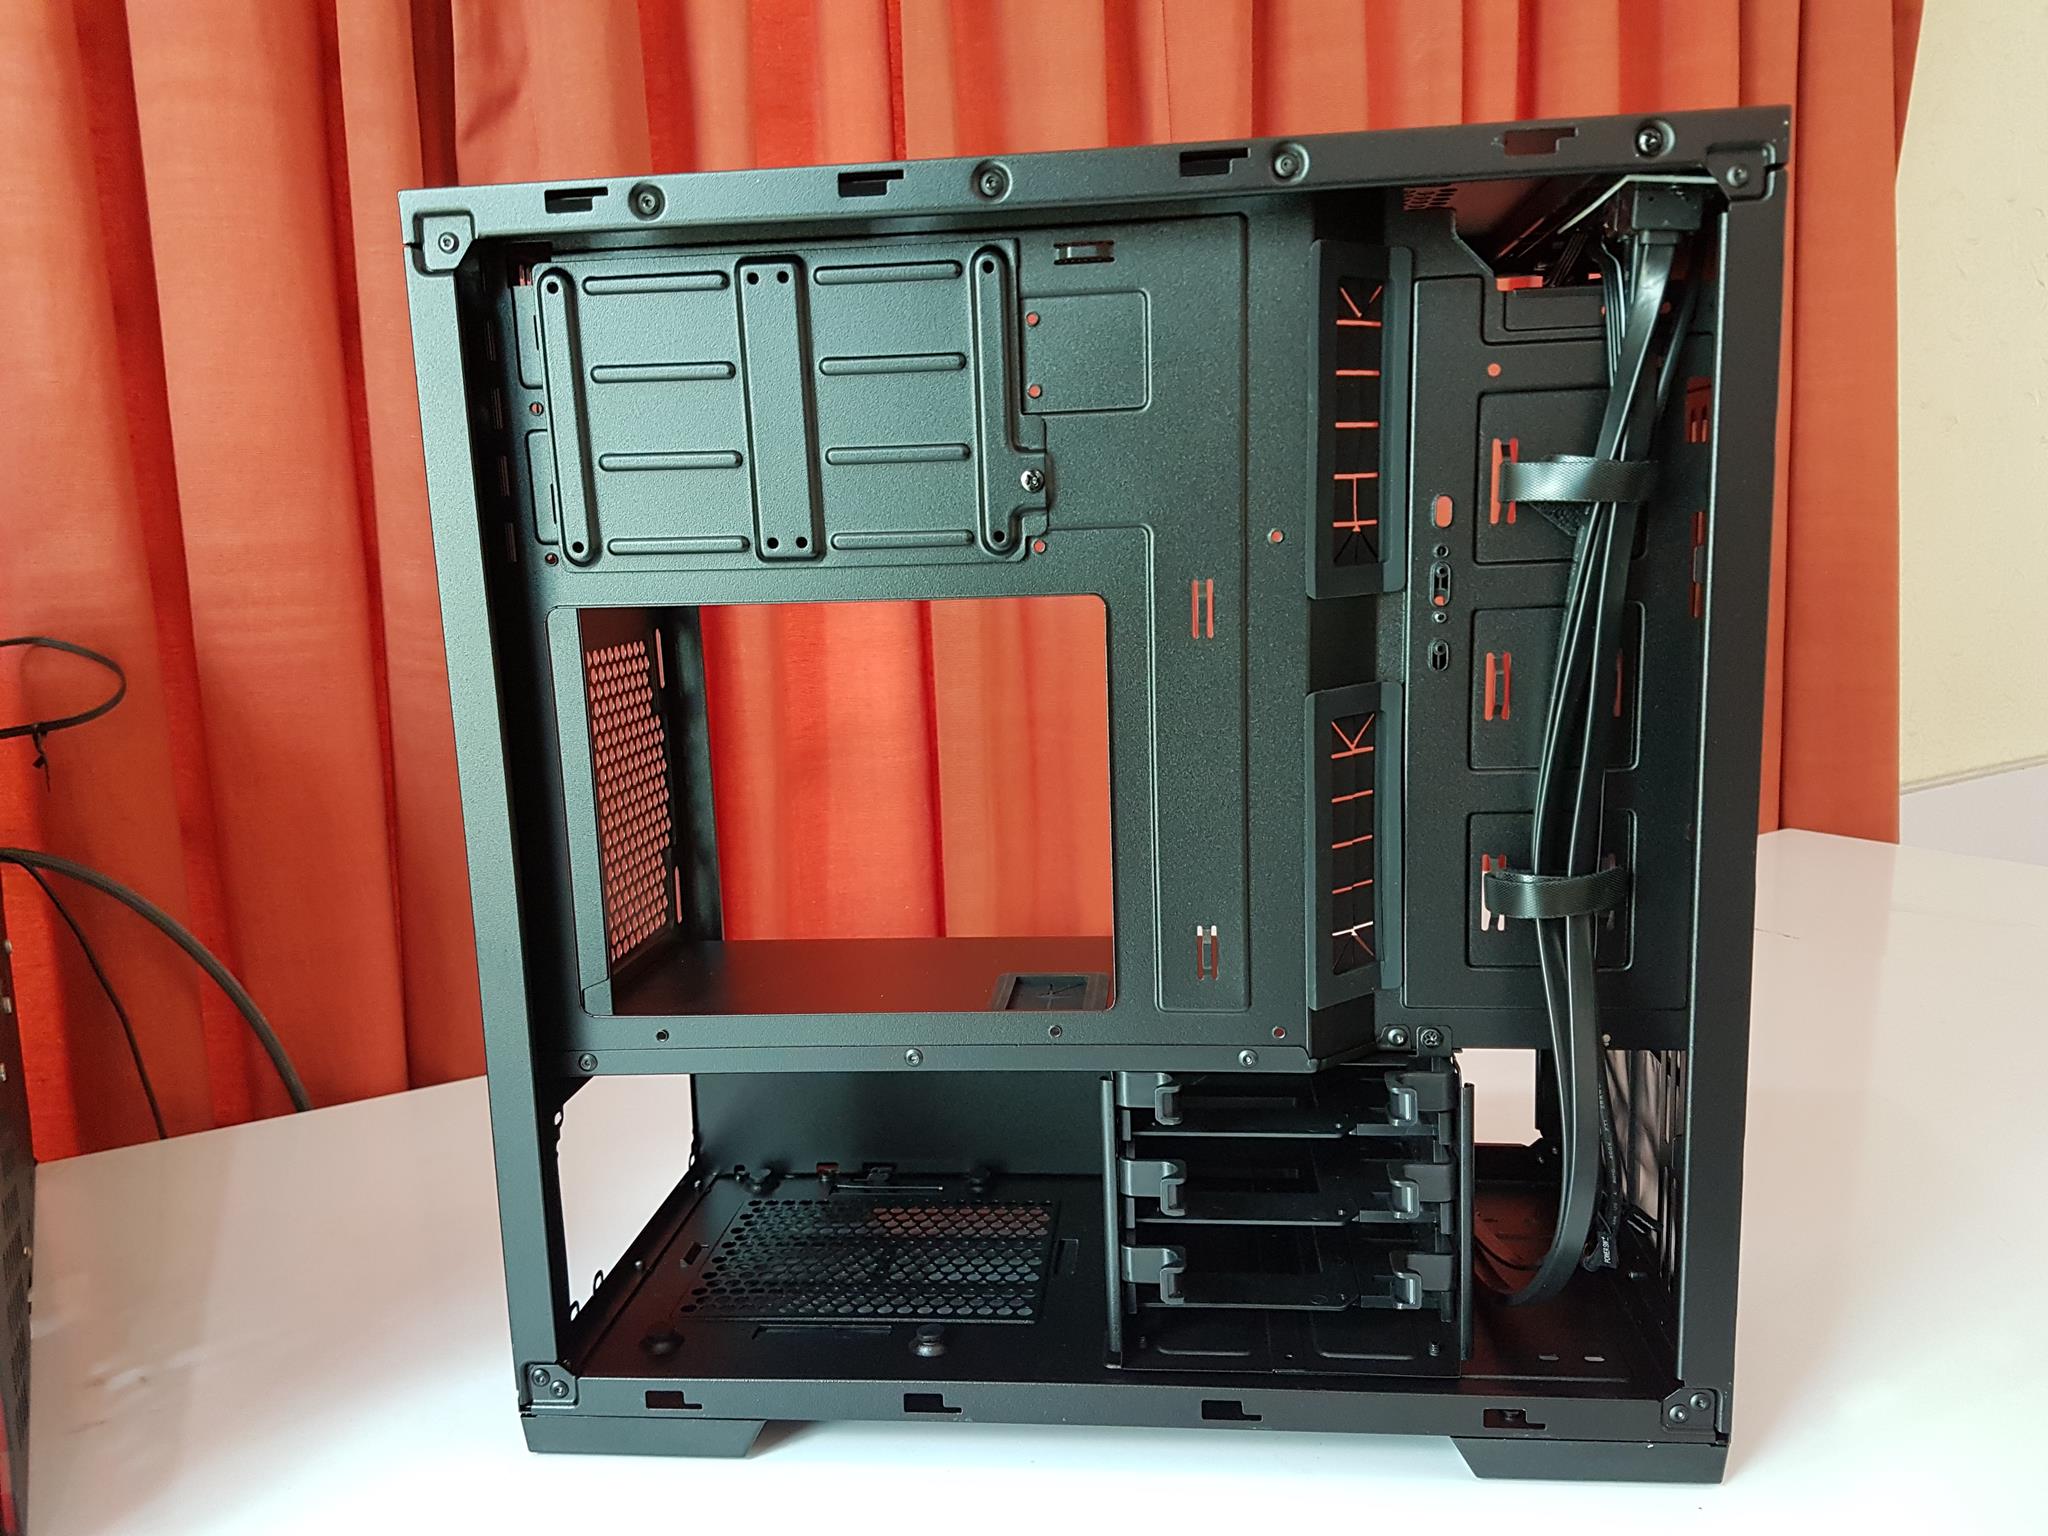
It is time to take a look at the backside of the chassis.
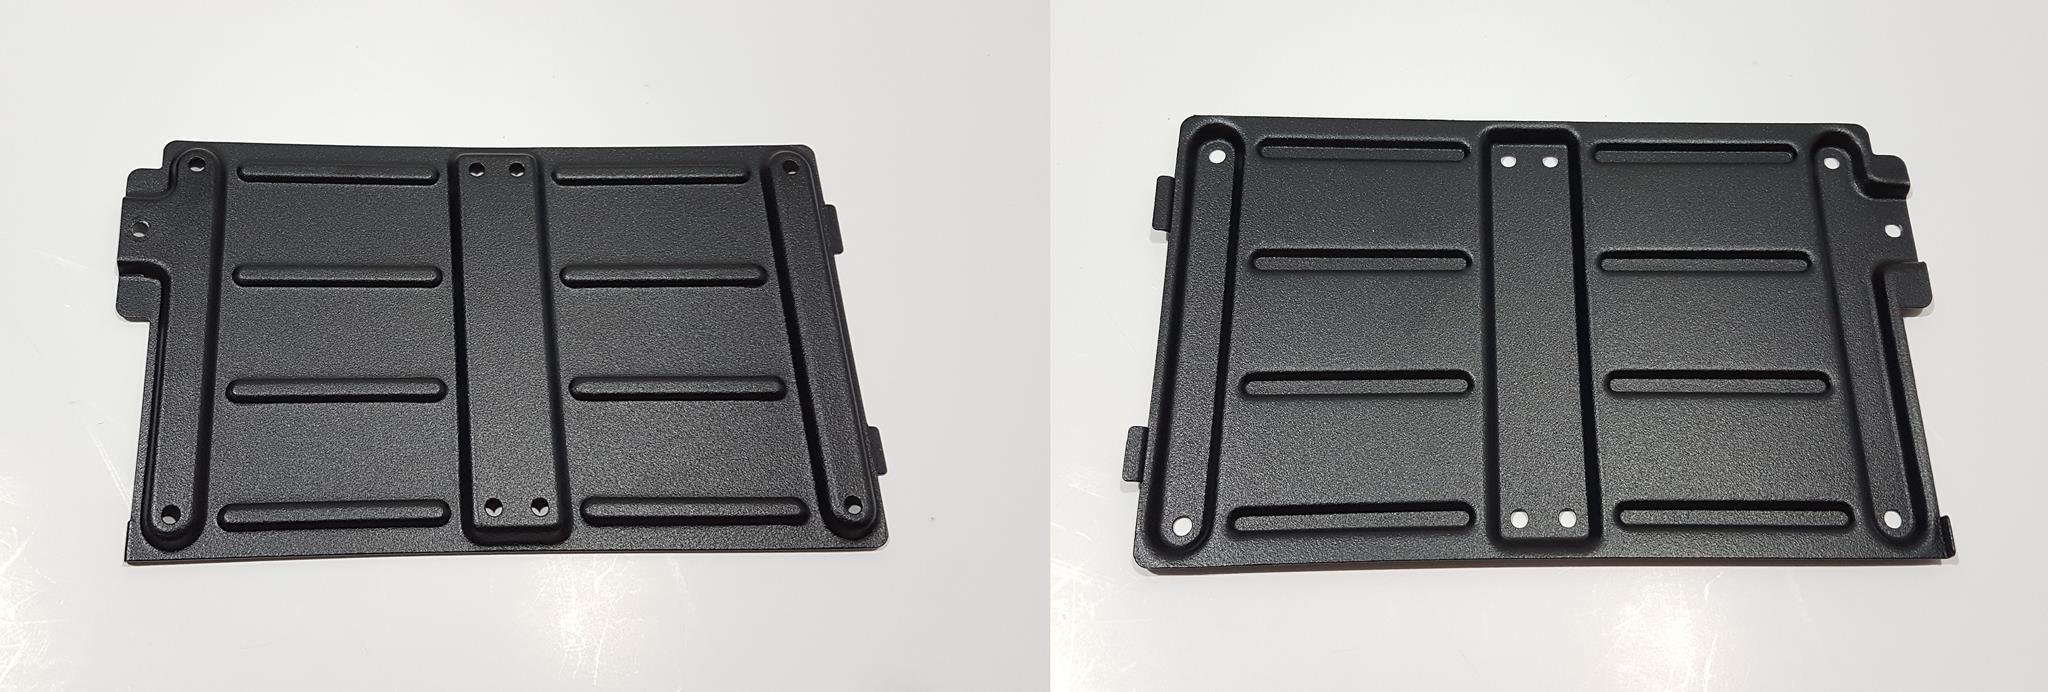
On the top left side, there is a 2.5” SSD mounting bracket secured using a screw. This could have been a slim thumb screw but space consideration could have been an issue there. Up to two 2.5” SSDs can be installed on this bracket. The user will have to remove the bracket first as the screws need to be used from the backside of the bracket to install the SSD. There are multiple cable tie points on the main motherboard tray on the backside.
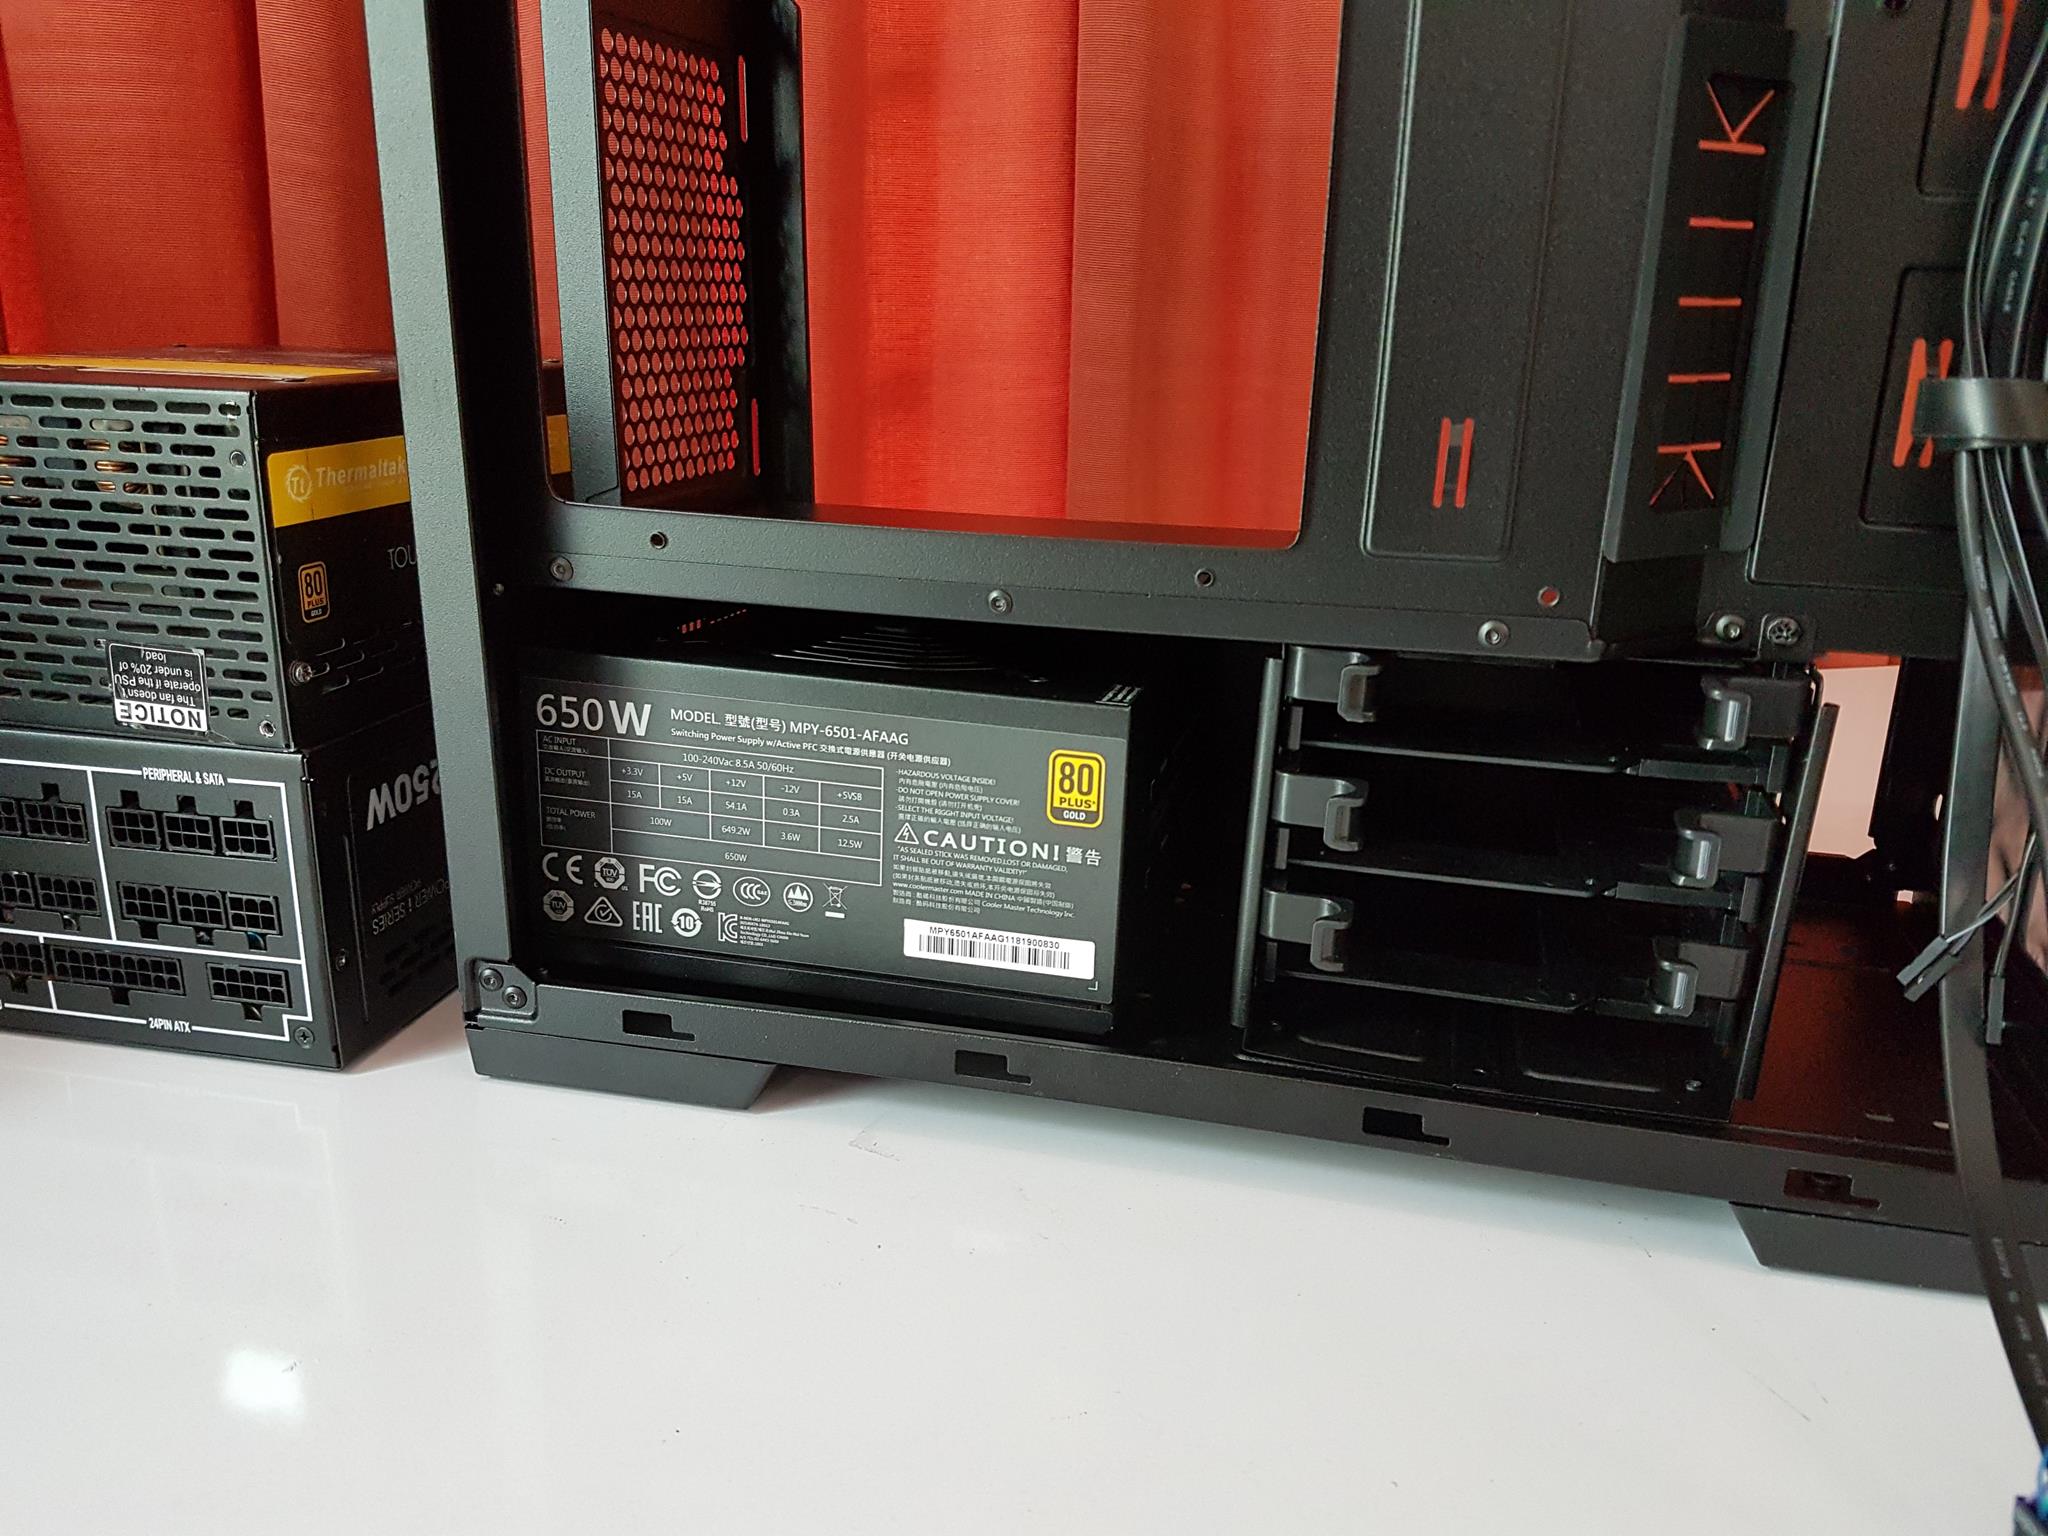
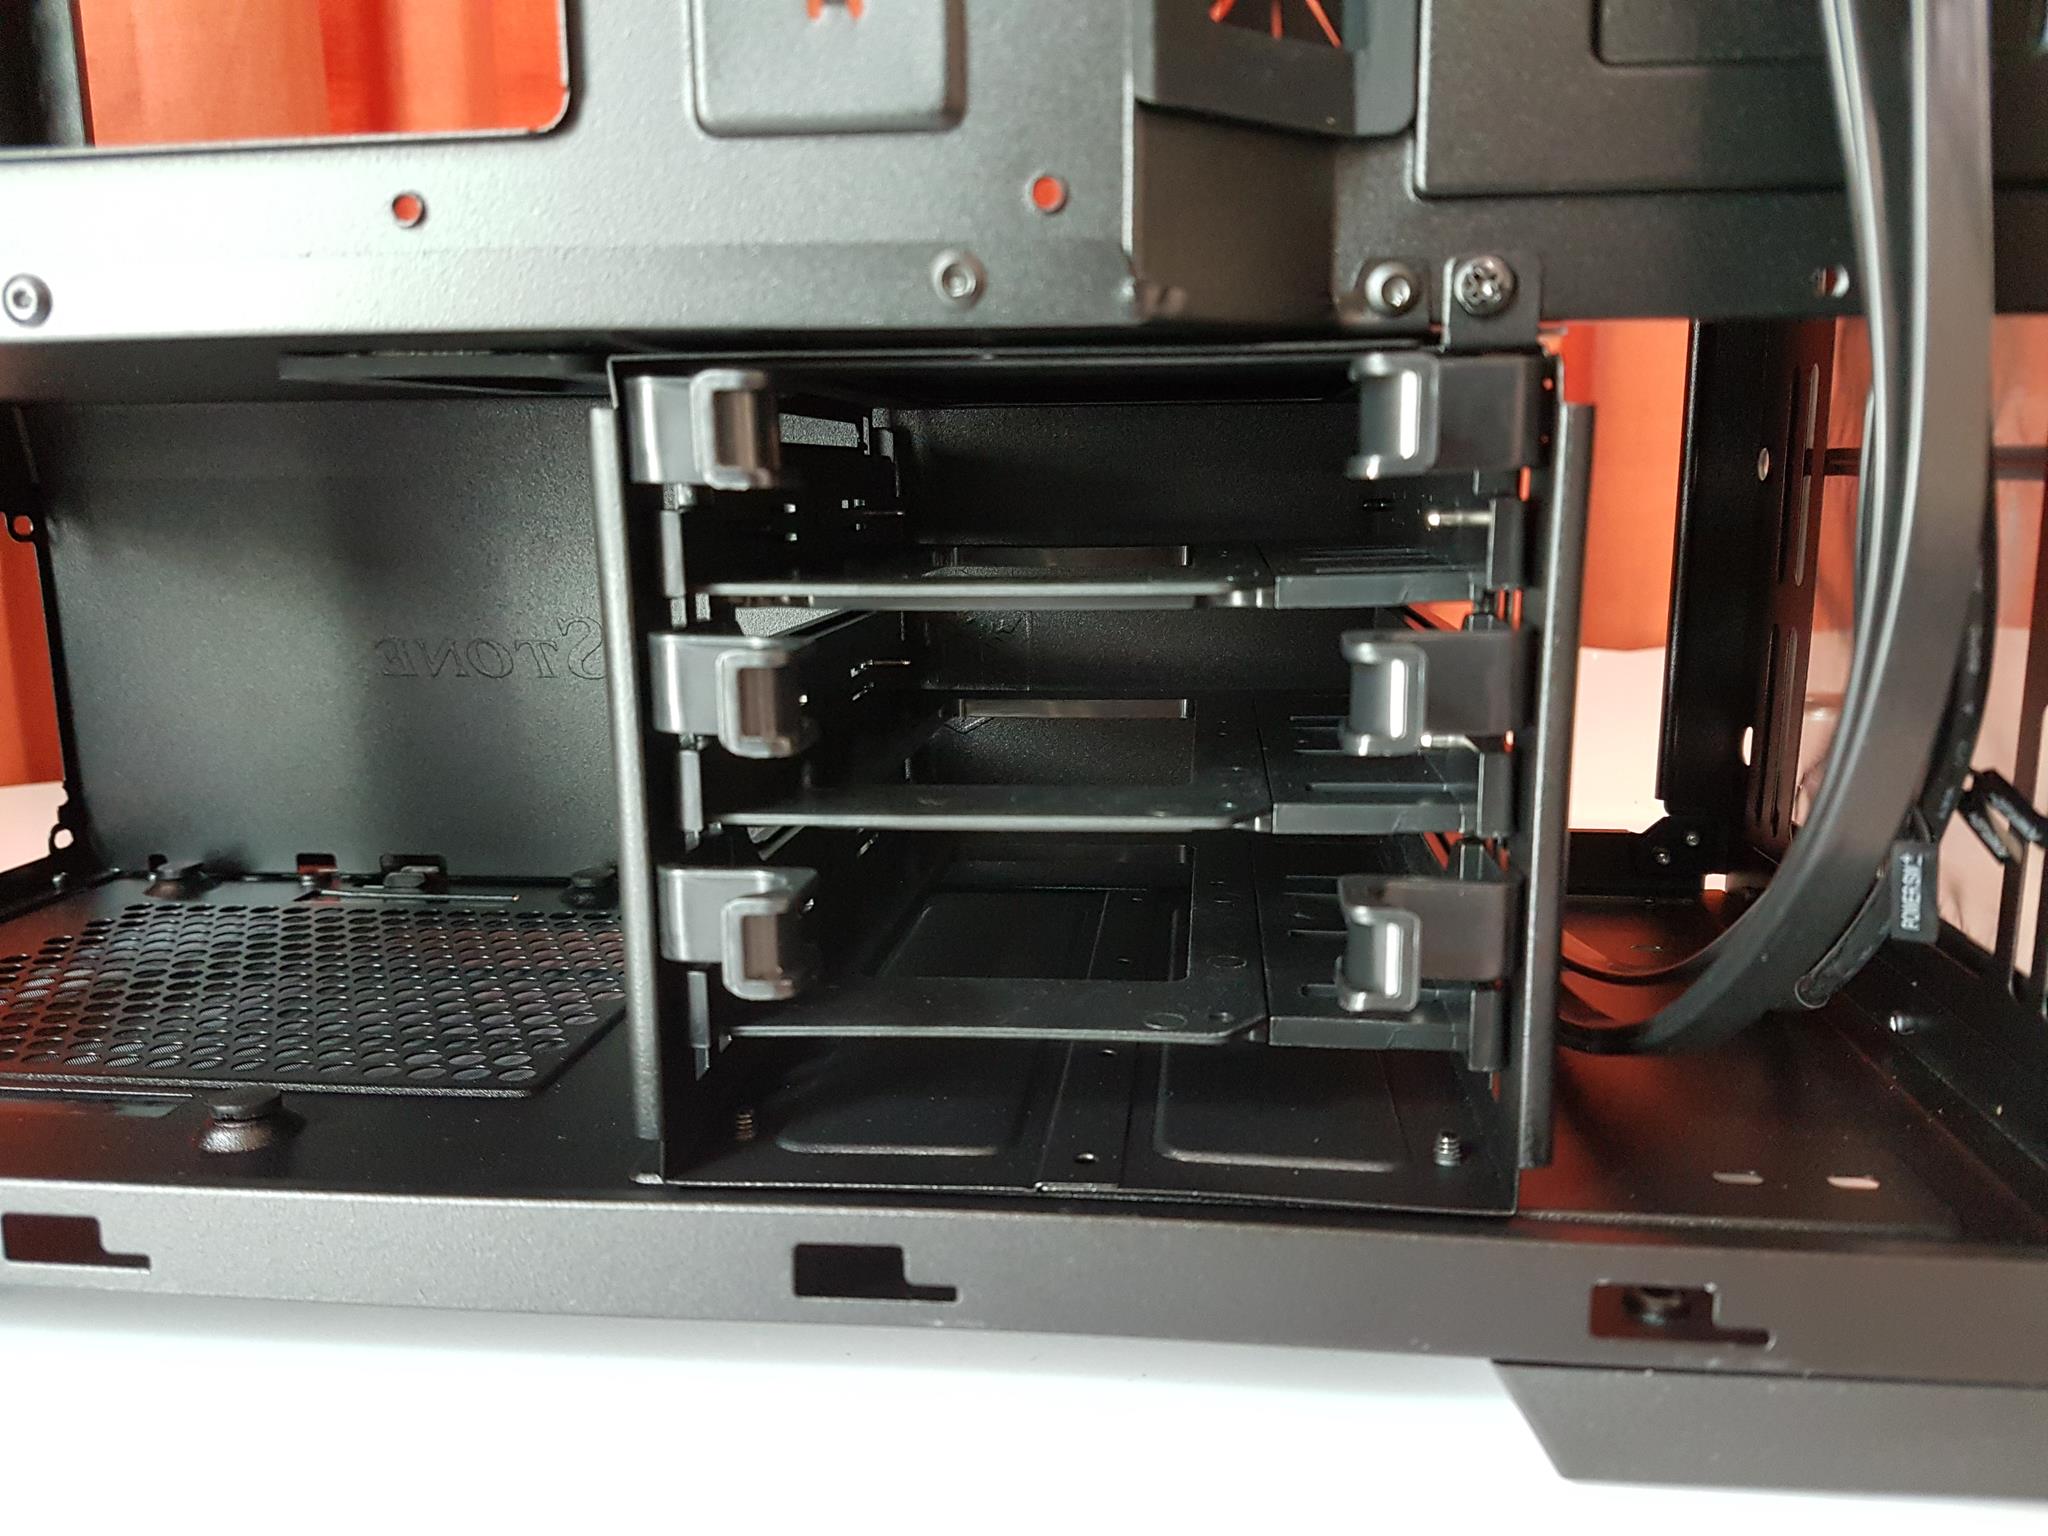
There are four raised tabs with anti-vibration rubber pads on their top. The PSU is placed on top of these tabs. PSUs having a length of up to 220mm can be installed which is too good a clearance. I have tested the chassis with a 160mm, 180mm, and 200mm length PSUs. There is an HDD cage right next to the PSU mount. It has three cadies which are tool-less.
Take out a caddie, find a latch on the backside, press it and slide the side of the caddie to make room for placing 3.5” HDD. Simply slide that side in to lock the HDD on to the caddie and put it back in the cage. It is much easier doing than writing about it. The user can also install 2.5” SSD on these cadies but only a 2.5” or a 3.5” drive can be had at a time.
There is a screw on the top right side of the cage securing it with the frame. As mentioned above, there are four screws on the bottom of the chassis securing the cage. This makes total screws to be 5 holding and securing the cage. The mounting hole on the top right of the cage has more width to adjust the position of the cage per hole. There are total 3 mounting holes. Hence this cage can be positioned in 3 pre-defined positions. There is approximately 35mm of spacing between the first and the second hole and approximately 10mm between the second and the third hole. There is a bit of play here as the user has to take into consideration the front mounted fans/radiator and PSU length and cables to adjust the position of the HDD cage. Remember, there is a gap of 71mm between the front side of the chassis and the PSU shroud. On its default position, the HDD cage is fully under the shroud. Adjusting the HDD cage on the second or third hole would reduce the gap on the front (71mm default gap) and could impact installation of the AIO or the fans. Installing the PSU of 160mm length would not need displacing the HDD Cage though having a non-modular PSU has its implications and user may slide the cage outwards. For PSUs up to 200mm length, the HDD cage can be moved to the second mounting position that would reduce 35mm of space on the front leaving only 36mm of gap up front. Moving the cage to the third position would leave the gap to be 26mm and the user can only install 25mm fans on the front in this configuration. The third mounting position would be needed for PSUs having a length of 220mm.
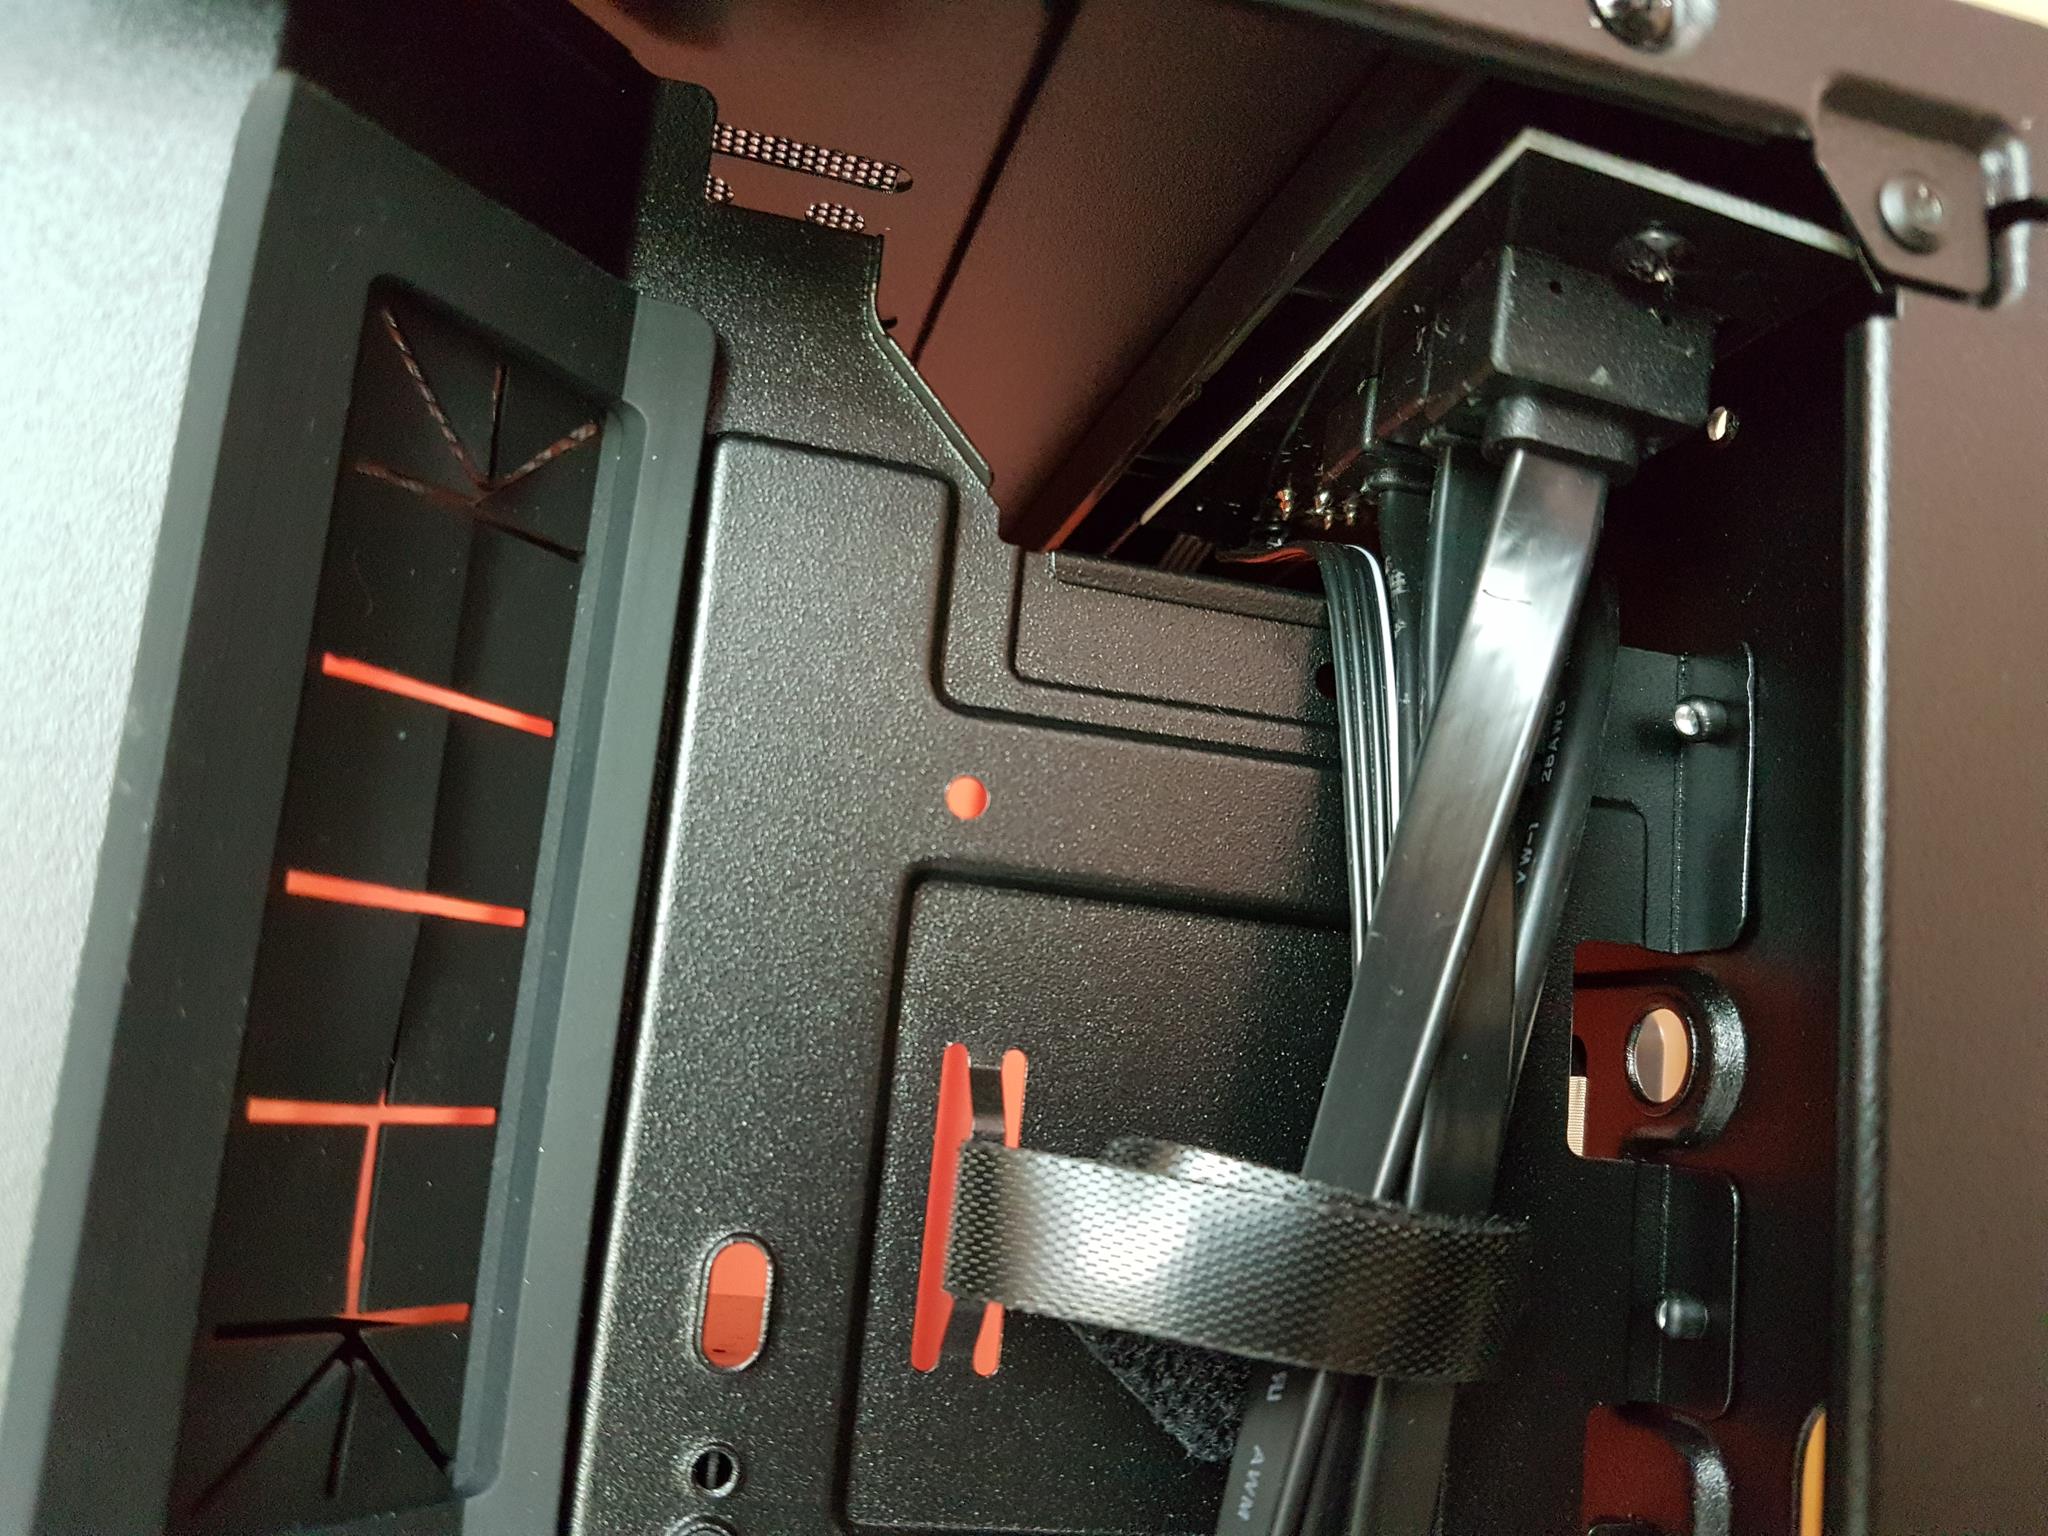
The area on the right side of the main motherboard tray has an inset and makes plenty of room for the cable management. The SilverStone has provided two Velcro strips for cable management. The bottom area is exposed and cables can be seen through dark tinted glass would come handy for that. There is a 35mm of spacing between the PSU and the side of the chassis for cable management. I see no issue with respect to the cable management in this chassis. It has ample room and all that is needed is a bit of planning and patience on the user’s part but it is only when the PSU is modular and has flat cables. Even if the PSU is not modular and has flat cables, cable management will not be an issue but in case you are dealing with a non-modular PSU with bulky rounded cables then it is quite a challenge and I wish they had made the HDD Cage removable as it would come handy under those circumstances. The inset design makes it easier to connect SATA cables to the motherboard even if the graphics card is already installed. The side panels are not fully flushed to the chassis frame which is expected. There is a tiny gap between the frame and the glass which is due to the fact Stainless Steel bands are making contact with the frame. This is not apparent to the naked eye and SilverStone has done a good job in the design department. The length of the 3.1 cable coming from the I/O panel is 450mm approximately. The length of the USB 3.0 cable is 460mm approximately. The length of the HD Audio cable is 380mm approximately.
Installation
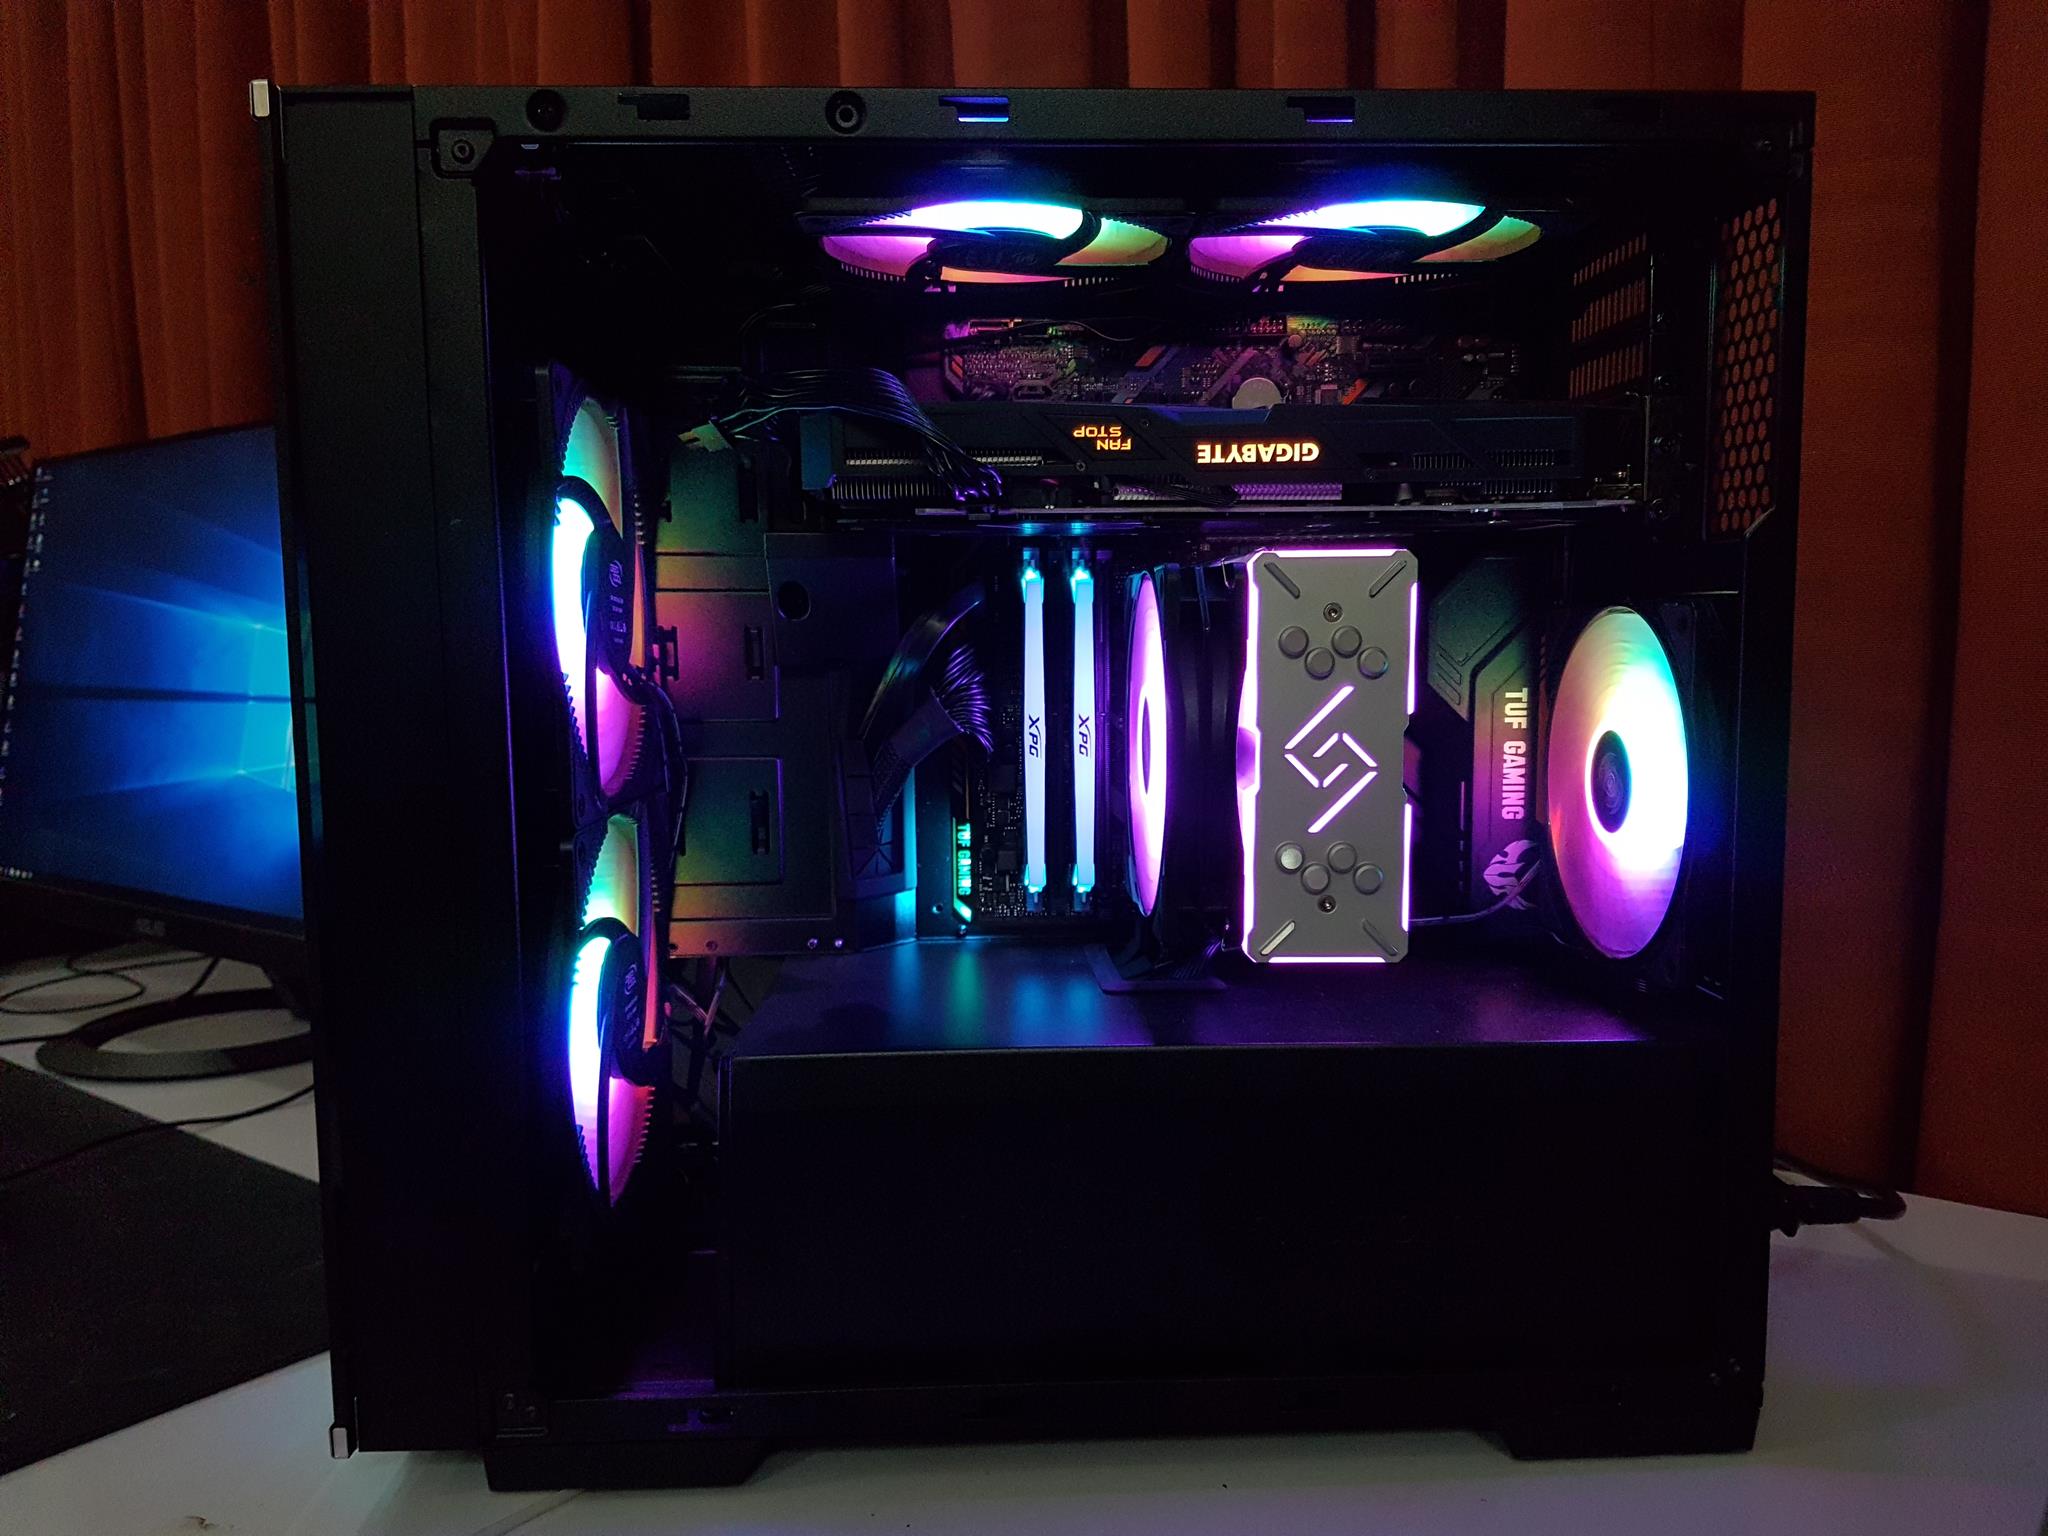
My installation experience in this chassis has been good though there are certain points that I would mention here based on what I have faced during the installation. Before going further, here is the list of the test build that I have used in this chassis:
- Intel i7 8700
- Asus TUF B360M-E Gaming
- ADATA XPG Spectrix D41 2x8GB @ 2666MHz
- HyperX 128GB SSD for OS Drive
- Deepcool Gammaxx GT CPU Cooler
- Deepcool CF 120mm and 140mm fans
- Deepcool 4-port Fan hub
- Gigabyte GTX 1060 Gaming G1 6GB
- Cooler Master MWE 650W Gold PSU
I started off with the required standoffs installation followed by the I/O shield and the motherboard itself. Before proceeding further, I would suggest the builders connecting necessary cables like 24-pin ATX cable, EPS cable, front I/O panel cables and SATA cables. Many mATX motherboards don’t have SATA ports implemented in 90° hence pay attention to the overall layout particularly with respect to the graphics card interference with these ports and top mounted fans that may cover the bottom mounted ports. This is only a consideration in this particular chassis as it is inverted. Once done then decide and install the fans and CPU cooler. This chassis does not have pre-installed fans so you would have to use your own cooling gear.
I would suggest using the top fans as intake fans so that graphics card can have direct fresh air. In case you would want to install AIO up top then keep in mind that the distance between the top fan slots and the first PCIe slot is 105mm. So, if you are using a two slot graphics card then you can easily mount an AIO with a radiator having a height of 30mm max and fans having a height of 25mm max. In case you are up to using 2.5/3 slot graphics card then AIO is out of question up top. In the case of 140mm fans being installed up top then there will be a gap of 20mm between the fans and the motherboard surface which is plentiful.
If there is still a chance of blockage to the lower mounted SATA ports then slim SATA cables could come handy. If you decide to use 280mm radiator on top and front simultaneously (you must be a high challenger if going that route) then SilverStone is recommending that the thickness of both radiators be less than 30mm to avoid interference. A 120mm radiator can be mounted on the rear panel of the case, there is no thickness limitation if the height of the motherboard components in the same area is less than 50mm.
Now that, motherboard, cooler, and fans have been installed, install the storage drives as per the requirement. I have used a 2.5” SSD for OS and basic testing applications hence I did not need a 3.5” HDD. Next step is to the install the PSU. I have kept the PSU and the graphics card for the last. After installing the PSU, it is time for some cable management on the backside. There are two Velcro strips on the backside of the chassis near the front. Use them to your maximum advantage. I have used 5 case fans with each fan having two cables one for the LEDs and the other for the power. The cooler has an RGB top plate for which there is a 4-pin cable and the fan on the cooler also has two cables. All in all, I had to deal with 13 cables coming from the fans and cooler alone. Needless to mention that these cables needed to be connected to the RGB controller and power source to spin the fans, there were more cables involved. The rear fan was connected to the motherboard’s fan header. The fan on the cooler was connected to the CPU Fan header of the motherboard. As this board has only two fan headers in addition to the CPU fan header, I had to use a fan hub to connect and control the remaining 4 fans. For that, I have used Deepcool’s 4-port fan header. Its 4-pin cable was connected to the available fan header on the motherboard and all remaining fans were connected to the hub. The power supply I have used is modular but unfortunately, its 24-pin ATX cable is not flat and it was challenging handling this cable. The front I/O panel’s cables and fans’ power/LED cables were maximum combined and tucked on the backside of the chassis near the front using those two Velcro strips. There is still enough clearance on the sides of the chassis to tuck your cables. In a case where needed, you can increase the gap between the PSU and the HDD cage is space on the front allows for this move to create more space for cable laying. I did not spend much of a time with the cables but my overall experience with the cable management was good and I have nothing serious to complain in this regard. The last step was to install the graphics card. Keep in mind that I had already passed the PEG cable up front so I did not have to face any issues in this regard. It is in the design that I would suggest using the top mounted fans to throw fresh air inside and use the AIO on the front. This would create positive air pressure inside the chassis. Single 120mm fan on the rear and vents on the rear side would be enough to exhaust the hot air. This way, your graphics card will also run cooler. Again mentioning that use the hose side of the front mounted AIO on the top as there is no space on the bottom to route the hoses in parallel with the PSU shroud.
So, test build has been completed and if you would ask me how was my overall experience with this chassis up till now before the testing, I would dare to say that this chassis has been winning me over badly. But is it that good when it comes to the thermal performance and airflow? Time to find out.
Testing
The very first thing that user these days ask given any chassis is the thermal performance based on airflow provision. I was set to do the same with my test build. As this chassis does not have pre-installed fans in it so it leaves a room for me to decide upon the fans and their configuration. I installed two CF140 ARGB fans on the front side of the chassis. Two CF120 ARGB fans on the top side were installed. Single CF120 ARGB fan was installed at the rear. The top and front mounted fans were all set as intake fans as it is only natural given the design element of the chassis to make the top two fans to throw fresh air on the graphics card as I was set to test it out. Initially, I was of the mind to use 240m AIO in the test build but dropped the idea in the favor of air cooler as many users are still using and prefer the air coolers in their build. CPU air cooler that I have used is Deepcool Gammaxx GT. Please, keep in mind that we are not judging the cooling potential of the cooler but the effect on thermal performance due to airflow restriction if any.
Following configurations were used to test the thermal performance:
- Thermal testing with the front cover off and front fans mounted behind the slots.
- Thermal testing with the front cover on and front fans mounted behind the slots.
- Thermal testing with the front cover on and front fans mounted in front of the slots.
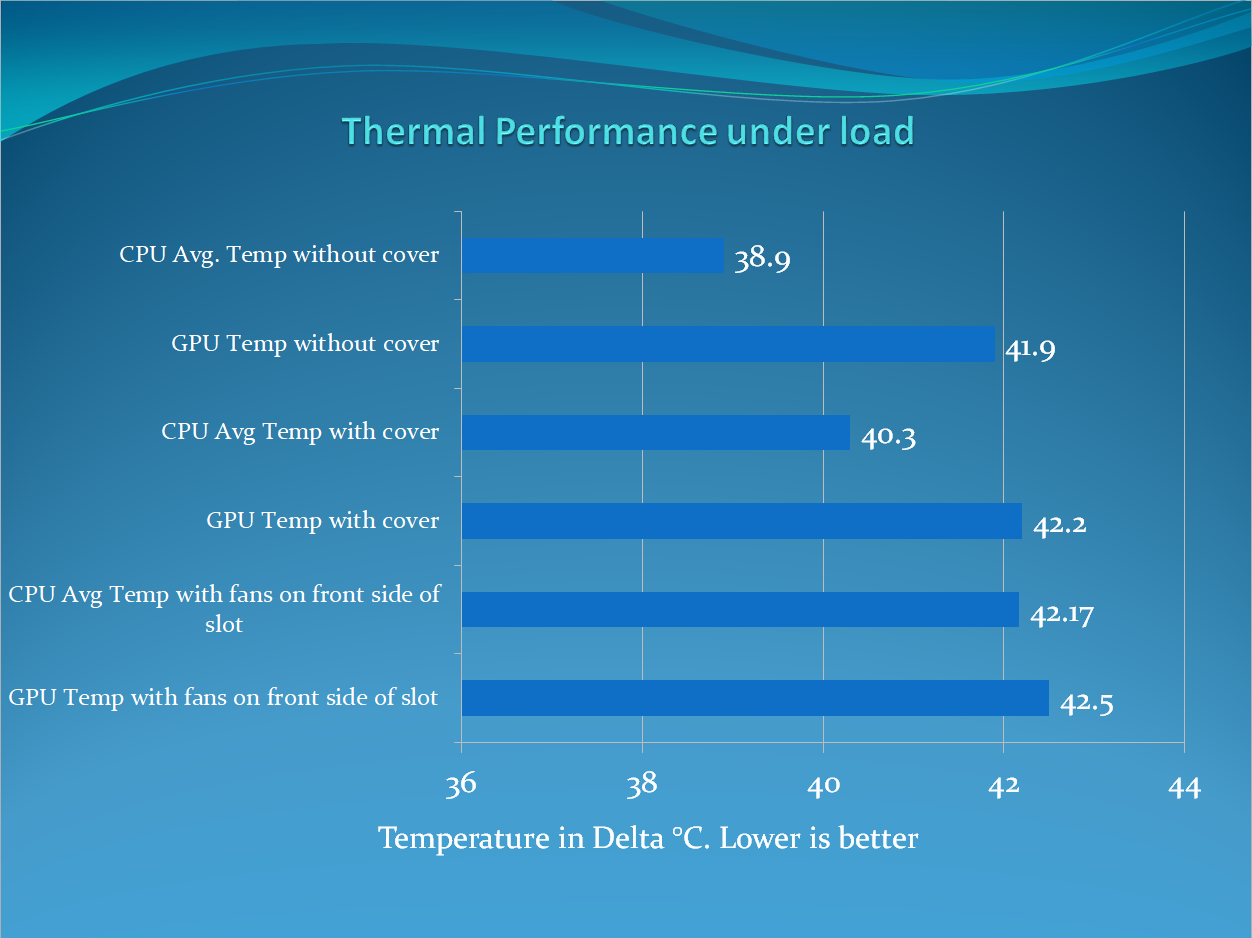
AIDA64 was used to stress test the CPU at 4.5GHz on all cores. A single run of the AIDA64 was made for 30 minutes and an average of the each core’s temperature is calculated which is then used to determine the delta value by subtracting the ambient temperature from the average value. Furmark was used to stress the graphics card at 1440P with 8x MSAA for 30 minutes. Both components were tested individually with a minimum of 30 minutes gap between each stress test. Testing was carried out on different days. Each fan was run at 100% of their speed. So, what is the thermal performance in this chassis? Here are the results:
Thermal Performance CPU
With front fans behind the slots (the configuration I would recommend the most) and front cover off, the delta temperature was 38.9°C. Next, I put the front cover on with front fans still behind the slots, the delta temperature was 40.3°C. There was a difference of mere 1.4°C which is too good a result that one could expect from fully tempered glass covered panels. Now, in our last configuration with front fans mounted on the front side of the slots and front cover on the delta temperature was 42.17°C. The difference between the last configuration and first configuration comes to be 3.27°C which is still better as compared to what I have seen in the Cooler Master Q300P if not good. The difference between the last configuration and the second configuration comes to 1.87°C which is still much better. This shows that the SilverStone Lucid LD01 is well optimized for the effective airflow though my recommendation is to mount the front fans on behind the front slots. The design element of the front side is clearly favoring this approach.
Thermal Performance Graphics Card
The graphics card with the front panel off was doing max at delta 41.9°C and 42.2°C with the front panel on. There is a difference of 0.3°C. This goes to show that the graphics card is taking full benefit of the top two mounted fans as they were throwing fresh air on the graphics card and graphics card was least dependent on the front mounted fans. The situation would have been different if the top mounted fans were either acting as exhaust or were simply not present. In our last configuration where the front fans were mounted on the front side of the slots and front cover on, the delta temperature on the graphics card was 42.5°C with 0.3°C difference with respect to the front fans installed behind the slots and front cover. Again, this is a marginal difference and goes to show the true beauty of the chassis design if the users utilize it to their benefit.
Acoustic Performance
I am not using sound meter these days as the summer season is still here and during this season there are environmental sounds that would simply invalidate the meter’s reading. Based on my judgment and experience with the fans and their sound level testing, this chassis was almost silent with custom fan curve. With all fans set to run at 100%, it was noisy but not teasing.
Conclusion
SilverStone has recently introduced a new series of their Chassis termed as Lucid. The main theme of this series is the high transparency using Tempered Glass Side panels. To give it a start, they took their most popular microATX chassis aka the Temjin TJ08-E and has perfected it in the form of LD01 with what I can term as spacious small form factor enclosure with room to accommodate some serious hardware. Given that it is from Lucid series, it packs three 3mm TG panels. When it comes to the LD001 there is more to it than meets the eye and we were not thrilled for no reason. This is still a microATX enclosure which can house mini-DTX and mini-ITX as well. Not only does it exterior speaks for the top notch finishing but the well thought out internal layout and design speaks for the SilverStone’s engineering. The dimension of the chassis is 218x390x431mm (WxHxD). Chassis is made of steel with steel reinforced tempered glass panels. Net weight of the chassis is 7.4KG. In terms of volume, this chassis has 36.6 Litres of space. Both side panels are made of 3mm dark tinted Tempered Glass which are reinforced by Stainless Steel bands. These bands are encapsulating the side panels for maximum safety and ruggedness yet doing it in a style as the Chrome finish on the bands, compliments the dark finish on the side panels. The same idea goes for the front panel. When fully assembled it almost gives the idea of the chassis finished in a single piece of TG on the three sides. This design is totally cohesive on the exterior and stands it out of the competition. The bands and TG panels are fingerprint magnet so take care while handling them and a microfiber cloth will come handy. They could have given one in the accessory! This chassis has 5 fan mounting slots and support for up to 280mm radiators on the front and up top. In terms of the storage capacity, the user has the option to install two 2.5” SSDs on the dedicated bracket on the backside of the motherboard tray. There is a 3.5” HDD cage with three caddies. These caddies also support 2.5” drive mounting. ATX PSU is supported up to 220mm length. CPU Cooler up to the height of 168mm can be installed. Say what? You read it right and yet it is a microATX chassis. Graphics card up to 370mm length can be installed. The I/O panel is mounted on the top side of the chassis and it has Audio jacks, two USB 3.0 Type A ports and a USB 3.1 Type C Gen 1 port. Come on SilverStone, provide Type C, Gen 2 port, please. The power button has a diffuser on its edges which lights up in the white color. There is a nice clicking to this button. Below paragraph will highlight some important design elements of the chassis and clearance notes.
Speaking of internal layout, this is an inverted design from the SilverStone. The components side is spacious. There is a PSU shroud covering the PSU and the HDD Cage. It has a cutout on the top with the rubber grommet. This cutout is implemented vertically, I would like to see it done horizontally and possibly rather I would like to have two small size cutouts on the shroud; one near the I/O shield side of the shroud and the other where the current large one is and of course I would love to see both cutouts with rubber grommets. Two cutouts would make the overall looks much cleaner. The air cooler in my test build is hiding the bulk of the cables going through this single cutout. The motherboard tray does not have flex in it and built quality is very good. The LD01 has provision for 5 PCIe slots. Normal microATX motherboards have 4 PCIe slots. This design has allowed the SilverStone to provide up to two 120/140mm fans up top and depending upon the graphics card’s width an AIO on up top is also possible. The rear side has a provision for a 120mm fan and/or radiator. There is no thickness limitation if the height of the motherboard components in the same area is less than 50mm. In case you would want to install AIO up top then keep in mind that the distance between the top fan slots and the first PCIe slot is 105mm. So, if you are using a two slot graphics card then you can easily mount an AIO with a radiator having a height of 30mm max and fans having a height of 25mm max. In case you are up to using 2.5/3 slot graphics card then AIO is out of question up top. In the case of 140mm fans being installed up top then there will be a gap of 20mm between the fans and the motherboard surface which is plentiful. If there is still a chance of blockage to the lower mounted SATA ports then slim SATA cables could come handy. If you decide to use 280mm radiator on top and front simultaneously (you must be a high challenger if going that route) then SilverStone is recommending that the thickness of both radiators be less than 30mm to avoid interference. The area on the left side of the PCIe slots has perforations to aid in the exhaust of the hot air from the chassis.
The Motherboard tray is inset or recessed as compared to the left side plate and there are two main cutouts on the angled side with rubber grommets. The user can mount up to two 120/140mm fans and/or radiator on the front. Fans can be installed behind the slots or the on the front side. Both sides have implications with respect to the thermal performance. Please, check our testing section for more details. Make sure to install the radiator such as the hose side is on the top. There is a graphics card support bracket which is adjustable to the second PCIe slot and is removable. Clearly, SilverStone was thinking straight and out of the box here as with inverted layout, the stress is more towards the PCB side of the graphics card and the on the motherboard’s PCIe slot and the majority of such chassis don’t have built-in support provided in the chassis. The HDD cage can be adjusted on three predefined positions to allow for more length of the PSU. But there is a play with the HDD cage positioning as it has to be done with respect to the PSU and the front mounted fans/radiator. Read the Closer Look section for more details and measuring. Read it to know the limitations. I have two suggestions here to the SilverStone for the HDD cage; make it removable and instead of giving the user pre-drilled holes, provide a slot so that the cage can conveniently slided. In terms of Cable Management, this chassis has good enough clearance on the backside near the front of the chassis and on the gap between the PSU and the left side of the chassis. Minimum clearance for the cable management is 25mm on any side which is ample. Keep in mind that cable management could be challenging for the non-modular PSUs not having flat cables. This could have been avoided if the HDD cage was removable. The front fan mounting side has a removable dust filter, the underside of the PSU tray has a removable dust filter and the top side has a magnetic dust filter. Sitting this magnetic dust filter is bit inconvenient as the user has to slide it manually to adjust for the proper alignment. The air intake is handled with a large cutout at the bottom of the chassis frame and the top side meshed perforated portion of the front panel.
This is already going lengthy, in case you are looking for answers to some questions, I encourage you to read the complete review as I have tried to cover as much of the detail as possible. My building experience with this chassis was a good one overall. The user will have to plan the build for sure. But here are some general tips for you guys. Don’t install the PSU right in the start. Save it for the very last. Similarly, install the graphics card in the last. Start with standoffs and use the provided wrench to install them. Install the motherboard. Before proceeding to the cooler and the fans, start with the cables and connect the necessary cables like 24-pin ATX, EPS, front I/O panel connectors etc. Then proceed with the cooling gear and set them up. Next, install the storage drive(s) and graphics card. Now, install the PSU and do the cable management on the backside of the chassis.
This chassis is rated at $114.99 at the time of the review. Some may say this is a high price tag for a microATX chassis as effectively this price bracket is for the ATX closures like Meshify C from Fractal, H500 from Cooler Master, View 31 from Thermaltake to name a few. With three TG panels with Stainless Steel bands reinforcement, provision of up to 5 fans, up to two 280mm radiators, good enough clearance for the CPU cooler, graphics card, built-in support bracket for the graphics card, and most of all the top-notch build quality and good finishing, I am willing to pay this price after having used it. Don’t forget the thermal performance of this chassis which has surprised me. After thorough and repeated testing, I have found that thermal performance is too good. The numbers in our testing section are speaking for it and this is beyond any doubt that it is indeed that design that I would want. There was a difference of 1.4°C with and without the front panel. I remember this difference was like 8°C in the Q300P. Even when the fans were installed on the front side of the slot the difference was 3.27°C which is still much better than what I have experienced with other chassis.
Lucid LD01 is a micro-ATX chassis with an artful blend of engineering and aesthetics. This is what SilverStone is marketing their Lucid series LD01 as. They are damn right about it. This chassis has earned our Must Have award. Much thanks to the SilverStone for giving us the opportunity to review their Lucid LD01.

