Thermaltake Ceres 300 TG ARGB PC Case
Thermaltake Ceres 300 TG ARGB PC Case
The Thermaltake Ceres 300 is a mid-tower PC Case designed for those who want something functional that also looks nice and doesn’t break the bank. Currently available for £89.99 at SCAN UK, for both the black and the snow version, this case does find itself smack dab in the middle of a very crowded price range. However, as we all know, Thermaltake has been working endlessly lately to continue to take their brand to the next level and that even includes the more affordable lineup of products as well.
In this review, we will take a look at the case from all angles and even feature a full build in it to show off just what you can get for your money. The case comes with three fans as standard and two of them are CT1240 ARGB sync fans, which adds a nice touch of RGB to the front of the case without overdoing it.
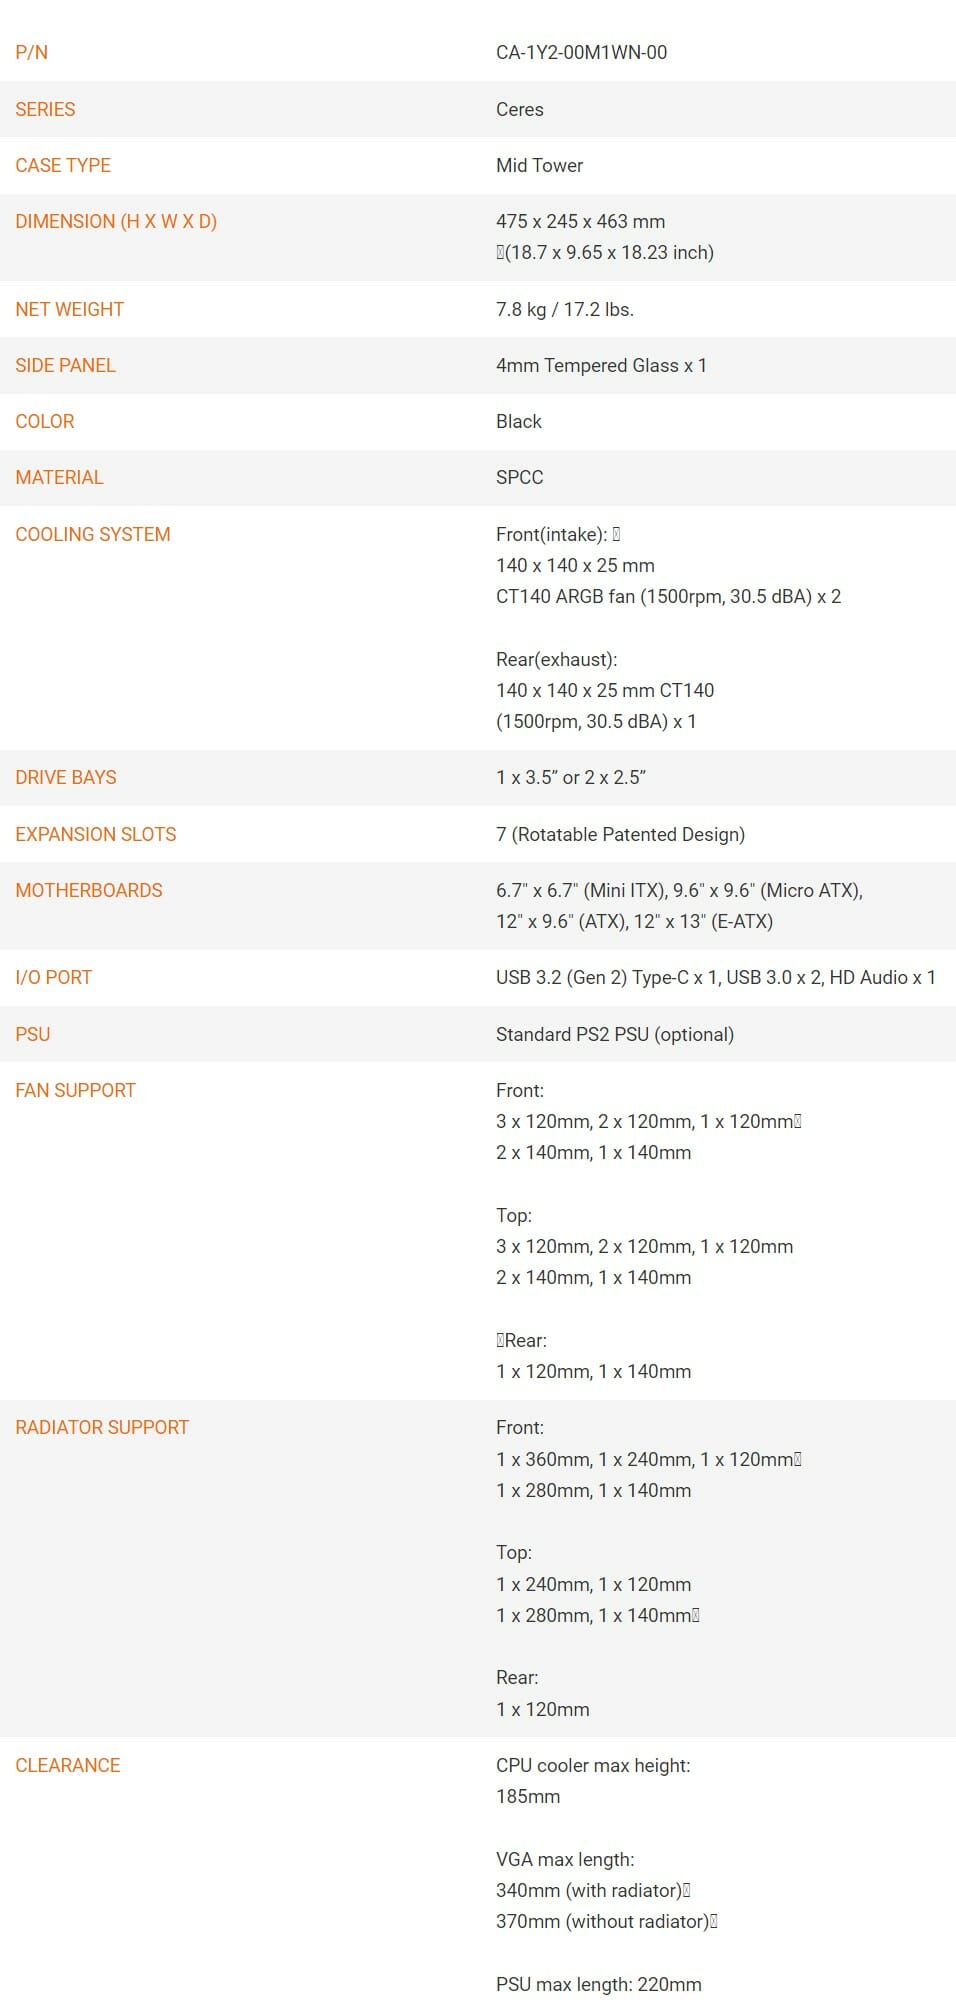
Specifications
Closer Look – External
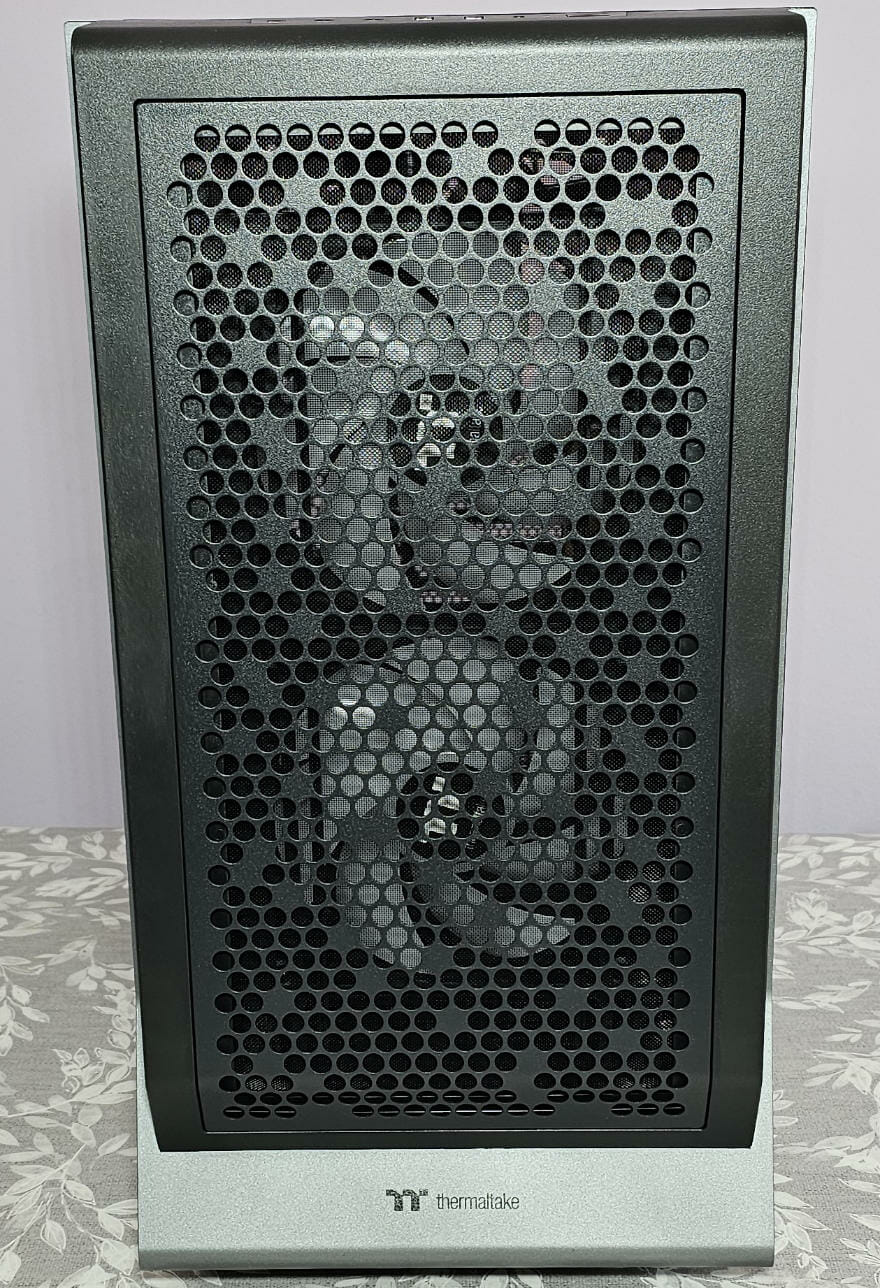
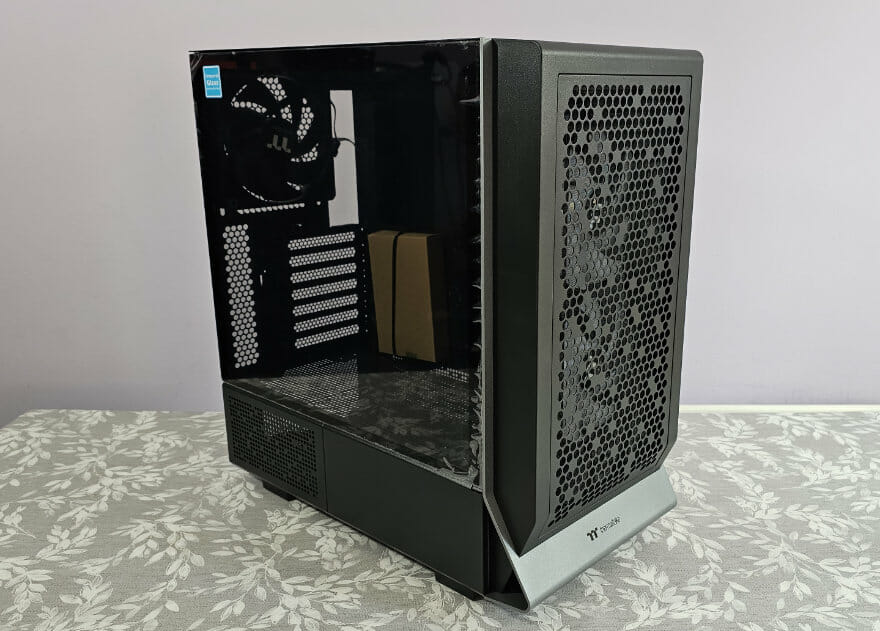
As the naming would suggest, the Ceres 300 TG comes with a tempered glass side panel. The front panel also has plenty of nicely sized holes to make use of the CT140 ARGB cooling fans so they can pull in enough air to help keep all your components cool.
Taking a look at the front panel and we get a better look at just how much ventilation it has. This is going to allow for some massive amounts of air to be pulled into the case from the front intake fans and essentially, help keep all your components cool.
Thermaltake has gone with a unique placement of the holes in their Ceres 300 case to allow for a bit nicer aesthetic.
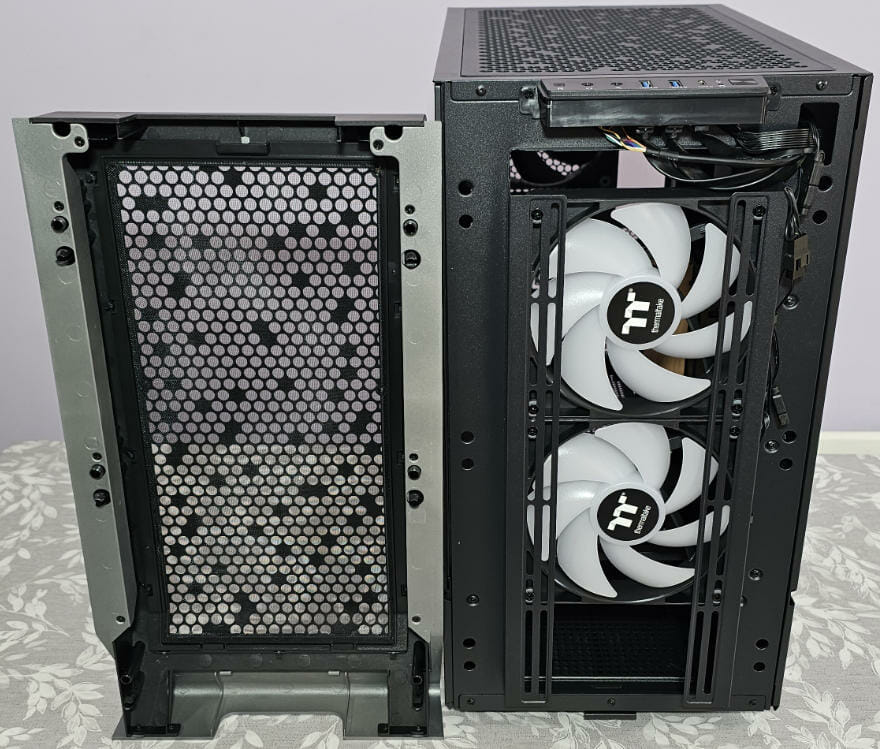
The front panel comes off rather easily. This not only allows access to the front-mounted fans but will allow you to take out the dust filter and clean it should you need it.
To take off the front panel, as with most cases, you just put your hand under the bottom and pull firmly. To put it back on, you simply line everything up and give a firm push where the mounts go into the holes.
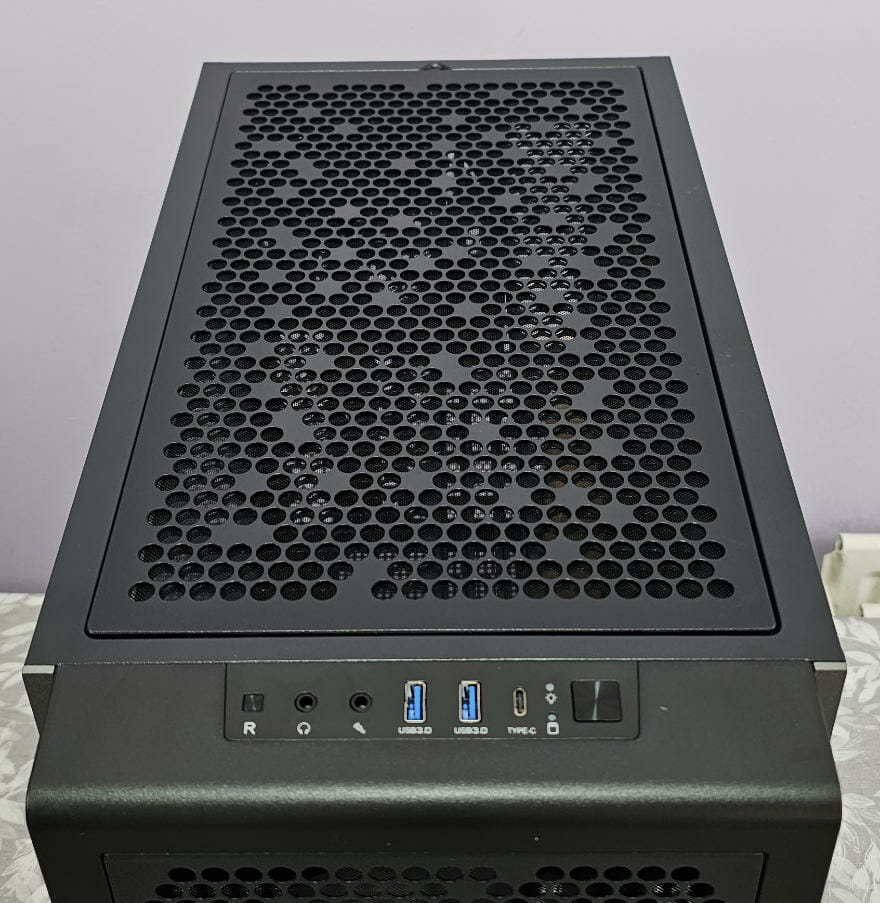
On the top of the case, we see the same circle design that we saw on the front. We are starting to see that this case is designed for some impressive airflow as there is no shortage of ventilation.
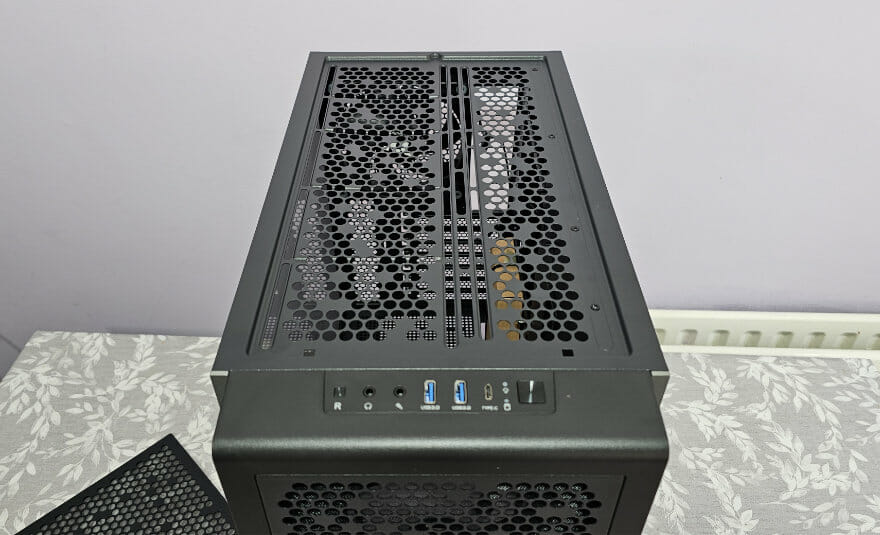
The top panel simply lifts off and now we can also see the mounting for any top-mounted fans or radiators.
Instead of simple holes, Thermaltake has gone for a design that will allow you to slide your fans or rads into the position you need, further allowing you to customize this case to your own needs.
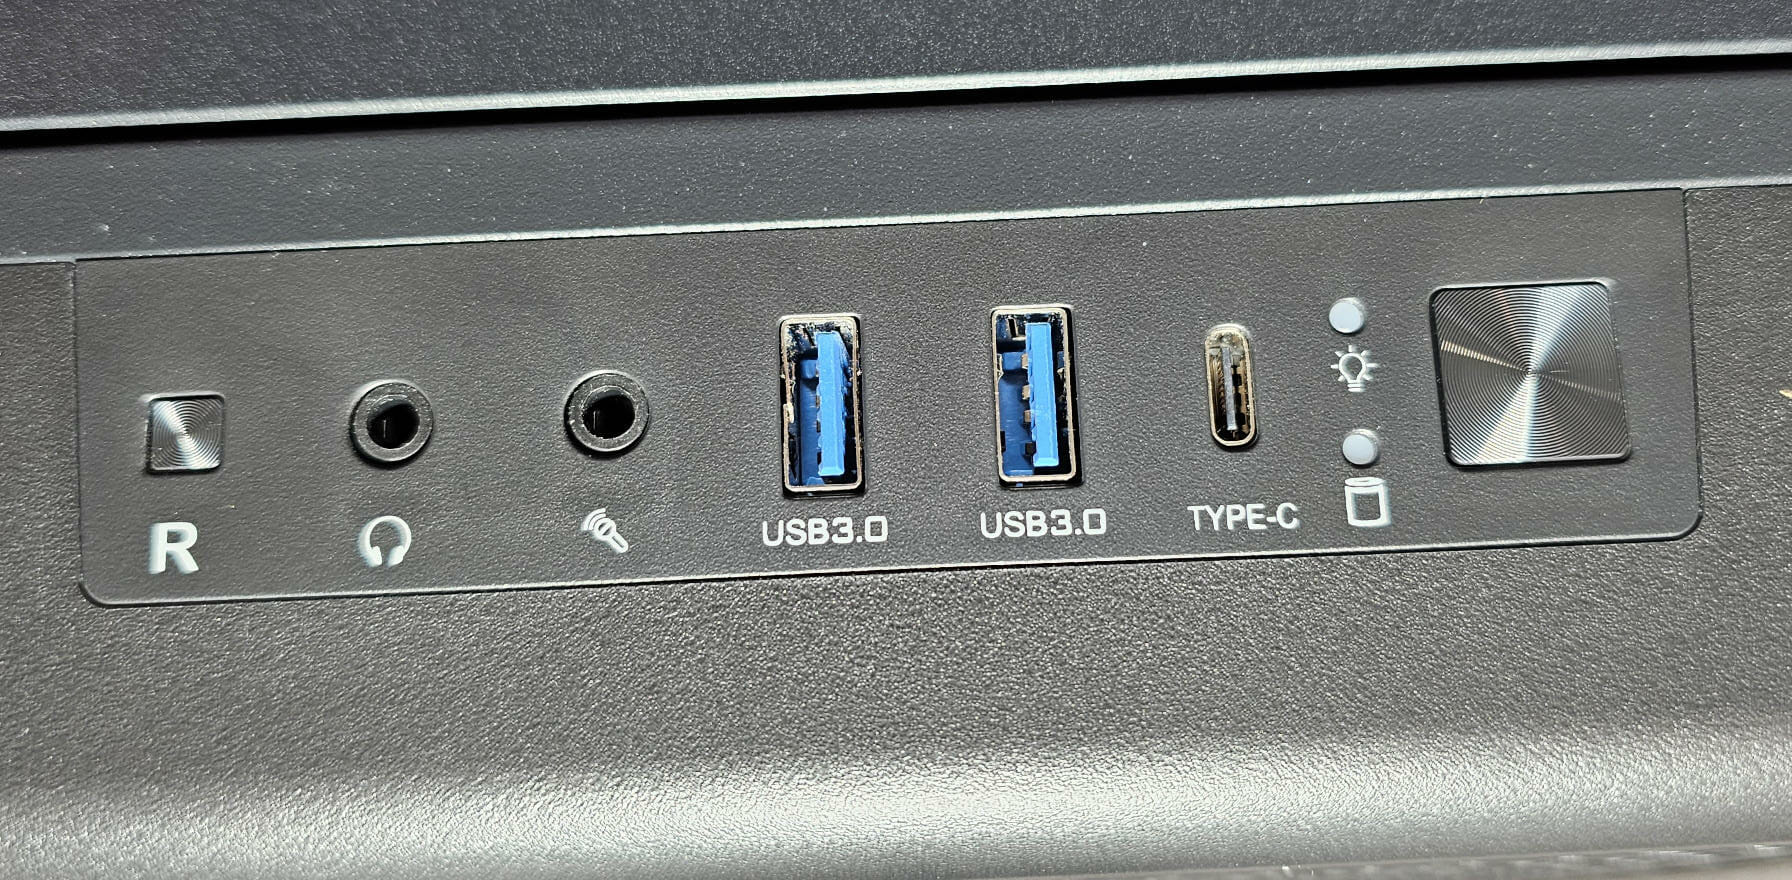
The front IO has two USB 3.0 Type-A ports and one USB 3.2 Type-C port as well as a pair of HD Audio ports.
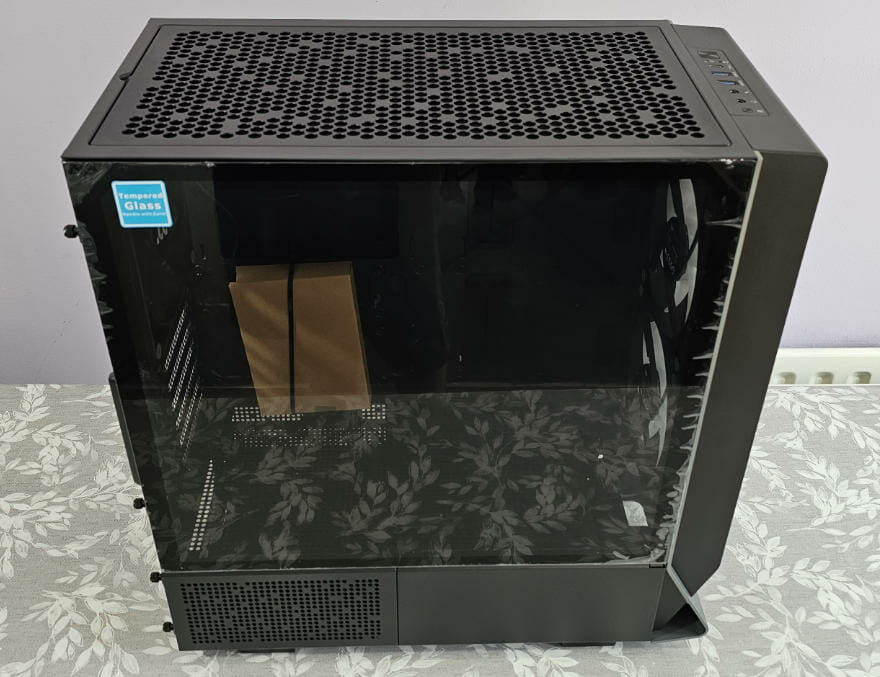
The main side panel is made from Tempered Glass (TG) and will allow you to view everything in the main chamber of the case. The PSU goes into a separate chamber so you don’t have to worry about seeing all those cables which will allow for a much nicer build.
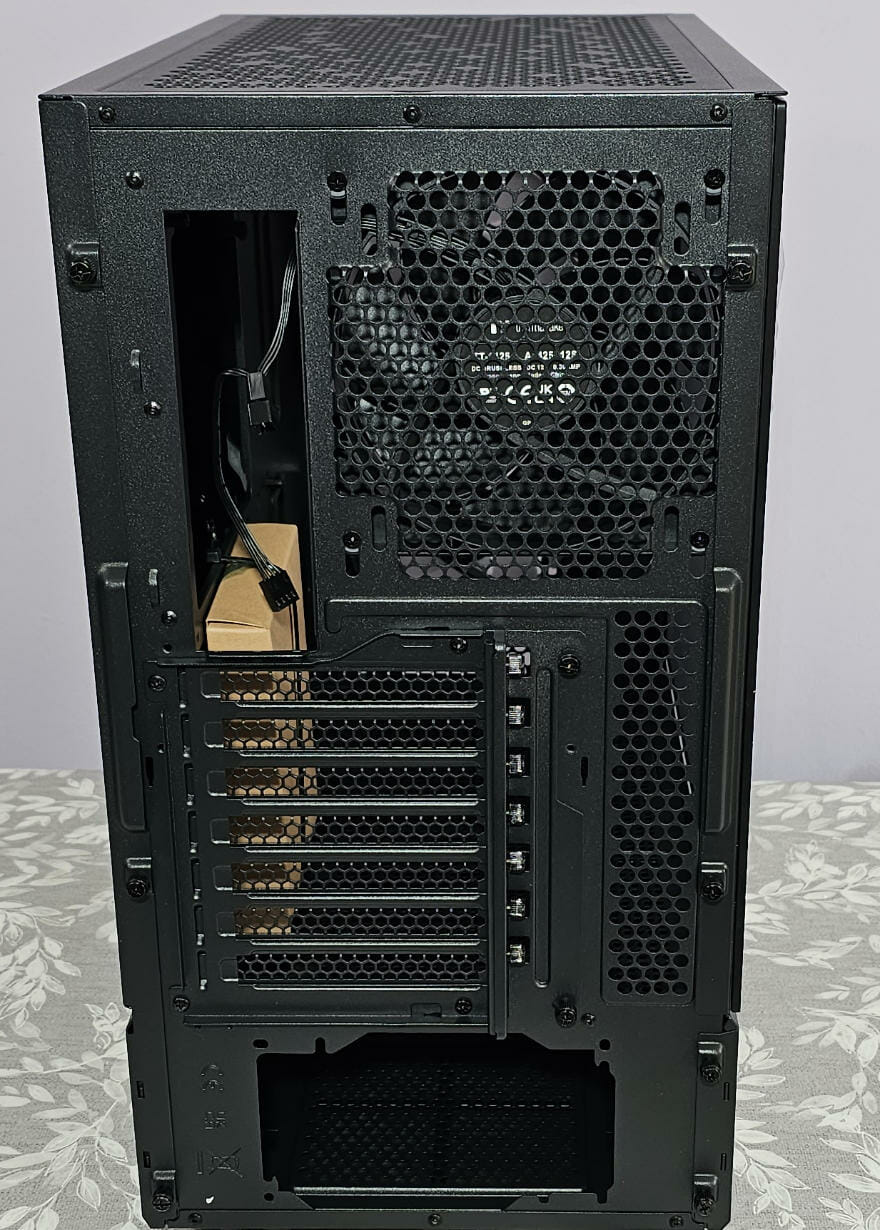
On to the backside of the Ceres 300 and we have a bit more going on here than normal.
The rear exhaust fan can be moved up or down by simply loosening the screws a bit and moving to your desired location.
There are seven PCI expansion bays. For those who like to vertically mount their GPU, the whole PCI expansion bay can be rotated to allow you to do so.
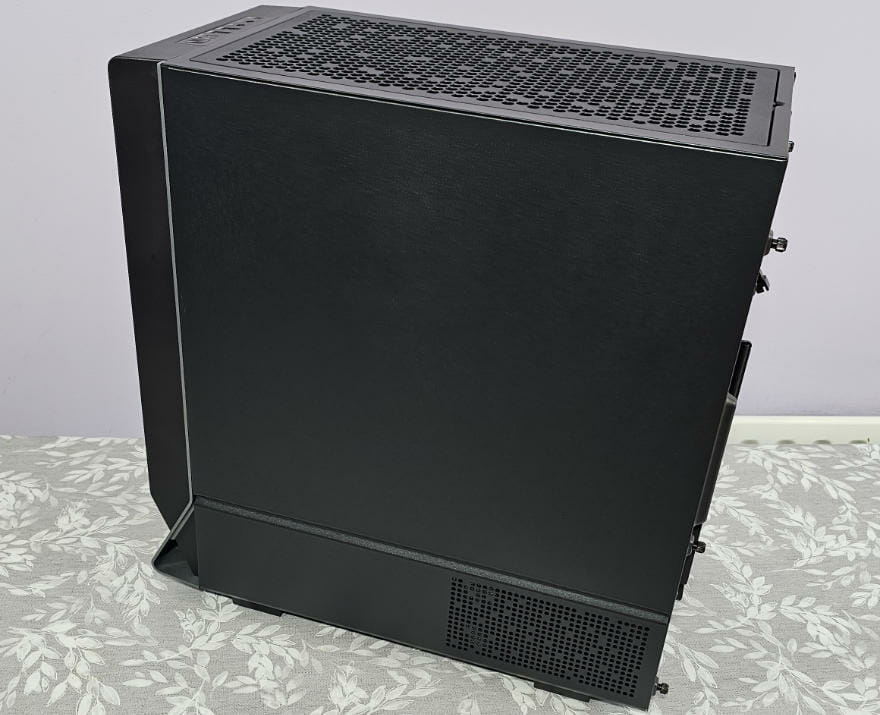
You will also notice four thumbscrews on the right side, that is because the TG side panel and the PSU side panel are separate and can be removed individually if need be.
You will notice on the non-TG side panel that it looks similar in the fact that it may have two separate panels. However, it does not and the PSU panel is attached to the side panel and they come off as one piece.
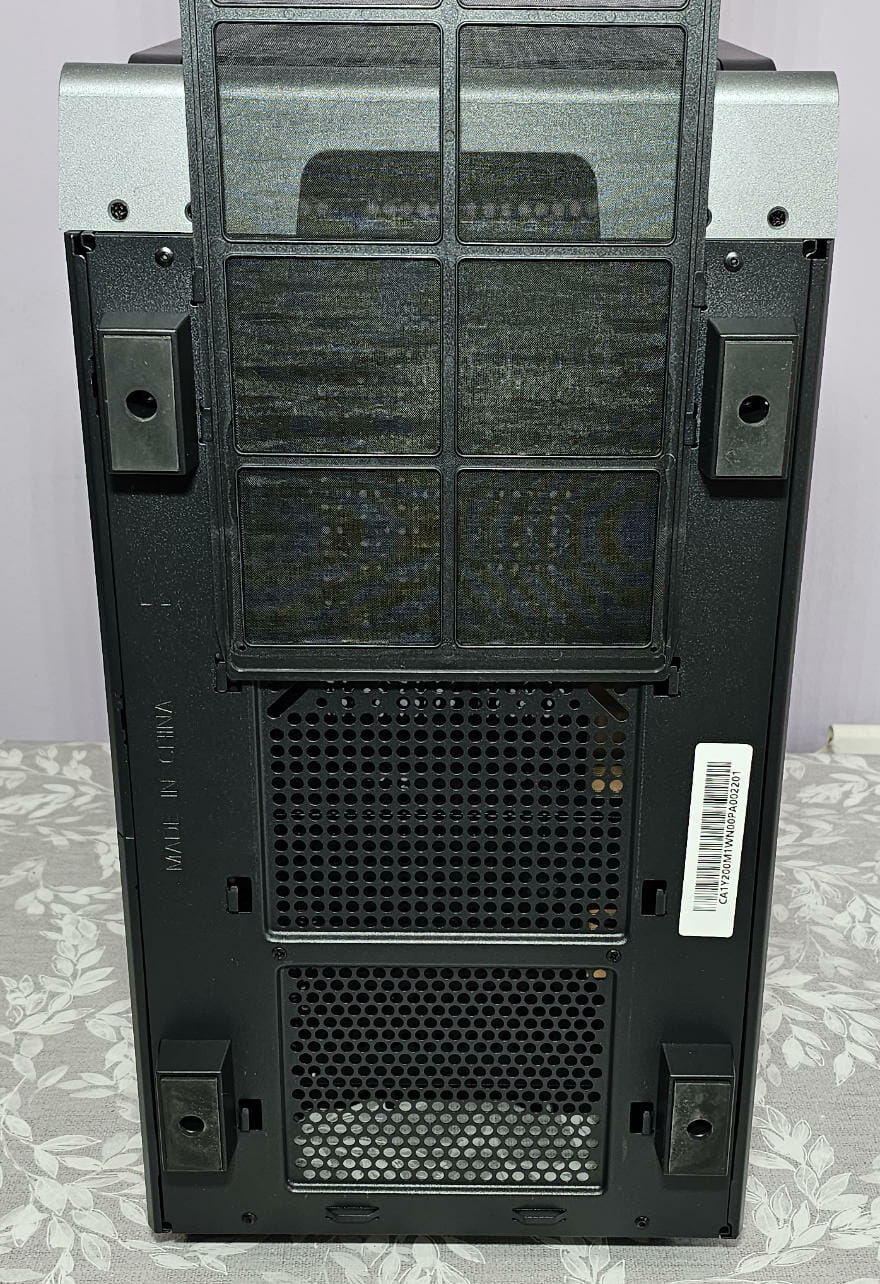
The bottom of the Ceres 300 has a full-length dust filter for added protection. This will help keep your PSU clean as for those of us who have to keep our PC on the floor, it sure does attract a lot of dust from the bottom.
Closer Look Internal
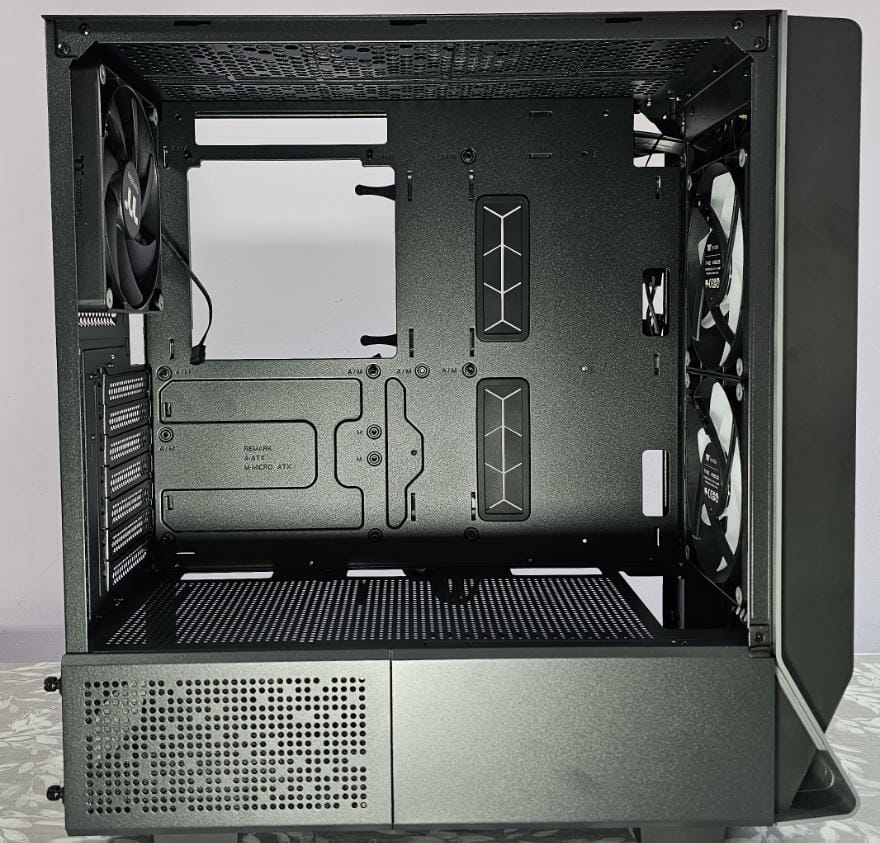
Taking off both side panels allows us to see just what is going on inside the Ceres 300 TG case. From the main view, we can see a nice large cutout which will allow for easy CPU cooler installation without having to take the motherboard out of the case.
We can also notice a couple of cable pass-throughs that have grommets to the right of the bigger cutout. The smaller cutout above is designed to allow you to route any cables you need to the top of the motherboard. It would have been nice to see a couple of smaller cutouts here as it would allow you to better hide the cables but it’s not a dealbreaker as it is still functional.
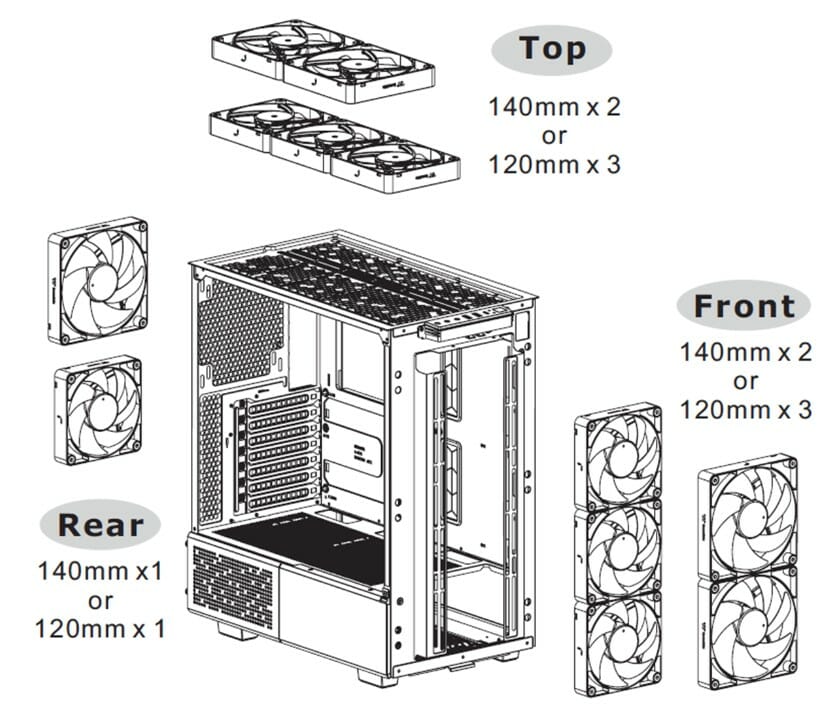
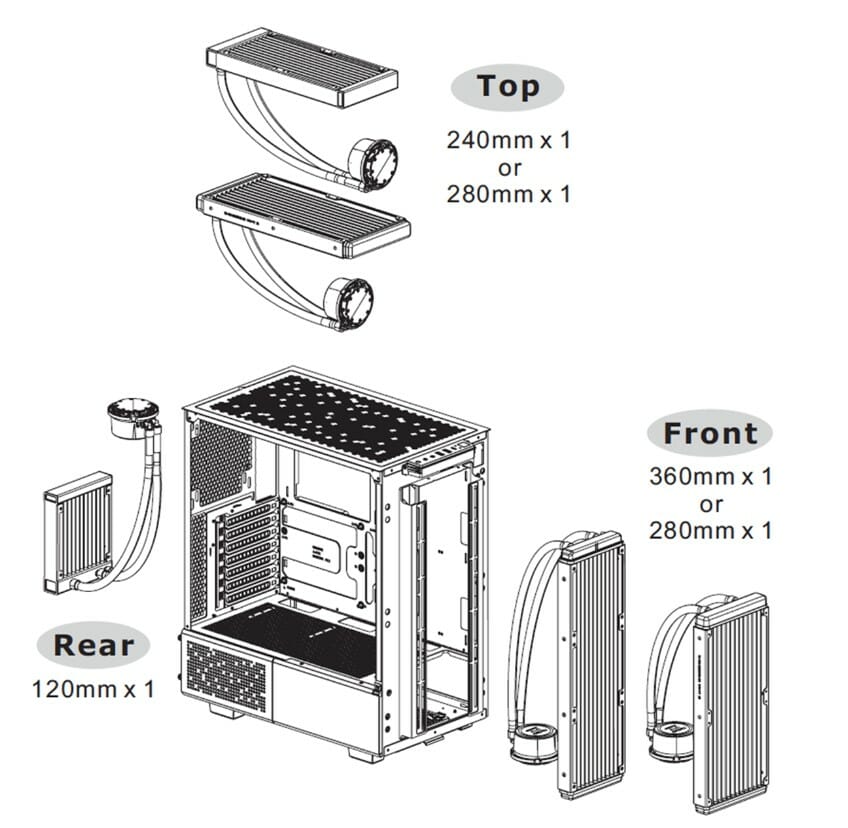
The Ceres 300 can fit several different fans and radiators. This will allow you plenty of different options to get the best cooling possible for your system when building inside this case.
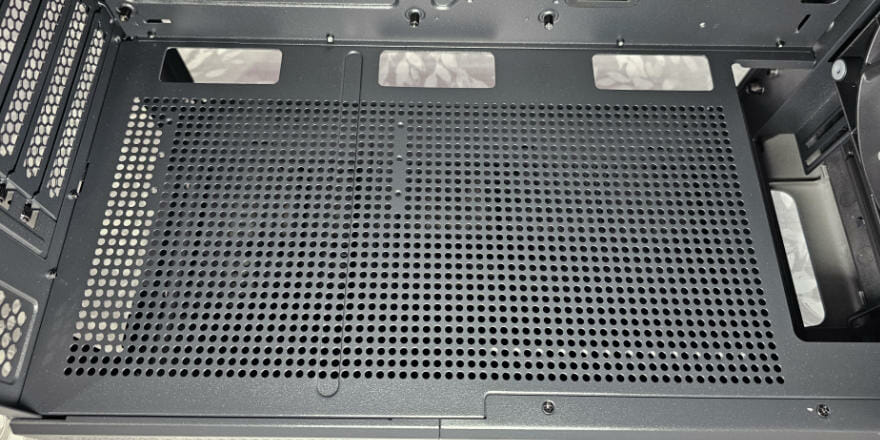
The bottom of the case (top of the PSU shroud) is fully perforated as well. This area also has mounting holes for a vertical GPU bracket should you wish to change the orientation of your GPU.
To the bottom right of the below image, you will notice a couple of screws. This is going to allow you to take a small piece of the side panel off and add an LC Panel which can be purchased separately. Currently, the Thermaltake LCD Panel Kit is listed at £109.99 on the Scan UK website. This does over double the price of the case, but as it is an accessory and not part of the standard Ceres 300 case, the price isn’t an issue.
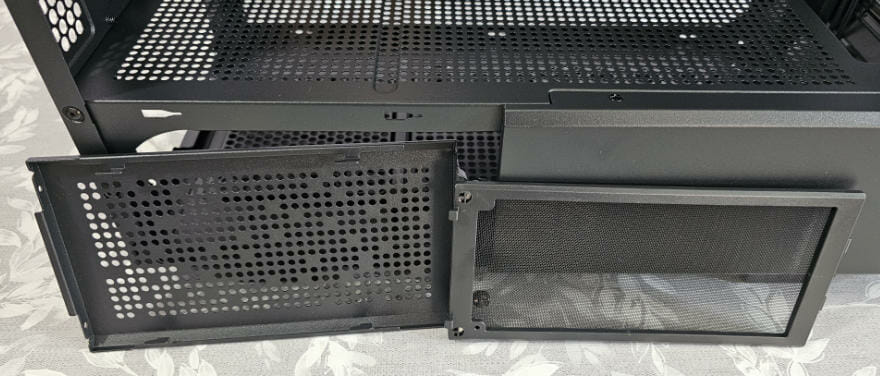
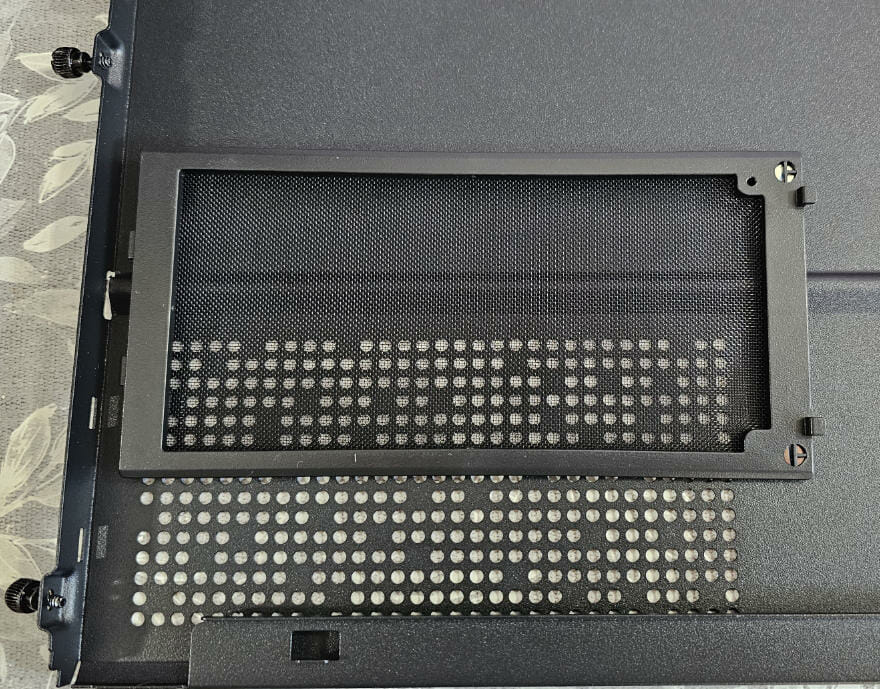
The other small side panel that we saw is removable VIA a couple of thumb screws on the backside of the case and also features a dust filter.
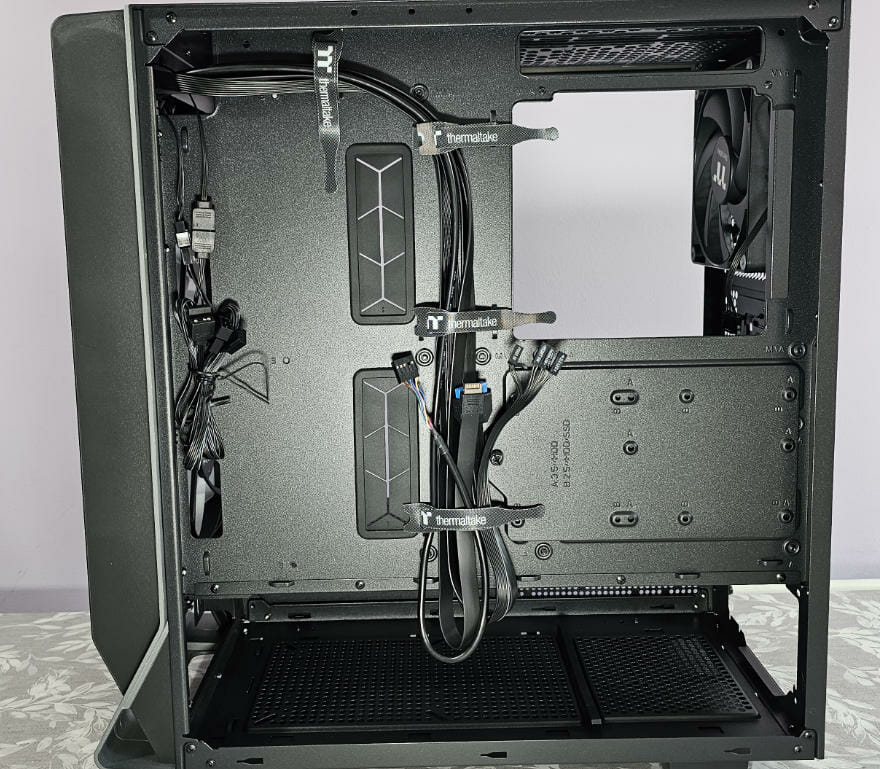
The backside of the motherboard tray is where all of our cables will be hidden nicely. As you can see, Thermaltake has already gone ahead and included some velcro ties so you can go ahead and keep your cables as tidy as possible.
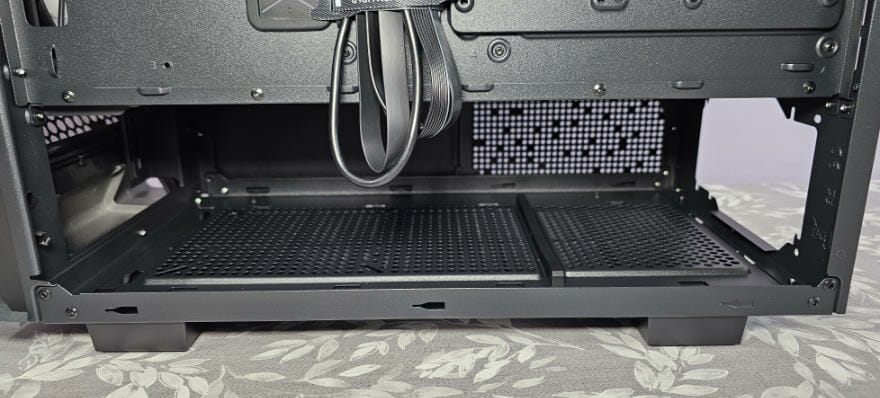
The bottom PSU chamber is completely open. A lot of times, companies stick extra HDD mounts down here but Thermaltake have not taken this approach with their Ceres 300 case.
Also worth noting is that on the side panel, the small perforated area comes with a magnetic dust filter similar in size to what we saw on the other side of the case. This means there are five total dust filters, all of which are easily removable for cleaning.
Thermaltake Ceres 300 TG ARGB PC Case Build
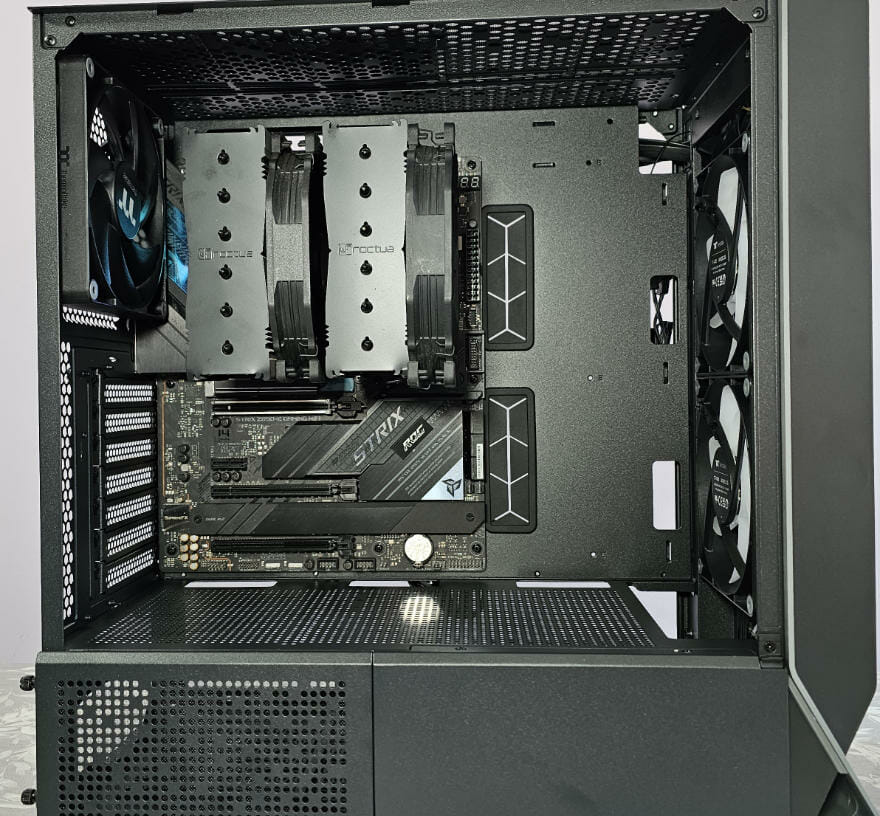
As with all PC builds, I like to get the motherboard installed first. This allows me to have a look around and mentally map out where cables will go and just how much room I have to play with inside the case.
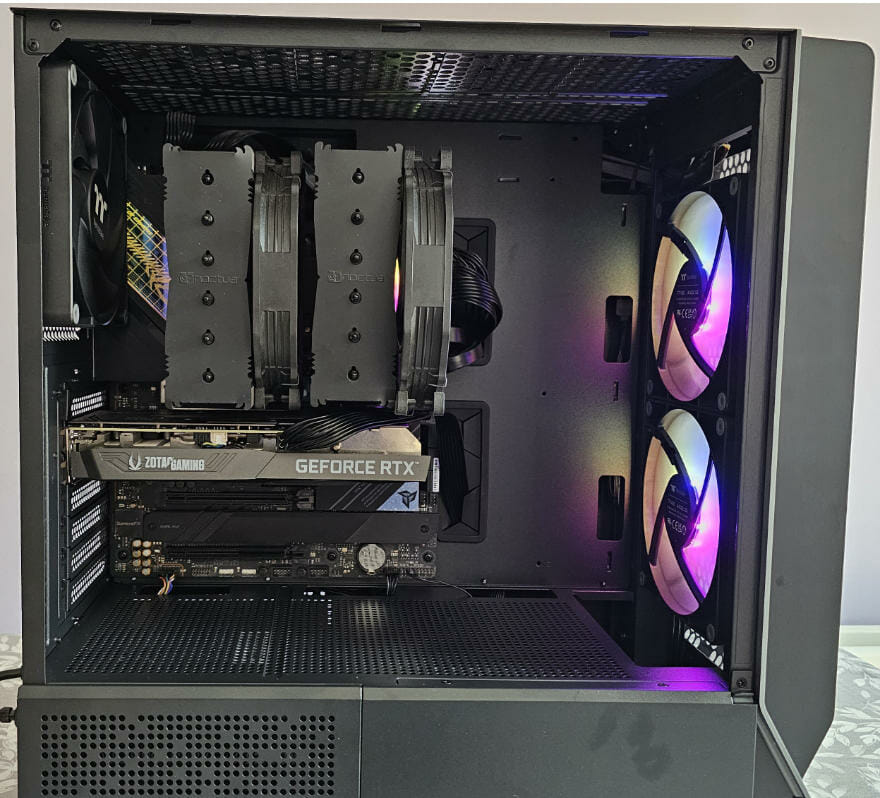
As you can see, in the Ceres 300 TG ARGB case, there is absolutely plenty of room. I have used an ATX motherboard which has a Noctua NH-D15 cooler mounted on top of the 12600K CPU.
The motherboard lines up perfectly with the grommeted cable pass-throughs and has just enough room on the top and bottom to connect all the additional cables you will need.
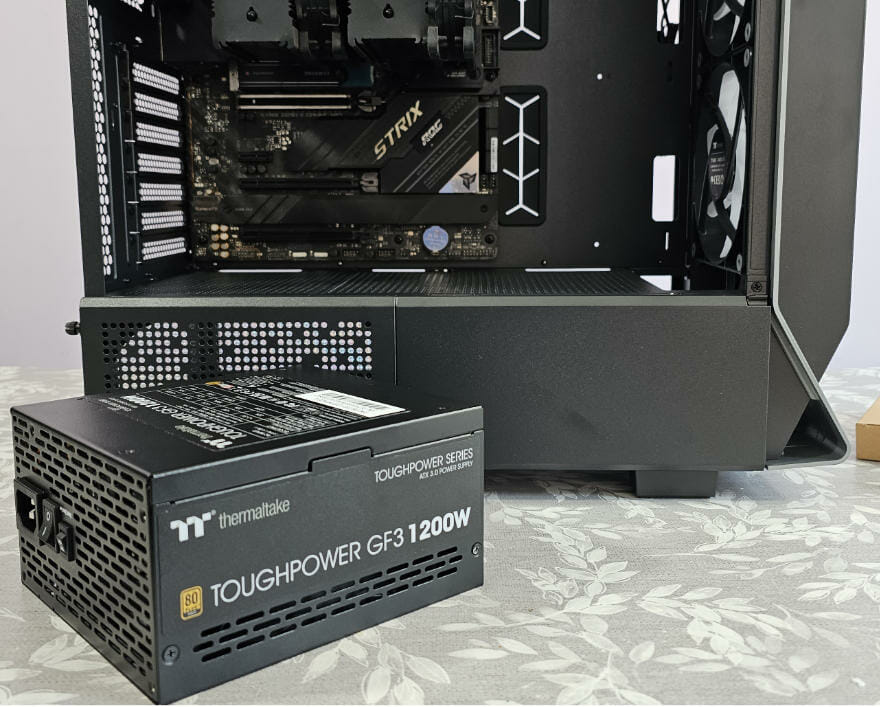
Once the motherboard is in place, it is then time to get the PSU installed and ready to connect all the power cables. For our Ceres 300 build, we went a bit overboard with our PSU and decided to use a TOUGHPOWER GF3 1200W PCI5 fully-modular unit.
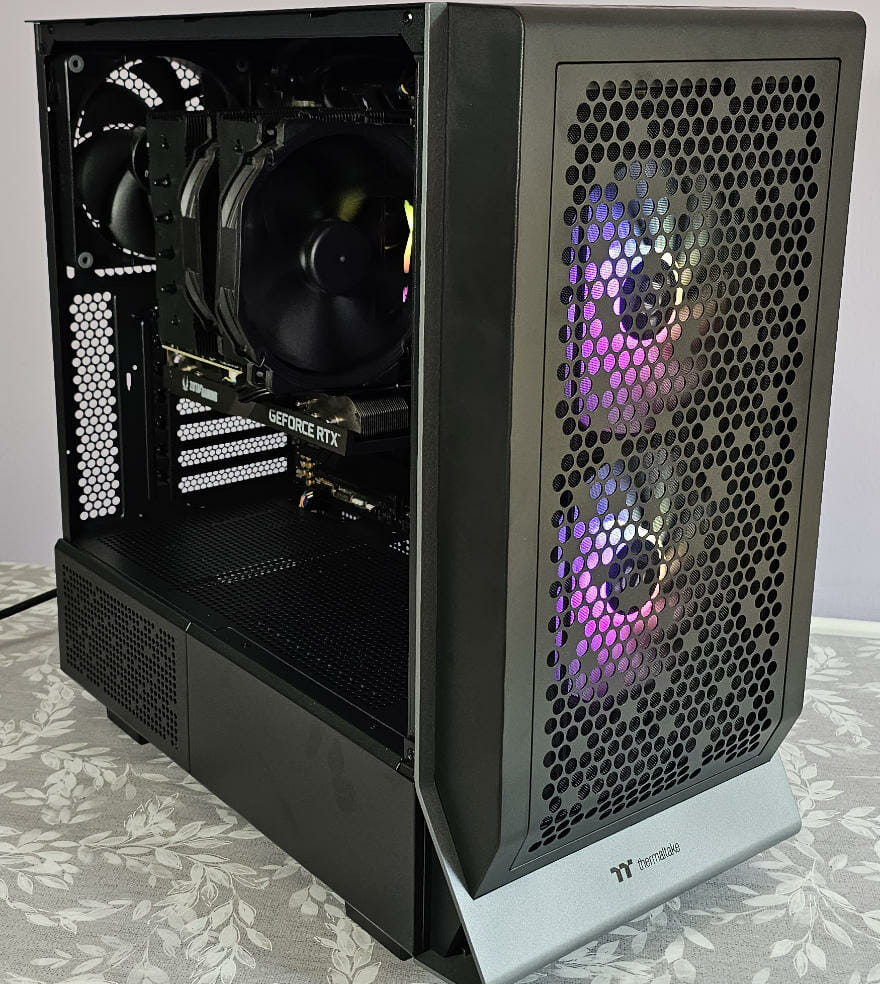
Once everything is connected and the PC, you can still see there is loads of room. This is in part due to the build we put inside the Ceres 300. However, it also shows that there is plenty enough room for a couple of radiators, either from AIO or a custom loop. If you opt for a custom loop, there is still enough room for a pump/reservoir as well so there is no need to worry.
The Ceres 300 TG ARGB case is easy to build in, provides plenty of room for today’s components, and looks amazing once done. Whether you are a beginner or a seasoned veteran, you should have no problem at all building inside of this case.
Conclusion
Performance and Design
With over 55% of the panels on the Ceres 300 being perforated, this case is designed for some massive airflow. This is going to allow for some amazing cooling performance. Thermaltake has done a great job of allowing for all this cooling potential but still offering an aesthetically pleasing PC case. As we saw, the holes are in a unique pattern which may not seem overly important but does catch some attention when looking at it.
The Ceres 300 also allows for plenty of customization options right out of the box. Whether you want to vertically mount your GPU or slide your fans a few millimeters to one side, the option is yours and Thermaltake has made it as easy as possible to do so.
Offering a great combination of looks and performance, the Ceres 300 also allows users to purchase a separate LCD screen if they want to take their build to the next level. Again, giving you the builder another option to customize your build and help make it stand out from the rest.
The three included cooling fans do a great job of circulating airflow and are also whisper-quiet for the most part. This is thanks to all the perforations allowing air to travel through the case with ease and quickly dissipate as much heat as possible while doing so.
Value
As mentioned, the Ceres 300 TG cases in both black or snow variants are currently available for £89.99 at the time of writing this review from SCAN UK. This means the Ceres 300 offers exceptional value for money when you consider all it has to offer. With plenty of airflow, a pair of 140mm ARGB fans, and an overall pleasing aesthetic, you really can’t go wrong for the price.
Let us also not forget that you can change the mounting of the PCI expansion bays with ease and that Thermaltake has an LCD screen that can be purchased separately for these cases. All in all, it is hard to argue with the value on offer here again, from a sub £100 case.

Thermaltake Ceres 300 TG ARGB PC Case Review
96%
Summary The Thermaltake Ceres 300 TG ARGB case is a great blend of pleasing aesthetics and performance. Considering this case can be had for under £100 here in the UK you really just can't go wrong with it.

